
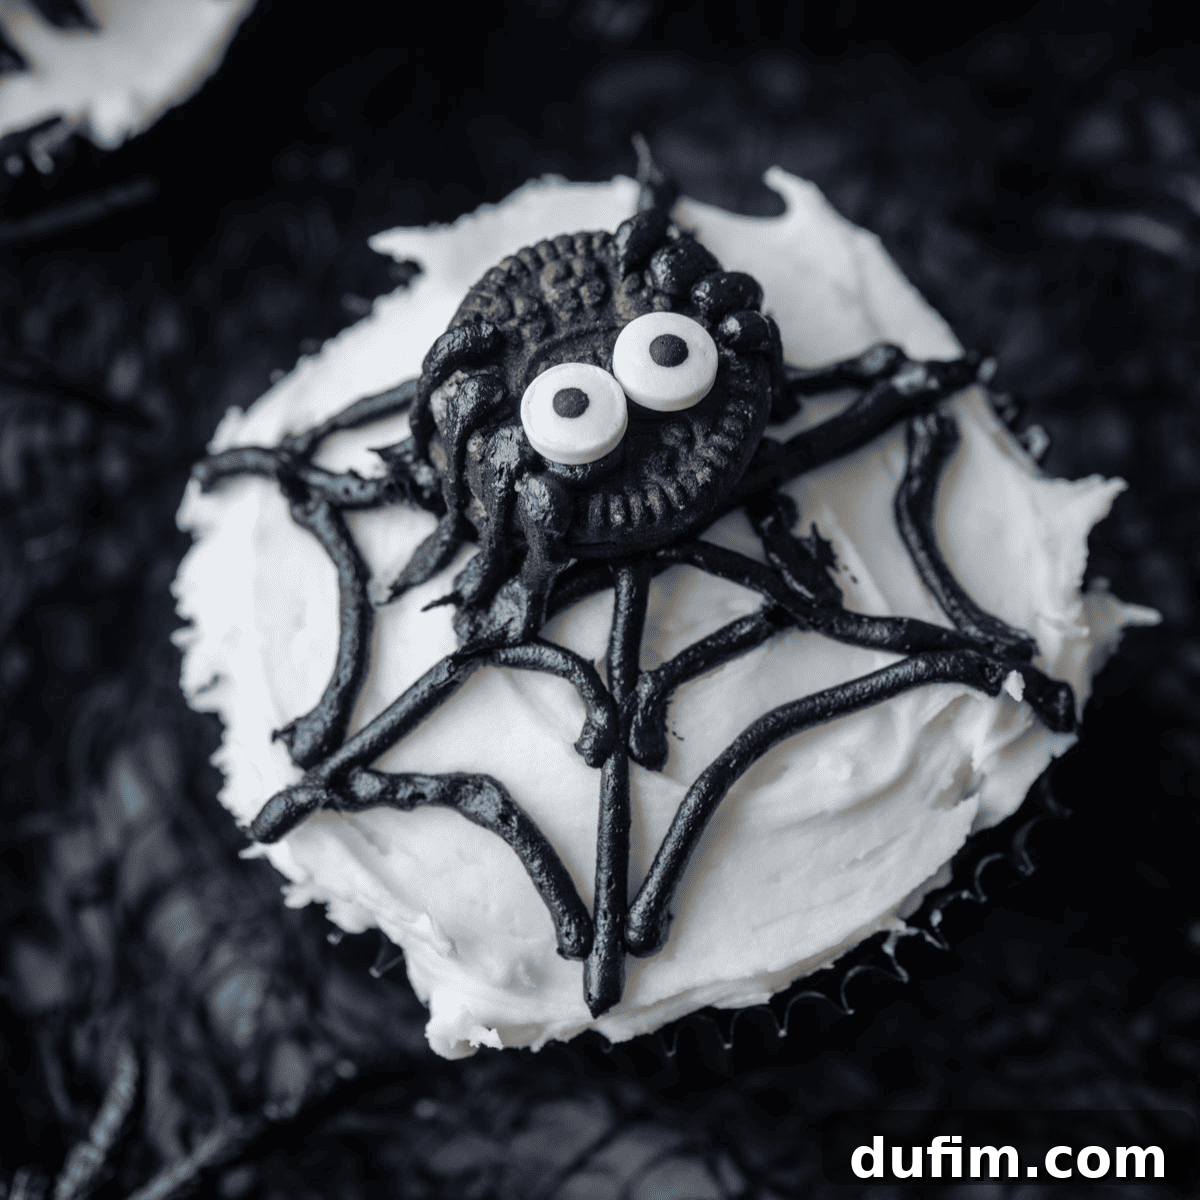
Get ready to impress your friends, family, and Halloween party guests with these utterly enchanting spider web cupcakes! Beyond their irresistibly cute appearance, these Halloween treats are renowned for being perfectly moist, rich in flavor, and surprisingly easy to make. Follow our straightforward, step-by-step instructions, and you’ll be crafting a batch of spooky-sweet delights in no time, ensuring your Halloween festivities are nothing short of spectacular.
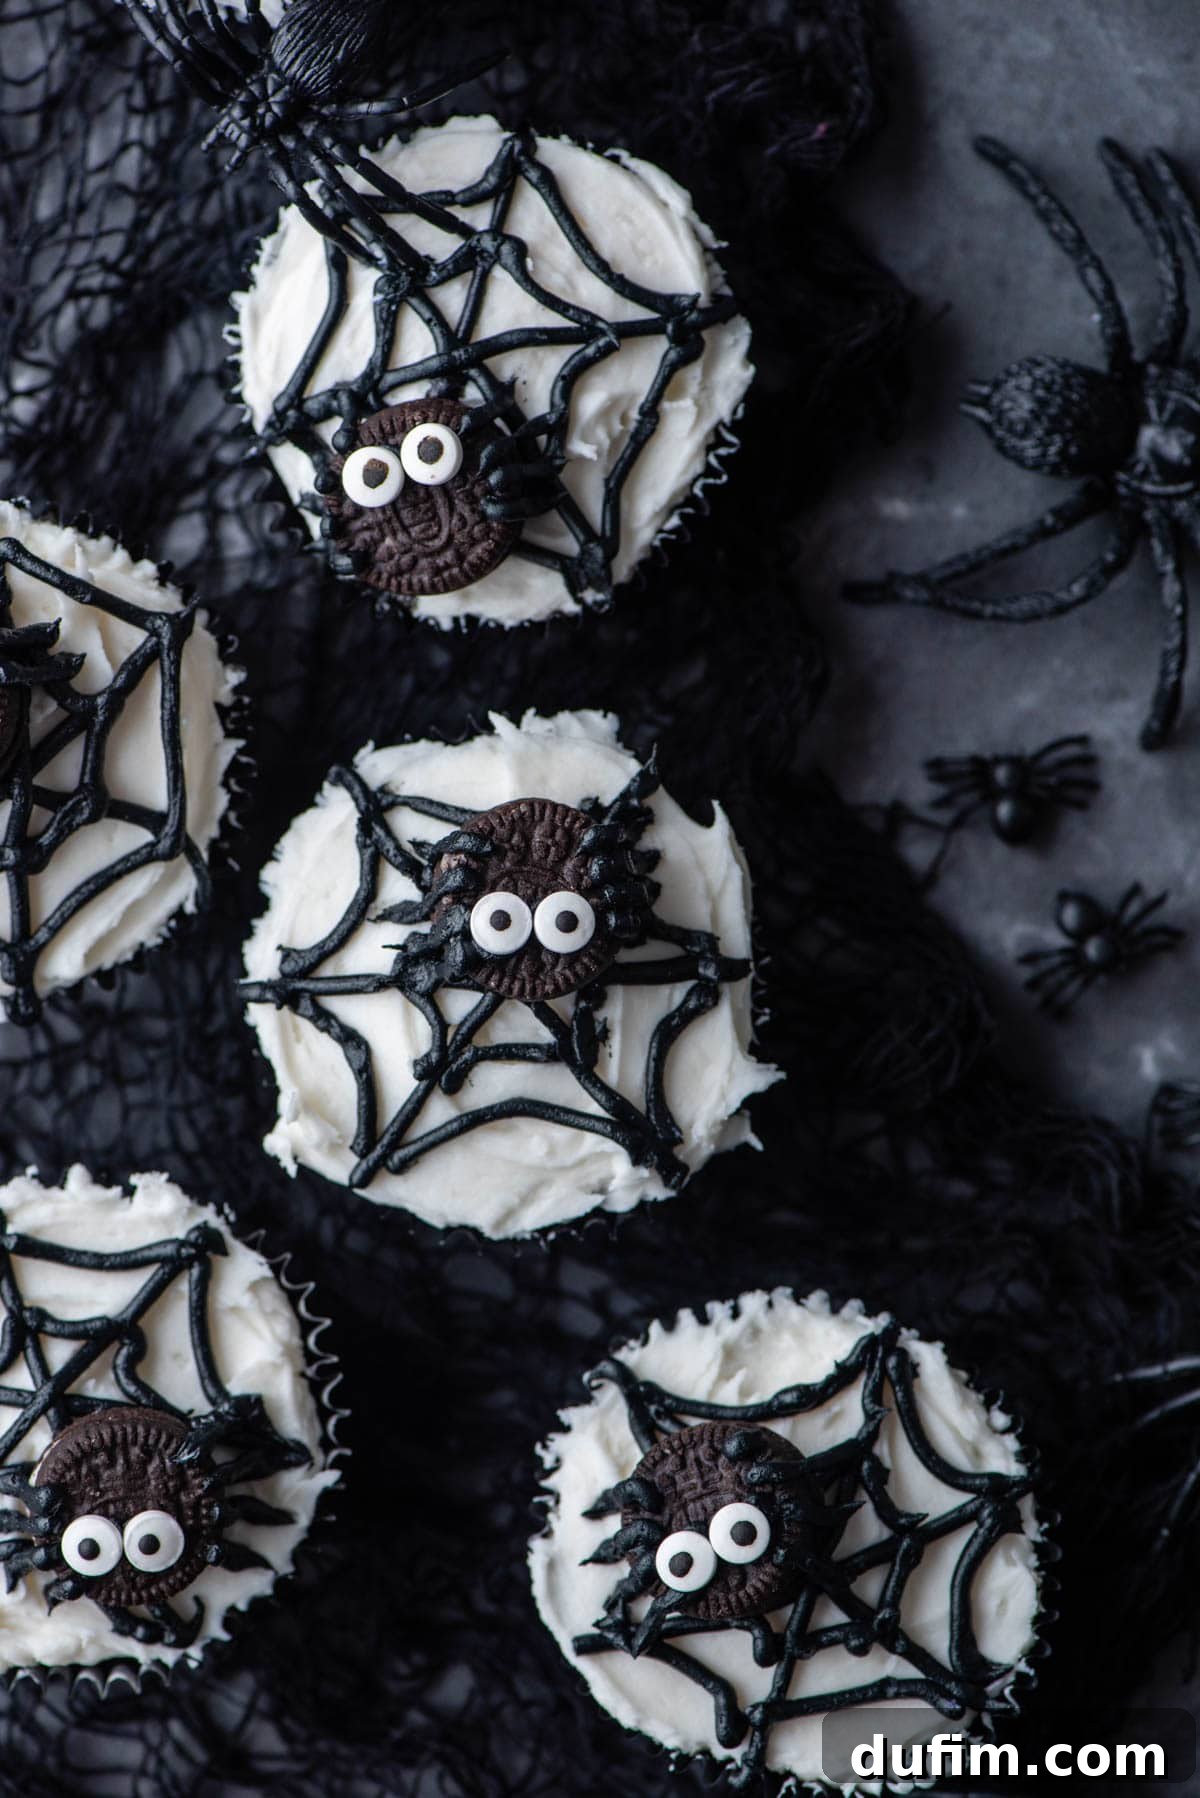
Easy Spider Web Cupcakes: The Perfect Halloween Dessert for Spooky Celebrations!
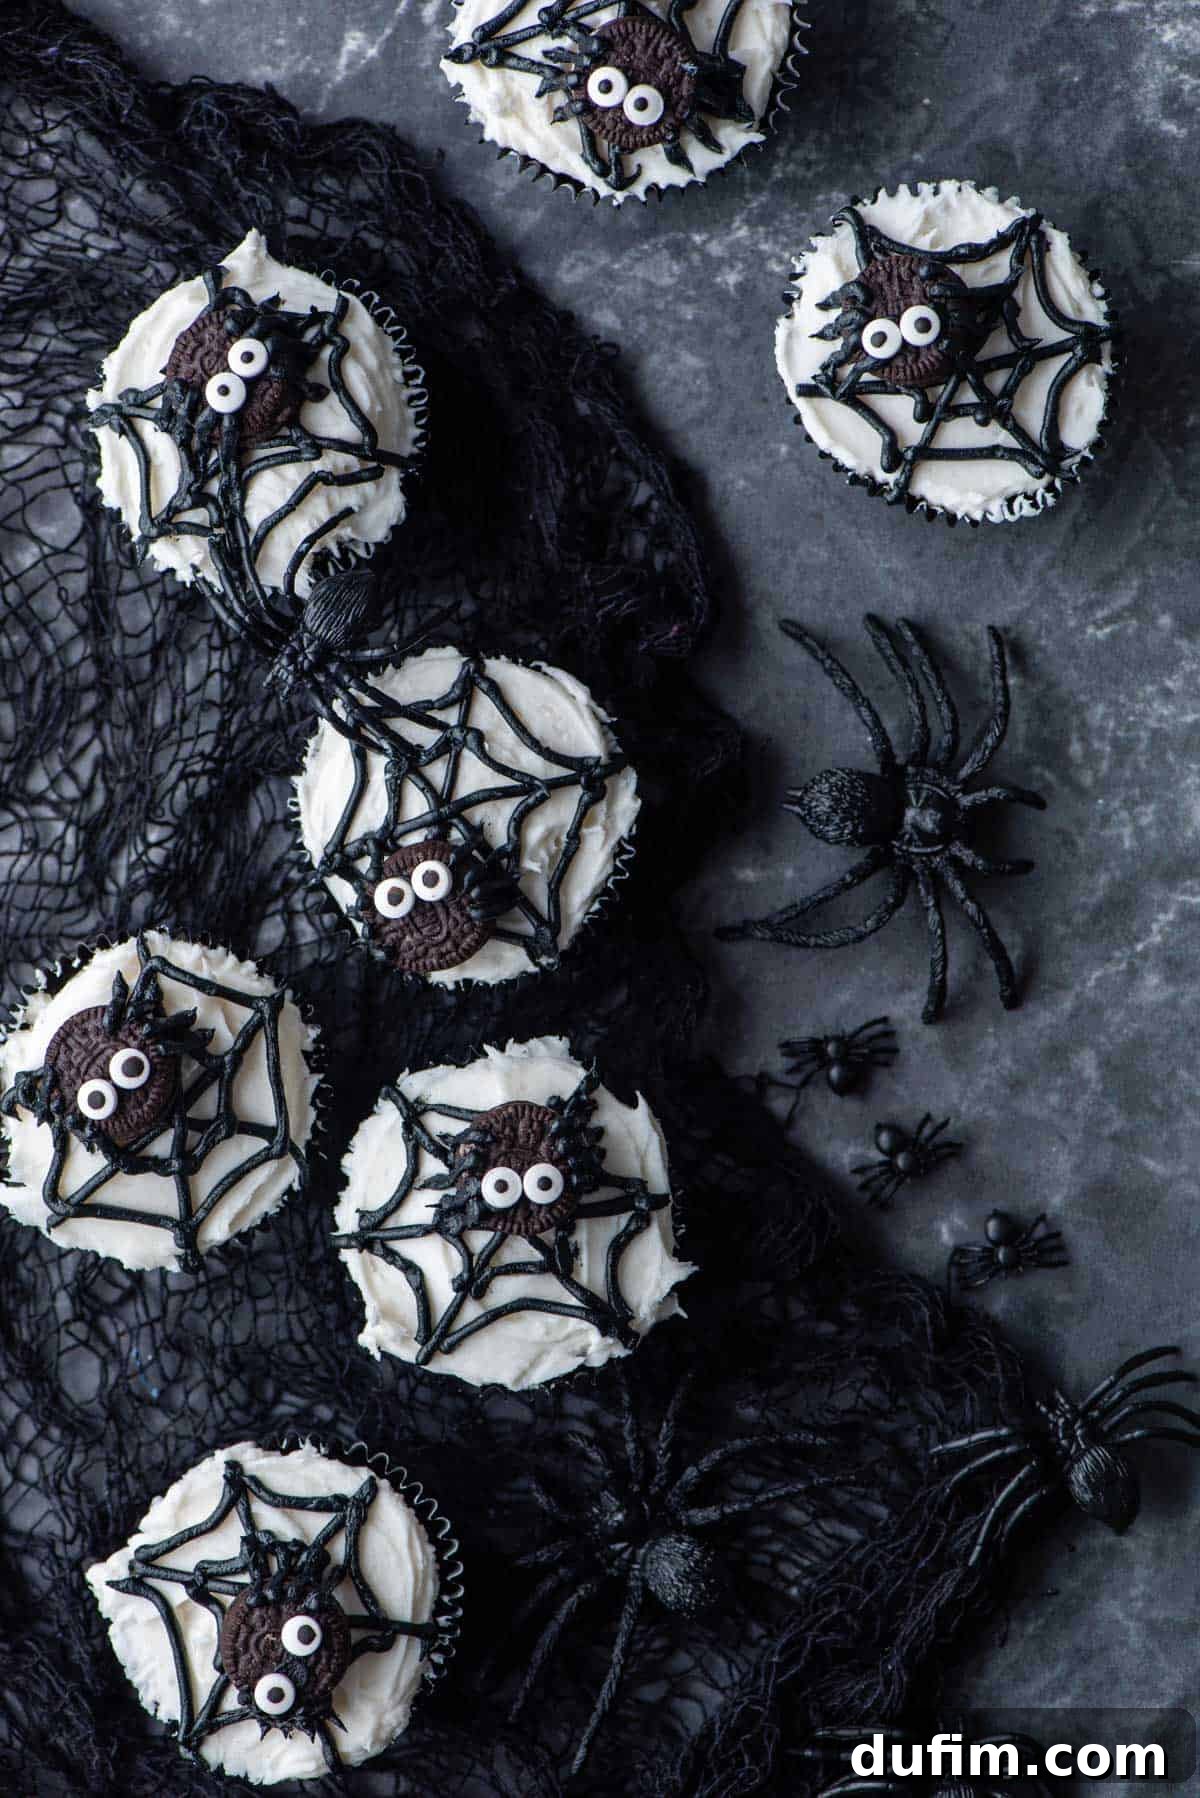
These delightful spider web cupcakes begin with our absolute favorite recipe for incredibly rich and moist chocolate cupcakes. We then elevate them with our effortlessly homemade frosting, which serves as both the smooth base and the intricate design for the spider webs. The finishing touch? Adorable, fully edible mini Oreo spiders complete with playful candy eyes, perched atop each frosting web. This combination ensures a treat that’s not only visually stunning but also bursting with delicious flavor.
Perhaps the most appealing aspect of this recipe is just how simple these Halloween cupcakes are to create! You don’t need extensive baking experience to achieve professional-looking results. Our detailed instructions below guide you through every easy step to make these chocolate spider web cupcakes without any stress or fuss. What’s more, we skip the traditional plastic spider toppings, opting instead for charming mini Oreos with candy eyes, making every part of these festive cupcakes completely edible and safe for everyone to enjoy.
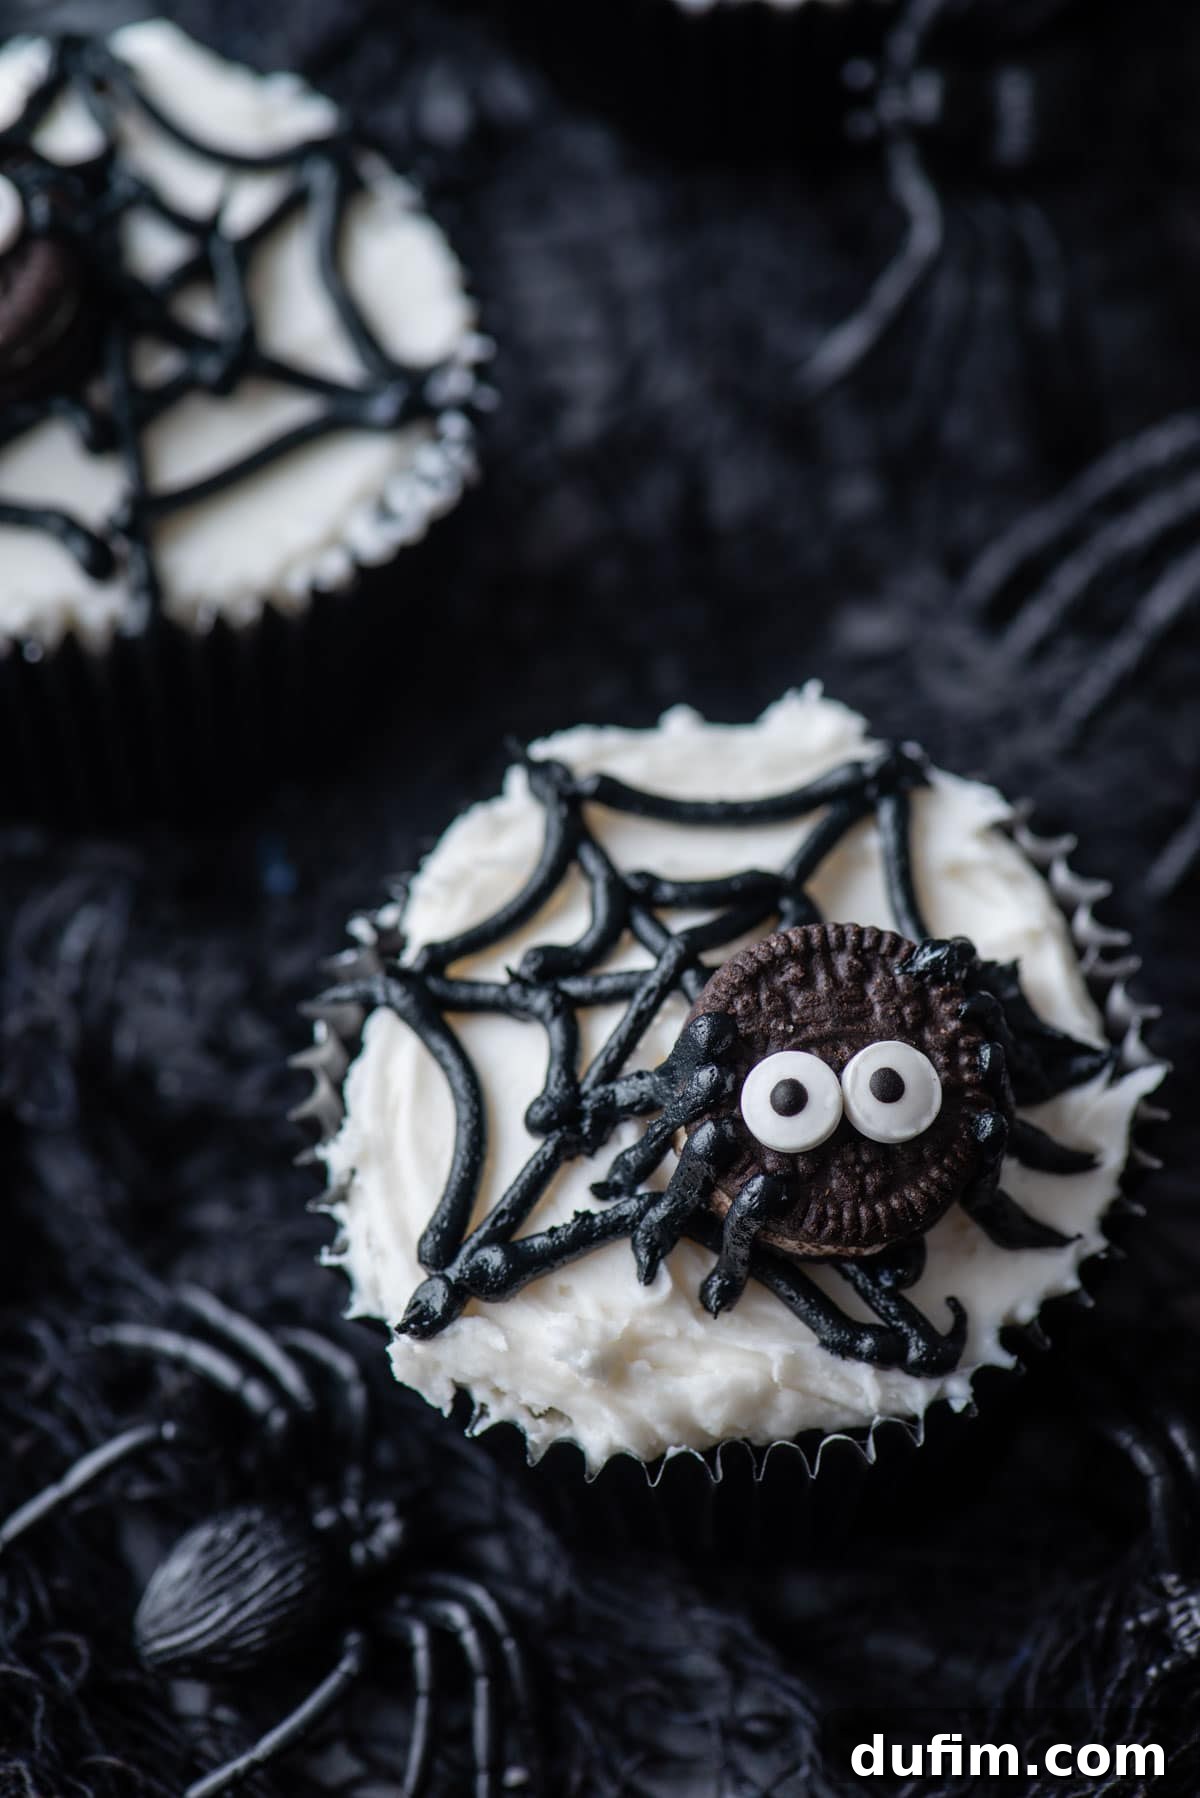
During the busy holiday season, easy and impressive recipes are an absolute lifesaver! We all want to delight our friends and family, and creating these charming spider web Halloween cupcakes is a fantastic way to do exactly that. These cupcakes are incredibly fun to make and perfect for a variety of occasions, whether you’re hosting a festive Halloween party, contributing to a school bake sale, or simply looking for a fun activity to get your family into the holiday spirit. Their adorable design and delicious taste make them a memorable addition to any Halloween celebration.
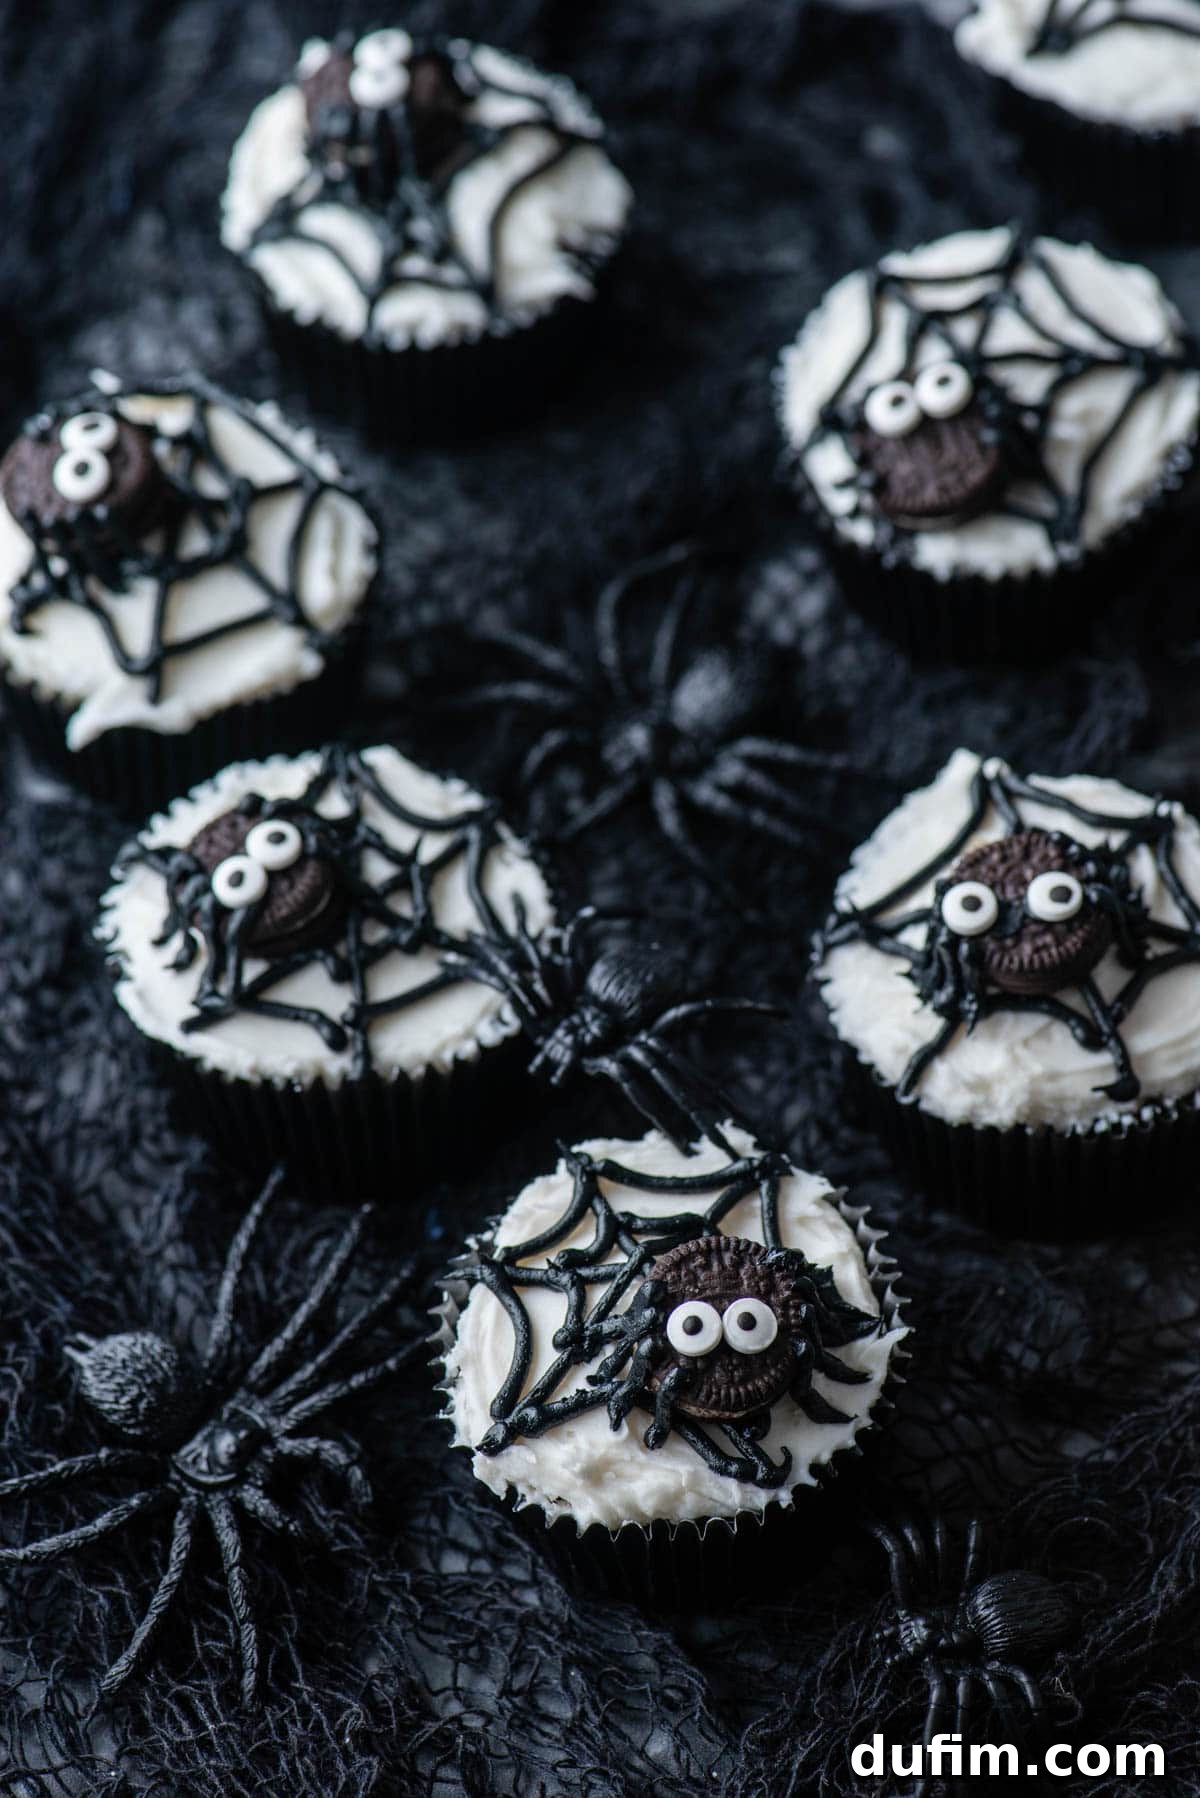
Why You’ll Absolutely Love These Spider Web Cupcakes
These spider web cupcakes aren’t just another Halloween treat; they’re a guaranteed hit that will bring smiles and spooky delight to everyone who sees (and tastes) them. Here’s why this recipe deserves a top spot in your holiday baking repertoire:
- The Ultimate Halloween Party Treat: Their eye-catching and perfectly spooky design makes them the star of any Halloween gathering. They serve as both a delicious dessert and a festive decoration.
- Loved by All Ages: Both kids and adults are captivated by the playful spider decor. The edible mini Oreo spiders are a whimsical touch that everyone finds adorable and delicious.
- Rich, Moist Chocolate Cupcakes: Beneath the charming facade lies an incredibly tender, deeply chocolatey cupcake base that’s moist and flavorful – truly a treat for chocolate lovers.
- Effortlessly Easy Recipe: Don’t let their intricate appearance fool you! This recipe is designed to be simple, with clear, step-by-step instructions that even novice bakers can follow with confidence to achieve impressive results.
- Adorable Edible Design: We’ve created a clever design that eliminates the need for non-edible plastic spiders. Our mini Oreo and candy eye spiders are completely edible, adding to the fun and ensuring every bite is pure joy.
- Perfect for Customization: While our classic chocolate base is fantastic, the recipe is versatile enough to allow for different cupcake flavors or frosting colors, letting your creativity shine.
- Great for Baking with Kids: The decorating process is straightforward and engaging, making it a wonderful activity to do with children. They’ll love helping to pipe the webs and assemble the cute spiders!
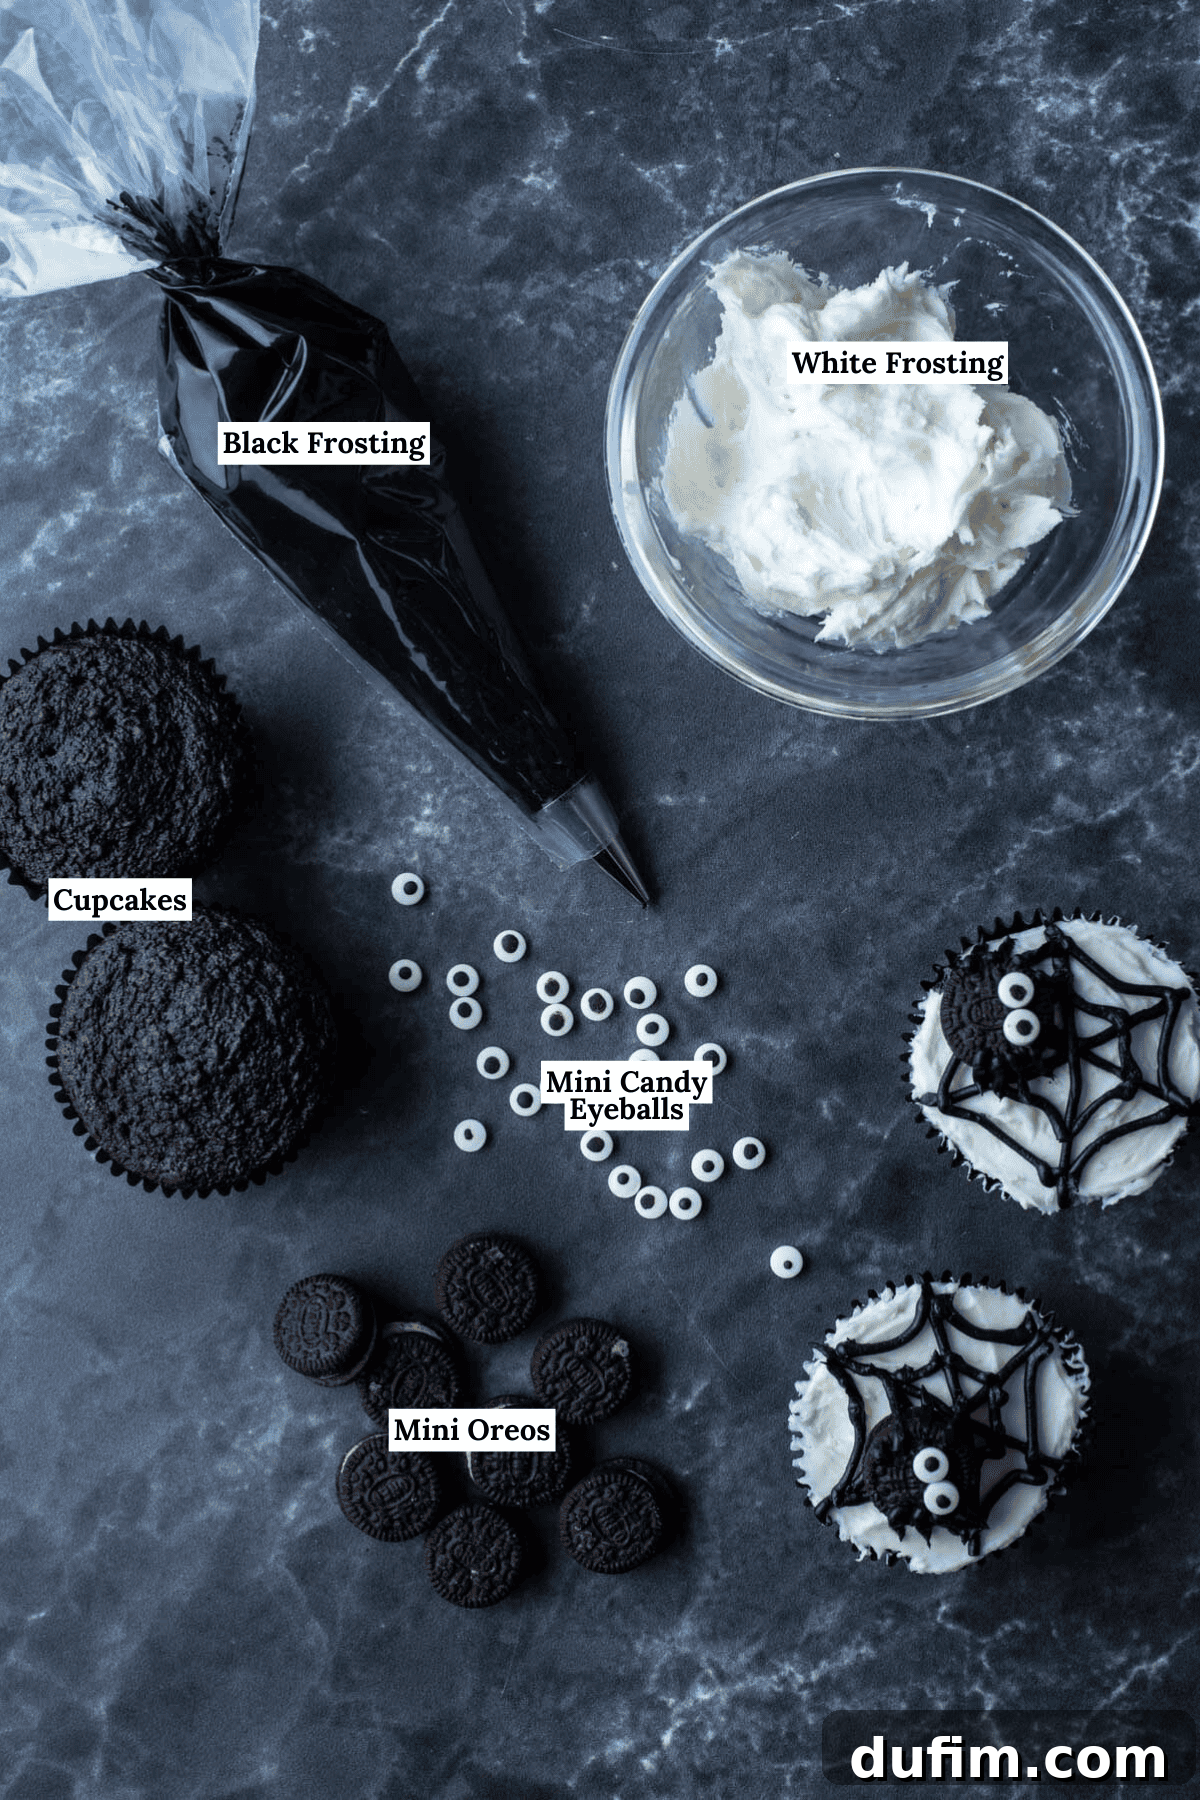
What You’ll Need for Spooktacular Spider Web Cupcakes
This recipe is truly one of our favorite Halloween treats, guaranteed to impress your family and friends with its charming edible Oreo spiders perched atop intricate frosting spider webs. Below is a comprehensive list of all the ingredients and equipment you’ll need. For the precise measurements and detailed instructions, be sure to refer to the full recipe card at the end of this article.
For the Decadent Chocolate Cupcakes:
Our foundational moist chocolate cupcake recipe uses a thoughtful blend of ingredients to ensure a rich, tender, and intensely chocolatey base.
- All-Purpose Flour: The primary structure builder for our fluffy cupcakes.
- Cocoa Powder: You can use natural unsweetened cocoa powder for a classic chocolate flavor or Dutch-processed cocoa powder for a darker color and milder taste. Both work wonderfully to deliver that deep chocolate essence.
- Instant Coffee Granules (optional): Such as Folger’s. While optional, a touch of instant coffee miraculously enhances the chocolate flavor without making the cupcakes taste like coffee. It simply deepens the richness.
- Baking Soda: Works with the buttermilk and cocoa powder to create a light and airy crumb.
- Baking Powder: Provides an additional lift, ensuring your cupcakes are wonderfully domed and tender.
- Salt: A crucial ingredient that balances the sweetness and brings out all the individual flavors.
- Unsalted Butter: Ensure your butter is at room temperature for optimal creaming with sugar, leading to a lighter, fluffier batter.
- Granulated Sugar: Sweetens and tenderizes the cupcakes, contributing to their moist texture.
- Large Eggs: Bind the ingredients, add richness, and help with the overall structure. Make sure they are also at room temperature.
- Buttermilk: Essential for a moist, tender crumb and reacts with the baking soda to create lift. If you don’t have buttermilk, you can make a substitute by adding 1 tablespoon of white vinegar or lemon juice to regular milk and letting it sit for 5-10 minutes.
- Hot Tap Water: Helps to “bloom” the cocoa powder, intensifying its flavor and creating a smooth batter.
For the Silky Smooth Frosting:
This easy homemade frosting is perfectly pipeable and delicious, providing a creamy canvas for your spider web designs.
- Unsalted Butter: Just like for the cupcakes, ensure your butter is at room temperature. This is key for achieving a smooth, lump-free, and fluffy buttercream frosting.
- Vanilla Extract: Adds a classic, warm flavor that complements the chocolate cupcakes beautifully.
- Powdered Sugar: The base for our frosting, providing sweetness and body. Sift it for the smoothest results.
- Milk or Heavy Cream: Used sparingly to adjust the frosting’s consistency, ensuring it’s spreadable but still firm enough to hold its shape for piping.
For the Spooky & Sweet Decorations:
These simple additions transform your frosted cupcakes into adorable spider web masterpieces.
- Candy Eyeballs: The cutest little eyes for our mini Oreo spiders, bringing them to life!
- Piping Bag: Essential for creating neat and precise spider web designs and spider legs.
- Wilton 4 Piping Tip: This small round tip is ideal for drawing fine lines for the webs and spider legs.
- Black Gel Food Coloring: Crucial for achieving that deep, spooky black color for our spider webs and spider bodies. Gel coloring provides vibrant color without thinning your frosting.
- Mini Oreos: The perfect bite-sized bodies for our cute edible spiders.
Essential Equipment:
- Glass Mixing Bowl: For combining your dry and wet ingredients.
- Muffin Pan: To bake your delicious chocolate cupcakes evenly.
- Cupcake Liners: For easy removal and a clean presentation.
- Electric Mixer (Handheld or Stand Mixer): Essential for creaming butter and sugar and achieving fluffy frosting.
- Wire Rack: For cooling cupcakes completely before frosting.
- Toothpicks: To test for doneness and for fine frosting adjustments.
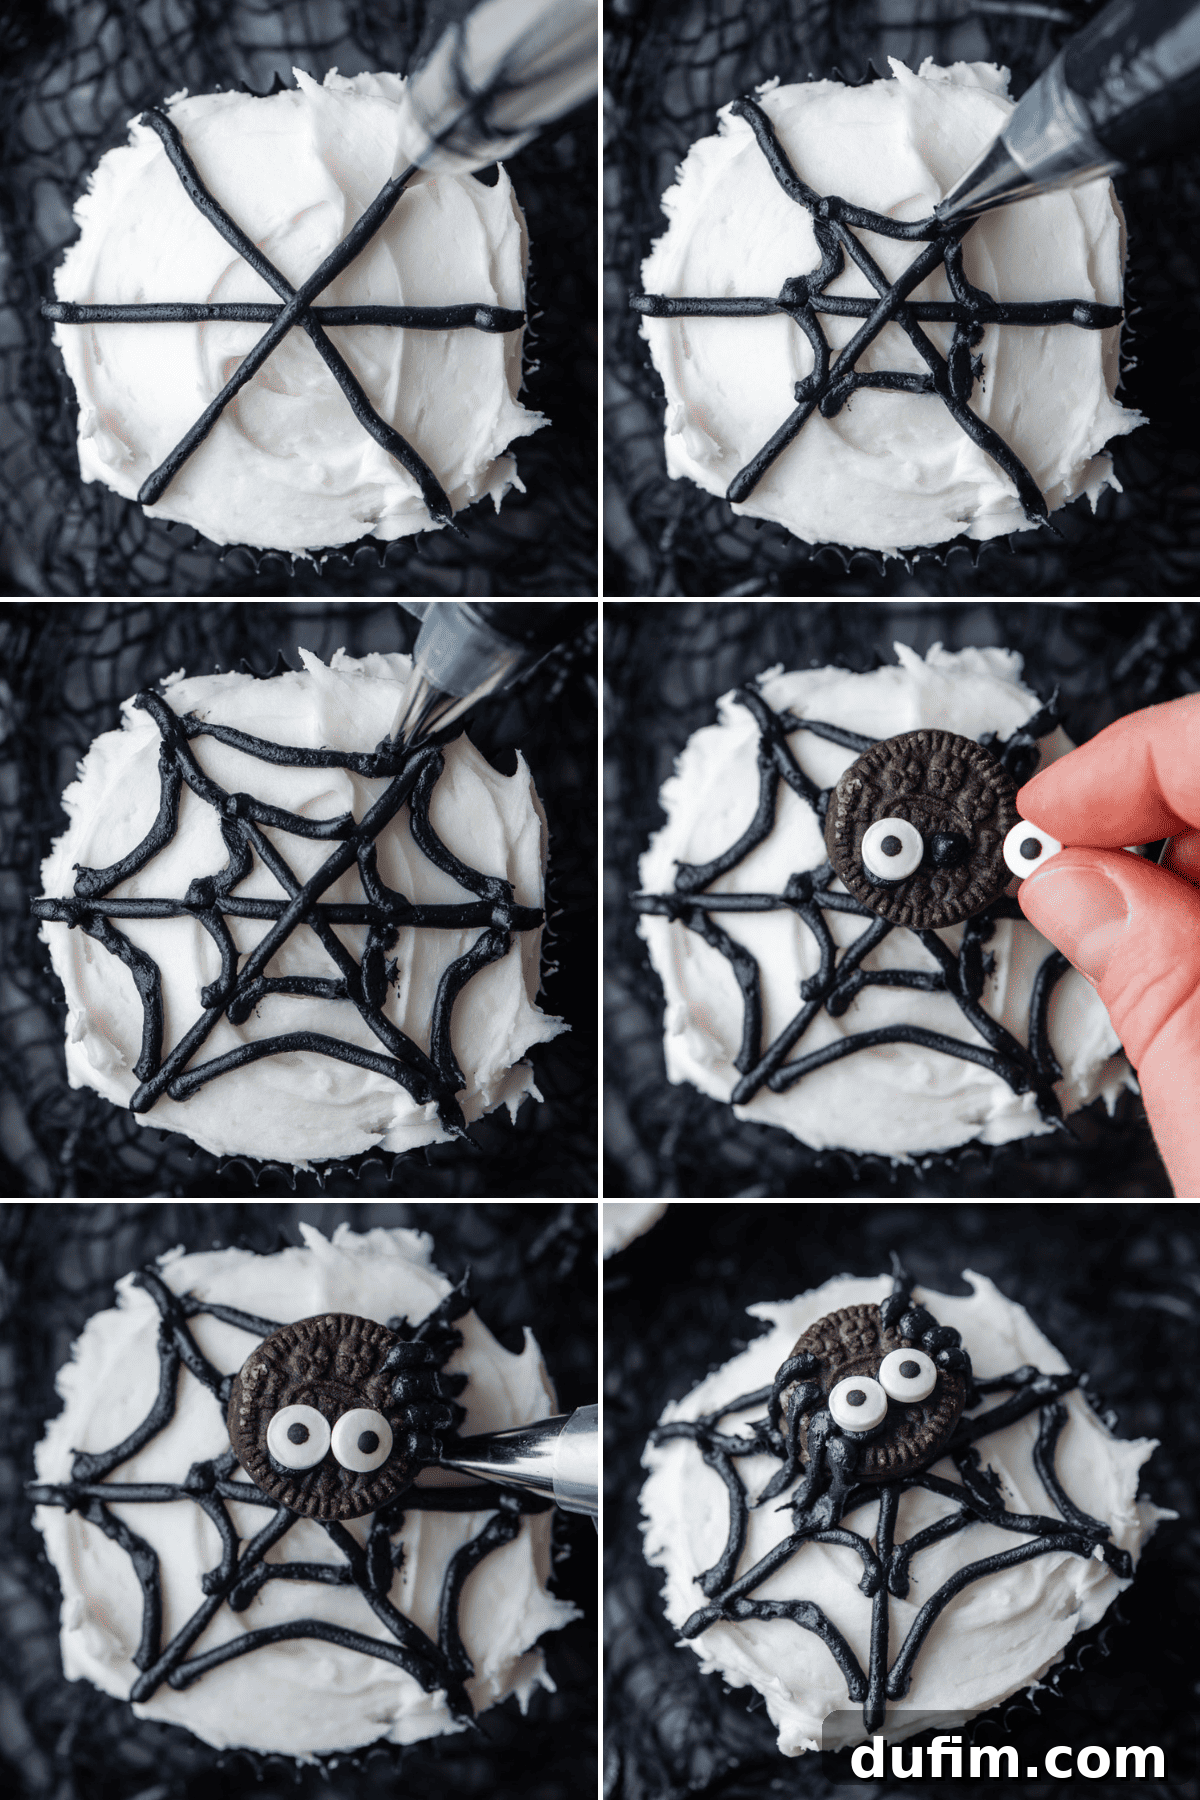
How to Make These Spooktacular Halloween Spider Web Cupcakes
Crafting this delicious chocolatey cupcake recipe, complete with its captivating spider web design, is much simpler than you might imagine! By following these easy-to-understand steps, you’ll seriously wow your friends and family with your baking prowess. Below, we’ve broken down the process into clear, manageable stages, but for the precise ingredient quantities and detailed measurements, always refer to the complete recipe card found further down the page.
Part 1: Baking the Perfect Chocolate Cupcakes
- Prepare Your Workspace: Begin by preheating your oven to a consistent 350º F (175°C). While the oven heats up, meticulously line a 12-cup cupcake or muffin tin with festive cupcake liners, ensuring each cavity is ready for batter.
- Combine Dry Ingredients: In a medium-sized mixing bowl, thoroughly whisk together the all-purpose flour, natural unsweetened or Dutch-processed cocoa powder, instant coffee granules (if using, as they deepen chocolate flavor), baking soda, baking powder, and a pinch of salt. Set this mixture aside, ensuring it’s well combined.
- Cream Wet Ingredients: In a large mixing bowl, using an electric mixer, beat the softened room-temperature unsalted butter and granulated sugar for approximately 2 minutes. Continue beating until the mixture becomes visibly pale and wonderfully fluffy. Next, incorporate the large eggs, beating for another 30 seconds until they are fully integrated and the mixture is smooth.
- Integrate All Ingredients: Add half of the buttermilk to your wet mixture, beating for about 20 seconds until just combined. Then, gradually add half of your dry ingredient mixture, beating on low speed until no streaks of flour remain. Follow this by adding the remaining buttermilk along with the hot tap water, mixing just until the liquids are incorporated. Finally, add the remaining dry ingredients, beating on the lowest speed only until the batter is uniformly combined. Be careful not to overmix, as this can lead to tough cupcakes.
- Bake to Perfection: Carefully fill each prepared muffin liner approximately half full with your rich chocolate batter. Bake in the preheated oven for 17-19 minutes, or until a wooden toothpick inserted into the center of a cupcake comes out with just a few moist crumbs clinging to it. If the toothpick comes out completely clean, they might be slightly over-baked. Once baked, remove the cupcakes from the oven and allow them to cool completely on a wire rack before attempting to frost them. Cooling thoroughly is crucial to prevent your frosting from melting.
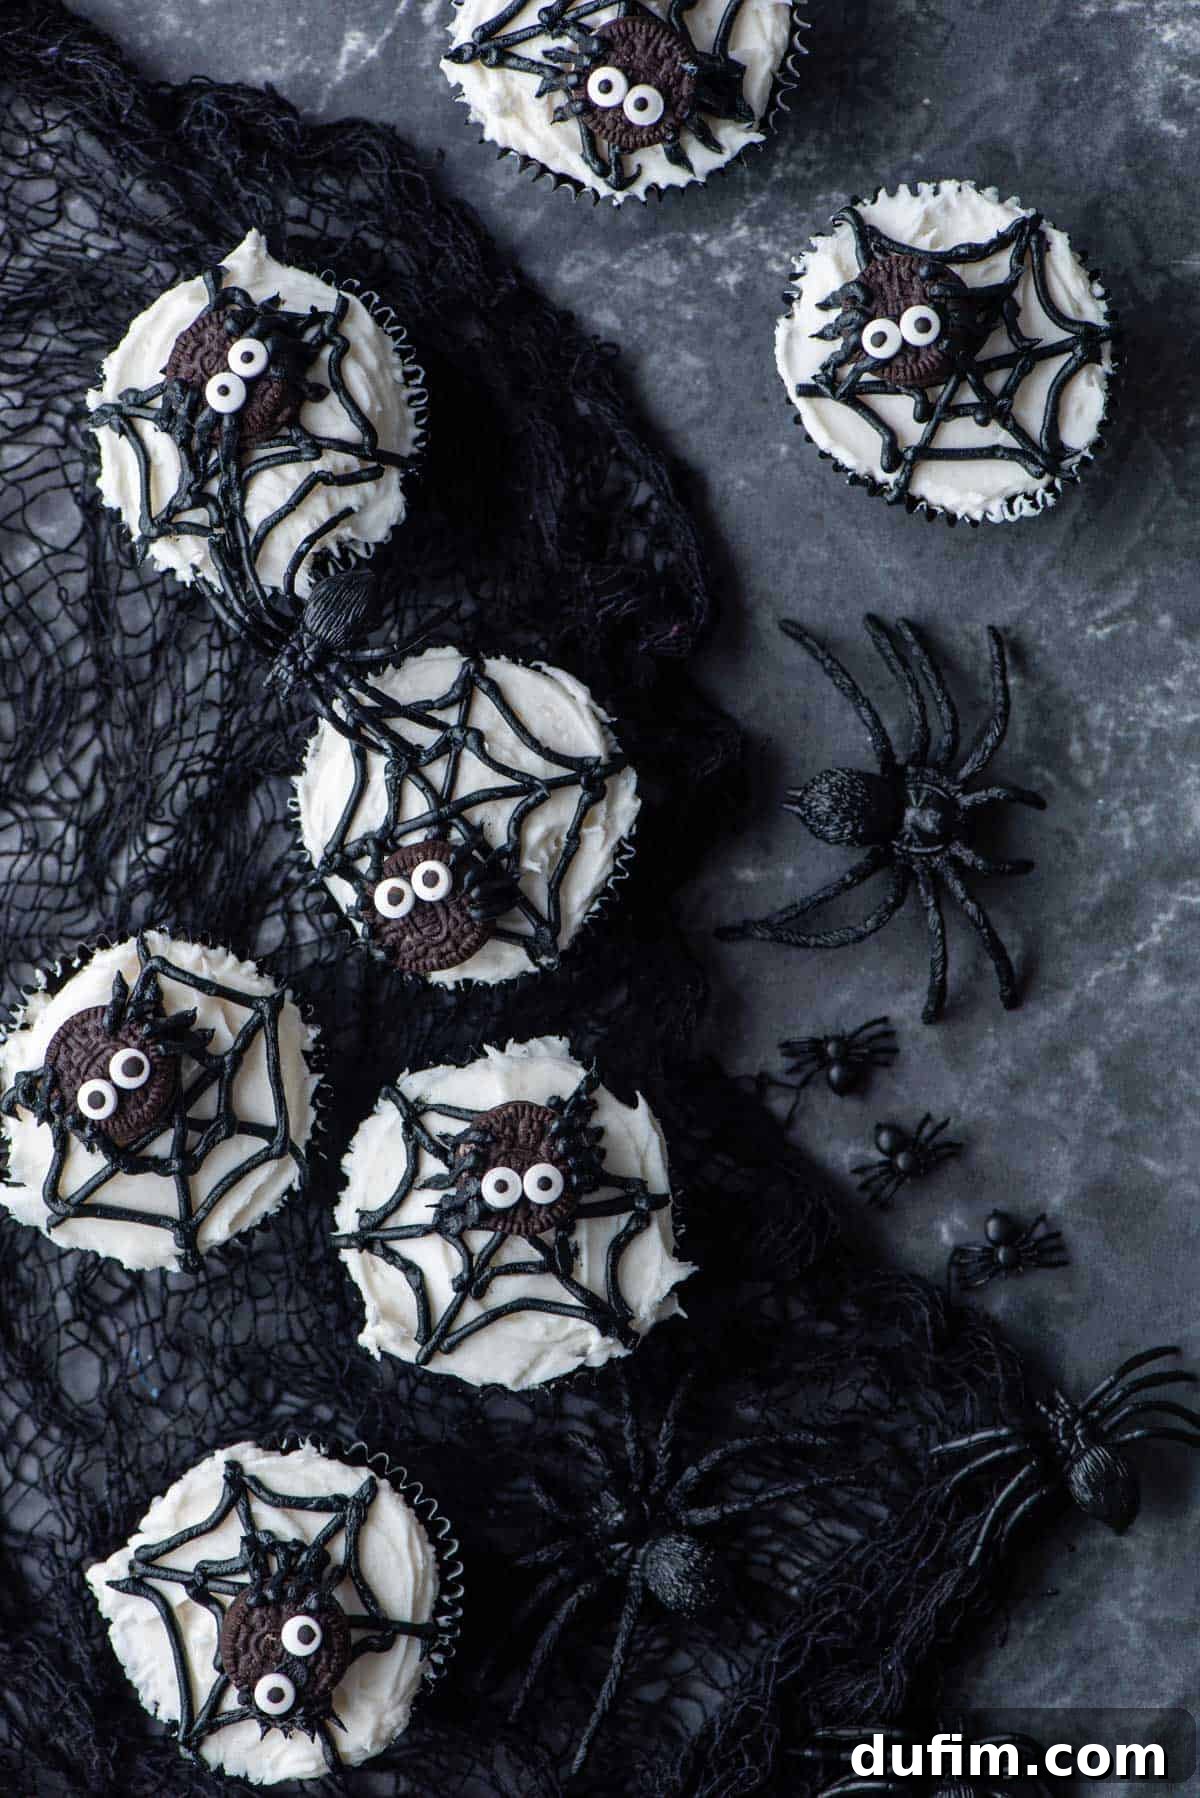
Part 2: Crafting the Silky Frosting
- Whip Butter and Vanilla: In a clean, large mixing bowl, combine the room-temperature unsalted butter and vanilla extract. Beat them together vigorously using an electric mixer for 1-2 minutes until the mixture is light, creamy, and visibly fluffy.
- Gradually Add Sugar: Begin adding the powdered sugar, one cup at a time, mixing on low speed until each addition is fully incorporated. Continue until you’ve reached your desired sweetness and consistency. Sifting your powdered sugar beforehand can help prevent lumps and create a smoother frosting.
- Introduce Food Coloring (If Desired): If you plan to use food coloring for your frosting base (though for spider webs, you’ll reserve some white frosting), this is the ideal time to add it. Mix until the color is evenly distributed.
- Taste and Adjust: Throughout the process, taste your frosting. If you desire more sweetness, gradually add more powdered sugar. If the frosting becomes too thick to pipe easily, add a dash (about a teaspoon at a time) of milk or heavy cream until it reaches your preferred smooth, spreadable, yet firm consistency.
- Optional Fluffy Boost: For an exceptionally light and airy frosting, add 1/4 cup of heavy whipping cream when you’re adding the last bit of powdered sugar. Whip the frosting for an additional 3-4 minutes on medium-high speed until it’s super fluffy and holds stiff peaks.
Part 3: Assembling the Spider Web Masterpieces
- Prepare Black Frosting: Scoop out approximately 1 cup of your prepared white frosting and transfer it to a separate small bowl. Add a generous amount of black gel food coloring to this portion, mixing until you achieve a deep, consistent, spooky black color.
- Frost the Cupcakes: Take your cooled chocolate cupcakes and evenly spread a generous amount of the remaining white frosting onto the top of each one. Aim for a smooth, slightly domed surface, which will serve as the perfect canvas for your spider webs.
- Ready the Black Frosting: Transfer the black frosting into a piping bag fitted with a Wilton 4 piping tip (or any small round piping tip that allows for fine lines). Twist the top of the bag to secure the frosting and prevent it from oozing out.
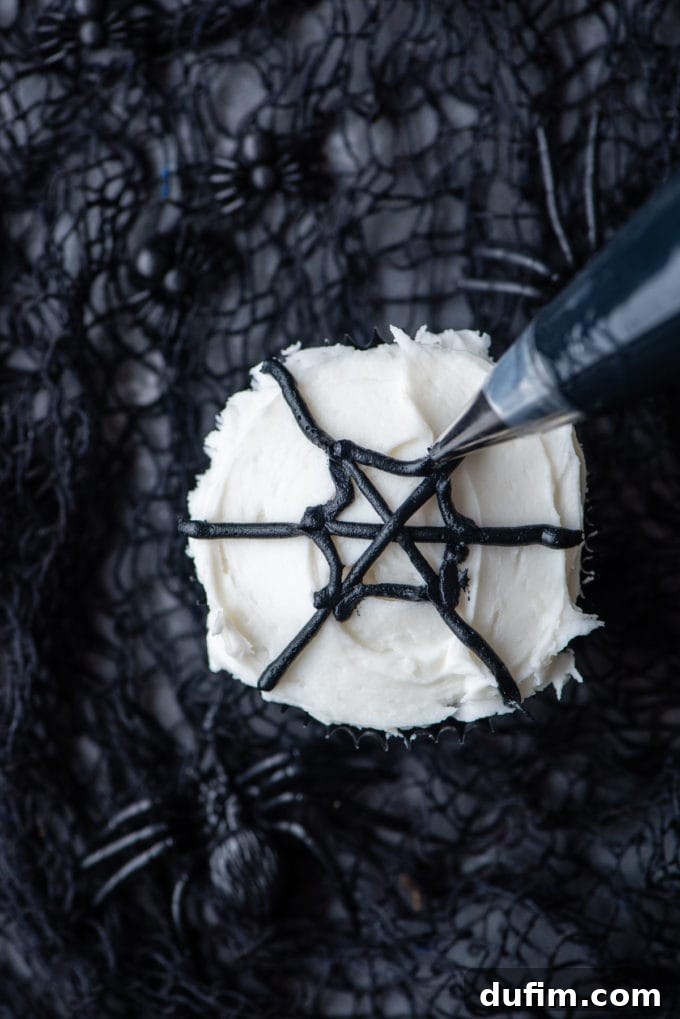
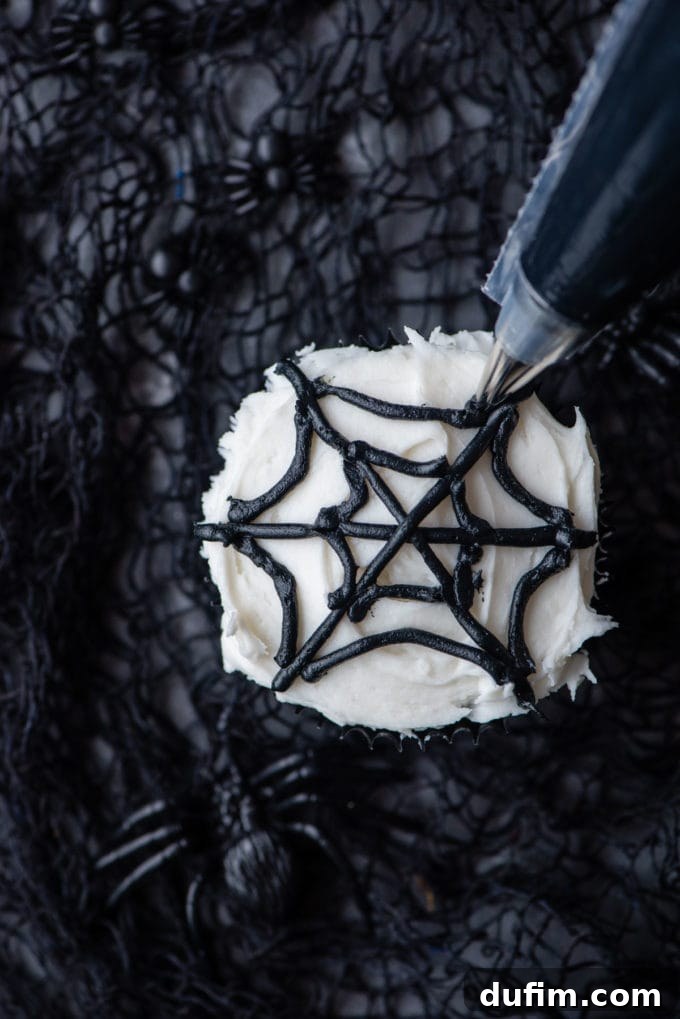
- Pipe the Spider Web Design: Now for the fun part!

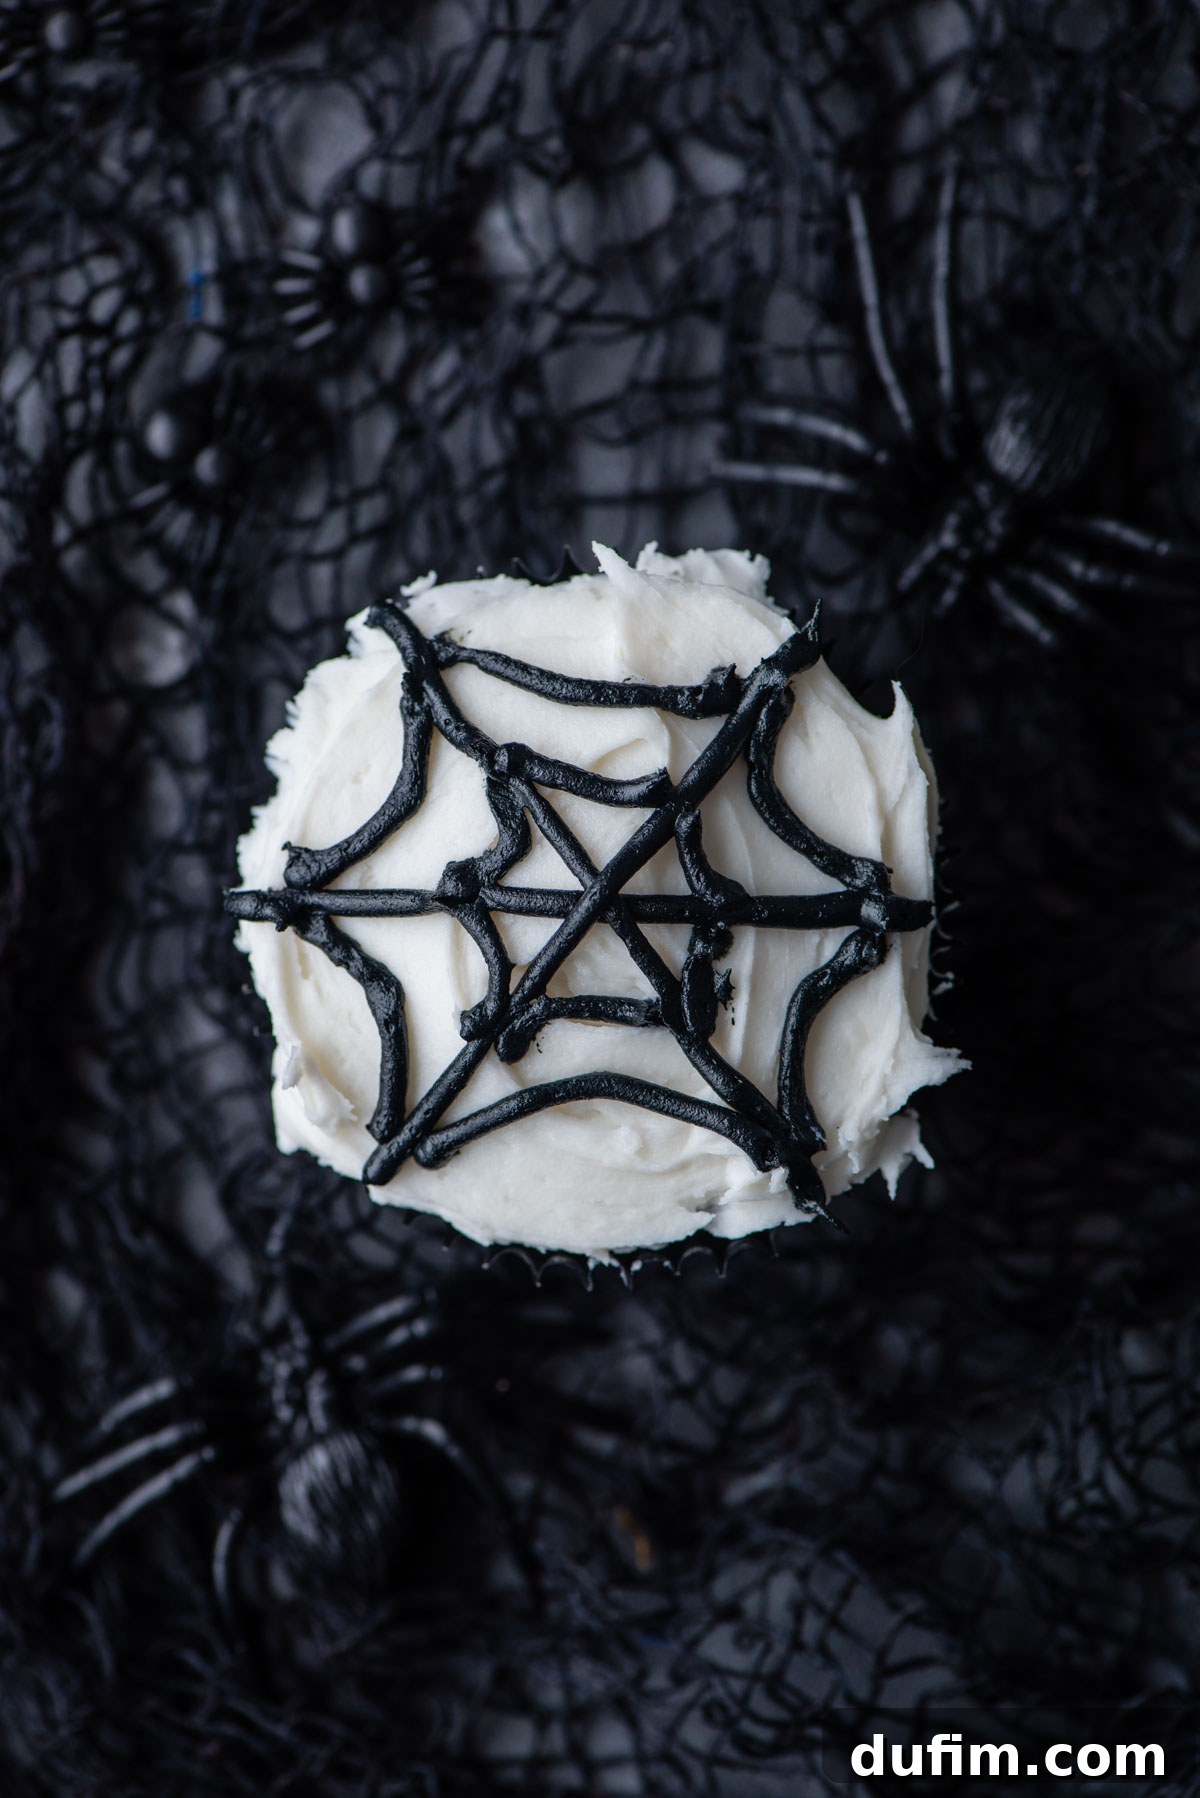
Start by piping a single straight black line horizontally across the center of a white-frosted cupcake. Next, add two diagonal lines that cross over the horizontal line, creating an “X” shape. You should now have four radiating lines. To form the web, pipe slightly curved lines connecting these radiating lines, adding about two curved lines per section. Work from the center outwards for a classic web effect. The slight curve makes the web look realistic and suspended.
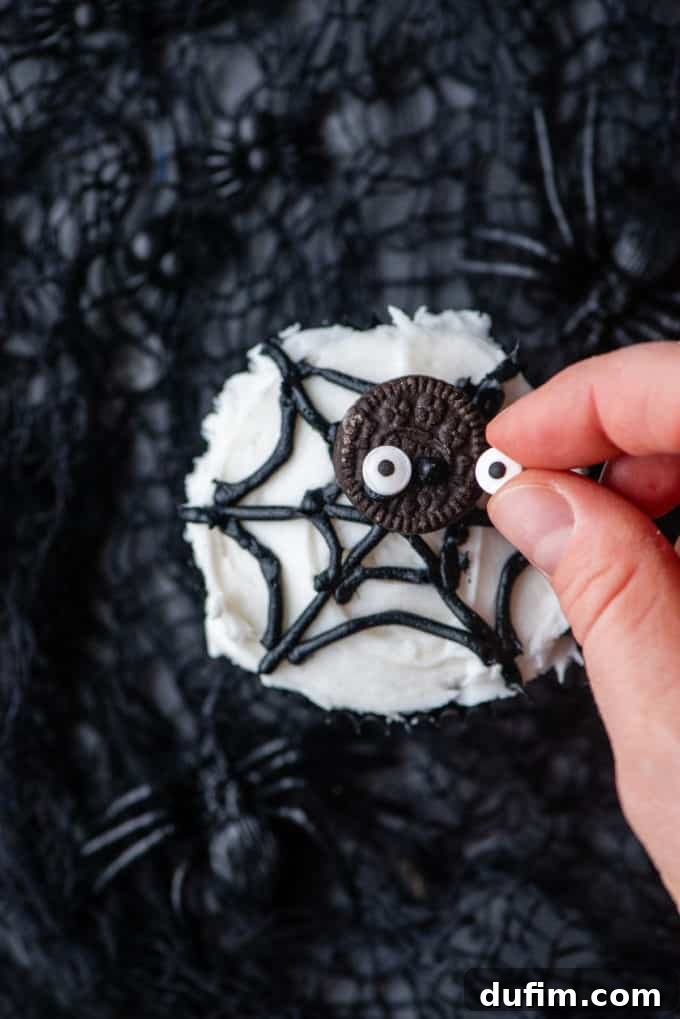
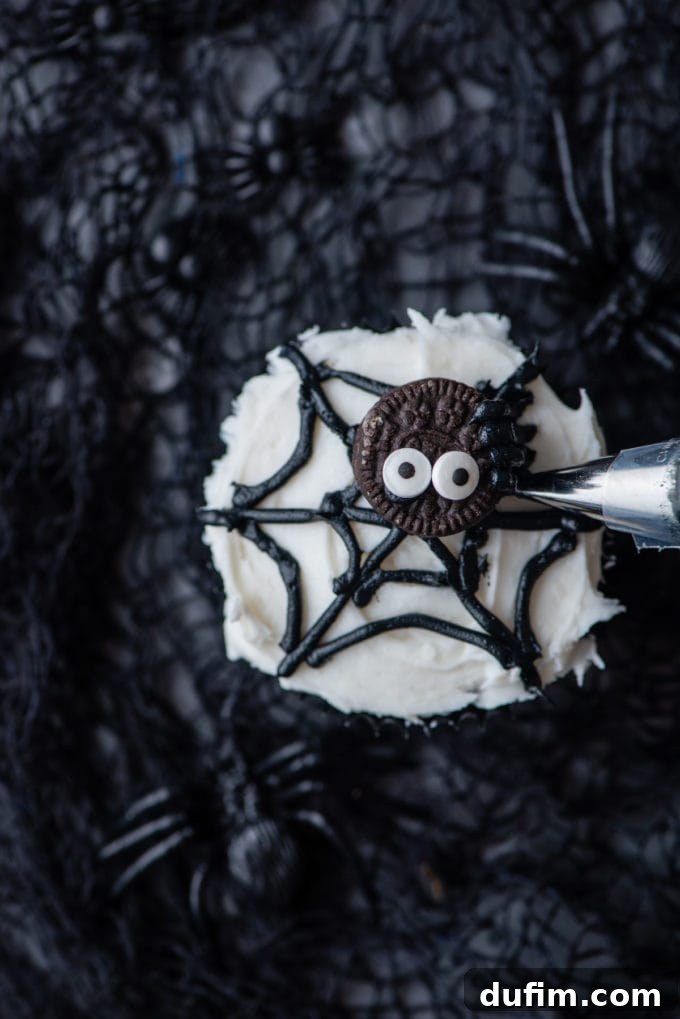
- Add the Adorable Spiders: Carefully place a mini Oreo cookie onto the piped spider web, positioning it slightly off-center to make it look like it’s crawling.
Use a tiny dab of frosting (either white or black) to attach two candy eyeballs to the mini Oreo, bringing your spider to life. Then, using your piping bag with black frosting, pipe four thin legs onto each side of the Oreo, ensuring a total of eight spider legs. Repeat this process for all of your remaining individual cupcakes, transforming each into a charmingly spooky treat.
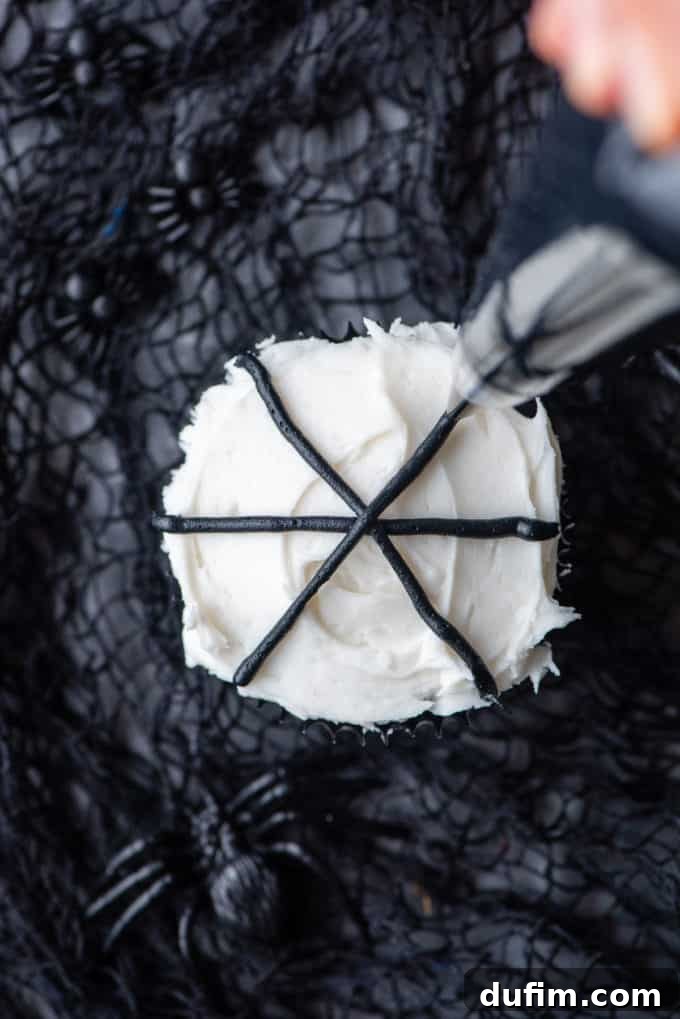
Expert Tips for the Best Spider Web Cupcakes
Achieving perfectly moist chocolate cupcakes and beautifully decorated spider webs is easy with a few insider tricks. Follow these quick tips to make your Halloween spider cupcakes truly stand out:
- Room Temperature Ingredients are Key: For both the cupcakes and the frosting, ensure your butter and eggs (and buttermilk) are at room temperature. This allows them to emulsify properly, creating a smoother batter and a creamier, lump-free frosting that’s easier to work with and results in a better texture.
- Don’t Overmix the Batter: Once you add the dry ingredients to the wet, mix only until just combined. Overmixing develops the gluten in the flour, leading to tough, dense cupcakes instead of light and fluffy ones. A few small lumps are perfectly fine!
- How to Know When Cupcakes are Done: The best and most reliable way to tell if your chocolate cupcakes are perfectly baked is to gently insert a toothpick into the center of one. When you pull it out, it should have just a few moist crumbs clinging to it. If the toothpick comes out completely clean, the cupcakes are likely a bit over-baked and might be dry.
- Cool Cupcakes Completely: This step cannot be stressed enough! Always allow your cupcakes to cool entirely on a wire rack before applying any frosting. If they are even slightly warm, the frosting will melt, slide off, and ruin your beautiful designs.
- Adjust Frosting Consistency: Frosting consistency is crucial for piping. If the frosting feels too thick and stiff to pipe smoothly, add milk or heavy cream a teaspoon at a time, mixing well after each addition, until it reaches a spreadable yet firm consistency. Conversely, if it’s too thin, gradually mix in more powdered sugar (a tablespoon at a time) until it thickens up.
- Achieving Dark Black Frosting: For a truly deep black color without using excessive food coloring (which can sometimes alter taste), start with a chocolate frosting base if possible, or use a high-quality gel food coloring designed for deep colors. Allow the black frosting to sit for 15-30 minutes after mixing; the color often deepens over time.
- Practice Your Piping: If you’re new to piping, it helps to practice on a piece of parchment paper first. You can scrape the practice frosting back into the bag. This allows you to get a feel for the pressure and movement required to create smooth lines and webs before moving to the actual cupcakes.
Creative Substitutions & Exciting Variations
While our classic chocolate spider web cupcakes are absolutely fantastic, this recipe offers wonderful flexibility to get creative and tailor them to your preferences or dietary needs. Here are some ideas for substitutions and variations:
- Different Cupcake Flavors: The spider web and spider decorations are versatile and look great on various cupcake bases. Instead of chocolate, consider trying:
- Vanilla Cupcakes: A bright white base makes the black webs truly pop for a striking contrast.
- Peanut Butter Cupcakes: For a delicious flavor twist that pairs well with chocolate frosting or a dark-colored web.
- Red Velvet Cupcakes: The deep red against white frosting with black webs creates a spooky gothic vibe perfect for Halloween.
- Orange or Green Cupcakes: Use food coloring in your vanilla batter to create vibrant, festive Halloween-themed cupcake bases.
- Alternative Frosting Colors: While white frosting with black webs is traditional, you can switch things up! Try an orange or purple frosting base with black webs, or a black frosting base with white webs for an inverted, ghostly effect.
- Different Spider “Bodies”: If mini Oreos aren’t available, you can use other small, round, dark candies or cookies, such as chocolate wafers or even a large chocolate chip for the spider’s body.
- Gluten-Free Option: Easily adapt this recipe by using a 1:1 gluten-free all-purpose flour blend in place of regular flour. Ensure your cocoa powder and other ingredients are certified gluten-free.
- Dairy-Free Option: Substitute regular butter with a good quality plant-based butter (like Miyoko’s Kitchen or Earth Balance sticks) and use dairy-free buttermilk (made with dairy-free milk and lemon juice/vinegar) and dairy-free milk/cream for the frosting.
Storing & Freezing Suggestions for Freshness
To ensure your spider web cupcakes taste their absolute best, they are ideally enjoyed the same day they are made. The frosting is at its peak freshness and the cupcake’s moisture is perfect. However, if you find yourself with leftovers or need to prepare them slightly in advance, here are some helpful storage tips:
Storing Frosted Cupcakes: Place your frosted spider web cupcakes in an airtight container. They can be stored at room temperature on the counter for up to 2 days. For longer freshness, especially if your kitchen is warm, you can refrigerate them for up to 3-4 days. Just be aware that refrigeration can sometimes slightly alter the texture of the cupcake and make the frosting firmer. Allow them to come to room temperature for about 15-20 minutes before serving for the best taste and texture.
Making Ahead: If you’re planning a big Halloween party and want to get a head start, we recommend baking the chocolate cupcakes a day or two in advance. Once fully baked and completely cooled, store them in an airtight container at room temperature. Then, prepare the frosting and assemble the spider web decor closer to serving time (ideally within a few hours) to ensure the freshest and most visually appealing results. This method significantly reduces stress on the day of your event!
Freezing Baked Cupcakes (Unfrosted): You can freeze the unfrosted chocolate cupcakes for up to 2-3 months. Once cooled completely, wrap each cupcake individually in plastic wrap, then place them in a freezer-safe airtight container or heavy-duty freezer bag. When ready to use, thaw them overnight in the refrigerator, then bring to room temperature before frosting and decorating.
Frequently Asked Questions (FAQ) About Spider Web Cupcakes
Here are some common questions bakers have about making these delightful Halloween spider web cupcakes:
Q: Can I use a boxed cake mix for the cupcakes?
A: Absolutely! If you’re short on time or prefer the convenience, a good quality boxed chocolate cake mix will work perfectly. Just follow the package directions for preparing and baking the cupcakes. You can even enhance the boxed mix by adding an extra egg or a teaspoon of vanilla extract for a more homemade taste.
Q: How can I make the black frosting truly black and not grey?
A: The trick to achieving a rich, dark black frosting is using a high-quality gel food coloring, specifically black. Liquid food coloring often doesn’t give a deep enough hue without thinning the frosting too much. Add the gel coloring gradually, mixing well after each addition. For the best results, make your black frosting ahead of time (even an hour or two) and let it sit at room temperature. The color will deepen significantly as it rests. Using a chocolate frosting base can also help to start with a darker color.
Q: What if my frosting is too stiff or too runny for piping?
A: This is a common issue! If your frosting is too stiff, add milk or heavy cream, 1 teaspoon at a time, mixing thoroughly until it reaches a pipeable consistency. If it’s too runny, gradually add more sifted powdered sugar, 1 tablespoon at a time, until it thickens up. Always make small adjustments to avoid overdoing it.
Q: Can I make these cupcakes dairy-free or vegan?
A: Yes! You can make suitable substitutions. For dairy-free, use plant-based butter (like Miyoko’s Kitchen or Earth Balance sticks), dairy-free milk for the buttermilk (with lemon juice/vinegar), and dairy-free milk/cream for the frosting. For vegan, ensure all dairy-free substitutions are made, and replace the eggs with a flax egg (1 tbsp ground flaxseed meal + 3 tbsp water per egg) or a commercial egg replacer.
Q: How far in advance can I decorate these?
A: While the cupcakes are best enjoyed fresh, you can decorate them up to 24 hours in advance. Store them in an airtight container at room temperature. If you need to make them further ahead, consider baking the cupcakes, freezing them unfrosted, and then thawing and decorating them the day before your event.
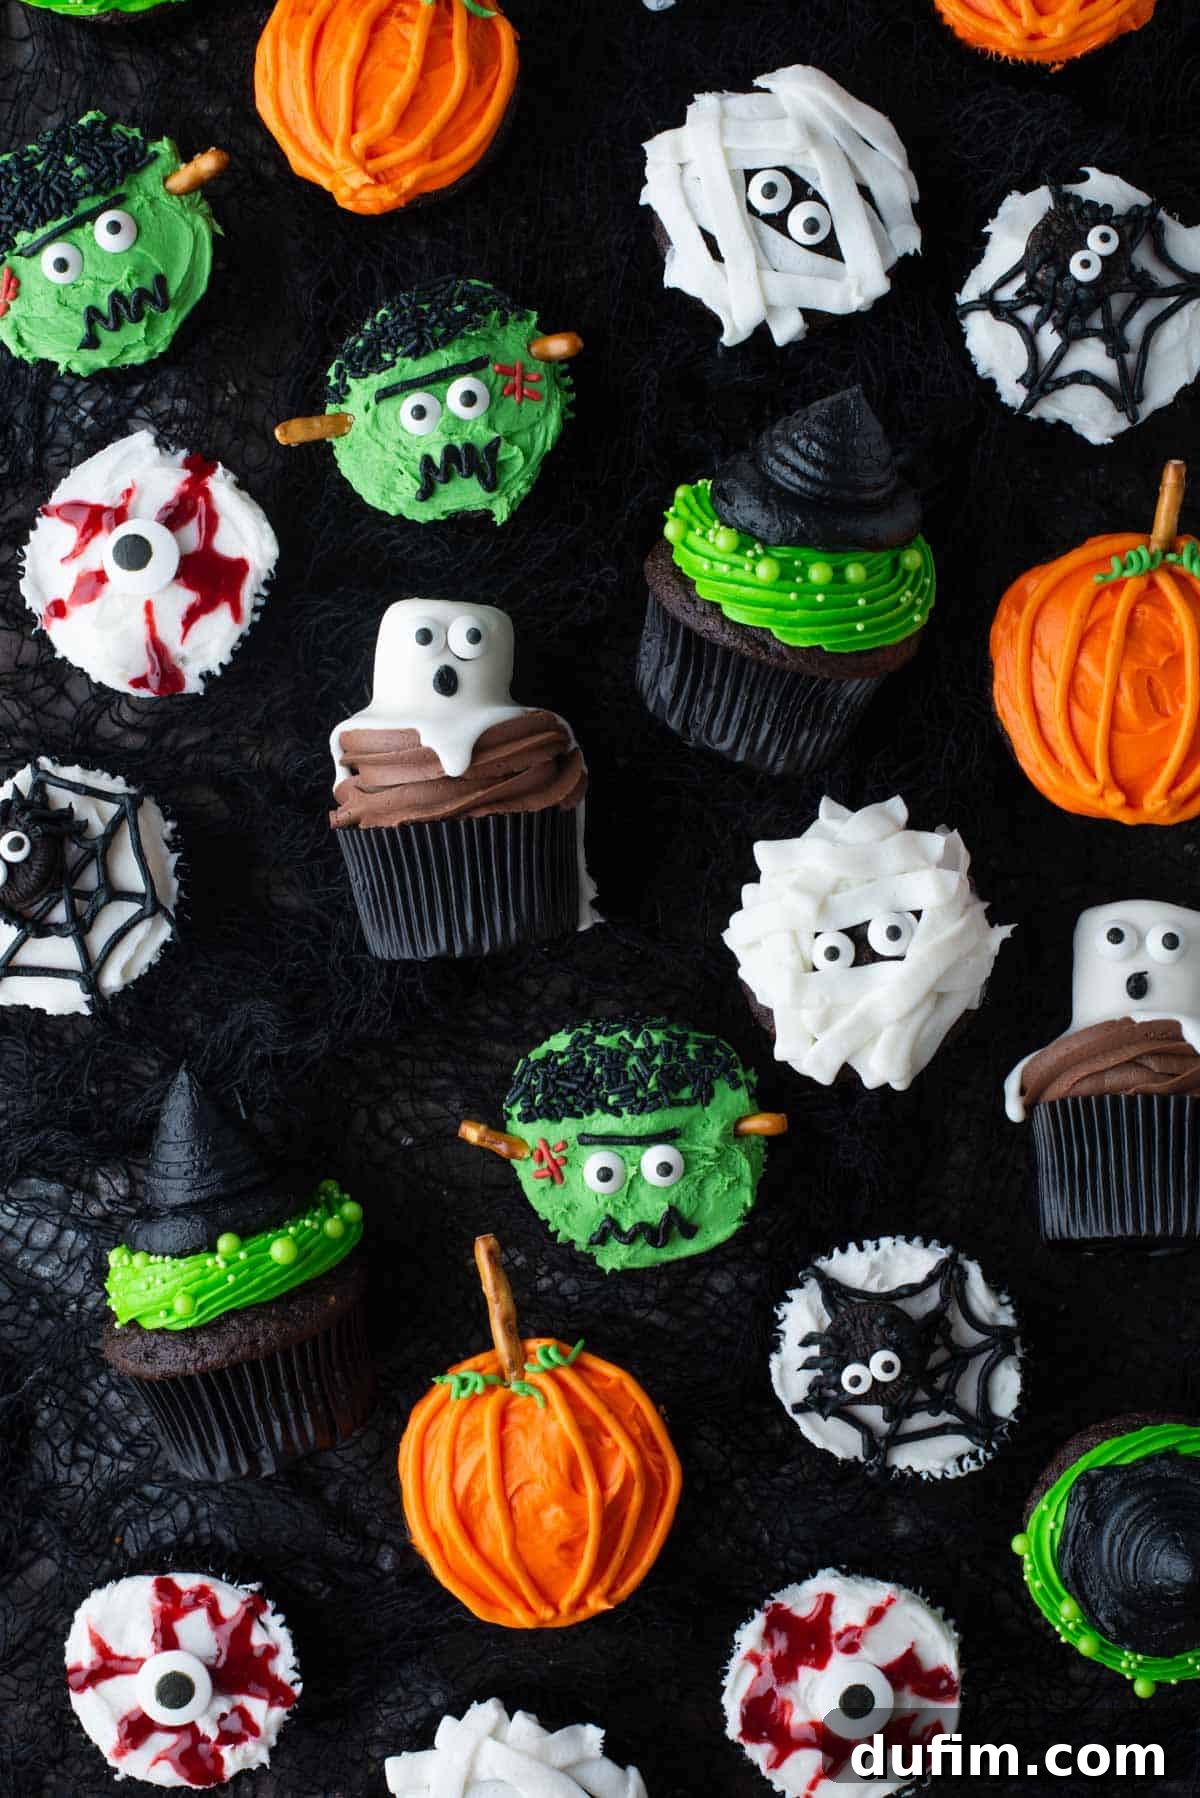
Want to Make an Assortment of Easy Halloween Cupcakes?
Why stop at just one type of spooky treat? Elevate your Halloween dessert table by creating a diverse assortment of fun and festive cupcakes. These spider web cupcakes will fit right in with a variety of other themed delights. Explore these other easy Halloween cupcake recipes to complete your collection!
- Frankenstein Cupcakes
- Mummy Cupcakes
- Witch Hat Cupcakes
- Eyeball Cupcakes
- Pumpkin Patch Cupcakes
- Ghost Cupcakes
- Spider Cupcakes
More Spooky Spider Recipes You’ll Love!
If you’re a fan of the spider theme for Halloween, there are plenty of other creative and delicious ways to incorporate these eight-legged creatures into your treat lineup. From cookies to meringues, these recipes offer more fun and spooky delights:
- Peanut Butter Spider Cookies
- Spider Web Meringues
- Oreo Spiders
- Spider Rice Krispie Treats
Spider Web Cupcakes
By: Beth
Cook Time: 19 minutes
Cooling Time: 30 minutes
Servings: 24 cupcakes
Get ready to impress your friends, family, and Halloween party guests! These adorable spider web cupcakes are not only delicious and perfectly moist, but these Halloween treats are incredibly easy to make when you follow our simple step-by-step instructions.
Print Recipe
Equipment
- Glass Mixing Bowl
- Muffin Pan
- Electric Mixer (e.g., KitchenAid 9-Speed Mixer)
- Piping Bag
- Wilton 4 Piping Tip
- Wire Rack
- Toothpicks
Ingredients
Chocolate Cupcakes
- 2 cups (240g) all-purpose flour
- ¾ cup (63g) cocoa powder (natural unsweetened or Dutch processed)
- 1 tsp instant coffee granules (such as Folger’s, optional)
- ½ tsp baking soda
- 1 tsp baking powder
- 1 tsp salt
- ½ cup (113g) unsalted butter (1 stick, room temperature)
- 1 ½ cups (297g) granulated sugar
- 2 large eggs (room temperature)
- 1 cup (236ml) buttermilk (room temperature)
- ½ cup (118ml) hot tap water
Frosting
- 1 ½ cups (339g) unsalted butter (3 sticks, room temperature)
- 1 tsp vanilla extract
- 2-3 cups (227-339g) powdered sugar (sifted)
- Dash of milk or heavy cream (if frosting becomes too thick)
Extras for Decoration
- Candy eyeballs
- Piping bag
- Wilton 4 piping tip
- Black gel food coloring
- Mini Oreos
Instructions
Chocolate Cupcakes
- Prep: Preheat oven to 350º F (175°C). Line a muffin pan with cupcake liners.
- Combine Dry Ingredients: In a medium bowl, whisk together the all-purpose flour, cocoa powder, instant coffee granules (if using), baking soda, baking powder, and salt. Set aside.
- Combine Wet Ingredients: In a large bowl, beat the softened butter and granulated sugar with an electric mixer for 2 minutes until pale and fluffy. Add the large eggs, beating for another 30 seconds until well combined.
- Mix All Ingredients: Add half of the buttermilk and beat for about 20 seconds. Add half of the dry ingredients and beat until just combined. Add the remaining buttermilk and hot water, beating just until the liquid is mixed in. Finally, add the remaining dry ingredients and beat on low speed only until combined. Do not overmix.
- Bake Cupcakes: Fill muffin liners 1/2 full. Bake for 17-19 minutes at 350º F (175°C), or until a toothpick inserted into the center comes out with a few moist crumbs. Allow cupcakes to cool completely on a wire rack before frosting.
Frosting
- Mix Butter and Vanilla: In a large mixing bowl, combine the room-temperature butter and vanilla extract. Beat using an electric mixer until fluffy, about 1-2 minutes.
- Add Powdered Sugar: Gradually add the sifted powdered sugar, mixing on low speed until fully combined and smooth.
- Add Food Coloring (Optional): If you plan to color your main frosting (not the black for webs), do so now.
- Adjust Consistency: Taste and adjust for sweetness by adding more powdered sugar if needed. If the frosting becomes too thick for piping, add a dash (teaspoon by teaspoon) of milk or heavy cream until desired consistency is reached.
- Optional Fluffy Boost: For extra fluffy frosting, add 1/4 cup heavy whipping cream when adding the last bit of powdered sugar. Whip for 3-4 minutes until light and airy.
Assemble
- Make Black Frosting: Remove about 1 cup of the white frosting and transfer it to a separate small bowl. Add black gel food coloring and mix until you achieve a deep, consistent black color.
- Frost Cupcakes: Spread a generous amount of white frosting evenly onto each cooled chocolate cupcake. Create a smooth, slightly domed surface.
- Prep Black Frosting Bag: Transfer the black frosting to a piping bag fitted with a Wilton 4 piping tip.
- Pipe the Spider Web: Start by piping a straight black line horizontally across the center of a frosted cupcake. Then, add two diagonal lines that cross over, forming an “X.” Connect these radiating lines with slightly curved lines, adding 2 curved lines per section, to create the web effect.
- Decorate with Spiders: Place a mini Oreo cookie on the spider web. Use a small dab of frosting to attach two candy eyeballs to the mini Oreo, creating the spider’s head. Using the black frosting piping bag, pipe four small legs onto each side of the Oreo, making a total of eight spider legs. Repeat this decoration process for all remaining cupcakes.
We hope you love making and sharing these adorable spider web cupcakes! Don’t forget to rate and comment below if you enjoyed this recipe. Happy Halloween baking!