
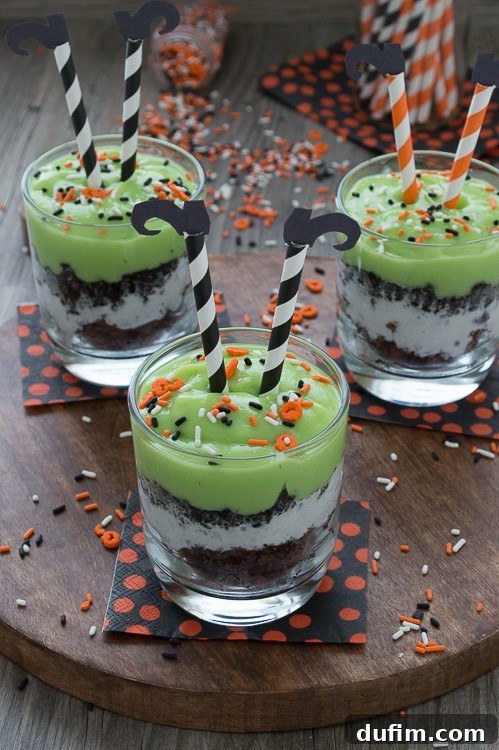
Melted Witch Pudding Parfaits: A Spooktacular Halloween Treat
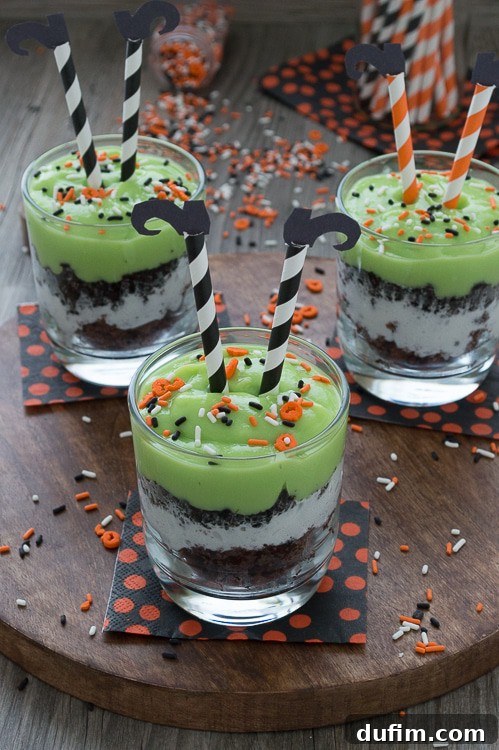
Halloween is a time for costumes, carved pumpkins, and, of course, delightfully spooky treats! If you’re searching for an easy yet impressive dessert that captures the spirit of the season, look no further than these enchanting Melted Witch Pudding Parfaits. Imagine layers of vibrantly green pudding, rich brownie crumbles, fluffy whipped cream, and crunchy Oreo pieces, all topped with adorable, easy-to-make witch’s legs. This isn’t just a dessert; it’s a playful edible narrative, perfect for captivating guests at any Halloween party or simply getting into the holiday mood before October 31st.
These parfaits are an absolute game-changer when it comes to Halloween entertaining. They combine classic, comforting flavors with a whimsical, slightly eerie presentation that is sure to draw smiles and gasps of delight from kids and adults alike. Forget about complicated baking or elaborate decorations; this recipe focuses on simple assembly and maximum festive impact. The secret? A generous “dash of melted witch” – which, in this case, translates to a decadent amount of green pudding, creating the perfect base for our ghoulishly good concoction. Get ready to cast a delicious spell in your kitchen!
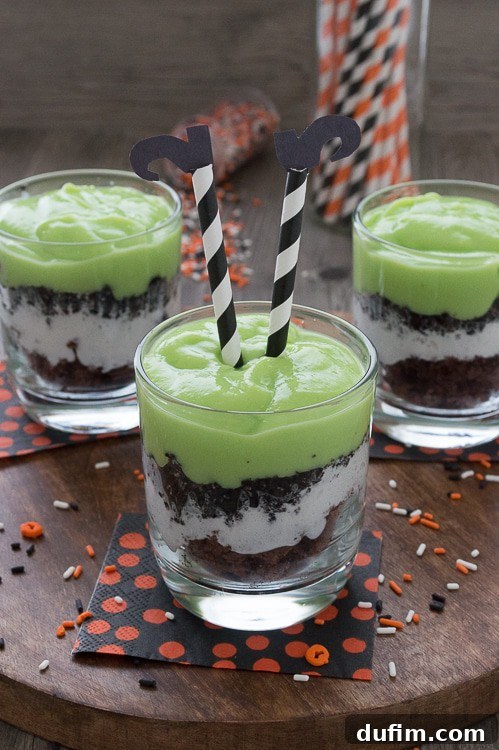
Why Melted Witch Pudding Parfaits Are Your Go-To Halloween Treat
What makes these parfaits stand out in a sea of Halloween sweets? Several compelling reasons:
- Unforgettable Visual Appeal: The striking green pudding against the dark brownies and white whipped cream creates a dramatic, eye-catching effect. Add the adorable witch legs, and you have a dessert that’s truly photo-worthy.
- Irresistible Texture & Flavor: Each spoonful offers a delightful contrast – the smooth, creamy pudding, the moist, chewy brownies, the light whipped cream, and the satisfying crunch of Oreos. It’s a symphony of textures and classic flavors that everyone loves.
- Effortlessly Easy: With minimal cooking involved (especially if you opt for store-bought brownies and pudding cups), this recipe is perfect for busy parents or last-minute party preparations. It’s more about assembly than intricate culinary skills.
- Kid-Friendly Fun: This is an excellent recipe to get children involved in the kitchen. They’ll love mixing the green food coloring into the pudding and layering the ingredients. Making the witch legs is also a fantastic craft activity.
- Party-Perfect Portions: Served in individual glasses, these parfaits are easy to distribute and enjoy, making them ideal for gatherings. No messy slicing or serving required!
Crafting the Iconic Witch’s Legs: A Simple DIY Guide
The witch’s legs are arguably the most charming and recognizable element of these parfaits. They add that final touch of Halloween magic, making the “melted witch” theme truly come alive. Making them is surprisingly simple and requires just a few basic craft supplies.
Materials for Witch Legs:
- Paper straws (striped or solid black work wonderfully to mimic witch stockings)
- Black paper (construction paper or cardstock is ideal for durability)
- Scissors
- Craft knife (for adult use only, or supervise children closely)
- Glue stick or tape
Step-by-Step Witch Leg Creation:
- Determine Length: Begin by deciding on your desired witch leg length. For most standard parfait glasses, around 4.5 to 5 inches works well. Remember, you’ll need enough straw to securely stick into the parfait without it toppling over.
- Cut Straws: Carefully cut your paper straws to your chosen length. For each parfait, you’ll need two separate straw pieces.
- Prepare for Shoes: On one end of each cut straw, use a craft knife or sharp scissors to make two small, opposing slits. These slits should be about 1/4 to 1/2 inch deep and will serve as the slot where you’ll insert the witch’s shoe. Ensure they are directly across from each other to help the shoe sit straight.
- Design and Cut Shoes: Draw small witch shoe shapes onto your black paper. Think classic pointed-toe shoes with a slight heel. You can freehand these or create a small template to ensure consistency. Cut out two shoes for each parfait.
- Attach Shoes: Gently slide the base of each black paper shoe into the slits you made on the straw. A tiny dab of glue or a piece of tape can help secure them in place if they feel loose. Repeat this process until all your witch legs are assembled and ready to stand proudly in your parfaits.
Pro Tip: Don’t make your witch legs too short! You need sufficient straw length to anchor them firmly into the pudding layers, preventing them from falling over.
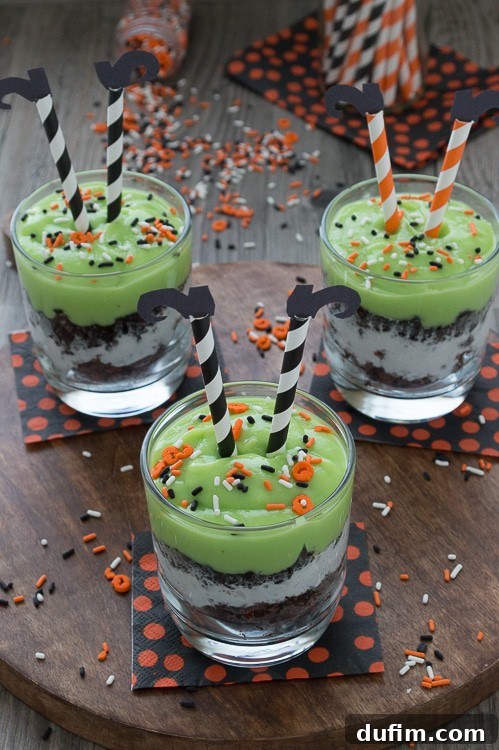
Assembling Your Melted Witch Pudding Parfaits
Once your charming witch legs are ready, the assembly of the parfaits is a breeze. These Halloween pudding parfaits come together incredibly quickly, especially if you have pre-baked brownies on hand (or use a good quality boxed mix for convenience). This is where the magic truly happens, layer by delicious layer!
Key Ingredients for Parfaits (Makes 6 Servings):
- 6 vanilla Snack Pack pudding cups (or 3-4 cups of prepared vanilla pudding)
- Green food coloring (gel food coloring provides a more vibrant hue)
- Approximately 1 batch of brownies, crumbled into bite-sized pieces
- 1.5 – 2 cups whipped cream (homemade or store-bought like Reddi-wip)
- 10-12 Oreo cookies, crushed
- Halloween sprinkles
Step-by-Step Parfait Assembly:
- Dye the Pudding Green: Open your vanilla pudding cups. You can either dye each individual cup green or, for more uniform color, transfer all the pudding into a bowl. Add green food coloring a few drops at a time, stirring until you achieve your desired “witchy” green shade. Set aside.
- Brownie Base: Begin by layering crumbled brownie pieces into the bottom of each glass. Divide your brownie crumbles evenly among the 6 parfaits. This forms a rich, dark base for your melted witch.
- Whipped Cream Layer: Next, add a generous layer of whipped cream over the brownies. You can spoon it in, or for a neater look, use a piping bag with a star tip.
- Oreo Crunch: Sprinkle a layer of crushed Oreos on top of the whipped cream. This adds a fantastic crunchy texture and a contrasting dark color.
- Green Pudding Fill: Now, spoon the vibrant green pudding on top of the crushed Oreos. Fill each glass almost to the brim, ensuring a thick, smooth layer of “melted witch.”
- Final Touches: Add another dollop or swirl of whipped cream on top of the green pudding. Finish with a festive scattering of Halloween sprinkles and, finally, carefully insert your prepared witch’s legs into the top of each parfait.
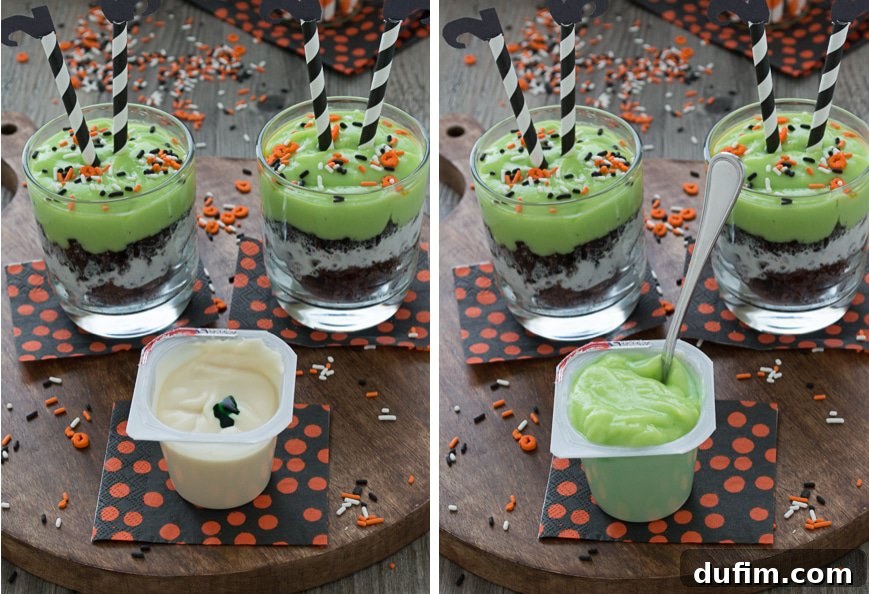
Melted Witch Pudding Parfaits Recipe
This is my absolute favorite way to eat pudding – in a parfait, loaded with delightful mix-ins, and a dash of melted witch magic! Who knew a melted witch could be so tasty? These parfaits are completely loaded with green pudding, brownies, Oreos, and whipped cream, making them a fantastic hit for any Halloween celebration or a delightful precursor to October 31st.
Prep Time: 20 minutes
Total Time: 20 minutes
Servings: 6 servings
Ingredients
- 6 Vanilla Snack Pack pudding cups (or 3-4 cups prepared vanilla pudding)
- Green food coloring (gel recommended for vibrant color)
- 1 batch brownies, crumbled into smaller pieces (homemade or store-bought)
- 10-12 Oreos, crushed
- 1.5 – 2 cups Whipped cream
- Halloween sprinkles
- **For Witch’s Legs (per parfait):**
- 2 paper straws, cut to 4.5-5 inches
- Small pieces of black paper for shoes
Instructions
- In a bowl (or individual cups), dye the vanilla Snack Pack pudding green using food coloring. Stir until you achieve your desired witchy green color. Set aside.
- To assemble the parfaits, begin by layering crumbled brownie pieces in the bottom of each glass. Divide the brownie pieces evenly among the 6 parfait glasses.
- Next, add a layer of whipped cream on top of the brownies in each parfait glass.
- Add the crushed Oreos on top of the whipped cream layer, spreading them evenly.
- Spoon the green pudding on top of the Oreos, filling each glass almost full.
- Add a final dollop or swirl of whipped cream on top of the green pudding.
- Decorate with Halloween sprinkles and gently insert the homemade witch’s legs into the top of each parfait.
- For best results, enjoy these parfaits within a few minutes of making, as prolonged sitting can make the ingredients soggy. Alternatively, prepare components in advance and assemble just before serving.
Nutrition
All nutritional values are approximate and provided to the reader as a courtesy. Changing ingredients and/or quantities will alter the estimated nutritional calculations.
- Calories: 137 kcal
- Carbohydrates: 29g
- Protein: 1g
- Fat: 2g
- Saturated Fat: 1g
- Polyunsaturated Fat: 1g
- Monounsaturated Fat: 1g
- Trans Fat: 1g
- Sodium: 193mg
- Potassium: 29mg
- Fiber: 1g
- Sugar: 22g
- Vitamin A: 1IU
- Calcium: 4mg
- Iron: 1mg
Tips for Success & Spooky Variations
While the Melted Witch Pudding Parfaits are straightforward to make, a few tips can elevate your dessert, and some creative variations can make them uniquely yours:
Tips for the Perfect Parfait:
- Chill Ingredients: For the best texture and firmness, ensure your pudding and whipped cream are well chilled before assembly.
- Assemble Just Before Serving: To prevent the brownie and Oreo layers from becoming soggy, it’s best to assemble the parfaits within an hour or two of serving. You can prepare all components (dye pudding, crumble brownies, crush Oreos, make witch legs) in advance and store them separately.
- Presentation Matters: Use clear glass cups or jars to showcase the beautiful layers. Mason jars are excellent for a rustic touch or for transport.
- Neat Layers: When adding whipped cream, a piping bag makes it easy to create clean, defined layers.
Spooky Variations:
- Different Pudding Flavors: While vanilla provides a neutral base for green coloring, feel free to experiment with chocolate pudding (for a darker “swamp” effect) or even pistachio pudding for a naturally green hue.
- Alternative Cookie Layers: Instead of Oreos, try crushed graham crackers for a “dirt” effect, or chocolate chip cookies for a different flavor profile.
- Candy Additions: Before adding the final whipped cream and witch legs, sprinkle in some gummy worms, candy corn, or other Halloween-themed candies for extra fun.
- Healthy Twist: For a slightly healthier option, consider using sugar-free pudding and light whipped topping. You could also substitute some of the brownie crumbles with fresh berries at the bottom.
- Adult Version: For an adult Halloween party, a tiny splash of a green liqueur (like Midori) could be mixed into the pudding for an extra “witchy brew” kick! (Ensure to label accordingly).
Whip Up Some Halloween Magic!
These Melted Witch Pudding Parfaits are more than just a dessert; they’re an experience. They embody the fun, creativity, and slightly spooky charm that makes Halloween so special. Whether you’re hosting a grand costume party, a cozy family gathering, or just looking for a delightful way to celebrate the season, these parfaits are guaranteed to be a hit.
The ease of preparation means you can spend less time in the kitchen and more time enjoying the festivities with loved ones. Plus, getting the kids involved in making them adds another layer of joy and excitement to the holiday. So, gather your ingredients, unleash your inner kitchen witch, and create these spellbindingly delicious parfaits. Your taste buds, and your Halloween guests, will thank you!
Don’t forget to share your creations and tell us how much you loved these enchanting treats!