
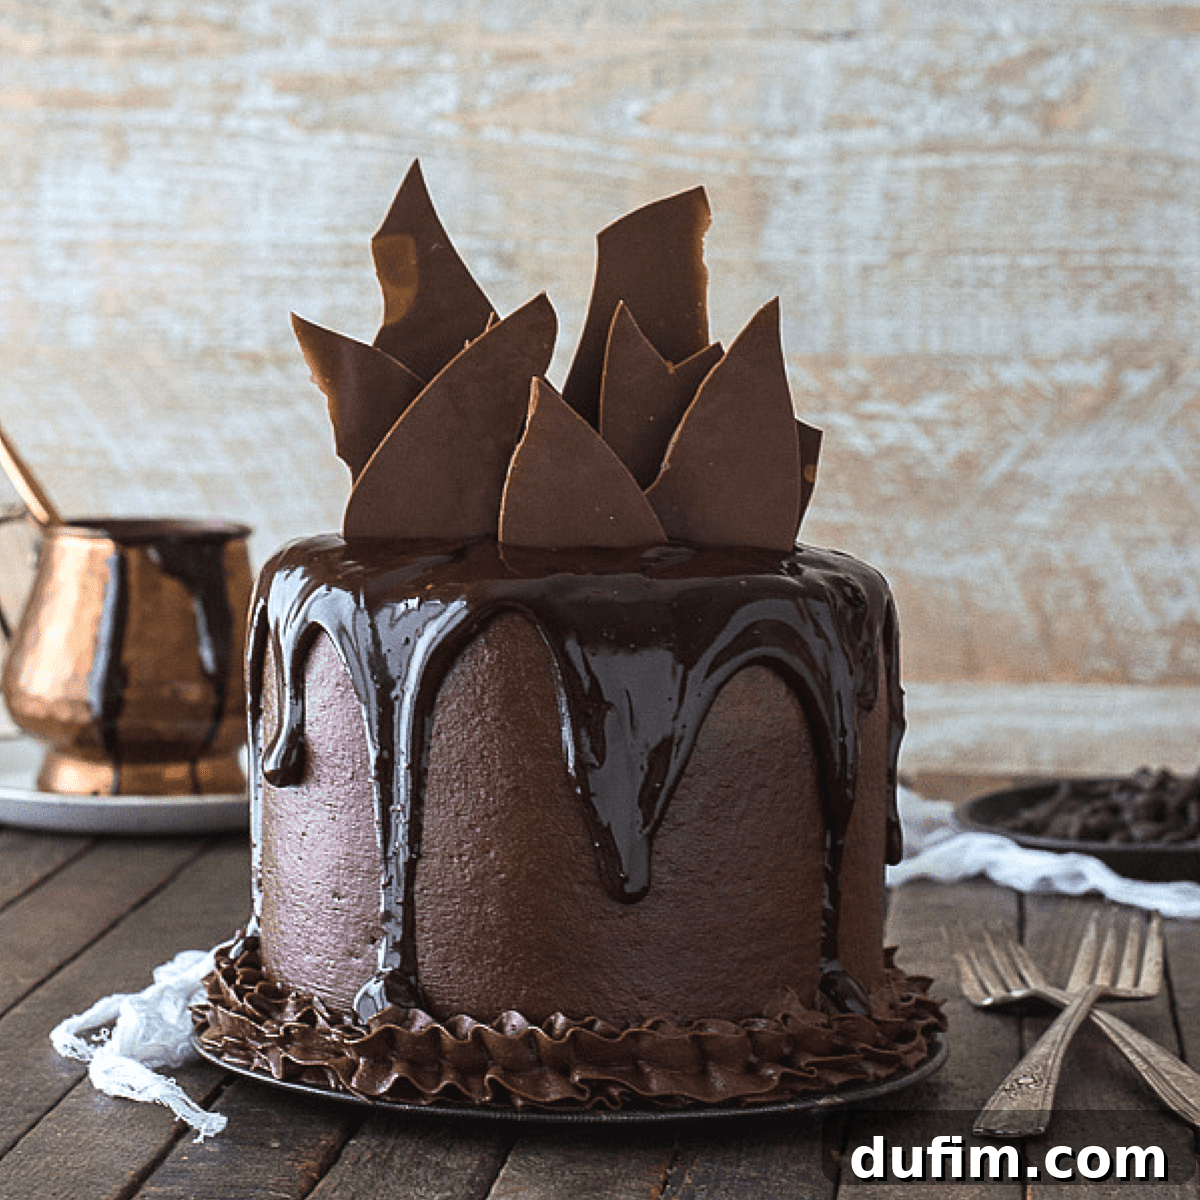
Ultimate Chocolate Chocolate Cake: A Decadent Delight
There’s a special kind of magic that chocolate brings to any occasion, and for us, the transition from autumnal pumpkin spice to the glorious world of rich, decadent chocolate is always a welcome one. While pumpkin certainly has its charm, we’re eagerly embracing the festive flavors of peppermint, eggnog, gingerbread, and of course, a generous abundance of CHOCOLATE!
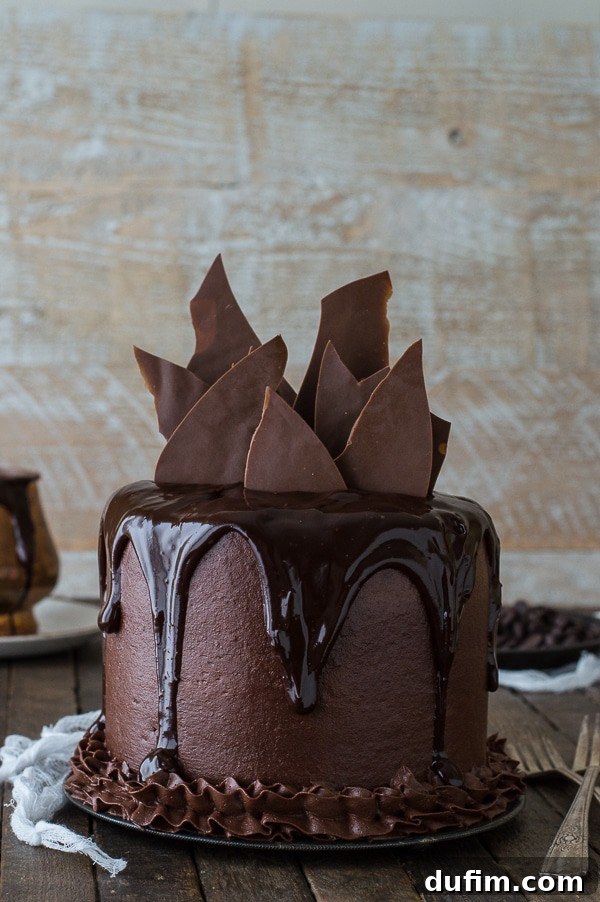
“Made this today! So delicious!!
-Malena”
We absolutely adore the warmth and comfort that fall flavors like pumpkin offer, but as the seasons shift, our palates crave something different, something deeply indulgent. And what better to satisfy that craving than a show-stopping chocolate cake that celebrates chocolate in every single layer? This isn’t just any chocolate cake; it’s an ode to cocoa, a symphony of chocolate textures and flavors designed to delight even the most discerning chocolate lover.
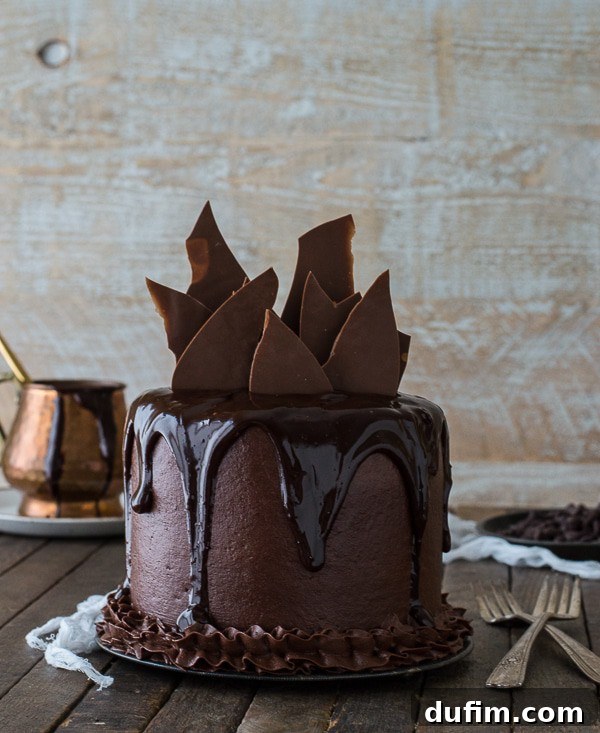
Follow me on Pinterest for more delicious recipes!
The Ultimate Chocolate Chocolate Cake Experience
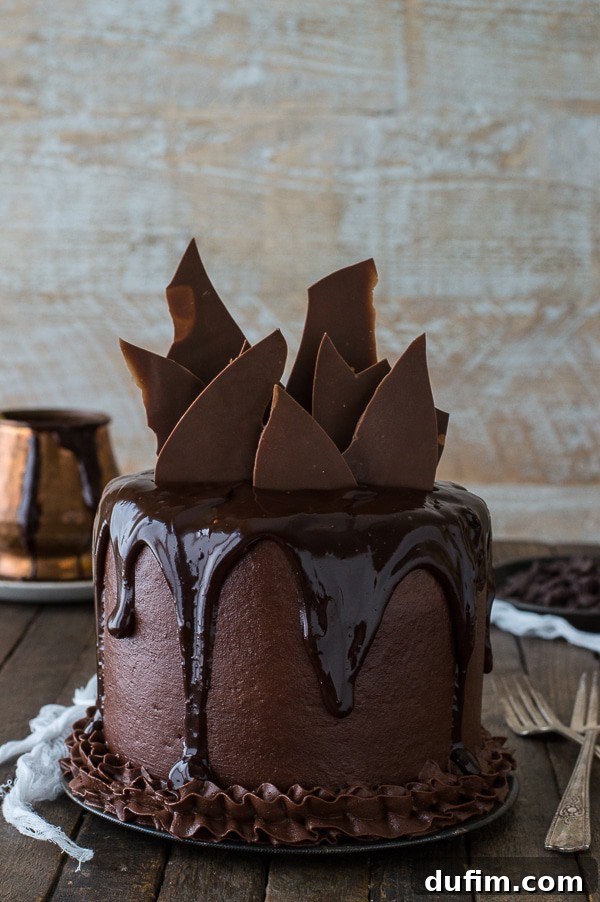
You might think chocolate isn’t a groundbreaking “new” flavor, and you’d be right – it’s a timeless classic, enjoyed year-round. However, for many, the holiday season evokes a desire for extra special indulgences, and chocolate takes center stage in our baking plans. This year, we’re kicking off the festive baking season with an extraordinary creation: a triple chocolate threat, featuring a rich chocolate cake, velvety chocolate buttercream, glossy chocolate ganache, and elegant chocolate shards. That’s right, we’re talking about multiple layers of pure chocolate bliss, each contributing to a symphony of flavor and texture that will leave you craving more.
This magnificent creation boasts four distinct chocolate elements, each meticulously crafted to elevate the overall experience:
- **Moist Chocolate Cake Layers:** The foundation of our masterpiece, offering a deep cocoa flavor and an irresistibly tender crumb.
- **Velvety Chocolate Buttercream:** A smooth, rich frosting that perfectly complements the cake, adding creamy sweetness to every bite.
- **Glossy Chocolate Ganache Drip:** A luxurious topping that not only looks stunning but also delivers an intense chocolate hit, dripping elegantly down the sides.
- **Handmade Chocolate Shards:** These easy-to-make, sculptural decorations add a sophisticated touch and a delightful textural contrast.
This chocolate chocolate cake is truly the perfect accompaniment to a cold glass of milk. While we love a good chocolate milk, pairing it with this cake might just be an overdose of chocolate – even for us! We believe in drawing the line at perfection, and this cake, with its perfect balance of flavors and textures, stands on its own as a truly magnificent treat.
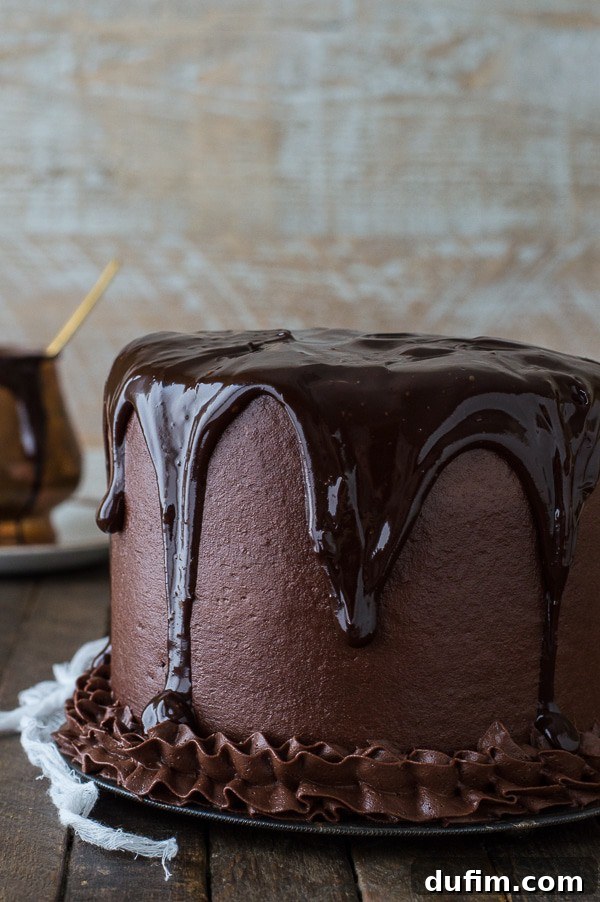
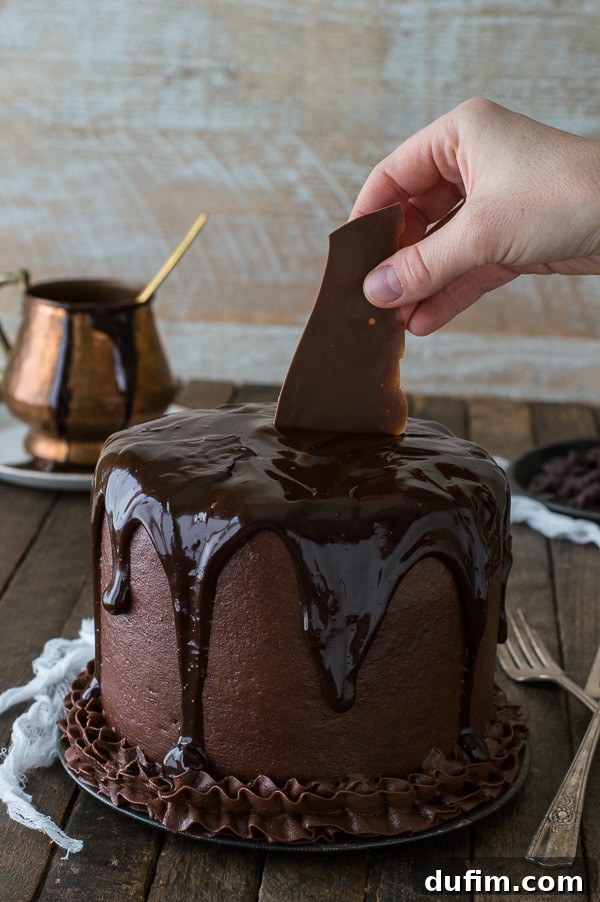
Initially, I dreamt of topping this stunning cake with intricate, homemade chocolate curls. However, despite numerous attempts, achieving those perfect, delicate curls remained a challenge. It seems getting the chocolate temperature just right is an art form I’m still perfecting. But as often happens in baking, a delightful alternative emerged! I discovered my new favorite cake decoration: chocolate shards! Not only are they incredibly simple to make (a definite win for any baker!), but they also add a beautiful, modern height and dramatic flair to any dessert. Their rustic elegance perfectly complements the richness of the cake, proving that sometimes, the simplest decorations are the most impactful.
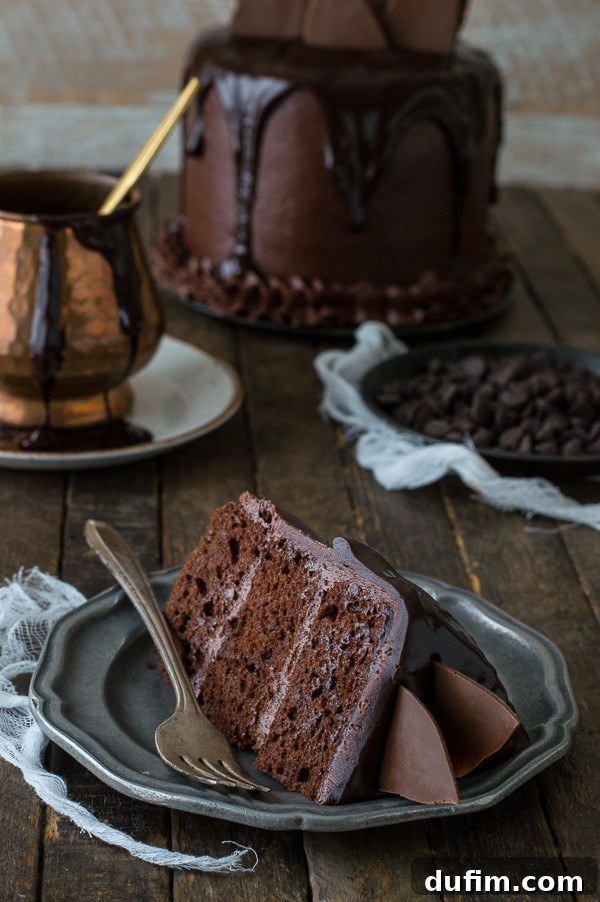
Crafting Elegant Chocolate Shards: A Simple Guide
Creating beautiful chocolate shards is surprisingly easy and adds a professional, artistic touch to your homemade cakes and desserts. Here’s a detailed, step-by-step guide to achieving these stunning edible decorations:
- **Melt Your Chocolate:** Start by gently melting your preferred chocolate or candy melts. You can use high-quality chocolate chips, store-bought candy melts, or even chocolate candiquik or various colored Wilton candy melts for different effects. Use a double boiler or microwave in short bursts, stirring frequently, to ensure smooth, lump-free chocolate.
- **Prepare Your Surface:** Lay a large piece of wax paper or parchment paper over a sturdy cutting board or a flat baking sheet. The flat surface underneath is crucial for even spreading and easy transfer to the freezer.
- **Spread Evenly:** Pour the melted chocolate onto the center of the wax paper. Using an offset spatula or the back of a spoon, gently spread the chocolate into a thin, even layer across the wax paper. Aim for a consistent thickness for best results.
- **Top with More Wax Paper:** Carefully place another large piece of wax paper directly on top of the melted chocolate. Gently smooth out any air bubbles by lightly pressing down with your hands or a flat tool. This creates a clean, uniform surface and helps with easy breakage later.
- **Chill Until Firm:** Transfer the entire assembly (cutting board or baking sheet included) to the freezer. Chill for about 10-15 minutes, or until the chocolate is completely firm and snaps easily.
- **Allow to Temper Slightly:** Remove the chocolate from the freezer and let it sit at room temperature for 2-3 minutes. This brief tempering makes it easier to break into shards without excessive crumbling.
- **Break into Shards:** Peel off the top layer of wax paper. Now, simply begin breaking the hardened chocolate into various sizes and shapes. The beauty of shards is their natural, organic look, so don’t worry about perfection! You can create long, jagged pieces or smaller, more angular fragments.
- **Store for Later Use:** Store your finished chocolate shards in an airtight container in the freezer until you are ready to use them. This keeps them firm and prevents melting, ensuring they hold their shape when added to your dessert.
Chocolate shards are not only visually appealing but also offer a wonderful crunch that contrasts beautifully with soft cake and creamy frosting, making them a fantastic addition to this decadent chocolate chocolate cake.
Average: 4.50 from 18 ratings
Chocolate Chocolate Cake
Beth
20 minutes
30 minutes
50 minutes
16
servings
Comment
Equipment
-
Glass Mixing Bowl
-
KitchenAid 9-Speed Mixer
-
My favorite spatula!
-
Kitchen Scale
Ingredients
Chocolate Cake (this recipe makes three 6-inch cakes)
- ½ cup (42g) cocoa powder
- 1 ½ cups (180g) all-purpose flour
- 1 ½ tsp baking powder
- 1 tsp baking soda
- ½ tsp salt
- ¾ cup (170g) butter, 1 ½ sticks, room temperature
- 1 cup + 2 Tbsp sugar (223g total)
- 3 large eggs
- 1 ½ tsp vanilla extract
- ⅔ cup + ¼ cup sour cream (209g total)
- 3 Tbsp melted chocolate, cooled
Chocolate Buttercream
- 1 ½ cups (339g) butter, 3 sticks, room temperature
- 1 ½ cups (354ml) vegetable shortening
- 1 ½ cups (126g) cocoa powder
- 3-4 cups (339-454g) powdered sugar
Chocolate Shards
- ¾ cup (129g) chocolate chips or candy melts
- ½ Tbsp vegetable oil
Chocolate Ganache
- ½ cup (118ml) heavy cream
- ¾ cup (129g) chocolate chips
Instructions
Chocolate Cake
-
Preheat the oven to 350ºF (175ºC).
-
Using butter, generously grease the bottom and sides of three 6-inch round cake pans or springform pans. Line the bottoms with a round piece of parchment paper. To ensure even baking and prevent doming, consider placing a bake-even strip around each pan. You can easily make your own homemade bake-even strip by cutting a towel or piece of cloth to fit the size of your pan. Get the fabric thoroughly wet, then squeeze out the dripping water (but don’t wring it completely dry). Secure the damp fabric snugly around the pan with a safety pin.
-
In a small mixing bowl, combine the cocoa powder, all-purpose flour, baking powder, baking soda, and salt. Gently mix these dry ingredients together using a spoon or whisk until well combined.½ cup (42g) cocoa powder, 1 ½ cups (180g) all-purpose flour, 1 ½ tsp baking powder, 1 tsp baking soda, ½ tsp salt
-
In a larger mixing bowl, cream together the room-temperature butter and sugar using an electric mixer until the mixture is light and fluffy. Add in the eggs one at a time, beating well after each addition, then mix in the vanilla extract until just combined. Avoid overbeating at this stage.¾ cup (170g) butter, 1 cup + 2 Tbsp sugar (223g total), 3 large eggs, 1 ½ tsp vanilla extract
-
Gently fold in the sour cream and cooled melted chocolate by hand using a spatula. Mix until just incorporated.⅔ cup + ¼ cup sour cream (209g total), 3 Tbsp melted chocolate
-
Gradually add half of the dry flour mixture to the wet ingredients. Do not simply dump it in; instead, take spoonfuls of the flour mixture and gently shake or sift it over the wet ingredients. Fold the mixture carefully using a spatula until no streaks of flour remain. Repeat this process with the remaining half of the flour, folding it in and scraping the sides and bottom of the bowl to ensure everything is thoroughly incorporated without overmixing.
-
Evenly divide the batter among the three prepared 6-inch pans. Each pan should contain approximately 1 ⅓ cups to 1 ½ cups of batter.
-
Bake for 22 minutes. Then, loosely cover the pans with aluminum foil to prevent the tops from browning too quickly. Continue to bake for an additional 7-10 minutes, or until a toothpick inserted into the center of the cakes comes out clean.
-
Once the cakes are done baking, allow them to cool in their pans on a wire cooling rack for 10 minutes. After 10 minutes, carefully invert and remove the cakes from their pans. If using springform pans, simply release the sides and bottom. Allow the cake layers to cool completely on the cooling rack before frosting. Once cool, gently peel off the parchment paper rounds from the bottom of each cake. If necessary, use a cake leveler or a sharp serrated knife to level the tops of your cake layers for even stacking.
-
If you plan to assemble the cake later, wrap the cooled cake layers individually and very tightly in plastic wrap. Place them in the refrigerator, where they will stay fresh for up to 5 days, or freeze for longer storage.
Chocolate Buttercream
-
In a large mixing bowl, combine the room-temperature butter and vegetable shortening. Beat using an electric mixer on medium-high speed until the mixture is light and fluffy, about 3-5 minutes. Add in the cocoa powder and gently mix by hand with a spatula to prevent a “cocoa cloud” from forming before beating with the mixer.1 ½ cups (339g) butter, 1 ½ cups (354ml) vegetable shortening, 1 ½ cups (126g) cocoa powder
-
Begin adding the powdered sugar, about 1-2 cups at a time. Mix by hand first with a spatula to incorporate, then switch to the electric mixer on low speed, gradually increasing to medium, until smooth. Continue adding powdered sugar until the frosting reaches your desired sweetness and consistency, and is perfectly smooth and well mixed.3-4 cups (339-454g) powdered sugar
Chocolate Shards
-
Melt the chocolate chips or candy melts with the vegetable oil in a small saucepan over very low heat, or in a microwave-safe bowl in 30-second intervals, stirring in between. Stir with a spatula until completely smooth and melted.¾ cup (129g) chocolate chips or candy melts, ½ Tbsp vegetable oil
-
Place a plastic cutting board or a metal baking sheet on your counter. Lay a large piece of wax paper on top of this flat surface.
-
Pour the melted chocolate onto the wax paper. Use an offset spatula or the back of a spoon to spread the chocolate into a thin, even layer across the entire surface of the wax paper.
-
Carefully place another piece of wax paper on top of the melted chocolate and gently smooth out any air bubbles by lightly pressing with your hands.
-
Transfer the cutting board or baking sheet with the wax paper and chocolate into the freezer for approximately 15 minutes, or until the chocolate is completely firm.
-
After 15 minutes, remove it from the freezer and allow it to sit at room temperature for 2-3 minutes. This slight warming helps prevent the chocolate from shattering too finely.
-
Remove the top layer of wax paper. Gently break the chocolate into shards of various sizes and shapes – embrace the organic, imperfect look! Store the finished shards in an airtight container or a freezer-safe bag in the freezer until you are ready to decorate your cake.
Chocolate Ganache
-
Place the chocolate chips in a medium heat-proof bowl.¾ cup (129g) chocolate chips
-
In a small pot over low heat, gently heat the heavy cream until it just reaches a boil, showing small bubbles around the edges.½ cup (118ml) heavy cream
-
Immediately pour the hot heavy cream over the chocolate chips. Allow the mixture to stand undisturbed for 1-2 minutes; this allows the chocolate to melt thoroughly.
-
After resting, use a spatula to gently stir the mixture from the center outwards until it becomes completely smooth, glossy, and emulsified.
-
Allow the ganache to cool and thicken to room temperature before adding it to your cake. It should be thick enough to cling to the sides but still pourable for a perfect drip.
How to Assemble the Cake
-
Spread a small dollop of chocolate buttercream onto a 6-inch round cardboard cake circle. Place your first cooled cake layer centered on top of the cardboard. Apply a generous layer of buttercream on top of the first cake layer and spread it as evenly as possible with an offset spatula. The amount of frosting between layers is a matter of personal preference; we typically use between ⅓ to ½ cup for each layer.
-
Repeat this process for each subsequent cake layer, stacking them carefully and applying an even layer of buttercream in between. Once all the layers are stacked and filled, spread a similar amount of frosting (as used between layers) evenly across the very top of the cake.
-
Next, it’s time for the crumb coat. This thin layer of frosting is crucial for sealing in any loose crumbs and creating a smooth base for your final frosting layer. Using your offset spatula, apply a thin, even layer of buttercream around the sides and across the top of the entire cake. It’s often easiest to start with a bit more frosting on the cake and then scrape off the excess as you smooth it out.
-
Transfer the entire crumb-coated cake to the freezer or refrigerator for at least 20 minutes to allow the frosting to firm up. This step makes the final frosting much easier and cleaner.
-
Once the crumb coat is firm, begin applying the second, final layer of frosting. Spread an even, thicker layer of frosting on the top of the cake. Then, either pipe or spread the frosting around the sides of the cake. Use a clean offset spatula or a dedicated icing smoother to smooth out the frosting, scraping off any excess as you go to achieve a pristine finish. For an extra smooth surface, place a piece of Viva brand paper towel (known for its smooth texture) on the cake and gently rub a fondant smoother over it, repeating this process all around the cake.
-
Carefully transfer the finished cake to your desired serving plate or cake stand.
-
Using a piping bag fitted with a piping tip (a Wilton 1M tip works beautifully for a classic border), pipe a decorative border of buttercream around the bottom edge of the cake.
-
Once the chocolate ganache has cooled to room temperature and reached a pourable consistency, use a spoon to carefully drizzle the ganache around the perimeter of the cake top, allowing it to artfully drip down the sides. Then, fill the middle of the cake top with the remaining ganache and spread it evenly with the back of the spoon. Allow the ganache to set for about 10 minutes.
-
Finally, artfully arrange your various chocolate shards on top of the cake, pressing them gently into the ganache and buttercream for a stunning visual effect.
-
Slice and serve this magnificent chocolate creation to eager guests!
Nutrition
Carbohydrates: 59g |
Protein: 5g |
Fat: 56g |
Saturated Fat: 28g |
Polyunsaturated Fat: 7g |
Monounsaturated Fat: 17g |
Trans Fat: 4g |
Cholesterol: 120mg |
Sodium: 443mg |
Potassium: 225mg |
Fiber: 4g |
Sugar: 43g |
Vitamin A: 1014IU |
Vitamin C: 1mg |
Calcium: 67mg |
Iron: 2mg
Nutrition Disclosure
All nutritional values are approximate and provided to the reader as a courtesy. Changing ingredients and/or quantities will alter the estimated nutritional calculations.
Like this recipe? Leave a comment below!