
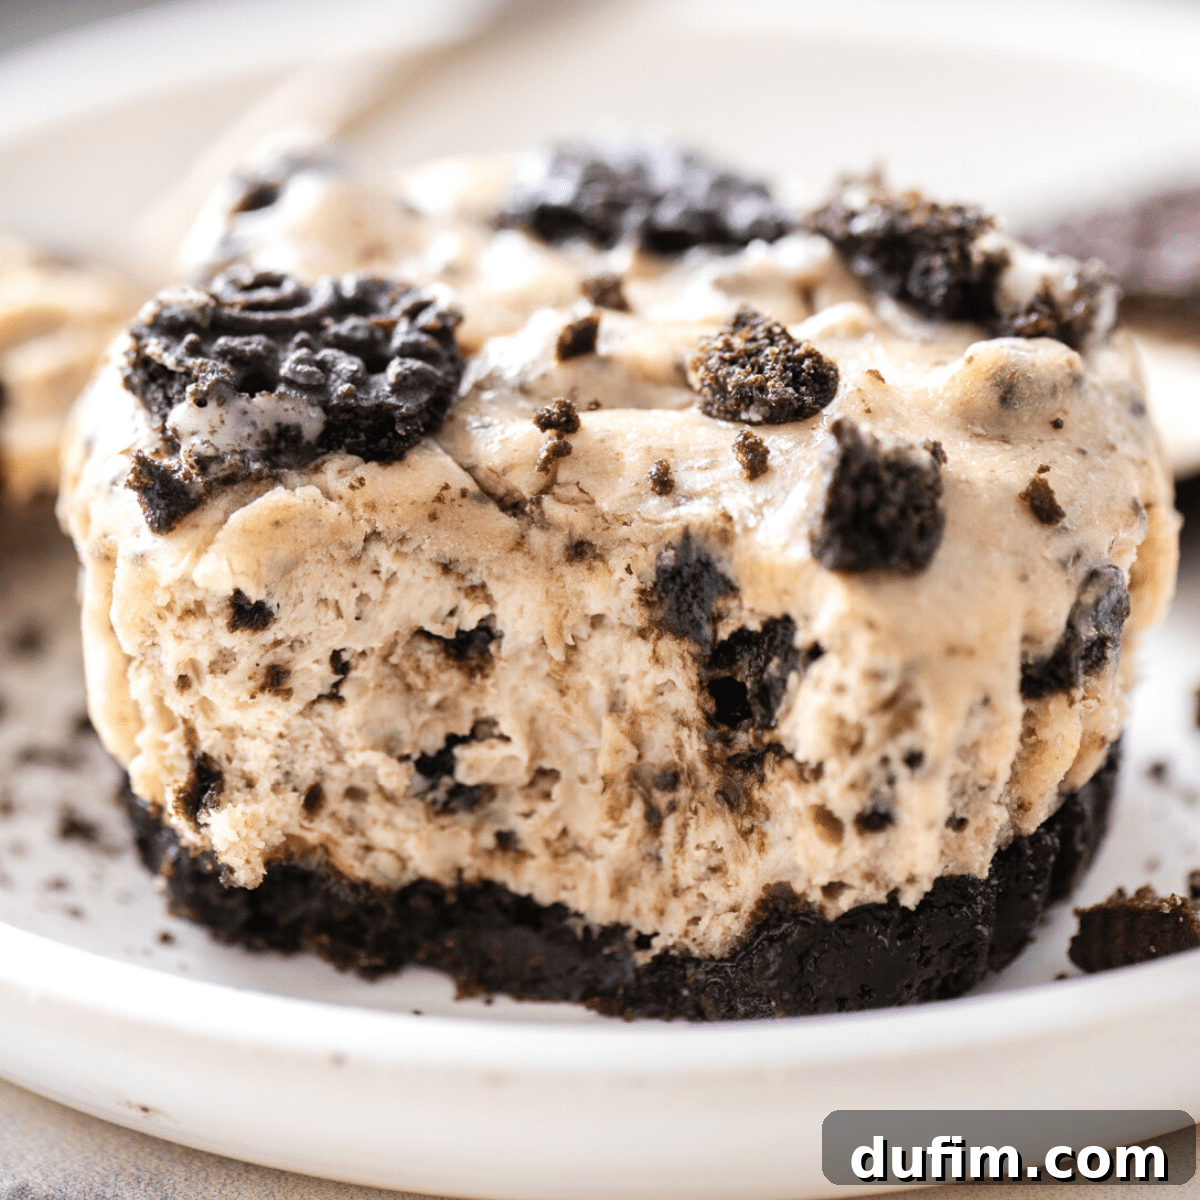
Irresistible Mini Oreo Cheesecakes: The Ultimate Easy Recipe for Perfect Bites
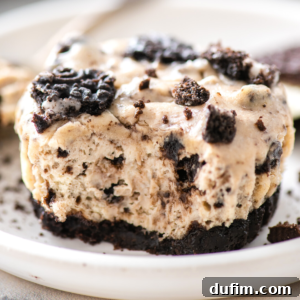
Prepare to be adored and begged for more with these “lip-smacking good” Oreo cheesecake bites! They come with a delightful warning: only embark on this culinary adventure if you’re ready for endless compliments and requests for repeat performances. These mini cheesecakes are not just a dessert; they’re an experience, combining the beloved crunch of Oreo cookies with a velvety smooth cheesecake filling, all in a perfectly portioned, easy-to-handle bite.
This recipe is so light and perfectly sweet (not too sweet)! I got many compliments at the party. Thank you for the recipe!
– Lori
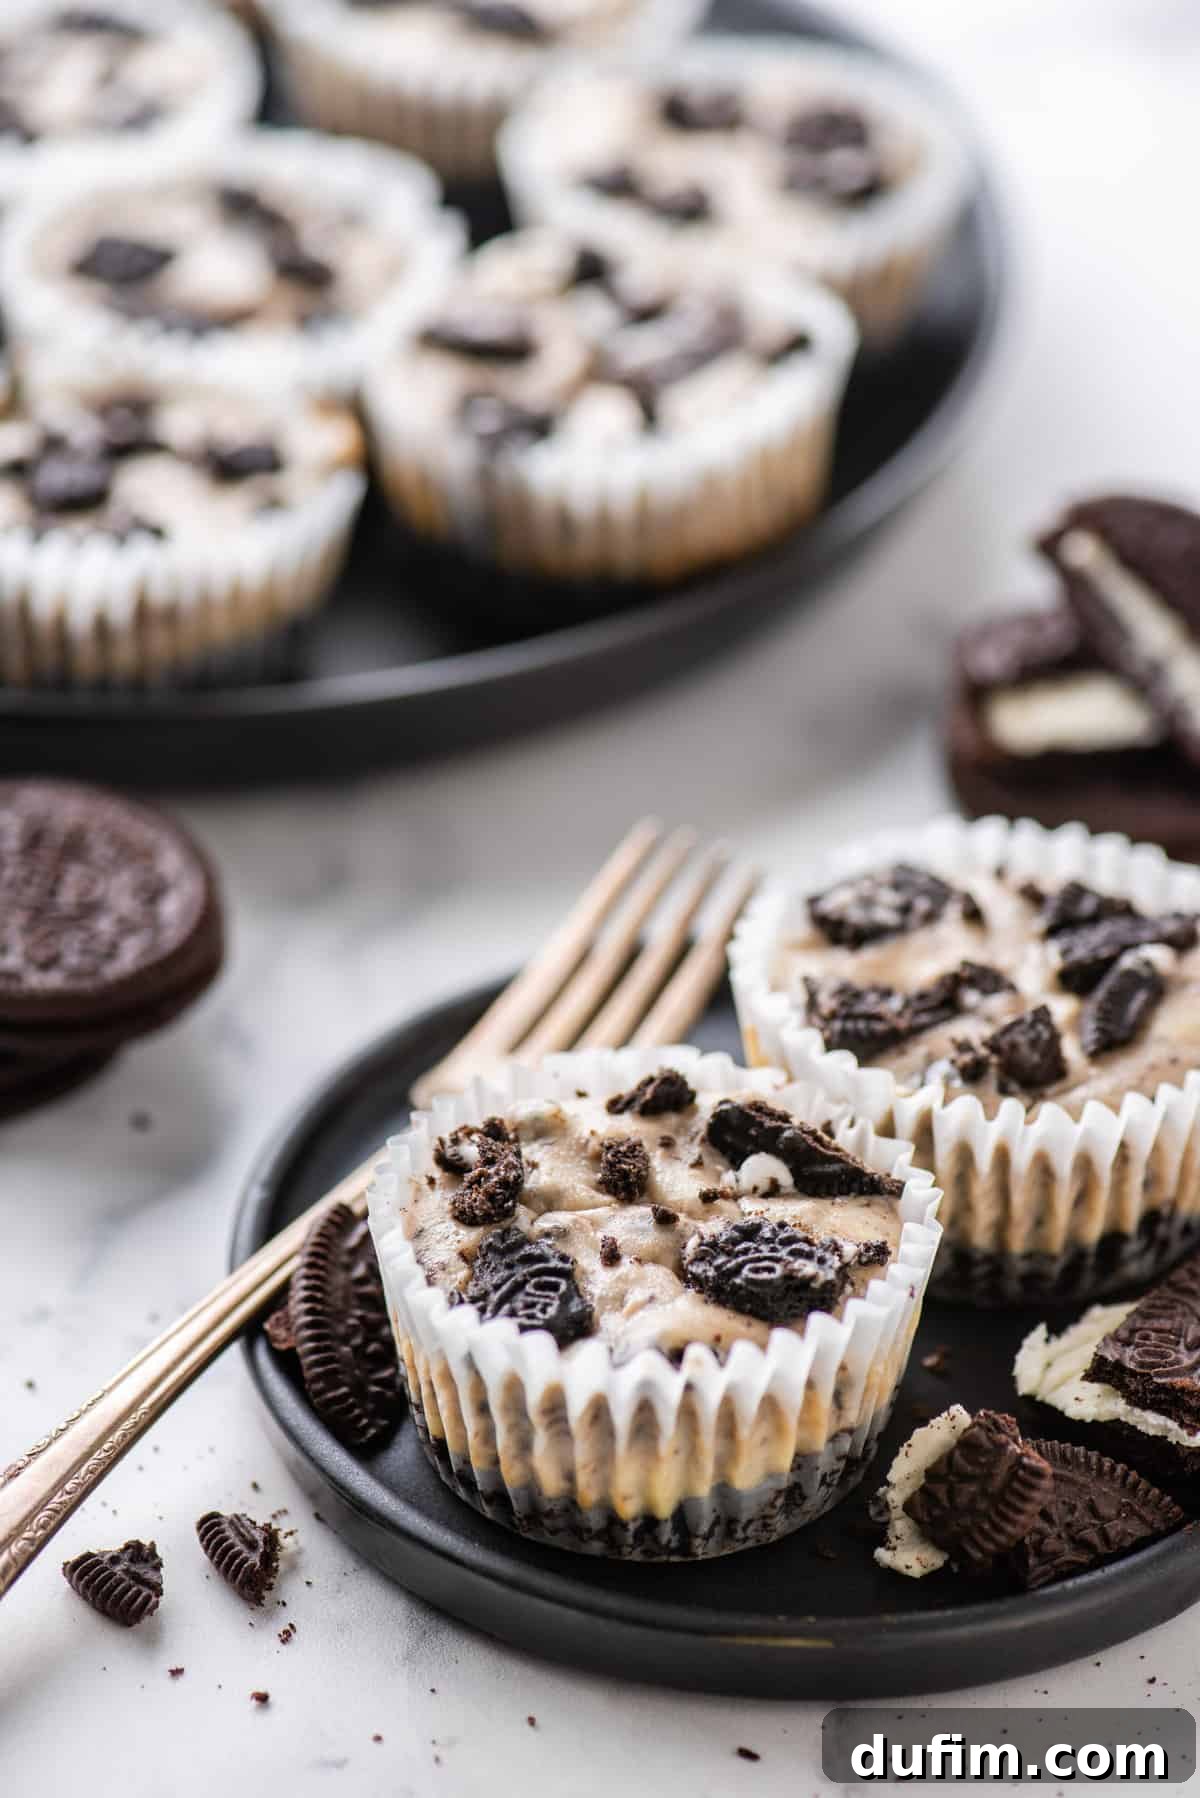
Mastering Mini Oreo Cheesecakes: A Dessert for Every Occasion
Unlock the secret to crafting the ultimate mini Oreo cheesecakes – delightful treats that seamlessly blend the iconic flavor of Oreo cookies with the luxurious creaminess of classic cheesecake. Made effortlessly in a standard muffin pan, these Oreo cheesecake cupcakes are a testament to how simple ingredients can create extraordinary desserts. With just seven core ingredients, this recipe promises a straightforward path to a dessert that consistently earns rave reviews from everyone who tastes them.
What makes these miniature delights so universally cherished? It’s the harmonious contrast between the rich, smooth cheesecake and the satisfying crunch of the Oreo cookie crust and pieces embedded within. Their petite size makes them ideal for any gathering, from casual family dinners to elegant celebrations, or simply as a well-deserved personal sweet escape. Forget the complexities often associated with traditional cheesecakes; our easy-to-follow recipe ensures a flawless outcome every time. Prepare to become everyone’s favorite baker as you present these irresistible mini Oreo cheesecakes!
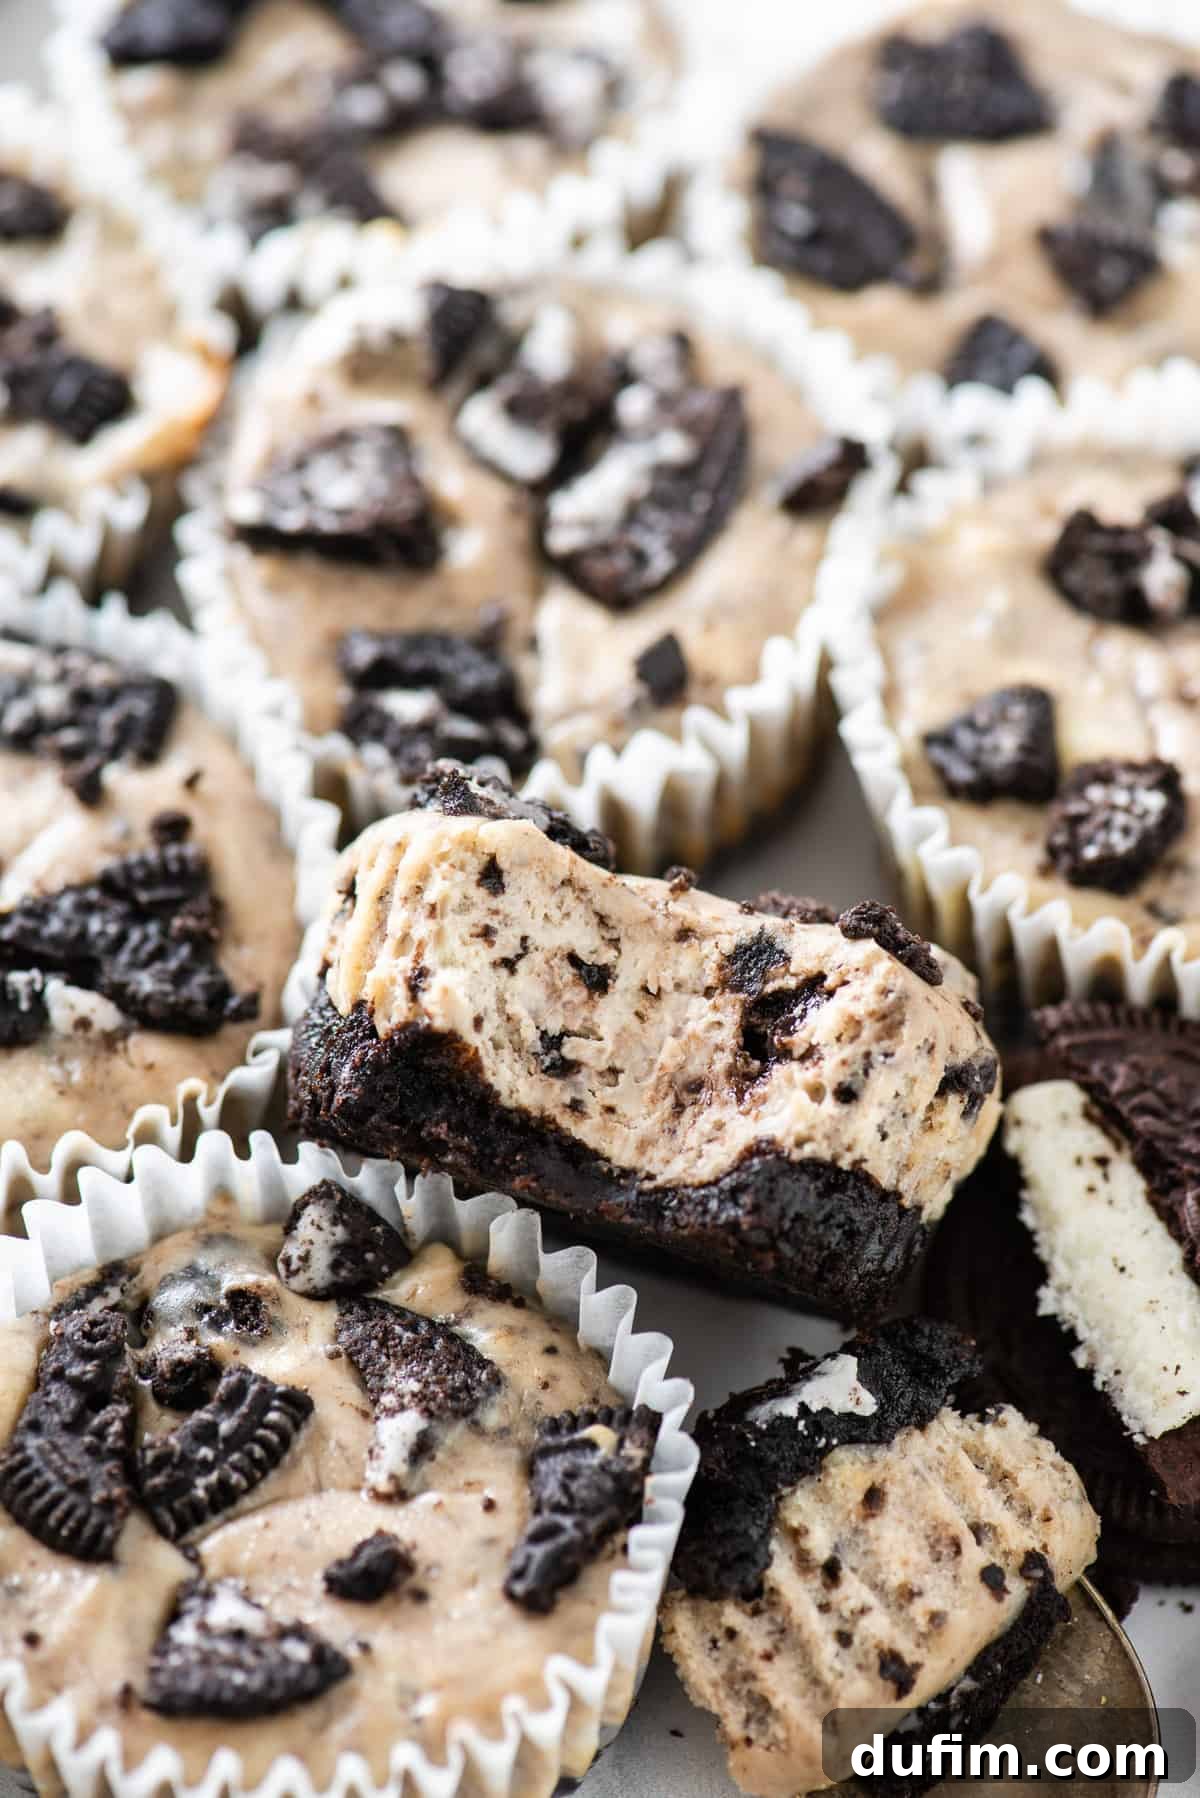
Essential Ingredients for Your Mini Oreo Cheesecake Masterpiece
Creating these heavenly mini Oreo cheesecake bites requires a careful selection of fresh, high-quality ingredients. Each component plays a vital role in achieving that perfect balance of texture and flavor. Below, you’ll find a detailed breakdown of what you’ll need. For precise quantities and step-by-step instructions, please refer to the comprehensive recipe card at the end of this post.
For the Irresistible Oreo Crust:
- Oreo Cookie Crumbs: The foundation of our mini cheesecakes. Ensure you use whole Oreo cookies, including the cream filling, for the best flavor and texture. Crushing them finely will create a cohesive crust.
- Unsalted Butter: Melted unsalted butter binds the Oreo crumbs together, forming a sturdy and flavorful base. Using unsalted butter allows you to control the overall saltiness of the dessert. Melt it gently in the microwave or a small saucepan until just liquid.
For the Creamy Cheesecake Filling:
- Full-Fat Cream Cheese: This is the star of the show. For an impeccably smooth and rich cheesecake, use only full-fat cream cheese in block form, not the whipped or spreadable kind from a tub. Crucially, allow it to come to room temperature before mixing. This ensures it whips up smoothly without lumps, creating a truly luxurious filling.
- Granulated Sugar: A touch of granulated sugar perfectly sweetens the cream cheese, balancing its natural tanginess and creating a delightfully sweet, but not cloying, flavor profile.
- Pure Vanilla Extract: Vanilla extract enhances the overall flavor, adding a warm, aromatic note that complements both the cream cheese and the chocolatey Oreo. Opt for pure vanilla extract for the best results.
- Large Eggs: Eggs provide structure and richness to the cheesecake, helping it set beautifully. Like the cream cheese, bring your eggs to room temperature. This helps them incorporate more evenly into the batter, reducing the risk of over-mixing and ensuring a smooth, uniform texture.
- Additional Oreo Crumbs and Crushed Oreo Pieces: For an extra burst of Oreo goodness throughout the filling, we incorporate both fine crumbs and larger crushed pieces. This layering of textures and flavors amplifies the Oreo experience, making each bite even more satisfying.
Can I Substitute the Oreo Crumbs? Absolutely!
While Oreo crumbs are undeniably delicious, you have creative freedom to customize your crust! For a classic cheesecake experience, opt for buttery graham cracker crumbs. If you prefer a lighter, vanilla-centric base, crushed vanilla wafers make an excellent substitute. Another charming option is to place a whole Oreo cookie at the bottom of each muffin liner to serve as the entire crust – a delightful surprise for guests!
For those looking for an even lighter or gluten-free alternative, these mini cheesecake bites can also be made entirely without a crust. The versatility of this recipe ensures there’s an option for every preference and dietary need.
Essential Tools for Perfect Mini Oreo Cheesecakes
One of the many joys of making mini cheesecakes is that they require minimal specialized equipment, making them an accessible baking project for all skill levels. Here’s what you’ll need:
- Standard Size Muffin Pan / Cupcake Pan: The hero of our recipe! A regular 12-cup muffin pan is all it takes to create perfectly portioned mini cheesecakes. No fancy springform pans or fiddly water baths required.
- Paper Muffin / Cupcake Liners: These are crucial for easy removal and serving. They also help maintain the shape of your cheesecakes and make cleanup a breeze.
- Electric Mixer (Hand or Stand Mixer): Essential for achieving a smooth, lump-free cream cheese filling.
- Blender or Food Processor: For transforming whole Oreos into fine, uniform crumbs for the crust and filling.
- Mixing Bowls: Several bowls will come in handy for preparing the crust and filling separately.
- Spatula: For gently folding in crushed Oreos and dividing the batter.
Making individual Oreo cheesecake bites in a muffin pan is a brilliant way to scale down a traditional large cheesecake recipe. This method simplifies the baking process significantly; mini cheesecakes bake much faster, eliminate the need for a water bath, and don’t require any special expertise to achieve a professional-looking finish. This makes them the ultimate stress-free dessert for any occasion.
Step-by-Step Guide: How to Make Mini Oreo Cheesecake Bites
Follow these detailed steps to create flawless, mouth-watering mini Oreo cheesecakes. Precision in each stage ensures a perfect result every time.
Crafting the Crunchy Oreo Crust:
- Prepare Your Baking Station: Begin by preheating your oven to 350°F (175°C). Line a standard 12-cup muffin pan with paper muffin liners. This crucial step prevents sticking and ensures easy removal.
- Create the Perfect Oreo Crumbs: Take your whole Oreo cookies (both cookie and cream filling) and blend them in a food processor or high-speed blender until they form fine, uniform crumbs. Approximately 16 whole Oreos will yield about 1 ½ cups of crumbs, which is perfect for this recipe.
- Mix the Crust Mixture: In a medium mixing bowl, combine the fine Oreo crumbs with the melted unsalted butter. Stir thoroughly with a spoon or spatula until the mixture is well-combined and resembles coarse, moist sand. Every crumb should be coated in butter.
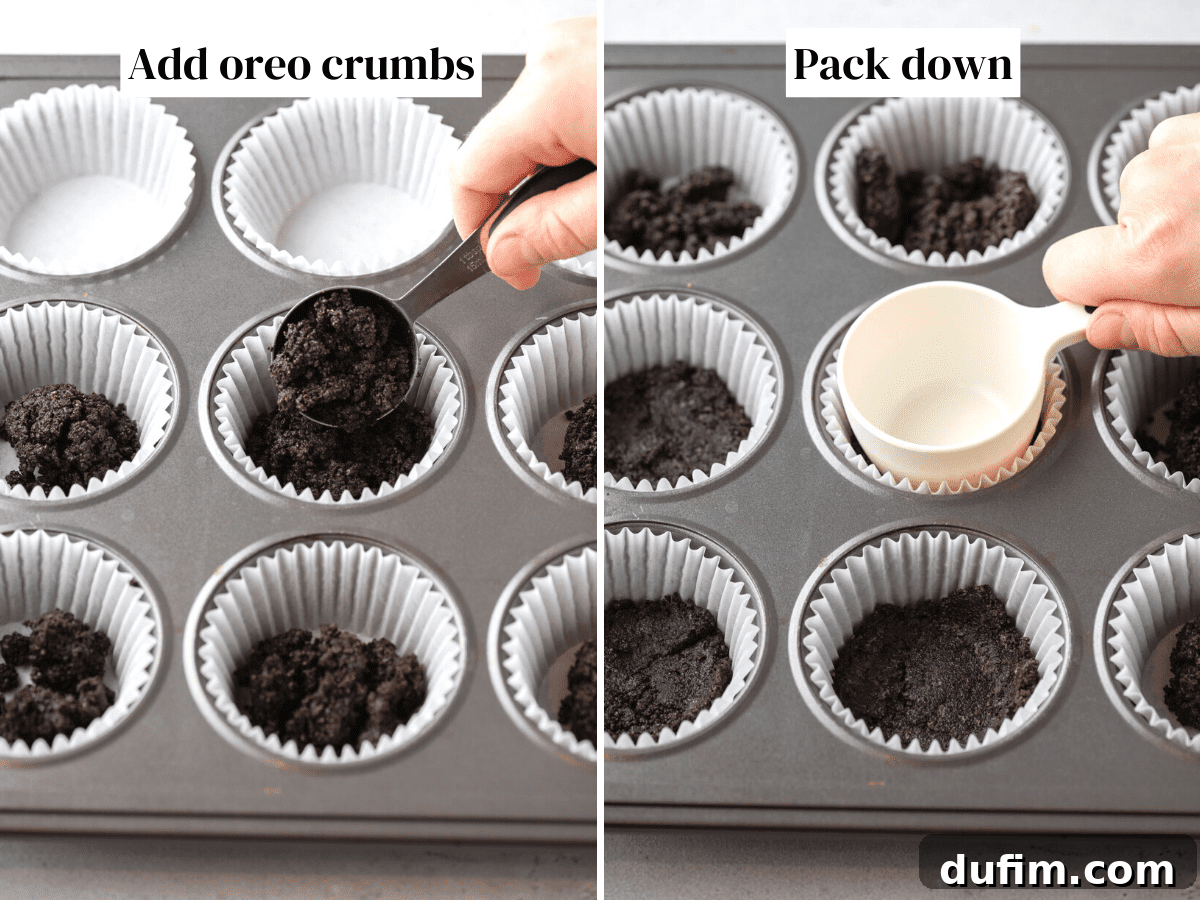
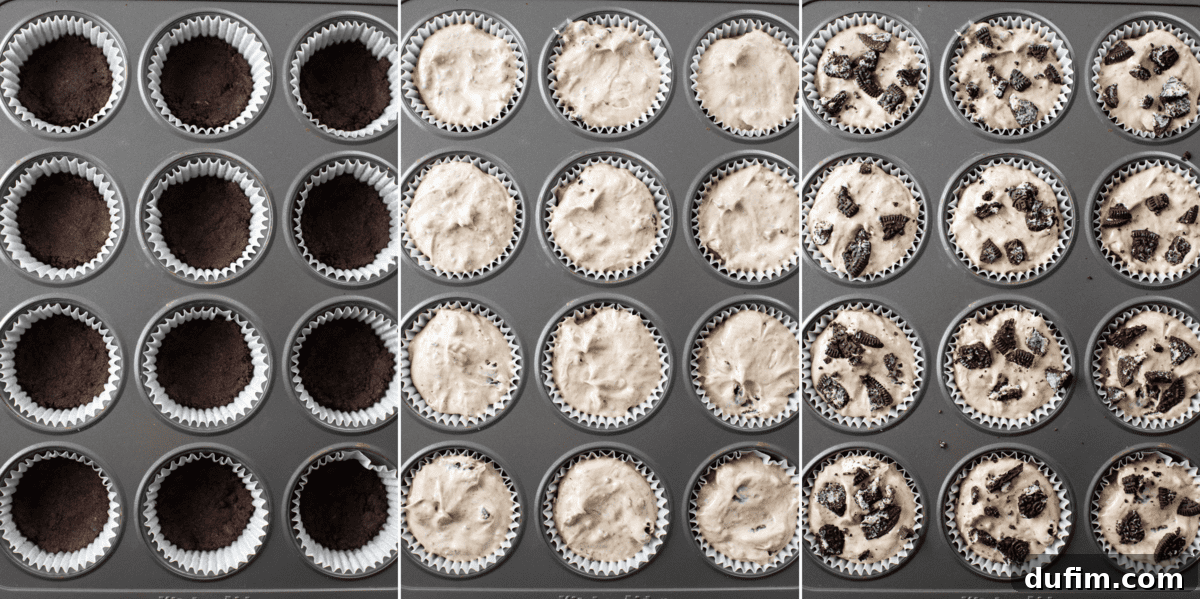
- Form the Crusts in Liners: Distribute 1 to 2 tablespoons of the Oreo crumb mixture into the bottom of each prepared muffin liner. Use the flat bottom of a 1/3 cup measuring cup, a small glass, or a tart tamper to firmly press the crumbs down, creating a compact, even layer at the base of each cup. This forms a solid foundation for your cheesecake.
- Pre-bake the Crusts: Carefully place the muffin pan into your preheated oven and bake the Oreo crusts for exactly 5 minutes. This brief bake time helps to set the crust, making it sturdy and preventing it from becoming soggy once the cheesecake filling is added. Remove the pan from the oven and allow the crusts to cool completely on a wire rack while you prepare the creamy cheesecake filling.
Preparing the Silky Smooth Cheesecake Filling:
- Cream the Cheese and Sugar: In a large mixing bowl, using an electric hand mixer (or stand mixer with a paddle attachment) on medium-high speed, beat the room-temperature full-fat cream cheese for 1-2 minutes until it becomes exceptionally smooth and creamy, with no lumps. Gradually add the granulated sugar and continue beating for another minute until the mixture is light, fluffy, and well-incorporated.
- Incorporate Vanilla and Eggs Gently: Beat in the pure vanilla extract. Next, add the large eggs, one at a time. This is a critical step for preventing cracks. Beat each egg in just until the yolk breaks and it’s fully incorporated into the batter, typically about 30-60 seconds per egg. Avoid over-mixing once the eggs are added, as excessive air can lead to sinking or cracking during cooling.
- Fold in the Oreo Pieces: Using a rubber spatula, gently fold in the reserved Oreo crumbs and larger crushed Oreo pieces. Mix just until they are evenly distributed throughout the cheesecake batter. The goal is to incorporate them without deflating the batter.
- Assemble Your Cheesecakes: Evenly divide the cheesecake batter among the cooled, pre-baked Oreo crusts in the muffin cups. Fill each liner nearly full, aiming for a consistent amount in each cup to ensure even baking.
- Bake to Perfection: Return the muffin pan to the oven. Bake for 15 to 17 minutes. The cheesecakes are done when the edges appear set and slightly puffed, but the centers still have a slight jiggle when you gently shake the pan. This “jiggle test” is key to preventing over-baking, which can cause dry or cracked cheesecakes.
Understanding the Time Commitment for Your Oreo Cheesecakes
While the active preparation time for these mini cheesecakes is surprisingly short, patience is a virtue, especially when it comes to chilling. Here’s a realistic breakdown of the time you’ll need:
- Crust Preparation: Approximately 5 minutes to blend Oreos and mix with butter.
- Crust Pre-Bake: A quick 5 minutes in the oven to set the base.
- Cheesecake Filling Preparation: Around 5-7 minutes to beat cream cheese, sugar, vanilla, and eggs.
- Cheesecake Baking: 15-17 minutes until the centers are perfectly jiggly.
- Cooling & Chilling: This is the most crucial waiting period. Allow the cheesecakes to cool to room temperature (about 30-60 minutes), then refrigerate for a minimum of 4 hours. For the absolute best texture and flavor, chilling them overnight is highly recommended. We know waiting is the hardest part, but it’s worth every minute!
The Jiggle Test: Knowing When Your Mini Cheesecakes Are Perfectly Baked
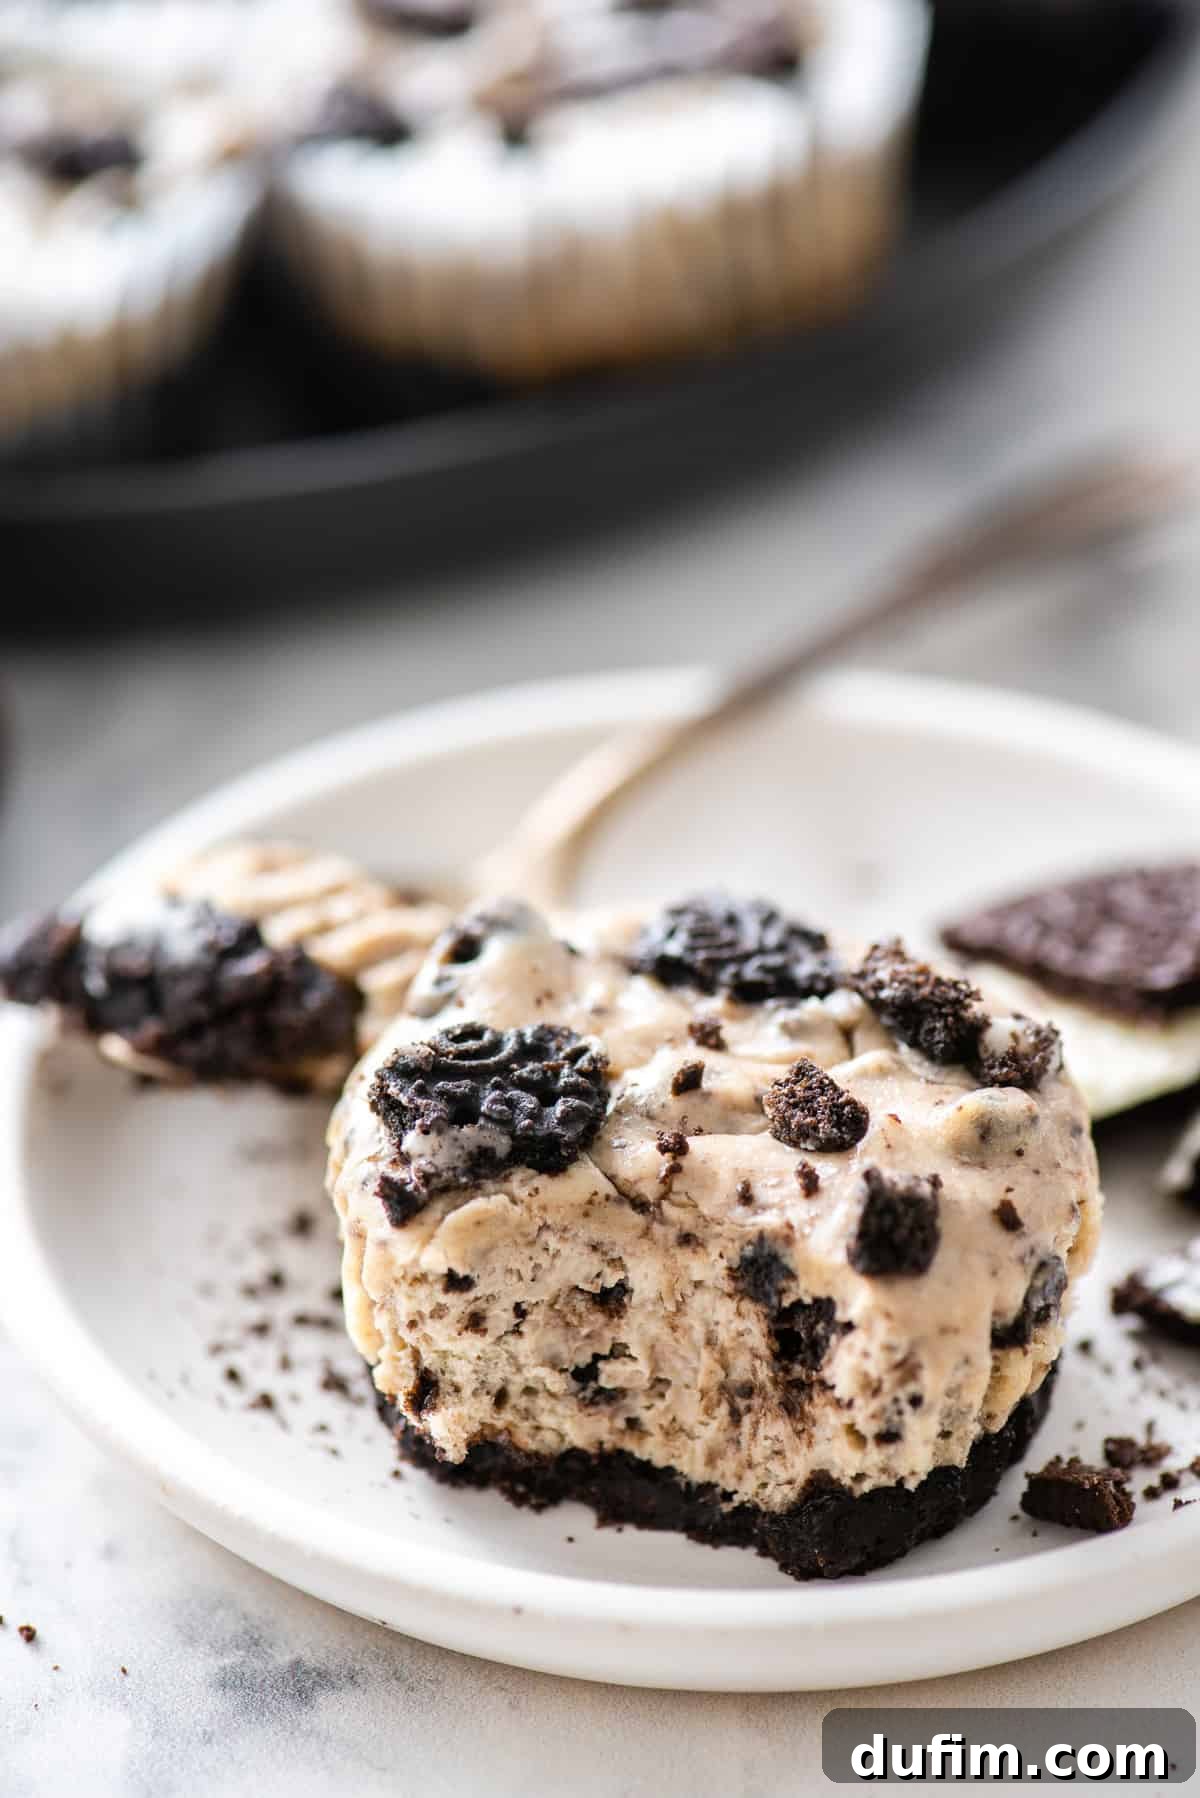
Determining the doneness of cheesecakes, especially mini ones, can be tricky. The most reliable method is the “jiggle test.” When the mini cheesecakes are ready, the edges will appear slightly set and a bit puffed, while the very center will still exhibit a gentle, slight jiggle when you delicately shake the muffin pan. It shouldn’t be liquidy or wobbly, but rather a soft, subtle movement. This indicates a perfectly baked cheesecake that will firm up beautifully upon cooling and chilling, retaining its creamy texture.
Cooling Your Mini Oreo Cheesecake Bites for Flawless Results
Proper cooling is just as important as proper baking to prevent cracks and ensure a smooth, dense texture. Once your Oreo cheesecake cupcakes have passed the jiggle test, carefully remove the muffin pan from the oven. Place the entire pan on a wire rack on your kitchen counter. Allow the cheesecakes to cool gradually to room temperature within the pan. This slow cooling process helps prevent sudden temperature changes that can cause the cheesecake to crack or sink. Once cooled, they are ready for refrigeration.
Pro Tips for Perfect Mini Oreo Cheesecakes Every Time
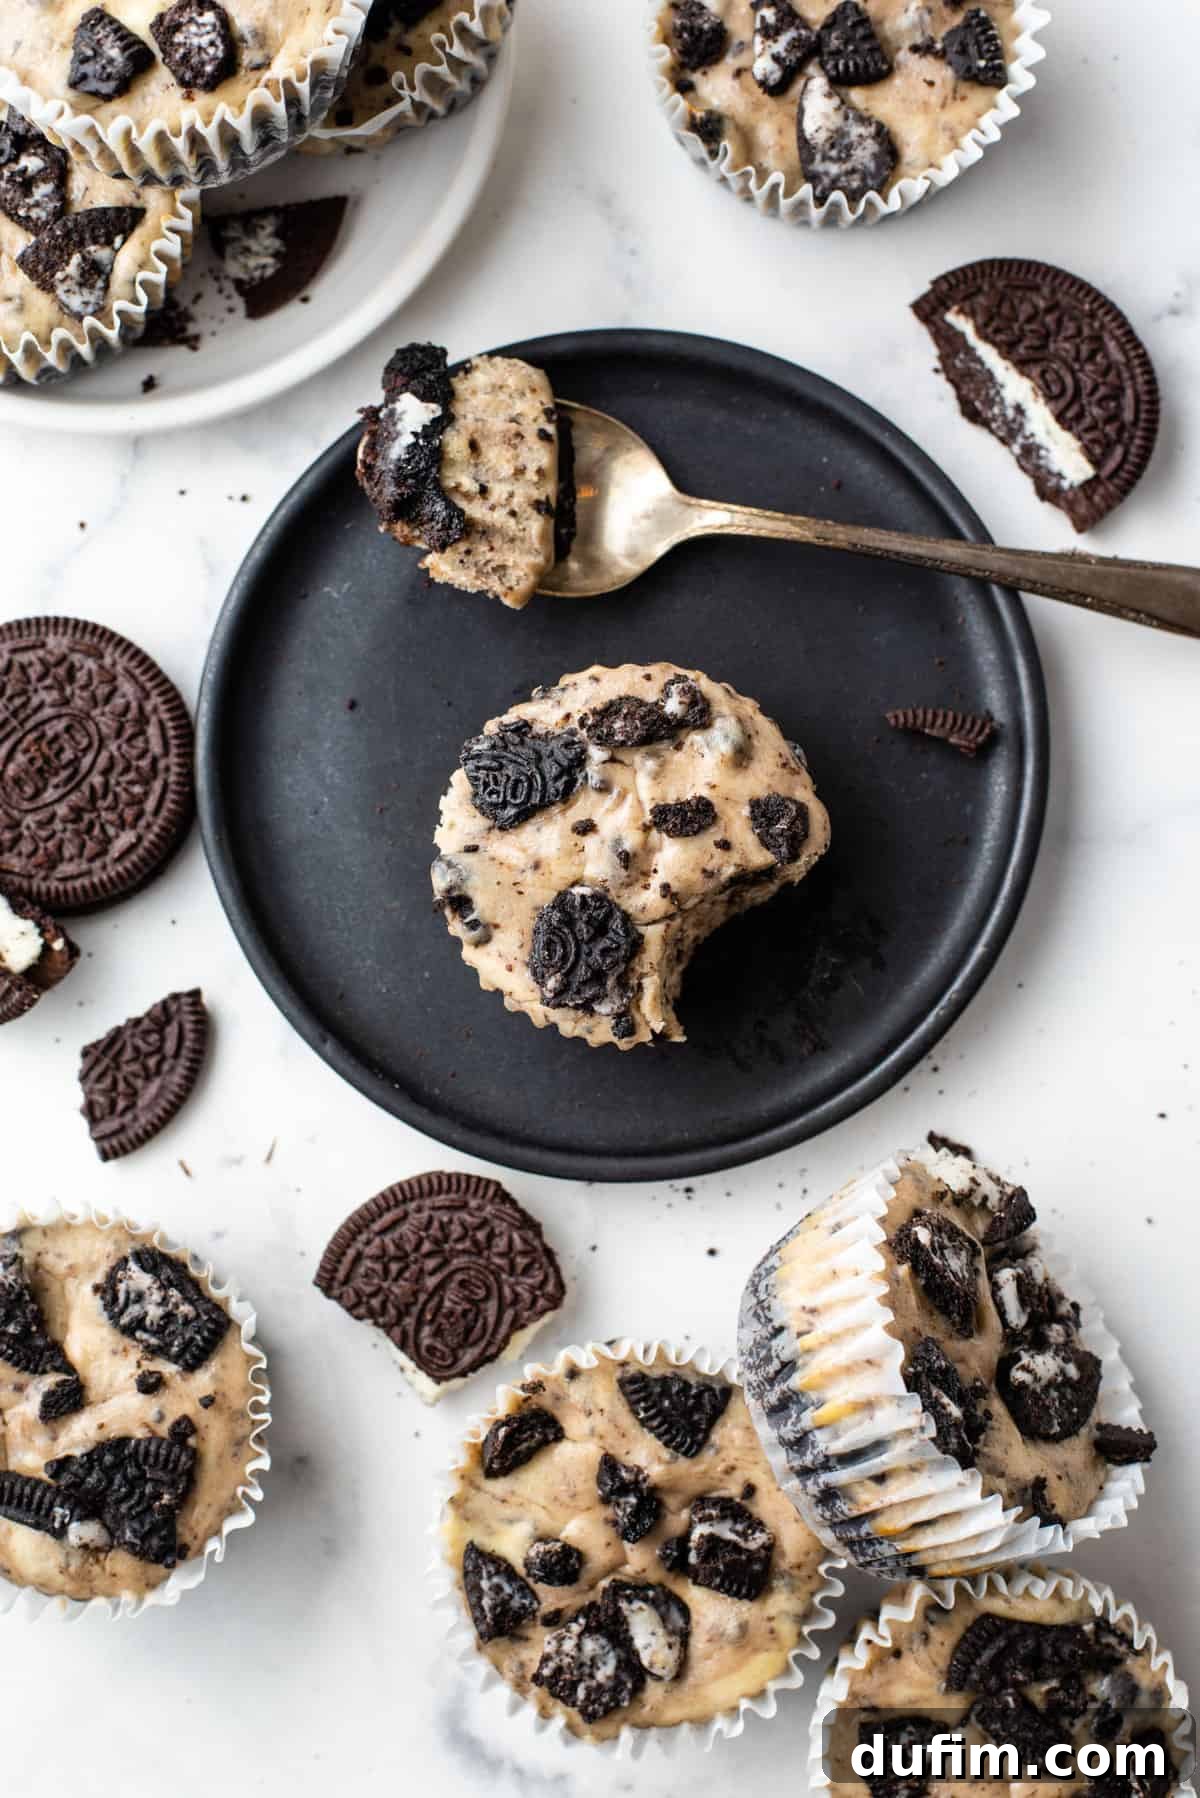
While mini cheesecakes are far less intimidating than their full-sized counterparts, a few expert tips can elevate your baking from good to absolutely phenomenal. These insights will help you achieve perfectly smooth, creamy, and crack-free results, even if this is your first cheesecake adventure!
- Don’t Over-Mix the Cheesecake Batter: This is arguably the most crucial tip. Once you’ve added the eggs, beat them in *just* until the yolk breaks and the egg is fully incorporated into the mixture. Over-beating introduces too much air into the batter, which can lead to air bubbles, sinking centers, and unsightly cracks during baking and cooling. Mix gently and briefly after each egg.
- Avoid Over-Baking at All Costs: Over-baking is another common culprit for dry textures and cracked surfaces. Rely on the “jiggle test” mentioned earlier. When you gently shake the baking pan back and forth, the centers of the cheesecakes should jiggle slightly, like firm jelly. If they move like a liquid, they need a few more minutes. If they are completely firm, they are likely over-baked.
- Allow Ample Chilling Time: Patience is key to cheesecake perfection. Warm cheesecake simply doesn’t have the desired firm, dense, and creamy texture. Ensure you allocate sufficient chilling time – at least 4 hours, and ideally overnight – in the refrigerator before serving. This allows the flavors to meld and the cheesecake to fully set, resulting in the best possible eating experience.
- Don’t Stress About Imperfections (You Have a Backup Plan!): Even the most seasoned bakers can occasionally experience a slight crack or a few small bubbles on top. Don’t worry! This is where delicious toppings come to the rescue. Once you adorn your mini cheesecakes with whipped cream, ganache, or extra Oreo crumbs, any minor flaws will be beautifully hidden, and no one will be the wiser!
- Room Temperature Ingredients are Non-Negotiable: We emphasized this in the ingredients section, but it bears repeating. Cold cream cheese and eggs will not incorporate smoothly, leading to a lumpy batter and an inferior texture. Plan ahead and take them out of the refrigerator at least 30-60 minutes before you start baking.
Troubleshooting: Why Did My Mini Oreo Cheesecakes Sink?
The primary reason for cheesecake centers sinking is often due to over-beating the eggs. When you incorporate too much air into the batter, these air bubbles expand during baking, causing the cheesecake to rise excessively. As the cheesecakes cool, this trapped air escapes, leading to a collapse in the center.
To prevent sinking, remember to add eggs one at a time and mix them in *just* until the yolk breaks and the egg is fully combined. Once all eggs have been added, beat the batter for no more than 30-60 seconds. This minimizes air incorporation while still ensuring a homogenous mixture, resulting in beautifully smooth and level mini cheesecakes.
Elevate Your Mini Oreo Cheesecakes with Delicious Toppings
While these mini Oreo cheesecakes are utterly delicious on their own, adding a topping can transform them into an even more decadent and visually stunning dessert. Here are some fantastic ideas to elevate your creations:
- Classic Whipped Cream: A dollop of fresh, homemade whipped cream adds a light, airy contrast to the rich cheesecake. For an extra treat, try chocolate whipped cream!
- Decadent Chocolate Ganache: A drizzle of smooth, glossy chocolate ganache brings an extra layer of chocolatey richness that pairs perfectly with the Oreo flavor.
- Extra Oreo Crumbles: For the ultimate Oreo lover, sprinkle additional crushed Oreo cookies over the top just before serving.
- Fresh Berries: The tartness of fresh raspberries, strawberries, or blueberries can cut through the richness of the cheesecake, adding a burst of color and fruity flavor.
- Caramel or Hot Fudge Sauce: A swirl of warm caramel or hot fudge sauce creates a luxurious finish.
- Mint Whipped Cream: For a refreshing twist, infuse whipped cream with a hint of mint extract.
Whether you choose to keep them simple or go all out with creative toppings, these mini Oreo cheesecakes are guaranteed to impress!
Storing and Freezing Your Mini Oreo Cheesecake Delights
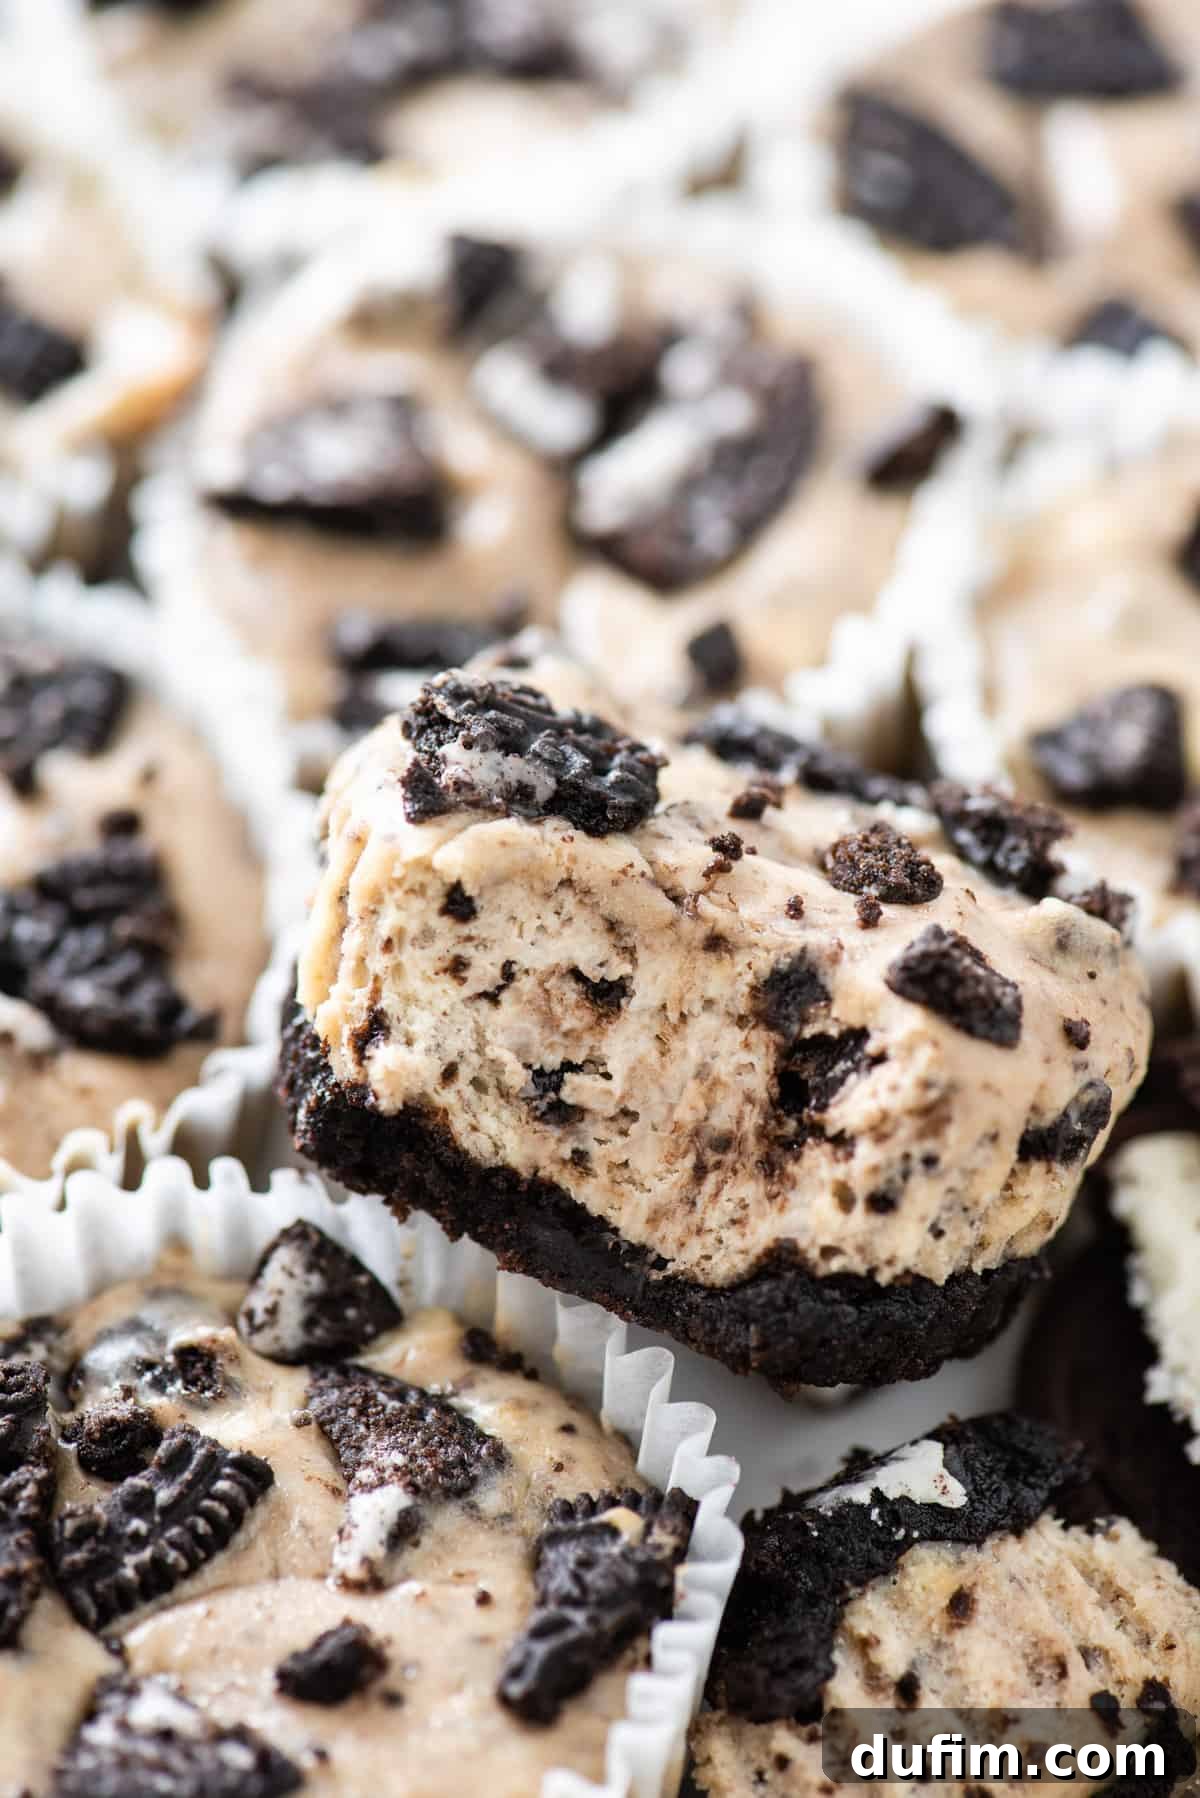
One of the many conveniences of mini cheesecakes is their ease of storage, making them perfect for preparing ahead of time or enjoying throughout the week. Proper storage ensures they remain fresh, creamy, and delicious.
Refrigeration:
Once your mini Oreo cheesecakes have cooled completely to room temperature, they must be refrigerated. The best way to store them is either by keeping them in the muffin pan, loosely covered with plastic wrap, or by transferring them to an airtight container. Arrange them in a single layer or place parchment paper between layers if stacking. Store them in the fridge for up to 5-7 days. Always chill them overnight before serving for the best texture and flavor development.
Freezing for Long-Term Enjoyment:
Mini cheesecakes freeze beautifully, allowing you to enjoy these treats weeks or even months later. This is an excellent option for meal prepping desserts or having a sweet treat on hand for unexpected guests.
- Ensure Complete Cooling: Before freezing, make sure your cheesecakes are completely cooled to room temperature, and ideally, have been chilled in the refrigerator for at least an hour. Do not add any garnishes or toppings if you plan to freeze them.
- Initial Freezing: Place the cooled, un-garnished mini cheesecakes on a baking sheet, ensuring they are not touching. Place the baking sheet, uncovered, into the freezer until the cheesecakes are solid, typically 1-2 hours. This step prevents them from sticking together.
- Wrap and Store: Once frozen solid, individually wrap each mini cheesecake tightly in aluminum foil, followed by a layer of plastic wrap to prevent freezer burn. Alternatively, you can place the wrapped cheesecakes into a large freezer-safe ziplock bag or an airtight freezer container.
- Freezer Life: Frozen mini cheesecakes can be stored for up to 3-4 months.
- Thawing: To thaw, simply transfer the wrapped cheesecakes from the freezer to the refrigerator and let them thaw overnight.
- Serve with Toppings: Once thawed, add your desired fresh toppings or garnishes right before serving for the best presentation and taste.
These mini cheesecakes are truly the perfect delicious dessert for any occasion! Follow our step-by-step instructions and photos, and you’ll create a flawless dessert for holiday gatherings like Thanksgiving, elegant celebrations such as baby showers, or simply a delightful treat to share with loved ones. Their ease and adaptability make them a continuous crowd-pleaser.
What People Are Saying About These Incredible Oreo Cheesecake Bites:
Made these for my fiancé and best friend (both HUGE oreo fiends). They didn’t last long and are literally begging me for more! Thank you for the amazing recipe!
– Joey
Explore More Delicious Oreo Recipes
If you’re an undeniable fan of Oreo cookies, you’re in for a treat! The versatility of Oreos extends far beyond these mini cheesecakes, offering a world of delicious possibilities. Dive into our collection of other incredible Oreo-inspired desserts that are sure to satisfy your cravings:
- Easy Oreo Cupcakes: A classic cupcake infused with the irresistible flavor and crunch of Oreos.
- Oreo Angel Food Cake: Light, airy angel food cake gets a delightful upgrade with crushed Oreos.
- Oreo Earthquake Cake: A stunning dessert with pockets of cream cheese and chocolate, all infused with Oreo goodness.
- No-Bake Oreo Pie: Craving Oreo but don’t want to turn on the oven? This simple, no-bake pie is your answer!
- Cookies and Cream Cupcakes: A variation on the classic, celebrating the beloved cookies and cream flavor profile.
Tap stars to rate!
Oreo Cheesecakes Bites
Print Recipe
Equipment
-
Electric Mixer (hand or stand mixer)
-
Spatula
-
Muffin Pan
-
Food Processor or Blender
Ingredients
Crust
- 1 ½ cups (180g) oreo crumbs, about 16 whole oreos
- 4 Tbsp (57g) melted unsalted butter, 1/2 stick
Cheesecake
- 16 oz (452g) full fat cream cheese, room temperature
- ⅓ cup (66g) granulated sugar
- 1 tsp vanilla extract
- 2 large eggs, added one at a time
- ¼ cup (30g) oreo crumbs plus 4-5 whole oreos broken into larger pieces, the whole cookie – cream & all!
Instructions
Crust
-
Preheat the oven to 350º F (175°C).
-
Line a regular sized muffin pan with 12 paper muffin liners.
-
In a mixing bowl, combine the oreo crumbs and melted butter until it resembles coarse sand.1 1/2 cups (180g) oreo crumbs, 4 Tbsp (57g) melted unsalted butter
-
Press 1-2 tablespoons of the oreo crumb mixture firmly into the bottom of each muffin cup.
-
Bake the crust for 5 minutes. Remove the pan from the oven and allow it to cool while prepping the cheesecake filling.
Cheesecake
-
In a mixing bowl, beat the room temperature cream cheese with an electric mixer until smooth, about 2-3 minutes.16 oz (452g) full fat cream cheese, room temperature
-
Beat in the sugar and vanilla extract until smooth and well combined.1/3 cup (66g) granulated sugar, 1 tsp vanilla extract
-
Beat in the eggs, one at a time, mixing just until each yolk breaks and is incorporated. Avoid over-mixing.2 large eggs
-
Gently fold in the additional oreo crumbs and larger oreo pieces with a spatula.
-
Divide the cheesecake batter evenly among the muffin cups, filling each liner nearly full.
-
Optionally, top the cheesecakes with additional oreo crumbs or larger oreo pieces before baking for extra crunch and visual appeal.1/4 cup (30g) oreo crumbs plus 4-5 whole oreos broken into larger pieces
-
Bake for 15-17 minutes, or until the center of the cheesecake is only slightly jiggly when the pan is gently shaken.
-
Allow the cheesecakes to cool completely to room temperature in the muffin pan on a wire rack. Then, transfer them to the fridge for at least 4 hours to chill before serving. For best results, refrigerate overnight. If refrigerating overnight, loosely cover the cheesecakes with plastic wrap to prevent drying out.
Video
(Video demonstration of this recipe can be found on our website.)

Notes
How to store: Refrigerate your mini cheesecakes in an airtight container for up to 5-7 days.
How to freeze: You can freeze mini cheesecakes for up to 3 months. Cool completely, freeze individually on a baking sheet, then wrap tightly in aluminum foil and place in a freezer bag. Thaw in the refrigerator overnight before serving.
Nutrition
Nutrition Disclosure
All nutritional values are approximate and provided to the reader as a courtesy. Changing ingredients and/or quantities will alter the estimated nutritional calculations.