
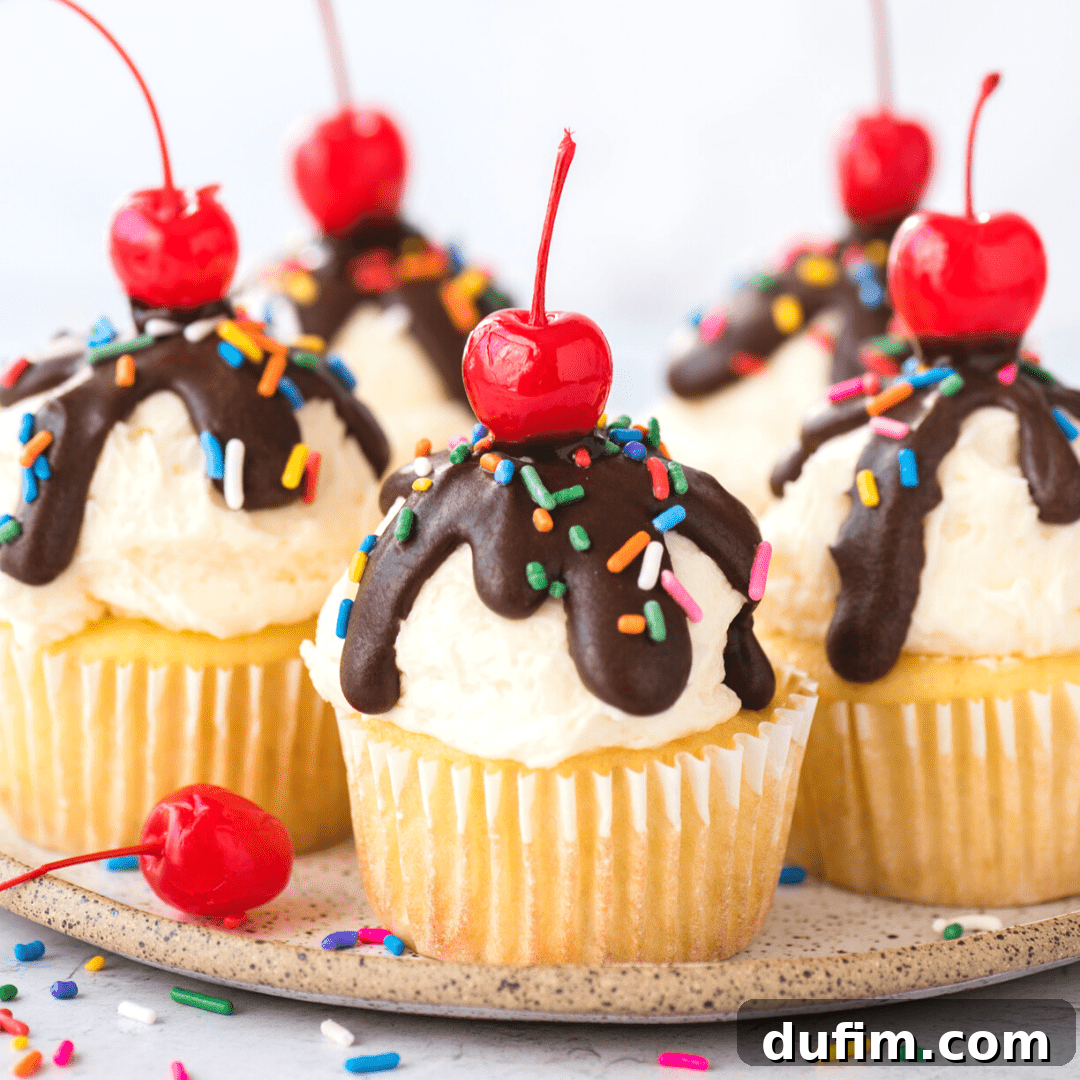
Ice Cream Cupcakes: The Ultimate Birthday Treat for Any Celebration
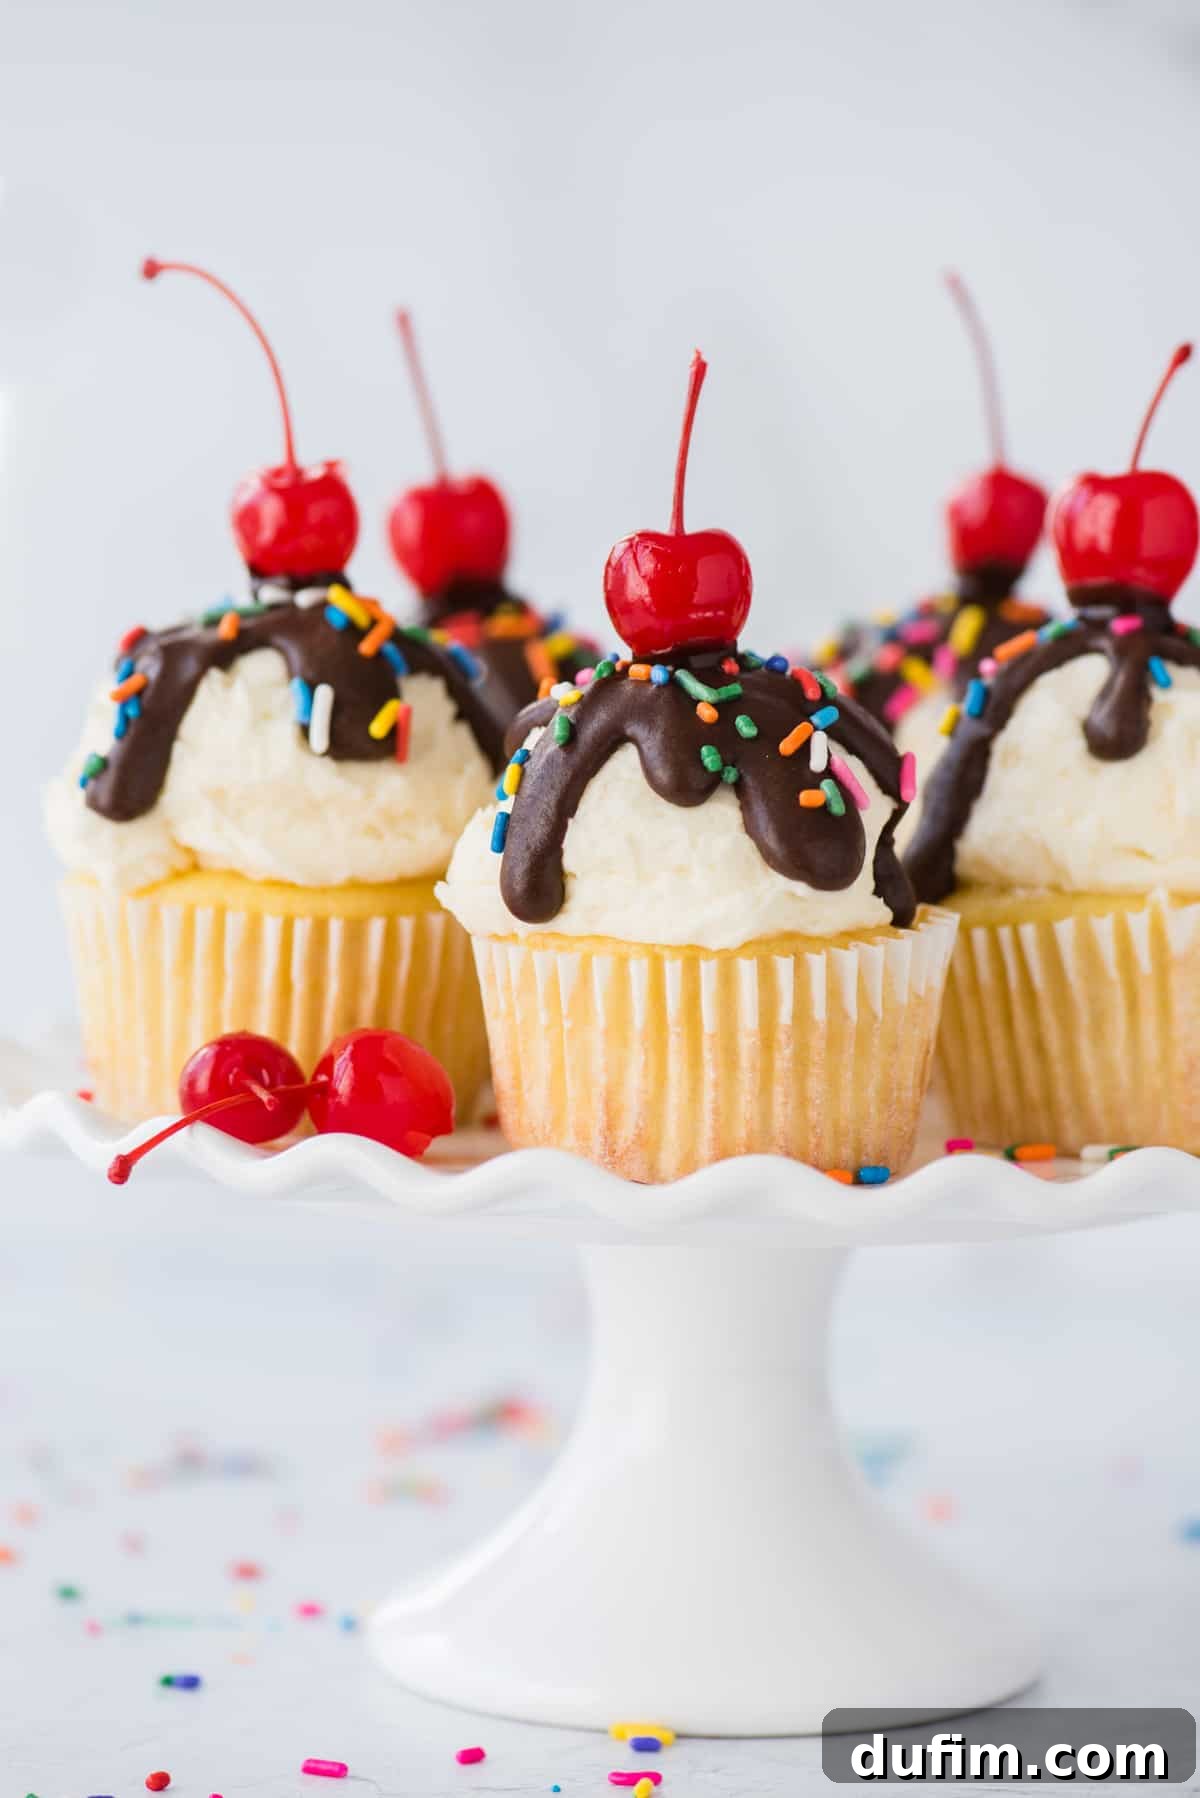
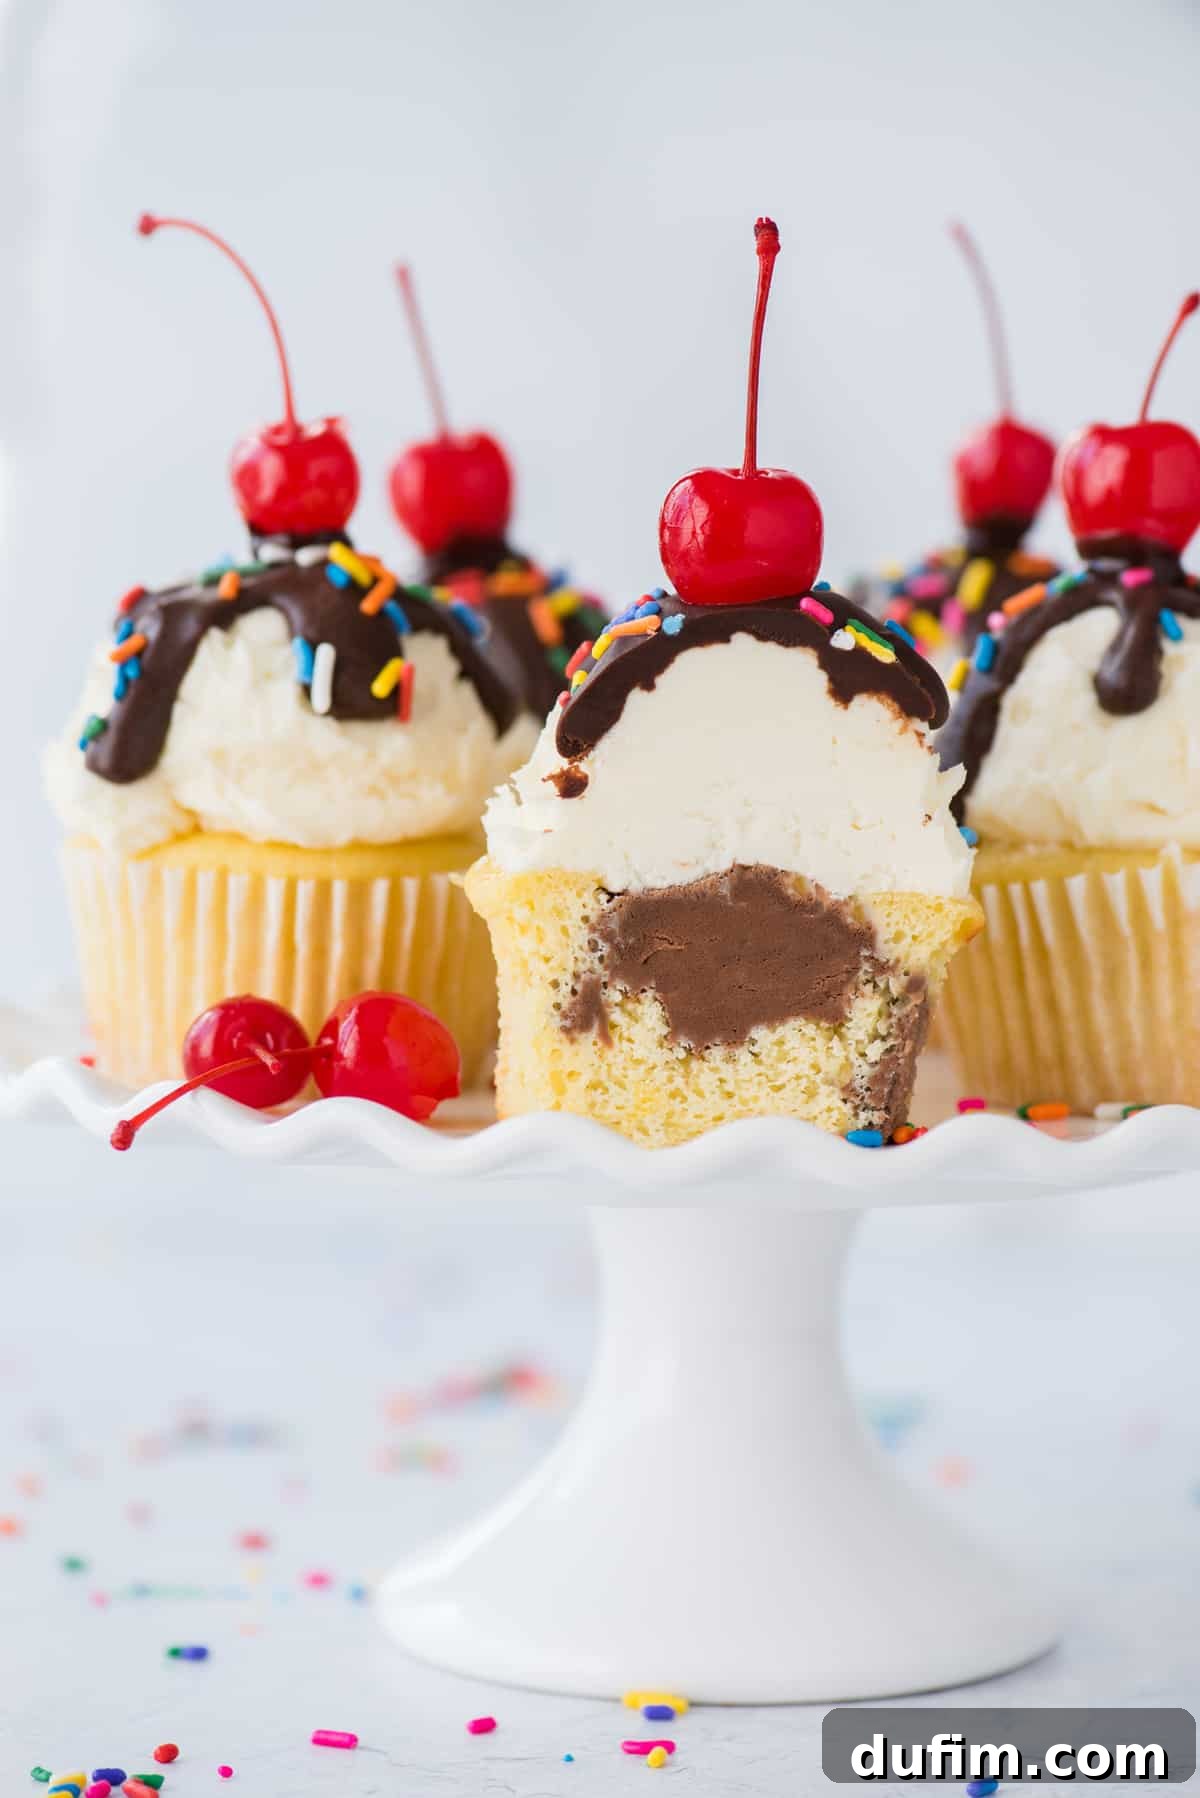
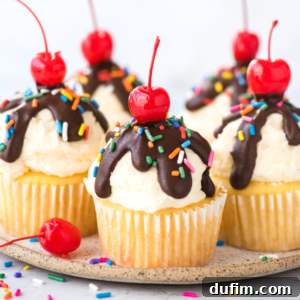
Imagine the delight of a fluffy cupcake combined with the cool, creamy goodness of ice cream, all in one bite. This incredible ice cream cupcake recipe takes a simple yellow cake mix and transforms it into a dessert that tastes utterly homemade. Each cupcake features a delightful scoop of ice cream at its core, making them the absolute best birthday cupcakes. With a few creative decorating touches, these treats will resemble charming mini ice cream sundaes, guaranteed to impress guests of all ages!
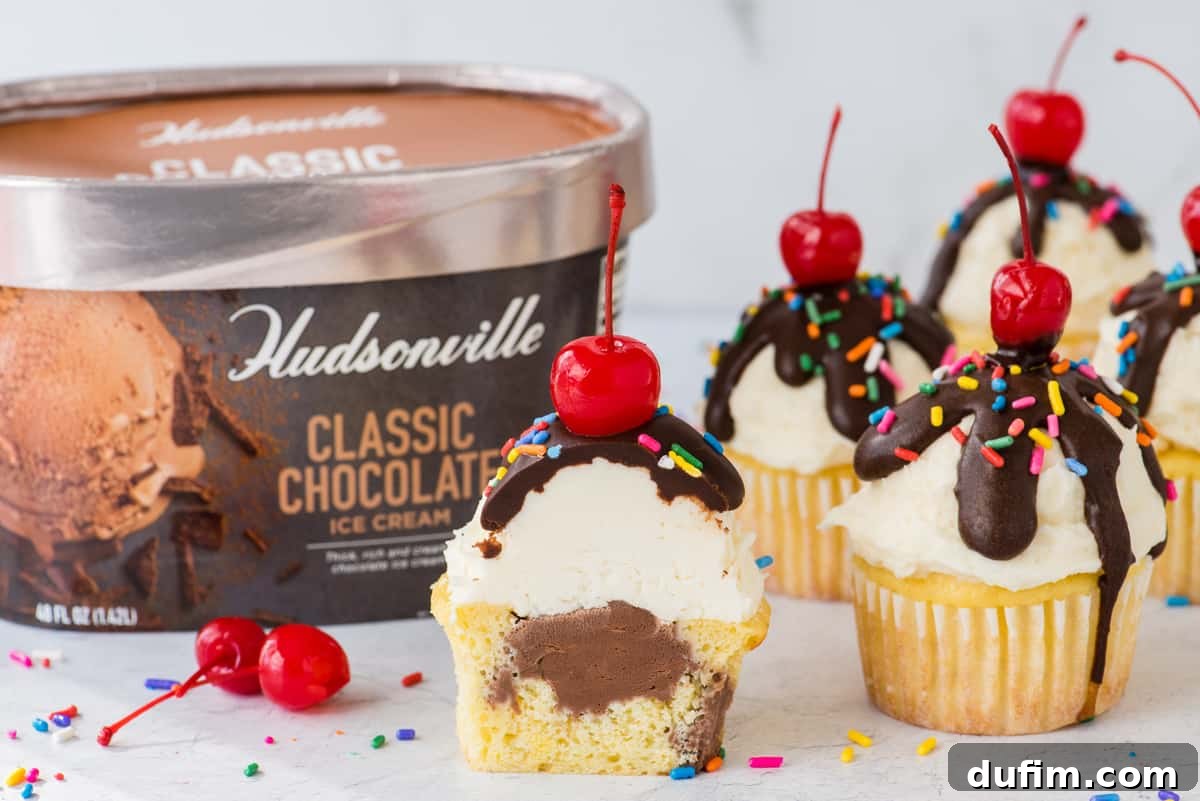
We’re thrilled to partner with Hudsonville Ice Cream to bring you these fun and festive ice cream cupcakes, designed to add sweeter moments to your day. This recipe is an ideal choice for any birthday celebration, especially when the birthday honoree finds it impossible to choose between a classic cake and a scoop of their favorite ice cream. Why settle for one when you can have both?
For this delightful recipe, we opted for Hudsonville’s Classic Chocolate ice cream, a choice that is anything but ordinary. Crafted with real Dutch cocoa and fresh cream, it delivers a rich, authentic flavor that elevates these cupcakes. Hudsonville has a long-standing tradition of making moments sweeter, a Midwest brand dedicated to producing exceptional ice cream based on a beloved recipe dating back to 1926. While we adore the chocolate, feel free to unleash your creativity! Customize your cupcakes by selecting different cake mix flavors and your preferred ice cream varieties to craft your own perfect, personalized combination.
Key Components for Irresistible Ice Cream Cupcakes
Crafting these extraordinary ice cream sundae cupcakes requires a few key ingredients, each playing a vital role in their delicious outcome. Here’s what you’ll need to assemble your memorable dessert:
- Easy Yellow Cupcakes: Our base starts with a convenient box mix, skillfully enhanced to taste like it’s made entirely from scratch.
- Rich Chocolate Ice Cream: The creamy heart of each cupcake, providing a delightful contrast to the cake. We recommend Hudsonville’s Classic Chocolate for its superior quality.
- Velvety Vanilla Frosting: The perfect sweet cloud topping, designed to mimic a scoop of soft-serve ice cream.
- Decadent Chocolate Ganache: A luscious drizzle that acts as your “hot fudge” topping.
- Colorful Sprinkles: For that essential festive touch and playful texture.
- Bright Maraschino Cherries: The classic crowning jewel for any sundae-inspired treat.
Why Elevate a Box of Yellow Cake Mix? The Secret to Easy “Homemade” Flavor
You might be wondering why we’d start with a humble box of yellow cake mix for such a special recipe. The answer is simple: this recipe is designed for maximum ease and enjoyment without compromising on taste! We believe that delicious, impressive desserts don’t always require hours of complex baking from scratch.
This “doctored up” box cake recipe is ideal for anyone who appreciates the convenience of a mix but yearns for that undeniably homemade flavor and texture. It’s about working smarter, not harder. By adding a few extra ingredients, you can transform a standard mix into a moist, rich, and flavorful cupcake base that will fool even the most discerning palates. Best of all, this enhanced version comes together just as quickly as the original box mix, often requiring nothing more than combining everything in one bowl and beating it until smooth. It’s the perfect shortcut to gourmet results.
Transforming Boxed Cake Mix: Secrets to a Scratch-Made Taste
The magic of making a box cake taste genuinely homemade lies in enriching the mix with additional ingredients that boost its moisture, tenderness, and overall flavor. We specifically focus on adding components that introduce moisture and a touch of acidity, which react beautifully with the leavening agents in the mix, resulting in a superior crumb and taste. Here’s a closer look at the key additions:
- Yellow Cake Mix: This serves as our convenient starting point. Always ensure you’re using a 15.25 oz box, as sizes can vary between brands, and the correct proportion is crucial for our modifications.
- All-Purpose Flour: While the mix contains flour, adding a bit more helps to build a more robust cake structure, giving the cupcakes a better rise and a firmer, yet still tender, texture.
- Granulated Sugar: A touch more sweetness enhances the overall flavor profile, ensuring a perfectly balanced taste.
- Salt: Just a pinch is all it takes to balance the sweetness, preventing the cake from being overly sugary and enhancing all the other delicious flavors.
- Eggs: Eggs are essential binders, providing structure to the batter and contributing to the cake’s rich texture.
- Vanilla Extract: A staple in baking, vanilla extract deepens the classic vanilla flavor in the cake, making it more aromatic and appealing.
- Milk: Adds crucial moisture to the batter, resulting in a softer, more tender crumb.
- Buttermilk: This is a game-changer! Buttermilk not only adds significant moisture but also acidity. The acidity reacts with the baking soda (often present in cake mixes) to create a lighter, more tender texture and a subtle tang that enriches the flavor. If you don’t have buttermilk on hand, you can easily make your own.
- Sour Cream: Similar to buttermilk, sour cream contributes moisture and acidity, making the cupcakes incredibly tender and moist. It also adds a slight richness that gives the cake a luxurious, “from scratch” feel.
Crafting the Perfect Cavity for Your Ice Cream Core
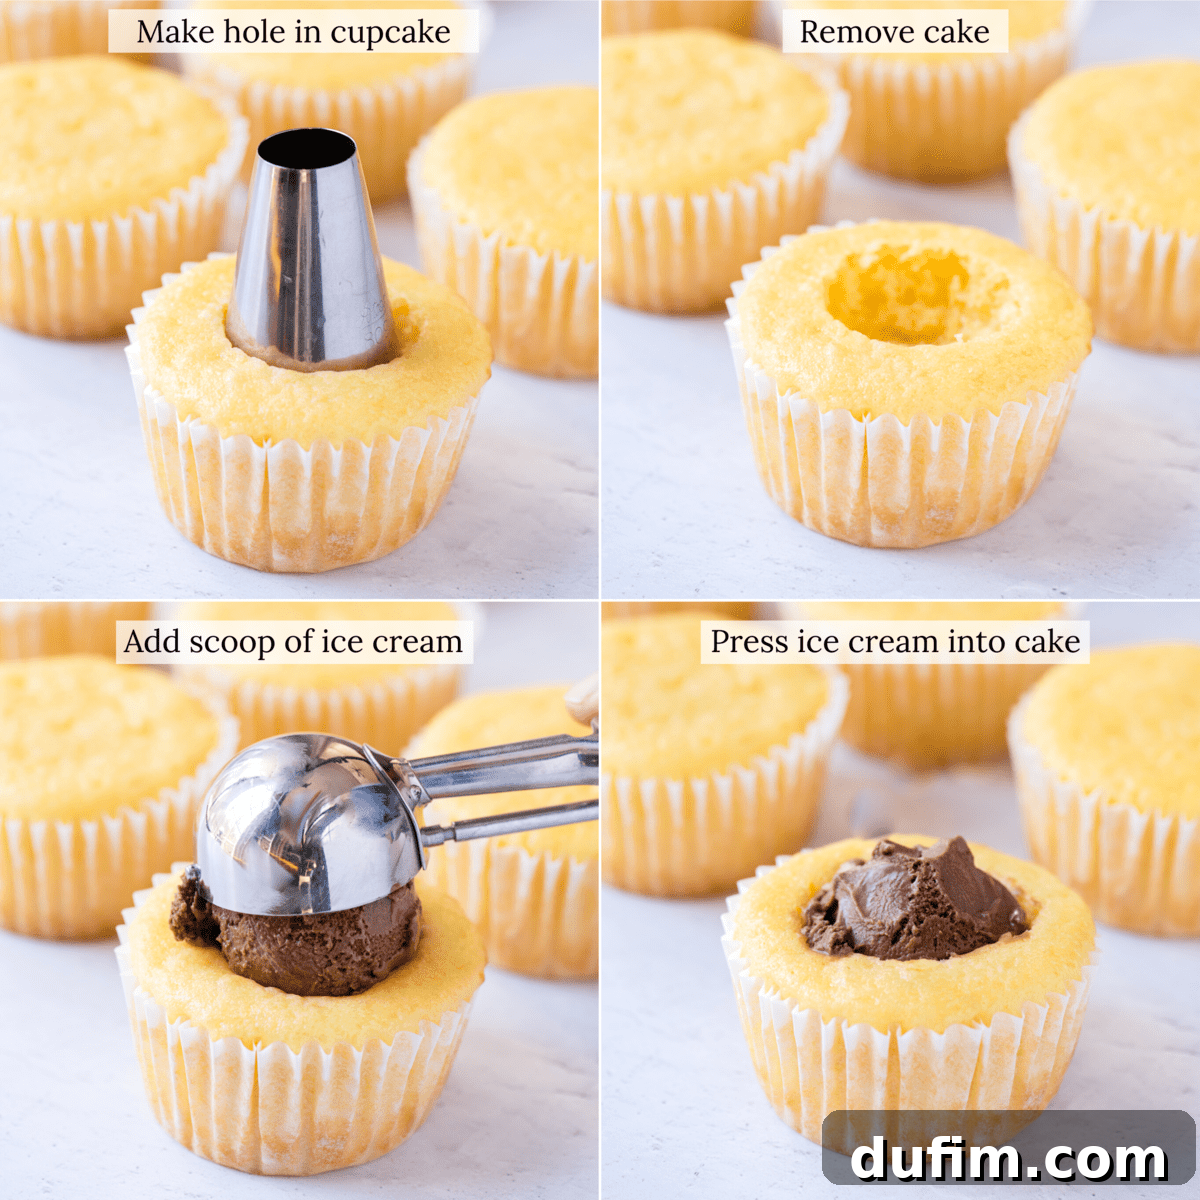
Once your cupcakes are baked to golden perfection and have cooled completely, the next fun step is creating a cozy home for your ice cream! The exact tool you use isn’t as important as the outcome: a neat, well-defined hole in the center of each cupcake, perfectly sized to hold a scoop of your favorite frozen treat.
Handy Tool Options:
You have several simple household tools at your disposal for this task. Choose the one you find most convenient:
- Piping Tip: A large round piping tip can create a perfectly circular hole.
- Melon Baller: Ideal for scooping out a consistent sphere of cake.
- Small Knife: A paring knife can be used to carefully cut a circle, then gently scoop out the center.
- Your Finger: For a truly rustic and hands-on approach, a clean finger can work wonders for a small cavity!
- Tablespoon: The edge of a tablespoon can be used to scoop out the center.
No matter your chosen tool, aim for a hole that goes about two-thirds of the way down into the cupcake, leaving enough cake at the bottom to form a sturdy base. Once you’ve created these little pockets, it’s time to add a generous scoop of ice cream to each cupcake. Immediately after filling, make sure to cover the cupcakes tightly with plastic wrap and transfer them to the freezer. This crucial step prevents the ice cream from melting and ensures they are firm and ready for frosting when you are.
The Illusion of Ice Cream: Frosting Like a Pro
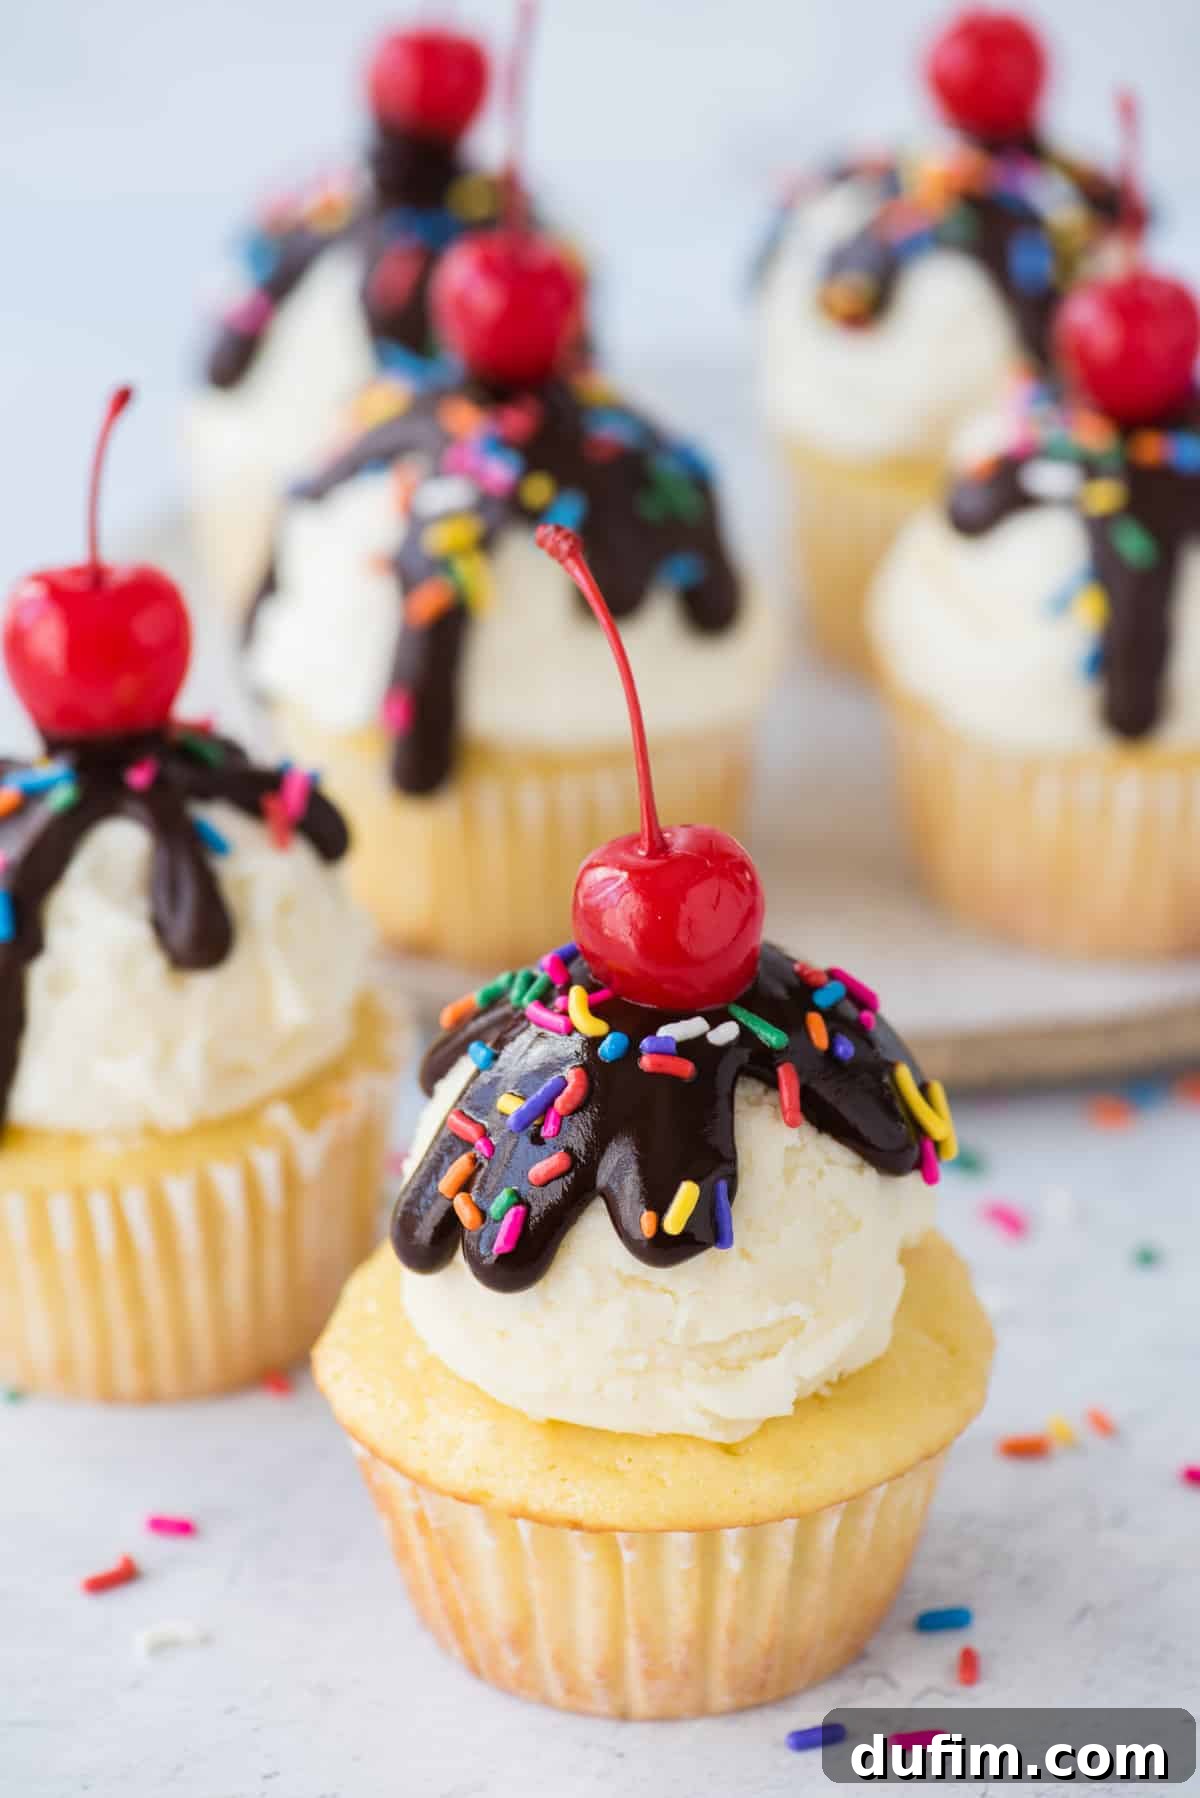
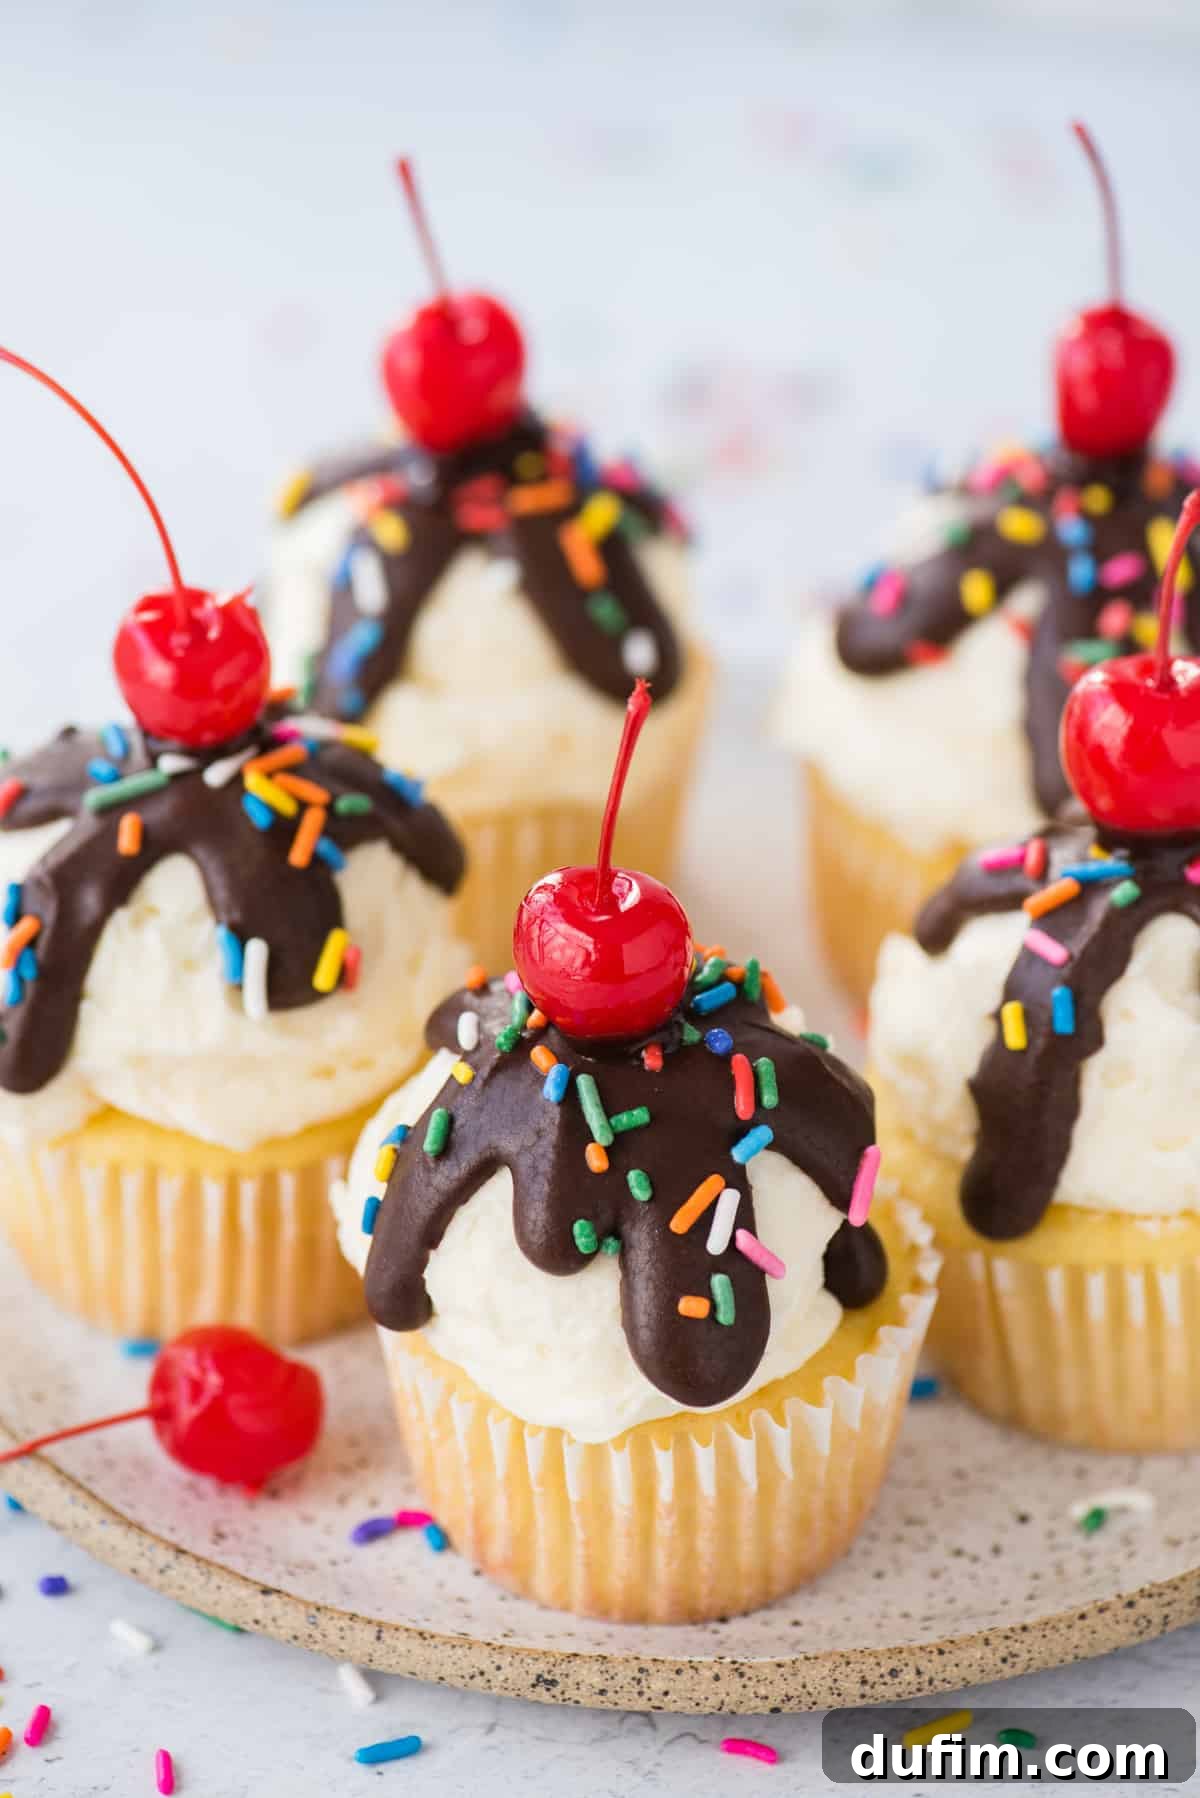
One of the most charming aspects of these birthday cupcakes is how the frosting on top perfectly mimics a scoop of soft-serve ice cream. This visual detail is what truly transforms them into irresistible ice cream sundae cupcakes and adds an extra layer of fun and whimsy to your dessert table!
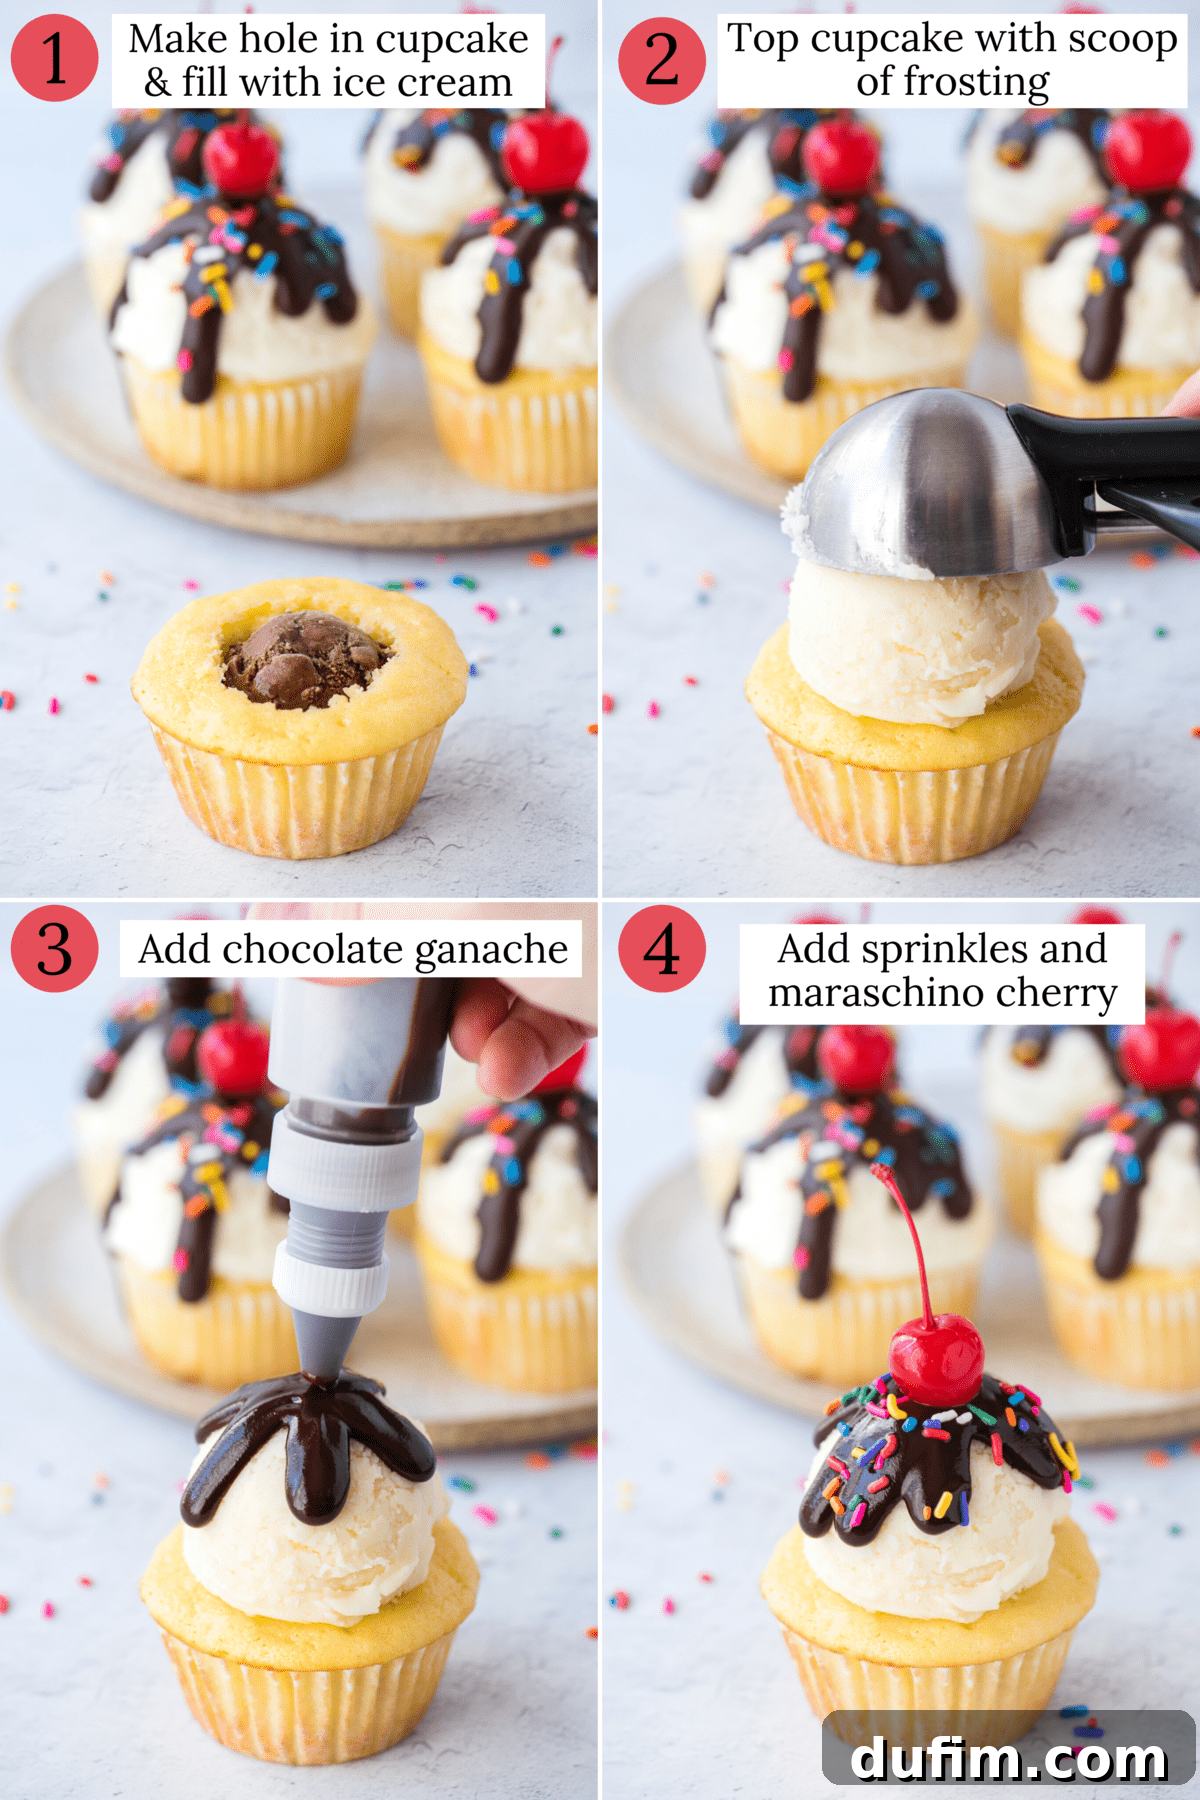
To achieve this appealing, rounded “scoop” look, you’ll want to use a large cookie scoop. We recommend one that is 2.25 inches in diameter or even larger for the most impactful presentation. Simply press the cookie scoop firmly into your bowl of prepared frosting, ensuring it’s completely full. Then, gently level off any excess frosting against the side of the bowl for a clean, uniform scoop. Finally, use the spring release mechanism to carefully place this perfect dome of frosting directly onto the center of each chilled cupcake. The result is a smooth, inviting swirl that looks just like a fresh scoop of your favorite frozen treat, ready for all the delicious toppings!
The Grand Finale: Finishing Touches and Dazzling Decorations
Once your cupcakes are frosted, it’s time to add the glorious toppings that complete their transformation into delightful ice cream sundaes. These finishing touches not only add visual appeal but also enhance the flavor and texture, making each bite an experience.
For the classic “hot fudge” drizzle, I highly recommend transferring your rich chocolate ganache into a squeeze bottle. This simple trick provides incredible control, allowing you to create those perfect, professional-looking drips and swirls effortlessly over the frosting. A steady hand and a squeeze bottle are your best friends here!
Next, it’s time for the vibrant and fun element: sprinkles! Shower your cupcakes generously with your favorite colors and shapes. Sprinkles add a delightful crunch and a burst of color that makes these treats even more appealing. Finally, crown each masterpiece with a bright red maraschino cherry. For the absolute best results and to prevent any unwanted color bleeding or excess moisture, be sure to gently pat the maraschino cherries with a paper towel. This removes any lingering liquid before you place them proudly atop your finished ice cream cupcakes. Serve immediately and watch them disappear!
Storing Your Ice Cream Cupcakes: Keeping Them Perfectly Chilled
Given the delightful ice cream filling at their heart, proper storage is essential to maintain the quality and structure of these unique cupcakes. They are, at their core, a frozen dessert, so the freezer is your best friend!
If you’re preparing them in advance or have leftovers, follow these guidelines:
- Pre-Frosting Storage: After creating the hole in each cupcake and filling it with a scoop of ice cream, it’s crucial to cover the cupcakes tightly with plastic wrap. This prevents freezer burn and keeps the ice cream firm. Store them in the freezer until you are ready to add the frosting and additional toppings.
- Post-Assembly Storage: Once your ice cream cupcakes are fully assembled with frosting, ganache, sprinkles, and cherries, they must be returned to the freezer immediately. Place them in an airtight container or wrap them individually to protect them.
- Serving for Best Results: While these cupcakes store well in the freezer for a few days, for the absolute best taste, texture, and overall experience, we highly recommend serving them on the same day you assemble them. This ensures the cake remains moist, the ice cream is perfectly chilled, and the toppings are at their freshest.
When ready to serve, simply remove them from the freezer a few minutes before eating to allow the frosting to soften slightly, making them easier and more enjoyable to bite into.
Time at a Glance: Your Cupcake Creation Timeline
Planning to make these delightful ice cream cupcakes? Here’s a breakdown of the time you’ll need to dedicate to each step, allowing you to organize your baking schedule efficiently and enjoy a smooth, stress-free process:
- Prep the Cupcake Batter: Approximately 5 minutes. Thanks to our doctored-up box mix, this step is wonderfully quick.
- Bake Cupcakes: Expect 18-20 minutes in the oven for perfectly golden and fluffy cupcakes.
- Cool the Cupcakes: Allow a crucial 30 minutes for your cupcakes to cool completely before proceeding. This prevents the ice cream from melting prematurely.
- Create Holes and Add Ice Cream: This fun assembly step takes about 10 minutes. Immediately after, transfer to the freezer.
- Make Frosting, Ganache, and Assemble: Dedicate about 30 minutes to whip up your creamy frosting, prepare the chocolate ganache, and finalize the decoration of your cupcakes.
While some steps require active attention, much of the time is hands-off cooling or freezing. The total time invested is well worth the incredible result: a batch of impressive, delicious ice cream cupcakes!
Explore More Frosting Flavors for Your Cupcakes
While vanilla frosting provides a classic “ice cream scoop” aesthetic and flavor, don’t limit your creativity! You can easily swap out the vanilla for other delicious frosting options to perfectly complement your chosen cake and ice cream flavors. Here are a few fantastic ideas to inspire your next batch of ice cream cupcakes:
- Rich Chocolate Frosting: A decadent choice that pairs wonderfully with vanilla or mint chocolate chip ice cream.
- Sweet and Salty Caramel Frosting: An elevated flavor that would be incredible with coffee or butter pecan ice cream.
- Zesty Lemon Frosting: A bright and refreshing option, perfect with berry sorbet or a delicate vanilla bean ice cream.
- Creamy Oreo Frosting: A crowd-pleaser that’s fantastic with cookies and cream or plain vanilla ice cream for an extra textural delight.
Experiment with these different frostings to discover your ultimate ice cream cupcake combination!
Curious where to find the delightful Hudsonville Ice Cream near you? Utilize their convenient Scoop Locator to quickly discover retail locations in your area.
Watch How to Make These Irresistible Ice Cream Cupcakes!
For a visual guide to crafting these amazing treats, check out our step-by-step video tutorial. Seeing each stage of the process can be incredibly helpful, especially for new bakers or those who prefer to follow along visually. You’ll get to see exactly how to prepare the batter, create the perfect cavity for the ice cream, frost them to look like mini sundaes, and add all the charming finishing touches. Happy baking!
Tap stars to rate!
Ice Cream Cupcakes
Equipment
- Muffin Pan
- Large Cookie Scoop
- Glass Mixing Bowl
- KitchenAid 9-Speed Mixer
Ingredients
Cupcakes
- 1 box yellow cake mix, 15.25 oz (I prefer Duncan Hines)
- 1 cup (198g) granulated sugar
- 1 cup (120g) all purpose flour
- ¾ tsp salt
- 4 large eggs
- 1 tsp vanilla extract
- 1 cup (236ml) milk, skim, 1% or 2%
- ½ cup (118ml) buttermilk
- 1 cup (228g) sour cream
- 1 container Hudsonville Classic Chocolate ice cream
Vanilla Frosting
- 1 ½ cups (339g) unsalted butter, room temperature, 3 sticks
- 4 cups (454g) powdered sugar
- 2 tsp vanilla extract
- 1 Tbsp heavy whipping cream
Chocolate Ganache
- 1 cup (170g) semi-sweet chocolate chips
- ⅓ cup (79ml) heavy whipping cream
Additional
- Sprinkles
- Maraschino cherries
Instructions
Cupcakes
- Preheat the oven to 350º F. Line a muffin pan with liners. This recipe makes about 24 cupcakes. Set aside.
- In a large mixing bowl, combine the cake mix, flour, sugar, salt, eggs, vanilla extract, milk, buttermilk, and sour cream. Beat with an electric mixer until just combined, about 1-2 minutes.
- Fill each muffin cup 1/2 full with batter. Place one pan in the center of the oven and bake for 18-20 minutes or until a toothpick inserted in the center comes out clean. Allow the cupcakes to cool completely on a wire rack.
- Once the cupcakes are baked and fully cooled, make a hole in the center of each cupcake for the ice cream. You can use a piping tip, melon baller, a small knife, your finger, or a tablespoon to create this cavity.
- Add a scoop of Hudsonville Ice Cream to each cupcake, pressing the ice cream gently to create a relatively flat top. Immediately after adding the ice cream, cover the cupcakes tightly with plastic wrap and store them in the freezer until you’re ready to add the frosting.
Frosting
- Place the room temperature unsalted butter in a mixing bowl. Use an electric mixer on medium speed and beat the butter for 1 minute until it’s whipped and fluffy.
- Add in the powdered sugar and vanilla extract. Beat again on low speed for 1-2 minutes, scraping down the sides of the bowl as needed, until all ingredients are fully incorporated and smooth.
- If the frosting appears too thick, add a tablespoon of milk or heavy cream and beat again until it reaches a creamy, spreadable consistency.
Chocolate Ganache
- Place the semi-sweet chocolate chips in a medium heat-proof bowl.
- In a small pot over low heat, gently heat the heavy cream just until it begins to boil around the edges.
- Pour the hot heavy cream over the chocolate chips. Allow the mixture to stand undisturbed for 1 minute to allow the chocolate to melt.
- Use a spatula to stir the mixture gently until it becomes smooth and glossy. Transfer the ganache to a squeeze bottle for effortless application.
Assemble
- Achieve the signature “ice cream scoop” look for your frosting! Use a large cookie scoop (2.25 inches in diameter or larger). Press the scoop into the bowl of frosting, leveling off the excess against the side. Then, use the spring release to place the rounded scoop of frosting on top of each frozen cupcake.
- Finish your cupcakes with a drizzle of chocolate ganache (your “hot fudge topping”), a generous scattering of sprinkles, and a classic maraschino cherry. For best results, gently pat the maraschino cherries with a paper towel to remove any excess liquid before placing them on the cupcakes. Serve and enjoy these festive treats!
Notes
How to Store Ice Cream Cupcakes
Because these delightful treats are filled with ice cream, they absolutely need to be stored in the freezer to maintain their integrity and keep the ice cream frozen.
After creating a hole in each baked cupcake and adding a scoop of ice cream, ensure you cover the cupcakes thoroughly with plastic wrap. Store them in the freezer at this stage until you’re ready to proceed with assembly (frosting and toppings).
Once the cupcakes are fully assembled with the frosting, ganache, and decorations, they should be stored in the freezer until just before serving. For the best flavor and texture experience, it’s highly recommended to serve them on the same day you complete the assembly.
Nutrition
All nutritional values are approximate and provided to the reader as a courtesy. Changing ingredients and/or quantities will alter the estimated nutritional calculations.
Calories: 510kcal | Carbohydrates: 69g | Protein: 6g | Fat: 25g | Saturated Fat: 15g | Polyunsaturated Fat: 1g | Monounsaturated Fat: 7g | Trans Fat: 1g | Cholesterol: 90mg | Sodium: 299mg | Potassium: 229mg | Fiber: 2g | Sugar: 53g | Vitamin A: 740IU | Vitamin C: 1mg | Calcium: 141mg | Iron: 2mg
Like this recipe? We’d love to hear your thoughts! Share your experience and rating in the comments below!