
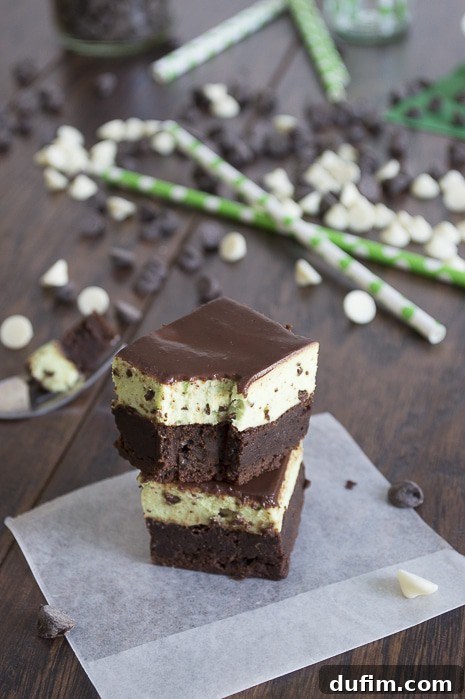
Mint Chip Mousse Brownies: A Decadent Layered Dessert for Any Occasion
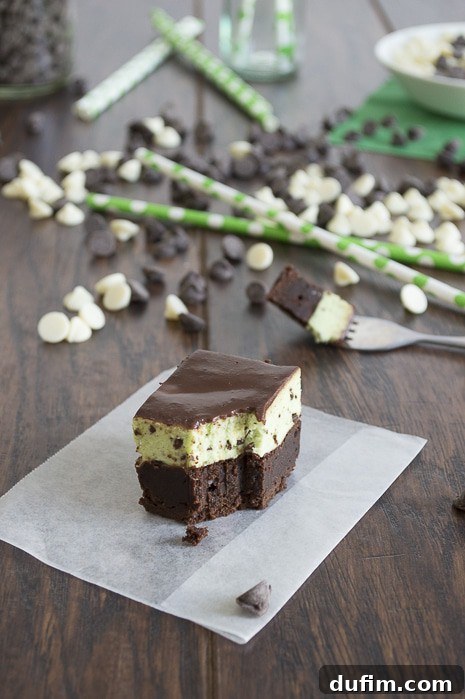
Prepare to be absolutely captivated by these Mint Chip Mousse Brownies. This dessert isn’t just a treat; it’s an experience, a culinary journey that elevates the humble brownie to a five-star restaurant-worthy masterpiece. Imagine a dessert so rich, so perfectly balanced in flavor and texture, that each bite transports you to a realm of pure indulgence. That’s precisely what these brownies offer: a symphony of deep chocolate, cool refreshing mint, and a luxurious creamy finish, making them an ideal choice for any special gathering or a well-deserved personal indulgence.
These aren’t your average brownies. They are truly magnificent, boasting an impressive profile that will leave a lasting impression on anyone lucky enough to try them!
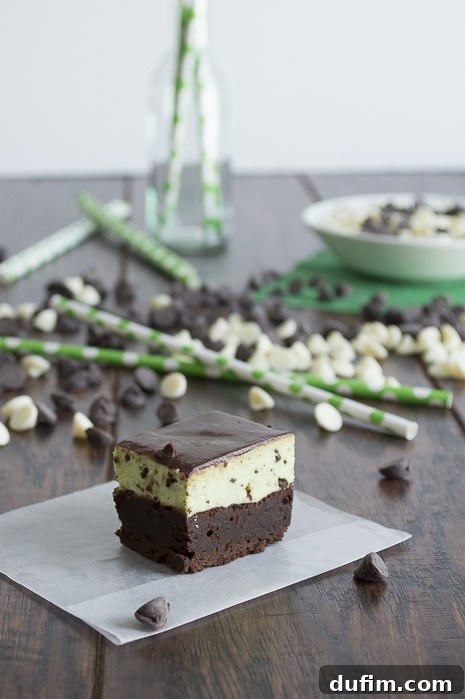
One of the best discoveries I’ve made with this recipe is how wonderfully these brownies freeze. Wrapping the extras tightly in foil and tucking them away in the freezer is like creating a secret stash of pure happiness. On days when an irresistible craving for something sweet, cool, and utterly decadent strikes, simply retrieve one. It’s almost like enjoying a frozen mint chip ice cream brownie sandwich, offering a delightful chill and a chewiness that’s simply divine. Honestly, I might be hiding a few behind the frozen chicken and vegetable packages, ensuring my personal supply remains untouched for those urgent dessert emergencies!
Why These Mint Chip Mousse Brownies Are a Must-Try
These brownies stand out not just for their stunning appearance, but for the incredible interplay of flavors and textures. The combination of dense, fudgy chocolate, light, ethereal mint mousse, and a snappy chocolate glaze creates a sensory delight that is hard to forget. They are perfect for holidays, dinner parties, birthdays, or any time you want to impress without having to step out to a fancy patisserie. Each component is carefully crafted to complement the others, resulting in a harmonious dessert that feels both gourmet and comforting. The vibrant green mint layer, contrasted with the rich dark chocolate, also makes for a visually appealing treat that will surely be a conversation starter.
The Irresistible Layers: Crafting a Masterpiece
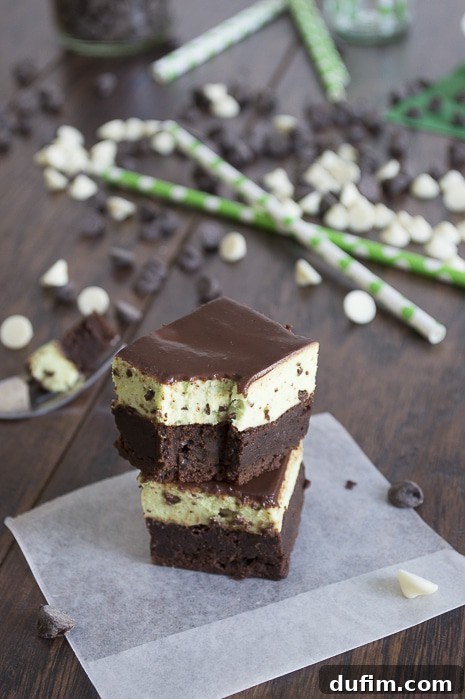
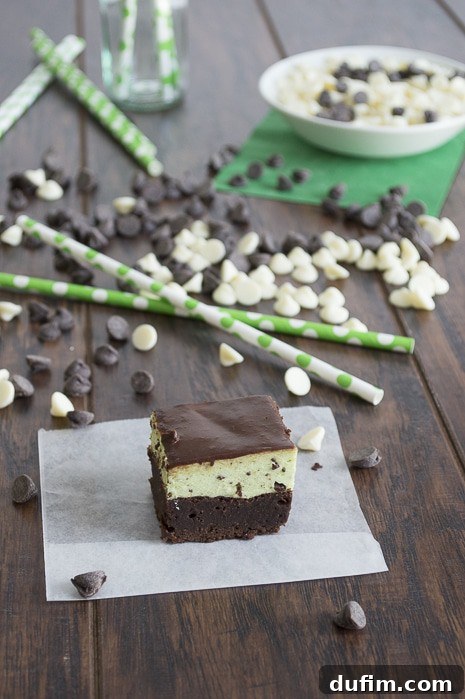
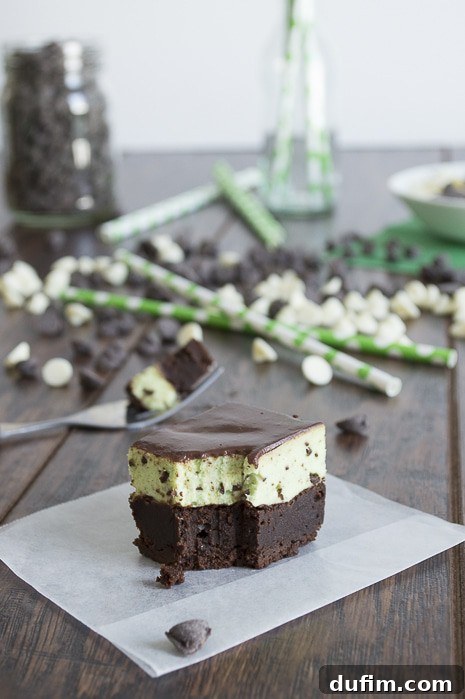
The magic of these Mint Chip Mousse Brownies lies in their meticulously crafted layers, each contributing its unique texture and flavor to the overall symphony:
- Gooey, Fudgy Brownie Base: This isn’t just any brownie; it’s a deeply chocolatey, moist, and perfectly fudgy foundation that holds up beautifully to the layers above. We’re talking about a rich, dense brownie that provides a substantial counterpoint to the lighter mousse. Its intense chocolate flavor is the perfect starting note for this layered delight.
- Lovingly Homemade Mint Chip Mousse: This light and airy mousse is truly the star of the show. Infused with just the right amount of refreshing peppermint extract and generously studded with finely chopped semi-sweet chocolate, it delivers a cool, invigorating chill and a delightful texture that literally melts in your mouth. Its vibrant green hue also adds a beautiful visual pop, signaling the minty goodness within. The use of gelatin ensures it sets perfectly, maintaining its elegant form.
- Glossy Chocolate Glaze: A thin, elegant layer of dark chocolate glaze caps it all off, adding a final touch of intense chocolatey goodness and a satisfying snap with every bite. This glaze not only provides a stunning, reflective finish that makes the brownies look incredibly professional but also locks in the moisture and freshness of the mousse layer below. It’s the perfect sweet closure to each bite.
Seriously, that mint chip mousse is so crazy yummy, I’m already brainstorming other desserts to put it on! Maybe layered in a trifle, dolloped onto cupcakes, or even just served by itself with a spoon as a quick, refreshing dessert. The possibilities are truly endless when something tastes this good and has such a wonderfully light texture!
Embracing the Two-Day Recipe Journey: A Labor of Love
Full disclosure: this is indeed a multi-step recipe, best tackled over two days. While it requires a bit of patience and planning, every moment spent is a worthwhile investment in a truly spectacular dessert. The staggered approach allows each layer to cool and set properly, which is crucial for achieving those clean lines and perfect textures that make these brownies so impressive. Think of it less as a chore and more as an enjoyable, rewarding project that culminates in an exquisite treat.
Here’s a typical timeline that works beautifully and breaks down the process into manageable steps:
- Day 1 (Saturday): Baking the Brownie Base
Start by baking the fudgy brownie base. This is the simplest part. The absolute key here is to allow the brownies to cool completely, preferably overnight, before adding any wet layers. Attempting to add the mousse to warm or even slightly warm brownies will result in a melted, messy disaster, as the mousse will simply liquefy and absorb into the brownie. Cooling overnight ensures a firm, stable foundation. - Day 2 (Sunday Morning): Preparing and Setting the Mousse
On Sunday morning, you can prepare and spread the luxurious mint chip mousse. This involves melting chocolate, blooming gelatin, and whipping cream. Once the mousse is spread evenly over the cooled brownies, it needs at least 30 minutes to chill and begin setting in the refrigerator. This partial set is important for the glaze not to sink in or mix with the mousse. - Day 2 (Sunday Afternoon): Applying and Setting the Glaze
Finally, in the afternoon, you can prepare and apply the rich chocolate glaze. This layer also requires several hours to set fully in the refrigerator, resulting in that beautiful, firm, and glossy finish. Rushing this step will lead to a runny or dull glaze.
This careful layering and setting process ensures that each component shines, creating a dessert that’s not only delicious but also visually stunning. It truly is a labor of love, but the “oohs” and “aahs” from anyone who tries them, not to mention the immense satisfaction of creating such a beautiful dessert, will confirm it was all absolutely worth it!
The Ultimate Mint Chip Mousse Brownies Recipe
Mint Chip Mousse Brownies
By: Beth
These layered brownies take over a day to put together but they are SO worth it! A delightful combination of rich chocolate, refreshing mint, and a perfect glossy finish.
Prep Time: 30 minutes
Cook Time: 15 minutes
Additional Time: 3 hours (for setting)
Total Time: 3 hours 45 minutes
Servings: 12 servings
Rate Recipe
Print Recipe
Ingredients
For the Brownies:
- 5 oz (140g) unsalted butter, cubed
- 1 ¼ cups (250g) granulated sugar
- ½ cup + 6 tbsp (approx. 75g) unsweetened cocoa powder
- ½ tsp salt
- ½ tsp vanilla extract
- 2 large eggs
- ½ cup (60g) all-purpose flour
For the Mint Chip Mousse:
- 6 oz (170g) white chocolate chips
- 1 cup (240ml) heavy cream, divided use (¼ cup for melting chocolate, ¾ cup for whipping)
- ⅛ tsp salt
- 1 ¼ tsp unflavored powdered gelatin (approx. 1/2 packet, typically 0.25 oz or 7g total per packet)
- 1 tbsp cold water
- ½ tsp peppermint extract
- Green and yellow food coloring (a few drops of each, to achieve desired mint green)
- ¼ cup (45g) finely chopped semi-sweet chocolate (for the “chips”)
For the Chocolate Glaze:
- 2 oz (55g) finely chopped semi-sweet chocolate
- ¼ cup (60ml) heavy cream
Instructions
For the Brownies:
- Preheat your oven to 350°F (175°C). Line an 8×8 inch (20×20 cm) baking pan with aluminum foil, ensuring the foil extends up and over the sides to create “handles.” Lightly spray the foil with nonstick cooking spray.
- In a medium saucepan, combine the cubed butter, granulated sugar, unsweetened cocoa powder, and salt. Place the saucepan over medium-low heat. Stir the mixture frequently until the butter has completely melted and the ingredients are well combined, forming a slightly grainy mixture. Remove from heat and allow it to cool for about 5 minutes.
- Stir in the vanilla extract. Then, add the eggs one at a time, whisking vigorously after each addition until fully incorporated. You’ll notice the mixture transforms from grainy to a glossy, smooth consistency. Finally, gently fold in the all-purpose flour until no streaks of flour remain, being careful not to overmix.
- Scrape the brownie batter evenly into the prepared pan. Bake for 15-20 minutes, or until a toothpick inserted into the center comes out with moist crumbs, but not wet batter. Avoid overbaking for fudgier brownies. Allow the brownies to cool completely in the pan on a wire rack. If you’re preparing them the day before, cover the cooled brownies overnight at room temperature to ensure they are fully set and cold.
For the Mint Chip Mousse:
- In a microwave-safe bowl, combine the white chocolate chips, ¼ cup of heavy cream, and ⅛ tsp of salt. Microwave in 30-second intervals, whisking thoroughly after each, until the white chocolate is completely melted and the mixture is smooth and uniform. Set aside to cool to room temperature.
- While the white chocolate mixture cools, prepare the gelatin. In a small bowl, whisk together the unflavored powdered gelatin and 1 tablespoon of cold water. Let it sit undisturbed for 5 minutes to allow the gelatin to absorb the water and “bloom” (thicken).
- Once the white chocolate mixture has reached room temperature, microwave the bloomed gelatin for about 15 seconds, or until it has melted into a clear liquid. Whisk the melted gelatin into the cooled white chocolate mixture until well combined.
- Stir in the ½ tsp of peppermint extract. Add several drops of green food coloring and one drop of yellow food coloring to achieve your desired mint green shade. Remember that the color will lighten slightly when the whipped cream is added, so aim for a slightly more intense color at this stage.
- In a separate, large bowl, whip the remaining ¾ cup of heavy cream to firm peaks. The cream should hold its shape well. Be careful not to over-whip it into butter.
- Gently fold half of the whipped cream into the mint-chocolate mixture until just combined. Then, carefully fold in the remaining whipped cream until the mousse is light, airy, and uniformly colored. Stir in the finely chopped semi-sweet chocolate to create the “chips.”
- Evenly scrape the mint chip mousse over the completely cooled brownie layer, spreading it smoothly to the edges of the pan. Refrigerate for at least 30 minutes to allow the mousse to set slightly before applying the glaze.
For the Chocolate Glaze:
- In a small microwave-safe bowl, combine the 2 oz of finely chopped semi-sweet chocolate and ¼ cup of heavy cream. Microwave in 30-second intervals, whisking every 30 seconds, until the chocolate is completely melted and the mixture is smooth and glossy.
- Carefully and evenly pour the warm chocolate glaze over the partially set mint mousse layer. Use an offset spatula or the back of a spoon to gently spread it if needed, but avoid disturbing the mousse.
- Refrigerate the entire pan of brownies for a minimum of 3 hours, or preferably overnight, to allow both the mousse and the glaze to set completely. This ensures firm, distinct layers.
- Once fully set, use the foil handles to lift the brownies out of the pan. Place them on a cutting board and cut into 12 squares (or your desired size). For the cleanest edges, clean your knife with a damp cloth after each cut. Serve chilled and enjoy the layered perfection!
Recipe Notes:
This recipe was adapted from Sugar Hero.
For an extra pop of mint flavor that permeates all layers, try adding a tiny hint (1/8 tsp) of mint extract to the brownie batter as well!
Nutrition Information (per serving – approximate):
Calories: 417kcal | Carbohydrates: 40g | Protein: 5g | Fat: 28g | Saturated Fat: 17g | Polyunsaturated Fat: 1g | Monounsaturated Fat: 8g | Trans Fat: 1g | Cholesterol: 94mg | Sodium: 242mg | Potassium: 182mg | Fiber: 2g | Sugar: 32g | Vitamin A: 713IU | Vitamin C: 1mg | Calcium: 63mg | Iron: 1mg
Nutrition Disclosure: All nutritional values are approximate and provided to the reader as a courtesy. Changing ingredients and/or quantities will alter the estimated nutritional calculations.
Tips for Perfect Mint Chip Mousse Brownies Every Time
Achieving bakery-quality layered brownies at home is entirely possible with a few key techniques. Here are our top tips to ensure your Mint Chip Mousse Brownies are nothing short of perfect:
- Don’t Overbake the Brownies: This is arguably the most crucial step for a truly fudgy texture. Brownies continue to cook slightly after being removed from the oven. They should still be slightly moist in the center when you pull them out; a toothpick inserted should come out with moist crumbs, not wet batter, and not completely clean.
- Patience is Key for Cooling: Each layer needs to be completely cooled or set before adding the next. This means the brownies must be fully cold before the mousse, and the mousse must be partially set before the glaze, and then the entire dessert needs ample time to set. Rushing this process will result in messy, ill-defined layers.
- Proper Gelatin Bloom: Ensure your gelatin fully blooms in cold water for the recommended time (usually 5 minutes) before melting. This guarantees that it fully dissolves and provides the necessary structure for a smooth, consistent mousse texture that holds its shape beautifully.
- Achieve the Right Mint Color: For a natural, appealing mint green, a combination of green food coloring with a tiny touch of yellow food coloring often works best, rather than relying solely on green, which can look artificial. Remember that the color will lighten slightly once you fold in the whipped cream, so aim for a slightly more vibrant hue in the melted chocolate-gelatin mixture.
- Whip Cream to Firm Peaks: For a light and airy mousse, your heavy cream needs to be whipped to firm peaks. It should hold its shape when you lift the whisk. Be careful not to over-whip, which can turn it grainy or even into butter.
- Finely Chop Chocolate for Mousse: When adding chocolate to the mousse, opt for finely chopped semi-sweet chocolate rather than large chips. Small, fine pieces distribute better throughout the mousse and provide a pleasant “chip” texture without being too chunky or disrupting the mousse’s delicate consistency.
- Clean Cuts for Professional Presentation: For beautiful, professional-looking slices, use a long, sharp knife. Dip it in very hot water and wipe it completely clean with a damp cloth after each cut. This prevents the layers from sticking to the knife and creates neat, impressive slices.
- High-Quality Ingredients Matter: Since there are relatively few ingredients in each layer, the quality of your components truly shines through. Use good quality butter, a reputable brand of unsweetened cocoa powder, and good quality chocolate for the best flavor results.
Storage and Make-Ahead Brilliance
These Mint Chip Mousse Brownies are not just delicious; they are also an excellent dessert for making ahead, which is a huge bonus for entertaining or simply having a gourmet dessert ready whenever you desire. The preparation timeline inherently makes them a make-ahead treat, allowing you to space out your efforts.
Refrigeration: Store the finished brownies in an airtight container in the refrigerator for up to 3-4 days. The flavors actually meld and deepen beautifully over time, often tasting even better on the second or third day!
Freezing: For longer storage, as I fondly mentioned earlier, freezing is your best friend! Once the brownies are fully set and cut into individual squares, wrap each slice tightly in plastic wrap, then again in aluminum foil. Place the double-wrapped brownies in a freezer-safe bag or container, removing as much air as possible. They can be frozen for up to 2-3 months without significant loss of quality. To enjoy, simply thaw them in the refrigerator for a few hours, or indulge in them slightly frozen for a unique, ice-cream-like treat that is truly refreshing. It’s the perfect way to have a sophisticated dessert on standby for any impromptu craving or surprise guest!
Creative Variations to Try
While this recipe for Mint Chip Mousse Brownies is perfect as is and a true crowd-pleaser, you can always experiment with variations to suit your specific taste preferences or to match a particular occasion:
- Extra Chocolate Kick: For the ultimate chocolate lover, add about ½ cup of mini chocolate chips to the brownie batter before baking. This will create an even richer and chunkier base.
- Different Extracts for a Twist: Instead of peppermint, consider using other extracts in the mousse. Try almond extract for an “Almond Joy” inspired twist, or orange extract for a sophisticated chocolate-orange delight. You could even experiment with a hint of coffee extract for a mocha-mint blend.
- Toppings Galore: Before the chocolate glaze completely sets, get creative with your toppings! Sprinkle with additional mini chocolate chips, crushed peppermints (perfect for a festive holiday touch), or even finely chopped toasted nuts like pecans or walnuts for added texture.
- Boozy Brownies for Adults: For an adult-friendly version, add a tablespoon of crème de menthe or peppermint schnapps to the mousse mixture (reducing the peppermint extract slightly). This will impart a sophisticated boozy note that elevates the dessert for adult gatherings.
- Dark Chocolate Mousse: Instead of white chocolate in the mousse, use melted dark chocolate. This will create an intensely rich chocolate mint mousse, perfect for those who prefer deeper chocolate flavors.
Frequently Asked Questions (FAQs)
- Can I use a different size pan for the brownies?
- An 8×8 inch (20×20 cm) baking pan is ideal for achieving the perfect thickness for these layered brownies. If you use a larger pan, such as a 9×13 inch (23×33 cm), the brownies will be thinner, and the baking time will be reduced. You may also need to adjust the quantities of the mousse and glaze components to ensure proper coverage and maintain the desired layer thickness.
- Is gelatin absolutely necessary for the mousse?
- Yes, for this specific recipe, unflavored powdered gelatin is crucial. It acts as a stabilizer, helping the mousse set firmly enough to hold its beautiful, distinct shape between the fudgy brownie base and the glossy chocolate glaze. Without it, the mousse might be too soft, preventing those clean layers and potentially collapsing.
- How do I get clean cuts for my brownies?
- The best trick for achieving beautiful, professional-looking slices is to use a long, sharp knife. For the neatest cuts, dip the knife in very hot water and wipe it completely clean with a damp cloth after each slice. This prevents the layers from sticking to the knife and ensures crisp, attractive edges.
- Can I make these brownies gluten-free?
- While I haven’t personally tested a gluten-free version of this specific recipe, you might be able to substitute the all-purpose flour in the brownie recipe with a high-quality 1:1 gluten-free baking flour blend that contains xanthan gum. Ensure all other ingredients you use are certified gluten-free. Please note that results may vary.
- What’s the best way to serve these Mint Chip Mousse Brownies?
- These brownies are best served chilled, straight from the refrigerator. The cool temperature enhances the refreshing mint flavor and keeps the mousse and glaze perfectly set. For an elegant presentation, you can garnish each square with a small fresh mint leaf or a few delicate chocolate shavings just before serving.
Like this recipe? We’d love to hear your thoughts! Share your experience and comment below!
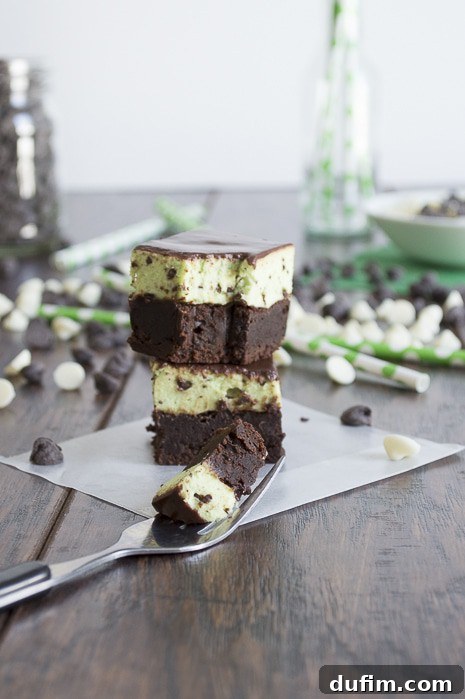
Now, if you’ll excuse me, I’m off to go “check on” my frozen stash. Just making sure it’s all still there, of course! You should definitely make a batch for yourself and experience this delightful treat – you won’t regret the effort involved in creating such a spectacular dessert.