
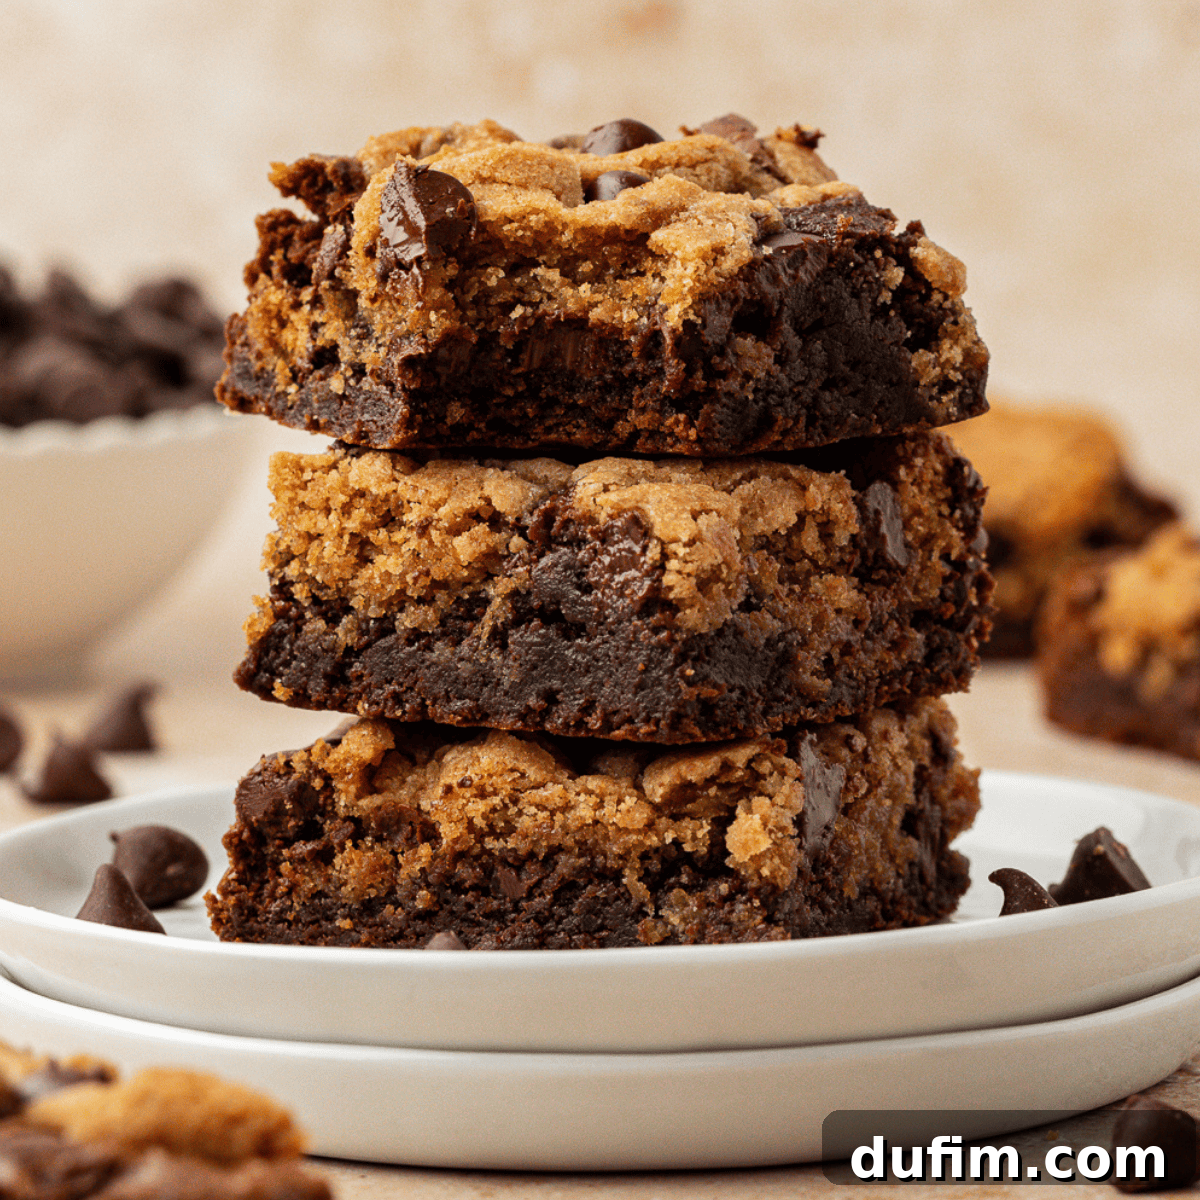
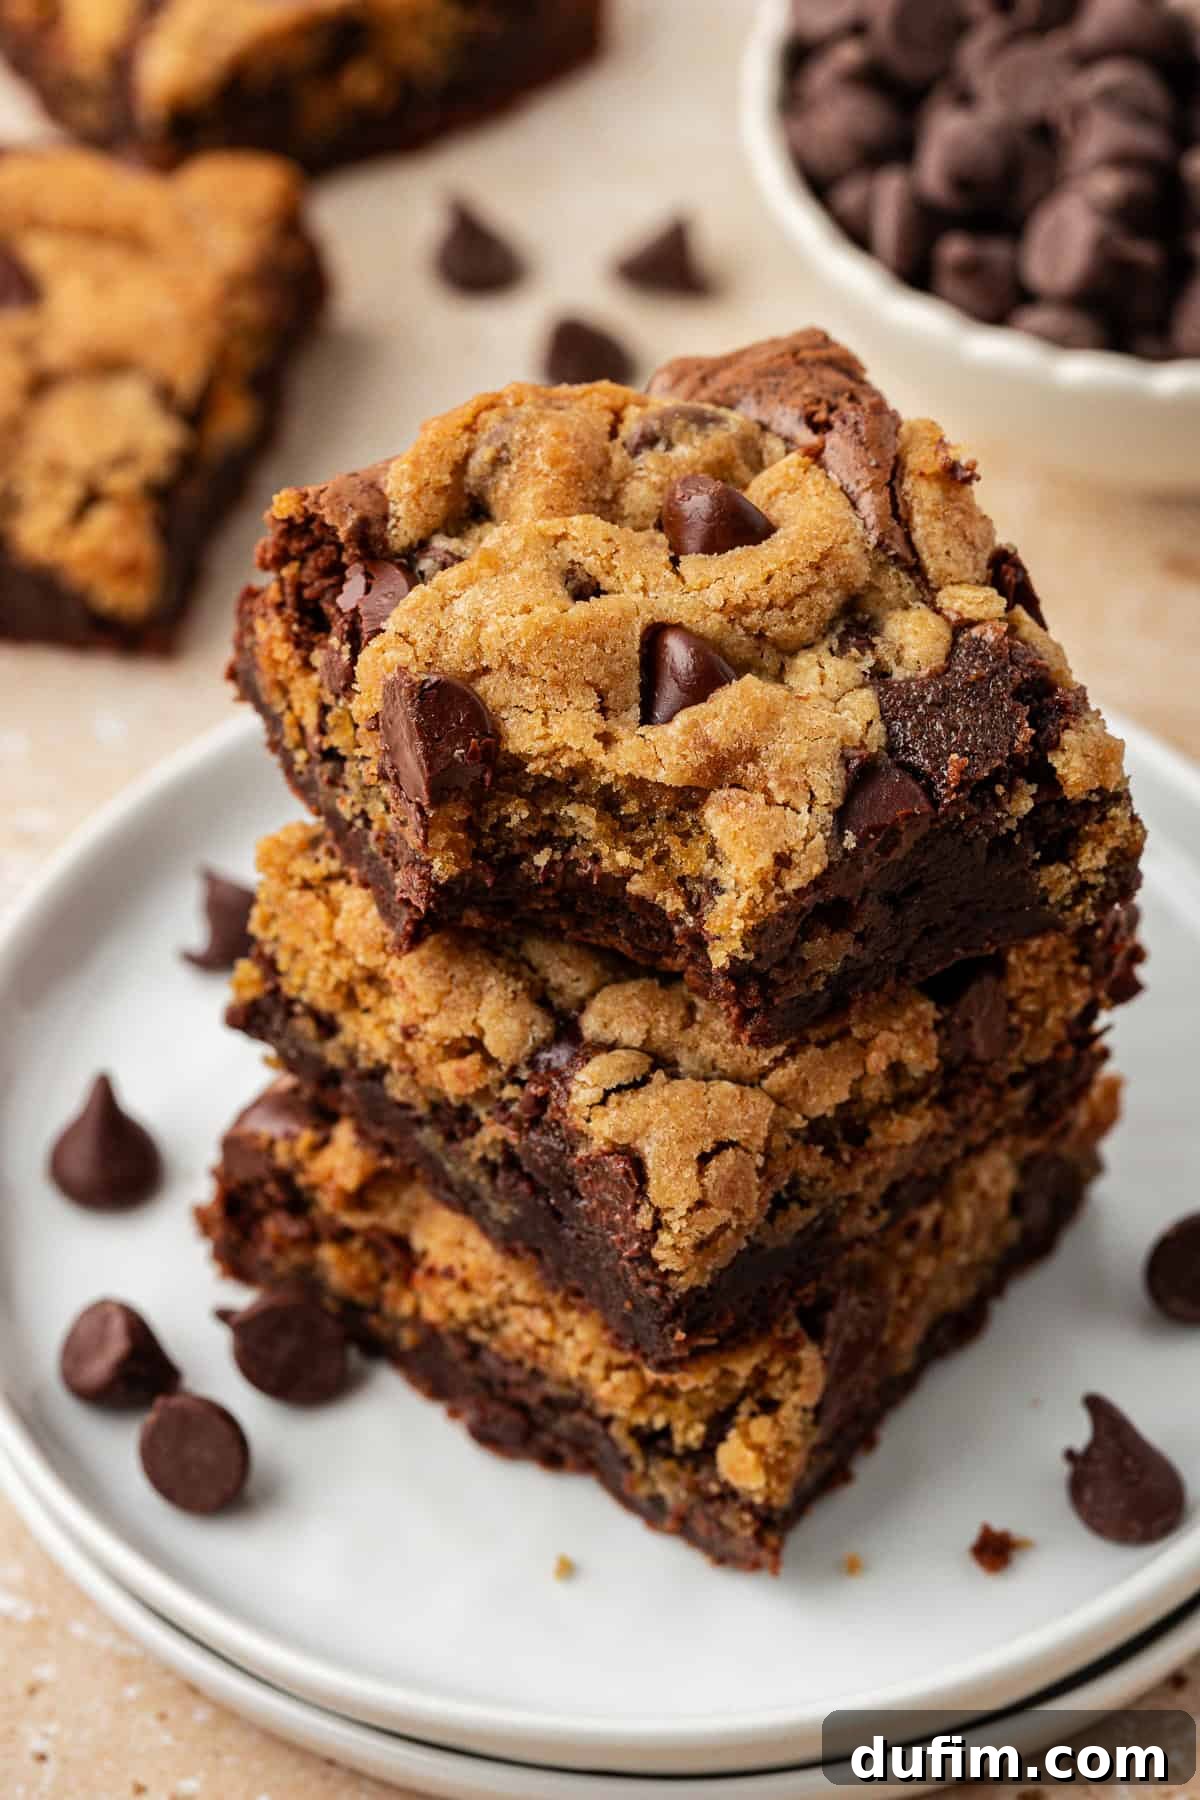
Prepare to indulge in the ultimate dessert mashup: Brookies! This incredible recipe seamlessly merges two timeless favorites – the rich, fudgy delight of a brownie and the satisfying chewiness of a classic chocolate chip cookie – into a single, show-stopping treat. We’ve taken our most popular homemade brownie and chocolate chip cookie recipes, both adored by thousands of families for their consistent deliciousness, and meticulously layered them to create what we confidently call the best homemade brookies you’ll ever bake.
“These tasted great! I’ll definitely make them again!”
-Ally
The allure of dessert mashups is undeniable, and few combinations are as iconic and satisfying as the brookie. My journey to perfect this hybrid began with a simple question: how do you combine two already flawless recipes to create something even more extraordinary? With my go-to chocolate chip cookie recipe and decadent brownie recipe as the foundation, I embarked on extensive testing. Both recipes had already earned their stripes, celebrated by countless families for their consistent deliciousness and ease of preparation. The challenge was finding the optimal technique to layer these beloved textures and flavors, ensuring each bite delivered the best of both worlds – a harmonious blend of fudgy, chewy, and rich notes that captivate the senses.
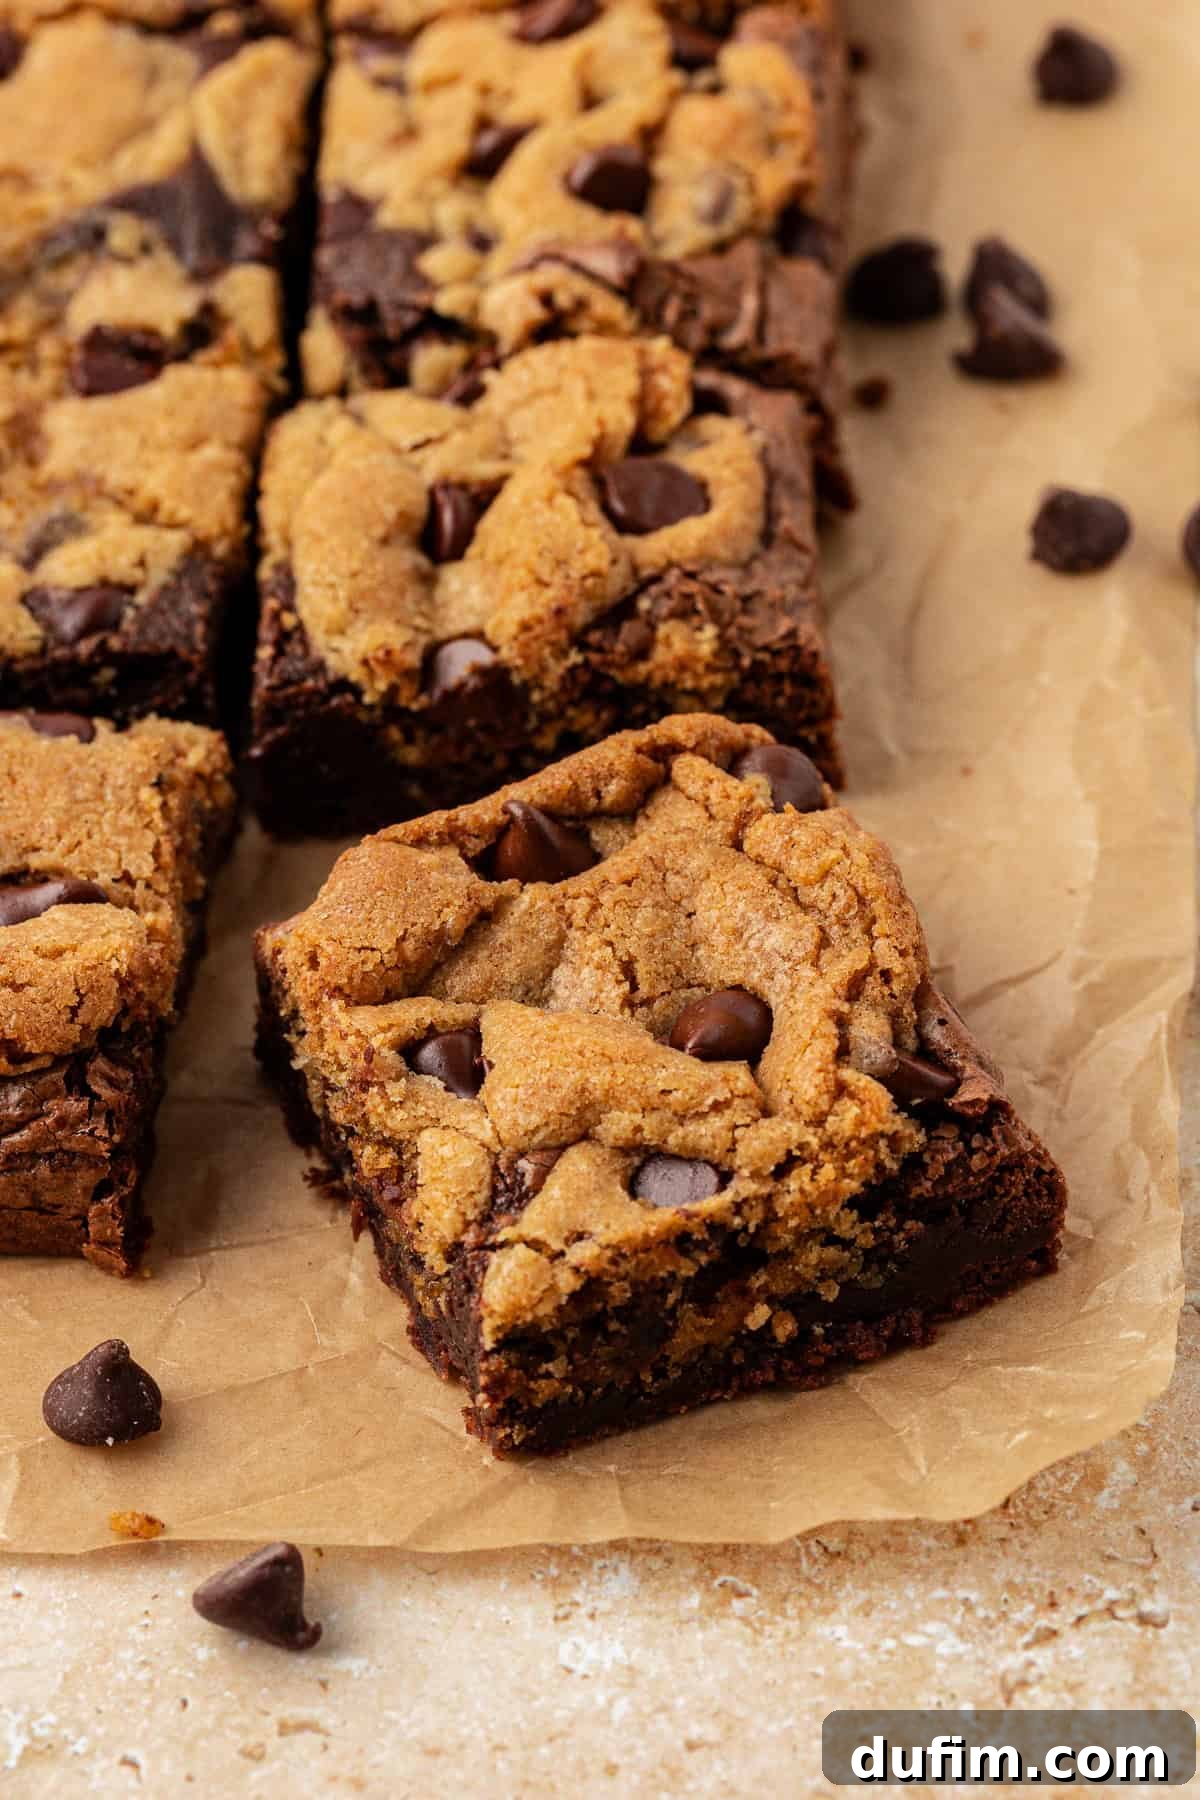
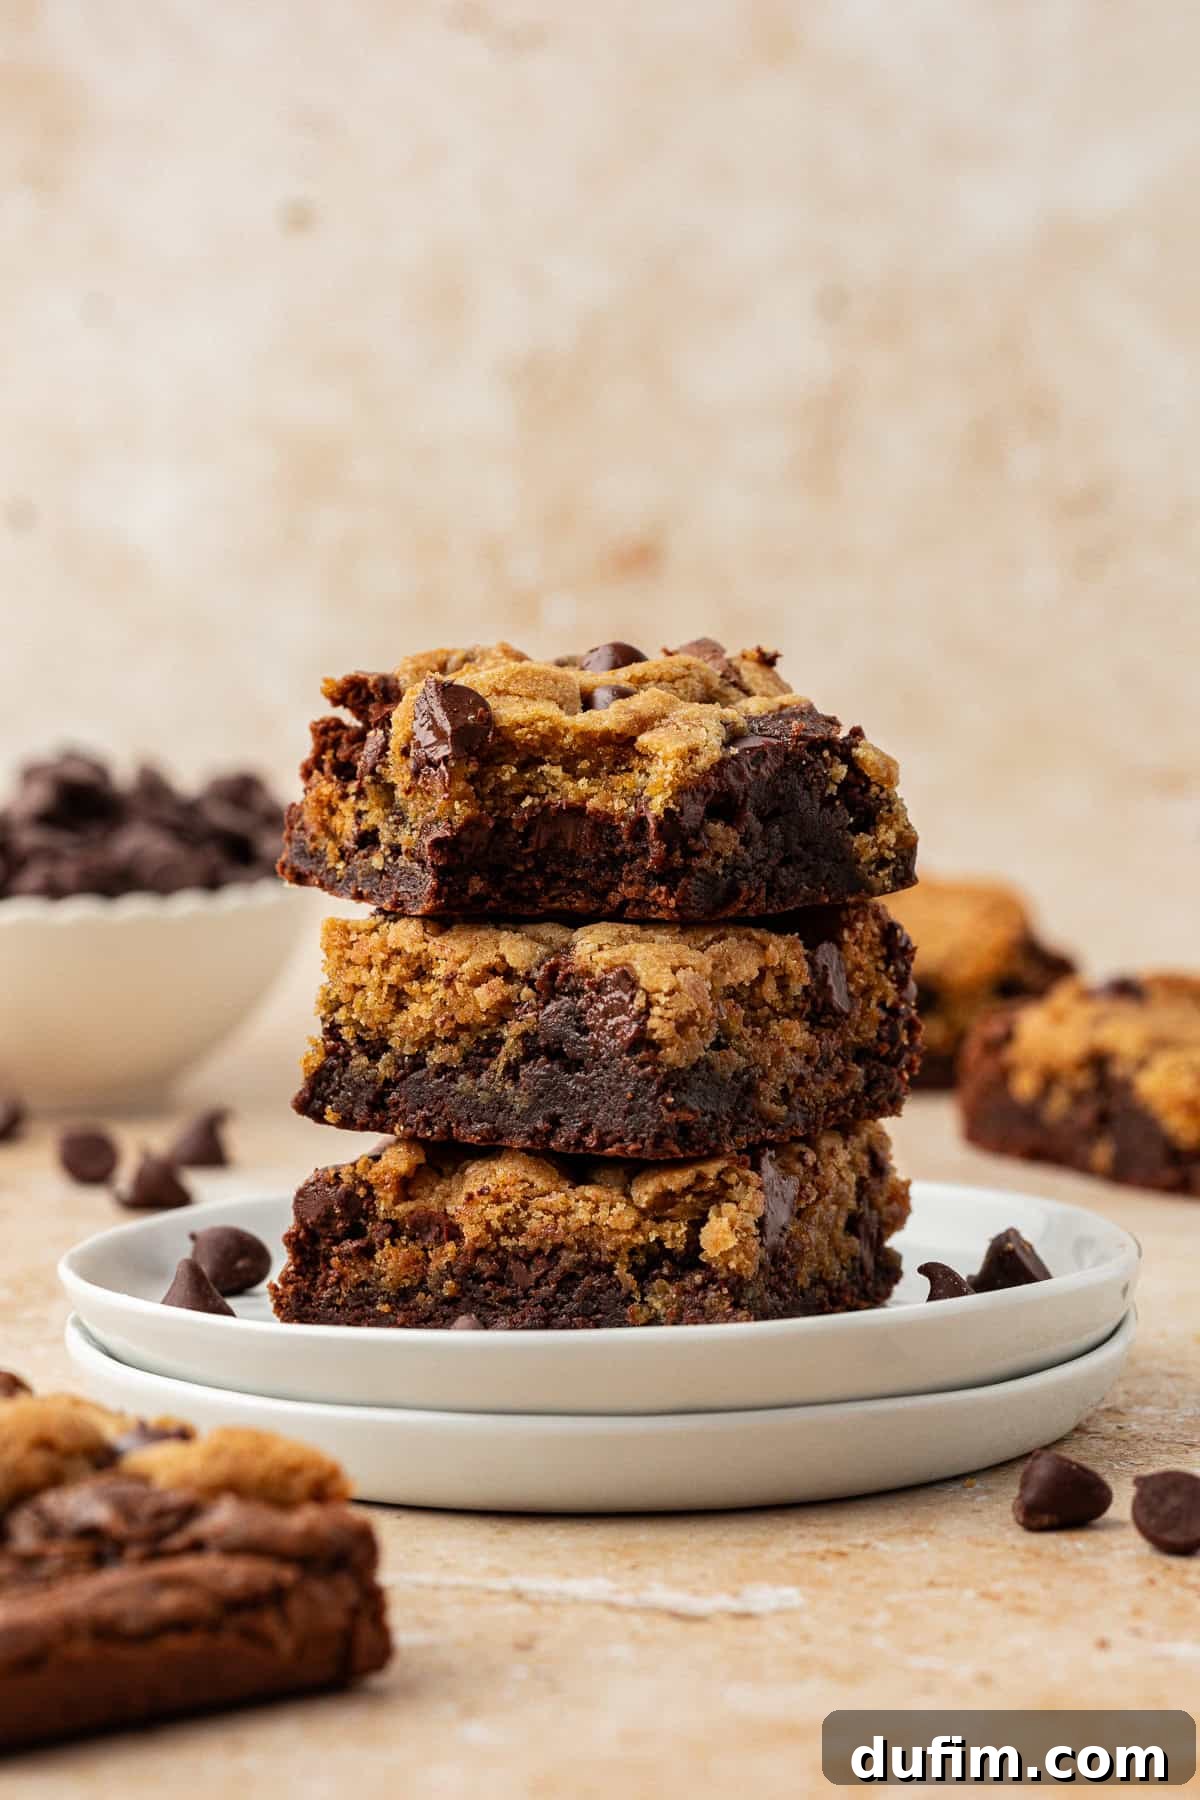
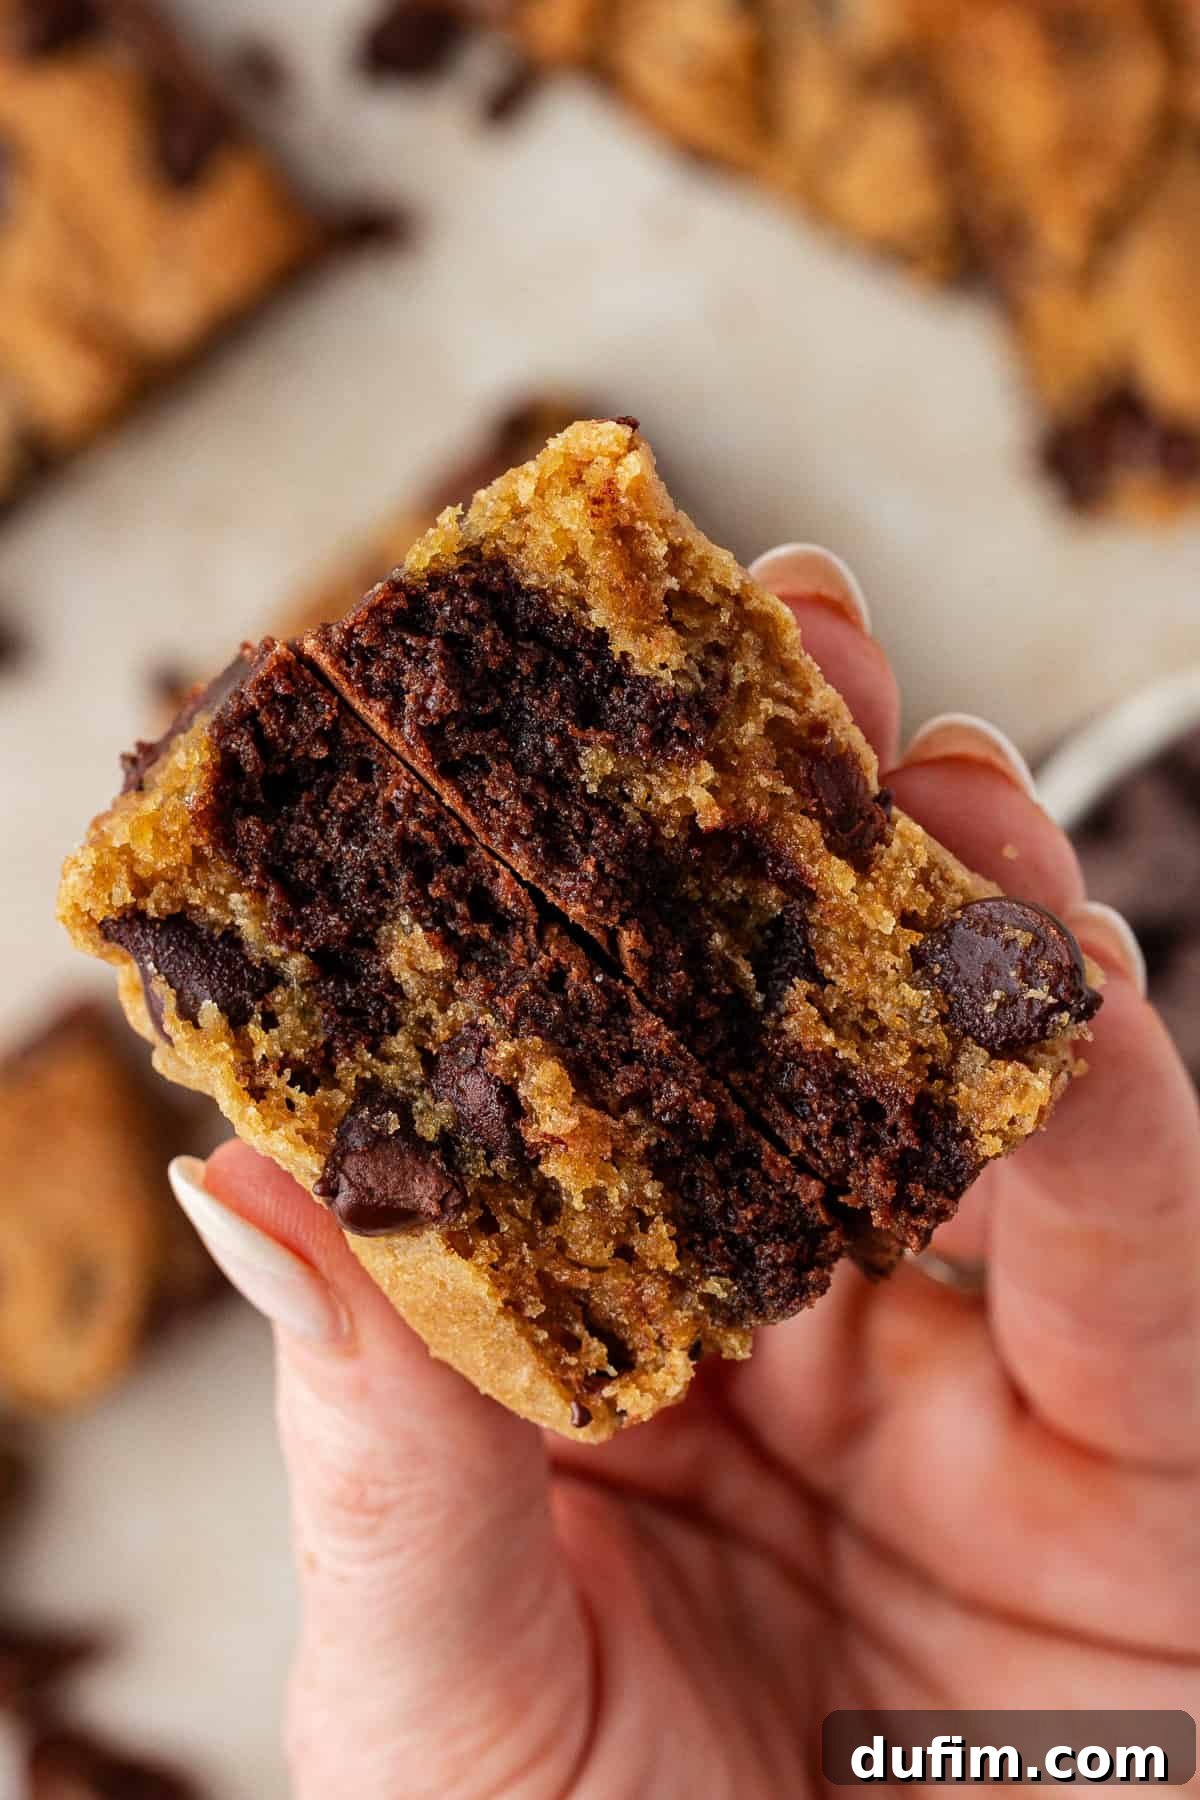
A truly exceptional brookie is defined by its distinct layers, offering a delightful contrast in every mouthful. During my recipe development, I experimented with two primary methods for combining the brownie and cookie layers: a swirling technique and a drop technique. The results were clear: the drop technique emerged as the undisputed winner. The swirling method, while visually appealing in theory, tended to obscure the individual cookie pieces, often integrating them too deeply into the brownie batter, leaving only a thin cookie layer visible on the surface. This often resulted in a less distinguishable texture between the two components. In contrast, the drop technique yielded beautifully defined cookie and brownie sections throughout the bar, creating an appealing “polka-dotted” appearance. More importantly, this method allowed for a superior tasting experience, letting you truly appreciate the unique fudginess of the brownie alongside the chewy, buttery goodness of the cookie, providing a delightful textural and flavor journey with every bite.
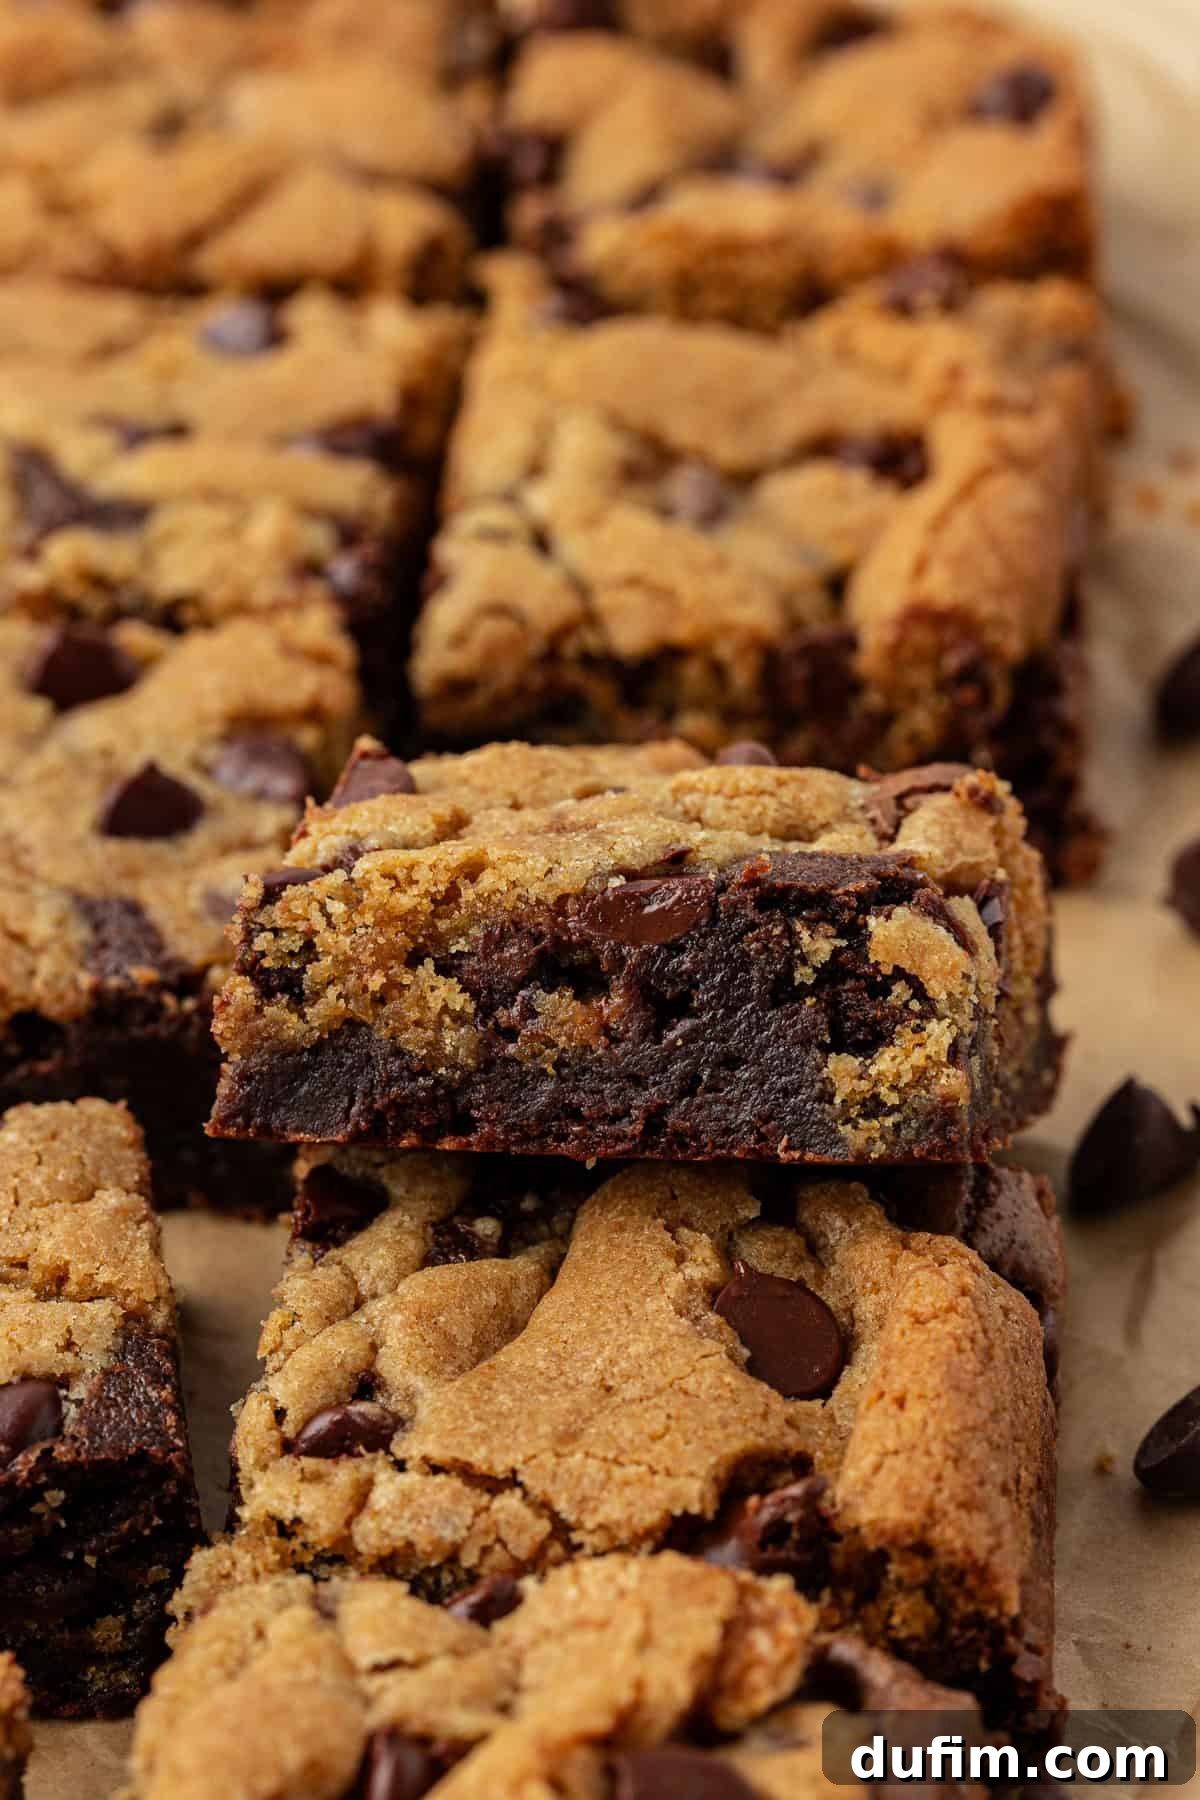
My commitment to recipe testing extends to every detail, right down to the baking vessel itself. I rigorously tested both metal and glass pans to determine which would produce the optimal brookie, focusing on even baking and desired texture. The metal pan proved to be the superior choice, consistently delivering brookies with a wonderfully chewier brownie layer and a more uniform bake throughout. Metal’s excellent heat conduction ensures that the heat is distributed evenly, allowing both layers to cook optimally without one part becoming overdone or underdone. Glass pans, while popular for some baked goods, tended to overcook the edges of the brookies while leaving the center excessively fudgy – a texture many love in a pure brownie, but less desirable when seeking the perfect balance and distinct layers in a brookie. The even heat distribution of the metal pan ensures that both the brownie and cookie layers achieve their ideal consistency, making for a truly spectacular bar.
Beyond the fundamental combination and pan choice, achieving brookie perfection involves a few key insights and techniques that can make all the difference. Keep reading to unlock all my best brookie baking tips, comprehensive guidance on how to properly store and freeze your delicious creations to enjoy them longer, and much more! Whether you’re a seasoned baker looking for new tricks or a curious beginner eager to try a show-stopping dessert, this guide will equip you with everything you need to bake the ultimate cookie brownies that will impress everyone.
What Exactly is a Brookie? The Ultimate Dessert Hybrid Explained
At its heart, a brookie is a glorious culinary innovation that marries the best characteristics of two universally beloved desserts: the classic fudgy brownie and the irresistible chocolate chip cookie. Far from just two separate treats baked side-by-side, a true brookie is a single bar dessert crafted by artfully layering rich brownie batter with sweet, chewy cookie dough, most commonly chocolate chip. The magic of a brookie lies in the delightful contrasting textures and complementary flavors that harmonize beautifully in every bite. Imagine sinking your teeth into a piece that offers the dense, intensely cocoa-rich fudginess of a perfectly baked brownie, immediately followed by the comforting, buttery sweetness, soft chew, and slight crispness of a warm chocolate chip cookie. It’s a symphony of dessert experiences, meticulously designed to satisfy every sweet craving in one deliciously convenient bar.
This ingenious combination isn’t just a fleeting trend; it’s a testament to the undeniable truth that some things are truly better together. The bottom brownie layer provides a moist, intensely chocolatey foundation, often with that coveted shiny, crinkly top and a satisfying chewiness. The top cookie layer, meanwhile, contributes a distinct flavor profile with notes of rich brown sugar, fragrant vanilla, and plenty of gooey, melted chocolate chips, along with its signature soft yet firm texture. When baked correctly, the layers remain beautifully distinct yet incredibly complementary, creating a mosaic of flavors and textures that makes the brookie a standout choice for potlucks, celebratory parties, bake sales, or simply a luxurious personal indulgence on a quiet evening. It’s a dessert that consistently brings smiles and earns rave reviews.
Essential Ingredients for Your Perfect Brookies
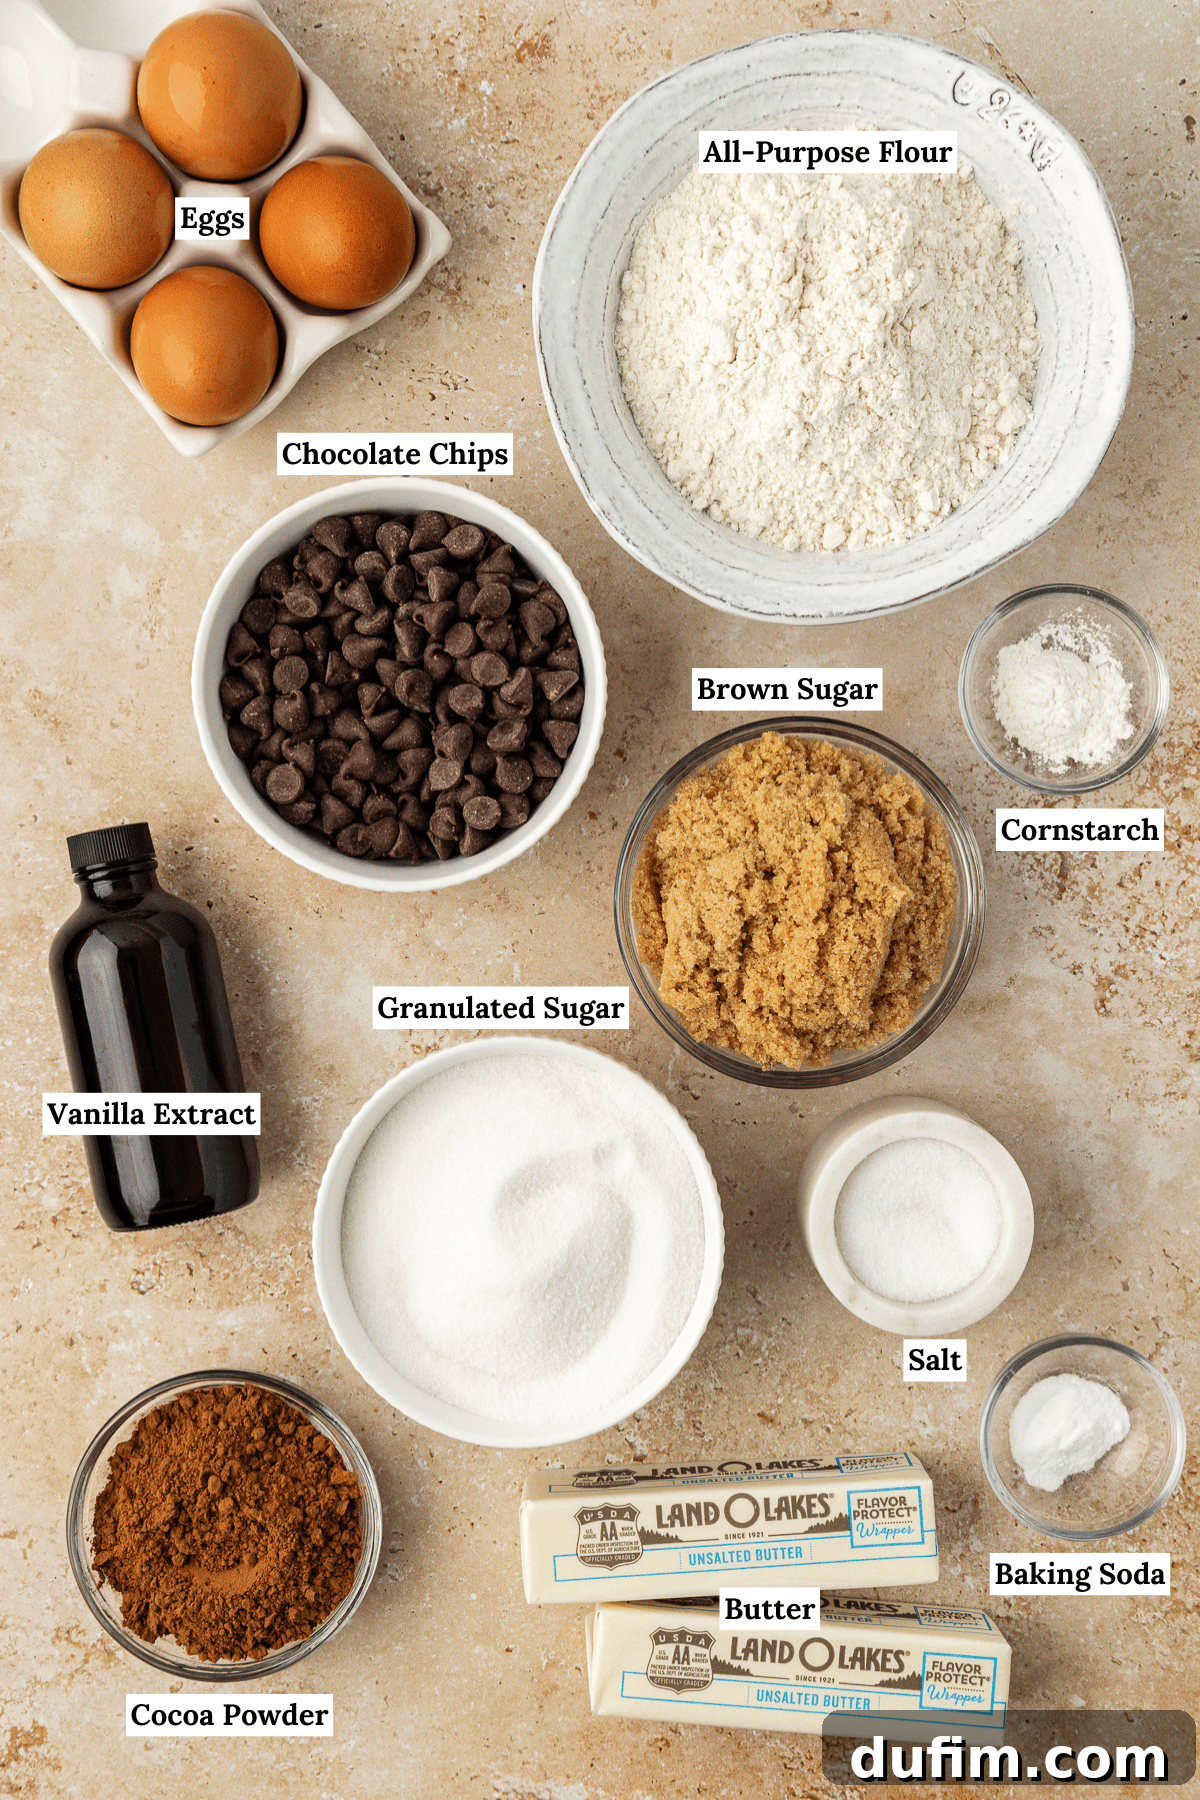
Crafting these delectable brookies requires only a handful of common pantry staples, making it an accessible and incredibly rewarding baking project for any home chef. With just about 20 minutes of active prep time, you can assemble a dessert that’s perfect for any occasion – from casual weeknight treats to festive holiday gatherings, impressive bake sales, or elegant dinner parties. The key to their incredible flavor and irresistible texture lies not only in the precise combination but also in understanding the role of each quality ingredient. Below is a detailed breakdown of the components required for both the rich, fudgy brownie base and the irresistible, chewy chocolate chip cookie topping. The full list with precise measurements and comprehensive, step-by-step instructions can be found in the recipe card at the very end of this article.
For the Decadent Brownie Layer:
- All-purpose flour: The structural backbone of our fudgy brownie, providing tender density without being cakey.
- Salt: A crucial flavor enhancer that balances the sweetness of the sugar and intensely deepens the chocolate flavor.
- Unsweetened natural cocoa powder: Delivers the deep, classic chocolate flavor and rich, dark color that defines a truly great brownie.
- Semi-sweet chocolate chips (or high-quality baking chocolate): Melted into the batter for an intense chocolatey goodness and to contribute to that signature fudgy texture.
- Unsalted butter: Contributes significant richness and moisture, and is essential for achieving the desired fudgy consistency.
- Granulated sugar: Sweetens the brownie to perfection and plays a vital role in creating that desirable shiny, crinkly top crust.
- Large eggs: Act as powerful binders, providing essential structure, and adding to the overall richness and moistness of the brownie.
- Extra large egg yolk: The secret weapon for an even more decadent texture! An additional yolk boosts richness, chewiness, and fudginess without adding excess liquid that could otherwise make the brownie cakey.
- Pure vanilla extract: A fundamental flavor enhancer that perfectly complements and elevates the deep chocolate notes, adding complexity.
For the Chewy Chocolate Chip Cookie Layer:
- All-purpose flour: Forms the robust base of the cookie dough, providing essential structure and body.
- Cornstarch: A secret ingredient for ultimate chewiness and a slightly softer crumb in your finished cookies, preventing them from becoming too crisp.
- Baking soda: The primary leavening agent that helps the cookies rise slightly, spread to a perfect thickness, and achieve a tender interior.
- Salt: Balances the sweetness of the sugars and highlights the complex, buttery flavors of the cookie dough.
- Semi-sweet chocolate chips: The undisputed star of the cookie layer, melting into gooey, irresistible pockets of chocolate throughout.
- Unsalted butter (room temperature): Absolutely crucial to be at room temperature for proper creaming with the sugars, contributing significantly to the cookie’s tender texture, spread, and rich flavor.
- Packed brown sugar: Adds vital moisture, a distinct caramel-like flavor, and contributes significantly to the cookie’s characteristic chewiness.
- Granulated sugar: Provides a crisp sweetness and helps achieve those slightly crispy edges that contrast beautifully with the chewy center.
- Large egg: Acts as a key binder, adds richness, and helps emulsify the dough, ensuring a well-structured and uniformly delicious cookie.
- Pure vanilla extract: Essential for enhancing all the other wonderful flavors in the cookie dough, adding warmth and depth.
How to Bake the Perfect Brookies: A Step-by-Step Guide for Success
Creating these irresistible brookie bars is simpler than you might think, especially when you follow these clear, easy-to-understand steps. Each instruction is designed to guide you towards dessert perfection, ensuring a fantastic outcome every single time. Remember, baking is a wonderful balance of precision and passion, so take your time, pay attention to the details, and most importantly, enjoy the process of bringing this incredible treat to life!
Crafting the Fudgy Brownie Layer:
- Prepare Oven and Pan: Begin by preheating your oven to 350º F (175º C). Accurate oven temperature is crucial for even baking. Next, generously line a 9×13 inch metal baking pan with aluminum foil or parchment paper. Make sure to leave an overhang on the sides; these will act as “handles” to make it incredibly easy to lift the entire batch of brookies out of the pan once baked and completely cooled, simplifying the slicing process significantly.
- Combine Dry Ingredients: In a medium mixing bowl, whisk together the all-purpose flour, salt, and unsweetened natural cocoa powder. Whisking ensures these dry ingredients are thoroughly combined and evenly distributed, preventing any pockets of flour or lumps in your final brownie batter. Set this perfectly blended mixture aside for later use.
- Melt Butter and Chocolate: In a small saucepan, gently combine and melt the semi-sweet chocolate chips and unsalted butter over very low heat. Stir continuously or at frequent intervals to prevent the chocolate from scorching. This delicate process should take approximately 5 minutes, resulting in a beautifully smooth, glossy, and uniform chocolate mixture. Once fully melted and combined, remove the saucepan from the heat and allow the mixture to cool slightly to avoid cooking the eggs later.
- Beat Sugar and Eggs for Volume: In a larger mixing bowl, combine the granulated sugar, two large eggs, and the additional egg yolk. Using an electric mixer (either stand or handheld), beat this mixture on medium-high speed for about 1 minute. You’re looking for a significant transformation here: the mixture should become noticeably pale yellow in color and double in volume, becoming light, airy, and ribbon-like. This aeration is key to achieving that desirable shiny, crinkly top on your brownies.
- Integrate Wet Ingredients: Once the melted chocolate and butter mixture has cooled slightly (it should be warm but not hot), slowly pour it into the beaten egg and sugar mixture. Add the vanilla extract. Mix on low speed with your electric mixer or gently fold by hand with a rubber spatula until just combined. It is vital not to overmix at this stage, as it can negatively impact the brownie’s texture.
- Gently Combine Wet and Dry: Gradually add the reserved dry flour mixture (from step 2) to the wet ingredients. Using a rubber spatula, gently fold the ingredients together until just combined. Stop mixing as soon as no dry streaks of flour are visible in the batter. Overmixing develops the gluten in the flour, which can lead to tough, dense, and cakey brownies rather than the rich, fudgy ones we’re aiming for.
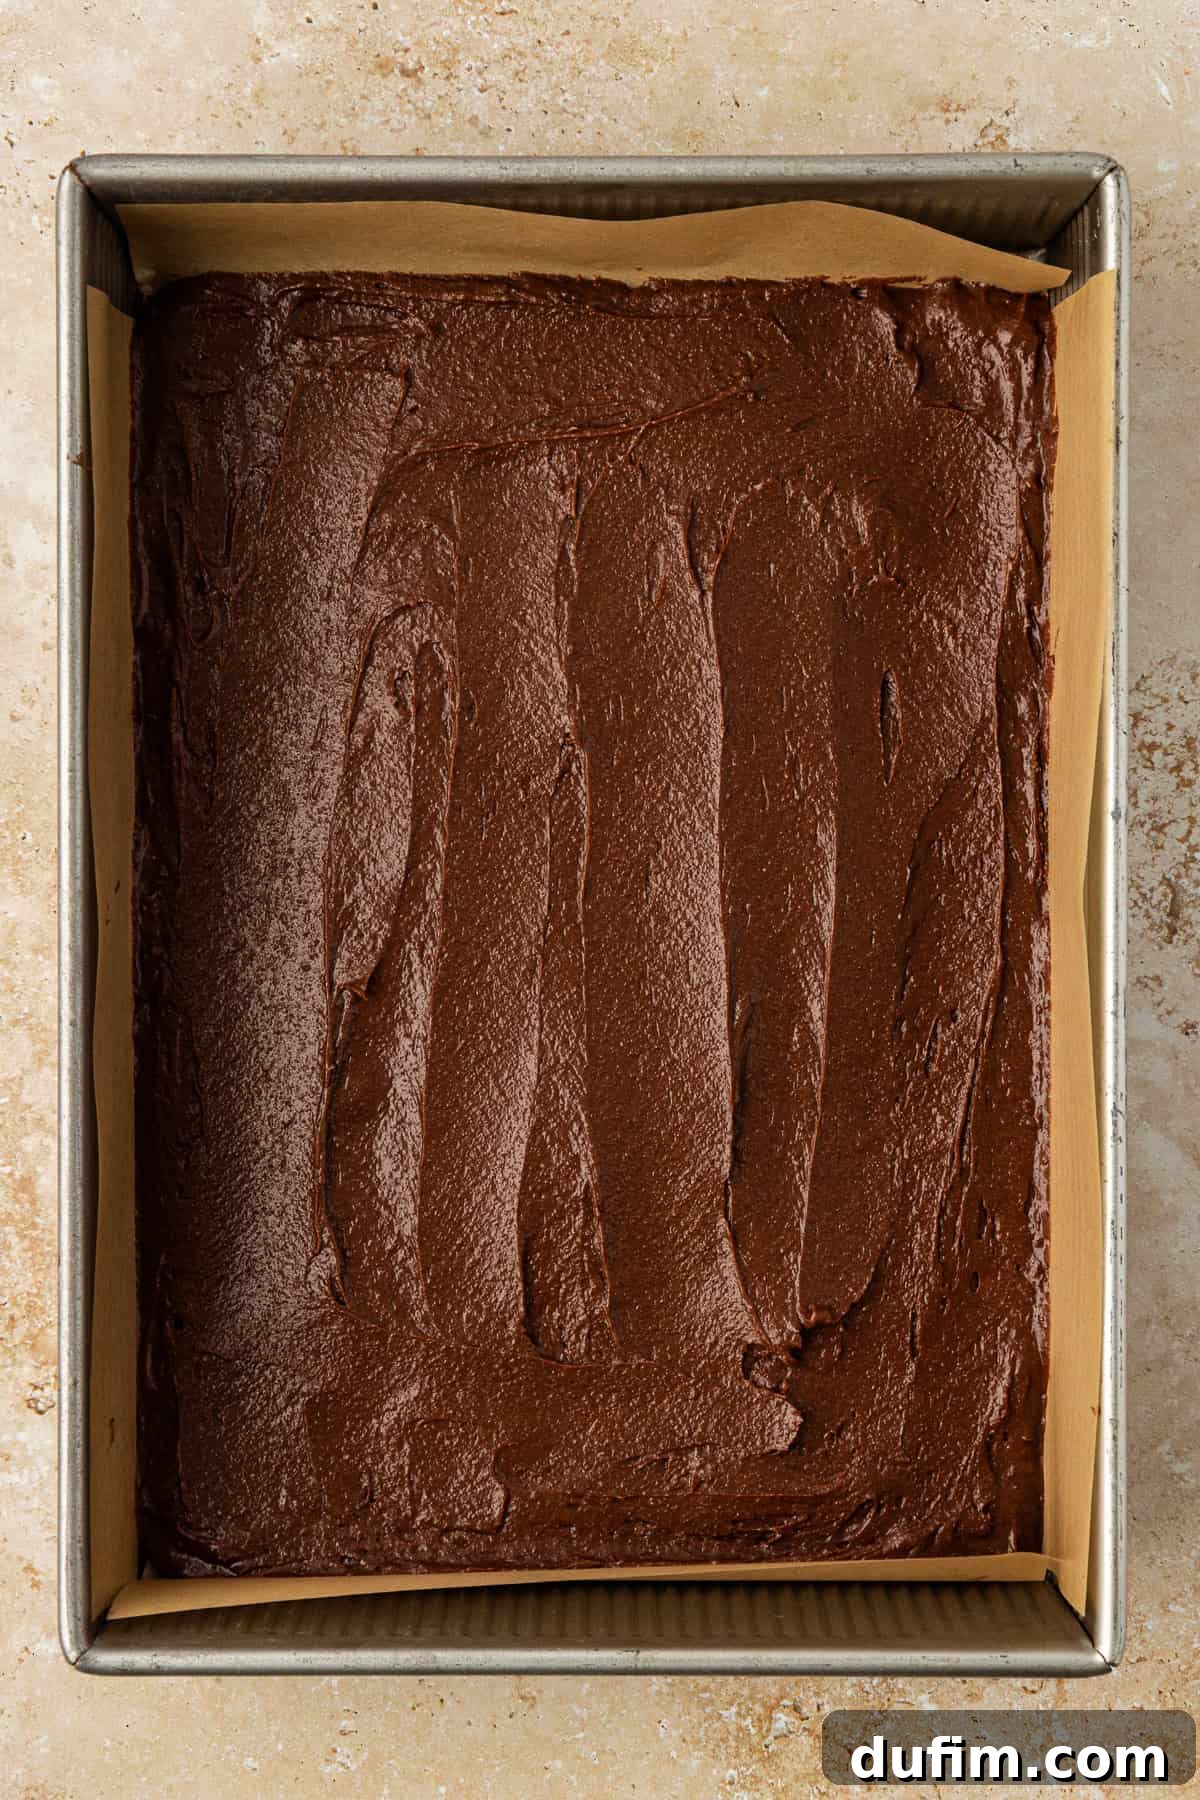
- Prepare the Brownie Base: Pour the luscious brownie batter evenly into the prepared 9×13 inch pan. Use your rubber spatula to spread it smoothly from edge to edge, ensuring a uniform base. Now, set this aside while you proceed to prepare the equally important and delicious chocolate chip cookie layer.
Crafting the Chewy Chocolate Chip Cookie Layer:
- Mix Dry Ingredients: In a separate medium bowl, combine the all-purpose flour, cornstarch, baking soda, and salt. Whisk these dry ingredients thoroughly to ensure the leavening agent and cornstarch are evenly distributed throughout. Then, stir in ½ cup of the semi-sweet chocolate chips. Set this dry mixture aside.
- Cream Butter and Sugars: In a large mixing bowl, combine the room temperature unsalted butter, packed brown sugar, and granulated sugar. Beat with an electric mixer on medium speed for about 1 minute, or until the mixture is light, fluffy, and visibly pale in color. This crucial creaming process incorporates essential air, which is vital for the cookie’s tender texture and proper spread during baking.
- Add Wet Ingredients: Beat in the large egg and vanilla extract for approximately 30 seconds, or until they are fully incorporated into the butter-sugar mixture. Remember to scrape down the sides of the bowl with a spatula to ensure everything is evenly mixed and no ingredients are left uncombined.
- Gradually Mix in Dry Ingredients: With your electric mixer on low speed, gradually add the reserved dry flour mixture (from step 1 of the cookie layer) into the wet ingredients. Mix just until a thick dough forms and no streaks of dry flour remain. The cookie dough will be quite thick and somewhat crumbly; this is the normal and desired consistency for perfectly chewy cookies.
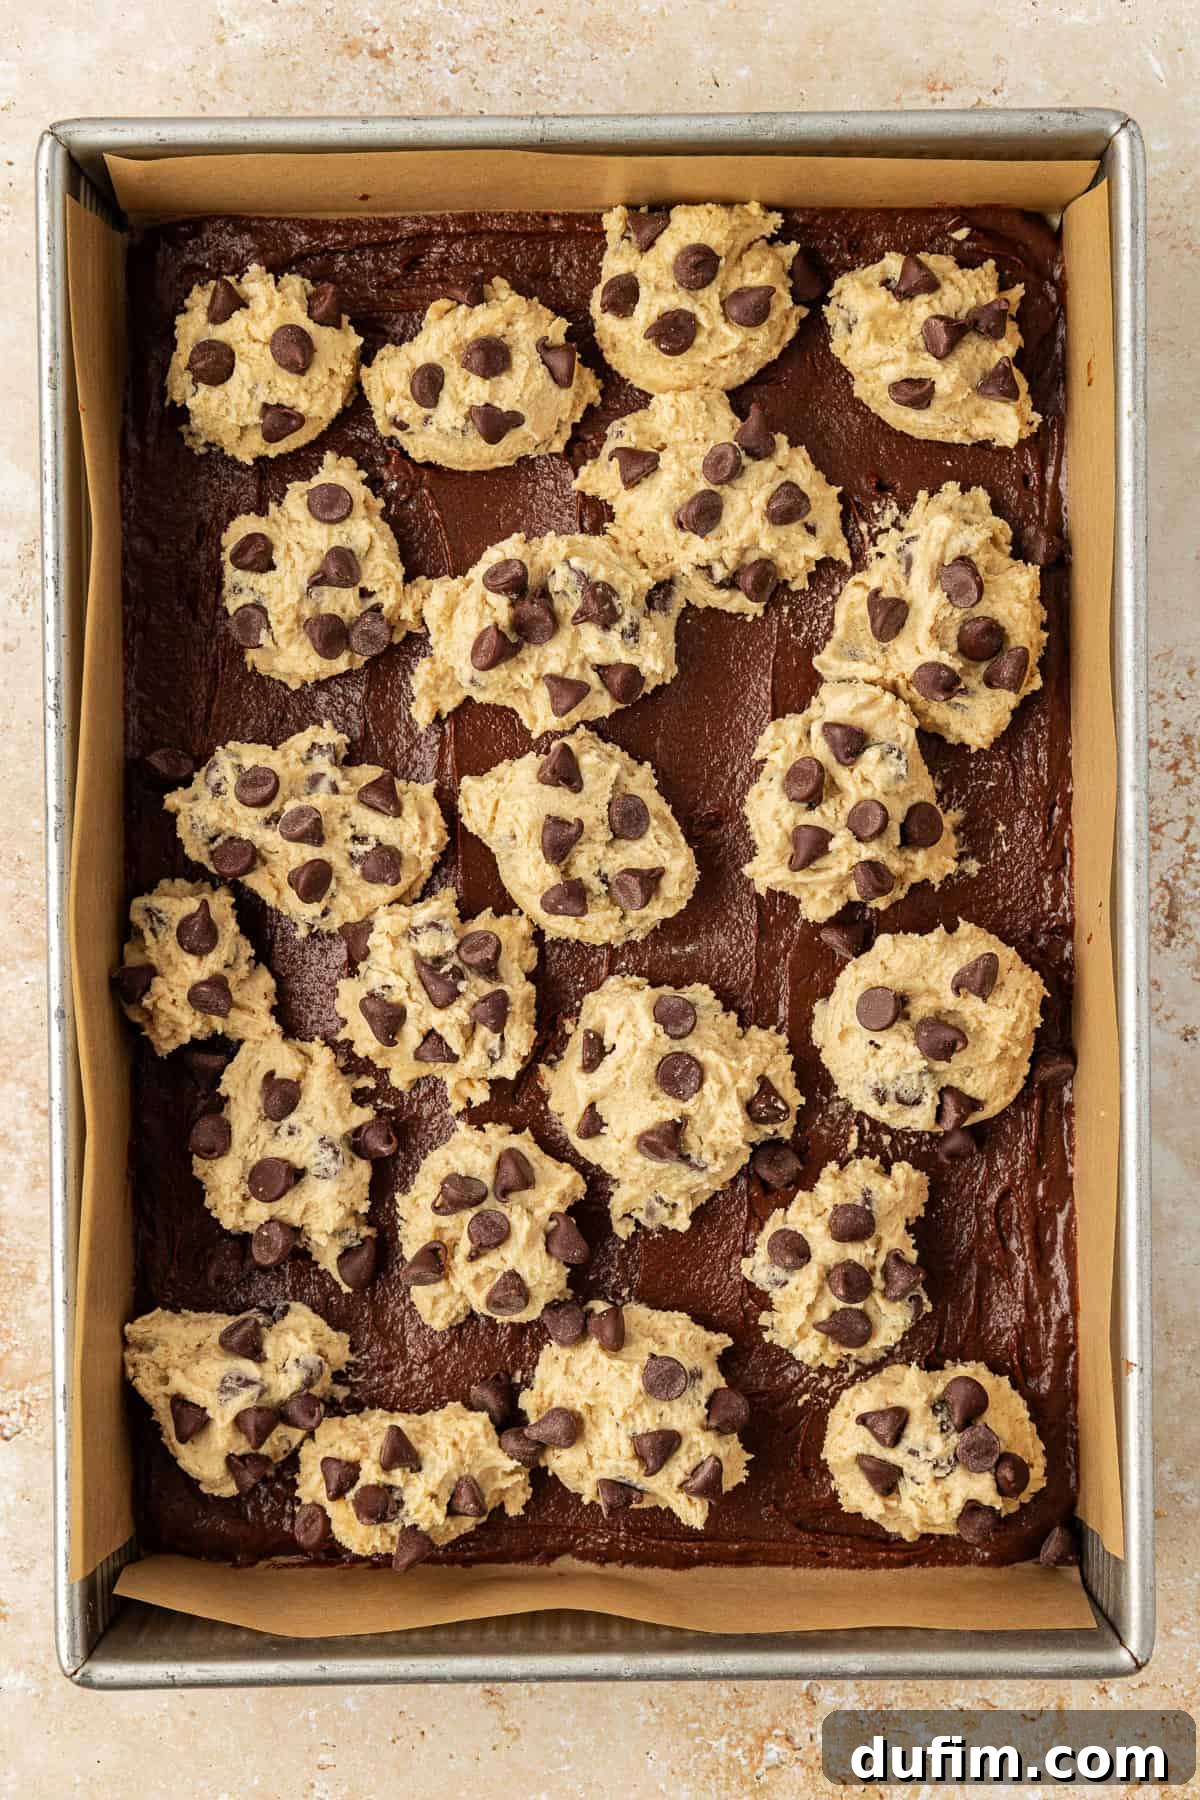
- Assemble and Top: Now for the layering! Take small dollops (about 1.5-2 tablespoons each) of the prepared chocolate chip cookie dough and evenly drop them over the brownie batter in the prepared pan. The goal is to have distinct cookie dough balls surrounded by the brownie batter, creating a visually appealing, somewhat “polka-dotted” effect. While a slight swirl might naturally occur, actively avoid fully swirling the layers together, as this diminishes the distinct texture contrast that makes brookies so special. During baking, the brownie batter will gently rise and envelop the cookie dough, creating a beautiful layered bar. Finally, for an extra touch of decadence and visual appeal, press the remaining ½ cup of chocolate chips onto the top of the cookie dough dollops before baking.
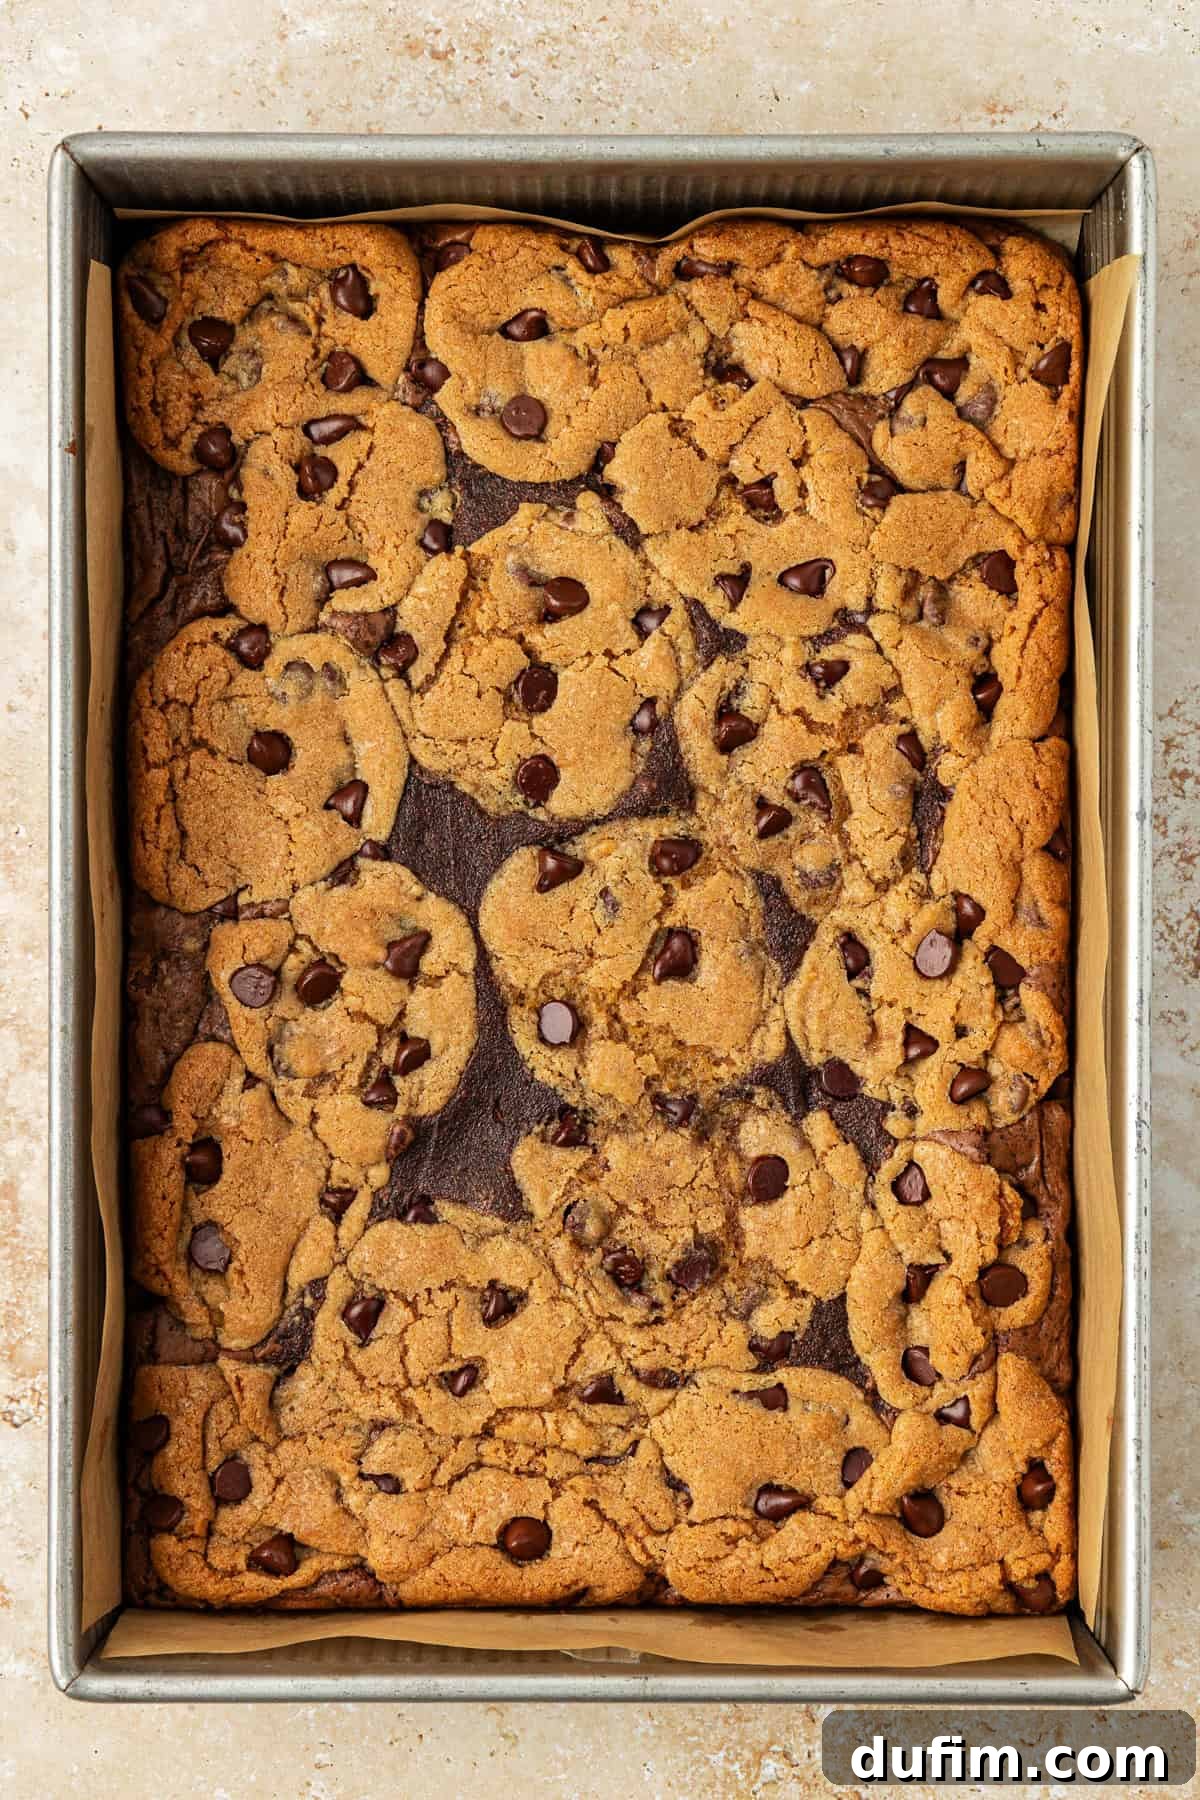
- Bake to Perfection: Carefully place the pan in your preheated 350ºF (175ºC) oven and bake for an initial 20 minutes. After this time, carefully remove the pan from the oven and loosely cover it with a large piece of aluminum foil. Return the pan to the oven and continue baking for an additional 15-25 minutes. The foil is crucial here: it acts as a shield, preventing the delicate cookie dough from becoming too brown or crispy while allowing the fudgy brownie layer to finish baking to its ideal perfection. The brookies are done when the cookie layer appears golden brown and a toothpick inserted into the brownie portion (make sure to avoid hitting a cookie dough dollop) comes out with moist crumbs attached, but not wet batter.
- Cool Completely: This step is often overlooked but is absolutely essential for achieving the best brookies – both in terms of texture and ease of cutting. Allow the brookies to cool completely in the pan on a wire rack for at least 2-3 hours, or even longer. This extended cooling period allows the layers to set properly, firming up the fudgy brownie and setting the chewy cookie, ensuring clean, neat slices and the ideal fudgy-chewy texture in every bar. Attempting to cut them warm will result in a messy, crumbly outcome.
Exciting Brookie Recipe Variations and Creative Customizations
While the classic chocolate chip cookie and fudgy brownie combination is undeniably spectacular and a crowd-pleaser, this brookie recipe offers a fantastic canvas for your culinary creativity. Don’t hesitate to experiment and personalize your batch with these delightful variations, tailoring them to your taste preferences or any special dietary needs:
- Gluten-Free Brookies: Adapting this recipe for gluten-free diets is surprisingly simple and yields equally delicious results. Just swap out the all-purpose flour for a high-quality gluten-free all-purpose baking blend. I highly recommend King Arthur’s Measure-for-Measure flour, which is specifically designed to be a direct 1:1 substitute in most recipes without needing additional adjustments. Always check the specific blend’s recommendations.
- Creative Mix-ins: Elevate your brookies by incorporating your favorite mix-ins into either the brownie or cookie layer, or both! Consider adding a handful of chopped walnuts or pecans for a delightful nutty crunch and earthy flavor. Shredded coconut can offer a tropical twist, while vibrant sprinkles can add a fun, festive touch for birthdays or celebrations. For a truly indulgent experience, mini marshmallows swirled into the brownie layer can create a s’mores-like effect when baked!
- Alternative Chocolate and Flavor Swaps: The possibilities are endless when it comes to chocolate and flavor profiles. Instead of semi-sweet chocolate chips, try rich dark chocolate chips for an even more intense, less sweet chocolate experience, or creamy white chocolate chips for a sweeter, contrasting note. You could even use a combination of different chocolate types for a dynamic flavor. For a truly unique twist, consider swapping the traditional cocoa-based brownie layer for a blondie layer, which offers a buttery, rich vanilla, and often caramel-like flavor profile. Or, dare to combine both: a blondie base with a different flavored cookie dough on top for a multi-faceted treat!
- Different Cookie Doughs: Why stick to just chocolate chip? This recipe is flexible enough to accommodate various cookie doughs. Imagine a peanut butter cookie layer for a nutty contrast, an oatmeal raisin cookie layer for a chewier, spiced profile, or even a simple sugar cookie layer for pure, buttery sweetness. When choosing an alternative, ensure the consistency of your chosen cookie dough is firm enough to be dropped in dollops without completely blending into the brownie batter. You may need to chill softer doughs.
- Seasonal Additions: Tailor your brookies to the season! In the fall, pumpkin spice chips, a hint of cinnamon, or a swirl of pumpkin puree in the cookie layer would be delightful. For the winter holidays, peppermint chips or crushed candy canes could add a festive sparkle and cooling kick. In summer, try adding lemon zest to the cookie dough for a bright twist.
Expert Tips for Baking the BEST Cookie Brownies (Brookies)
Achieving brookie perfection involves more than just mixing ingredients; it requires a few tried-and-true techniques and insights that can significantly elevate your baking results. Follow these expert tips for cookie brownies that are consistently chewy, intensely fudgy, and utterly delicious, earning you rave reviews every time:
- Mastering the Two-Stage Baking Process: For that ideal balance of a fudgy, moist brownie and a perfectly cooked, chewy cookie layer, our two-stage baking method is absolutely crucial. Start by baking your brookies at 350ºF (175ºC) for an initial 20 minutes. This allows the brownie base to begin setting and developing its structure. Then, carefully remove the pan from the oven and loosely cover it with aluminum foil for an additional 15-25 minutes of baking. This protective foil is the key; it prevents the delicate cookie layer from over-browning or drying out, ensuring it remains wonderfully golden and chewy while the brownie finishes baking through to its fudgy perfection.
- Choose Your Pan Wisely – Metal is Paramount: As proven during our extensive recipe testing, a metal baking pan is your best friend for baking brookies. Metal pans conduct heat more efficiently and evenly than glass, which results in a consistently chewier brownie layer and a more uniform bake across the entire bar. Glass pans, while common for some casseroles, tend to cook the edges faster and can leave the center of the brownies undercooked and overly fudgy (and often gummy, not in a good way for brookies!), or alternatively, dry out the edges before the center is done. For optimal texture and doneness, always opt for a metal pan.
- Cream Butter and Sugar Thoroughly for Cookie Perfection: For chocolate chip cookies that are glossy, wonderfully chewy, and tender, do not skimp on the creaming process for the cookie dough. Beat the room temperature butter and sugars together until the mixture is light, fluffy, and noticeably pale in color. This crucial step incorporates essential air into the mixture, which contributes significantly to the cookie’s final texture and prevents a dense, leaden result.
- Room Temperature Butter is Non-Negotiable: This seems like a simple detail, but it is a critical one often overlooked, especially for the cookie layer. Ensure your unsalted butter for both layers is genuinely at room temperature – soft enough to make a slight indentation with your finger without resistance, but not melted or greasy. Cold butter won’t cream properly, leading to a denser cookie, while melted butter will yield a greasy, flat cookie. Plan ahead and take your butter out of the fridge at least an hour or two before you intend to start baking.
- Do Not Overmix the Brownie Batter: Once you’ve added the dry ingredients to the wet components of the brownie batter, mix just until no visible streaks of flour remain. Overmixing vigorously or for too long develops the gluten in the flour, which can lead to a tough, dense, and cake-like brownie texture instead of the desired rich, fudgy one. A light hand with a rubber spatula, folding gently, is all you need for the perfect fudgy brownie base.
- Patience is a Virtue: Cool Completely Before Slicing: This step is paramount for both aesthetics and texture, but it’s incredibly tempting to skip! It’s difficult to resist slicing into warm brookies, but resist the urge at all costs. Allowing the brookies to cool completely in the pan – ideally on a wire rack for several hours – is absolutely essential. As they cool, the layers firm up and set properly, making them much easier to cut into clean, neat bars. Warm brookies are prone to crumbling, smudging the distinct layers, and can be quite messy to handle.
- Don’t Skimp on Quality Chocolate: Since chocolate is a star ingredient in both the brownie and cookie layers, using good quality semi-sweet chocolate chips (or finely chopped baking chocolate) will make a noticeable difference in the overall depth of flavor and enjoyment of your brookies. Better chocolate melts smoother and tastes richer.
Storing and Freezing Brookies for Lasting Freshness
Once you’ve baked a delicious batch of these glorious brookies, you’ll want to ensure they stay fresh, moist, and utterly delicious for as long as possible. Proper storage is absolutely key to preserving their wonderful dual texture and rich flavor. Here’s how to keep your brookies at their absolute best, whether for immediate enjoyment or saving for a future craving:
Room Temperature Storage: For immediate enjoyment and up to a week of freshness, brookies can be stored effectively at room temperature for 5-7 days. The most important factor here is an airtight container. Placing them in a sealed container prevents them from drying out and helps maintain their soft, fudgy brownie layer and chewy cookie top. If stacking multiple bars, you might consider placing a small piece of parchment paper between layers to prevent them from sticking. Always keep them away from direct sunlight or any heat sources, which can alter their texture and freshness.
Freezing Brookies for Longer Enjoyment: Brookies freeze exceptionally well, making them perfect for meal prepping desserts, preparing for future events, or simply saving some for a rainy day craving. You can freeze them for up to 3 months without compromising their quality, texture, or delicious flavor. To freeze your brookies effectively, follow these steps:
- Cool Completely: This first step is crucial. Ensure your brookies are completely cooled to room temperature before attempting to freeze them. Freezing warm items can create undesirable condensation inside the packaging, which can lead to ice crystals forming and ultimately result in freezer burn, affecting the taste and texture.
- Pre-slice (Optional but Highly Recommended): For maximum convenience, you can slice the brookies into individual bars before freezing. This thoughtful preparation allows you to thaw only what you need at a time, preventing unnecessary waste and making portion control easier.
- Prevent Sticking: If you plan to freeze multiple layers of brookies in one container, place a small piece of parchment paper or wax paper between each layer. This simple trick prevents the bars from sticking together, allowing for easy separation without damage once frozen.
- Airtight Packaging: Place the cooled and optionally sliced brookies in an airtight freezer-safe container. Alternatively, you can use heavy-duty freezer-safe bags. If using bags, gently squeeze out as much air as possible before sealing to create a vacuum effect, which is highly effective in preventing freezer burn and preserving freshness.
- Thawing and Reheating: When you’re ready to enjoy a frozen brookie, simply remove it from the freezer and let it thaw at room temperature for a few hours. For a warm, gooey treat that tastes freshly baked, you can also gently reheat individual bars in the microwave for 10-20 seconds (depending on your microwave’s power) or in a low oven (around 250°F / 120°C) for 5-10 minutes. The warmed chocolate chips will be wonderfully melted!
Cookie Brownie FAQs: Your Most Common Questions Answered
While both blondies and brookies are incredibly delicious bar desserts, they are distinctly different in their core ingredients and flavor profiles. A blondie, often referred to as a “blonde brownie,” is similar in texture to a traditional brownie but lacks the cocoa. Its flavor profile is typically rich with vanilla, brown sugar, and butter, often reminiscent of caramel and butterscotch. A brookie, on the other hand, is a specific layered bar dessert that strategically combines a fudgy, chocolate-rich brownie layer on the bottom with a sweet, chewy chocolate chip cookie layer on top, offering a unique dual flavor and texture experience that truly stands out.
A brookie delivers a truly delightful mashup of classic, comforting flavors. From the bottom layer, you’ll experience the rich, intense chocolate notes and dense fudginess that characterize a traditional brownie. This is perfectly complemented by the sweet, buttery, and vanilla-infused chewiness of a classic chocolate chip cookie from the top layer. The combination creates a complex yet harmonious sweet treat that is deeply satisfying, utterly addictive, and offers a wonderful contrast in every bite.
Knowing when your brookies are done requires paying close attention to the cookie layer. The top chocolate chip cookie layer should appear beautifully golden brown and look set, with the edges slightly crisper. While the center may still seem slightly soft or even appear a little underbaked when you first pull the pan from the oven, resist the urge to bake longer! Brookies, much like pure brownies and cookies, continue to cook and set as they cool. The internal fudgy brownie will firm up to that perfect, desired texture upon cooling. So, trust the golden-brown indicator on the cookie top, and let cooling do its magic.
Yes, you absolutely can! While this recipe provides a fantastic homemade chocolate chip cookie dough that is highly recommended for optimal flavor and texture, using store-bought cookie dough is a perfectly acceptable and great time-saver, especially when you’re short on time. Simply press the store-bought dough into small dollops or sections and strategically drop them over your homemade brownie batter as instructed. This clever shortcut makes brookies even quicker and easier to assemble, perfect for when you need a delicious dessert in a pinch without sacrificing the fun concept or impressive appearance.
“Great recipe!!! I had some cookie dough leftover so I made 6 cookies and the texture was AMAZING!!! This is going to be my go to chocolate chip cookie recipe!!!”
-Priscilla
Explore More Delicious Bar Recipes from Our Collection
If you’ve fallen in love with the irresistible ease and deliciousness of bar desserts like our brookies, you’re in for a treat! The world of bar recipes is vast and full of delightful variations, perfect for sharing or savoring yourself. Here are some other fantastic bar recipes from our cherished collection that are sure to become new family favorites and crowd-pleasers:
- Zingy and Refreshing Key Lime Bars
- Decadent and Comforting Banana Pudding Brownies
- Classic and Moist Banana Brownies
- Irresistible and Nutty Pecan Pie Brownies
Readers love this recipe!
The Ultimate Cookie Brownie Recipe (Brookies)
Beth
20
40
20 bars
Pin Recipe
Equipment Needed
-
Large Mixing Bowl (Glass or Metal)
-
Electric Mixer (Stand or Handheld)
-
Kitchen Scale (Recommended for accuracy)
-
Rubber Spatula
-
9×13 Inch Metal Baking Pan
-
Small Saucepan
-
Wire Cooling Rack
Ingredients for Ultimate Brookies
For the Rich Brownie Layer:
- ¾ cup (90g) all-purpose flour
- ½ tsp salt
- ⅓ cup (28g) unsweetened natural cocoa powder
- ¼ cup (43g) semi-sweet chocolate chips, or 2 oz baking chocolate, for melting
- ½ cup (113g) unsalted butter, 1 stick
- 1 ¼ cups (248g) granulated sugar
- 2 large eggs
- 1 large egg yolk
- 1 tsp vanilla extract
For the Chewy Chocolate Chip Cookie Layer:
- 1 ½ cups (180g) all-purpose flour
- 1 tsp cornstarch
- ½ tsp baking soda
- ¼ tsp salt
- 1 cup (170g) semi-sweet chocolate chips, ½ cup for mixing, ½ cup for topping
- ½ cup (113g) unsalted butter, room temperature
- ¾ cup (160g) packed brown sugar
- ¼ cup (50g) granulated sugar
- 1 large egg
- 1 tsp vanilla extract
Detailed Instructions for Baking Brookies
For the Fudgy Brownie Layer:
-
1. Preheat your oven to 350º F (175º C). Line a 9×13 inch metal baking pan with aluminum foil or parchment paper, ensuring a generous overhang on the sides for easy removal of the baked bars.
-
2. In a medium mixing bowl, combine the all-purpose flour, salt, and unsweetened natural cocoa powder. Whisk these dry ingredients together thoroughly to ensure even distribution and prevent lumps. Set this mixture aside.
-
3. In a small saucepan, combine the ¼ cup (43g) semi-sweet chocolate chips and ½ cup (113g) unsalted butter. Melt over low heat, stirring occasionally, until the mixture is smooth and fully combined (this typically takes about 5 minutes). Remove from heat and allow to cool slightly.
-
4. In a larger mixing bowl, using an electric mixer, beat the 1 ¼ cups (248g) granulated sugar, 2 large eggs, and 1 large egg yolk for 1 minute. The mixture should become pale yellow in color and significantly increase in volume, becoming light and airy.
-
5. Carefully pour the slightly cooled melted chocolate mixture into the beaten egg mixture. Add 1 tsp vanilla extract. Mix on low speed or fold gently with a spatula until just combined. Avoid overmixing.
-
6. Gradually spoon the reserved dry flour mixture into the wet ingredients. Fold gently with a rubber spatula until just combined. Stop mixing as soon as no dry streaks of flour are visible, to ensure a fudgy texture.
-
7. Pour the prepared brownie batter evenly into your prepared 9×13 inch pan. Use a spatula to spread it smoothly to form the base layer. Set aside and proceed to make the chocolate chip cookie layer.
For the Chewy Chocolate Chip Cookie Layer:
-
1. In a separate medium bowl, combine the 1 ½ cups (180g) all-purpose flour, 1 tsp cornstarch, ½ tsp baking soda, and ¼ tsp salt. Stir in ½ cup of the semi-sweet chocolate chips. Set aside.
-
2. In a larger mixing bowl, cream together the ½ cup (113g) room temperature unsalted butter, ¾ cup (160g) packed brown sugar, and ¼ cup (50g) granulated sugar using an electric mixer. Beat on medium speed for 1 minute until the mixture is light, fluffy, and pale in color.
-
3. Add in the 1 large egg and 1 tsp vanilla extract, beating for 30 seconds until fully incorporated. Scrape down the sides of the bowl to ensure everything is well combined.
-
4. Gradually mix in the reserved dry ingredients from step 1 (of the cookie layer) on low speed until a thick dough forms and no dry streaks remain. The dough will be quite thick.
-
5. Drop dollops of the prepared cookie dough evenly over the brownie batter in the pan. Aim for distinct mounds rather than a continuous layer or full swirl. This creates the appealing “polka-dotted” look and distinct layers. Press the remaining ½ cup of chocolate chips onto the top of the cookie dough dollops for extra chocolate.
-
6. Bake in the preheated oven at 350ºF (175º C) for 20 minutes. Then, carefully cover the pan loosely with a large piece of aluminum foil and continue baking for an additional 15-25 minutes. The foil is essential to prevent the cookie dough from over-browning while the brownie finishes cooking. The brookies are done when the cookie top is golden brown and a toothpick inserted into the brownie portion (avoiding cookie dough) comes out with moist crumbs attached.
-
7. Allow the brookies to cool completely in the pan on a wire rack for several hours before lifting out using the foil handles and slicing into bars. This is crucial for clean cuts and optimal fudgy and chewy texture.
Recipe Notes for Best Results
Ensure all your wet ingredients, especially butter and eggs, are at room temperature for optimal emulsion and texture in both the brownie and cookie layers. This is a common but crucial baking tip.
Do not overmix either batter once the flour is added. Overmixing develops gluten, which can lead to a tough and undesirable texture. Mix only until just combined to keep your brookies tender and delicious.
Nutrition Information (Approximate per Serving)
Calories: 305 kcal |
Carbohydrates: 41 g |
Protein: 4 g |
Fat: 15 g |
Saturated Fat: 9 g |
Polyunsaturated Fat: 1 g |
Monounsaturated Fat: 4 g |
Trans Fat: 0.4 g |
Cholesterol: 62 mg |
Sodium: 131 mg |
Potassium: 127 mg |
Fiber: 2 g |
Sugar: 27 g |
Vitamin A: 342 IU |
Calcium: 26 mg |
Iron: 2 mg
Nutrition Disclosure
All nutritional values provided are approximate estimations and are offered to the reader as a courtesy. Please be aware that altering ingredients, their brands, or their quantities will inevitably change the estimated nutritional calculations. This information is not intended as medical or dietary advice; consult a professional for personalized guidance.
Love this recipe? Please consider leaving a rating and comment below!
Your feedback not only helps us but also inspires other enthusiastic bakers in our community!