

The Ultimate Guide to Baking Perfect Lemon Scones: Tall, Flaky & Bursting with Flavor
Welcome to the ultimate guide for baking lemon scones that aren’t just good, but truly exceptional. This recipe is the culmination of weeks of dedicated testing and refinement, built upon the rock-solid foundation of my master scone recipe. I meticulously experimented with every variable: from the ideal flour ratios to the perfect balance between buttermilk and sour cream, and whether one egg or two yielded the best results. My quest wasn’t merely to create a decent scone; I was determined to achieve those coveted tall, bakery-style scones with a melt-in-your-mouth texture and a vibrant, fresh flavor that awakens the senses.
In this comprehensive guide, I’m sharing all my best tips and tricks, including why cold butter and freezing the dough are absolutely non-negotiable for achieving scone perfection. These lemon scones promise to be tender, delightfully flaky, and bursting with zesty citrus flavor in every bite. Whether you’re a seasoned baker or just starting your scone journey, I’m here to walk you through every step, ensuring your success and delight.

Baking Easy Lemon Scones from Scratch: A Journey to Scone Perfection
Scones often carry a bit of a daunting reputation. Perhaps you’ve encountered ones that were notoriously dry, crumbly, or disappointingly flat, resembling pancakes more than the tall, majestic pastries they should be. Or maybe you’ve shied away from baking them altogether, intimidated by the perceived fussiness or the fear of a botched batch. Trust me, I’ve been there. This understanding is precisely why I poured so much time and effort into developing a scone recipe that truly works, consistently delivering spectacular results even for absolute beginners.
My extensive testing phase left no stone unturned. I explored the precise quantity of flour needed to accommodate the added liquid from fresh lemon juice, debated the merits of buttermilk versus sour cream for the most tender crumb, pinpointed the ideal number of eggs for richness, and perfected the art of shaping and chilling the dough for maximum rise. I wouldn’t rest until I achieved a scone that was not only tall, beautifully golden, and wonderfully flaky but also deeply flavorful—never dry, bland, or flat. This wasn’t just about a recipe; it was about creating a foolproof method.

One of the most common anxieties bakers face with scones is the dreaded spreading in the oven, leading to misshapen pastries. I’ve tackled this challenge head-on with critical steps that ensure your scones maintain their magnificent shape and achieve that desired height. This recipe prominently features the indispensable techniques of using intensely cold butter and freezing the scones before they ever hit the oven. These steps are crucial for locking in their structure and guaranteeing a beautiful, uniform rise.
You won’t need an arsenal of fancy tools or years of professional baking experience to master this recipe. All you require are a few key, proven tips and a tested, trustworthy recipe designed for success. If you’ve ever felt apprehensive about baking scones, I promise you, this is the recipe that will fundamentally change your perspective and empower you to bake with confidence. Thousands of enthusiastic readers have already achieved incredible results with my foundational scone recipe, and this bright, zesty lemon variation has quickly become one of my absolute favorites. My mission here is simple: to make sure you, too, can succeed and create scones that will impress everyone who tries them.
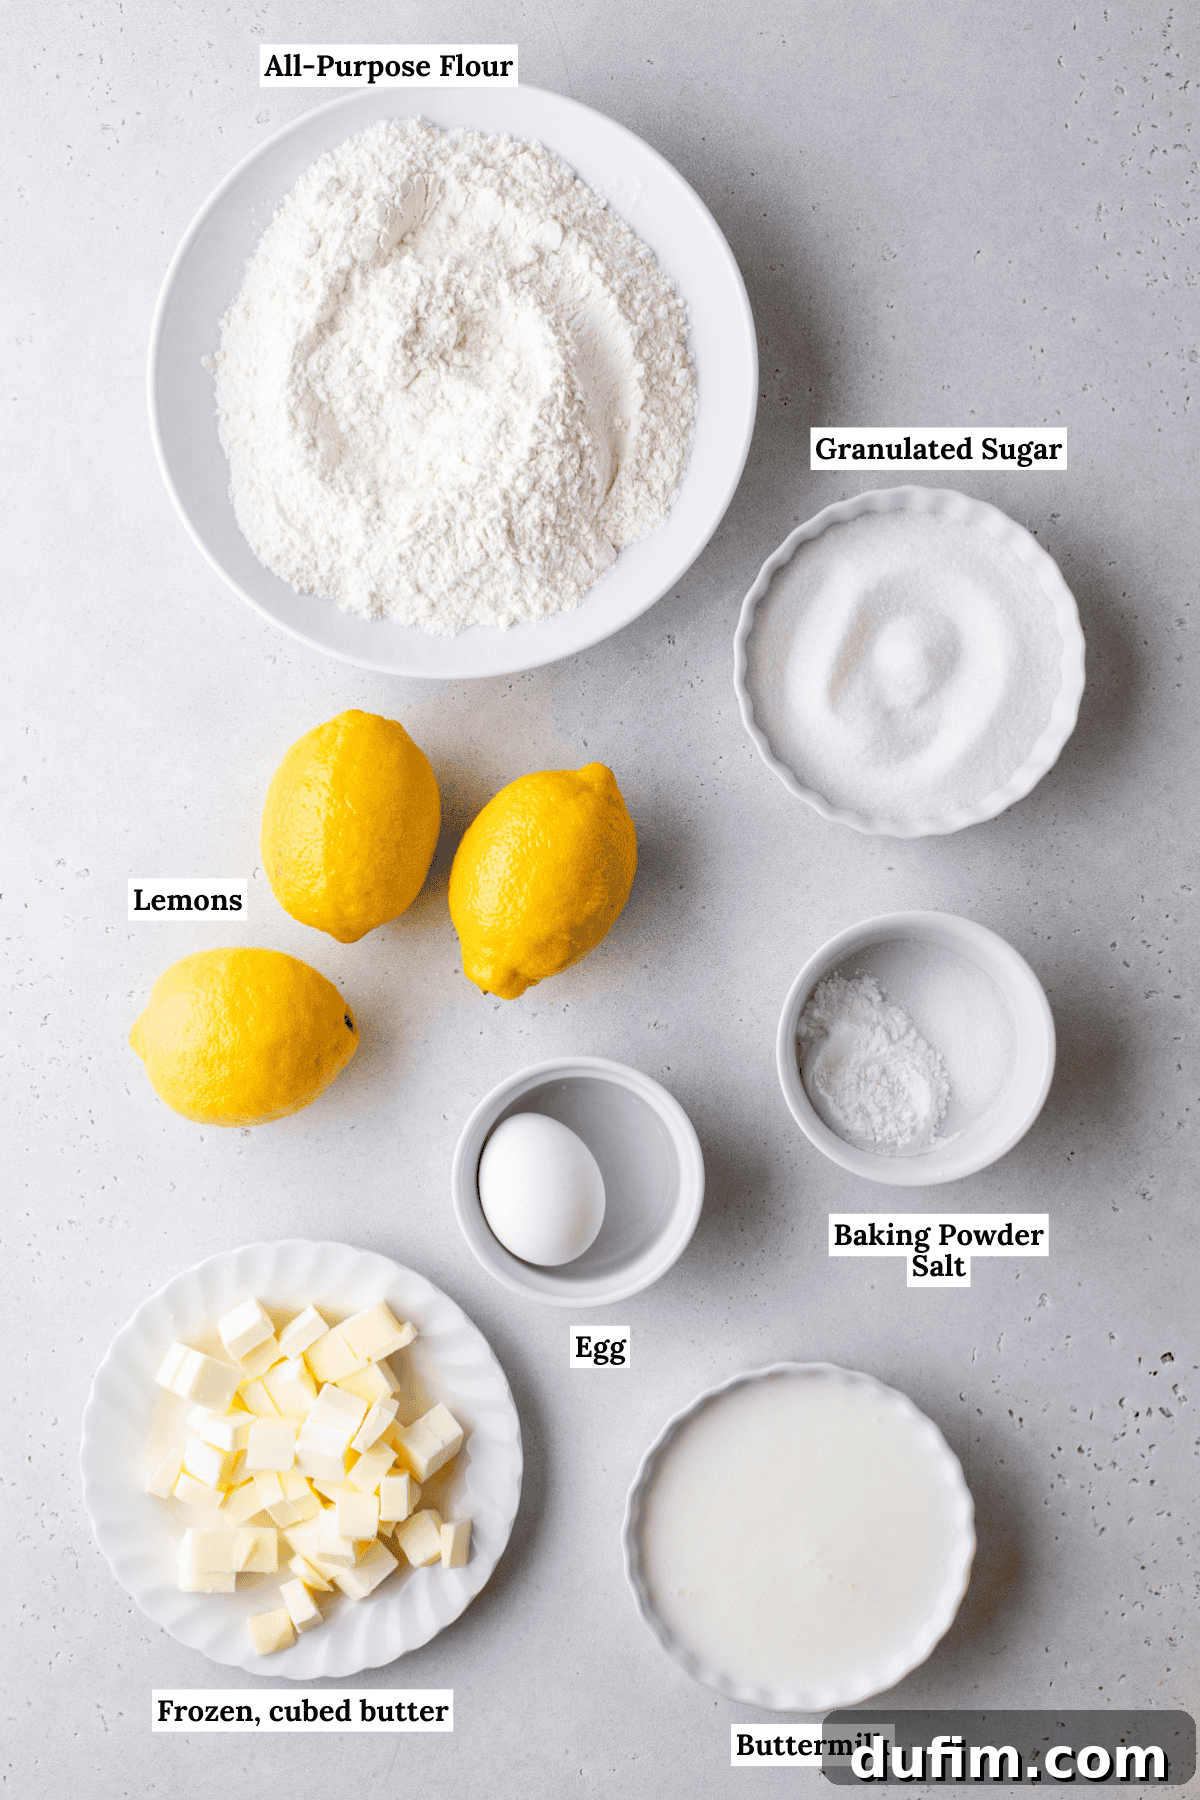
Unveiling the Power of Key Ingredients in Your Lemon Scones
Understanding the role of each ingredient is crucial for baking success. Let’s dive into the essential components that make these lemon scones truly stand out:
- All-Purpose Flour: The foundation of our scones. Through extensive recipe development, I meticulously adjusted the flour ratio to account for the extra liquid introduced by the fresh lemon juice. Using the correct amount of flour is paramount for achieving the perfect dough consistency—not too sticky, not too dry—which is vital for any exceptional baked good. It provides structure and tender chew.
- Baking Powder: For impressive height and lightness, this recipe calls for a generous 1 full tablespoon of baking powder. This leavening agent reacts with the liquids and heat to create carbon dioxide bubbles, which are trapped within the dough layers, contributing significantly to the tall, airy, and fluffy texture characteristic of bakery-style scones.
- Fresh Lemon Zest and Lemon Juice: These are the stars of our show, infusing the scones with their signature bright, tangy, and aromatic lemon flavor. The zest, extracted from the outer peel, contains concentrated essential oils that provide a vibrant aroma and intense citrus notes without adding excess liquid. The fresh juice adds a pleasant tang and moisture, balancing the sweetness of the sugar. Always opt for fresh lemons for the best flavor!
- Cold Unsalted Butter: This is arguably the most critical ingredient for achieving flaky, tender scones. The butter absolutely must be cubed and kept very cold—ideally, even frozen briefly. As the cold butter melts in the hot oven, it releases steam, which creates pockets of air and separates the layers of dough. This process, known as “lamination” (which we’ll explore further), is what gives scones their characteristic flaky, light texture. Unsalted butter allows you to control the total salt content in your recipe.
- Granulated Sugar: Beyond sweetness, sugar plays a role in tenderizing the dough and promoting browning on the exterior of the scones, giving them that beautiful golden crust.
- Salt: A pinch of salt enhances all the other flavors, particularly the sweetness and the bright lemon notes, preventing the scones from tasting flat.
- Buttermilk: Buttermilk is a magic ingredient for scones. Its acidity reacts with the baking powder, boosting the leavening action for a higher rise. More importantly, the lactic acid in buttermilk helps to tenderize the gluten in the flour, resulting in an incredibly soft and moist crumb. If you don’t have buttermilk, you can make a substitute by adding 1 tablespoon of lemon juice or white vinegar to a measuring cup, then filling it with regular milk to the ½-cup line. Let it sit for 5-10 minutes until it slightly curdles.
- Large Egg: The egg contributes to the richness, flavor, and structure of the scones. It adds moisture, helps bind the ingredients together, and contributes to a slightly golden hue.

Crafting the Best Lemon Scones: Your Step-by-Step Guide
Follow these detailed, step-by-step instructions to bake exquisite lemon scones like a true professional. Precision and technique are key here, so pay close attention to each stage.
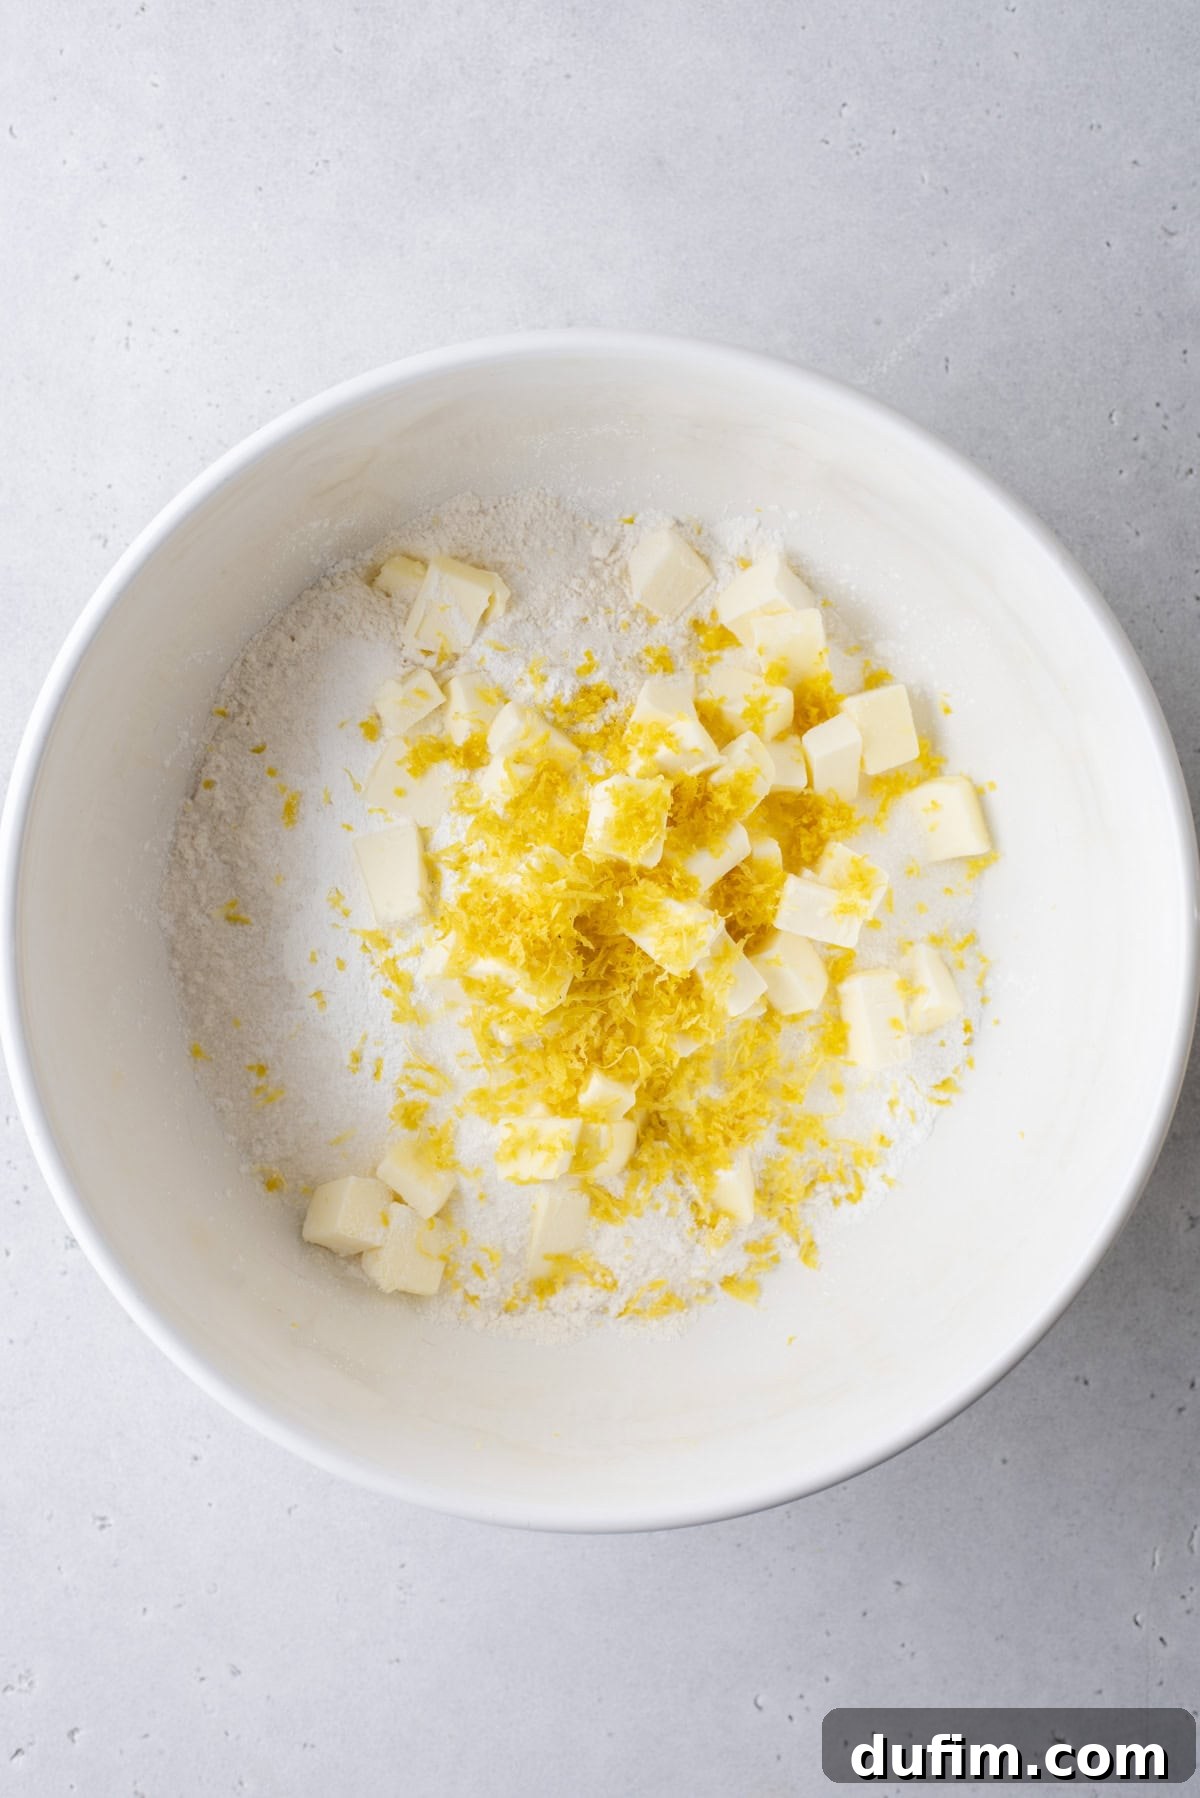
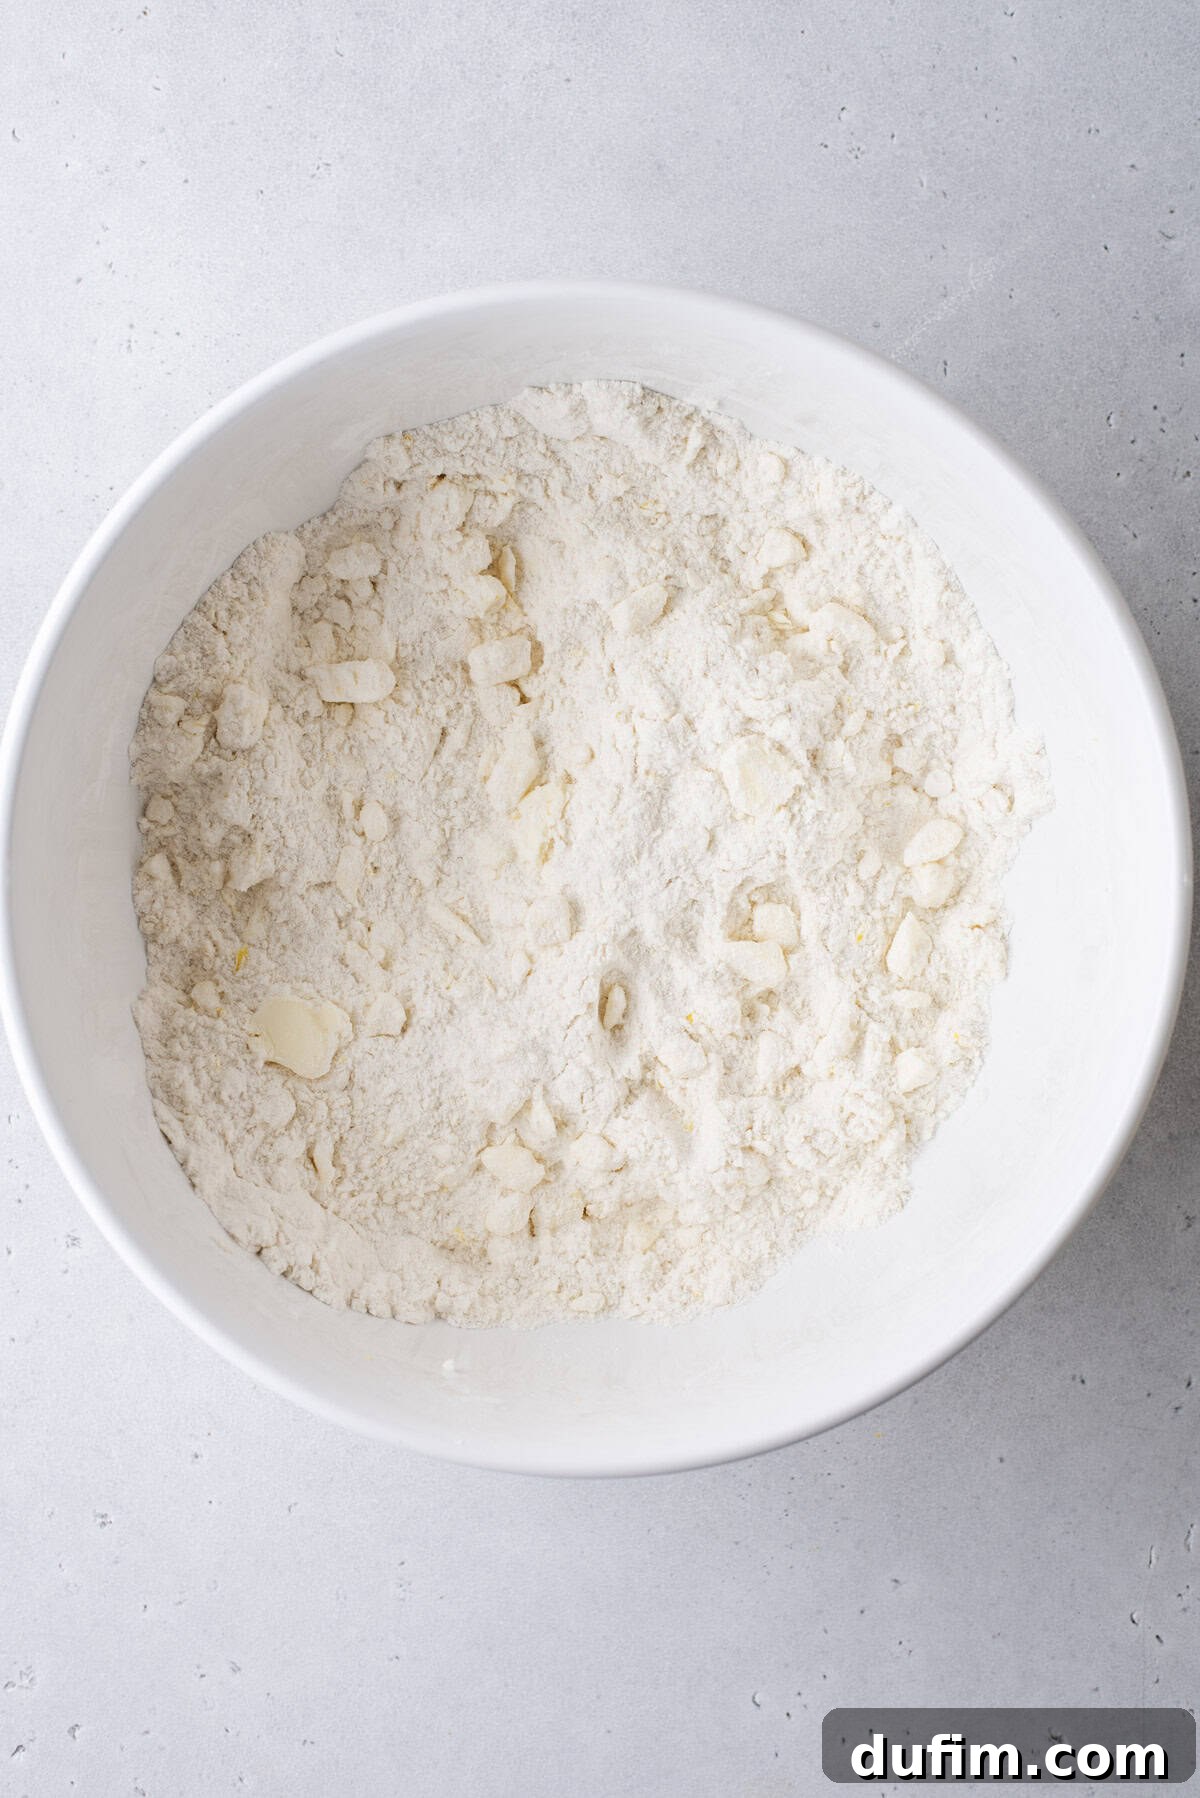
- Combine Dry Ingredients and Cut in Butter: In a large mixing bowl, meticulously combine the all-purpose flour, granulated sugar, baking powder, salt, and fragrant lemon zest. Ensure these dry ingredients are well-mixed to distribute the leavening evenly. Next, add the intensely cold, cubed unsalted butter. Using your fingertips, a pastry cutter, or even a food processor (pulsing briefly), work the butter into the flour mixture. The goal here is to break down the butter into pea-sized amounts. This step is crucial: the colder the butter, the flakier your scones will be. Avoid overworking the butter, as this can warm it up too much.
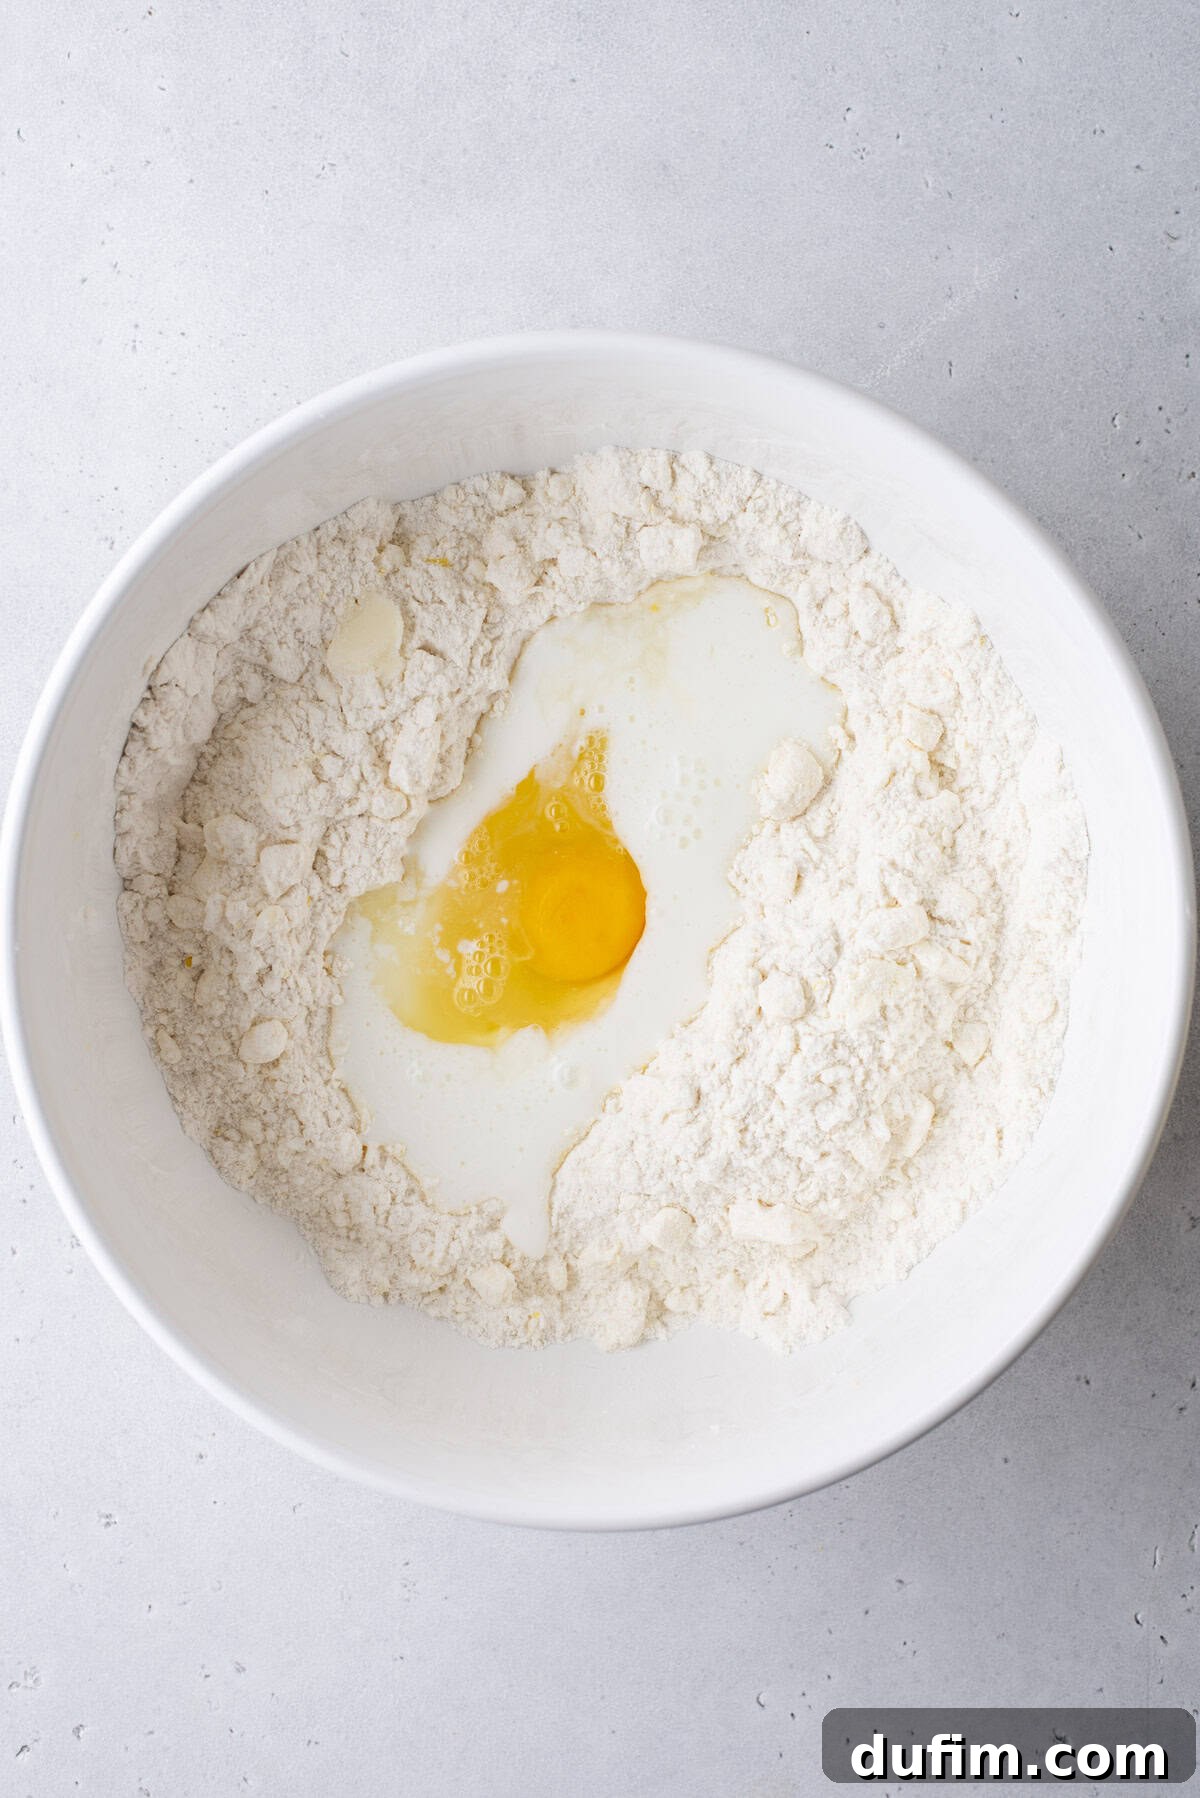
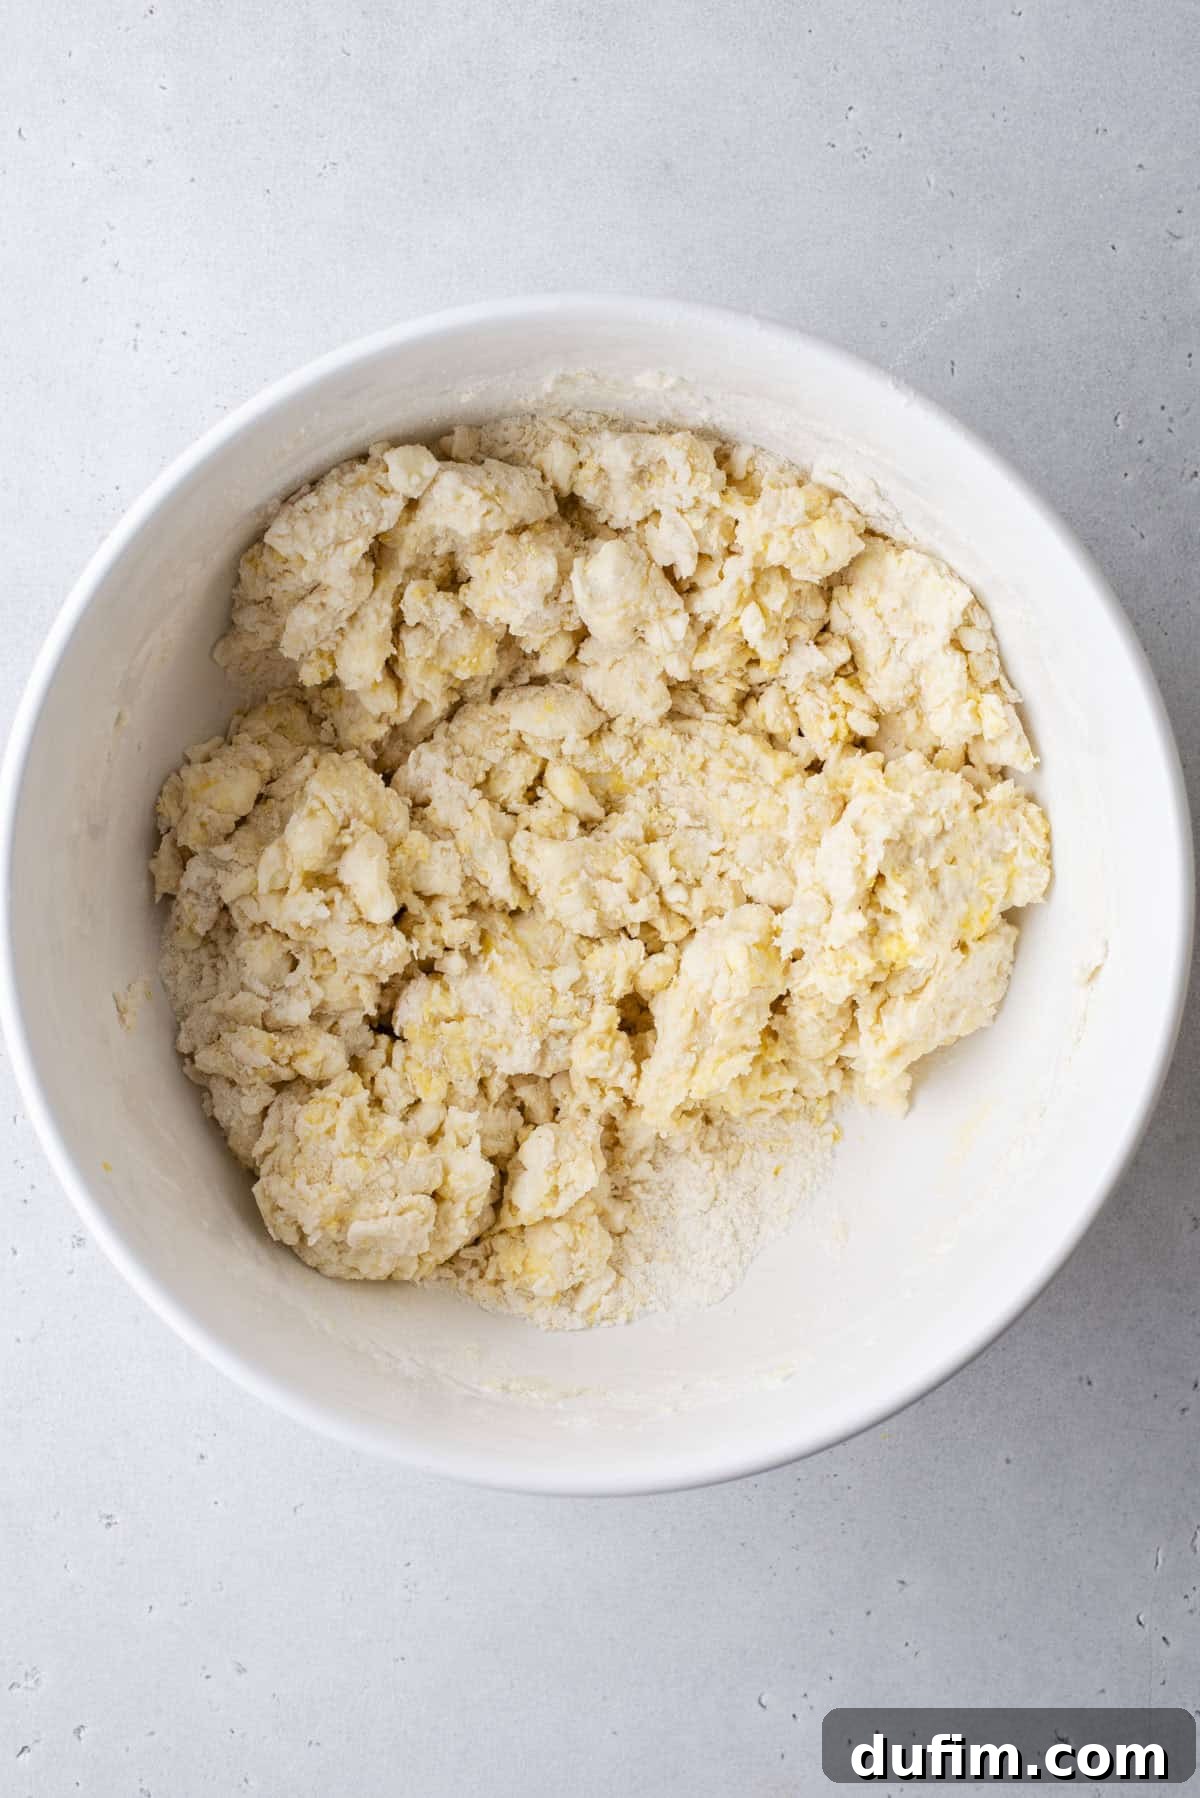
- Incorporate Wet Ingredients: Create a small well in the center of your dry flour and butter mixture. Into this well, pour the cold buttermilk, fresh lemon juice, and the large egg. Using a sturdy spatula or a wooden spoon, gently combine these wet ingredients with the dry mixture. Mix just until the ingredients are barely combined and the dough begins to come together. It will be thick and sticky, and that’s exactly what you want at this stage. Avoid overmixing, as this can develop the gluten too much, leading to tough scones.
- Gently Knead the Dough: Transfer the sticky dough onto a lightly floured silicone mat or a clean kitchen counter. With very gentle hands, knead the dough just until all the dry flour pockets are fully incorporated and the dough forms a cohesive mass. The key word here is “gently”—minimal handling ensures a tender crumb.
- Adjust Dough Consistency (If Needed): If you find the dough is still excessively sticky and difficult to handle after gentle kneading, add 1-2 additional tablespoons of all-purpose flour, one tablespoon at a time, until it reaches a manageable consistency. Be cautious not to add too much flour, as this can dry out your scones.
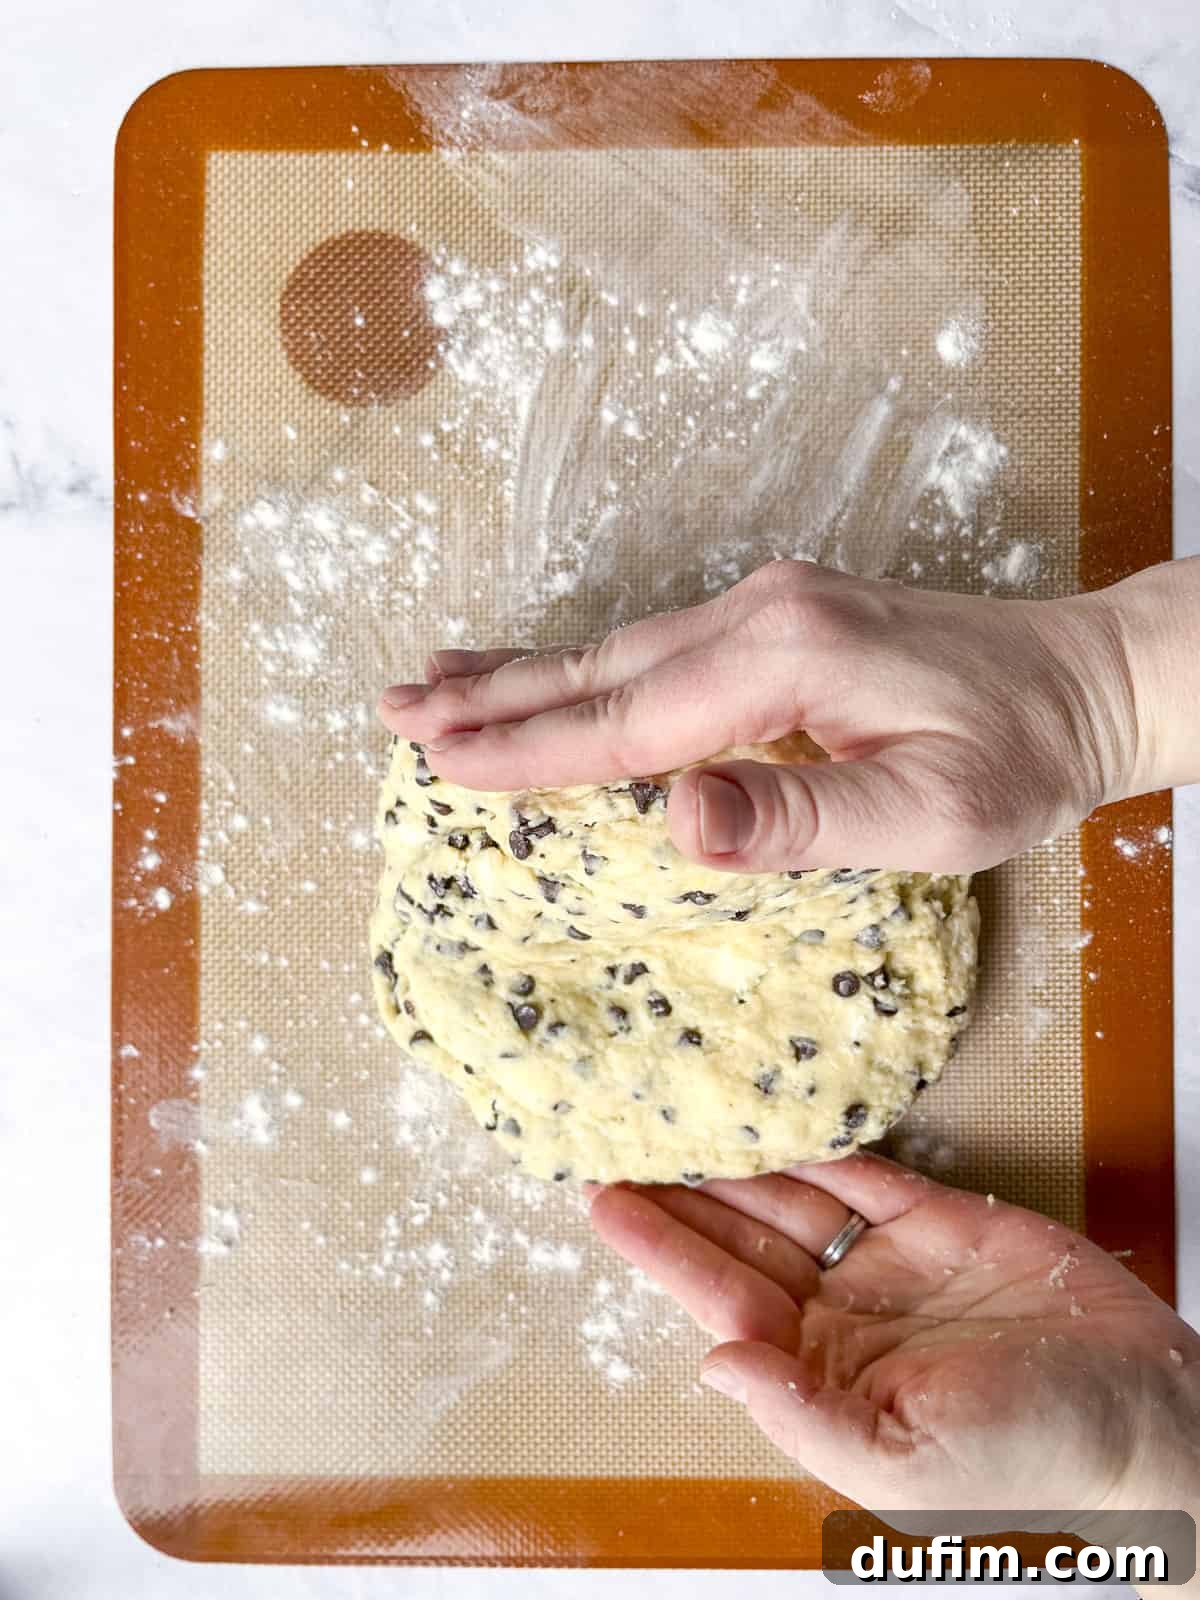
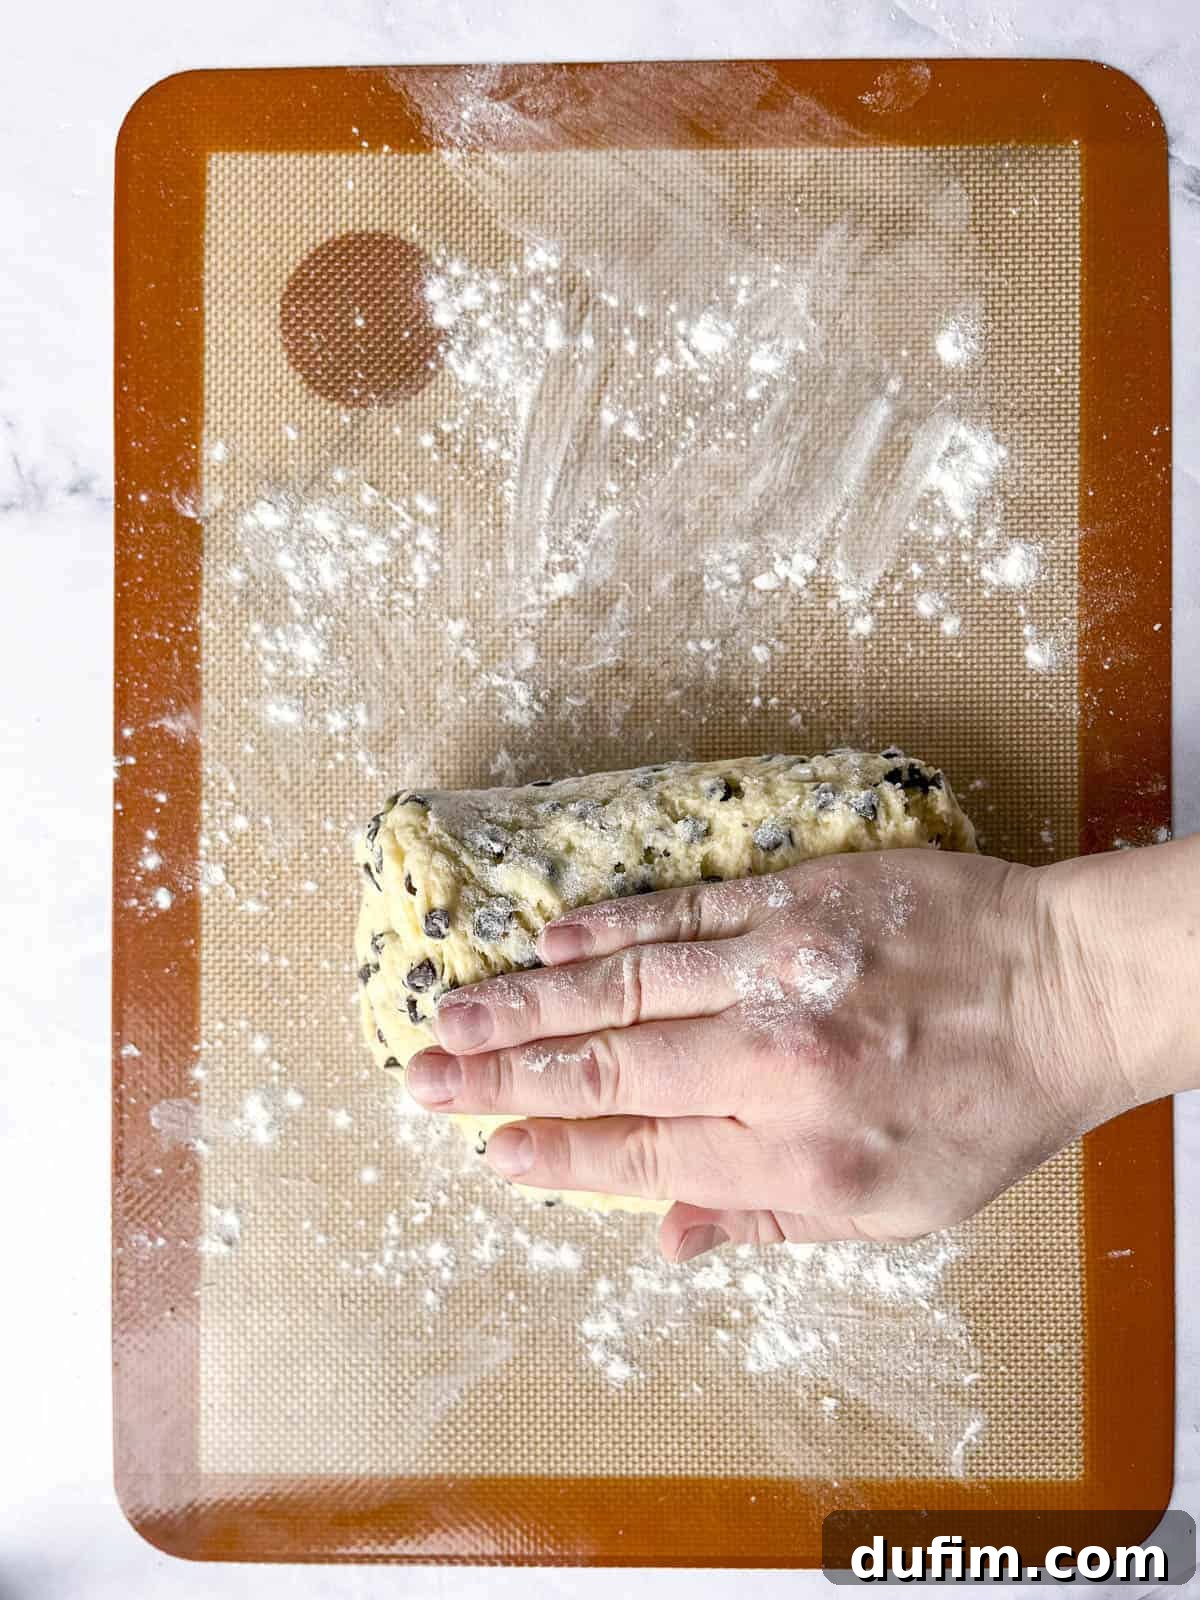
- Lamination for Flaky Layers: This step is where the magic happens for truly flaky scones! To create those beautiful layers, perform a simple lamination technique. Fold the dough in half, gently press it down to seal slightly, then rotate the dough 90 degrees. Fold it in half again, and press. Repeat this folding and turning process 4-5 times. This action helps distribute the cold butter evenly throughout the dough, creating distinct layers that will expand and separate during baking, resulting in that irresistible flaky texture.
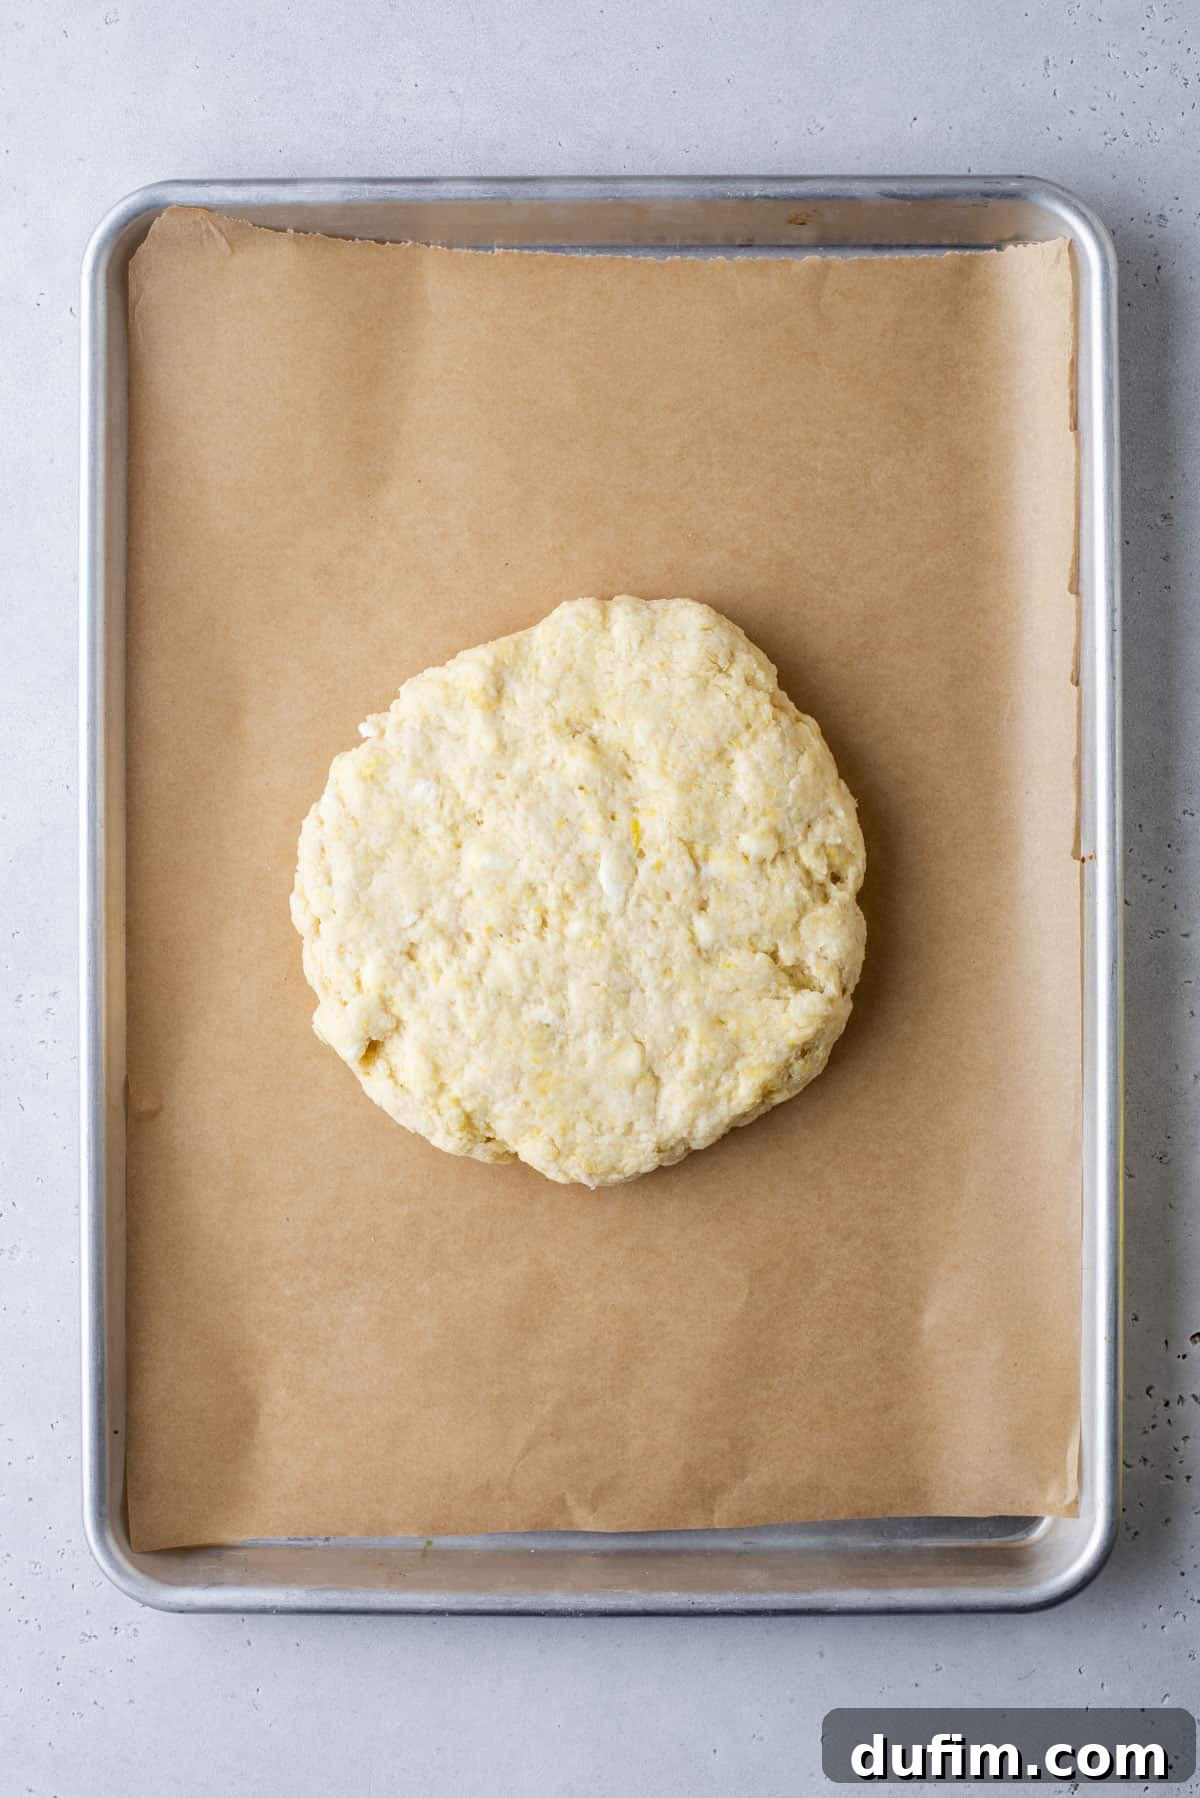

- Shape and Briefly Chill the Dough: Gently shape the laminated dough into a thick disc, approximately 8-10 inches in diameter and about 1.5 to 2 inches tall. For optimal results, transfer this disc to a plate or a small baking sheet lined with parchment paper, and refrigerate it for 5-10 minutes. This brief chill helps the dough firm up slightly, making it easier to cut and ensuring the butter remains cold.
- Cut the Dough into Wedges: Once the dough has chilled, place it on a lightly floured surface. Using a sharp knife or a pizza cutter, cut the large dough disc into 8 equal wedges. For perfectly uniform scones, aim to cut them symmetrically.
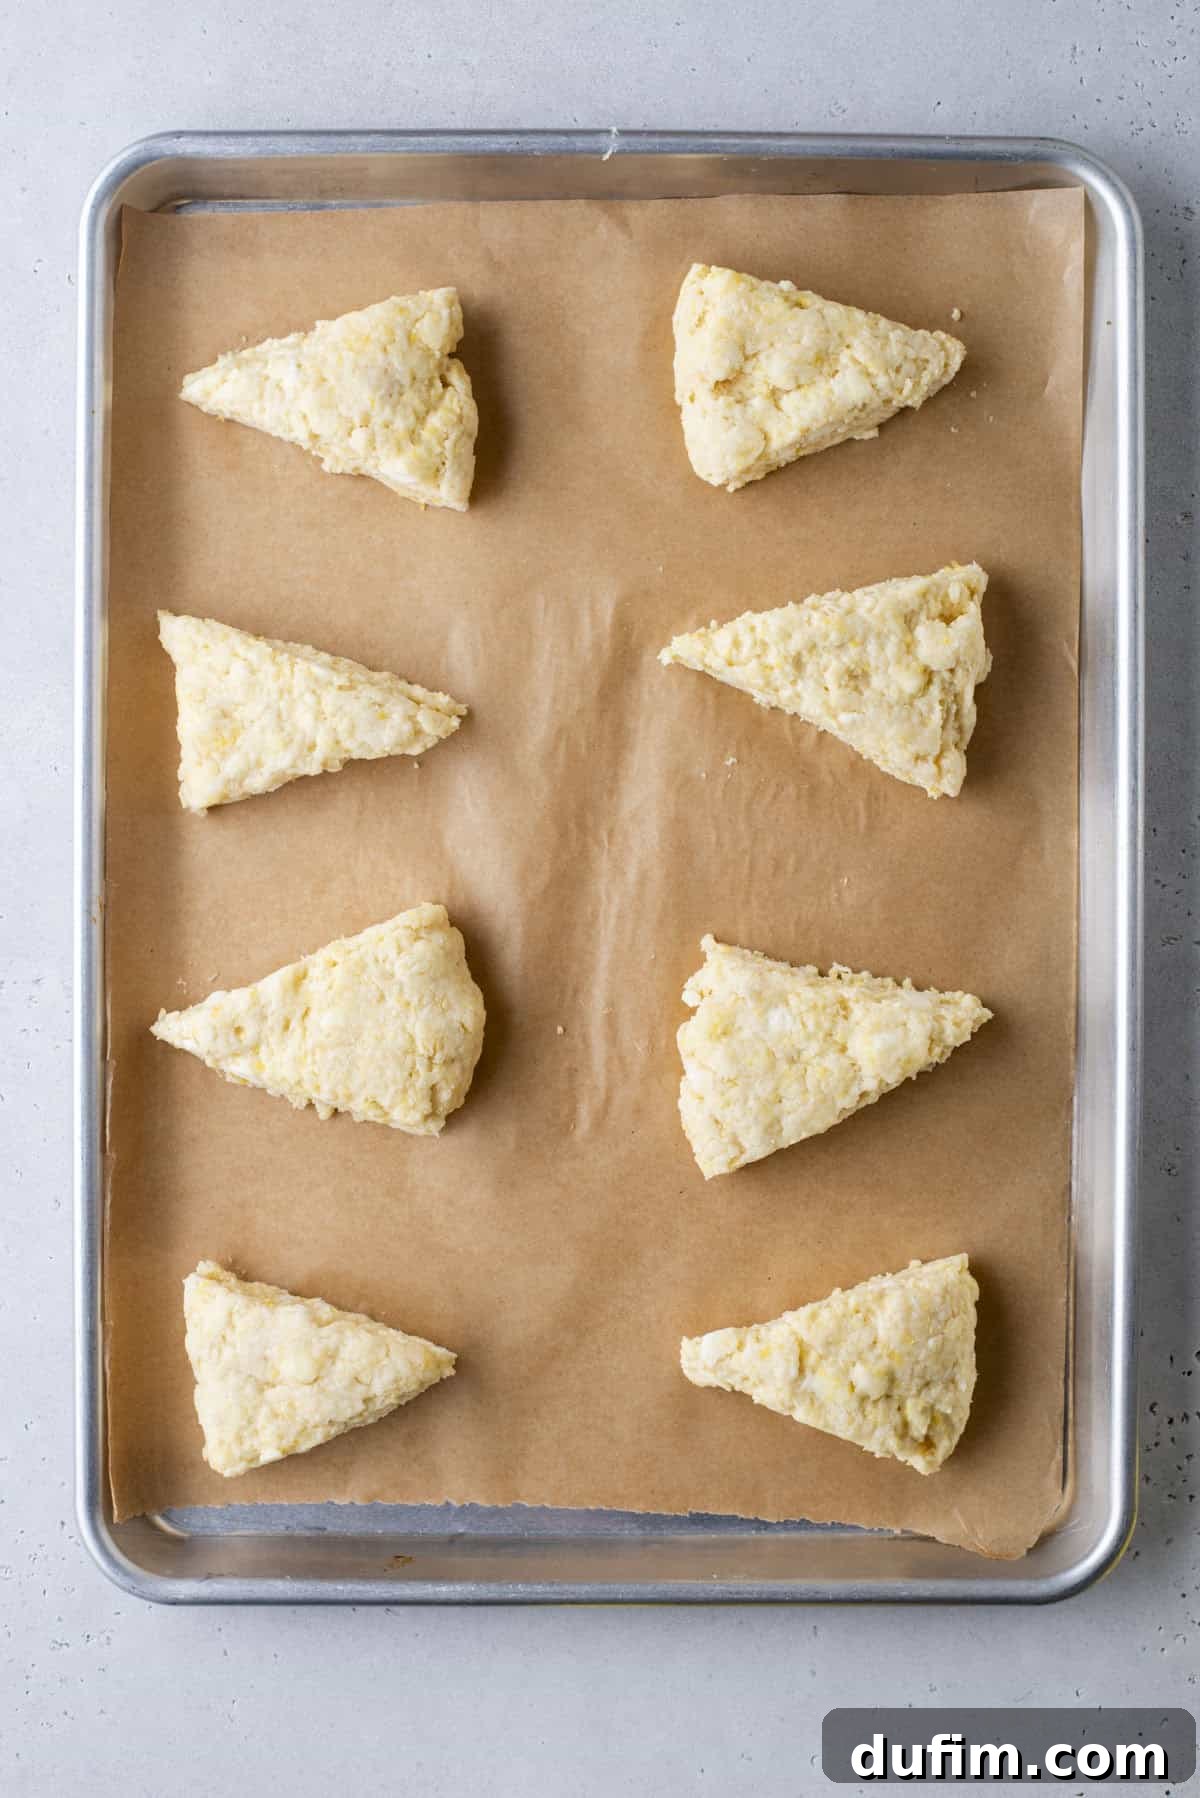
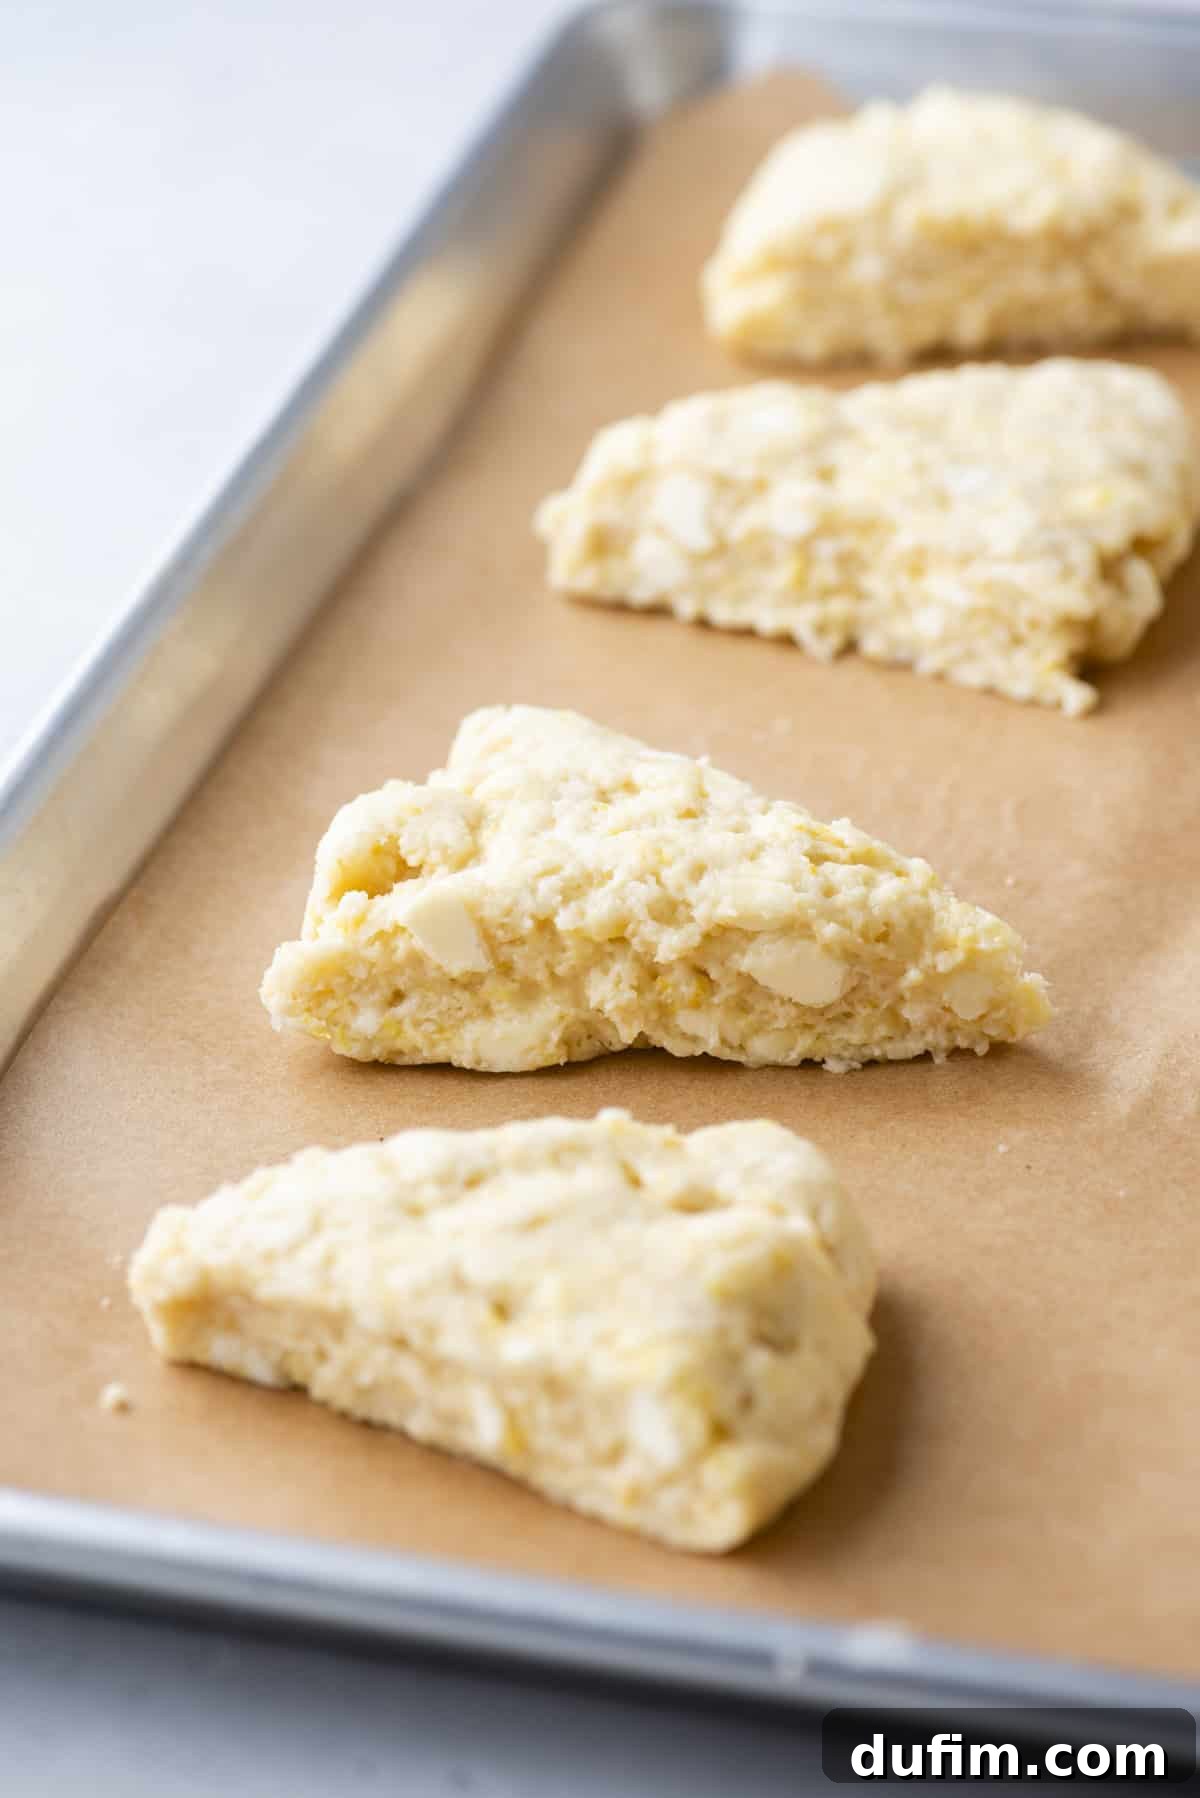
- Prepare Scones on Baking Sheet: Line a large baking sheet with a silicone mat or parchment paper. Carefully transfer the cut scone wedges onto the prepared baking sheet, ensuring they are spaced 2-3 inches apart to allow for proper airflow and expansion during baking.
- Freeze the Scones and Preheat Oven: This step is critical for achieving a tall, flaky scone. Place the entire baking sheet with the scones into the freezer for a full 30 minutes. During the last 5 minutes of this freezing period, preheat your oven to 400°F (200°C). Freezing the dough ensures the butter is rock-solid cold when it enters the oven, preventing premature spreading and maximizing the rise.
- Apply Egg Wash and Optional Sugar: Just before baking, prepare an egg wash by whisking 1 large egg with 1 tablespoon of water, buttermilk, or heavy cream. Lightly brush the tops of each scone with this mixture. The egg wash will give your scones a beautiful golden-brown, shiny crust. For an added touch of sparkle and a slight crunch, sprinkle coarse sanding sugar over the egg-washed tops, if desired.
- Bake and Cool: Transfer the frozen scones into the preheated 400°F (200°C) oven. Bake for approximately 20-26 minutes, or until the scones are gloriously golden-brown on top and cooked through. The exact baking time can vary slightly depending on your oven, so keep an eye on them. Once baked, remove the scones from the oven and allow them to cool on the baking sheet for a few minutes before transferring them to a wire rack to cool completely. Cooling is important for the structure to set.
Optional Lemon Glaze: The Perfect Finishing Touch
While these lemon scones are delightful on their own, a simple lemon glaze adds an extra layer of zesty sweetness and a beautiful presentation.
- Prepare and Drizzle Glaze: In a small bowl, whisk together 1 cup (113g) of powdered sugar with 2 tablespoons of fresh lemon juice. Continue adding small amounts of lemon juice (½ teaspoon at a time) until you achieve your desired consistency – a thick, yet pourable glaze. Drizzle this luscious glaze generously over the cooled scones just before serving. The contrast of the sweet, tart glaze with the rich scone is simply divine.

Expert Tips for Achieving Perfect Lemon Scones Every Time
To ensure your lemon scones turn out consistently perfect, every single time, pay close attention to these expert tips. These aren’t just suggestions; they are crucial elements that distinguish a good scone from a truly outstanding one.
- Always Use Cold Unsalted Butter: This cannot be stressed enough. Cold butter is absolutely fundamental for achieving the desired flaky, tender texture in this scone recipe. For the very best results, take the time to cut your unsalted butter into small cubes and then pop them into the freezer for 10-15 minutes before you begin incorporating them into the dough. This ensures the butter remains solid until it hits the hot oven, creating those magical steam pockets.
- Never Skip the Freezing Step Before Baking: This chilling period is not merely a suggestion; it’s a critical stage in the scone-making process. Freezing the cut scones for 30 minutes before baking is paramount for several reasons. Firstly, it helps them firmly hold their shape, dramatically reducing any unwanted spreading in the oven. Secondly, it significantly improves their final texture. By ensuring the butter within the dough is rock-solid cold, it prevents it from melting too quickly. When this super-cold butter finally melts in the hot oven, it rapidly releases steam, pushing apart the layers of dough. This rapid steam production is what creates the signature flaky, tender crumb and the impressive tall rise that defines a perfect bakery-style scone. Without this step, your scones risk being flat and dense.
- Avoid Overworking the Dough: Scone dough is delicate. Overmixing or excessive kneading develops the gluten in the flour too much, leading to tough, dense scones instead of light, tender ones. Mix and knead only until the ingredients are just combined and no dry streaks of flour remain.
- Ensure Your Baking Powder is Fresh: Baking powder loses its potency over time. If your baking powder is old, your scones won’t rise properly. To test its freshness, mix a teaspoon of baking powder with a few tablespoons of hot water. If it fizzes vigorously, it’s good to go.
- Use Fresh Lemon Zest: The oils in fresh lemon zest are what give these scones their vibrant, natural lemon flavor. Avoid bottled lemon zest if possible, as it lacks the bright, aromatic punch of fresh zest.

Adapting the Recipe: How to Make Gluten-Free Lemon Scones
For those with dietary restrictions or who prefer gluten-free options, you’ll be pleased to know that this recipe can be successfully adapted! I’ve personally tested this recipe with gluten-free flour and achieved fantastic results. My top recommendation is King Arthur’s Gluten-Free Measure for Measure Flour. It’s designed as a direct 1:1 substitute for regular all-purpose flour, making the conversion incredibly simple. Just swap it in, and follow all other recipe steps as written. You’ll still get wonderfully tender and flavorful lemon scones!
The Secret to Tall, Flaky Scones: Mastering Lamination
If you’re aiming for those impressively tall, beautifully flaky scones that rival any professional bakery, understanding and executing the lamination process is key. While it sounds fancy, it’s actually quite straightforward!
Lamination is a technique that creates distinct, delicate layers by repeatedly folding the dough, sandwiching thin sheets of cold butter between layers of flour mixture. During baking, as the intense heat of the oven causes the butter to melt, it releases steam. This steam then forces apart the individual layers of dough, puffing them up and separating them, which results in that characteristic light, airy, and undeniably flaky texture we all adore in a perfect scone.
As detailed in step 5 of the recipe, the lamination process for these scones is simple: once your dough is gently mixed, simply fold the dough in half, lightly press it down, then turn the dough 90 degrees and fold it in half again. Repeat this folding and turning motion 4-5 times. This brief, gentle exercise is all it takes to set your scones up for incredible layers and a towering rise.

Storing Your Delicious Lemon Scones for Lasting Freshness
Proper storage is essential to maintain the delicate texture and fresh flavor of your homemade lemon scones. Follow these guidelines to keep them at their best for as long as possible:
Firstly, always allow your scones to cool completely before storing them. Packing them up while they’re still warm will trap unwanted moisture, leading to a soggy, undesirable texture. Once fully cooled, place your lemon scones in an airtight container or a zip-top bag. Store them at room temperature in a cool, dry spot, away from direct sunlight or heat. Stored this way, they will remain wonderfully fresh for approximately 1-2 days.
It’s generally best to skip the refrigerator for fresh scones. The cool, dry environment of a fridge tends to dry them out quickly, making them hard and stale much faster than at room temperature. However, if you’ve added a cream cheese frosting or a highly perishable topping, refrigeration might be necessary, but be aware it will impact the texture.
For longer storage, freezing is an excellent option that preserves their quality beautifully. Baked and cooled scones can be frozen for up to a month. To freeze, arrange the cooled scones in a single layer on a baking sheet and freeze until solid. Once frozen, transfer them to a freezer-safe airtight container or heavy-duty freezer bag, removing as much air as possible to prevent freezer burn. When you’re ready to enjoy them, simply let them come to room temperature on your counter, or gently reheat them in a low oven (around 250°F / 120°C) for 10-15 minutes until warmed through. This can even help restore some of their fresh-baked tenderness!

Frequently Asked Questions About Lemon Scones
The absolute key to baking truly great scones lies in two main principles: starting with intensely cold ingredients, especially the butter, and handling the dough as gently and minimally as possible. Cold butter creates steam pockets for flakiness, while gentle handling prevents over-developing gluten, which would result in a heavy, chewy texture instead of a light and tender one.
To achieve deliciously soft, airy, and fluffy scones, it’s paramount to avoid overhandling the dough. If your scones consistently turn out flat or dense, the most likely culprit is mixing or kneading the dough too much. Overworking the dough overdevelops gluten, weighing down the final product. Using fresh baking powder and cold buttermilk also contributes significantly to fluffiness.
All-purpose flour is generally considered the best choice for scones. Its protein content provides enough structure to give the scones a desirable tall rise and helps them maintain their shape both during and after baking, while still allowing for a tender crumb when handled correctly. While some recipes might call for self-rising flour, using all-purpose allows for precise control over the leavening agents.
Absolutely, and it’s highly recommended! Using frozen, grated, or finely cubed butter is an excellent trick to ensure the butter stays as cold as possible throughout the mixing process. This maximizes the flakiness of your scones as the frozen butter creates more steam pockets in the oven.
Scones spreading instead of rising is a common issue often caused by warm butter, overworking the dough, or not chilling the dough sufficiently. If the butter is too warm, it melts before the scone structure sets, causing spreading. Overmixing develops gluten, making the dough less prone to rising. The crucial freezing step in this recipe directly addresses this by ensuring the butter remains solid until baking, promoting a tall, beautiful rise.
Explore More Delightful Scone Recipes
If you’ve fallen in love with these lemon scones, you’ll be thrilled to discover other fantastic variations of my perfected scone recipe. Each one offers a unique flavor profile while maintaining that irresistible tender, flaky texture.
- Classic Chocolate Chip Buttermilk Scones
- Fresh Blueberry Buttermilk Scones
- Cozy Pumpkin Spice Scones

Lemon Scones Recipe
By: Beth
Prep Time: 10 minutes
Cook Time: 20-26 minutes
Chill Time: 40 minutes (5-10 min initial chill, 30 min freeze)
Servings: 8 scones
These lemon scones are tall, golden, and bursting with citrus flavor! I tested this recipe for weeks to make sure it works—even if you’ve never baked scones before. Includes all my best tips, like using cold butter and freezing the dough to get that perfect bakery-style rise. Say goodbye to dry or flat scones forever!
Equipment
- Kitchen Scale (highly recommended for precise measurements)
- Silicone Baking Mat (for easy cleanup and even baking)
- Large Mixing Bowl
- Pastry Cutter or your hands
- Spatula
- Baking Sheet
- Wire Rack
Ingredients
For the Scones:
- 2 ½ cups (300g) all-purpose flour
- ½ cup (99g) granulated sugar
- 1 Tbsp baking powder (ensure it’s fresh!)
- ½ tsp salt
- 1 Tbsp lemon zest (from about 3 medium lemons)
- ½ cup (113g) cold unsalted butter, cubed and ideally frozen briefly
- ½ cup (118ml) cold buttermilk
- 1 Tbsp fresh lemon juice, freshly squeezed
- 1 large egg
- Optional: 1 large egg + 1 Tbsp water/buttermilk/cream for egg wash
- Optional: Coarse sanding sugar for topping
For the Glaze (optional):
- 1 cup (113g) powdered sugar
- 2-3 Tbsp fresh lemon juice
Instructions
- Prepare Dry Ingredients and Cut in Butter: In a large mixing bowl, whisk together the flour, granulated sugar, baking powder, salt, and lemon zest. Add the cold, cubed butter. Using your hands or a pastry cutter, cut the butter into the dry ingredients until small, pea-sized amounts of butter remain. This ensures flakiness.
- Add Wet Ingredients: Create a well in the center of the flour mixture. Pour in the cold buttermilk, fresh lemon juice, and the large egg. Use a spatula to gently mix until the dough is just combined and appears thick and sticky. Avoid overmixing.
- Gently Knead Dough: Transfer the dough onto a lightly floured silicone mat or clean kitchen counter. Gently knead the dough until all the flour is incorporated and a cohesive dough forms. Do not overwork it.
- Adjust Consistency: If the dough is still too sticky to handle, add 1-2 additional tablespoons of flour, one at a time, until it is more manageable.
- Lamination for Flaky Layers: Fold the dough in half, press it down slightly, then turn the dough 90 degrees. Fold it in half again and press. Repeat this folding and turning process 4-5 times to create flaky layers.
- Shape and Chill: Shape the dough into a disc that is approximately 8-10 inches in diameter and about 1.5 to 2 inches tall. Place the disc on a plate or small baking sheet and refrigerate for 5-10 minutes.
- Cut Scones: Using a sharp knife or pizza cutter, cut the chilled dough disc into 8 equal wedges.
- Arrange on Baking Sheet: Line a baking sheet with parchment paper or a silicone mat. Place the scone wedges 2-3 inches apart on the prepared sheet.
- Freeze and Preheat Oven: Freeze the scones on the baking sheet for 30 minutes. During the last 5 minutes of freezing, preheat your oven to 400°F (200°C).
- Egg Wash (Optional): If desired, whisk one large egg with 1 tablespoon of water (or buttermilk/cream) to create an egg wash. Lightly brush the tops of the frozen scones with the egg wash. You can also sprinkle coarse sanding sugar for extra sparkle.
- Bake and Cool: Bake for 20-26 minutes, or until the scones are beautifully golden brown on top and cooked through. Remove from the oven and let them cool on the baking sheet for a few minutes before transferring to a wire rack to cool completely.
For the Glaze (optional):
- Combine and Drizzle: In a small bowl, whisk together the powdered sugar and 2 tablespoons of lemon juice. Add more lemon juice, half a teaspoon at a time, until you reach your desired drizzling consistency. Drizzle the glaze generously over the cooled scones.
Video Demonstration
Watch a video demonstration of how to make these delicious lemon scones.
Nutrition Information
All nutritional values are approximate and provided to the reader as a courtesy. Changing ingredients and/or quantities will alter the estimated nutritional calculations.
- Serving: 1 scone
- Calories: 370kcal
- Carbohydrates: 59g
- Protein: 5g
- Fat: 13g
- Saturated Fat: 8g
- Polyunsaturated Fat: 1g
- Monounsaturated Fat: 3g
- Trans Fat: 0.5g
- Cholesterol: 53mg
- Sodium: 331mg
- Potassium: 81mg
- Fiber: 1g
- Sugar: 28g
- Vitamin A: 410IU
- Vitamin C: 3mg
- Calcium: 119mg
- Iron: 2mg
Like this recipe? We’d love to hear from you! Please take a moment to rate and comment below with your feedback and experience.