
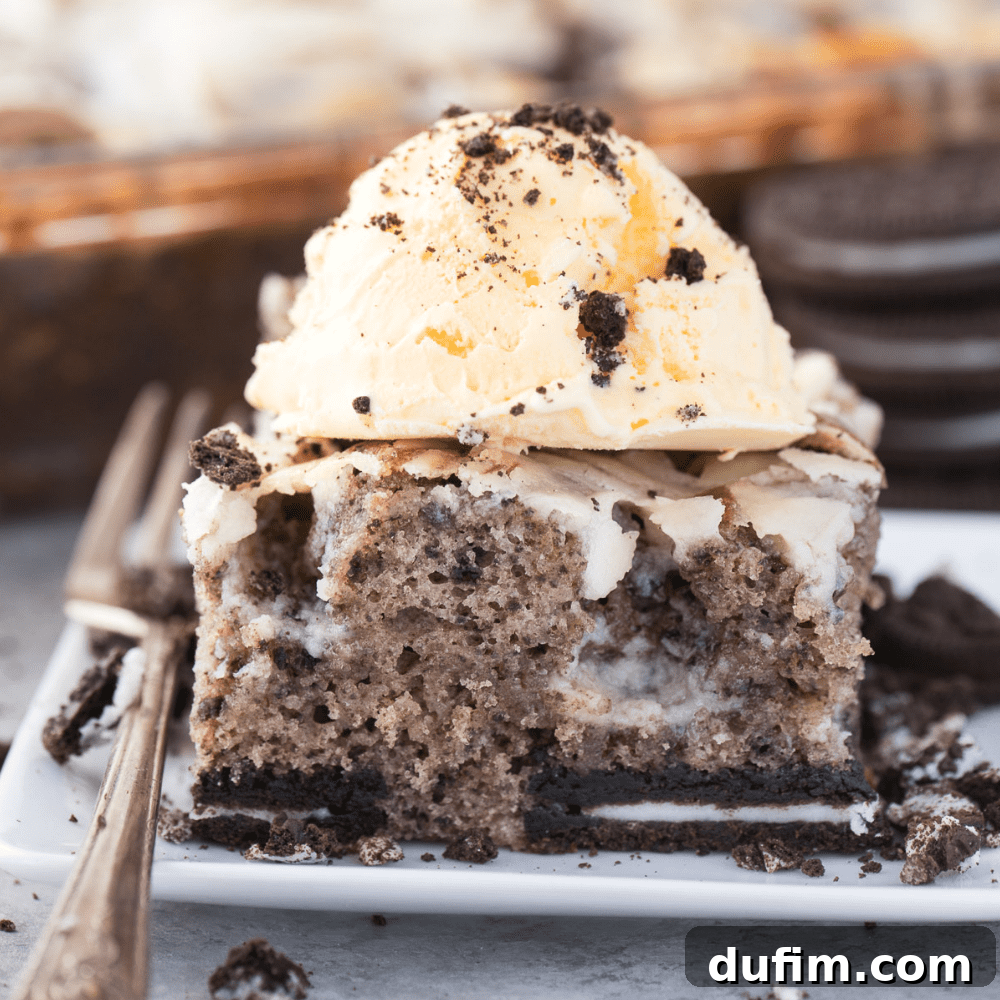
Prepare to be amazed by this incredible Oreo Earthquake Cake – a dessert sensation that’s as delightful to look at as it is to eat! This recipe starts with a classic white cake mix, generously loaded with both whole Oreo cookies and crushed Oreo crumbs. What truly sets it apart is the luxurious cream cheese frosting layer, artfully swirled into the batter before baking. As the cake bakes, this frosting magically melts and seeps into the cake, forming irresistible, creamy crevices and “fault lines” across the top, giving it its unique and aptly named “earthquake” appearance. Get ready to bake a showstopper that’s guaranteed to impress every Oreo enthusiast!
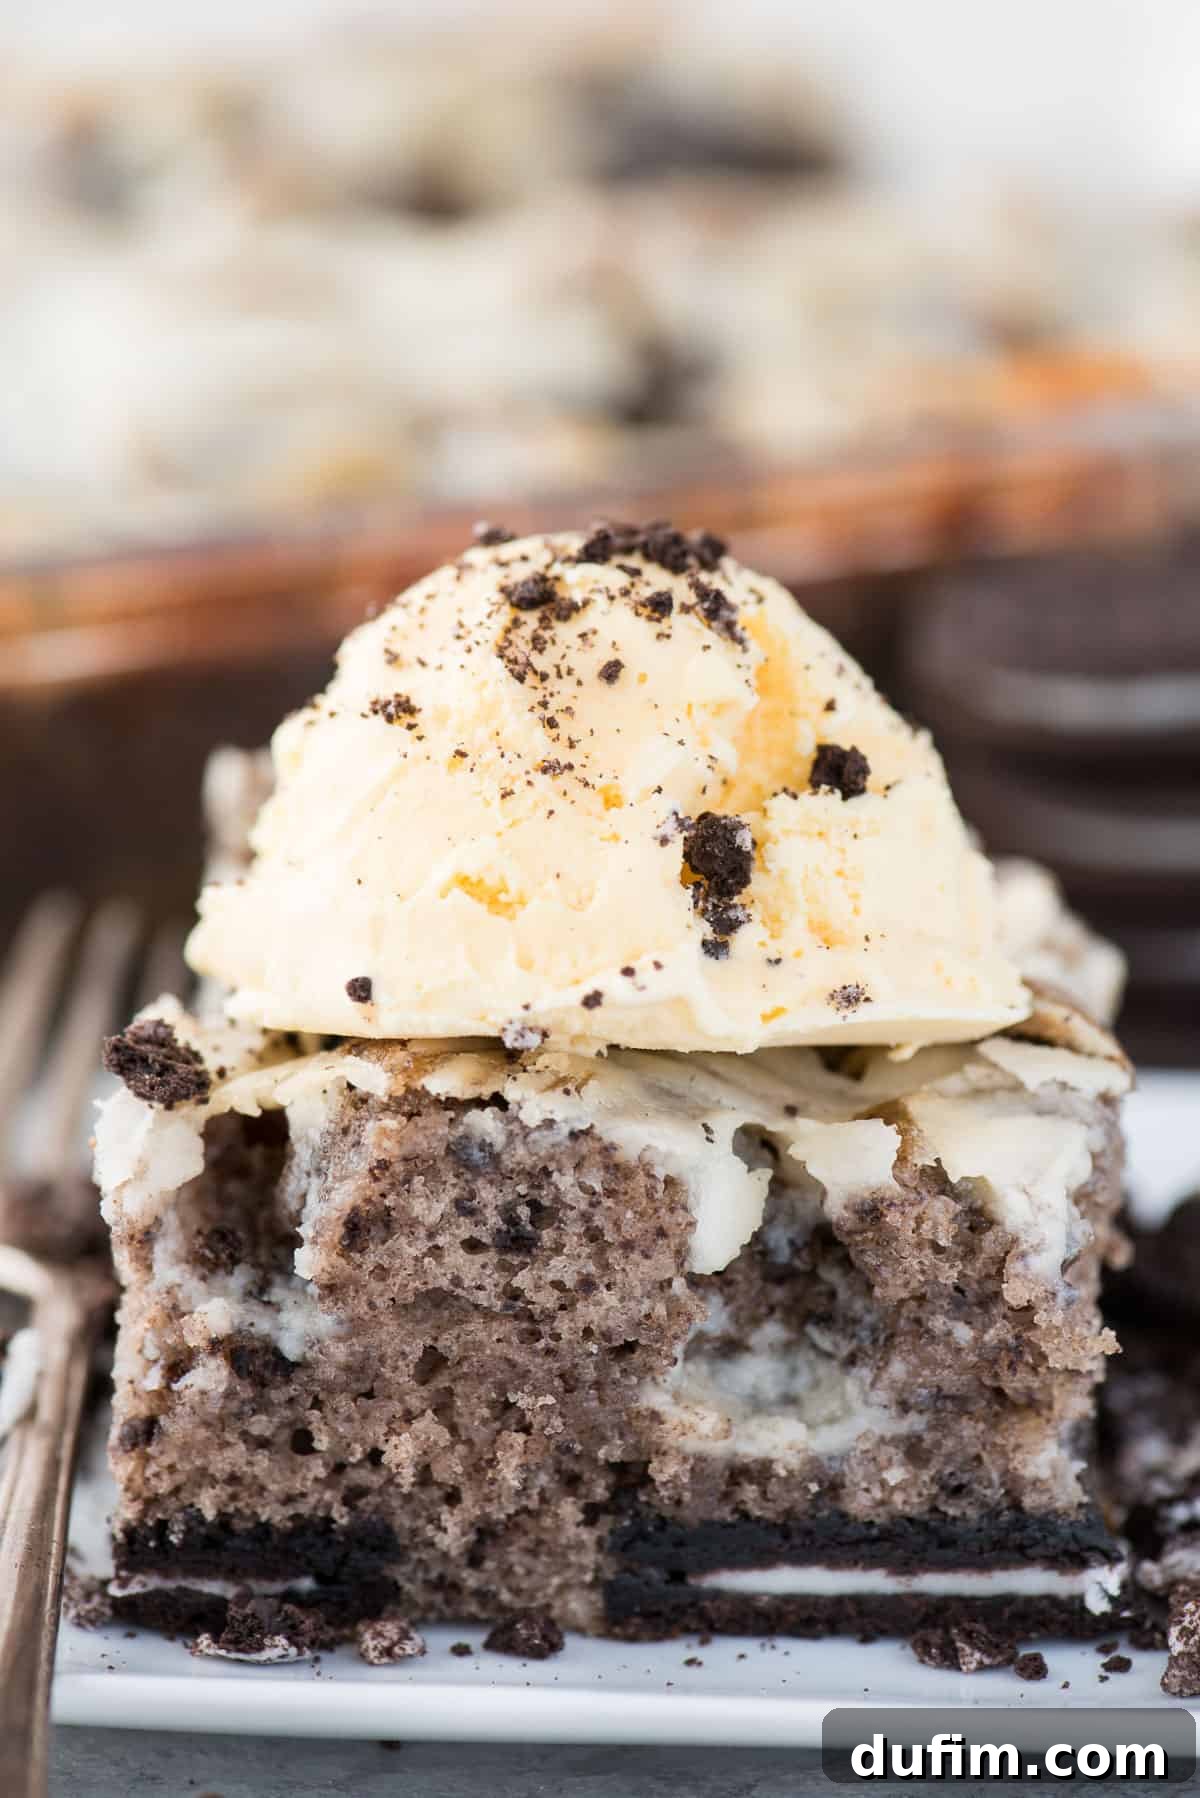
Who can resist the classic charm of an Oreo cookie? Whether you’re twisting, dunking, or devouring them whole, Oreos hold a special place in the hearts of dessert lovers worldwide. Now, imagine taking that beloved chocolatey, creamy goodness and embedding it directly into a moist, tender cake. The result? Pure culinary magic! This isn’t just a cake; it’s an experience, a celebration of all things Oreo.
If you’re an avid fan of desserts that feature this iconic cookie, you’ll surely appreciate other delightful creations such as mini Oreo cheesecakes, indulgent cookies and cream cupcakes, and the effortlessly delicious no-bake Oreo pie. But for those seeking a truly unique cake experience, our Oreo Earthquake Cake stands in a league of its own.
What is an Earthquake Cake? The Secret Behind the Cracks
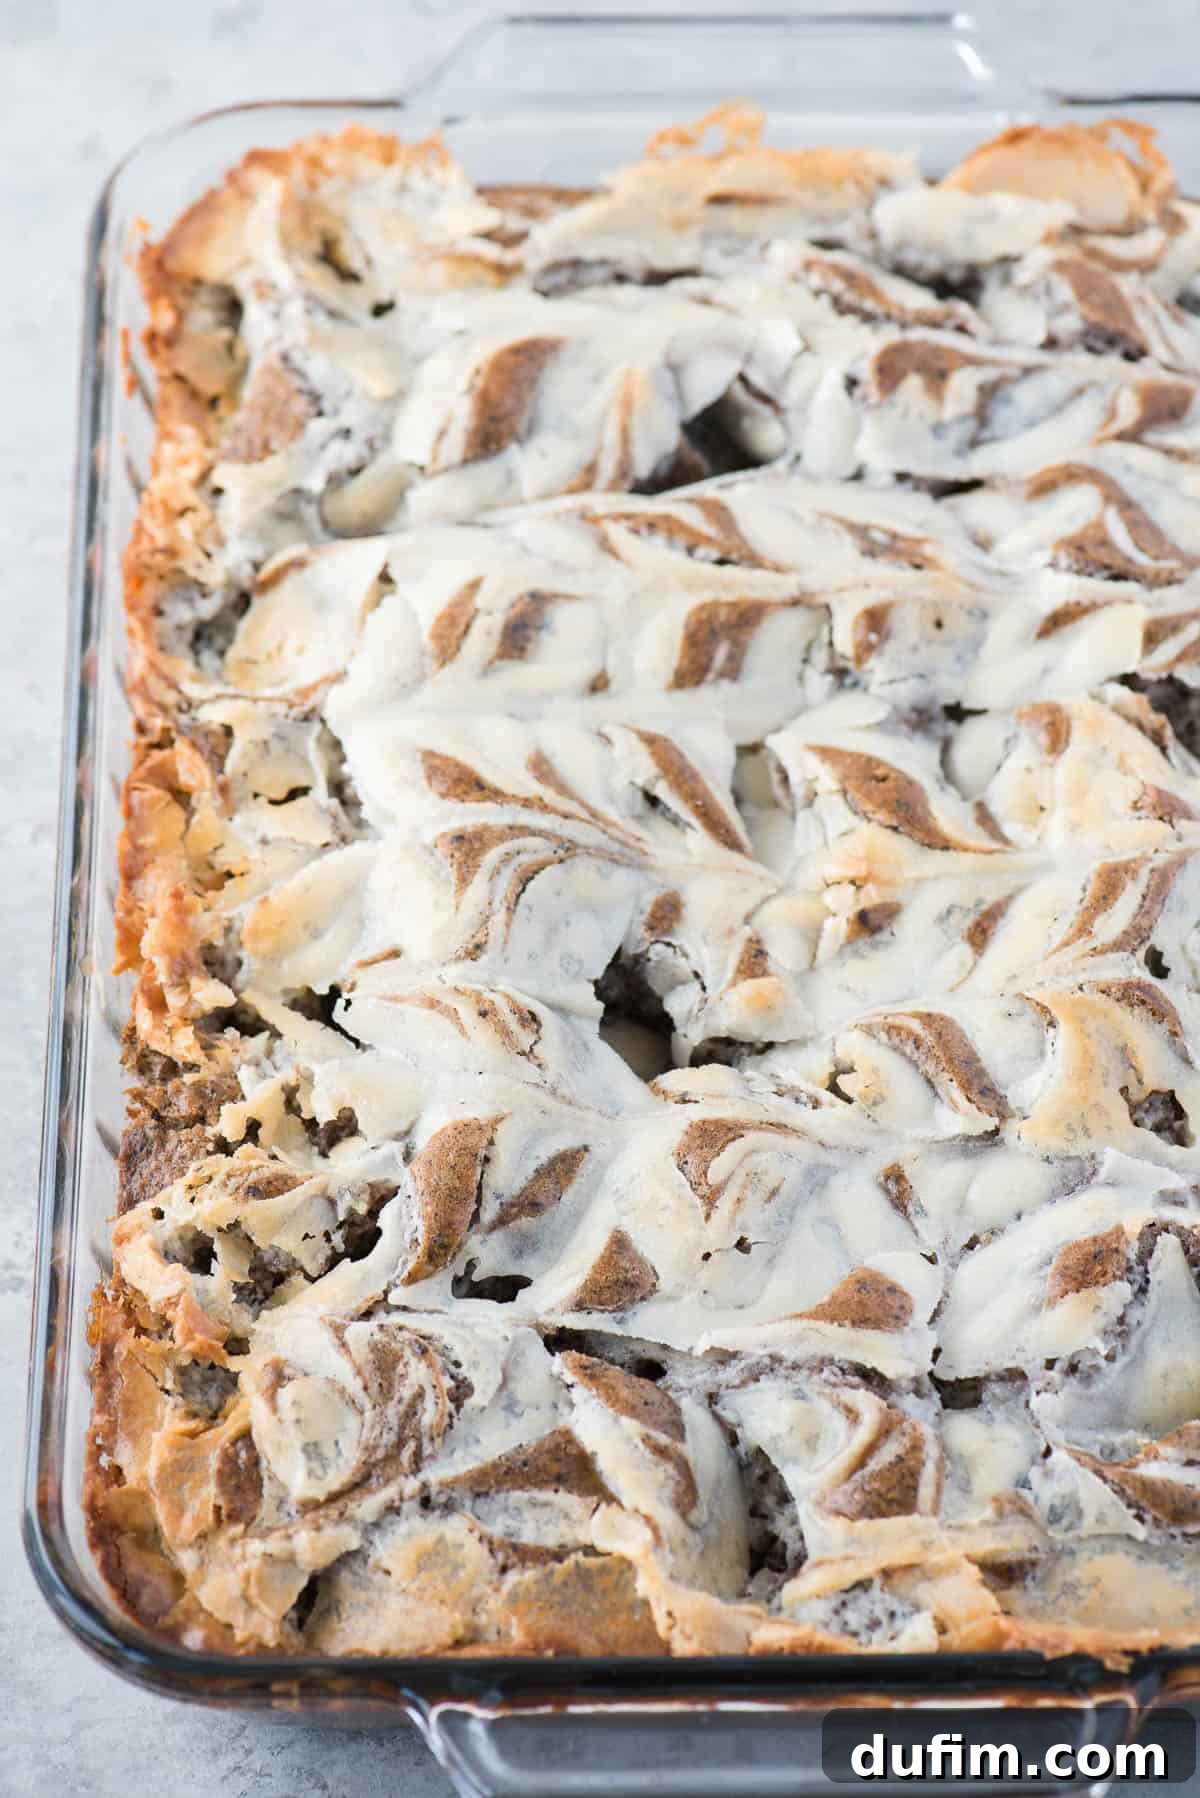
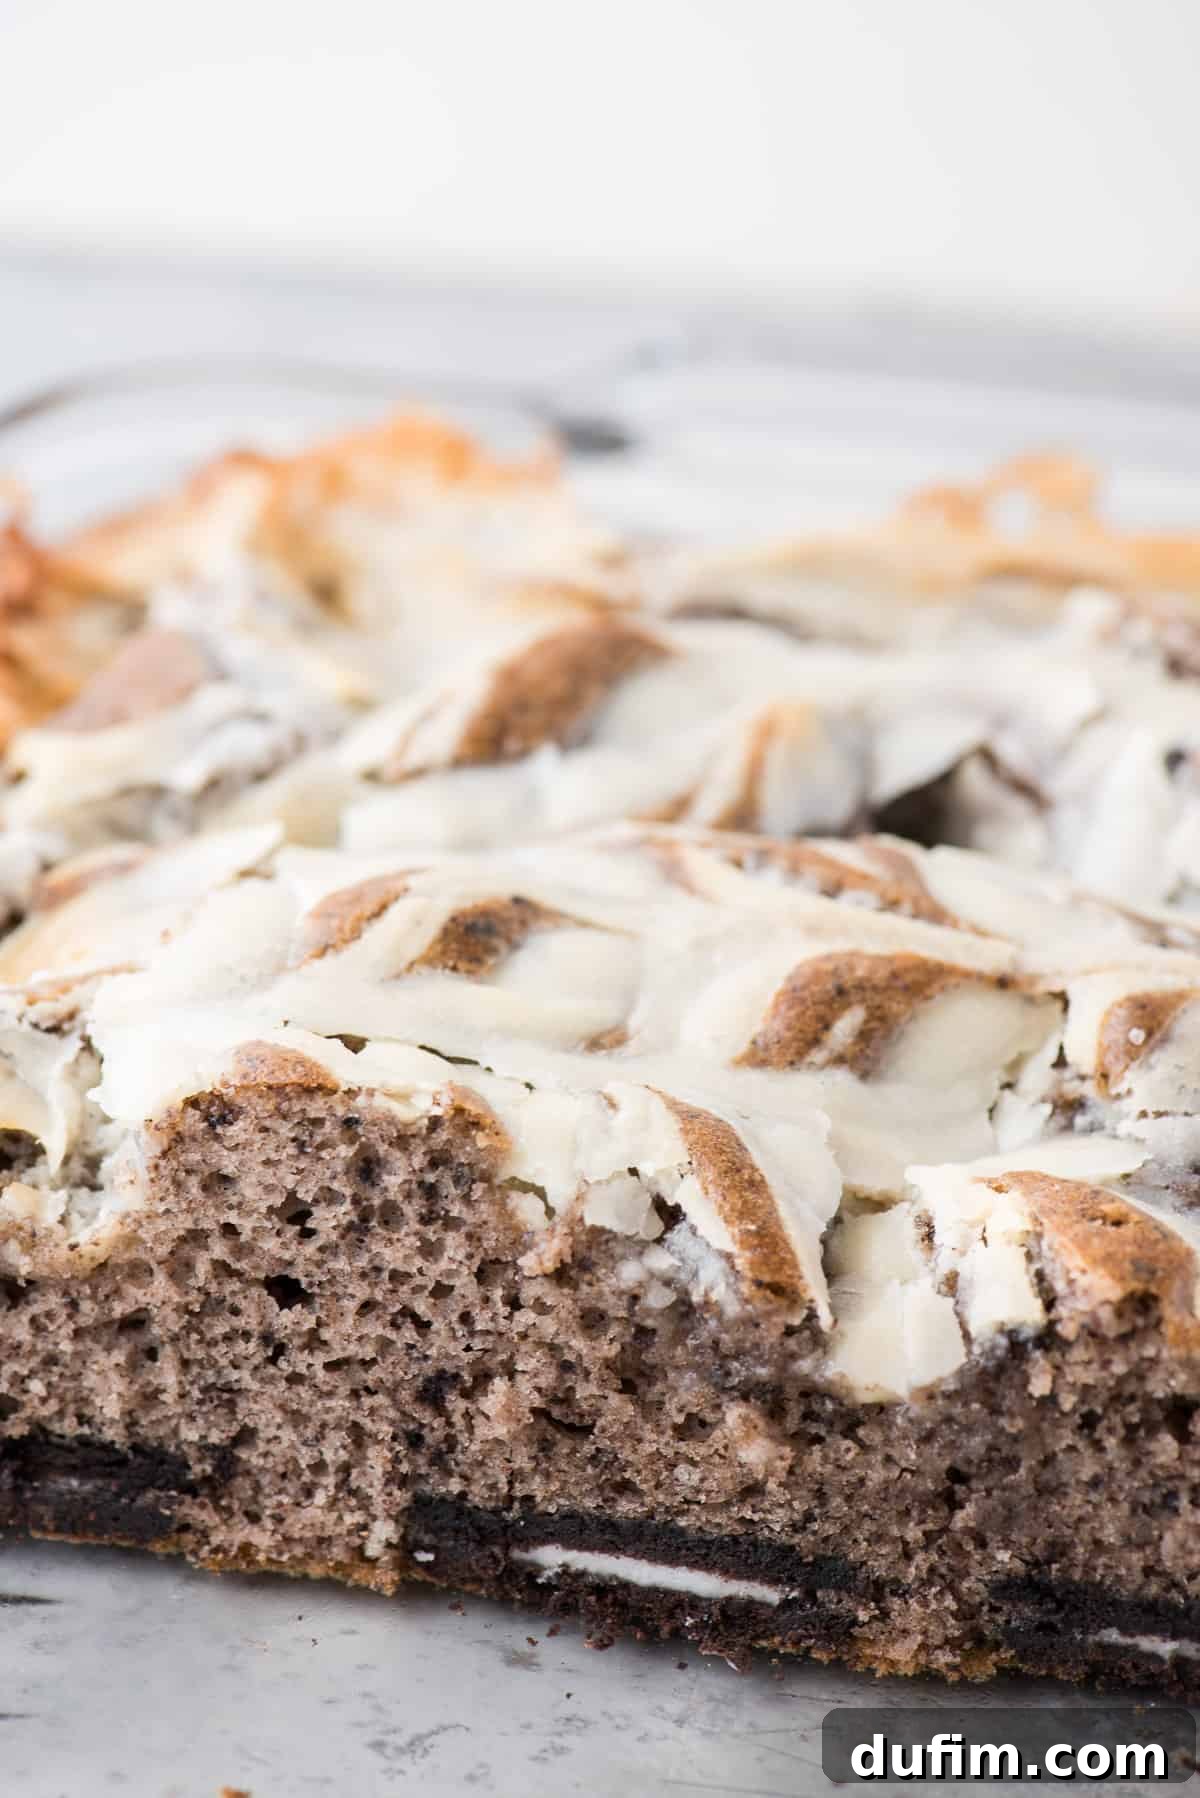
The “Earthquake Cake” is a fascinating and incredibly delicious style of dessert known for its distinctive appearance and rich, integrated frosting layer. Unlike traditional cakes where frosting is applied after baking, an earthquake cake incorporates a generous layer of cream cheese frosting directly into the cake batter before it ever sees the oven. As the cake bakes and rises, the denser cream cheese layer “melts” and sinks, creating an alluring landscape of frosting-filled crevices, cracks, and pockets on the cake’s surface. This dramatic, uneven topography is precisely what gives the cake its memorable “earthquake” moniker.
This ingenious baking method eliminates the need for any additional frosting on top of the finished cake, as the luscious cream cheese goodness is already baked right into every bite. The result is consistently a super moist, extraordinarily flavorful, and beautifully rustic cake that comes out of the oven ready to serve. It’s an all-in-one dessert marvel that delivers on both taste and visual appeal, offering a delightful surprise with each forkful of moist cake infused with pockets of creamy, sweet frosting.
Crafting Your Own Oreo Earthquake Cake: A Step-by-Step Guide
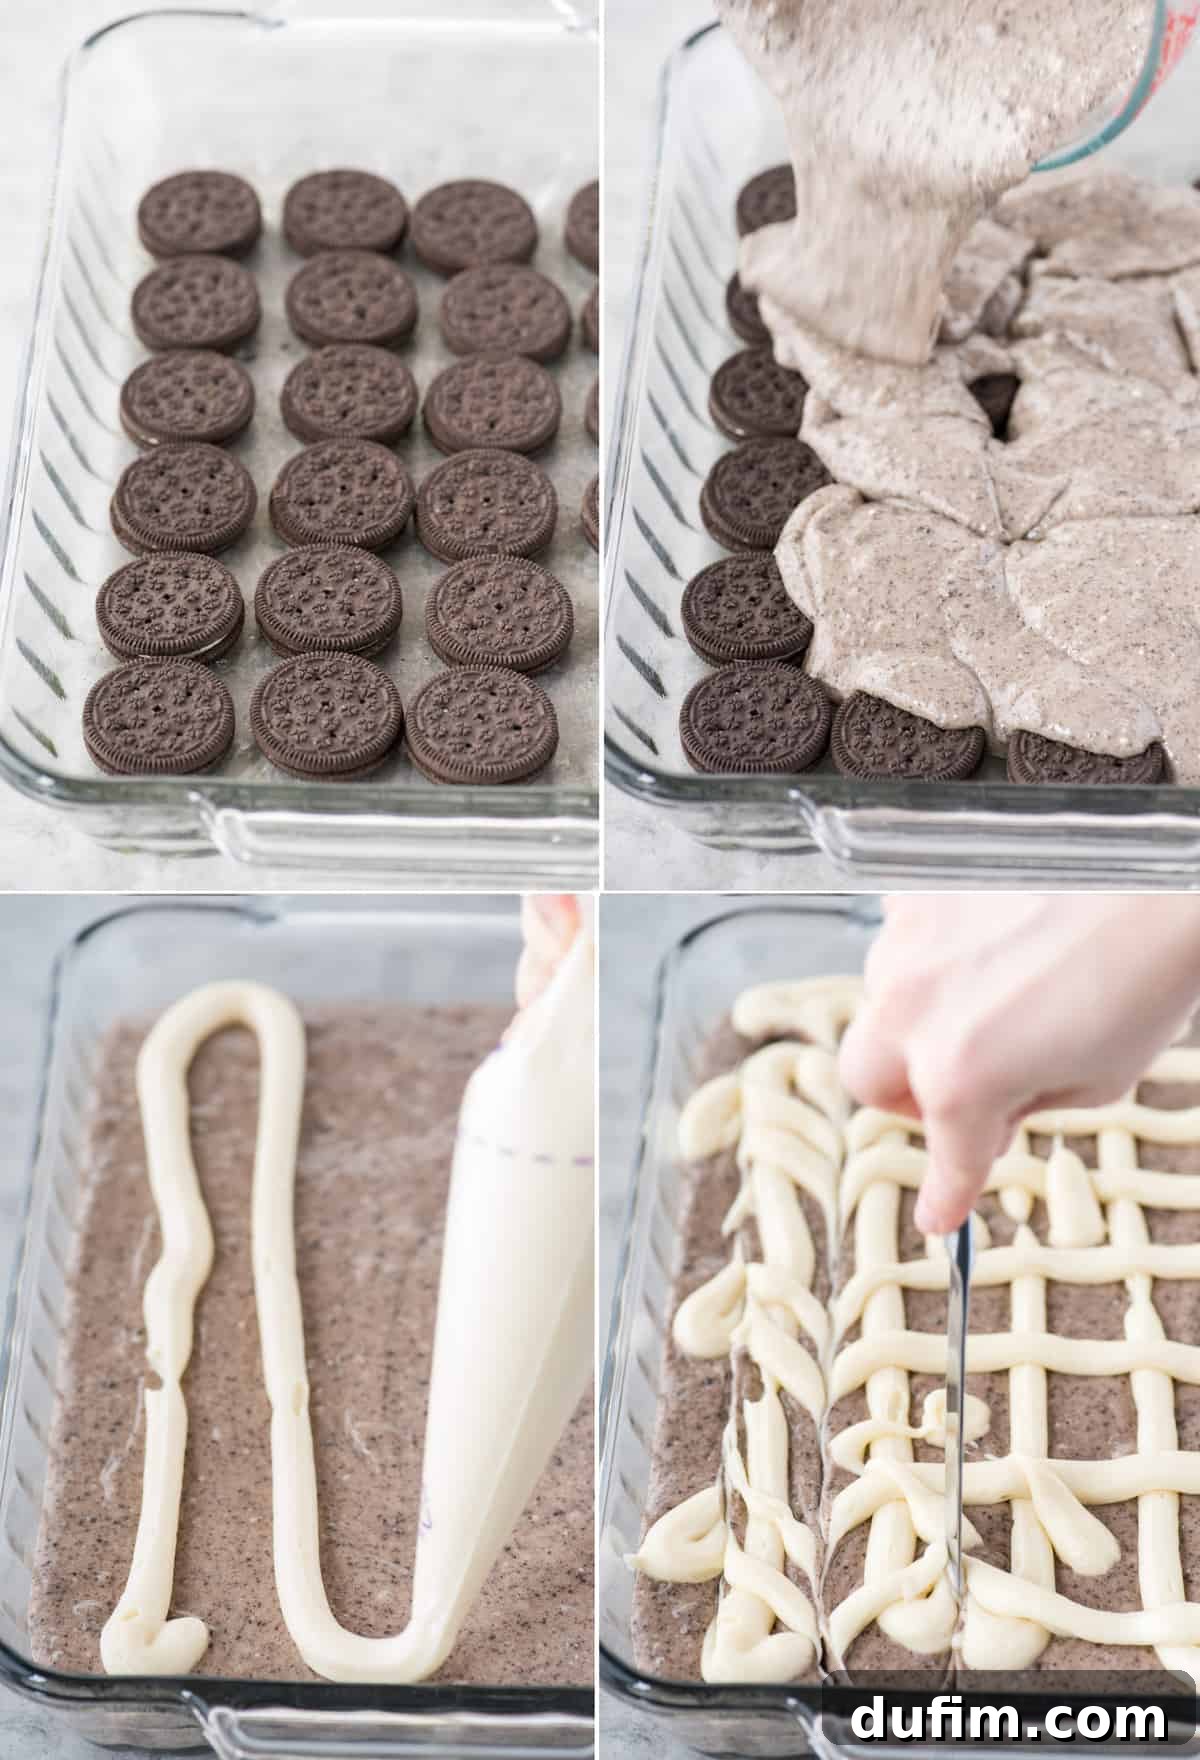
Creating an Earthquake Cake is a surprisingly simple process, making it a favorite for both novice and experienced bakers alike. Most earthquake cake recipes begin with a foundational layer at the bottom of a standard 9×13 inch baking pan. Common choices for this base layer often include shredded coconut, chocolate chips, or various nuts, or a delightful combination of these. For our exquisite Oreo Earthquake Cake, we elevate this tradition by laying down a solid foundation of whole Oreo cookies, ensuring a delightful crunch and intense chocolate flavor in every slice.
Next comes the cake layer itself. We streamline the process by utilizing a convenient box of white cake mix, typically 15.25 ounces, which provides a wonderfully tender and versatile base. To transform this into an irresistible Oreo-infused batter, we enrich it with essential ingredients like milk, eggs, and vegetable oil. The real magic happens when we stir in a generous amount of crushed Oreo crumbs, ensuring that the signature cookies and cream flavor permeates every part of the cake. This thoughtful addition creates an instant Oreo cake, bursting with flavor and texture. Once your batter is perfectly mixed, gently pour it evenly over the layer of whole Oreos you’ve placed in the pan.
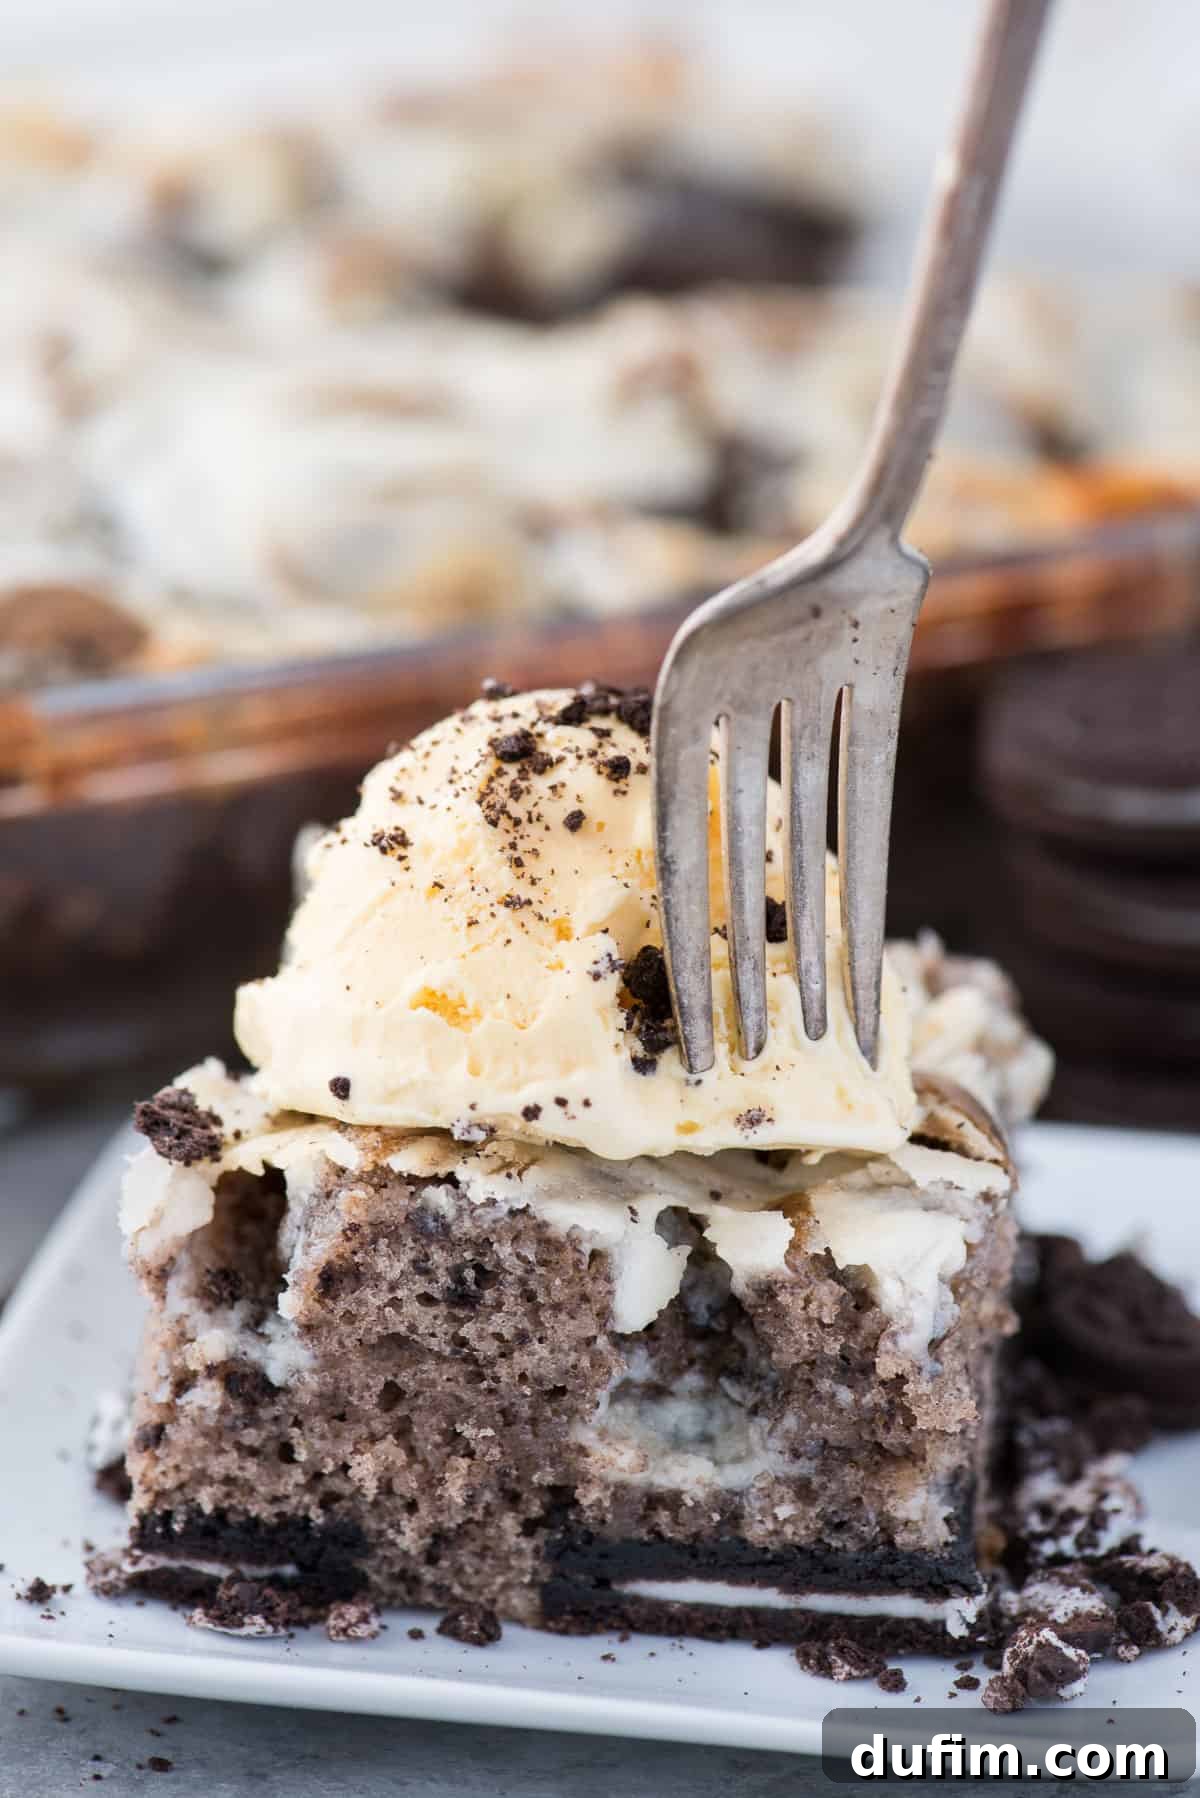
The crowning glory of this cake is the rich and tangy cream cheese frosting. Prepare this indulgent frosting exactly as outlined in the detailed recipe card below, ensuring it reaches a smooth, pipeable consistency. For ease and precision, transfer the prepared frosting into a piping bag, or a sturdy ziplock bag with one corner snipped off. Now, let your creativity flow as you pipe the frosting mixture all over the cake batter. I personally love creating a neat grid pattern, then going back with a simple butter knife to swirl it gently into the cake batter. This technique helps achieve those beautiful, characteristic cracks and pockets of frosting that define an earthquake cake.
For those who simply can’t get enough Oreo goodness, feel free to crumble an extra handful of Oreos directly on top of the cake batter after piping the frosting and before it goes into the oven. This adds another layer of texture and an intensified Oreo flavor. Once all your delicious layers are assembled, it’s time to bake this masterpiece! Pop it into your preheated oven and let the transformation begin. The aroma alone will have everyone eagerly awaiting the first slice.
Storing Your Delicious Creation: Should I Refrigerate a Cake with Cream Cheese?
When it comes to cakes featuring cream cheese frosting, the question of refrigeration is a common one, and the answer can sometimes depend on various factors including the environment and how quickly the cake will be consumed. Many trusted bakers and culinary experts suggest that if you plan to serve and enjoy the cake within one to two days, and if your home maintains a comfortable room temperature of around 70 degrees Fahrenheit (21 degrees Celsius) or cooler, it is perfectly acceptable to leave the cake covered on the countertop. This often allows the cake to maintain its optimal texture and flavor, as refrigeration can sometimes alter the moistness of the cake and the softness of the cream cheese.
However, prudence dictates a different approach if your home is warmer, or if you’re baking during the hot summer months. In such conditions, where temperatures can rise, the safer and highly recommended option is to store your cake in the refrigerator. This helps to prevent the cream cheese frosting from spoiling and keeps the cake fresh for longer. If you choose to refrigerate your cake overnight because you plan to serve it the following day, a great tip is to remove it from the fridge first thing in the morning. This allows the cake ample time to gradually come back to room temperature, ensuring the frosting softens slightly and the cake regains its most enjoyable texture for serving.
My personal opinion, stemming from years of baking experience, aligns with common wisdom: if your cake will be consumed within the next day or two and your kitchen isn’t overly warm, go ahead and leave it on the counter. Just be absolutely sure to cover it tightly with a cake lid or plastic wrap to protect it from drying out and to maintain its freshness. For longer storage, or in warmer climates, the refrigerator is undoubtedly your best friend. This ensures both food safety and maximum enjoyment of your delightful Oreo Earthquake Cake.
“Absolutely delightful! So thrilled to finally have this recipe. I can’t wait to bake and enjoy this cake again!”
-Miranda
Explore More Irresistible Cake Recipes
If you’ve enjoyed baking and tasting this magnificent Oreo Earthquake Cake, you’ll be thrilled to discover other fantastic cake recipes that are just as rewarding. Expand your baking repertoire with these crowd-pleasing options:
- Classic Yellow Cake Recipe
- Vibrant Funfetti Earthquake Cake
- Traditional Classic Earthquake Cake
- Elevated Doctored Up White Cake
Tap stars to rate!
Oreo Earthquake Cake
15
35
45
1 35
20 servings
Rate
Equipment
-
My favorite spatula!
-
Glass Mixing Bowl
-
9×13 glass pan
-
Kitchen Scale
Ingredients
- 24 Whole Oreos for the bottom of the pan*
Cake Layer
- 1 box white cake mix, 15.25 oz
- ½ cup (60g) Oreo crumbs
- ½ cup (118ml) vegetable oil
- 3 large eggs
- 1 cup (236ml) milk
Frosting Layer
- 4 oz (114g) cream cheese, softened
- ½ cup (113g) unsalted butter, melted, 1 stick
- 1 Tbsp vanilla extract
- 2 ½ cups (283g) powdered sugar
Instructions
-
Preheat your oven to 350 degrees F (175 degrees C).
-
Lightly spray a 9 x 13 inch baking pan with non-stick cooking spray to prevent sticking. Arrange the whole Oreo cookies in a single layer to cover the bottom of the pan, creating a delicious base.24 Whole Oreos for the bottom of the pan*
-
In a large bowl, using an electric mixer on low speed, beat together the white cake mix, vegetable oil, eggs, milk, and Oreo crumbs until just combined and smooth. Be careful not to overmix.1 box white cake mix, 1/2 cup (60g) Oreo crumbs, 1/2 cup (118ml) vegetable oil, 3 large eggs, 1 cup (236ml) milk
-
Carefully pour the prepared cake batter evenly over the layer of whole Oreos in the baking pan.
-
For the frosting layer: In a separate bowl, use an electric mixer to beat the softened cream cheese, melted butter, and vanilla extract until well combined and creamy. Gradually add the powdered sugar, mixing until the frosting becomes thick and smooth. Transfer this luscious frosting mixture into a piping bag (or a sturdy ziplock bag with a small corner snipped off for piping).4 oz (114g) cream cheese, 1/2 cup (113g) unsalted butter, melted, 1 Tbsp vanilla extract, 2 1/2 cups (283g) powdered sugar
-
Pipe the cream cheese frosting mixture over the cake batter. You can create any pattern you desire – a grid, dollops, or swirls work wonderfully. Use a butter knife or a skewer to gently swirl the frosting into the cake batter, creating those signature “earthquake” cracks and pockets.
-
Bake in the preheated oven for 30 minutes. After 30 minutes, loosely place a piece of aluminum foil over the top of the cake to prevent over-browning, and continue baking for an additional 5-10 minutes. The total bake time should be between 35-40 minutes, or until a toothpick inserted into the cake (avoiding the frosting pockets) comes out with moist crumbs.
-
Once baked, remove the cake from the oven and allow it to cool completely on a wire rack before serving. As it cools, the frosting layer will continue to “sink” and meld into the cake, creating delightful ribbons of creamy frosting hidden throughout!
-
If you plan to serve the cake within the next day or two, it can be kept covered on the counter. For longer storage or in warmer climates, refrigerate the cake. Always ensure it’s covered to maintain freshness.
Notes
Nutrition
Carbohydrates: 49g |
Protein: 4g |
Fat: 12g |
Saturated Fat: 6g |
Polyunsaturated Fat: 1g |
Monounsaturated Fat: 4g |
Trans Fat: 1g |
Cholesterol: 48mg |
Sodium: 297mg |
Potassium: 88mg |
Fiber: 1g |
Sugar: 33g |
Vitamin A: 278IU |
Calcium: 86mg |
Iron: 2mg
Nutrition Disclosure
All nutritional values are approximate and provided to the reader as a courtesy. Changing ingredients and/or quantities will alter the estimated nutritional calculations.
Enjoyed this recipe? Please consider leaving a rating and comment below!