
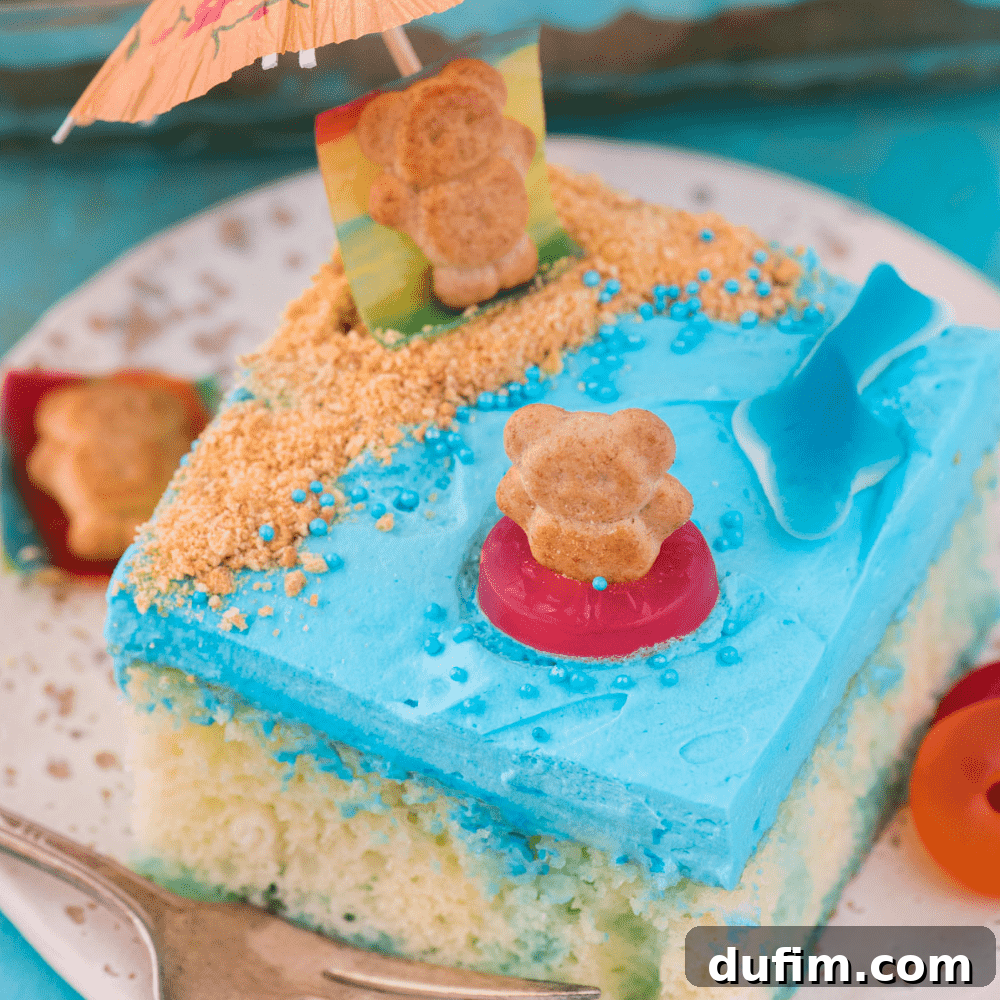
Looking for the ultimate dessert to make a splash at your next event? This vibrant Beach Poke Cake is an absolute hit for any beach-themed party, under-the-sea celebration, or simply a fun summer gathering! Kids and adults alike will delight in creating and devouring this whimsical treat, adorned with playful teddy grahams, colorful gummy sea creatures, and edible graham cracker “sand.” It’s more than just a cake; it’s an edible centerpiece that brings the joy of the seaside right to your table.
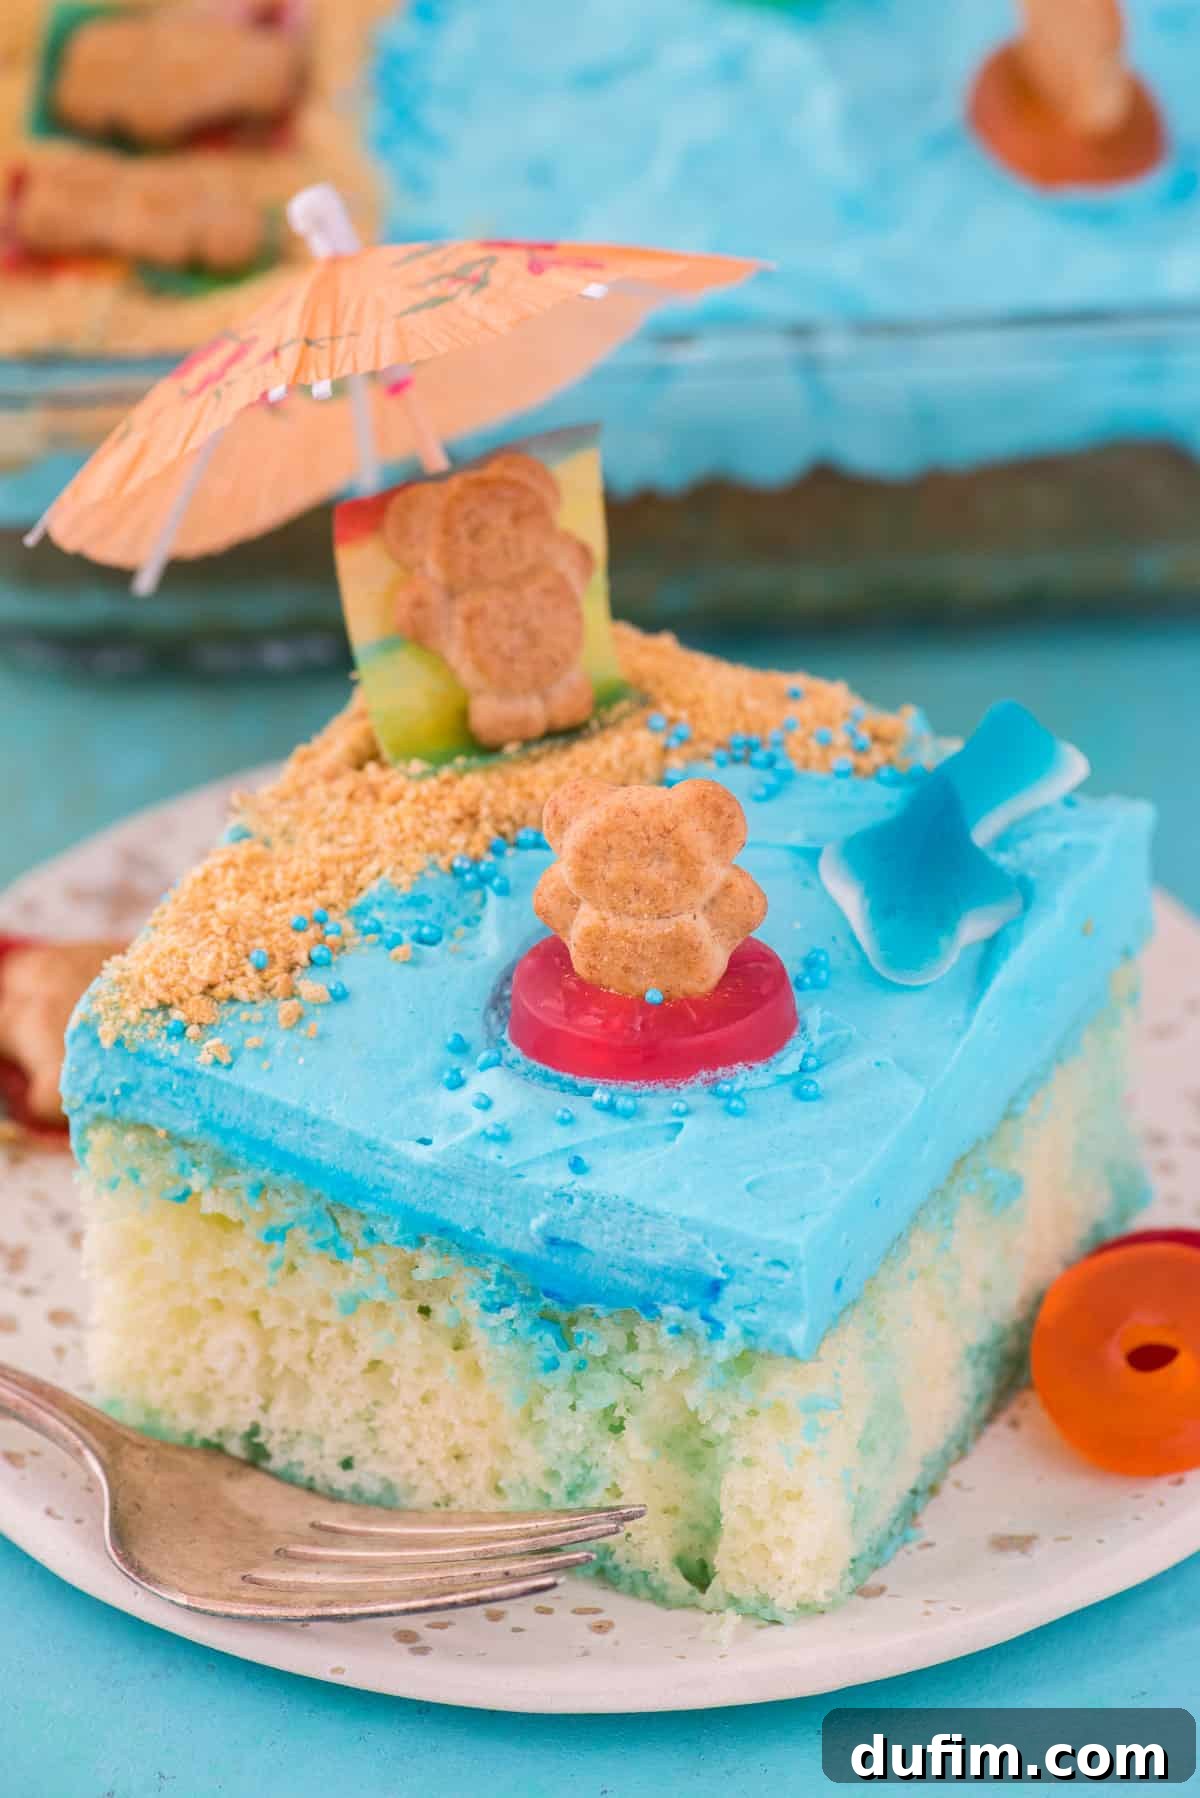
I made this last week for a family beach trip and it was a hit! Everyone loved how fun and tasty it was.
-Stefanie
The best ideas often strike at the most unexpected moments. For me, the inspiration for this delightful Beach Poke Cake came while I was simply lying in bed, awaiting sleep. While my partner, Ryan, typically drifts off in mere minutes, there was a precious window before he succumbed to slumber where we brainstormed. He casually mentioned a poke cake, and suddenly, like a wave crashing on the shore, the brilliant concept of a “BEACH POKE CAKE” washed over me!
This whole idea is undeniably cute and truly takes the concept of a dessert to a new level of fun. It’s the absolute perfect cake to bake for an ocean-themed birthday party or any event where you want to evoke the carefree spirit of summer. While we don’t have kids yet, I can already envision the joy of creating these imaginative, themed treats for their future birthdays! There’s something incredibly satisfying about bringing a creative vision to life in the form of a delicious, shareable dessert.
What is a Poke Cake? Your Guide to Easy Flavor Infusion
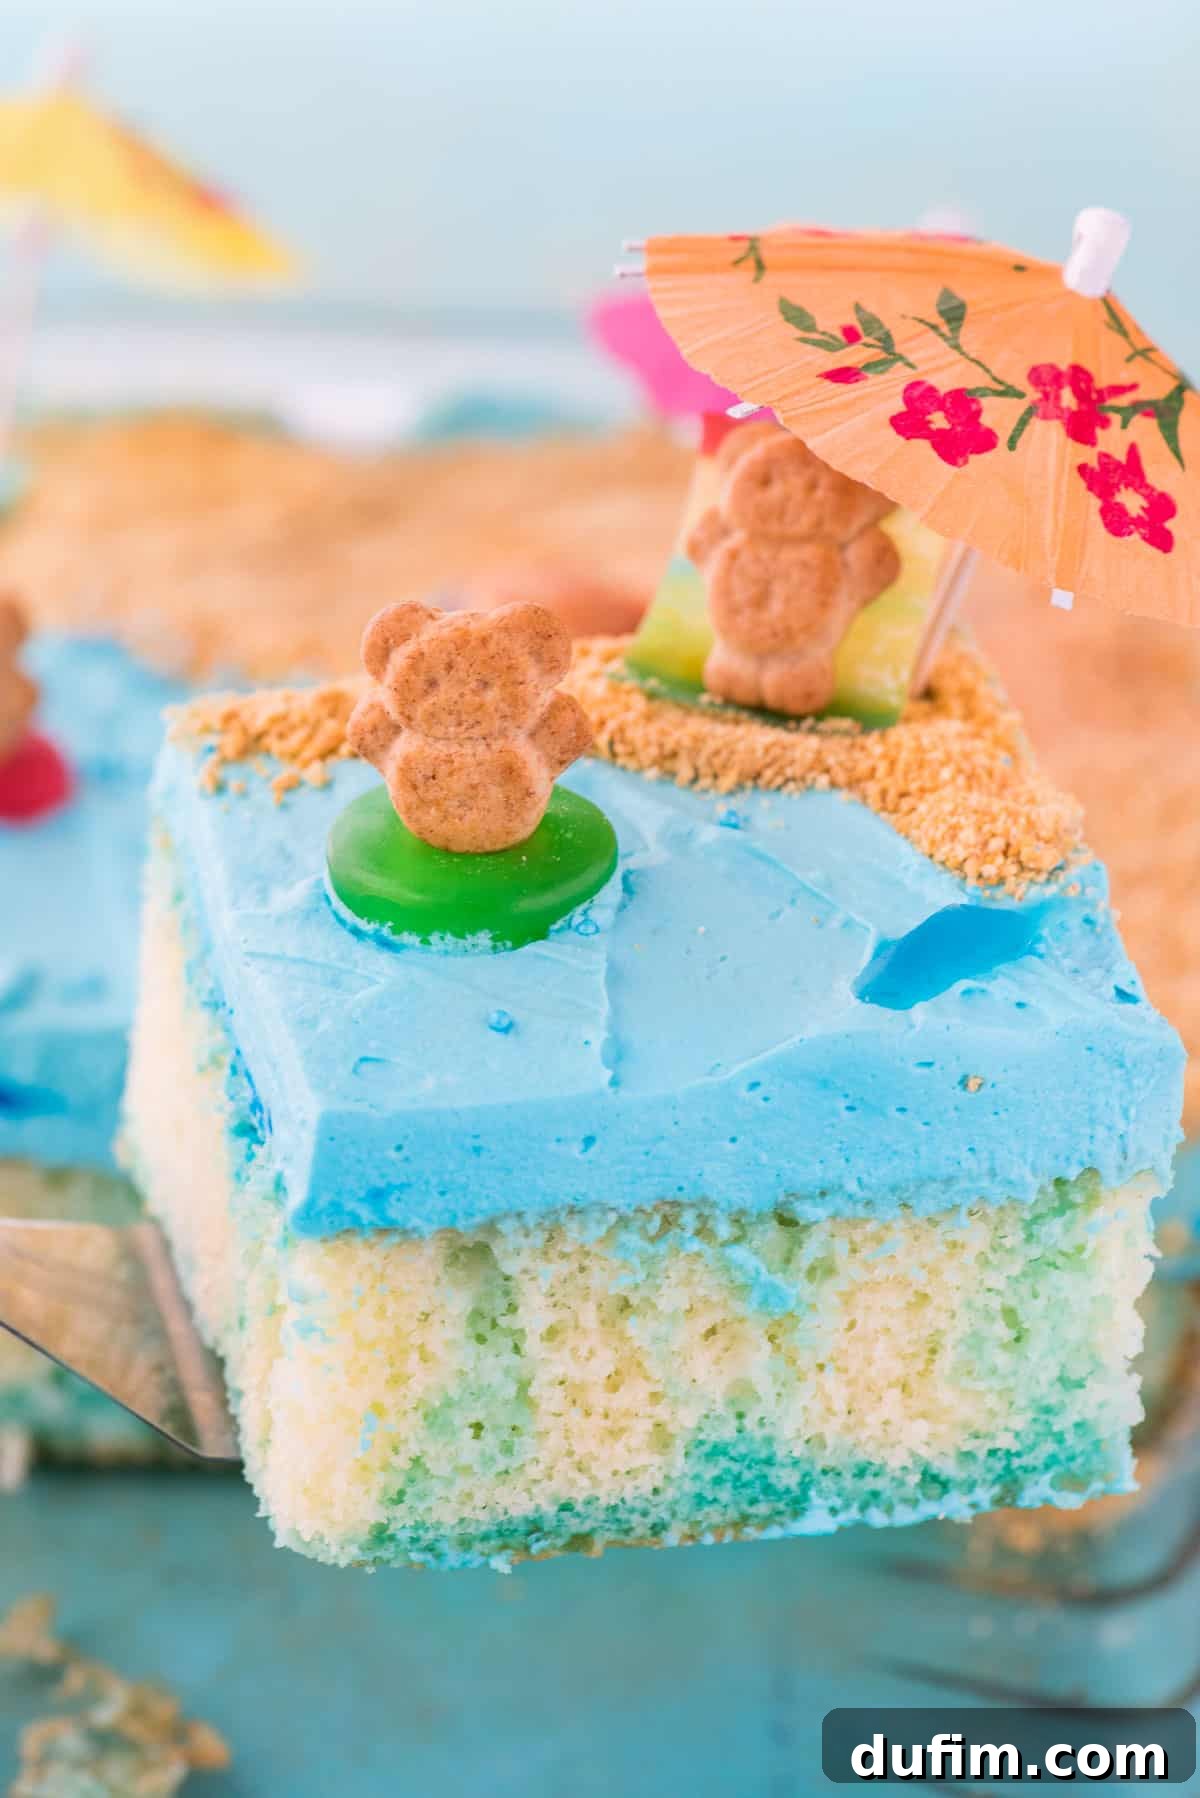
A poke cake is a baking marvel renowned for its simplicity and incredible flavor. Originating from a clever method of infusing extra moisture and taste into a baked cake, it involves literally “poking” holes into a cooled cake and then pouring a liquid mixture over it. This liquid then seeps into every crevice, creating pockets of deliciousness throughout the cake. This technique not only enhances the flavor profile but also ensures an incredibly moist and tender crumb with every bite, making it a perennial favorite for gatherings.
The foundation of any great poke cake begins with a perfectly baked cake. You have several options here: a convenient box cake mix for speed, a beloved homemade cake recipe for that personal touch, or even a doctored-up cake mix, which elevates a standard mix with a few extra ingredients for a richer, more homemade taste. The choice is yours, but the key is to ensure your cake is fully cooled before moving on to the next step.
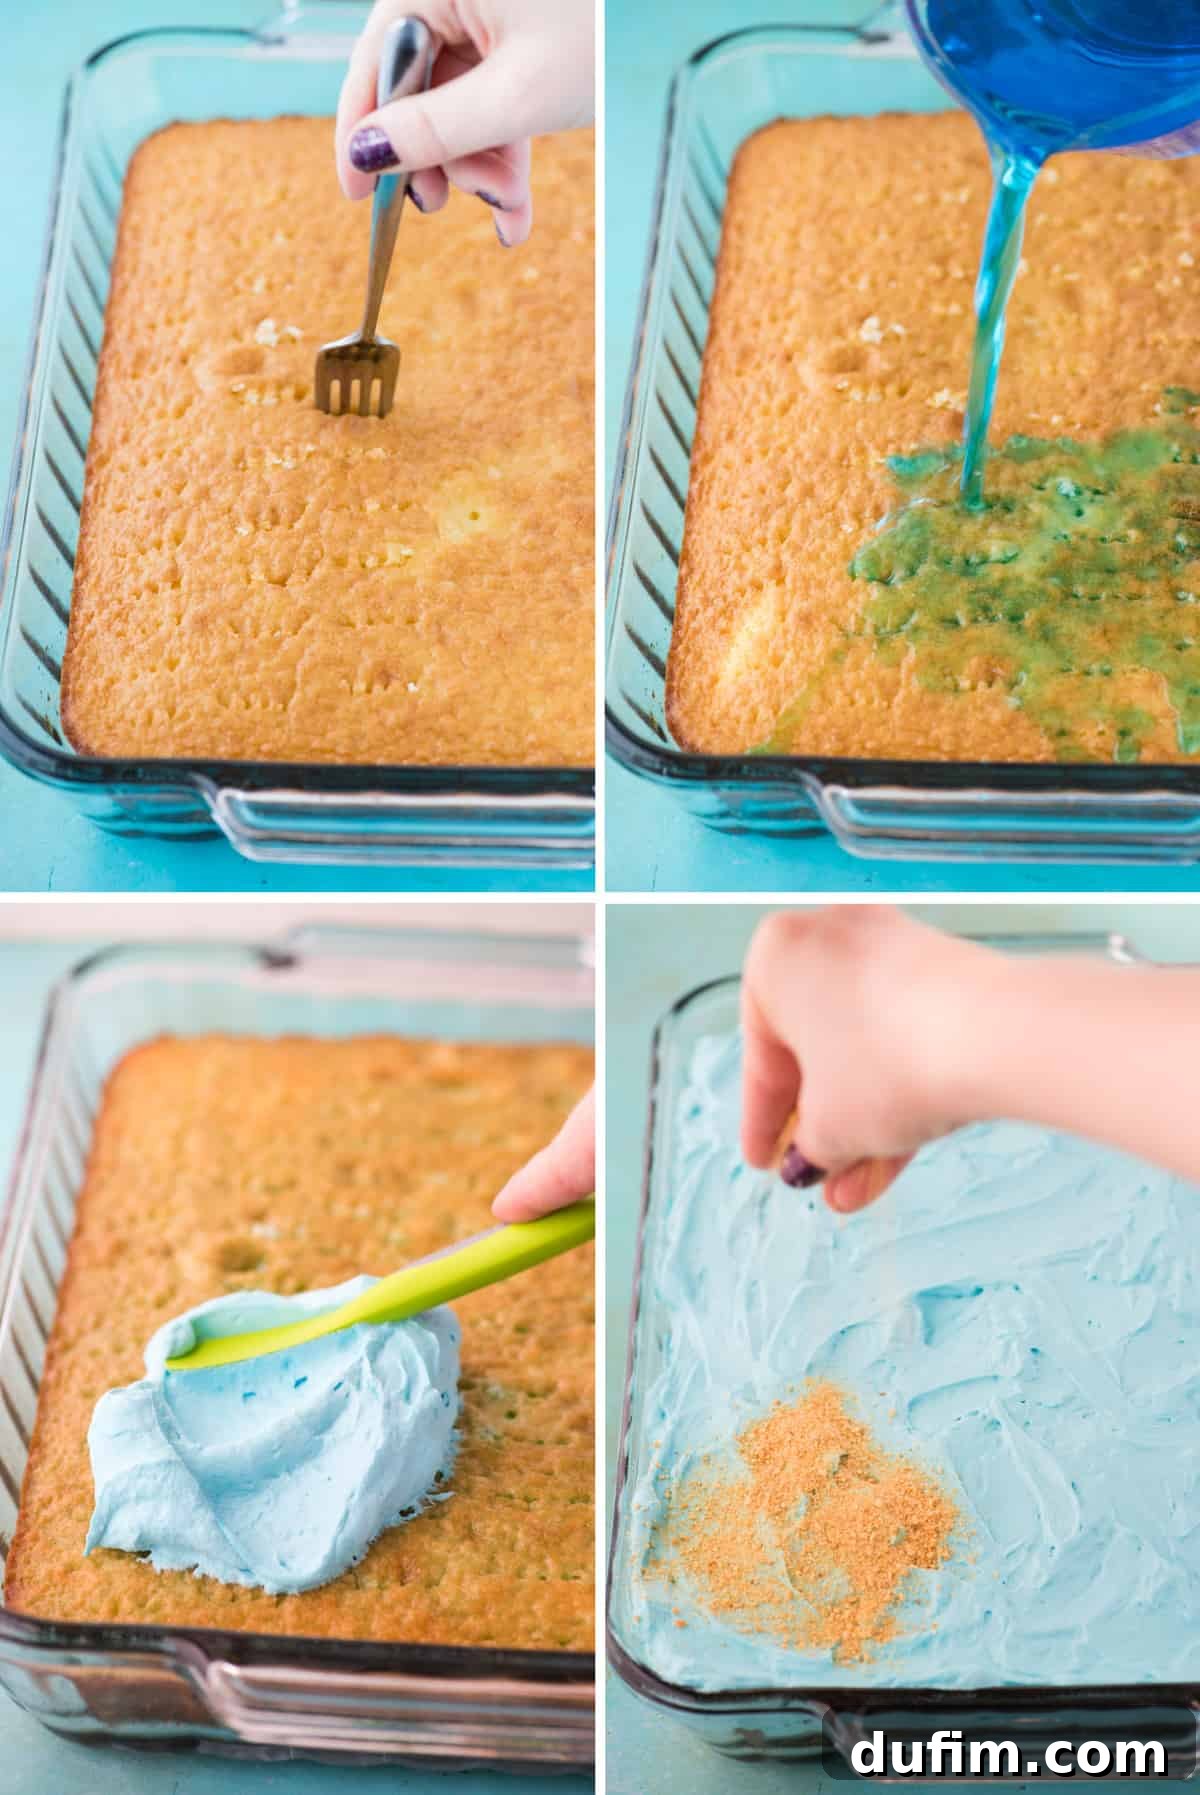
Once your cake has reached room temperature, the fun begins! Use a fork, a straw, or even the handle of a wooden spoon to poke holes across the entire surface of the cake. Aim for holes that are about half an inch apart and go all the way to the bottom of the pan. These holes are the conduits for the delicious filling that will transform your cake into a moist, flavor-packed dessert.
Next comes the star of the show: the filling mixture. This is where the poke cake truly shines, offering endless possibilities for customization. For our Beach Poke Cake, we use a vibrant blue jello mixture, which perfectly mimics the look of clear ocean water. However, you can explore other options like instant pudding, sweetened condensed milk, fruit purées, or even chocolate syrup. Simply pour or spread your chosen filling evenly over the cake, ensuring it seeps generously into all the poked holes. Then, refrigerate the cake to allow the filling to set and fully infuse.
Finally, you’ll crown your creation with a delectable frosting. Popular choices include classic whipped cream, a tangy cream cheese whipped cream, or a rich buttercream. The frosting not only adds another layer of flavor and texture but also serves as the canvas for your creative decorations. Once frosted, add your desired garnishes, and PRESTO! You’ve successfully made a show-stopping poke cake that is as easy to make as it is delicious.
Crafting Your Dream Beach Cake: Ingredients and Inspiration
To create this enchanting beach cake with its signature jello “ocean,” you’ll need a simple yet effective collection of ingredients that combine for both flavor and visual appeal. This recipe is designed to be approachable for bakers of all skill levels, ensuring a delightful outcome.
The Cake Base
Start with a box of white or yellow cake mix, along with the additional ingredients specified on the package (typically eggs, oil, and water). These classic flavors provide a neutral canvas, allowing the vibrant blue jello and playful decorations to truly shine. For those who enjoy a slightly elevated taste, consider using a doctored-up cake mix recipe for an even richer, more homemade texture.
The Ocean Filling
For the mesmerizing “ocean” effect, you’ll need a 3 oz box of blue raspberry jello. This specific flavor not only delivers a beautiful aquatic hue but also a sweet, fruity taste that complements the cake wonderfully. Combine the jello powder with boiling water as instructed, ensuring it fully dissolves to create a smooth, vibrant liquid ready to infuse your cake.
The Creamy Frosting Waves
Our frosting provides a smooth, creamy “sandy beach” and “ocean” border. You’ll need heavy cream, softened cream cheese, powdered sugar, and a touch of vanilla extract. For that perfect ocean blue, a small amount of blue gel food coloring is essential – gel colors are highly concentrated, ensuring a vivid tint without altering the frosting’s consistency. Alternatively, for a quicker option, you could use store-bought whipped topping (like Cool Whip) mixed with cream cheese, or simply Cool Whip for a lighter finish.
The Fun Beach & Sea Decorations
This is where your creativity truly comes alive! The decorations transform a simple cake into a lively beach scene. Gather:
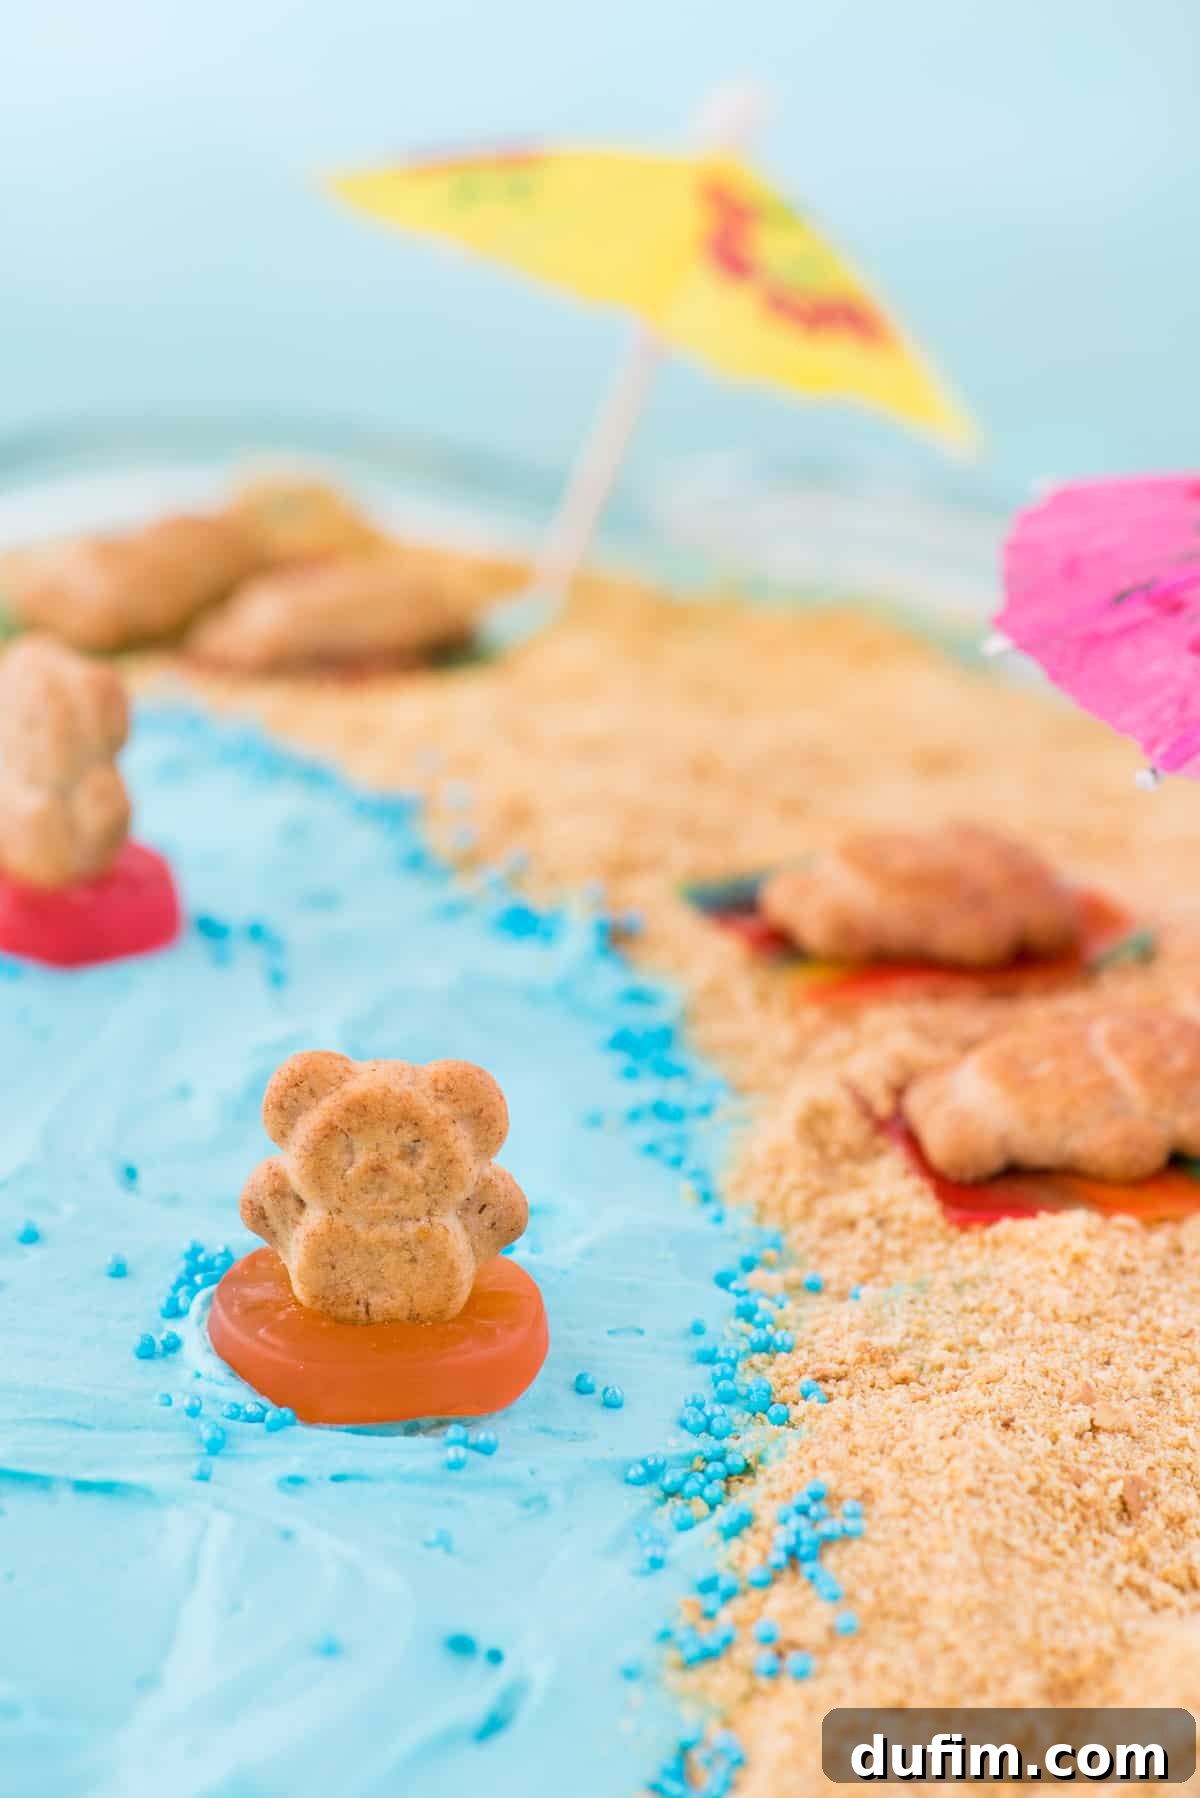
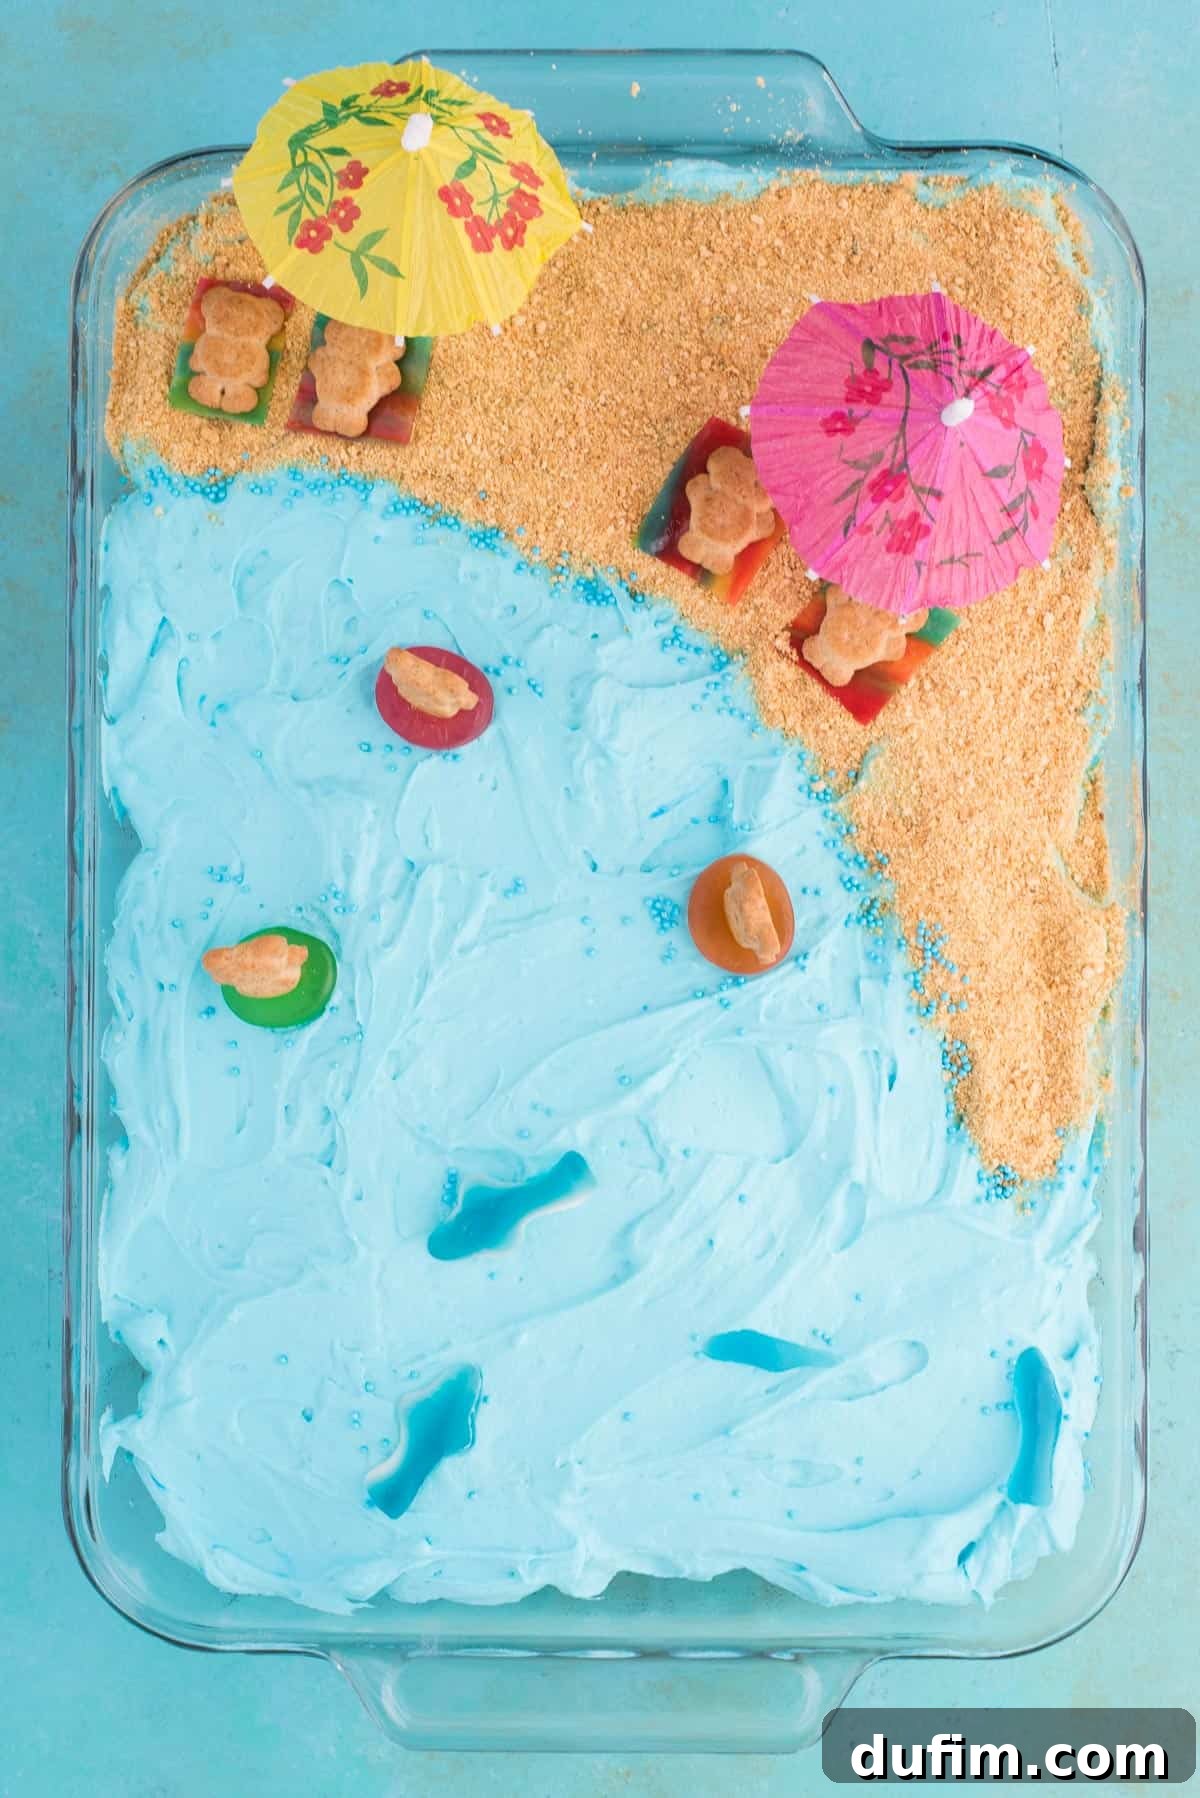
- Graham cracker crumbs: These are your perfect “sand.”
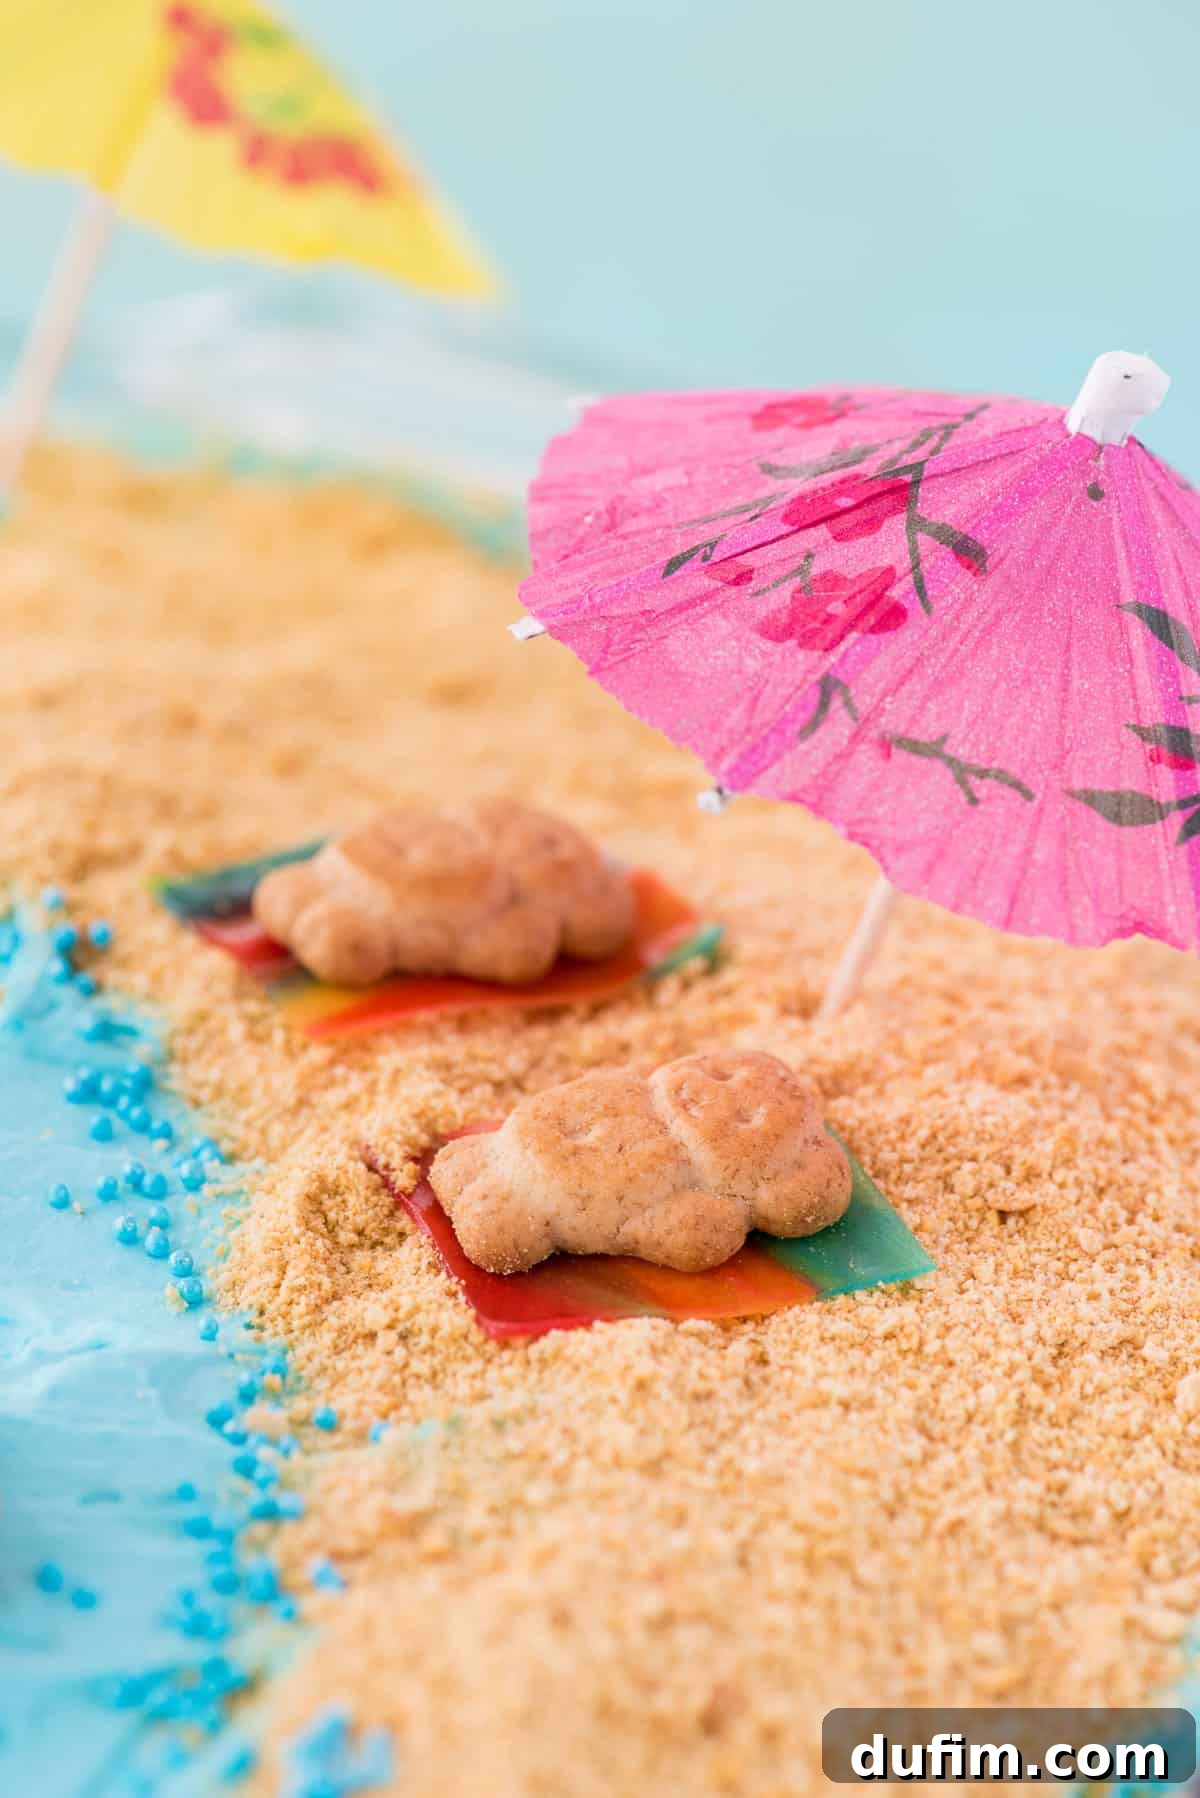
- Teddy Grahams: The adorable beach-goers, ready to relax.
- Gummy Life Savers: Perfect as inner tubes for your teddy grahams.
- Gummy sharks or other sea creatures: To swim in your jello ocean.
- Fruit roll-ups: Cut into small squares or rectangles for colorful “beach towels.”
- Blue sprinkles: To add shimmer to the water or outline the shore.
- Umbrella toothpicks: Essential for mini beach umbrellas.
The beauty of this beach cake lies in its adaptability. You are the artist! Want a sprawling beach? Pile on the graham cracker crumbs. Prefer a bustling ocean? Add more gummy fish and sharks. Feel free to substitute with other candies like Swedish Fish or Goldfish crackers for more variety in your underwater world. Edible seashells, pretzel sticks for driftwood, or even thinly sliced kiwi for tropical islands can further enhance your scene. Let your imagination guide you to create a unique and memorable edible beach paradise!
Expert Tips for a Flawless Beach Theme Poke Cake
Creating a stunning and delicious Beach Poke Cake is incredibly satisfying, and with these expert tips, yours will be picture-perfect every time. Paying attention to these small details will make a big difference in the final presentation and taste.
1. **Chill Time is Crucial After Filling:** After you’ve poured the vibrant blue jello mixture into the poked holes of your cake, it’s vital to refrigerate it for at least 1-2 hours, or until the jello is completely set. This chilling period allows the gelatin to firm up within the cake, creating those delightful pockets of “ocean” and ensuring the cake remains moist without becoming soggy. It also provides a stable base for the frosting layer. Resist the urge to rush this step!
2. **Apply “Sand” to Fresh Frosting:** The key to getting your graham cracker crumbs to stick beautifully and evenly, creating a realistic “sandy” beach, is to apply them immediately after spreading the frosting. The fresh, soft frosting acts as a perfect adhesive. If you refrigerate the cake after frosting but before adding the crumbs, the frosting will chill and harden, preventing the crumbs from adhering properly. For best results, frost a section, add crumbs, then frost the next section, or work quickly over the entire surface.
3. **Timing is Everything for Fruit Roll-Up Towels:** While incredibly cute, fruit roll-up beach towels are delicate! Do not add them to the cake if you plan to refrigerate it overnight or for an extended period before serving. The moisture in the refrigerator will cause the fruit roll-ups to become mushy and slimy, compromising their appearance and texture. Instead, place these adorable edible towels, along with your teddy grahams and other delicate gummy decorations, just shortly before you plan to serve the cake. This ensures they look fresh and appealing for your guests.
4. **Experiment with Blue Hues:** For your jello “ocean” and blue frosting, don’t be afraid to play with different shades of blue gel food coloring. You can create varying depths of ocean effect by using a lighter blue for some areas and a slightly darker blue for others, or even blending a touch of green for a turquoise lagoon feel.
5. **Crumb Coastline:** When creating your graham cracker “beach,” consider making a slightly uneven coastline. This mimics the natural curves of a real beach and adds to the realistic charm of your cake. You can achieve this by gently pushing the crumbs into the frosting in a wavy pattern.
By following these simple tips, your Beach Poke Cake will not only taste incredible but will also be a visually stunning masterpiece that will impress everyone at your party!
Can I Make a Beach Poke Cake Ahead of Time?
Absolutely! The make-ahead nature of a poke cake is one of its most appealing features, especially when you’re planning for a party and want to minimize last-minute stress. You can prepare your Beach Poke Cake in stages, ensuring maximum freshness and flavor while saving you valuable time on the day of your event.
You can bake the cake portion of the recipe up to 2 days in advance. Once baked and completely cooled, wrap it tightly in plastic wrap and store it in the refrigerator. This allows the cake to retain its moisture and texture.
For even more convenience, you can complete the entire cake — baking, poking, filling with jello, and frosting — 1 day in advance. After frosting, cover the cake tightly with plastic wrap or foil, ensuring no air can dry out the frosting or cake, and store it in the refrigerator. Remember to add any delicate decorations like fruit roll-up towels or specific gummy candies just before serving to maintain their best appearance and texture, as discussed in our tips section. This way, your beautiful Beach Poke Cake will be ready to unveil with minimal effort on party day.
Should I Refrigerate a Poke Cake?
Yes, refrigerating a poke cake is almost always necessary and highly recommended. The main reason for this is to allow the filling, whether it’s jello, pudding, or fruit purée, to properly set. This setting process is crucial for the structural integrity of the cake, creating those distinct, moist pockets of flavor that define a poke cake. Without refrigeration, the liquid filling would remain runny and would not properly infuse the cake or create the desired texture.
Furthermore, many poke cake fillings and frostings, particularly those made with dairy products like cream cheese, whipped cream, or pudding, require refrigeration for food safety. Keeping the cake chilled also helps to maintain its freshness and prevents it from drying out, ensuring that each slice is as delicious and appealing as the first. Always store your poke cake in an airtight container or tightly covered in the refrigerator until ready to serve.
More Fun & Creative Desserts to Try
If you loved making this Beach Poke Cake, you’ll surely enjoy exploring other fun and imaginative dessert recipes. Here are some more delightful treats from our collection that are perfect for parties, holidays, or just a sweet craving:
- Under the Sea Graham Crackers
- Lemon Sugar Cookies
- Oreo Acorn Balls
- Chocolate Whipped Cream
Tap stars to rate!
Beach Poke Cake
Rate
Equipment
-
9×13 glass pan
-
Umbrella Picks
-
Kitchen Scale
-
Glass Mixing Bowl
-
KitchenAid 9-Speed Mixer
Ingredients
- 15.25 oz box of white cake mix, plus ingredients listed on back
- 3 oz box of blue raspberry jello
- ½ cup (118ml) boiling water
- 8 oz (226g) softened cream cheese
- ½ cup (56g) powdered sugar
- 1 tsp vanilla extract
- 2 cups (473ml) heavy cream, 16 oz
- blue gel food coloring
Decorations
- Graham cracker crumbs, teddy grahams, gummy life savers, gummy sharks or other sea creatures, fruit roll ups, blue sprinkles and umbrella toothpicks
Instructions
-
If using a box of cake mix, follow the directions on the back of the box to prepare and bake the cake in a 9×13 inch pan. If you’d like to make a doctored up white cake mix, we have an awesome recipe that we love for an extra rich flavor!15.25 oz box of white cake mix
-
Allow the cake to cool completely to room temperature. This is crucial to prevent the jello from being absorbed incorrectly. Then, using a fork, a straw, or a wooden dowel, poke holes all over the cooled cake, approximately 1/2 inch apart. Ensure the holes go all the way to the bottom of the cake for maximum jello infusion.
-
Prepare the ocean filling: In a medium bowl, combine the blue raspberry jello powder with 1/2 cup of boiling water. Stir well with a spatula until the gelatin is completely dissolved and no granules remain. Carefully pour this vibrant blue mixture all over the cake, making sure it seeps into all the poked holes. Cover the cake and refrigerate for 1-2 hours, or until the jello is fully set.3 oz box of blue raspberry jello, 1/2 cup (118ml) boiling water
-
While the cake chills, prepare the creamy frosting. In a large mixing bowl, beat the softened cream cheese, powdered sugar, and vanilla extract using an electric mixer until the mixture is completely smooth and free of lumps. Gradually add the heavy cream, pouring in about 1/4 of the cream at a time, beating thoroughly after each addition until fully incorporated and smooth. Repeat this process until all the heavy cream has been added and the frosting is light and fluffy. Now, add a small amount of blue gel food coloring to achieve your desired “ocean” hue; remember, gel food coloring is highly concentrated, so a little goes a long way. Spread the frosting evenly over the top of the chilled cake.8 oz (226g) softened cream cheese, 1/2 cup (56g) powdered sugar, 1 tsp vanilla extract, 2 cups (473ml) heavy cream, blue gel food coloring
-
Immediately after frosting, sprinkle the graham cracker crumbs over a portion of the cake, creating a beautiful “sandy beach” area. Press them gently into the frosting to ensure they adhere well. Cover the cake and refrigerate until you are ready to serve.Graham cracker crumbs, teddy grahams, gummy life savers, gummy sharks or other sea creatures, fruit roll ups, blue sprinkles and umbrella toothpicks
-
Just before serving, arrange your charming decorations. Place fruit roll-up beach towels on the “sand,” position teddy grahams as sunbathers (some can even be “swimming” in gummy life savers!), add gummy sharks and other sea creatures to the “ocean” area, scatter blue sprinkles for extra sparkle, and complete the scene with tiny umbrella toothpicks. Serve chilled and watch your guests delight in this adorable edible beach!Graham cracker crumbs, teddy grahams, gummy life savers, gummy sharks or other sea creatures, fruit roll ups, blue sprinkles and umbrella toothpicks
Nutrition
Carbohydrates: 26g |
Protein: 2g |
Fat: 13g |
Saturated Fat: 8g |
Polyunsaturated Fat: 1g |
Monounsaturated Fat: 4g |
Trans Fat: 1g |
Cholesterol: 45mg |
Sodium: 215mg |
Potassium: 48mg |
Fiber: 1g |
Sugar: 16g |
Vitamin A: 502IU |
Vitamin C: 1mg |
Calcium: 74mg |
Iron: 1mg
Nutrition Disclosure
All nutritional values are approximate and provided to the reader as a courtesy. Changing ingredients and/or quantities will alter the estimated nutritional calculations.
Like this recipe? Rate and comment below!