
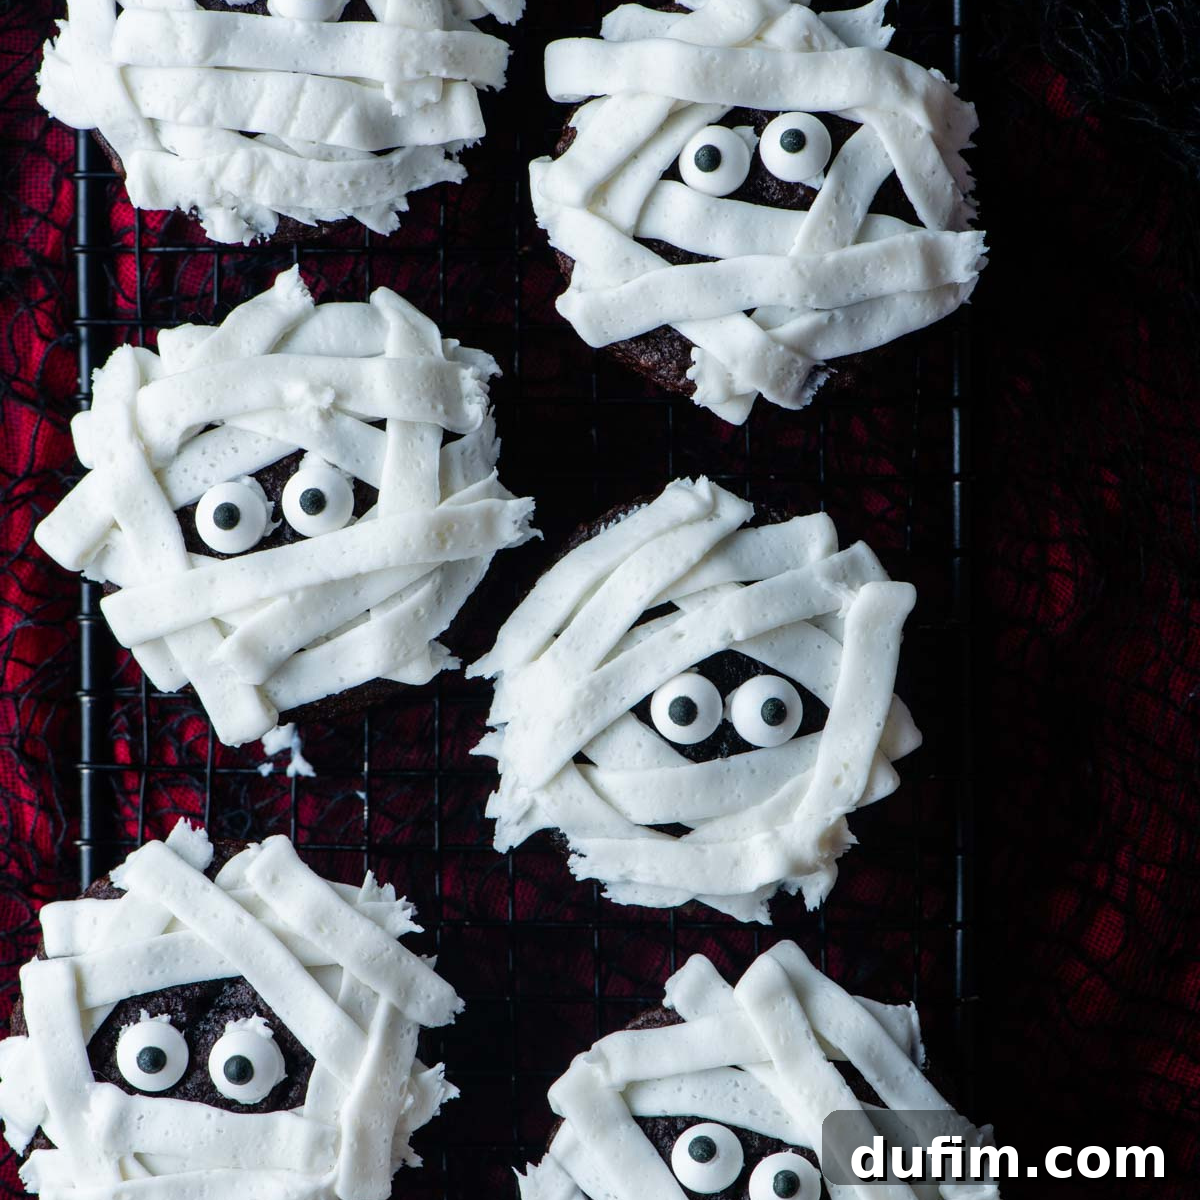
Get ready to whip up some frightfully delicious fun this Halloween! You don’t need to be a seasoned baking expert to create these utterly adorable and incredibly delicious mummy cupcakes. Our simple, step-by-step instructions below will guide you through crafting rich, moist chocolate cupcakes adorned with creamy white frosting bandages and whimsical candy eyes – the ultimate treat for any Halloween celebration, big or small!
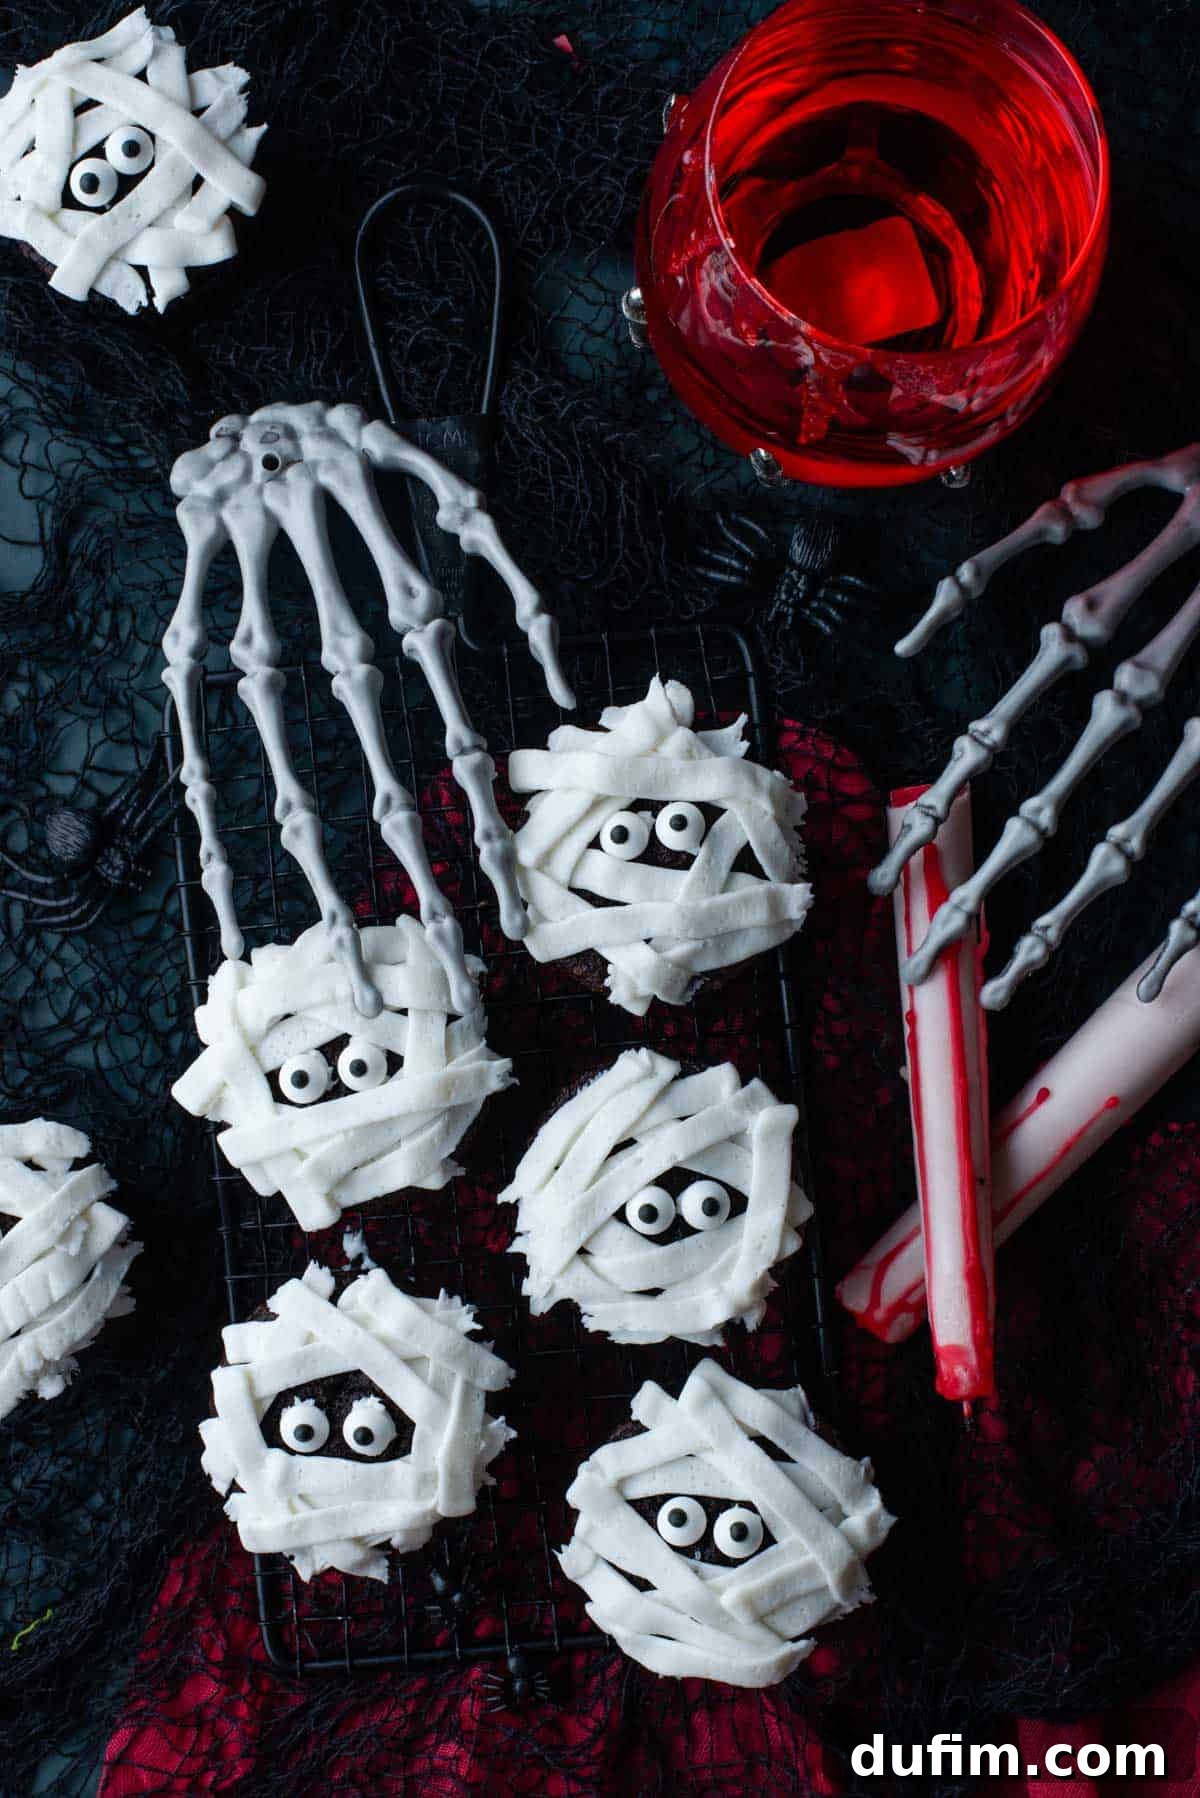
Unwrapping the Fun: Your Guide to Perfect Chocolate Mummy Cupcakes for Halloween
Are you searching for a show-stopping yet surprisingly simple dessert to enchant your guests at a Halloween party? Look no further! These charming mummy cupcakes are precisely what you need to create a memorable, spooky spread. Not only are these Halloween-themed delights incredibly easy to assemble and irresistibly cute, but they also boast a deep, rich chocolate flavor and an unbelievably moist texture that will leave everyone craving more.
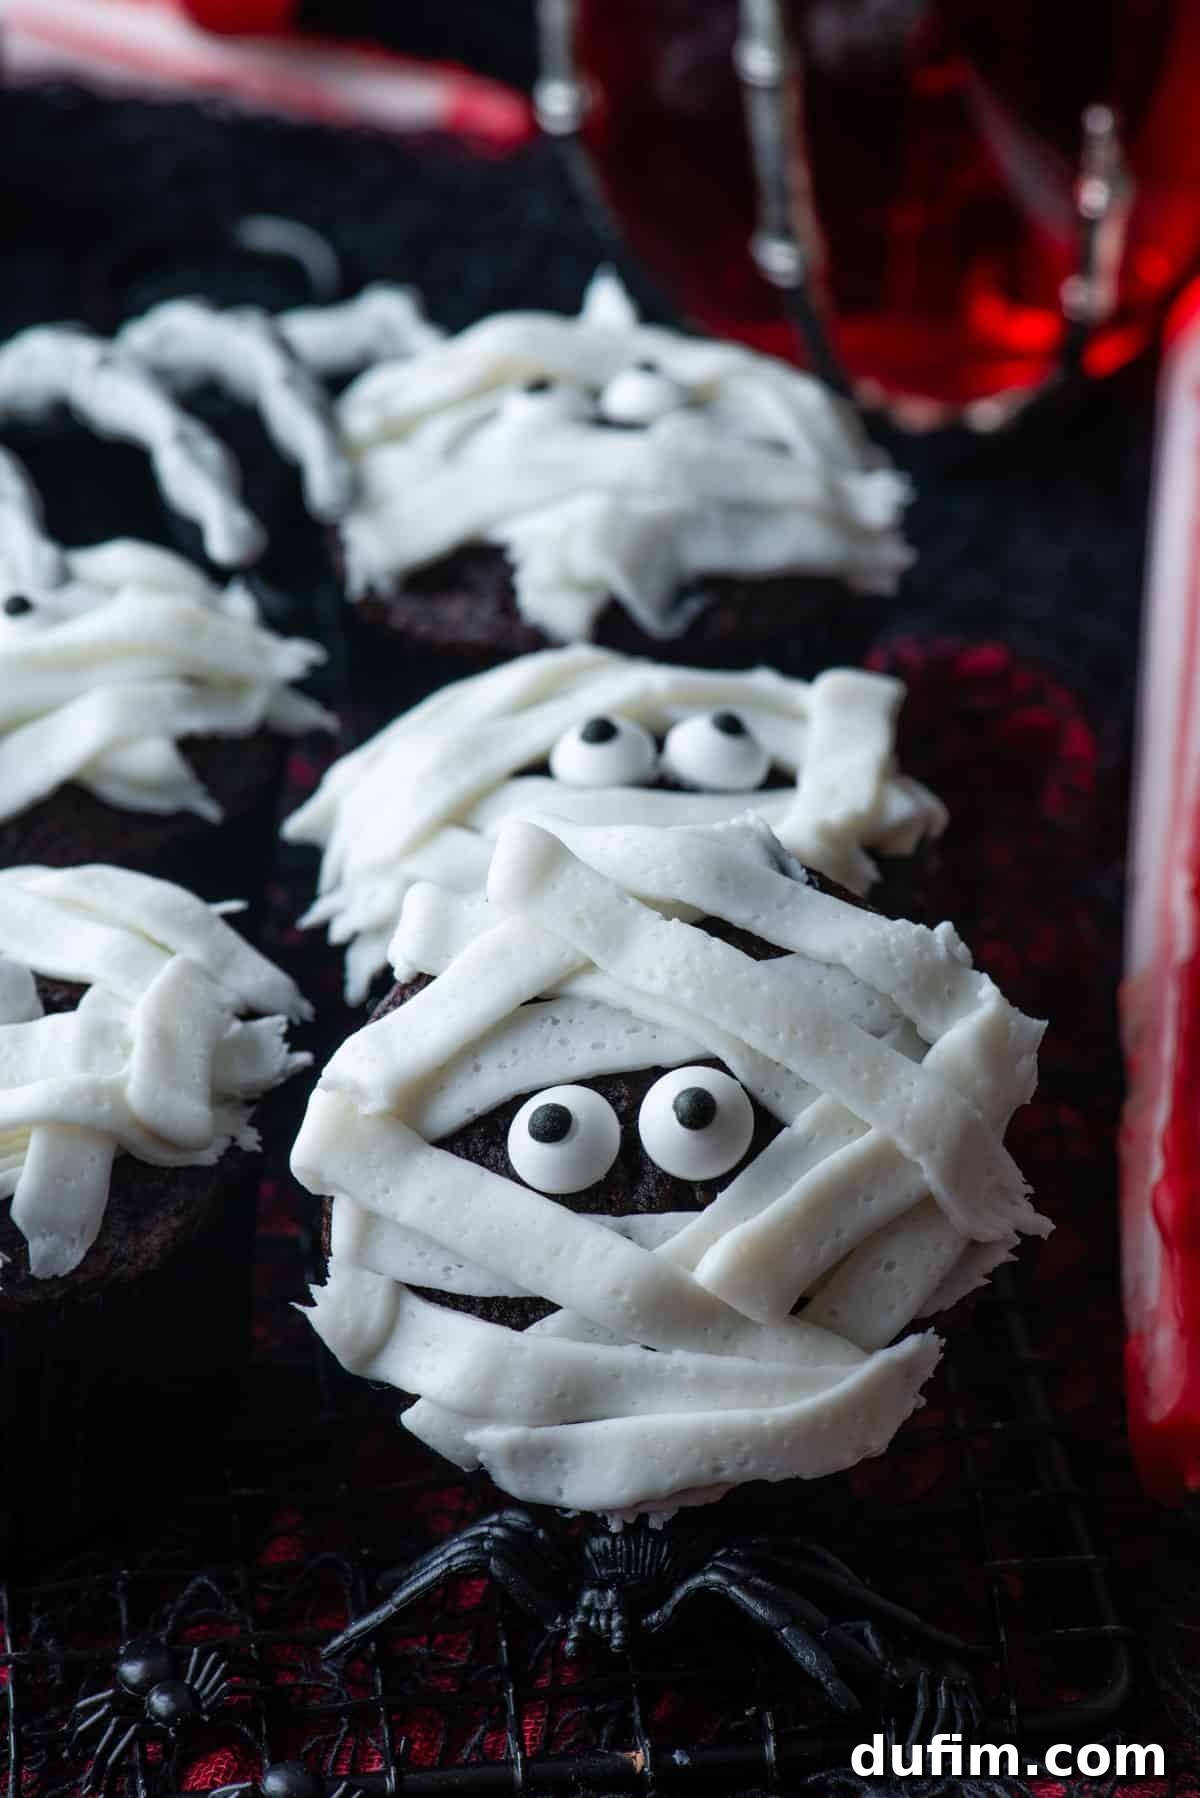
These straightforward Halloween cupcakes elevate the holiday spirit, making it extra special and fun for family, friends, and neighborhood trick-or-treaters alike. Each treat begins with a velvety chocolate cupcake base, lovingly topped with an adorable white frosting “mummy wrap,” brought to life with whimsical candy eyes. Imagine the smiles and gasps of delight when these playful mummies make an appearance! Prepare to delight and impress with these sweet, spooky creations that are as fun to make as they are to eat.
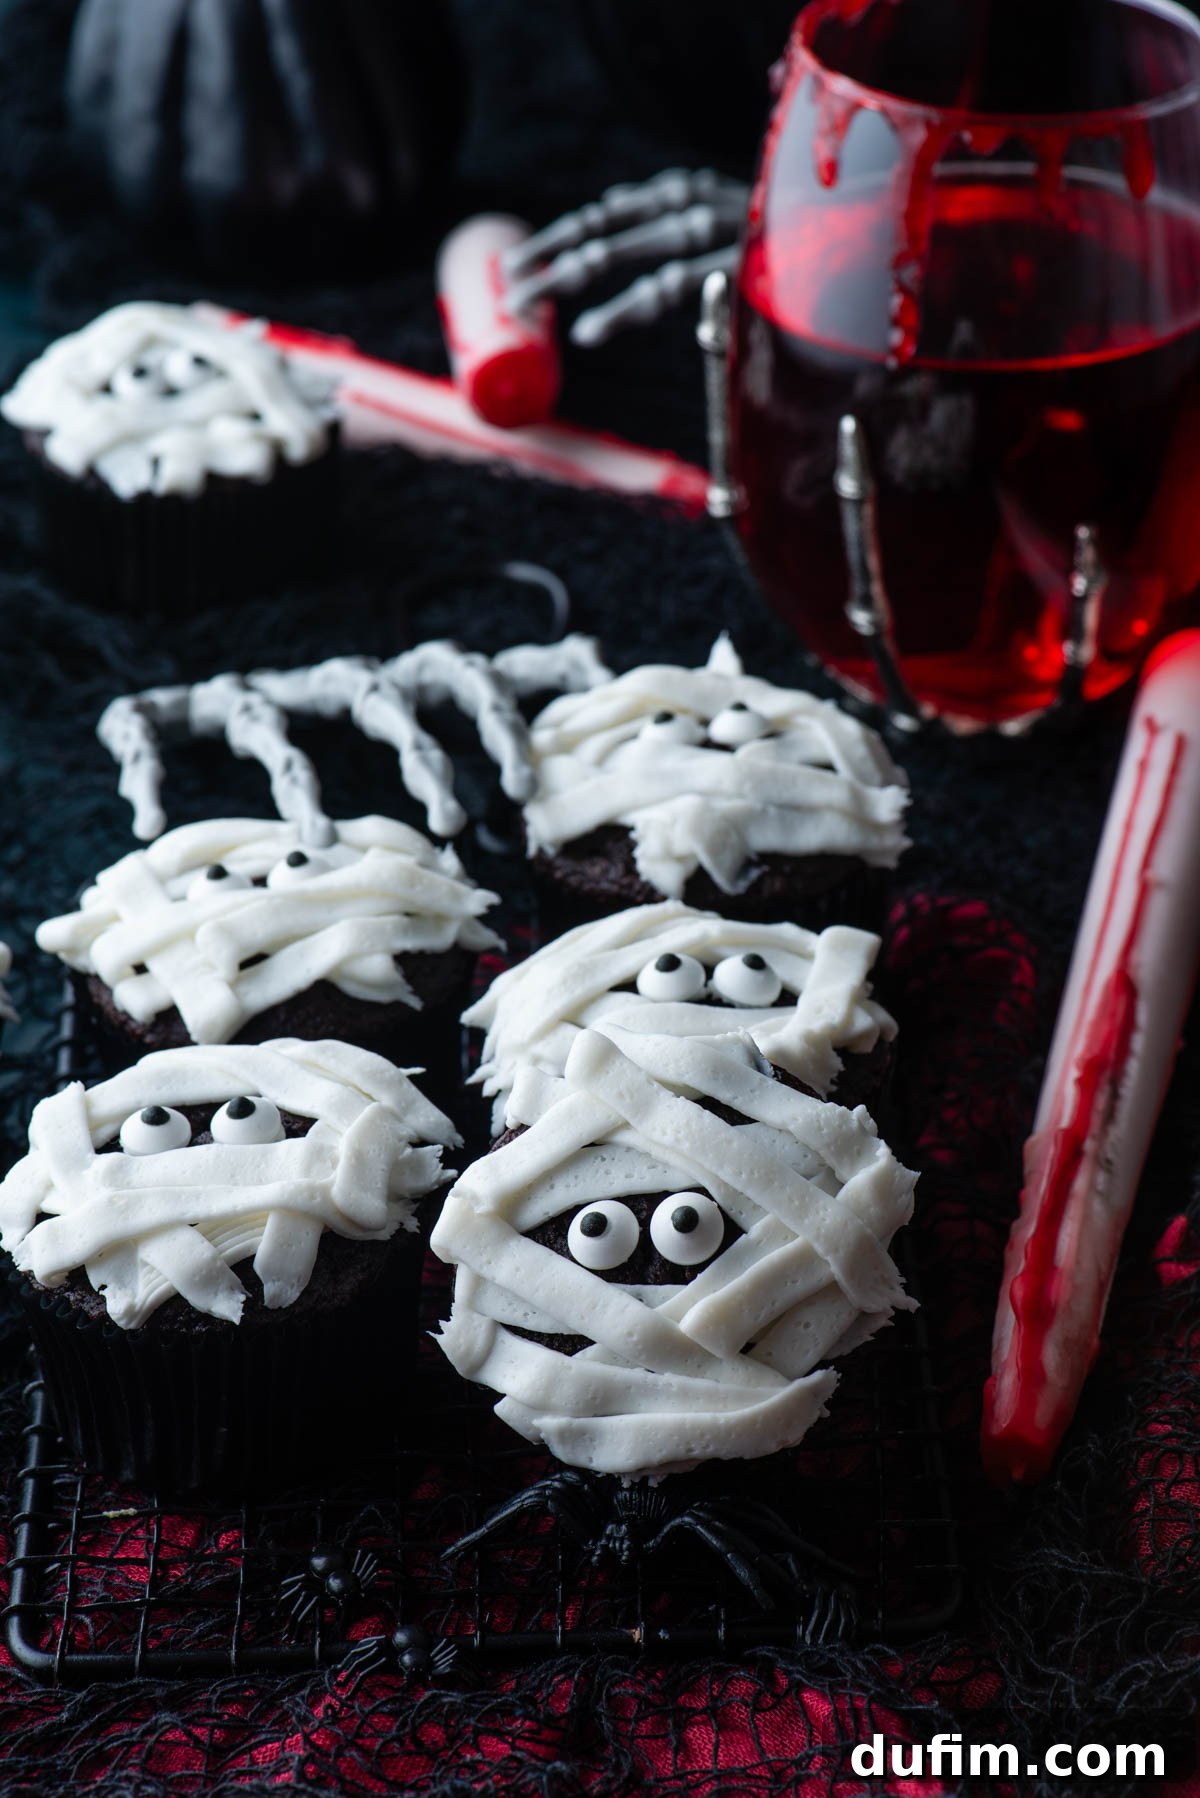
Why These Spooky Sweet Mummy Cupcakes Will Be Your Halloween Favorite
There’s a special kind of magic that comes with Halloween baking, and these mummy cupcakes capture it perfectly. They combine simplicity with irresistible charm, making them a go-to treat for the entire spooky season. With their delightful appearance and scrumptious taste, here’s why you’ll absolutely adore adding them to your holiday repertoire:
- Effortlessly Impressive: They might look intricate and professionally made, but the decorating process is surprisingly simple. This means you can create a stunning dessert spread that makes you look like a pastry pro, all without the usual fuss or extensive baking experience.
- Perfect for Any Halloween Gathering: These versatile treats are a guaranteed crowd-pleaser. Whether it’s a school party, a festive office potluck, a neighborhood block party, or an intimate spooky family dinner, these cupcakes are always a hit. They’re easy to transport and universally loved.
- Kid-Friendly Fun: Little ones are absolutely mesmerized by the whimsical candy eyes and the transformation of a simple cupcake into a spooky mummy! Involving children in the decorating process adds an extra layer of enjoyment and creativity to the holiday, making memories as sweet as the cupcakes themselves.
- Irresistible Flavor Combination: Prepare for a taste sensation! The deep, satisfying richness of our moist chocolate cupcakes pairs exquisitely with the light, sweet, and easy-to-make homemade vanilla buttercream frosting. It’s a classic dessert combo that never disappoints, offering a perfect balance of intense cocoa and creamy sweetness.
- Customizable Creativity: While perfect as is, this recipe offers plenty of room for creative twists. You can experiment with different cupcake base flavors, add various extracts to the frosting, or even get adventurous with different candy decorations to make each mummy unique.
Gather Your Tools: What You’ll Need to Create Mummy Cupcakes
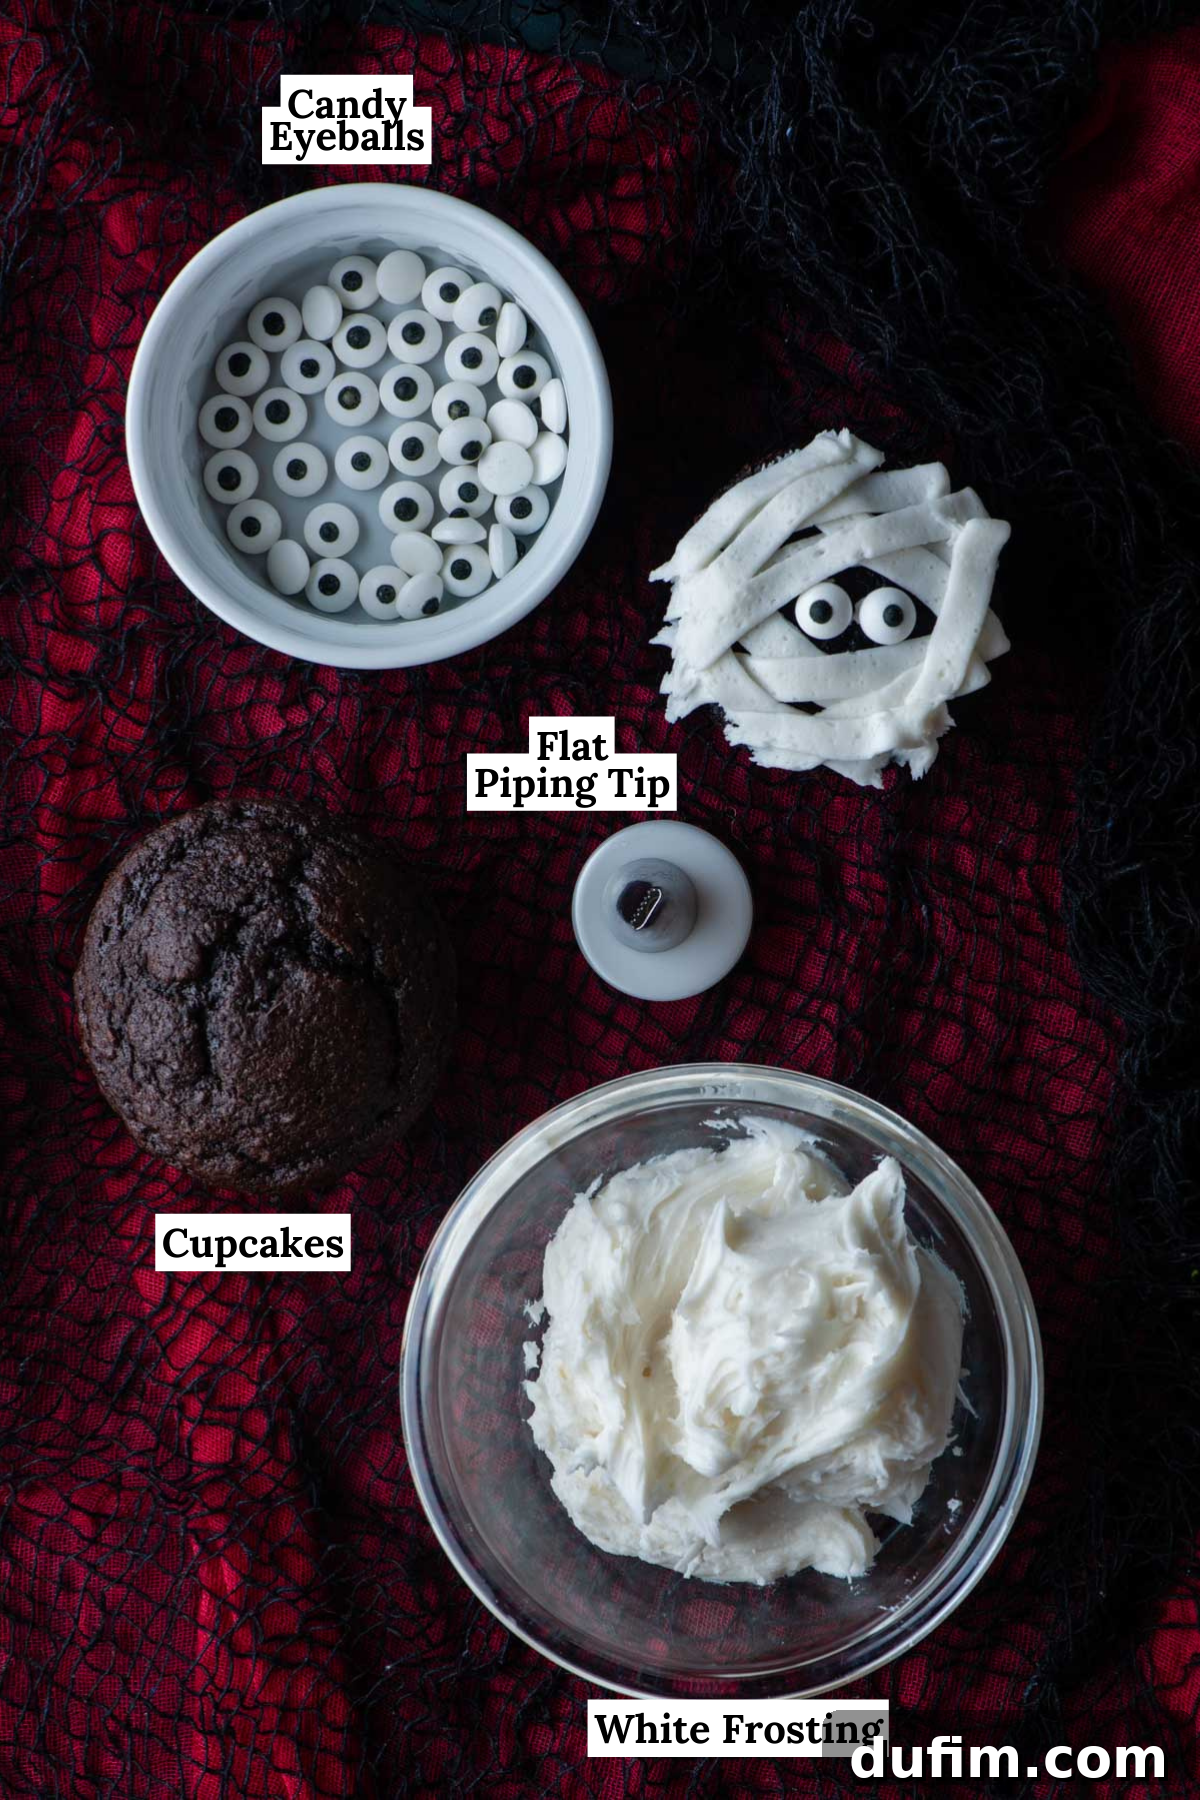
Embarking on this delightful Halloween baking adventure requires just a few essential ingredients and basic kitchen tools. This recipe utilizes my tried-and-true chocolate cupcake base, a velvety homemade vanilla buttercream frosting, and those essential fun candy googly eyes that give our mummies their adorable, spooky personality. Gather these items, and let the spooky baking begin!
For the Rich Chocolate Cupcakes:
- All-Purpose Flour: This is the foundational dry ingredient, providing the necessary structure to our perfectly risen, tender cupcakes.
- Cocoa Powder: Essential for that deep, intense chocolate flavor. You can use either natural unsweetened cocoa powder (which is fruitier and reacts with baking soda) or Dutch-processed cocoa powder (which is darker and milder). Both work wonderfully to create a rich chocolate base.
- Instant Coffee Granules (Optional): This is a wonderful secret weapon! Just a teaspoon significantly enhances the chocolate flavor, making it taste even more profound, without actually imparting a coffee taste to your cupcakes. Brands like Folger’s work perfectly.
- Baking Soda: This leavening agent works its magic by reacting with acidic ingredients (like buttermilk and natural unsweetened cocoa powder) to create lift and contribute to a tender crumb.
- Baking Powder: Provides additional lift and ensures a light, airy texture, preventing your cupcakes from being too dense.
- Salt: A crucial ingredient that balances and enhances all the sweet flavors, making the chocolate truly shine. Don’t skip it!
- Unsalted Butter: Ensure your butter is at room temperature. This is vital for optimal creaming with sugar, resulting in a lighter, more aerated batter and a finer crumb in the finished cupcake.
- Granulated Sugar: Not only sweetens the cupcakes but also plays a key role in contributing to their moist and tender texture.
- Eggs: Like butter, use large eggs that are at room temperature. They bind the ingredients together, add essential moisture, and contribute to the richness of the cupcakes.
- Buttermilk: The magic ingredient for truly super moist cupcakes! Its acidity also reacts perfectly with the baking soda, contributing significantly to a tender and fluffy crumb.
- Hot Tap Water: This helps to “bloom” the cocoa powder, intensifying its chocolate flavor, and also thins the batter to the perfect pourable consistency.
For the Velvety Vanilla Buttercream Frosting:
- Unsalted Butter: Once again, room temperature is the key here for a smooth, lump-free frosting that whips up beautifully fluffy and pipeable.
- Vanilla Extract: Pure vanilla extract provides that classic, comforting flavor that perfectly complements the rich chocolate cupcakes. Feel free to use a good quality extract for the best taste.
- Powdered Sugar (Confectioners’ Sugar): This is the base for our frosting, providing sweetness and body. Sifting it before use is highly recommended to ensure the smoothest, most luxurious buttercream texture, free of any lumps.
- Milk or Heavy Cream: Use a dash of either to achieve your desired frosting consistency. Heavy cream will make the frosting richer and slightly more stable, while milk offers a lighter touch. Add sparingly until perfect.
Essential Extras for That Mummy Magic:
- Candy Eyeballs: These are the absolute stars of the show! They instantly transform your frosted cupcakes into adorable, wide-eyed mummies and are crucial for the signature look.
- Piping Bag: Essential for creating neat and even frosting bandages. You can use reusable silicone bags, durable canvas bags, or disposable piping bags – whatever you prefer for ease and cleanup.
- Wilton Tip #47 (Basketweave Tip): This specific tip is crucial for achieving the flat, ribbon-like strips that perfectly mimic mummy bandages. Its unique shape, often with a serrated edge on one side, allows for creating wonderfully textured frosting lines.
Your Step-by-Step Guide: How to Craft These Enchanting Halloween Mummy Cupcakes
Creating these fun mummy cupcakes is a delightful process, simplified by following our clear, step-by-step guide below. Each stage, from baking the perfect chocolate base to artfully applying the mummy bandages, is designed for ease and enjoyment, even for novice bakers. For the complete recipe with precise ingredient measurements, refer to the detailed recipe card further down the page.
Crafting the Irresistible Chocolate Cupcakes:
- Preparation is Key: Begin by preheating your oven to a steady 350º F (175°C). Line a standard 12-cup muffin pan (or two for a batch of 24) with festive paper cupcake liners. This ensures easy removal and quick cleanup, setting you up for success.
- Whisk Dry Ingredients: In a medium-sized mixing bowl, combine your all-purpose flour, unsweetened natural cocoa powder, the optional instant coffee granules, baking soda, baking powder, and salt. Whisk these ingredients together thoroughly for about 30 seconds to ensure they are evenly distributed and no lumps remain, then set this bowl aside.
- Cream Wet Ingredients: In a separate, larger mixing bowl, using an electric mixer (either a stand mixer with a paddle attachment or a powerful handheld mixer), beat the softened unsalted butter and granulated sugar together for approximately 2 minutes. Continue mixing until the mixture becomes notably pale in color and fluffy in texture. Next, crack in the eggs, one at a time, beating for an additional 30 seconds after each addition until fully incorporated and the mixture is smooth and cohesive.
- Combine Wet and Dry Alternately: With your electric mixer set to low speed, gradually add half of the buttermilk to the wet ingredients, beating for about 20 seconds until just combined. Next, add half of the dry ingredient mixture and beat until just incorporated, being careful not to overmix. Follow this by adding the remaining buttermilk along with the hot tap water, mixing only until the liquids are just combined. Finally, add the remaining dry ingredients and beat on low speed until the batter is smooth and no streaks of flour remain. Remember, overmixing can develop too much gluten and lead to tough cupcakes, so mix just until combined.
- Bake to Perfection: Divide the luscious chocolate batter evenly among your prepared muffin liners, filling each approximately 1/2 to 2/3 full. Bake for 17-19 minutes. The most reliable way to check for doneness is to insert a toothpick into the center of a cupcake; it should come out with just a few moist crumbs clinging to it. If it comes out completely clean, they might be a tad over-baked. Once baked, promptly remove the cupcakes from the oven and allow them to cool completely on a wire rack before attempting to frost them. Cooling thoroughly is an essential step to prevent your beautiful frosting from melting and sliding off.
Whipping Up the Dreamy Vanilla Buttercream Frosting:
- Cream Butter and Vanilla: In a clean mixing bowl, combine the softened unsalted butter and vanilla extract. Beat them together vigorously using an electric mixer for 1-2 minutes until the mixture is light, creamy, and visibly fluffy. This incorporates air, making the frosting wonderfully airy.
- Gradually Add Sugar: Slowly begin to add the powdered sugar, one cup at a time, mixing on low speed until each addition is fully incorporated before adding more. This critical step prevents a cloud of sugar from erupting in your kitchen and ensures a smooth, lump-free frosting. Once all sugar is added, increase speed and beat until smooth.
- Coloring Option: If you desire to add food coloring for any variation (though traditional mummies are charmingly white!), now is the perfect time to mix it in. Add gel food coloring a drop at a time until the desired uniform color is achieved.
- Achieve Perfect Consistency: Taste the frosting and adjust for sweetness as needed by adding more powdered sugar if desired. The consistency of your buttercream is paramount for successful piping. If your frosting feels too thick and stiff for easy piping, add a very small dash of milk or heavy cream (about half a teaspoon at a time) until it reaches your desired creamy, pipeable consistency. Beat briefly after each addition.
- Optional Fluffiness Boost: For an exceptionally light and airy frosting, add 1/4 cup of heavy whipping cream when incorporating the last portion of powdered sugar. Then, whip the frosting vigorously on medium-high speed for an additional 3-4 minutes until it’s wonderfully fluffy, cloud-like, and holds stiff peaks. This technique makes for a truly luxurious buttercream.
Bringing Your Mummies to Life: Assembly Instructions:
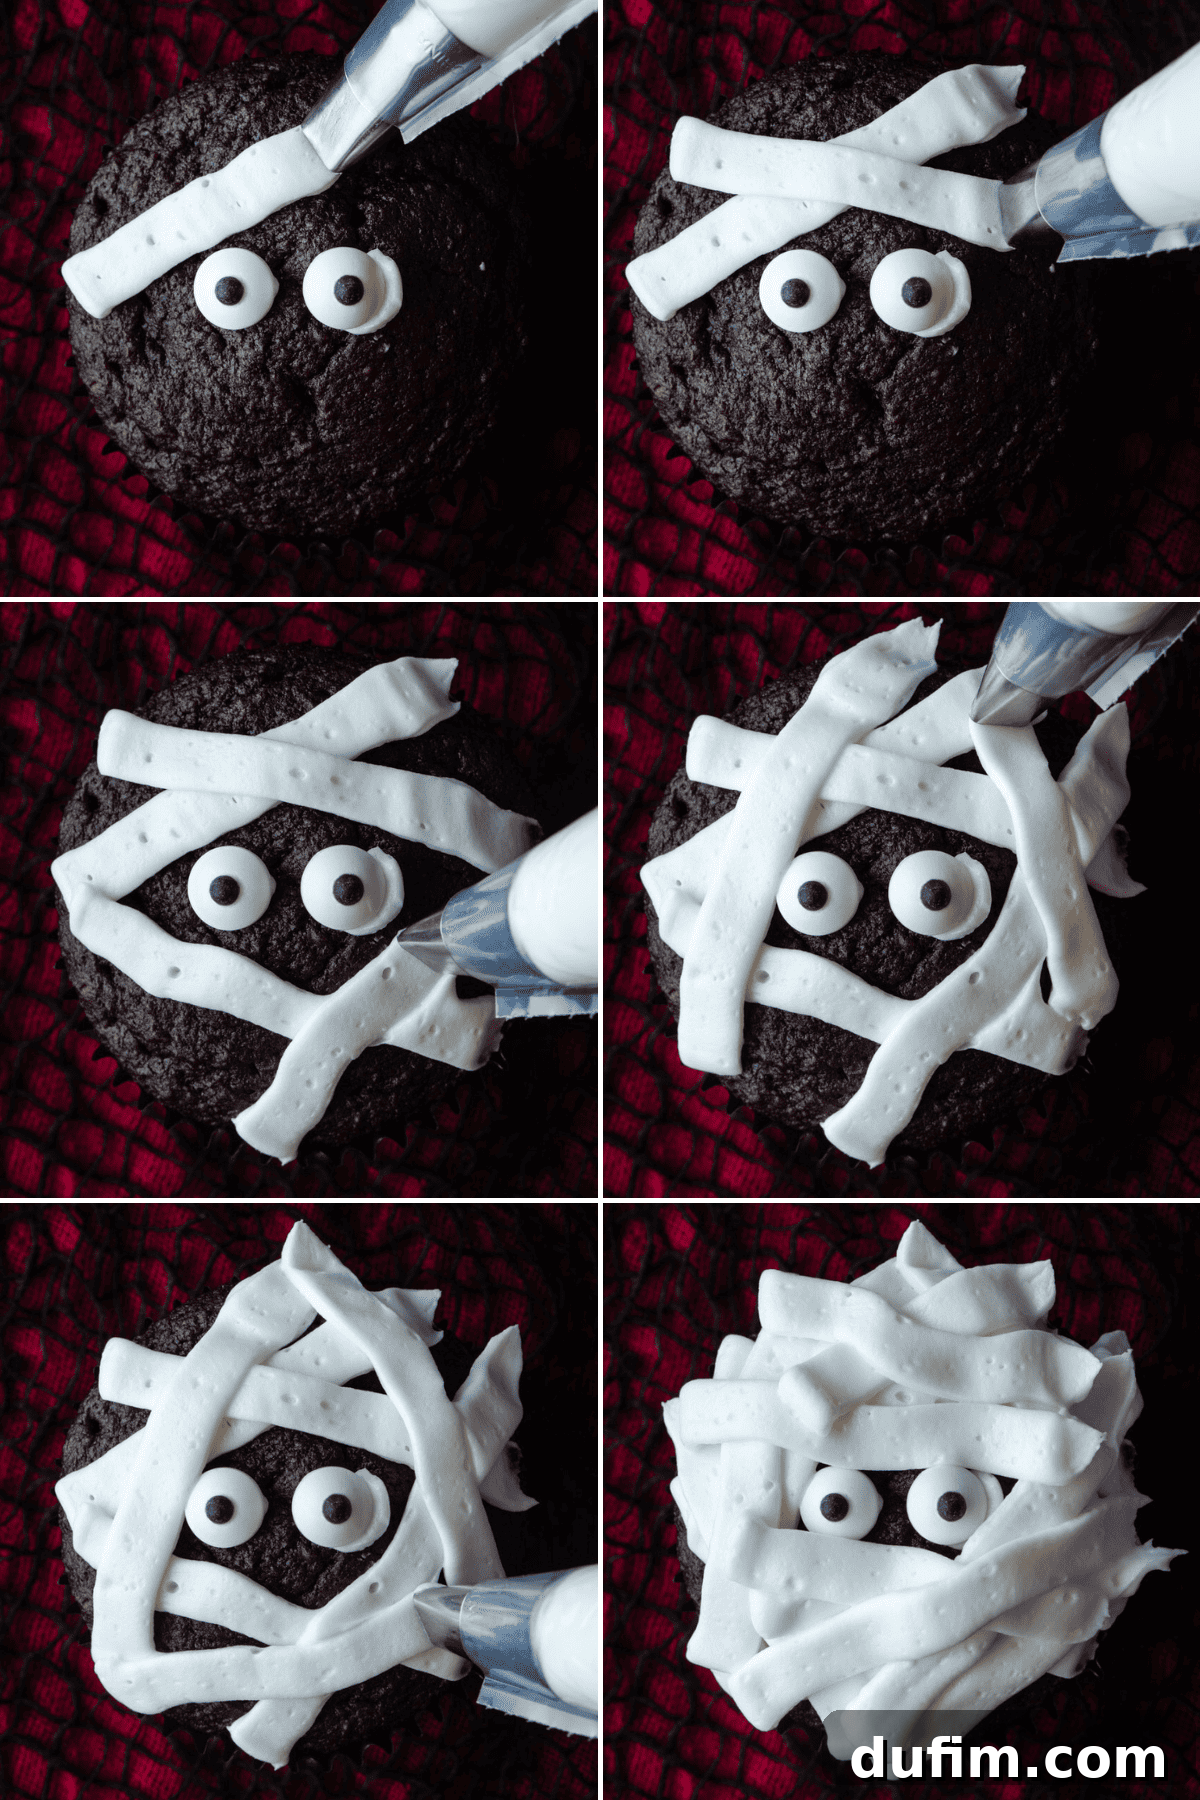
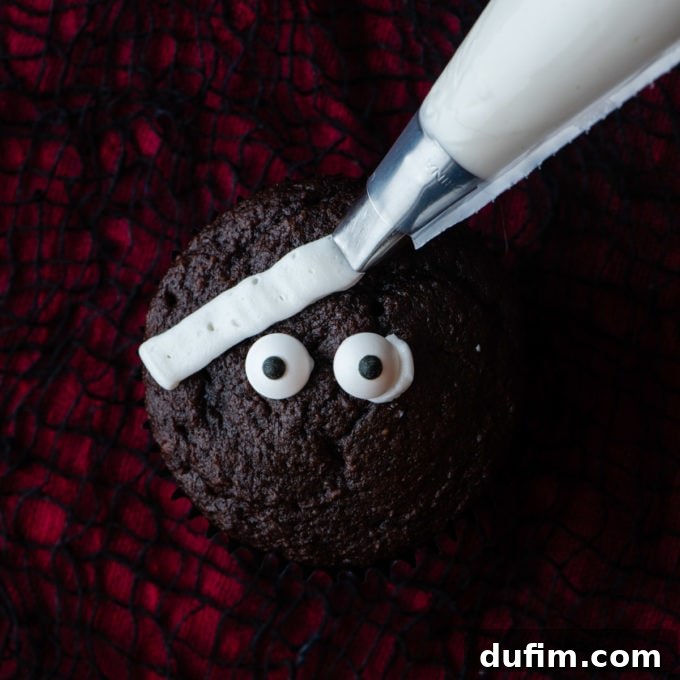
- Place the Eyes: Before piping the bandages, it’s easiest and most effective to position the candy eyeballs. Dab a tiny bit of frosting onto the back of each candy eyeball (this acts as edible glue). Carefully press two eyes onto the top of each cooled chocolate cupcake, leaving a small space between them where the “bandages” will be piped. Arrange them slightly off-center or straight, depending on the personality you want for your mummy!
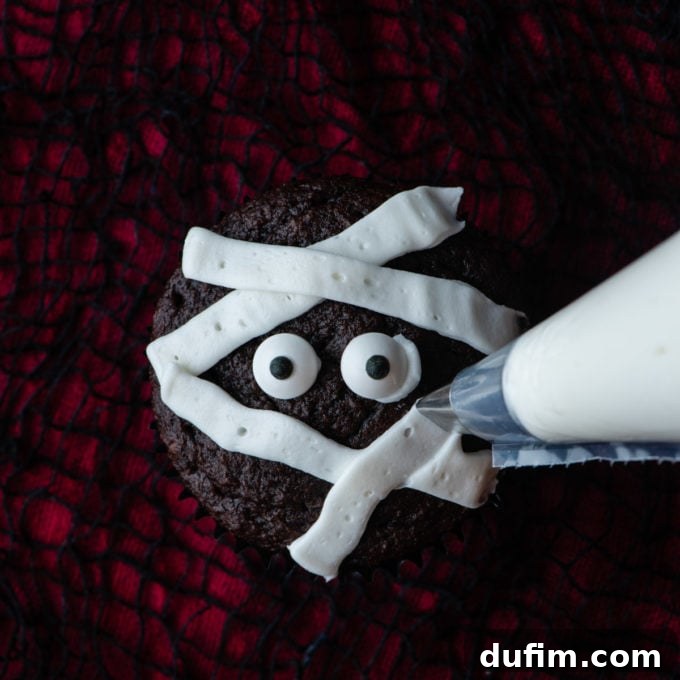
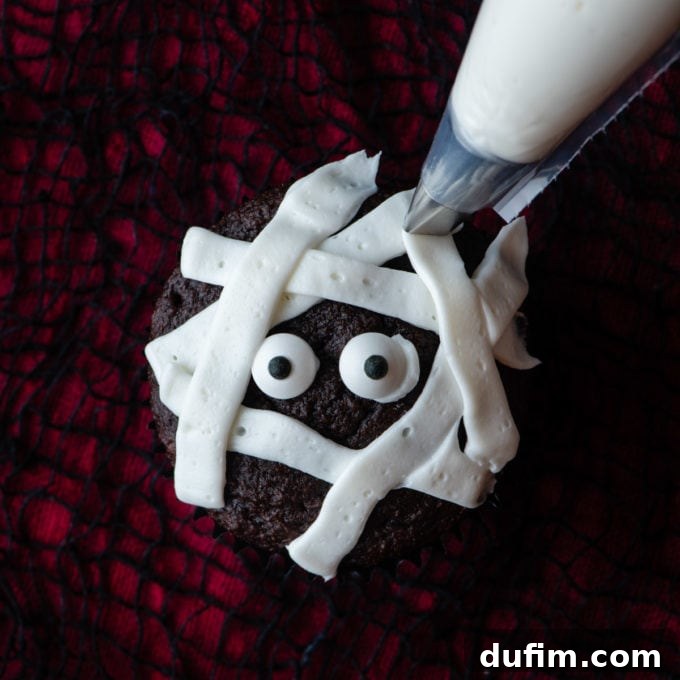
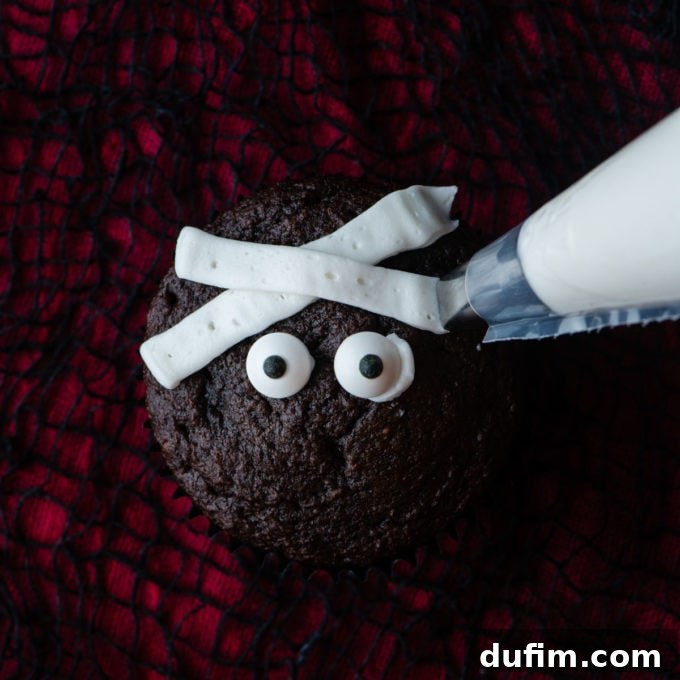
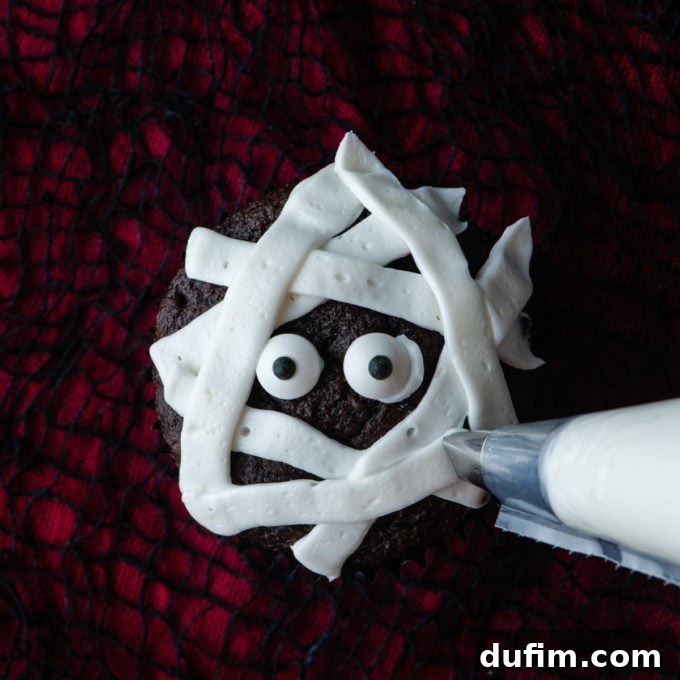
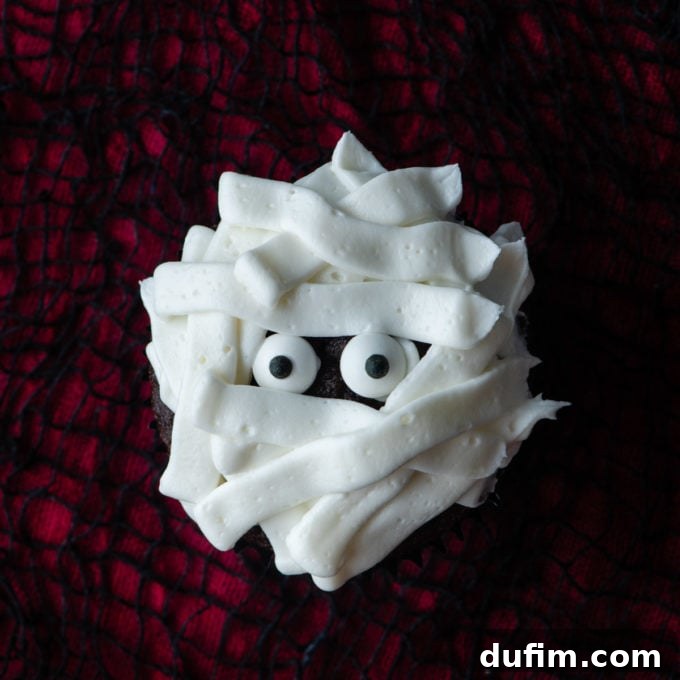
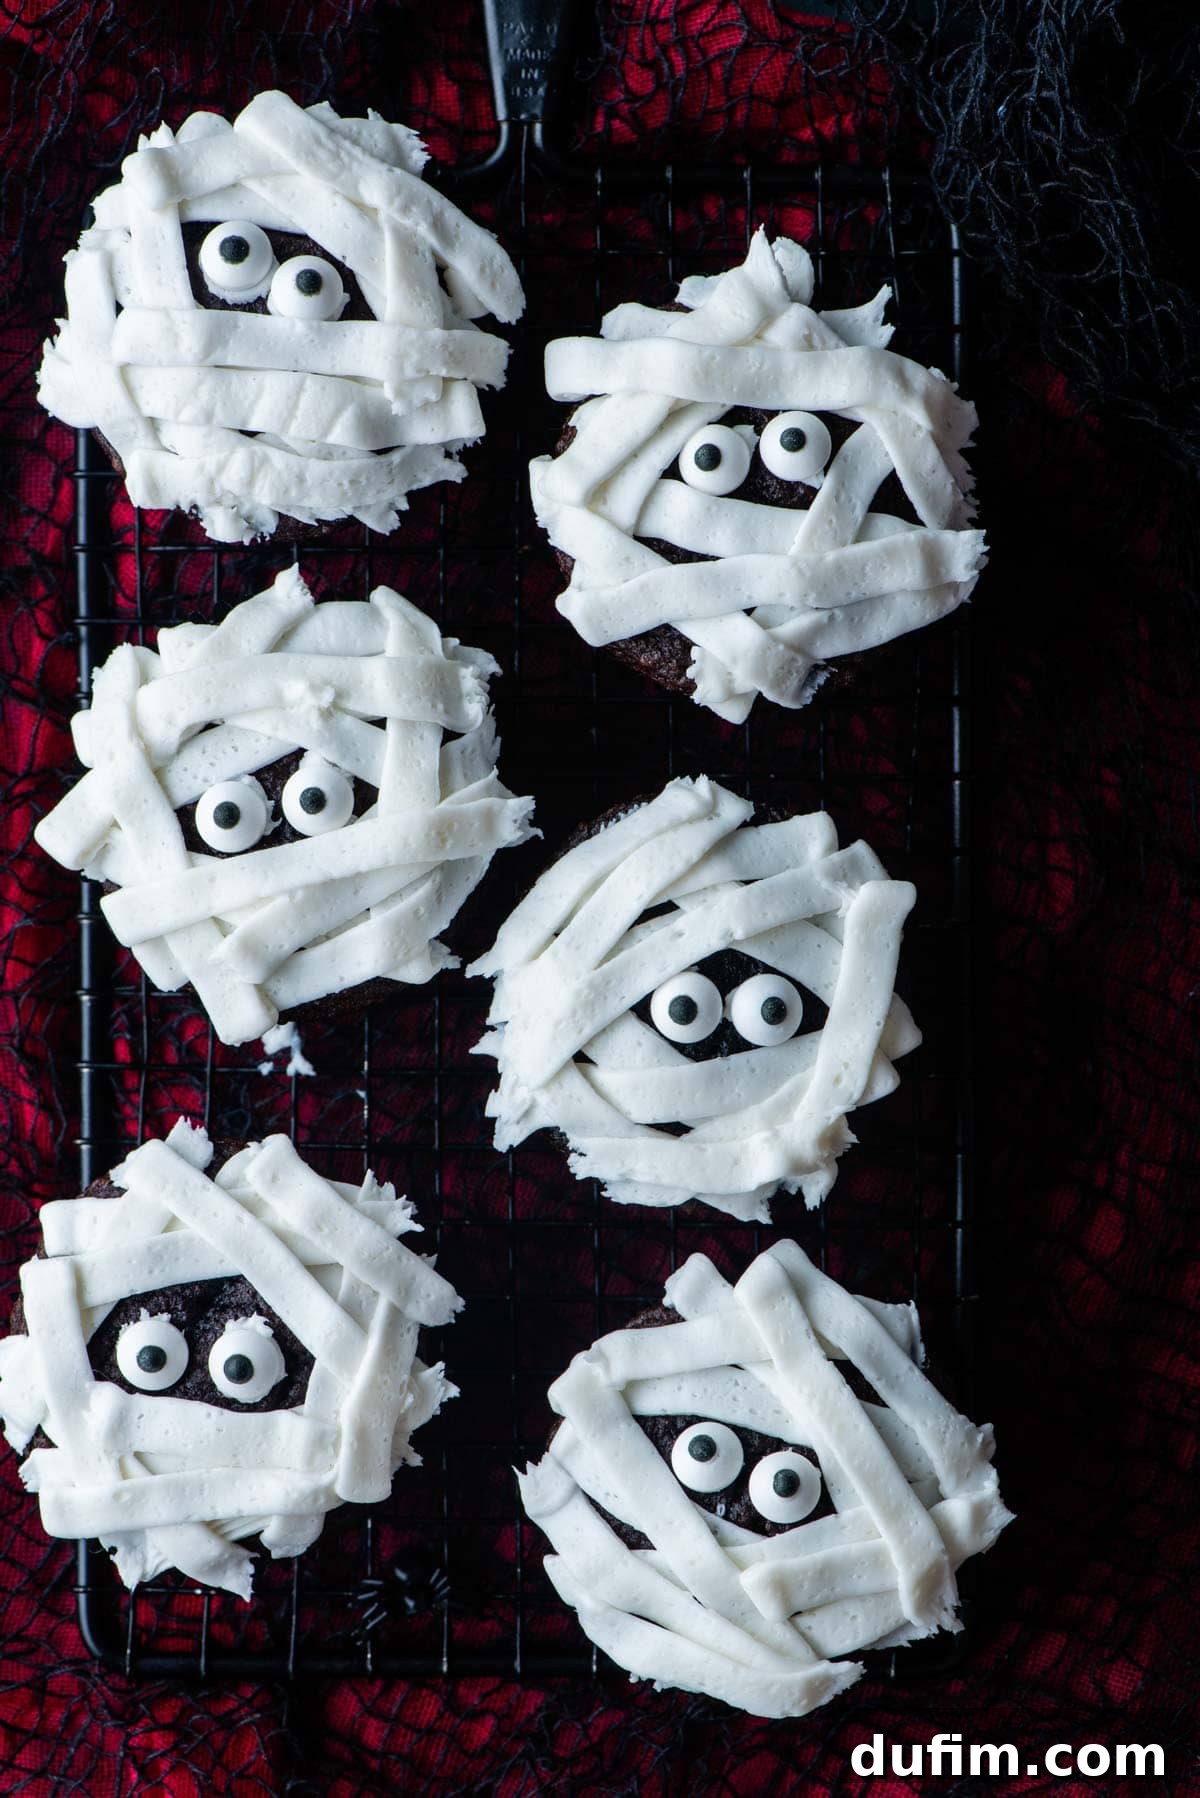
- Pipe the Mummy Bandages: Fit a piping bag with your Wilton #47 basketweave tip. This tip is ideal for creating flat, ribbon-like strips. Fill the bag about two-thirds full with your prepared vanilla buttercream frosting. Hold the piping bag just above a cupcake, slightly angled. Gently squeeze the bag to create thin, flat strips of frosting. Zigzag these strips across the cupcake, overlapping them slightly and intentionally going *around* the candy eyes, to create a rustic, wrapped mummy bandage effect. You can vary the length and angle of the strips to make each mummy unique and give them individual character. Repeat this fun and creative process with all the remaining cupcakes until your entire spooky army of mummies is complete and ready to impress!
Insider Tips for the Most Delicious and Picture-Perfect Mummy Cupcakes
While these mummy cupcakes are designed to be easy and accessible for all skill levels, a few expert tips can significantly elevate your baking and decorating game. Following these guidelines will ensure you achieve perfectly moist chocolate cupcakes and a fluffy, pipeable frosting every single time. These delightful treats are not only great for planned parties but also make for an impressive last-minute Halloween surprise!
- Room Temperature Ingredients are Non-Negotiable: This is arguably the most important tip for both your cupcakes and frosting. Ensure your butter, eggs, and buttermilk are all at room temperature before you begin. Room temperature ingredients emulsify properly, creating a smoother, more uniform batter and a creamier, lump-free frosting that’s easier to whip and pipe. Cold ingredients can result in a lumpy batter and a denser texture.
- The Toothpick Test for Doneness: The definitive way to tell if your chocolate cupcakes are perfectly baked is by using the trusty toothpick test. Insert a clean toothpick into the very center of a cupcake; it should emerge with just a few moist crumbs attached. If it comes out completely clean, the cupcakes are likely a tad over-baked, which can lead to a drier texture. If it’s wet with batter, they need more time.
- Cooling is Crucial: Patience is a virtue, especially when it comes to cupcakes! Allow them to cool completely on a wire rack before you even think about applying any frosting. Attempting to apply frosting to warm cupcakes will inevitably result in a melty, messy disaster, as the frosting will simply slide off.
- Achieving Frosting Perfection: The consistency of your buttercream is paramount for successful piping. If your frosting feels too thick and stiff to pipe smoothly, add an additional tablespoon (or half a teaspoon at a time) of heavy cream or milk, beating until smooth and creamy. Conversely, if the frosting is too thin and runny to hold its shape, gradually mix in more powdered sugar, a tablespoon at a time, until it reaches a firm yet pipeable texture. A good piping consistency should hold its shape without being too hard to squeeze from the bag.
- Don’t Overmix the Batter: After you’ve added the dry ingredients to the wet, mix only until they are just combined and no streaks of flour remain. Overmixing develops the gluten in the flour too much, leading to tough, dense cupcakes instead of the light, airy, and tender ones we’re aiming for.
- Piping Technique Matters: For creating that authentic mummy effect, it can be helpful to practice a few strips on a piece of parchment paper or a spare plate first if you’re new to piping. Hold the Wilton #47 tip with the flat side facing the cupcake for wider strips, or you can rotate it slightly to use the serrated side for a ribbed texture. Experiment with overlapping and varying the angles of your strips to create a truly rustic and bandaged look for your mummies.
Creative Twists & Substitutions: Elevate Your Mummy Cupcakes
While our classic chocolate mummy cupcakes are undeniably perfect for Halloween, don’t hesitate to get creative with substitutions and variations! These ideas can help you cater to different tastes, dietary needs, or simply add a unique flair to your spooky Halloween dessert spread.
- Flavor Exploration for Cupcake Bases: While chocolate is a timeless and delicious choice, these adorable mummy decorations would look fantastic on other cupcake bases. Consider trying our Vanilla Cupcakes for a brighter, contrasting flavor profile, or delve into our Peanut Butter Cupcakes for an indulgent and unexpected twist. Even seasonal flavors like pumpkin spice or vibrant red velvet cupcakes could offer a unique and delightful flavor profile hidden beneath the white bandages.
- Frosting Flavor Adventures: Beyond classic vanilla, your buttercream frosting offers a canvas for flavor experimentation. You could add almond extract for a subtle nutty note, peppermint extract for a mint chocolate mummy sensation, or even a hint of cream cheese to your buttercream for a tangier, richer profile. A touch of orange zest could also add a festive touch.
- Gluten-Free Option: Easily adapt the chocolate cupcake recipe to be gluten-free by substituting the all-purpose flour with a high-quality 1:1 gluten-free baking flour blend. Ensure your chosen blend already contains xanthan gum for the best results, as it helps with structure and elasticity.
- Dairy-Free Alternative: For dairy-free cupcakes, you can use a plant-based milk (such as almond or soy milk) combined with a teaspoon of apple cider vinegar to create a homemade buttermilk substitute. For the frosting, utilize dairy-free butter sticks and plant-based milk or cream to achieve a delicious vegan buttercream.
- Mini Mummies for Little Bites: Bake the cupcake batter in mini muffin tins for charming bite-sized mummy cupcakes. These are perfect for smaller hands, extensive dessert buffets, or large parties where a variety of treats is key. Remember to adjust your baking time accordingly; mini cupcakes usually require only 10-12 minutes.
- Decorating Variations:
- Bloody Mummies: For a more gruesome and dramatic effect, after piping the white frosting bandages, add a tiny drip of red gel food coloring or edible red piping gel coming from the eyes or along a few bandage strips.
- Colorful Bandages: To give your mummies a ghostly, mystical, or simply playful aura, tint a small portion of your vanilla frosting with a pastel color (like light green, pale purple, or eerie orange) before piping the bandages.
- Alternative Eyes: If traditional candy eyeballs aren’t readily available, don’t fret! You can use small chocolate chips (pointed side down), mini M&Ms, or even carefully piped dots of black gel frosting or melted chocolate for the mummy’s eyes.
Keeping Your Mummies Fresh: Storing & Freezing Tips
To ensure your chocolate mummy cupcakes remain as delightful and delicious as the moment they were decorated, proper storage is absolutely key. Here’s how to best keep them fresh and ready for your Halloween festivities:
- Short-Term Storage: Due to the luscious buttercream frosting, these cupcakes are truly at their absolute best when enjoyed on the day they are made. The frosting will be at its peak freshness, and the cupcakes will be perfectly moist. However, if you have leftovers or need to make them a day in advance, store them in an airtight container at room temperature for up to 2 days. The airtight container is crucial not only to prevent them from drying out but also to protect the delicate frosting decorations from being squashed or damaged.
- Making Ahead for Convenience: If you plan to bake a larger batch, or simply want to minimize last-minute stress on the day of your Halloween event, I highly recommend baking the chocolate cupcakes a day or two ahead of time. Once completely cool, store the unfrosted cupcakes in an airtight container at room temperature. You can also prepare the vanilla buttercream frosting separately and store it in an airtight container in the refrigerator. When you are ready to serve, allow the frosting to come to room temperature for about an hour, give it a quick whip with your electric mixer to restore its fluffy consistency, and then proceed with piping and decorating your mummies onto the cooled cupcakes. This approach ensures maximum freshness for both components.
- Freezing Cupcakes (Unfrosted): You can successfully freeze the baked, unfrosted chocolate cupcakes for up to 2-3 months. To do this, ensure the cupcakes are completely cool. Wrap each cupcake individually tightly in plastic wrap, followed by an additional layer of aluminum foil for extra protection against freezer burn. Place them in a freezer-safe bag or rigid container. When you’re ready to use them, thaw them overnight in the refrigerator, then bring them to room temperature on the counter before frosting and decorating. Freezing frosted cupcakes is generally not recommended, as the delicate texture of the buttercream can change upon thawing, and the candy eyes may “bleed” color or become sticky due to moisture.
Expand Your Spooky Spread: An Assortment of Halloween Cupcakes
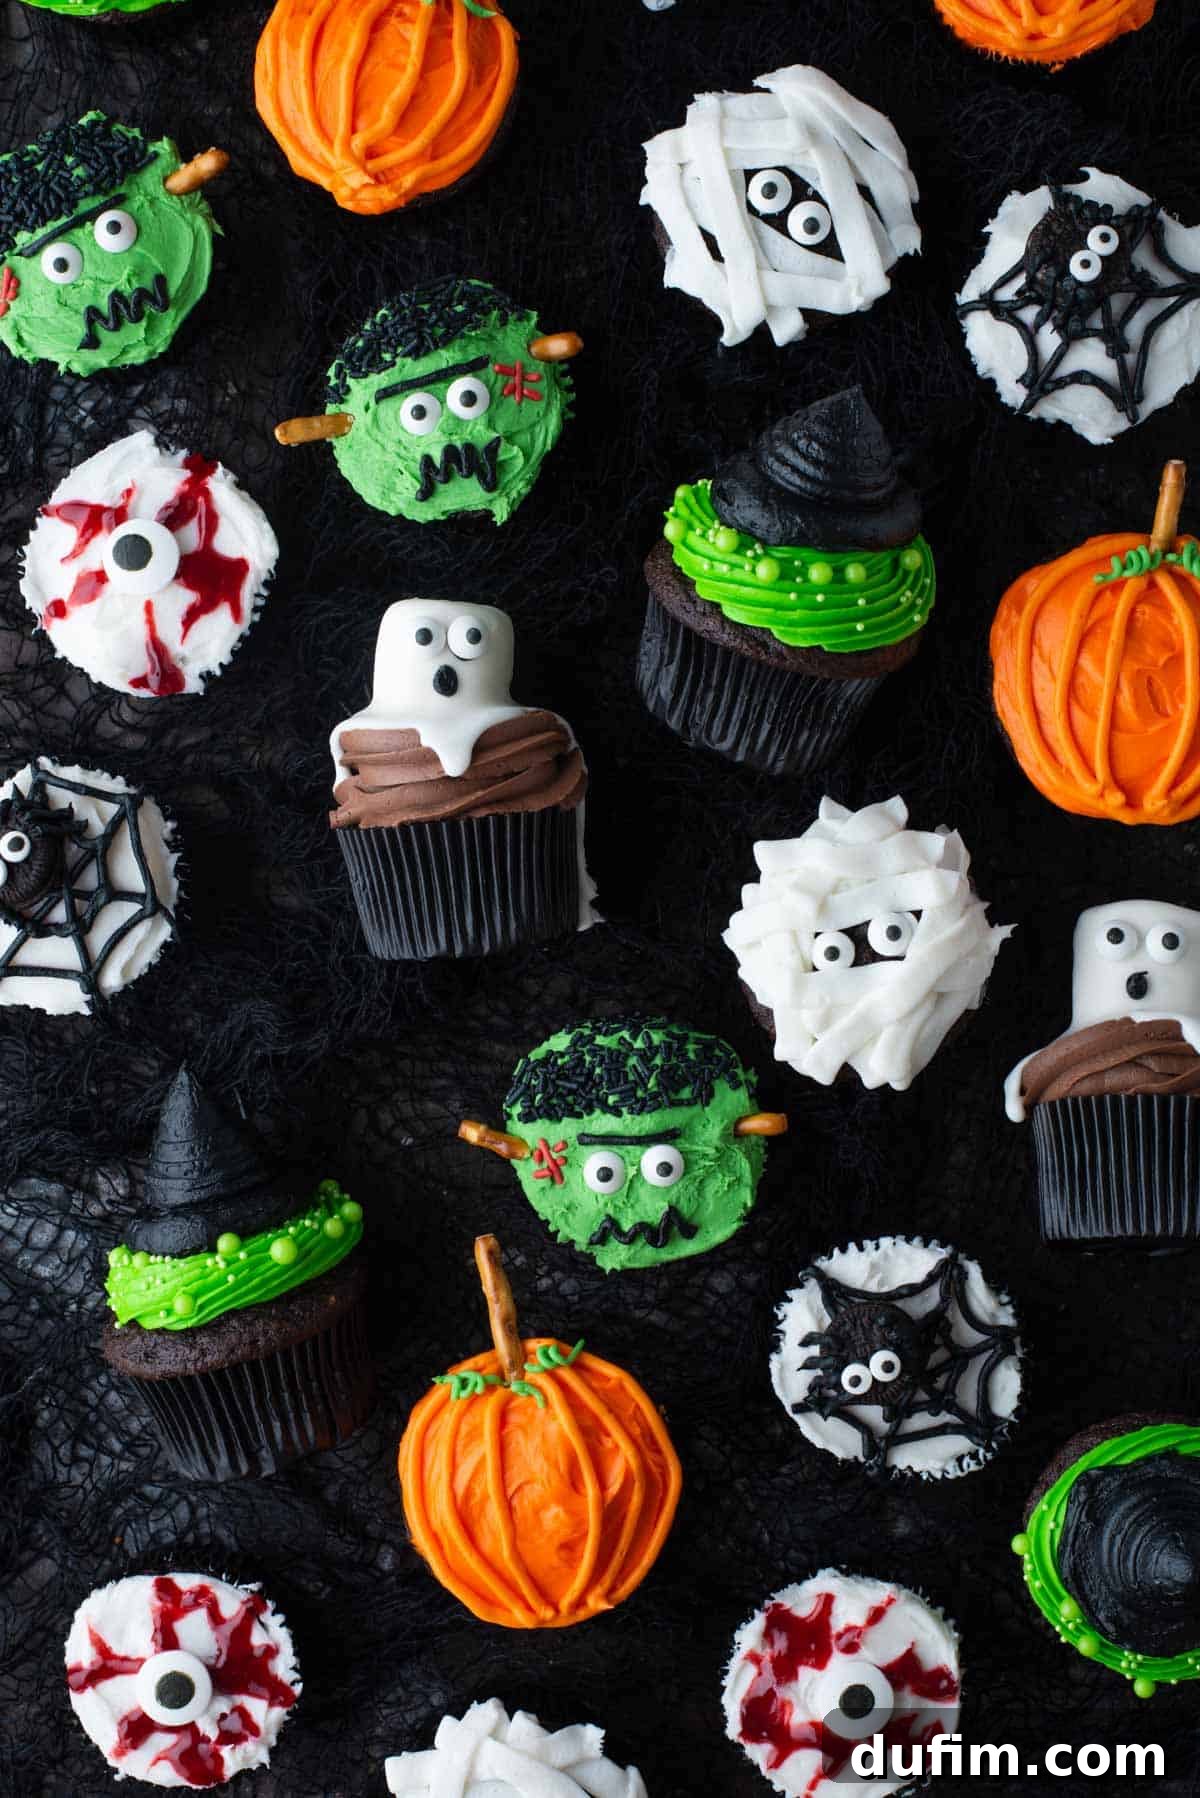
Why stop at just mummies when you can create an entire graveyard (or haunted house) of delicious Halloween treats? Diversify your dessert table with these other fantastic and fun Halloween cupcake recipes. Each one is designed to be easy to make and guaranteed to bring smiles (and a few delightful shivers) to your guests, creating an unforgettable and festive spread!
- Frankenstein Cupcakes: A monstrously good treat featuring vibrant green frosting, edible bolts, and stitched details, bringing the iconic monster to life in cupcake form.
- Witch Hat Cupcakes: Whimsical edible witch hats perched atop chocolate or vanilla cupcakes, perfect for adding a magical and charming touch to your Halloween feast.
- Eyeball Cupcakes: Ghastly good and incredibly simple cupcakes featuring a single, staring candy eye, creating an eerie yet delightful treat.
- Pumpkin Patch Cupcakes: Adorable cupcakes decorated like miniature pumpkin patches, complete with edible pumpkins and green frosting vines, perfect for autumn festivities.
- Spider Web Cupcakes: Simple yet highly effective designs featuring rich chocolate frosting and delicately piped spiderwebs, adding a touch of creepy-crawly elegance.
- Ghost Cupcakes: Whimsical white ghosts made from fluffy frosting, floating atop your favorite cupcake base, offering a classic and cute spooky vibe.
- Spider Cupcakes: Creepy-crawly fun with edible spiders perched on chocolatey tops, a fantastic option for those who love a bit of arachnid-inspired charm.
More Spooky Sweet Halloween Recipes to Explore
Beyond cupcakes, there’s a whole world of Halloween-themed treats waiting to be discovered. Complement your delightful mummy cupcakes with these other festive recipes, perfect for adding variety, extra sweetness, and a touch more spookiness to your holiday spread. From cookies to other delightful confections, we’ve got your Halloween baking covered!
- Halloween Cookies: Explore a diverse collection of fun and easy cookie recipes, perfect for every ghoul, ghost, and goblin at your party.
- Halloween Sugar Cookies: Transform classic sugar cookies into festive masterpieces with spooky shapes, vibrant icing, and creative decorations.
- Ghost Cupcakes: Dive into more ghostly cupcake inspiration, offering a different take on hauntingly good dessert designs.
- Spider Cupcakes: Discover another fantastic recipe for arachnid-inspired cupcakes, perfect for those who enjoy a creepy-cute vibe on their dessert table.
Full Recipe: Easy Chocolate Mummy Cupcakes
Here’s the complete recipe for your delicious and adorable chocolate mummy cupcakes, meticulously detailed with all ingredients and instructions for your baking success. Get ready to create some unforgettable Halloween magic in your kitchen!
Mummy Cupcakes
By: Beth
- Prep Time: 35 minutes
- Cook Time: 17-19 minutes
- Cooling Time: 30 minutes (minimum, must be completely cool)
- Yields: 24 cupcakes
Equipment:
- Large Glass Mixing Bowl
- Medium Mixing Bowl
- Electric Mixer (Stand mixer with paddle attachment or powerful handheld)
- 2 Standard 12-Cup Muffin Pans
- Paper Cupcake Liners
- Piping Bag
- Wilton #47 Basketweave Tip
- Wire Cooling Rack
- Toothpicks (for testing doneness)
Ingredients:
For the Rich Chocolate Cupcakes:
- 2 cups (240g) all-purpose flour
- ¾ cup (63g) cocoa powder (natural unsweetened or Dutch-processed)
- 1 tsp instant coffee granules (such as Folger’s, optional, for enhanced chocolate flavor)
- ½ tsp baking soda
- 1 tsp baking powder
- 1 tsp salt
- ½ cup (113g) unsalted butter, 1 stick, softened to room temperature
- 1 ½ cups (297g) granulated sugar
- 2 large eggs, at room temperature
- 1 cup (236ml) buttermilk, at room temperature
- ½ cup (118ml) hot tap water
For the Velvety Vanilla Buttercream Frosting:
- 1 ½ cups (339g) unsalted butter, 3 sticks, softened to room temperature
- 1 tsp pure vanilla extract
- 2-3 cups (227-339g) powdered sugar, sifted if possible, quantity adjusted for desired consistency
- Dash of milk or heavy cream (approximately ½ tsp at a time, if frosting becomes too thick)
- (Optional: ¼ cup heavy whipping cream for extra fluffy frosting)
For Assembly & Decoration:
- Candy eyeballs (quantity needed for 24 cupcakes)
Instructions:
Chocolate Cupcakes:
- Preheat & Prepare: Preheat your oven to 350º F (175°C). Line two standard 12-cup muffin pans with paper cupcake liners.
- Combine Dry Ingredients: In a medium mixing bowl, whisk together the all-purpose flour, cocoa powder, instant coffee granules (if using), baking soda, baking powder, and salt until thoroughly combined. Set this mixture aside.
- Cream Butter & Sugar: In a large mixing bowl, using an electric mixer, beat the softened unsalted butter and granulated sugar together for 2 minutes on medium-high speed until the mixture is light in color, pale, and fluffy.
- Add Eggs: Add the large eggs one at a time, beating for 30 seconds after each addition until each egg is fully incorporated into the batter. Scrape down the sides of the bowl as needed.
- Alternate Wet & Dry: With the mixer on low speed, add half of the buttermilk and beat for approximately 20 seconds. Next, add half of the dry ingredient mixture and mix just until combined. Then, add the remaining buttermilk along with the hot tap water, mixing until the liquids are just incorporated. Finally, add the remaining dry ingredients and beat on low speed only until the batter is smooth and no streaks of flour are visible. Be careful not to overmix.
- Bake: Divide the chocolate cupcake batter evenly among your prepared muffin liners, filling each cup approximately 1/2 to 2/3 full. Bake for 17-19 minutes. To check for doneness, insert a toothpick into the center of a cupcake; it should come out with only a few moist crumbs clinging to it.
- Cool Completely: Remove the muffin pans from the oven and let the cupcakes cool in the pans for a few minutes. Then, carefully transfer the cupcakes to a wire rack to cool completely. This step is absolutely essential before proceeding to frosting.
Vanilla Buttercream Frosting:
- Beat Butter & Vanilla: In a clean mixing bowl, combine the softened unsalted butter and pure vanilla extract. Beat them together using an electric mixer for 1-2 minutes until the butter is light, creamy, and noticeably fluffy.
- Gradually Add Sugar: Gradually add the powdered sugar, one cup at a time, mixing on low speed until each addition is fully combined. Once all sugar is added, increase the speed to medium-high and beat until the frosting is smooth and light.
- Adjust Consistency: Taste the frosting and adjust for sweetness by adding more powdered sugar if desired. If the frosting is too thick for piping, add a small dash (about ½ teaspoon at a time) of milk or heavy cream, beating after each addition until it reaches a smooth, pipeable consistency. If too thin, add more powdered sugar.
- Optional Fluffy Boost: For an extra fluffy and airy frosting, add ¼ cup of heavy whipping cream along with the last bit of powdered sugar. Whip the frosting vigorously on medium-high speed for an additional 3-4 minutes until it becomes exceptionally light and holds stiff peaks.
Assembly:
- Place Eyeballs: Once the chocolate cupcakes are completely cool, dab a tiny amount of vanilla buttercream frosting onto the back of two candy eyeballs. Carefully place these onto the top of each cupcake, leaving a small space between them.
- Pipe Bandages: Fit a piping bag with a Wilton #47 basketweave tip. Fill the bag approximately two-thirds full with your prepared vanilla buttercream frosting. Hold the piping bag just above a cupcake. Gently squeeze the bag to pipe thin, flat strips of frosting across the cupcake, creating a zigzag pattern. Overlap the strips slightly and pipe carefully around the candy eyes to mimic the look of mummy bandages. Vary the angles and lengths of the strips to give each mummy a unique, wrapped appearance.
- Serve: Repeat this decorating process with all the remaining cupcakes. Serve your spooktacular mummy treats and enjoy the compliments!
Frequently Asked Questions About Mummy Cupcakes
- Can I use a store-bought cake mix and frosting for these mummy cupcakes?
- Absolutely! While this recipe provides a delicious homemade chocolate cupcake base and a rich vanilla buttercream, using a high-quality store-bought chocolate cake mix and pre-made white canned frosting can be a fantastic time-saver, especially if you’re in a pinch. Just ensure the canned frosting is thick enough to pipe the “bandages.” You might need to add a bit of powdered sugar to thicken it, or a tiny bit of milk to thin it if it’s too stiff for piping.
- How do I prevent my cupcakes from sinking in the middle after baking?
- Cupcakes can sink for a few common reasons. The most frequent culprits are overmixing the batter (which develops too much gluten, leading to a tough, sunken center), opening the oven door too early during baking (causing a sudden temperature drop), or an inaccurate oven temperature. To prevent sinking, ensure you mix the batter only until just combined, avoid opening the oven before the last few minutes of baking, and consider using an independent oven thermometer to verify your oven’s accuracy.
- My frosting is too soft to pipe neat mummy bandages. What should I do?
- If your frosting is too soft, it’s likely too warm or simply needs more powdered sugar to achieve the correct piping consistency. First, try chilling the frosting in the refrigerator for 15-20 minutes. After chilling, give it a good re-whip with your electric mixer. If it’s still too soft, gradually add more powdered sugar, one tablespoon at a time, beating until it reaches a firm yet pipeable consistency that holds its shape well when squeezed from the piping bag.
- Can I make these mummy cupcakes in advance for a party?
- Yes, you can certainly prepare these cupcakes in stages! You can bake the chocolate cupcakes up to 2-3 days in advance and store them unfrosted in an airtight container at room temperature. You can also make the vanilla buttercream frosting a day or two ahead and store it in an airtight container in the refrigerator. When you’re ready to decorate, simply let the frosting come to room temperature for about an hour, give it a quick re-whip to restore its fluffiness, and then proceed with piping onto the completely cooled cupcakes.
- Where can I find candy eyeballs for the mummy decoration?
- Candy eyeballs are widely available and typically easy to find, especially during the Halloween season. You can usually locate them in the baking aisle of most major grocery stores, in craft stores with baking sections (like Michael’s or Hobby Lobby), and at party supply stores. You can also easily find a wide variety of candy eyeballs online from large retailers like Amazon (as linked in our recipe) or from specialty baking suppliers.