
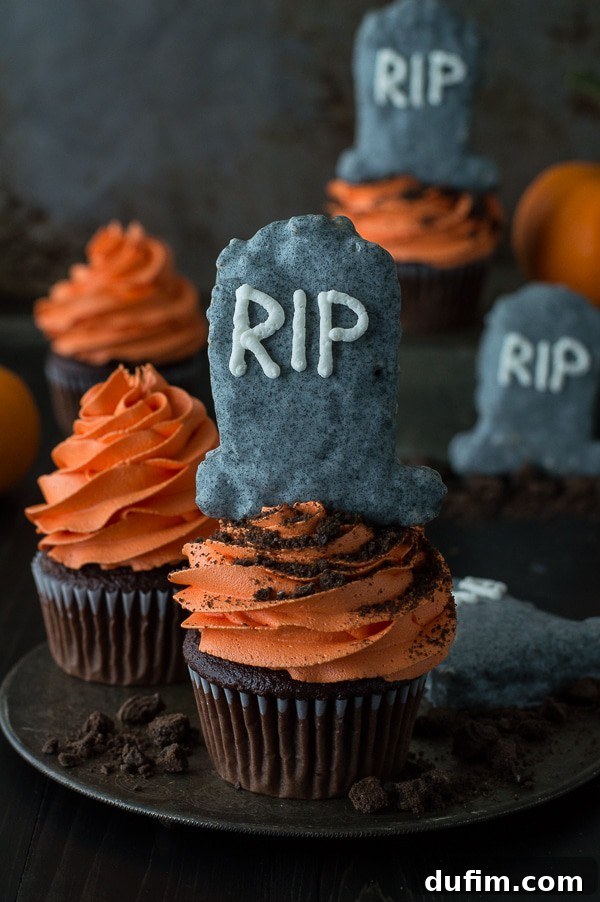
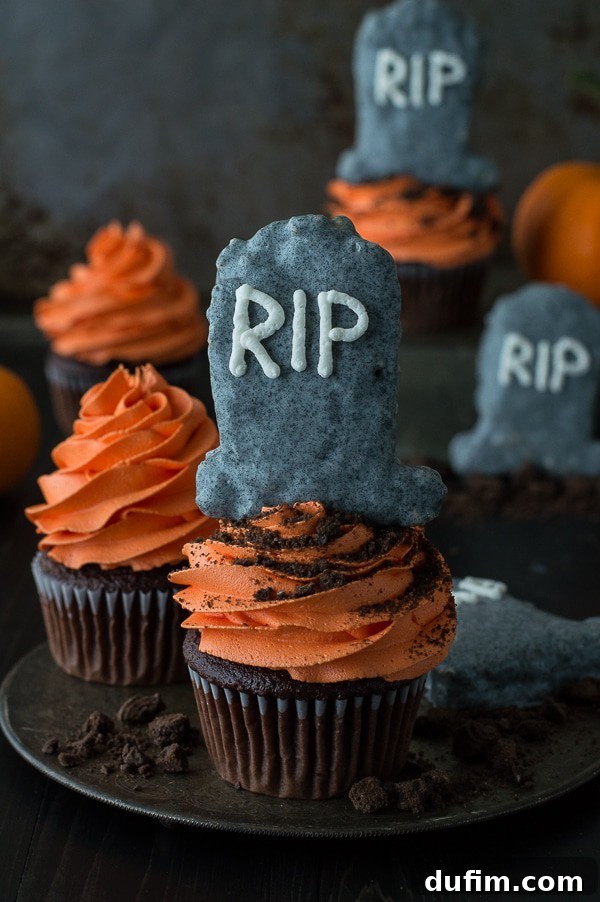
Embrace the spirit of Halloween with these incredibly fun and deliciously spooky Tombstone Cupcakes! Imagine biting into a rich, moist chocolate cupcake, topped with a vibrant swirl of orange buttercream, and adorned with an edible tombstone made from crispy, chewy Rice Krispie treats. This recipe isn’t just about baking; it’s about crafting edible art that will be the talk of any Halloween party or family gathering. Whether you’re a seasoned baker or just starting, these cupcakes are surprisingly simple to make and promise a ghoulishly good time in the kitchen.
The Unexpected Inspiration: My Cookie Cutter Collection
My journey to these hauntingly good Halloween Tombstone Cupcakes began, as many of my baking adventures do, with an impulse purchase of cookie cutters. A few weeks ago, I stumbled upon an incredible deal at my favorite online store, where most cutters were just 99 cents! Naturally, I stocked up on an array of shapes for both Halloween and Christmas. I’ll admit, I don’t bake cookies every day, but cookie cutters are truly versatile tools. You never know when you’ll need a specific shape – perhaps a charming strawberry, a whimsical witch, a trusty broom, a mysterious black cat, a classic Frankenstein, a cheerful pumpkin, autumnal leaves, or, as fate would have it, a tombstone. Suffice it to say, if you ever need a specific cookie cutter, there’s a good chance I might have it!
My newly acquired cookie cutters, along with other seasonal treasures, found a temporary home in a storage bin under my bed. It wasn’t until I decided to pull them out that I discovered a delightful assortment of forgotten items: some rustic slate pieces I’d bought for a steal at an antique store, candy canes from last year’s festive season, New Year’s Eve napkins and silverware, and even a stack of Christmas towels. It’s a bittersweet feeling to have a bin overflowing with holiday cheer that only sees the light of day for a mere 30 days each year. That realization sparked an immediate mission: I had to put some of those Halloween cookie cutters to good use before they were relegated back to storage for another 335 days. And so, the idea for Tombstone Cupcakes was born!
Crafting the Perfect Spooky Aesthetic: Tombstones and Frosting
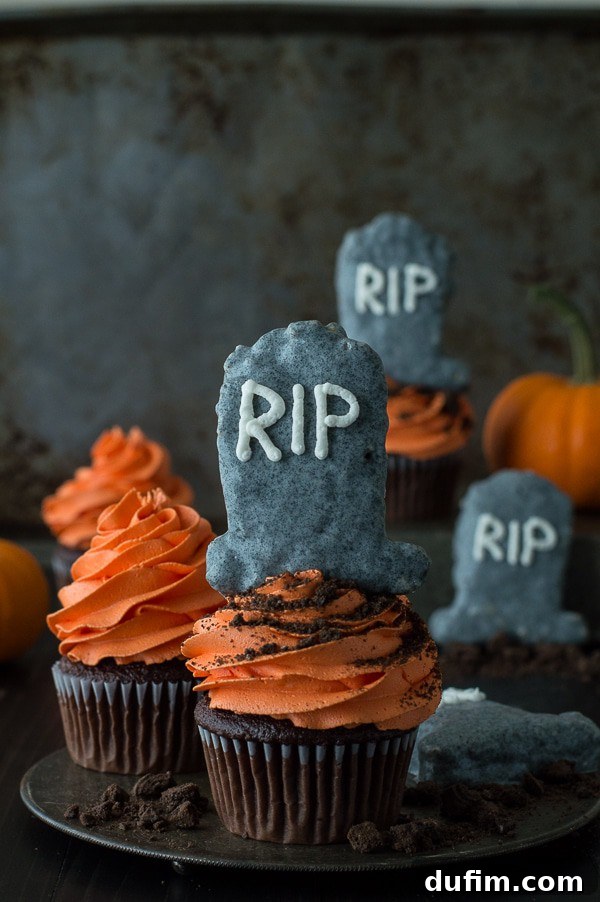
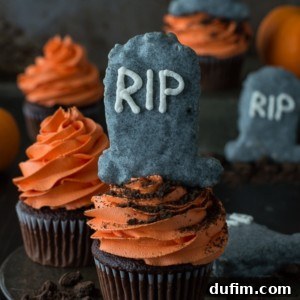
I absolutely adore how these Halloween Tombstone Cupcakes turned out! Initially, I had a slight concern that the tombstones might be a tad too large for the cupcakes. However, I’m known for my love of over-the-top, themed treats, so I decided to lean into the drama, and it paid off! The generous size of the tombstones truly makes these cupcakes stand out, creating an impressive and eye-catching display perfect for any Halloween celebration.
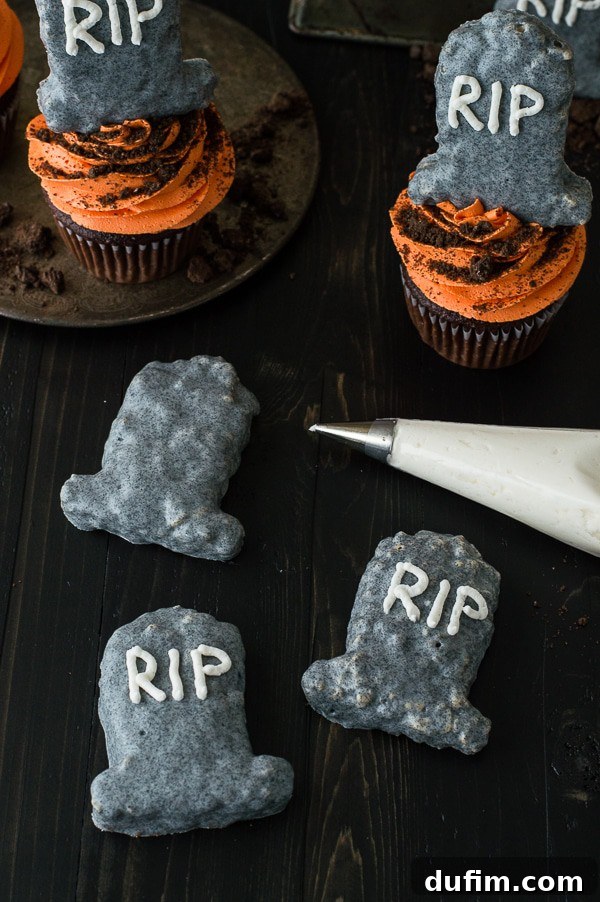
My initial vision for the tombstones was a classic, somber gray. But when I couldn’t find gray candy melts at the store, a momentary wave of panic set in. Determined not to let it deter me, I improvised by using white chocolate candiquik (or almond bark) and incorporating black gel food coloring. What resulted was an unexpected, yet utterly charming, speckled effect on the tombstones. It was a happy accident, really – the gel food coloring and candiquik didn’t mix perfectly smoothly, leading to beautiful black flecks against the white chocolate base, mimicking weathered stone with remarkable authenticity. This unique texture adds depth and character, making each tombstone look genuinely ancient and spooky.
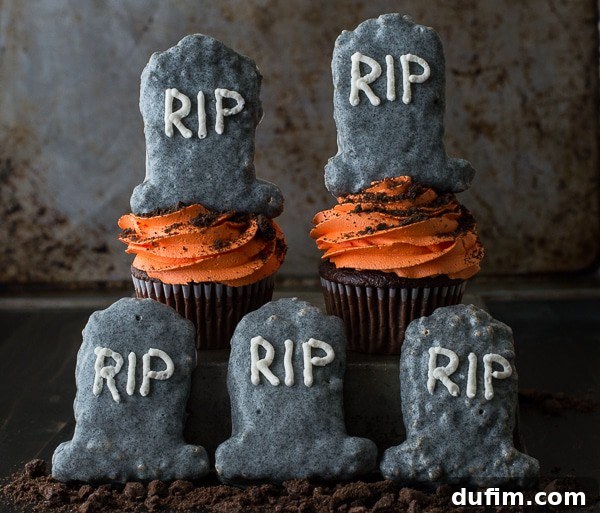
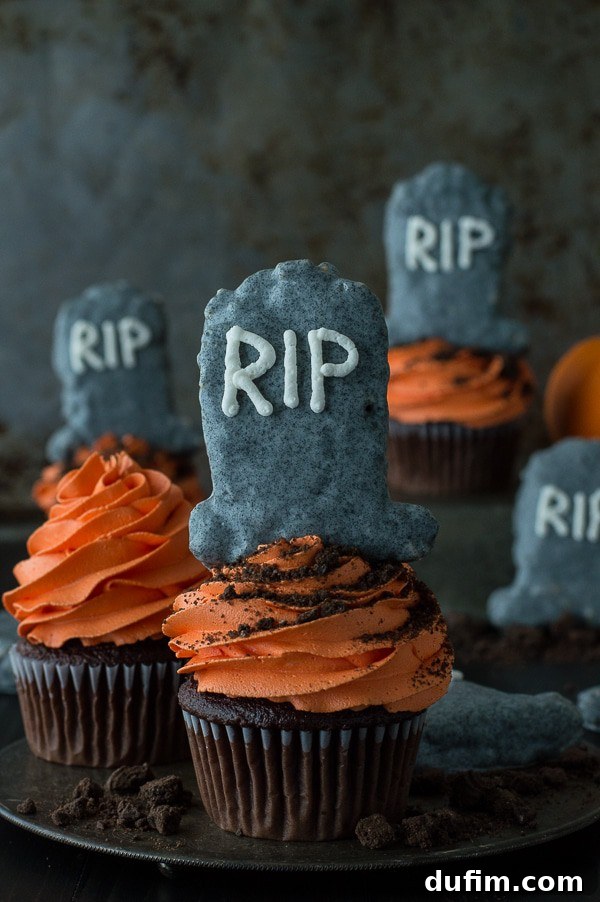
Another element of these cupcakes that I’m particularly excited about is the new method I used for piping the buttercream. Yes, I know, it might sound a bit nerdy, but this technique truly makes the frosting appear incredibly full and luscious. It also means I actually used a more generous amount of buttercream per cupcake, which, let’s be honest, is always a good thing! Typically, I start piping buttercream from the outside edge and work my way in. However, for these tombstone cupcakes, I tried starting in the center, swirling outwards to the edges, and then swirling back towards the center to create a beautifully stacked, voluminous frosting swirl. This method not only looks impressive but also provides a delightful texture with every bite.
The Edible Tombstones: Rice Krispie Treat Magic
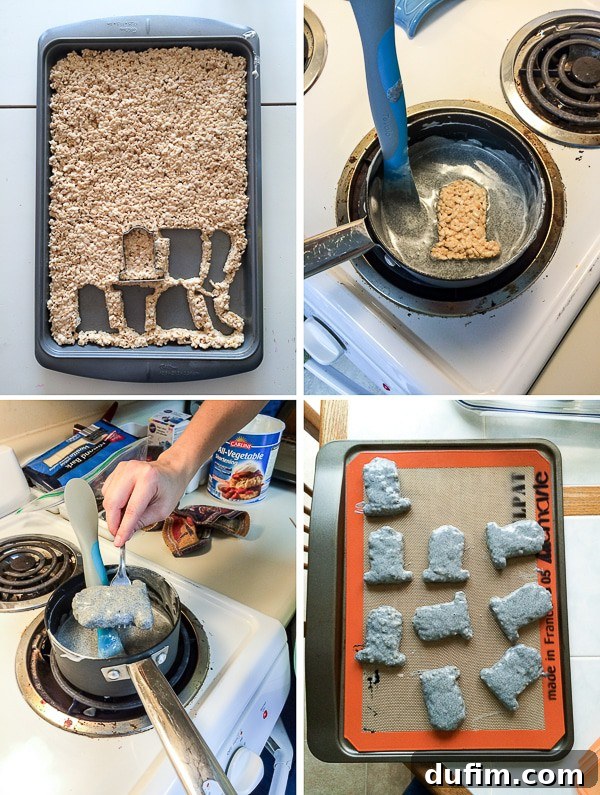
The best part about these tombstones? They are completely edible, made from classic Rice Krispie treats! This makes them not only delicious but also a fun and safe addition to your cupcakes. To create them, I whipped up a batch of my favorite Rice Krispie treats and pressed the warm, sticky mixture evenly onto a large baking sheet. Once slightly cooled but still pliable, I used my special tombstone cookie cutter to carefully cut out the shapes. For best results, I recommend refrigerating these Rice Krispie tombstones until they are firm and solid. This step is crucial for preventing them from becoming too soft when dipped in chocolate.
After the tombstones were perfectly chilled and firm, it was time for their chocolatey transformation. I gently dipped each one into the speckled chocolate mixture I’d prepared, ensuring a full and even coat. They were then carefully placed on a silicone baking mat to set and dry. While the chocolate hardened, I took a small portion of the buttercream, before coloring it orange, and piped “RIP” onto each tombstone using a fine piping tip. This detail adds an authentic, eerie touch. To complete the graveyard effect, I sprinkled crushed Oreos around the base of the tombstones on each cupcake, creating the illusion of freshly dug earth. And just like that, voilà – a truly dramatic and delicious Halloween treat!
More Spooky Halloween Treats & Recipes!
If you’re looking to expand your repertoire of Halloween treats beyond these delightful Tombstone Cupcakes, you’re in luck! I’ve curated a selection of other spooktacular recipes that are sure to impress your guests and bring an extra dose of fun to your festivities. From cakes to brownies, there’s something for every sweet tooth and every Halloween theme.
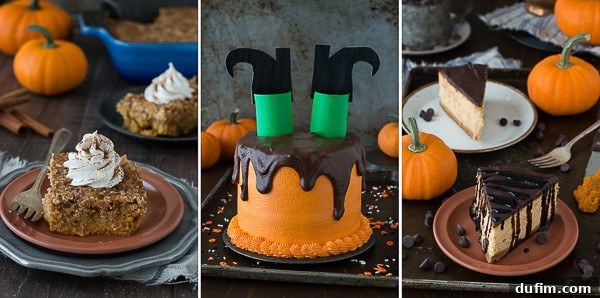
Don’t miss out on trying my Pumpkin Dump Cake, a wonderfully easy and flavorful dessert for autumn. For something truly enchanting, the Melted Witch Cake is a whimsical and memorable centerpiece. And if you’re a fan of rich, creamy indulgence, my Pumpkin Chocolate Cheesecake is an absolute must-try.
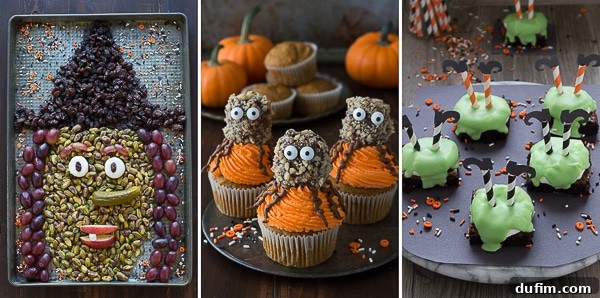
For a unique and interactive treat, assemble a festive Halloween Witch Platter. If you love cupcakes, these adorable Pumpkin Walnut Spider Cupcakes are both delicious and delightfully creepy. And for a classic treat with a spooky twist, my Melted Witch Brownies are always a crowd-pleaser. Explore these recipes and make your Halloween celebrations extra sweet!
Tombstone Cupcakes
Beth
15 minutes
30 minutes
45 minutes
12 cupcakes
Rate
Equipment
-
Glass Mixing Bowl
-
KitchenAid 9-Speed Mixer
-
Muffin Pan
-
Spatula
-
Tombstone Cookie Cutter
-
Piping Bags & Tips (Wilton 1M and Wilton 5 Round)
Ingredients
For the Chocolate Cupcakes
- ½ cup (42g) cocoa powder
- 1 cup (120g) all-purpose flour
- 1 tsp baking powder
- ½ tsp baking soda
- ¼ tsp salt
- ½ cup (113g) unsalted butter, 1 stick, softened to room temperature
- ¾ cup (149g) granulated sugar
- 2 large eggs
- 1 tsp vanilla extract
- ⅓ cup (76g) sour cream
- 2 Tbsp melted chocolate, cooled (dark or semi-sweet)
For the Buttercream Frosting
- 1 cup (226g) unsalted butter, 2 sticks, softened to room temperature
- ½ cup (118ml) vegetable shortening
- 1 tsp vanilla extract
- 5-7 cups (567-791g) powdered sugar
- Orange gel food coloring
For the Tombstones & Decoration
- 6-8 cups (168-224g) Rice Krispie cereal
- 3 Tbsp (43g) unsalted butter
- 10 oz mini marshmallows, or one standard bag
- 3-4 squares Vanilla candiquik or white almond bark, enough to cover approximately 12 tombstones
- 1 Tbsp vegetable shortening
- Black gel food coloring
- Buttercream, a small portion reserved before dying orange, for “RIP” lettering
- Oreo crumbs, for decorative “dirt”
Instructions
Chocolate Cupcakes
-
Preheat your oven to 350 degrees F (175 C). Line a 12-cup muffin tin with cupcake liners.
-
In a small mixing bowl, whisk together the cocoa powder, all-purpose flour, baking powder, baking soda, and salt until well combined. Set aside.½ cup (42g) cocoa powder,
1 cup (120g) flour,
1 tsp baking powder,
½ tsp baking soda,
¼ tsp salt -
In a larger mixing bowl, cream together the softened butter and granulated sugar using an electric mixer until light and fluffy, about 2-3 minutes. Beat in the eggs one at a time, then stir in the vanilla extract until just combined.½ cup (113g) butter,
¾ cup (149g) sugar,
2 large eggs,
1 tsp vanilla -
Gently fold in the sour cream and cooled melted chocolate by hand with a spatula until smooth.⅓ cup (76g) sour cream,
2 Tbsp melted chocolate -
Gradually add the dry flour mixture to the wet ingredients in two batches. For best results, gently sprinkle spoonfuls of the flour mixture over the wet ingredients, as if sifting, rather than dumping it all at once. Fold each batch in until no streaks of flour remain, being careful not to overmix. Scrape down the sides and bottom of the bowl to ensure everything is well incorporated.
-
Fill each cupcake liner about 1/2 full with batter.
-
Bake for 17-20 minutes, or until a toothpick inserted into the center of a cupcake comes out clean.
-
Allow the chocolate cupcakes to cool completely on a wire rack before attempting to frost them.
Buttercream Frosting
-
In a large mixing bowl, beat the room temperature butter and vegetable shortening together using an electric mixer until light and fluffy, about 2 minutes.1 cup (226g) butter,
½ cup (118ml) vegetable shortening -
Add the vanilla extract and continue to beat until well incorporated.1 tsp vanilla extract
-
Gradually add the powdered sugar, about 1-2 cups at a time. Begin mixing by hand with a spatula to prevent a sugar cloud, then switch to the electric mixer. Continue adding powdered sugar until the frosting reaches your desired consistency and sweetness.5-7 cups (567-791g) powdered sugar
-
Before adding color, reserve a small portion of the white buttercream (about 1/4 cup) for piping the “RIP” lettering onto the tombstones.
-
Add your desired amount of orange gel food coloring to the remaining buttercream. Start with a small amount and gradually add more until you achieve a vibrant Halloween orange. Beat the frosting one last time with the mixer to ensure even color distribution.Orange gel food coloring
Rice Krispie Treat Tombstones
-
Measure out 6-8 cups of Rice Krispie cereal and set aside in a large bowl.6 cups (168g) rice krispie cereal
-
In a large pot, melt the butter and mini marshmallows over medium-low heat, stirring frequently until completely smooth.3 Tbsp (43g) butter,
10 oz mini marshmallows -
Once the mixture is fully melted, remove the pot from the heat.
-
Pour the Rice Krispie cereal into the melted marshmallow mixture. Stir well with a greased spatula until all the cereal is evenly coated.
-
Transfer the warm mixture onto a large greased baking sheet (or a sheet lined with parchment paper). Using a greased piece of wax paper or your greased hands, press the mixture evenly into a flat layer, about 1/2 to 3/4 inch thick.
-
Refrigerate the pressed Rice Krispies for at least 20 minutes, or until firm.
-
Once firm and cold, use your tombstone cookie cutter to cut out as many tombstone shapes as you need (you should get at least 12).
-
Place the cut tombstones back into the refrigerator while you prepare the chocolate coating. They can also be refrigerated overnight if you plan to dip them on a different day.
-
In a small pot or microwave-safe bowl, combine the vanilla candiquik (or almond bark) and vegetable shortening. Melt over low heat, stirring occasionally, or microwave in 30-second intervals until smooth. Be very careful not to overheat the candiquik, as it can seize.3-4 squares Vanilla candiquik,
1 Tbsp vegetable shortening -
Once melted and smooth, add a few drops of black gel food coloring. Stir the food coloring into the chocolate mixture until it creates a speckled, stone-like appearance. The imperfect mixing of the gel with the white chocolate will naturally create this effect.Black gel food coloring
-
One by one, dip each cold Rice Krispie tombstone into the speckled chocolate mixture, spooning chocolate over it to ensure full coverage. Use a fork to gently remove the tombstone from the chocolate, allowing excess to drip off. A word of caution: the warm chocolate may cause the marshmallows in the Rice Krispies to soften slightly, so work quickly and carefully.
-
Place the dipped tombstones on a silicone baking mat or wax paper to allow the chocolate to set completely. This may take 15-30 minutes at room temperature, or faster in the refrigerator.
To Add Lettering onto the Tombstones
-
Fit a piping bag with a Wilton 5 round piping tip (or any small round tip). Fill the bag with the reserved white buttercream. Gently push the buttercream down into the bag, twist the top to seal, and carefully pipe “RIP” onto each set tombstone. Allow the lettering to dry slightly before handling.Reserved Buttercream
To Frost the Cupcakes & Assemble
-
Fit a clean piping bag with a Wilton 1M star piping tip (or any large open star tip). Fill the bag with the orange buttercream. Pipe the buttercream onto the cooled chocolate cupcakes using the center-out-center technique: start piping in the center of the cupcake, swirl outwards to the edge, then continue to swirl inwards and upwards, progressively stacking the frosting to create a tall, beautiful swirl.
-
Generously sprinkle Oreo crumbs over the buttercream on each cupcake to mimic freshly disturbed earth.Oreo crumbs
-
Carefully place one finished tombstone onto the top of each frosted cupcake, pressing it gently into the buttercream to secure. If any tombstone feels unstable or particularly large, you can discreetly support it from behind with a toothpick.
Notes
For the melted chocolate in the cupcake batter, you can use bittersweet, semi-sweet, or even milk chocolate, depending on your preference for sweetness. Ensure it’s cooled before adding to the wet ingredients to prevent cooking the eggs.
When making Rice Krispie treats, working with greased hands or a greased spatula can prevent the sticky mixture from adhering too much. This makes pressing it onto the baking sheet and cutting shapes much easier.
Gel food coloring is recommended for both the buttercream and the chocolate coating as it provides concentrated color without adding excess liquid, which can alter the consistency of your mixtures.
Nutrition
Calories:
788kcal
|
Carbohydrates:
101g
|
Protein:
5g
|
Fat:
43g
|
Saturated Fat:
24g
|
Polyunsaturated Fat:
4g
|
Monounsaturated Fat:
12g
|
Trans Fat:
2g
|
Cholesterol:
103mg
|
Sodium:
472mg
|
Potassium:
122mg
|
Fiber:
2g
|
Sugar:
74g
|
Vitamin A:
1810IU
|
Vitamin C:
9mg
|
Calcium:
48mg
|
Iron:
6mg
Nutrition Disclosure
All nutritional values are approximate and provided to the reader as a courtesy. Changing ingredients and/or quantities will alter the estimated nutritional calculations.
Did you enjoy this recipe? Share your thoughts!
Leave a comment below and let us know how your Tombstone Cupcakes turned out. Your feedback helps other bakers create their own spooky masterpieces!