

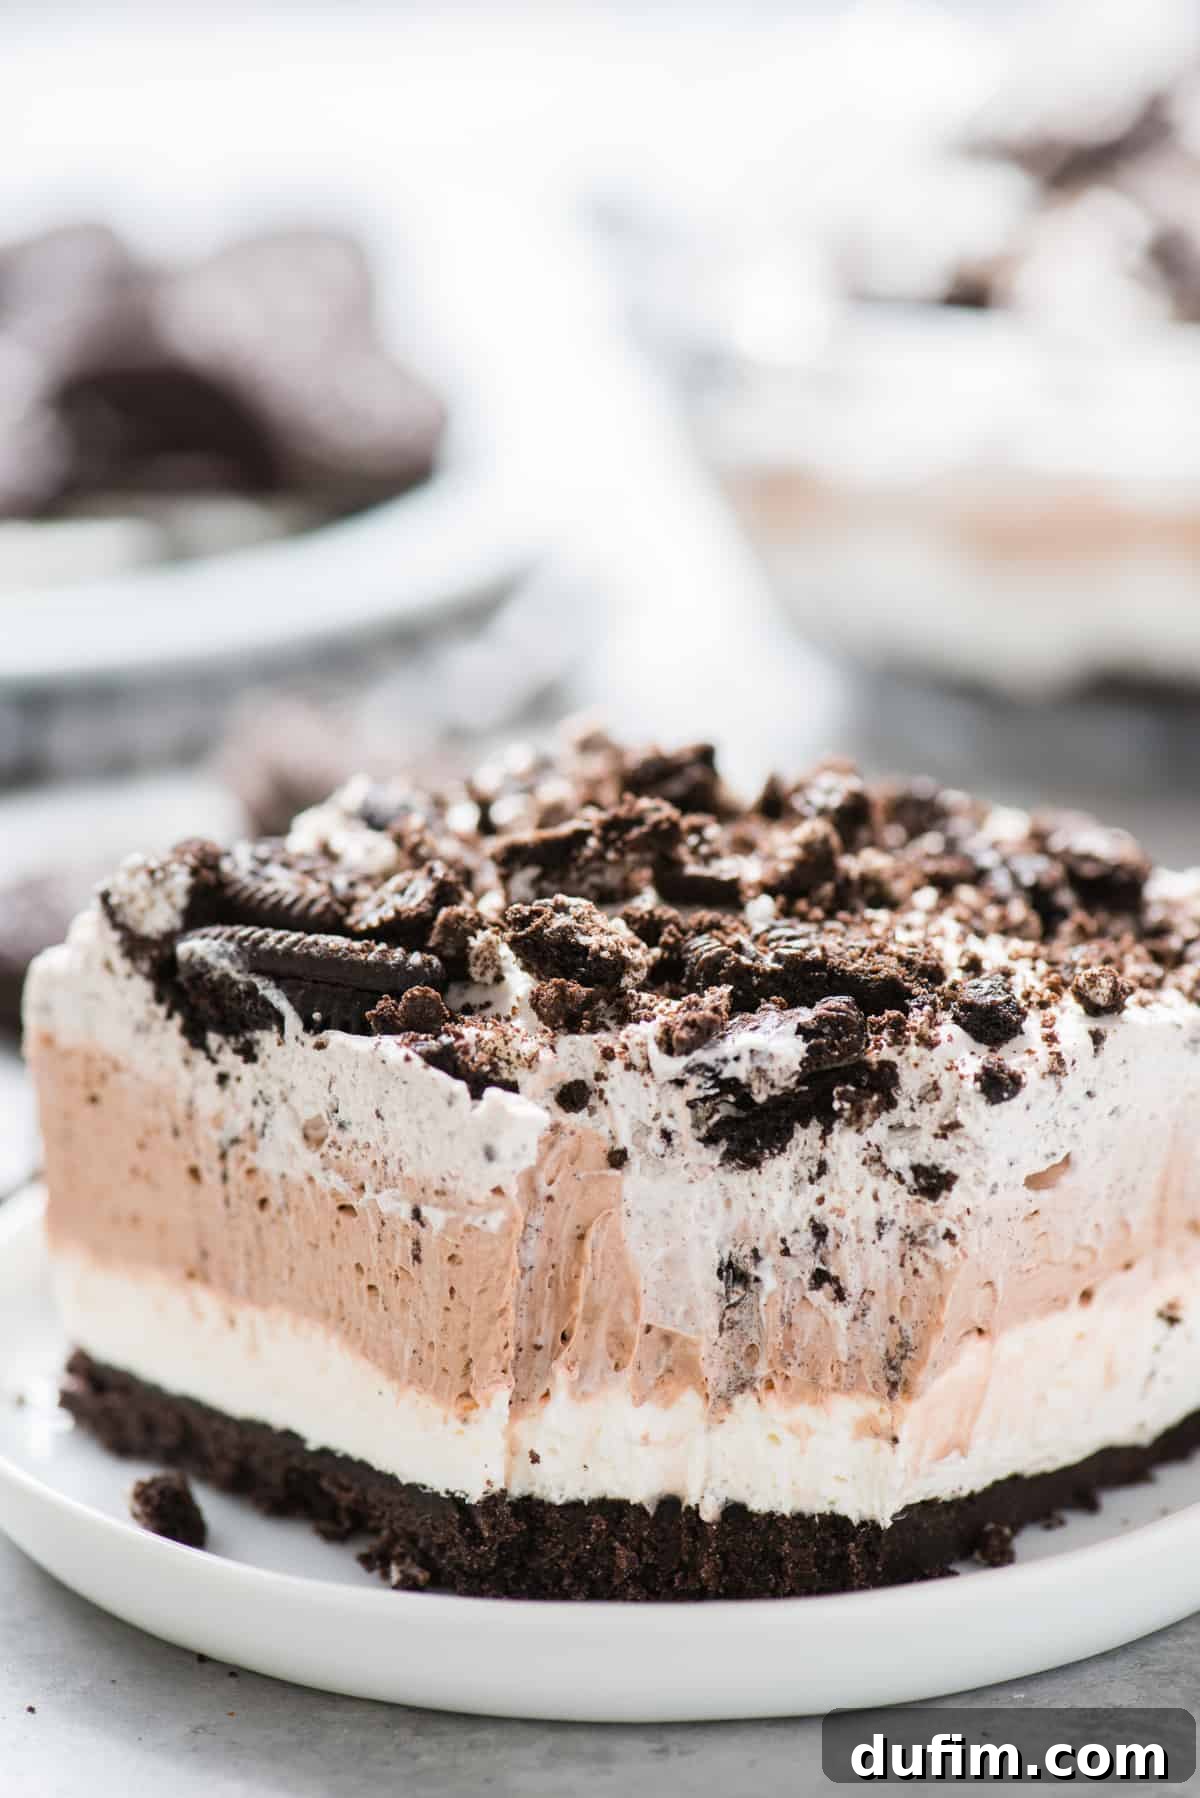
Say goodbye to soggy, unappetizing layered desserts! This incredible no-bake Oreo Delight recipe stands out with its remarkably thick, fluffy texture, ensuring every slice is perfectly clean and irresistible. Crafted in just 20 minutes of prep time using only 8 essential ingredients, this dessert has quickly earned a reputation as a beloved family favorite. It’s the ultimate solution for a quick, impressive treat that tastes as good as it looks.
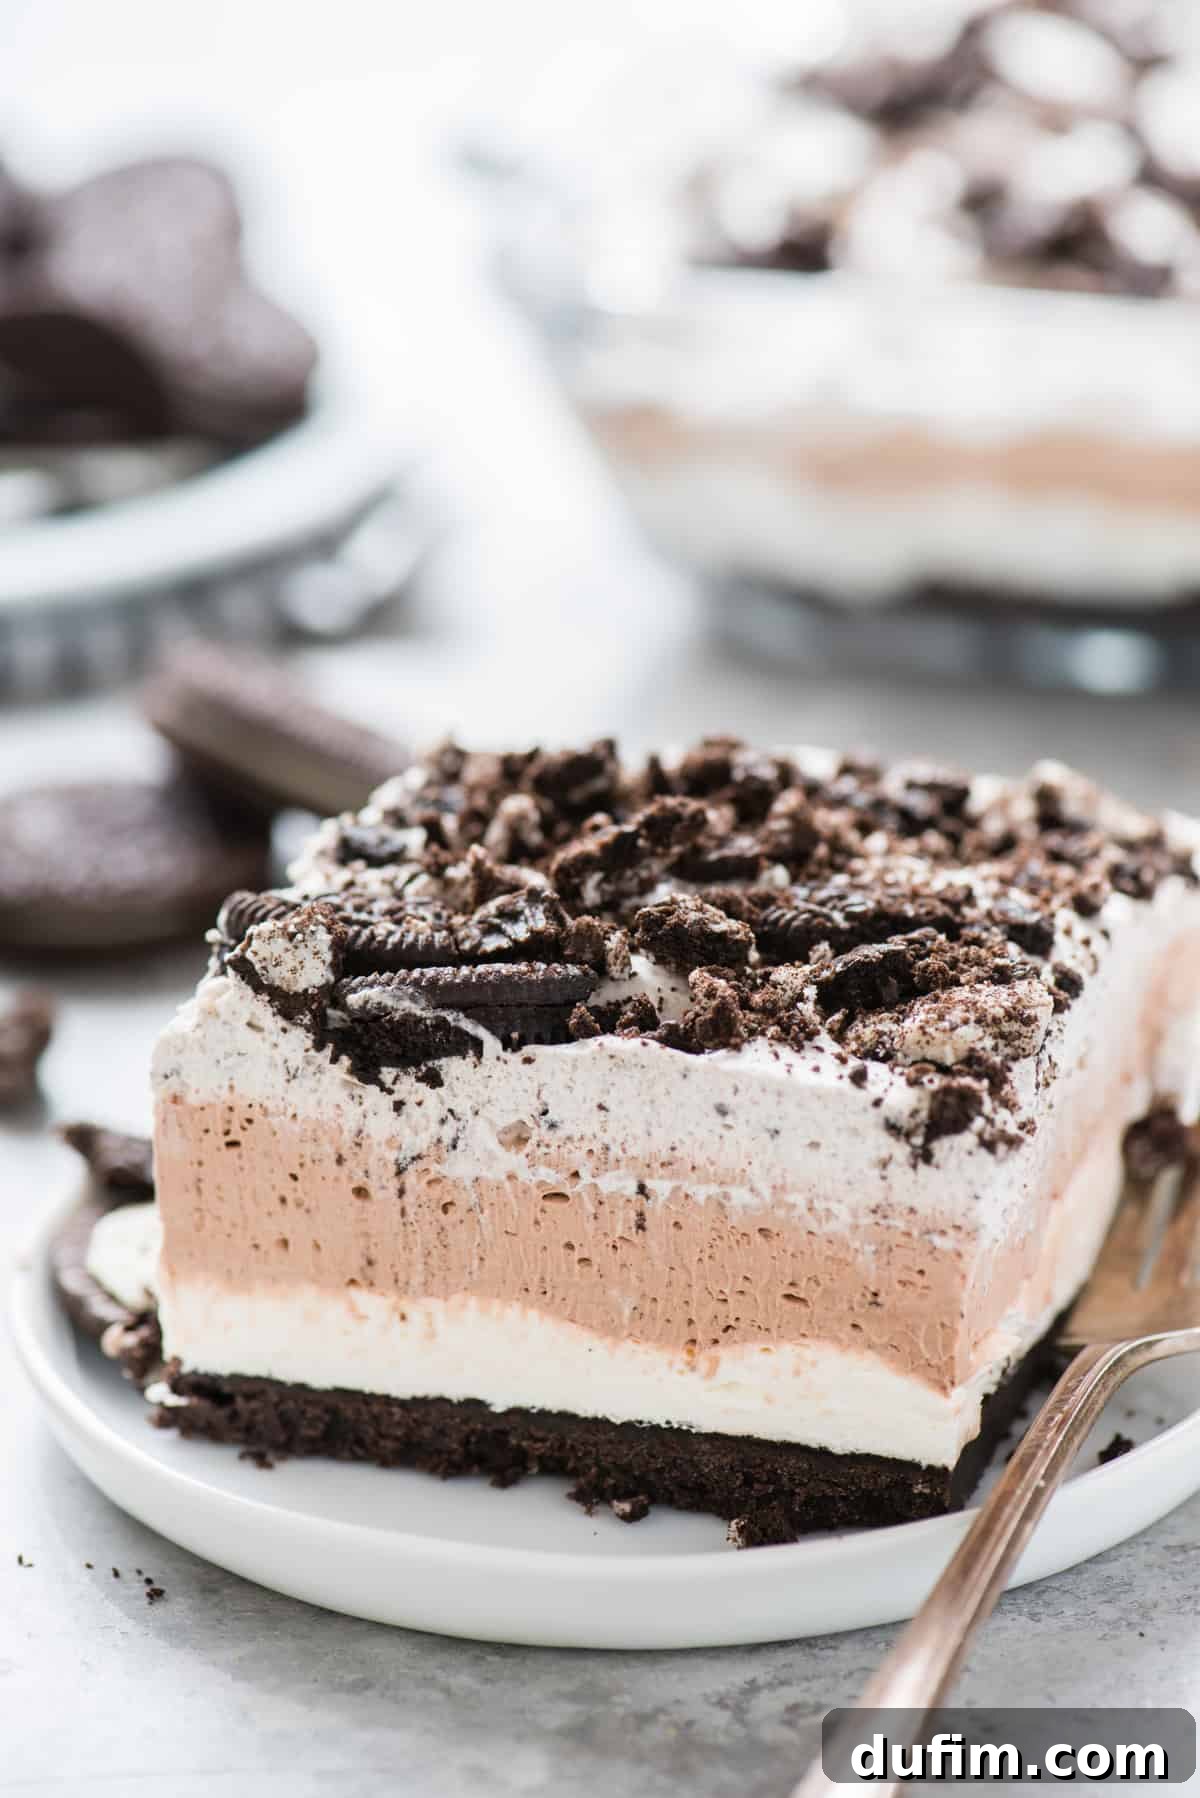
“This has officially become our go-to family favorite dessert! It’s always a hit and so easy to make.”
– Stephanie
The Ultimate No-Bake Oreo Dessert: Your New Favorite Summer Indulgence
Many traditional no-bake Oreo desserts often fall short, resulting in a mushy texture that makes clean slicing nearly impossible. This common issue usually stems from using a layer of actual, prepared pudding in the middle. While delicious on its own, conventional pudding often lacks the structural integrity needed for a truly impressive layered dessert, leading to disappointment when it’s time to serve.
Our unique no-bake Oreo Delight recipe cleverly sidesteps this problem. Instead of prepared pudding, we utilize a box of chocolate instant pudding mix, but with a crucial twist: you prepare it in a way that transforms it into a luscious, airy chocolate mousse. This innovative approach ensures that each layer is perfectly set, contributing to a dessert that is not only thick and incredibly fluffy but also holds its shape beautifully for immaculate, clean cuts. Get ready to impress your guests and delight your family with a dessert that truly delivers on both taste and presentation!
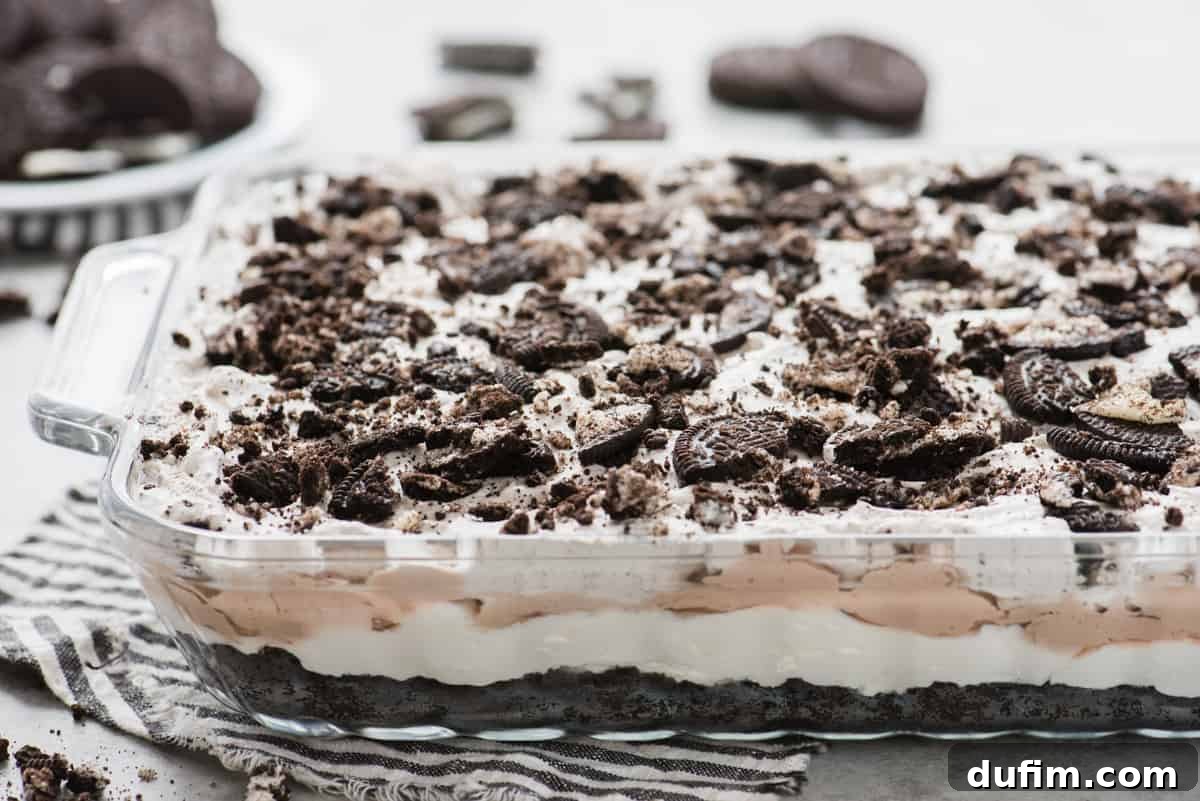
5 Reasons You Will Fall in Love with This Oreo Dessert Recipe
This exquisite no-bake Oreo dessert isn’t just another sweet treat; it’s a symphony of textures and flavors, meticulously designed to delight. Here’s why it’s guaranteed to become your new favorite:
- Crumbly Oreo Crust: A foundational layer of crushed Oreos and melted butter, providing the perfect balance of chocolatey goodness and a satisfying crunch.
- Tangy Cream Cheese Layer: A smooth, sweet, and slightly tangy cream cheese filling that perfectly complements the rich chocolate flavors, adding a delightful creamy contrast.
- Decadent Chocolate Mousse Layer: Our secret weapon! This light, airy, and rich chocolate mousse provides deep chocolate flavor without the sogginess of traditional pudding. It’s what gives this dessert its incredible structure and luxurious feel.
- Homemade Oreo Whipped Cream Layer: A cloud of freshly whipped cream infused with finely crushed Oreos, creating a light, dreamy topping that’s bursting with iconic cookie flavor.
- Generously Topped with Crushed Oreos: The grand finale! An extra sprinkle of crushed Oreos not only adds a beautiful visual appeal but also delivers another delightful layer of texture and intensified Oreo flavor in every bite.
Key Ingredients for Your Perfect Oreo Delight
Crafting this sensational no-bake Oreo dessert requires a concise list of readily available ingredients, each playing a vital role in creating its harmonious layers. You’ll only need 8 core items, ensuring this recipe is as convenient as it is delicious:
- Oreos: The star of the show! Used for the crust, infused in the whipped cream, and as a final topping. A family-size package is recommended.
- Unsalted Butter: Essential for binding the Oreo crumbs into a firm, flavorful crust.
- Cream Cheese: Provides the luscious, slightly tangy base for the second creamy layer. Ensure it’s softened for a smooth consistency.
- Powdered Sugar (Confectioners’ Sugar): Used in both the cream cheese and whipped cream layers for smooth sweetness without graininess.
- Vanilla Extract: A crucial flavor enhancer that brightens and balances the sweetness in the creamy layers.
- Cool Whip (Thawed): Adds lightness and stability to both the cream cheese and chocolate mousse layers, making them wonderfully fluffy.
- Chocolate Instant Pudding Mix (Boxed): Not for making pudding traditionally! This dry mix is key to creating our unique, thick chocolate mousse layer.
- Heavy Whipping Cream: The foundation for our homemade, rich, and airy Oreo whipped cream topping. Chilled for optimal whipping results.
How to Make This Oreo Delight Recipe Gluten-Free and Inclusive
One of the many wonderful aspects of this Oreo dessert is how easily it can be adapted to accommodate various dietary needs. Making this delightful recipe gluten-free is incredibly simple, requiring just one key substitution. Many brands, including Oreo themselves, now offer delicious gluten-free versions of their classic chocolate sandwich cookies.
By simply opting for gluten-free Oreos, you can transform this family-favorite dessert into a treat that everyone can enjoy, without compromising on taste or texture. All other ingredients in this recipe—such as butter, cream cheese, powdered sugar, vanilla extract, Cool Whip, instant pudding mix, and heavy whipping cream—are naturally gluten-free. This makes it a fantastic, inclusive option for gatherings where guests may have gluten sensitivities, ensuring no one misses out on the fun and flavor of this incredible no-bake creation.
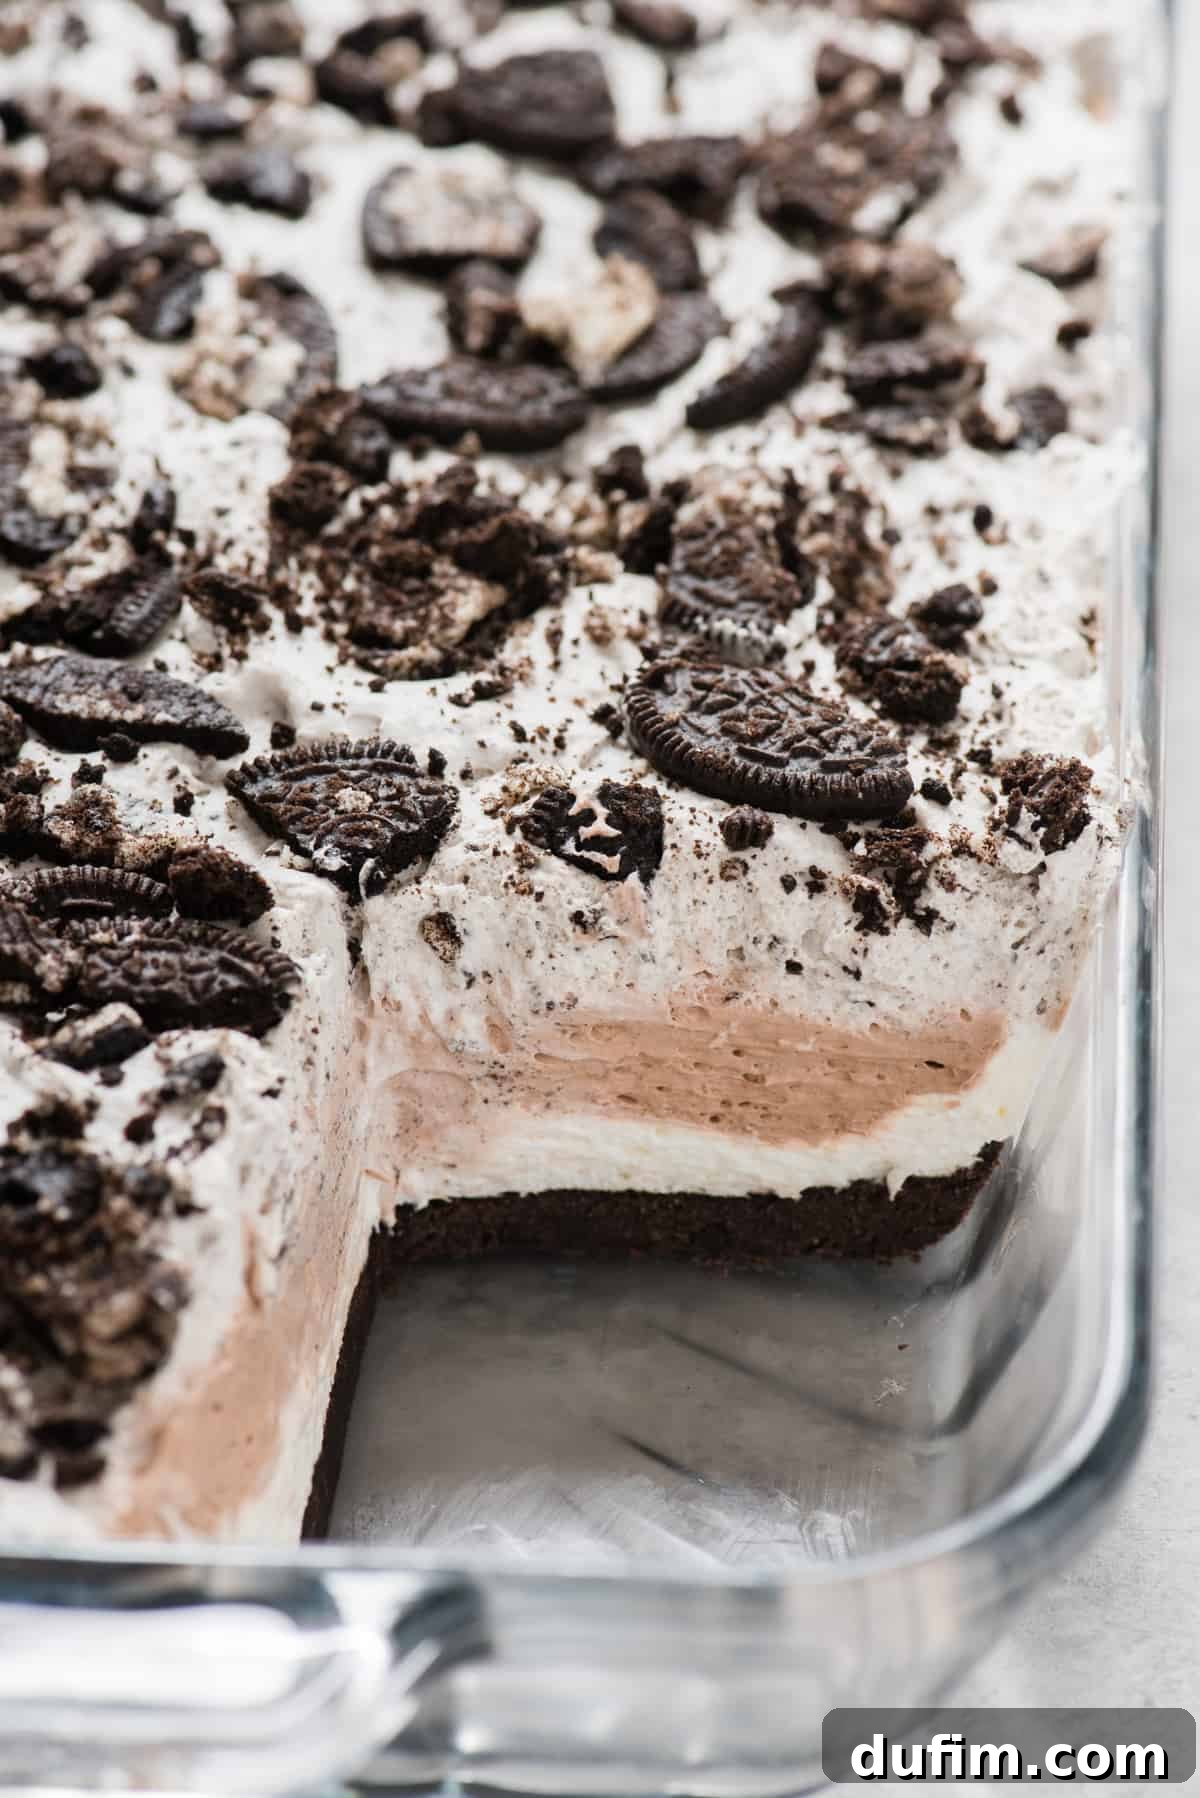
How To Make The Perfect No-Bake Oreo Dessert: Step-by-Step
Creating this irresistible layered Oreo dessert is a straightforward process, broken down into manageable steps for each delicious component. Follow these instructions carefully to achieve the perfect balance of flavors and textures.
The Satisfying Oreo Crust
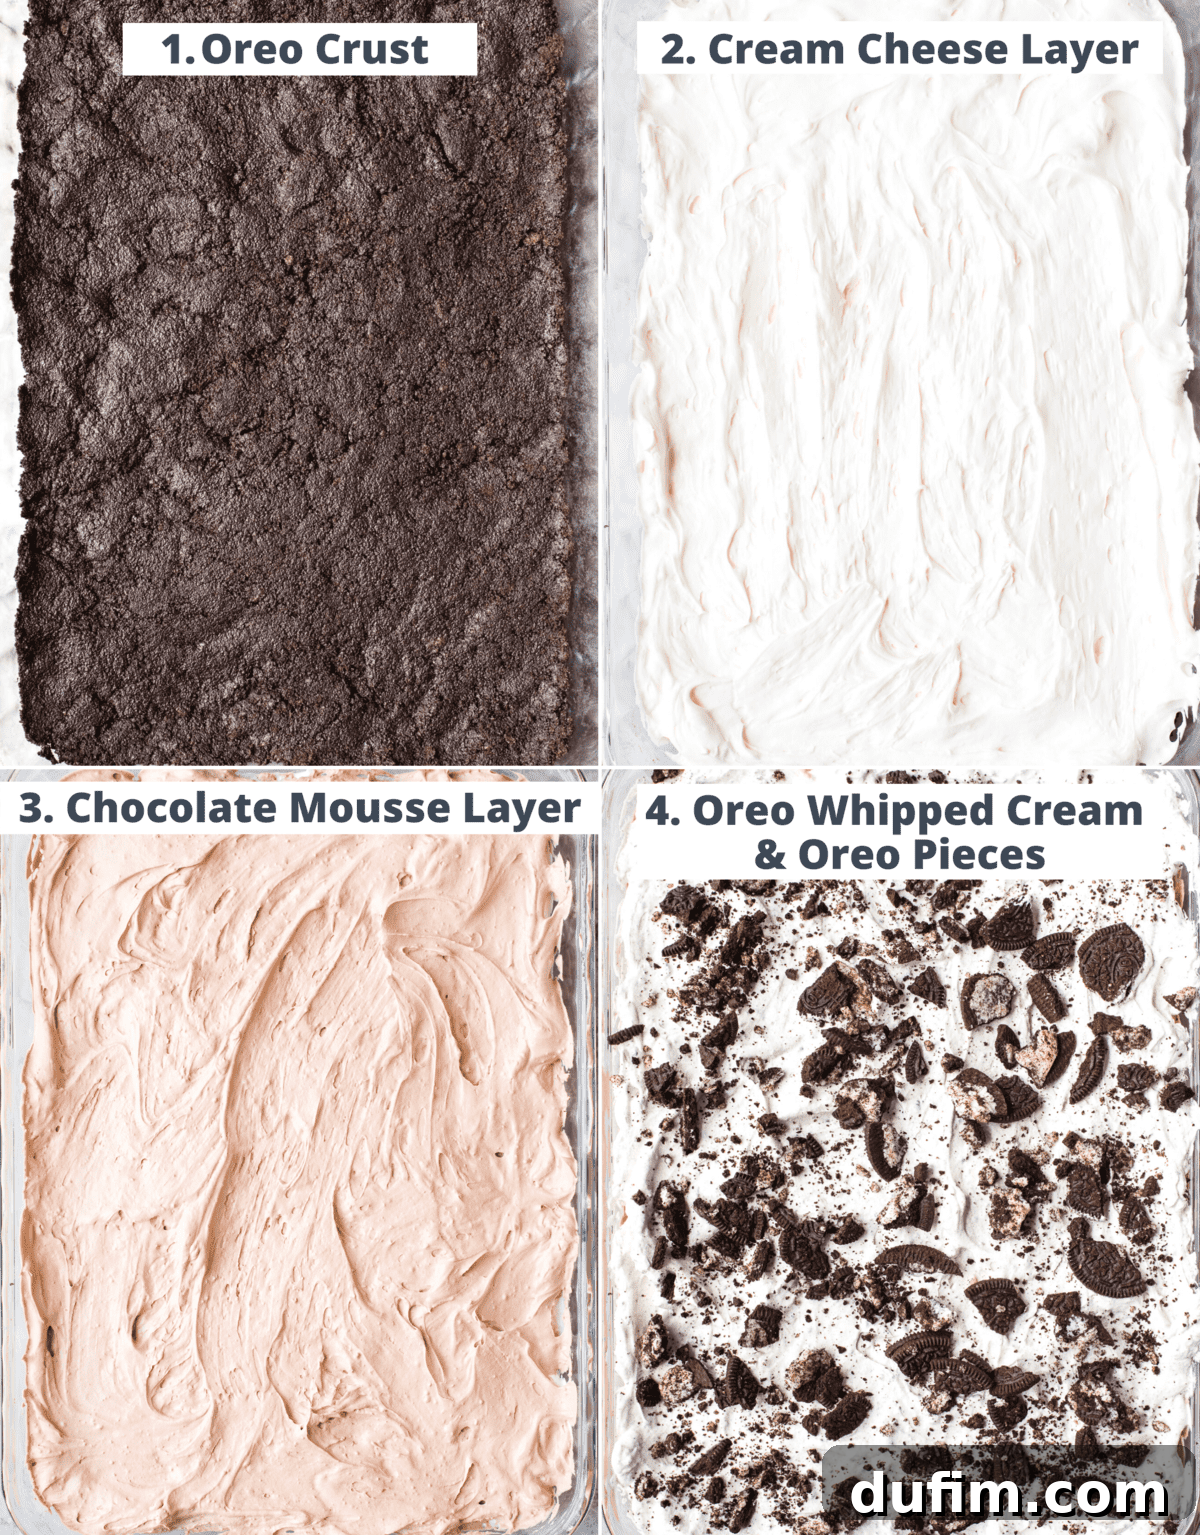
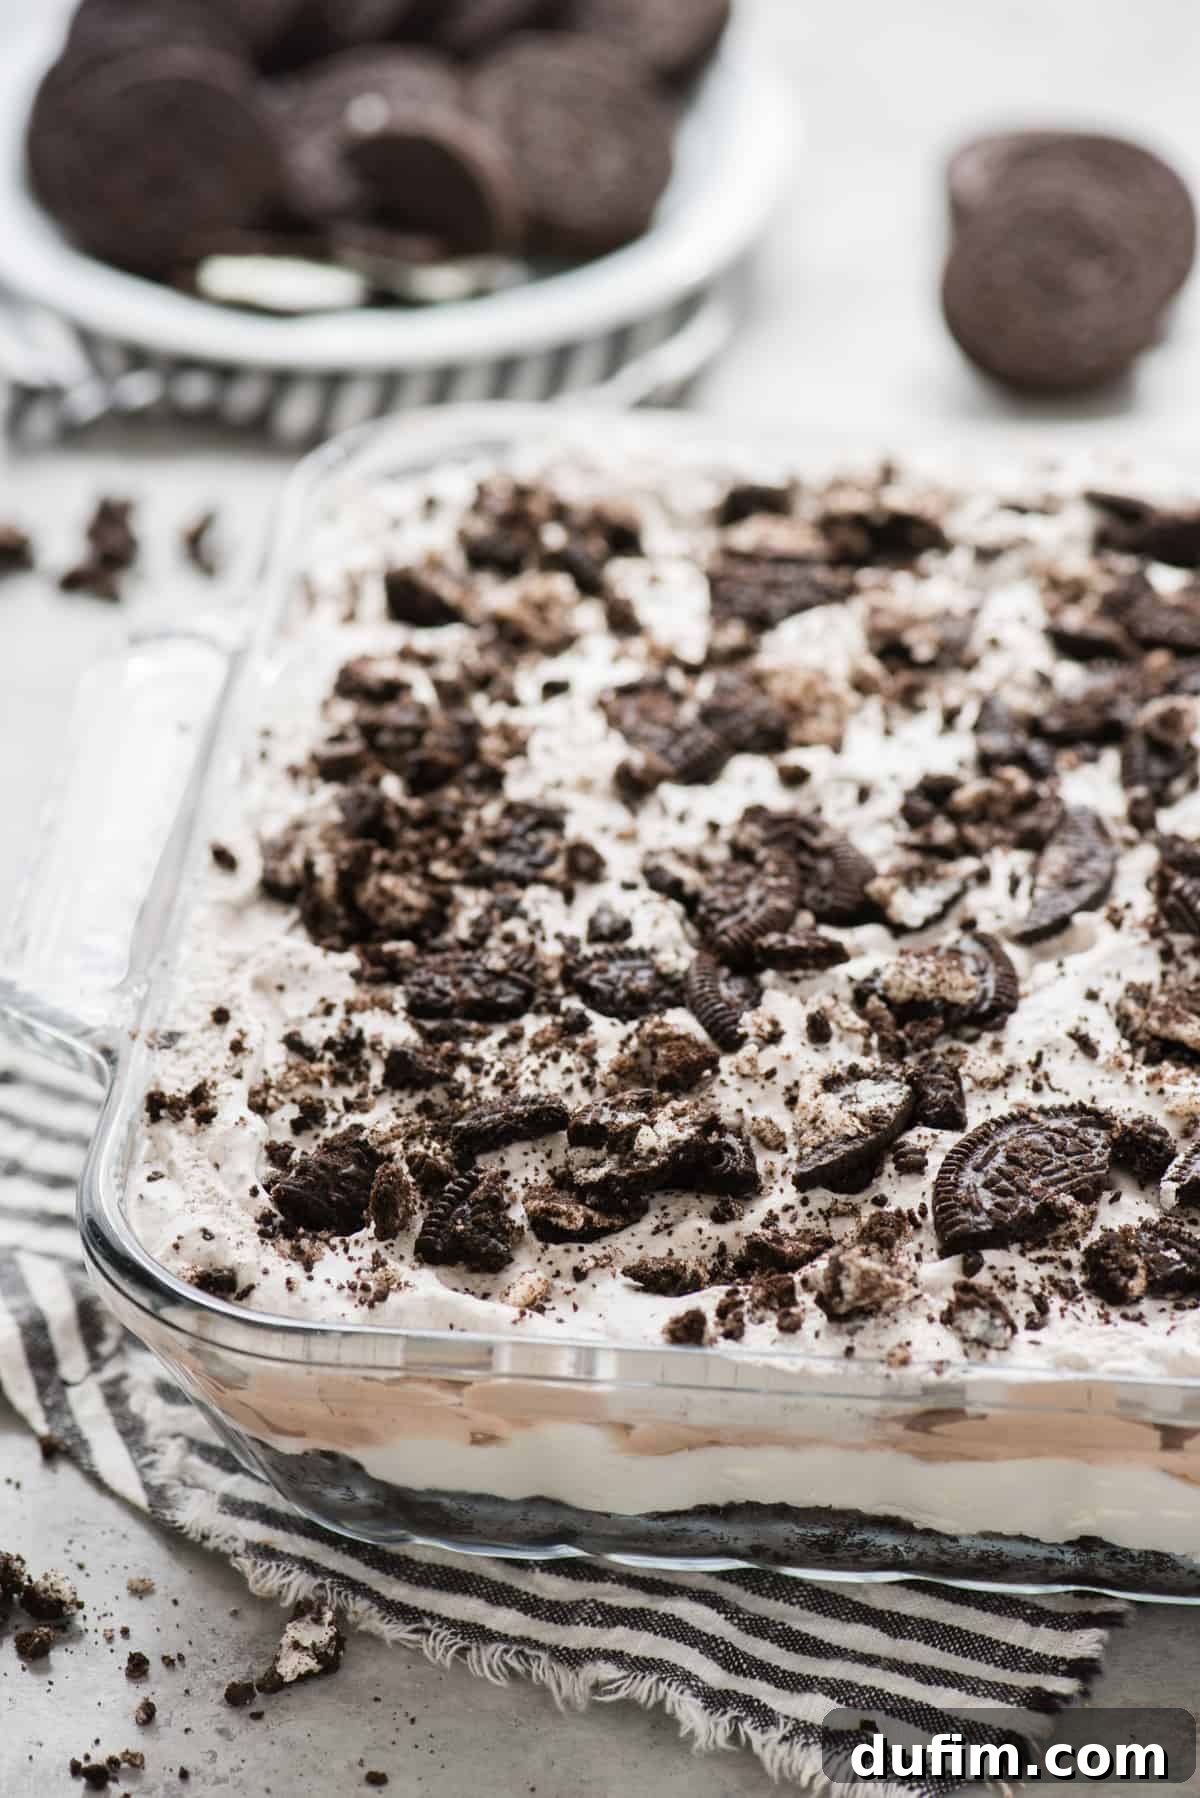
- Begin by finely crushing 36 Oreo cookies, including their creamy filling, in a blender or food processor. The finer the crumbs, the more uniform your crust will be. Transfer these crumbs to a mixing bowl. Pour in the melted unsalted butter and stir until the Oreo crumbs are thoroughly moistened and resemble wet sand. Press this mixture firmly and evenly into the bottom of an un-greased 9×13 inch baking pan. For a perfectly flat and compact crust, use the bottom of a glass or measuring cup to firmly press down the crumbs. Place the pan in the refrigerator to chill while you prepare the next layer, allowing the crust to firm up.
The Velvety Cream Cheese Layer
- In a clean mixing bowl, combine the softened cream cheese, powdered sugar, and vanilla extract. Using an electric mixer, beat these ingredients on high speed for 1-2 minutes until the mixture is exceptionally light, fluffy, and smooth, with no lumps of cream cheese remaining. Gently fold in one thawed container of Cool Whip, mixing on low speed until it’s just incorporated and the mixture is uniform. Avoid overmixing to maintain the airy texture. Carefully spread this creamy cheese layer evenly over the chilled Oreo crust. Return the pan to the refrigerator to continue chilling while you prepare the chocolate mousse.
The Decadent Chocolate Mousse Layer
- For the star of the show, the chocolate mousse layer, grab a clean mixing bowl (you can quickly rinse and dry the one used for the cream cheese). Crucially, **do not follow the directions on the pudding box**. Instead, pour the dry chocolate instant pudding mix powder directly into the bowl with the cold heavy whipping cream. Beat this mixture with an electric mixer on medium-high speed for 1-2 minutes, or until it becomes thick and forms soft peaks, resembling a rich mousse rather than traditional pudding. Once thickened, gently fold in one thawed container of Cool Whip until fully incorporated, adding to the mousse’s light and airy consistency. Carefully spread this decadent chocolate mousse layer over the cream cheese layer. Place the pan back in the refrigerator for further chilling.
The Light and Airy Oreo Whipped Cream Layer
- Retrieve your chilled metal or glass mixing bowl and beaters from the freezer – the cold helps the cream whip faster and hold its shape better. In this cold bowl, combine the cold heavy whipping cream, powdered sugar, vanilla extract, and 6 finely crushed Oreos. Beat with an electric mixer on high speed for 4-5 minutes, or until stiff peaks form and the whipped cream is firm enough to be scooped and hold its shape beautifully. This homemade Oreo whipped cream is incredibly light and flavorful. Spread this delightful layer evenly over the chocolate mousse. Finally, take the remaining 6 Oreos, break them into smaller pieces, and sprinkle them generously over the top of the dessert for an appealing finish and extra crunch.
- Cover the dessert tightly with a lid or plastic wrap and return it to the refrigerator for at least 4 hours to allow all the layers to set completely and the flavors to meld. For best results, overnight chilling is recommended. Once thoroughly chilled, use a sharp, thin knife to cut the dessert into neat squares. For exceptionally clean slices, wipe the knife clean with a damp cloth between each cut. Serve chilled and enjoy your perfectly crafted Oreo Delight!
Pro Tip: How To Quickly Soften Cream Cheese
Forget waiting hours for cream cheese to come to room temperature! Here’s a quick and efficient trick: remove the cream cheese block from its cardboard packaging, but keep it sealed in its foil wrapper. Place the foil-wrapped cream cheese in a bowl of warm (not hot, to avoid melting) water for about 5-10 minutes. This gentle bath will quickly bring the cream cheese to a perfectly softened, pliable consistency, ideal for smooth mixing without lumps.
How to Store This No-Bake Oreo Dessert for Maximum Freshness
To ensure your delightful Oreo dessert retains its superior taste and texture, proper storage is key. This no-bake treat is truly at its best when enjoyed within 2 days of preparation. While it remains perfectly edible beyond this timeframe, it’s important to note that the delicious Oreo crust will gradually soften as more time passes in the refrigerator. The crispy texture of the crust is a beloved element, and consuming it within the first 48 hours guarantees you experience it at its peak.
Always store your Oreo pudding dessert covered tightly with plastic wrap or a secure lid in the refrigerator. This prevents it from absorbing any odors from other foods and helps maintain the freshness and integrity of its creamy layers. Avoid freezing this dessert, as the delicate textures of the cream cheese and mousse layers, as well as the whipped cream, can be compromised upon thawing, leading to a less desirable consistency. Keep it chilled, covered, and ready to serve for that perfect, fresh taste!
Total Time Required for Your Oreo Masterpiece
One of the many appeals of this No-Bake Oreo Dessert is its relatively quick preparation, with most of the time dedicated to chilling. Here’s a breakdown of the time commitment, so you can plan your dessert-making adventure efficiently:
- Oreo Crust Preparation: Approximately 4 minutes of active work to crush the Oreos and press them into the pan.
- Cream Cheese Layer Preparation: Around 5 minutes for beating the cream cheese mixture until fluffy and incorporating the Cool Whip.
- Chocolate Mousse Layer Preparation: Another 5 minutes to whip the pudding mix with heavy cream and fold in the Cool Whip.
- Oreo Whipped Cream Preparation: Roughly 4 minutes to whip the heavy cream and crushed Oreos into stiff peaks.
- Chilling Time in the Fridge: A minimum of 4 hours is required for the layers to fully set and firm up, ensuring clean, beautiful slices. For the best possible texture and flavor integration, we highly recommend chilling it overnight (8+ hours).
With just about 20 minutes of active prep, you can create a show-stopping dessert that simply needs time to chill, making it perfect for preparing ahead for parties, potlucks, or simply to have a delicious treat ready when you are.
Expert Tips for a Flawless Oreo Delight
Achieving perfection with your No-Bake Oreo Dessert is easy with a few insider tips. These simple guidelines will help you create a dessert that’s not just delicious, but also beautifully structured and easy to serve:
- Choose the Right Oreos: For convenience and sufficient quantity across all layers, we highly recommend using a family-size 19.1 oz package of Oreos. This will give you enough cookies for the generous crust, the infused whipped cream, and the final topping.
- Master the Mousse: This is crucial! **Do NOT follow the directions on the pudding box for the chocolate mousse layer.** Instead, simply add the dry pudding mix powder directly to the cold heavy cream, then beat with an electric mixer until thick. This unconventional method is what creates the airy, stable mousse texture that prevents your dessert from becoming mushy.
- Embrace the Thickness: When mixing the chocolate mousse layer, be prepared for it to be VERY thick. If you own a stand mixer, this is the perfect opportunity to utilize its power and save your arm some work. Its robust motor can handle the density with ease, ensuring a smooth, well-combined mousse.
- Precision Cutting: For those enviable, picture-perfect squares, use a sharp, skinny knife. To achieve ultra-clean cuts that show off each distinct layer, make sure to wipe your knife completely clean with a warm, damp cloth between each slice. This prevents layers from dragging and smearing, giving you a professional finish.
- Chill Time is Crucial: While 4 hours is the minimum chilling time, try to allow for longer if possible, especially overnight. This extended chilling period allows all the layers to fully set, firm up, and for the flavors to meld beautifully, resulting in a more cohesive and delicious dessert that slices impeccably.
Oreo No Bake Dessert FAQs
A standard 14.3 oz package of regular Oreos typically contains 36 cookies. However, for this generous recipe, we highly recommend purchasing a family-size 19.1 oz package, which usually contains 48 cookies. This larger package ensures you’ll have enough Oreos for the crust, the homemade Oreo whipped cream, and extra for the decorative topping, leaving no cookie craving unsatisfied!
Absolutely! This No-Bake Oreo Delight is an excellent make-ahead dessert. In fact, chilling it overnight allows the flavors to deepen and the layers to set perfectly, making it even more delicious and easier to slice. Just ensure it’s tightly covered in the refrigerator.
Softened cream cheese is essential for a smooth, lump-free layer. If you forget to take it out ahead of time, use our quick tip: unwrap the cream cheese (but keep it in its foil), place it in a bowl of warm water for 5-10 minutes. It will be perfectly soft and ready to beat!
While chocolate is a classic pairing with Oreos, feel free to experiment! Vanilla, cheesecake, or even white chocolate instant pudding mixes could create interesting variations. Just remember to use the dry mix directly with heavy cream as instructed, not prepared pudding.
Explore More Irresistible Oreo Desserts
If you’ve fallen in love with this Oreo Delight, you’re in for a treat! Oreos are incredibly versatile, forming the base for countless other delectable desserts. Discover more ways to enjoy your favorite cookie with these fantastic recipes:
- Oreo Brownies: Rich, fudgy brownies studded with chunks of Oreos, offering a delightful textual contrast.
- Easy Oreo Cake: A simple yet impressive cake bursting with cookies and cream flavor, perfect for birthdays or celebrations.
- Oreo Mousse: Light, airy, and intensely chocolatey mousse, generously loaded with crushed Oreos for an elegant individual serving.
- Oreo Angel Food Cake: A lighter, fluffy cake infused with the beloved Oreo flavor, offering a delightful twist on a classic.
★★★★★
Tap stars to rate!
Oreo Delight Recipe
Rate
Equipment
-
Glass Mixing Bowl
-
9×13 glass pan
-
Electric Mixer (Hand or Stand)
-
Spatula
-
Kitchen Scale (Optional, for precision)
-
Blender or Food Processor (for crushing Oreos)
Ingredients
Crust
- 36 (405g) Oreos, use a 19.1 oz family size package (48 cookies total, saving some for topping)
- ½ cup (113g) unsalted butter, melted, 1 stick
Cream Cheese Layer
- 8 oz (226g) cream cheese, softened
- 1 cup (113g) powdered sugar
- 1 tsp vanilla extract
- 8 oz (226g) Cool Whip, thawed
Chocolate Mousse Layer
- 1 box chocolate instant pudding mix, 3.9 oz (dry mix only)
- 2 cups (473ml) heavy whipping cream, 1 pint, very cold
- 8 oz (226g) Cool Whip, thawed
Oreo Whipped Cream
- 2 cups (473ml) heavy whipping cream, 1 pint, very cold
- ½ cup (56g) powdered sugar
- 1 tsp vanilla extract
- 6 Oreos, crushed
For the Top
- 6 Oreos, crushed, for garnish
Instructions
-
Preparation Note: Before you begin mixing, ensure your heavy cream is very cold. For optimal results when making the Oreo Whipped Cream, place a metal or glass mixing bowl and your electric mixer beaters in the freezer for at least 15-20 minutes. Use a family-size (19.1 oz) package of Oreos for this recipe, which contains 48 cookies. You will use 36 Oreos for the crust, 6 Oreos for the Oreo whipped cream layer, and the remaining 6 Oreos for the final topping.
Oreo Crust
-
In a blender or food processor, finely crush 36 Oreo cookies (crush the entire cookie, including the cream filling). Transfer the crushed Oreos to a bowl and stir in the ½ cup of melted butter. The mixture should be thick and stick together. Press this Oreo crust mixture firmly and evenly into an un-greased 9×13 inch baking pan. Use the bottom of a glass or a flat measuring cup to create a compact, even layer. Place the pan in the refrigerator to chill while you prepare the next layer.36 (405g) Oreos, 1/2 cup (113g) unsalted butter, melted
Cream Cheese Layer
-
In a separate mixing bowl, combine the softened 8 oz cream cheese, 1 cup of powdered sugar, and 1 tsp of vanilla extract. Beat on high speed for 1-2 minutes until the mixture is very fluffy, light, and smooth. Gently add in one 8 oz container of thawed Cool Whip and mix on low speed until it’s just incorporated and no streaks remain. Evenly spread this creamy, dreamy layer over the chilled Oreo crust. Return the pan to the fridge to continue setting.8 oz (226g) cream cheese, 1 cup (113g) powdered sugar, 1 tsp vanilla extract, 8 oz (226g) Cool Whip, thawed
Chocolate Mousse Layer
-
In a clean mixing bowl (you can quickly rinse and dry the bowl used for the cream cheese layer), combine the 1 box of chocolate instant pudding mix (dry powder) and 2 cups of very cold heavy whipping cream. Beat with an electric mixer on medium-high speed for 1-2 minutes until the mixture becomes very thick and resembles a rich chocolate mousse. **Do not prepare the pudding mix as directed on the box.** Once thick, gently fold in one 8 oz container of thawed Cool Whip until fully incorporated. Spread this decadent chocolate mousse layer carefully on top of the cream cheese layer. Return the pan to the fridge.1 box chocolate instant pudding mix, 2 cups (473ml) heavy whipping cream, 8 oz (226g) Cool Whip, thawed
Oreo Whipped Cream Layer
-
Remove the chilled metal or glass bowl and beaters from the freezer. In this cold bowl, combine the 2 cups of cold heavy whipping cream, ½ cup of powdered sugar, 1 tsp of vanilla extract, and 6 finely crushed Oreos. Beat with an electric mixer on high speed for 4-5 minutes, or until stiff peaks form and the whipped cream is firm, scoop-able, and holds its shape beautifully. Gently spread this homemade Oreo whipped cream layer on top of the chocolate mousse layer.2 cups (473ml) heavy whipping cream, 1/2 cup (56g) powdered sugar, 1 tsp vanilla extract, 6 Oreos, crushed
-
Take the remaining 6 Oreos from your family-size package, break them into smaller pieces, and sprinkle them generously over the top of the dessert for a final decorative touch and added crunch.6 Oreos, crushed
-
Cover the dessert tightly with a lid or plastic wrap and chill in the fridge for a minimum of 4 hours. For the best possible set and flavor development, chilling overnight is highly recommended. After thorough chilling, use a sharp, thin knife to cut the dessert into neat squares and serve immediately. For perfectly clean cuts, wipe the knife clean between each slice.
Notes
- Pudding Mix Method: Remember, do not follow the directions on the pudding box. Add only the pudding mix powder directly to the heavy cream, then mix with an electric mixer to achieve the mousse consistency.
- Storage: Store the Oreo dessert covered in the fridge. It is best eaten within 2 days to maintain optimal texture, especially for the crust. Do not freeze, as this can affect the delicate consistency of the creamy layers.
Nutrition
Nutrition Disclosure
All nutritional values are approximate and provided to the reader as a courtesy. Changing ingredients and/or quantities will alter the estimated nutritional calculations.
Like this recipe? Rate and comment below!