
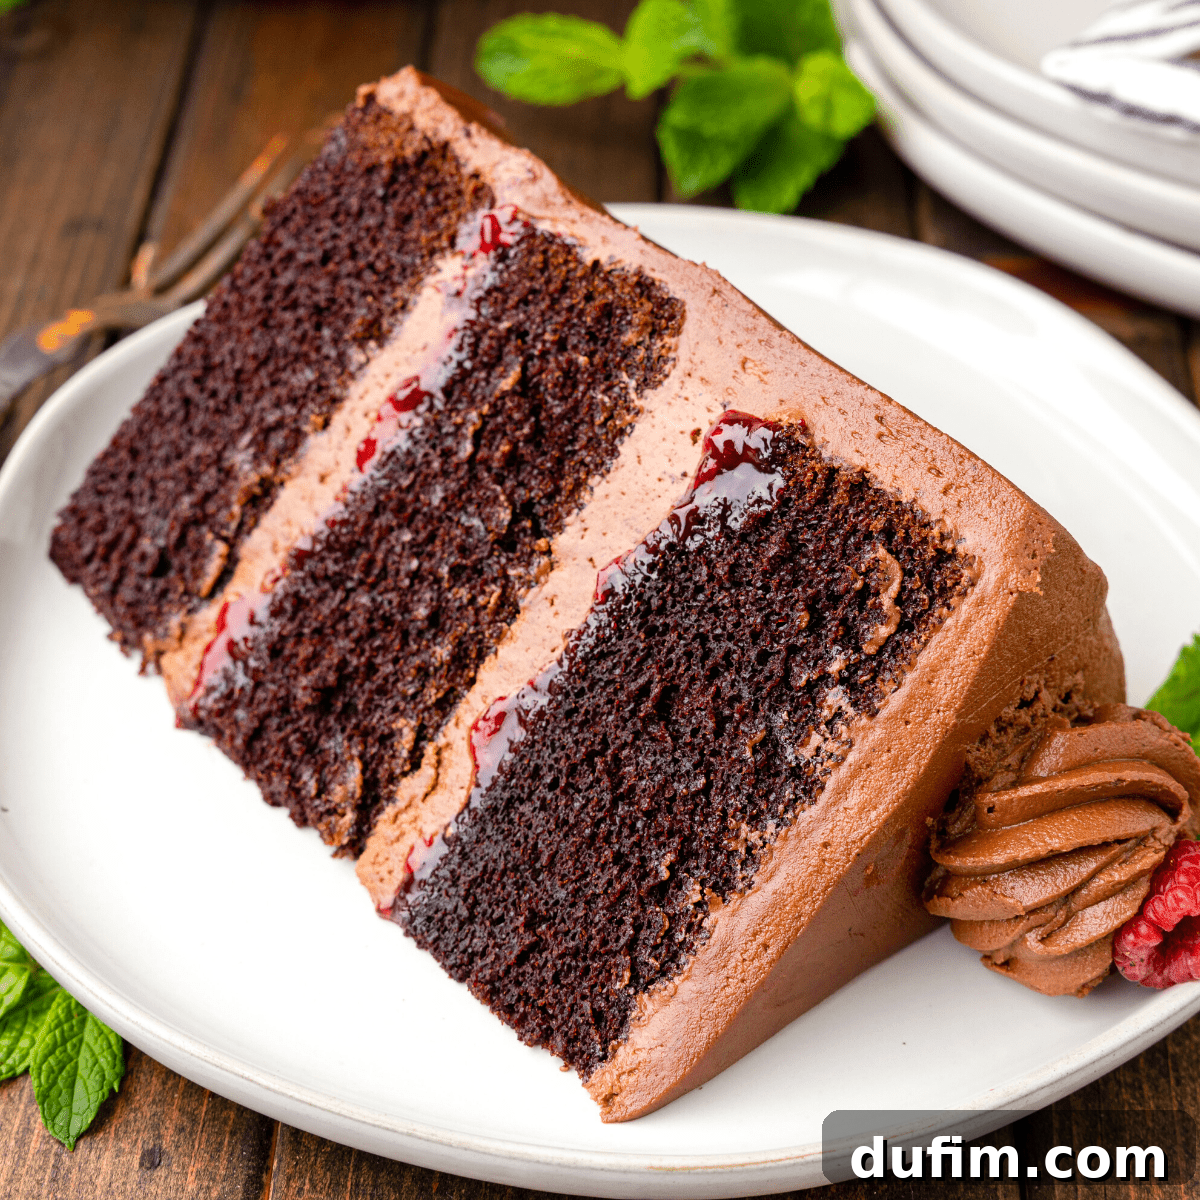
Sweet raspberry preserves are the perfect fruity filling for this truly decadent Chocolate Raspberry Cake! You’ll absolutely love the light, moist layers of homemade chocolate cake paired with rich chocolate frosting. This dessert is a celebration of classic flavors, creating an unforgettable experience with every bite.
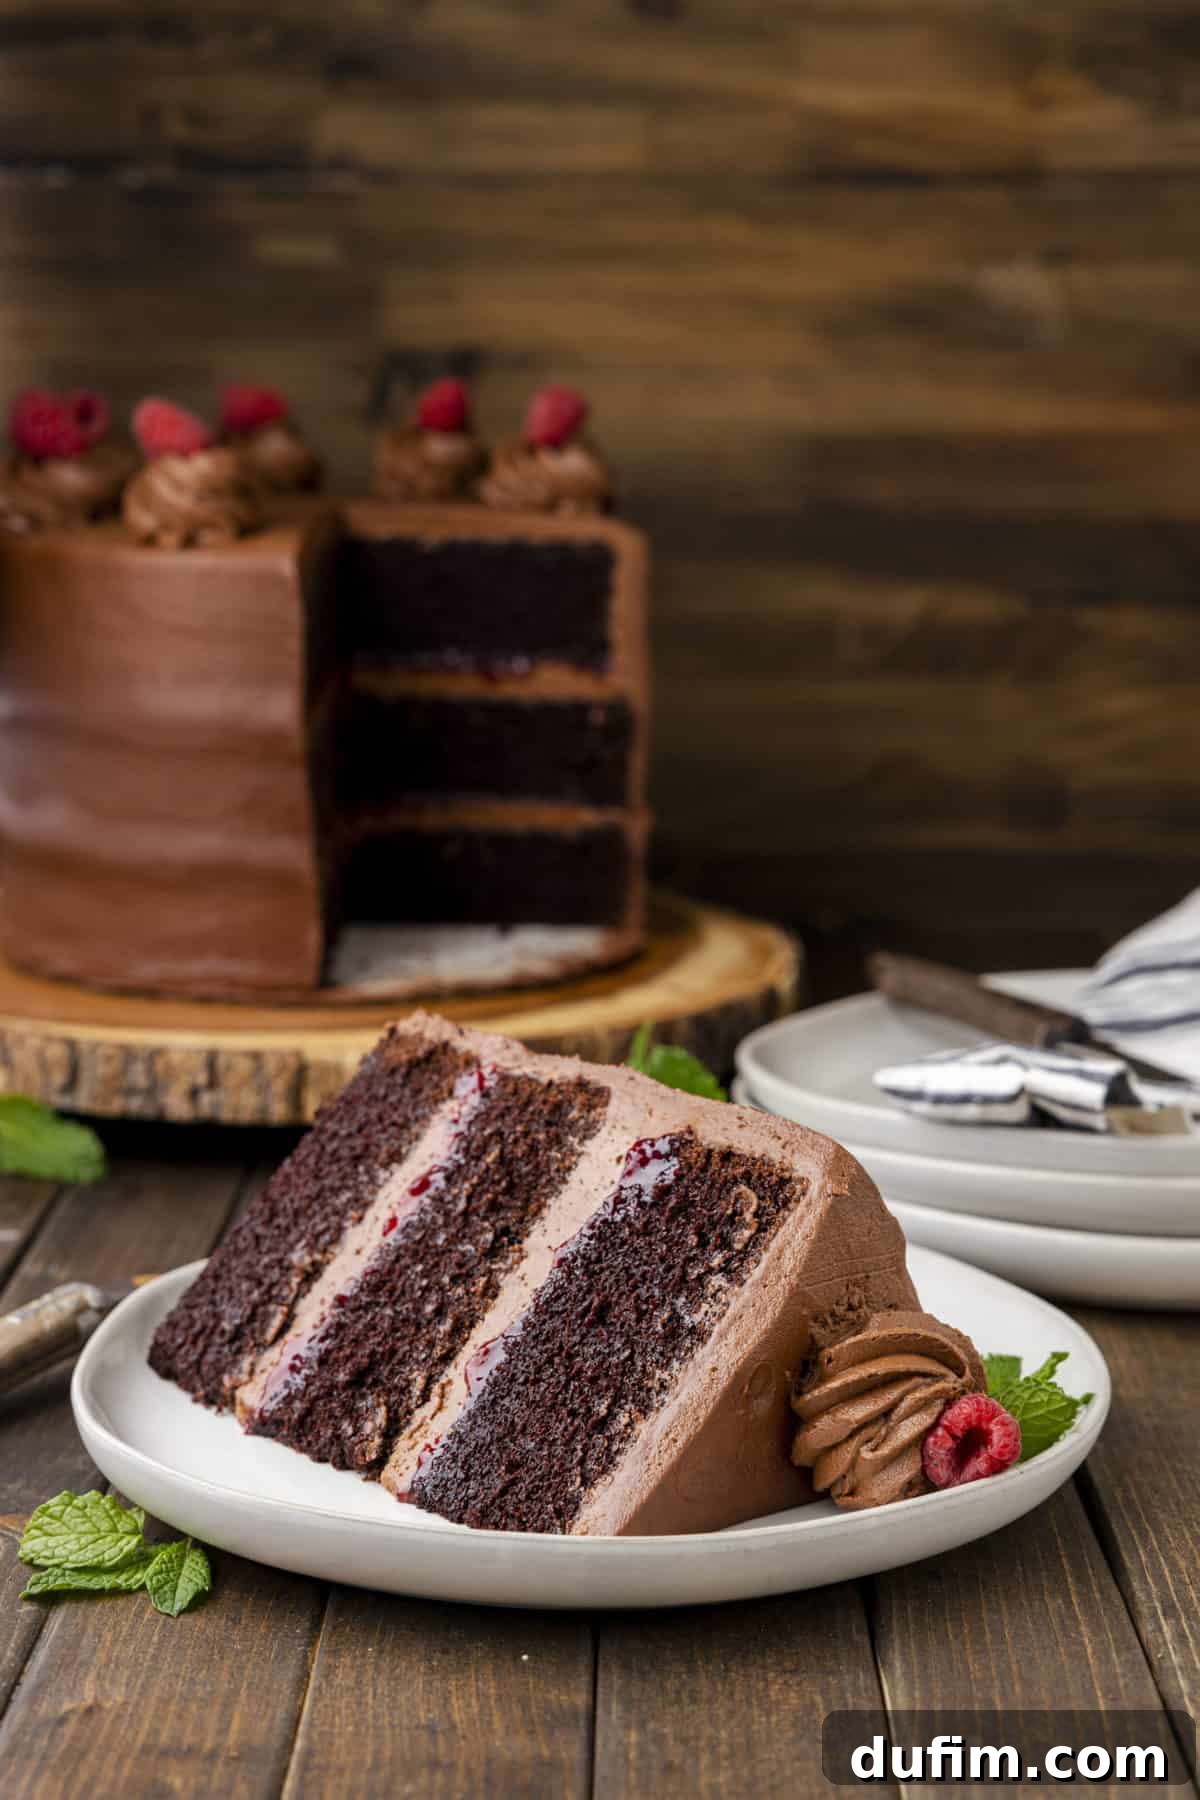
The cake was so fudgy and delicious. Hubby had two pieces!!
-Nancy
Decadent Homemade Chocolate Raspberry Cake: A Match Made in Heaven
Chocolate, a universally adored flavor, harmonizes beautifully with an array of other tastes. While the classic chocolate and peanut butter combination holds a special place, the fruity pairings are equally captivating—think chocolate and strawberries, chocolate and oranges, or even chocolate and cherries. Yet, among all these delightful duos, I believe the marriage of chocolate and raspberry stands out as one of the most exquisite, especially when experienced in this magnificent Chocolate Raspberry Cake.
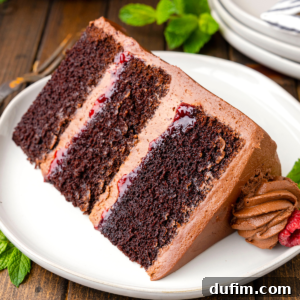
This recipe is designed to bring you the ultimate chocolate raspberry indulgence. It features deeply flavorful, moist homemade chocolate cake layers, generously slathered with a rich and creamy chocolate buttercream, and brightened by a luscious filling made from raspberry preserves. While every other component of this cake is lovingly crafted from scratch, incorporating store-bought raspberry preserves offers a convenient and welcome shortcut. This smart choice simplifies the baking process without compromising the incredible homemade taste and elegant presentation of the final cake. It’s a perfect balance of effort and indulgence, allowing you to create a show-stopping dessert with ease.
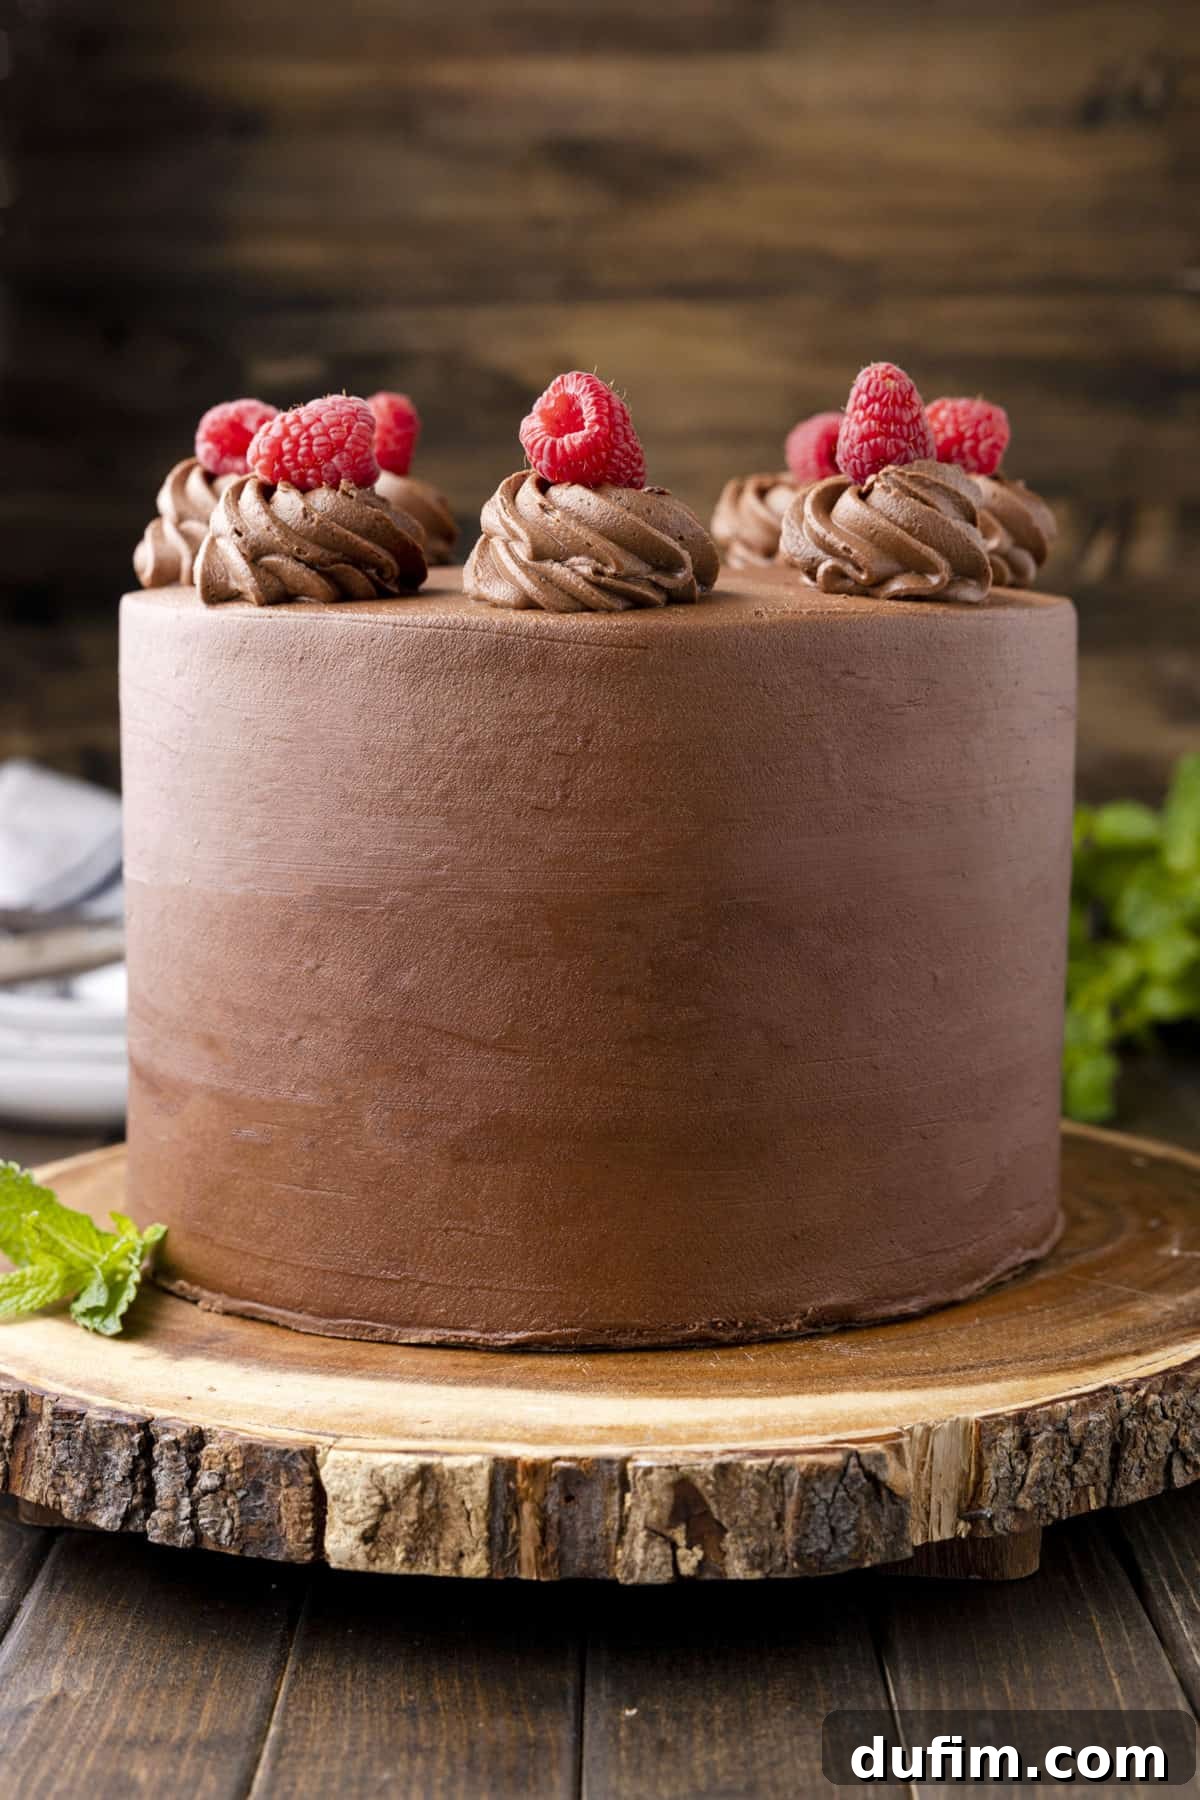
To elevate your serving experience, consider garnishing your finished cake with a generous scattering of fresh raspberries. Their vibrant color and slight tartness provide a beautiful contrast to the rich chocolate. For an extra touch of luxury, a scoop of vanilla bean ice cream or a dollop of freshly whipped cream makes a wonderful accompaniment. Imagine the velvety texture of cream melting into a slice of this magnificent cake – pure bliss! Some delightful whipped cream variations like Cheesecake Whipped Cream, Coffee Whipped Cream, or even Chocolate Whipped Cream would be absolutely perfect with this recipe, adding another layer of flavor complexity and richness.
Why You’ll Adore This Chocolate Raspberry Cake
This isn’t just another cake recipe; it’s an invitation to create a masterpiece that looks and tastes like it came straight from a gourmet bakery, yet is surprisingly simple to make in your own kitchen. Here’s why this chocolate raspberry cake will quickly become a favorite:
- Unforgettable Flavor Combination: The deep, intense flavor of chocolate perfectly complements the sweet and tart burst of fresh raspberries. It’s a classic pairing that never disappoints.
- Moist and Tender Cake Layers: Our carefully developed recipe ensures each chocolate cake layer is incredibly moist, light, and tender, dissolving delightfully in your mouth.
- Rich & Fluffy Chocolate Buttercream: The homemade buttercream is velvety smooth, lusciously rich, and whips up to a perfect fluffy consistency, making every bite heavenly.
- Effortless Elegance: Despite its impressive appearance, this three-layer cake is straightforward to assemble, even for novice bakers. The use of store-bought raspberry preserves simplifies the process without sacrificing flavor.
- Perfect for Any Occasion: Whether it’s a birthday, an anniversary, a holiday gathering, or just a weekend treat, this cake is guaranteed to impress your guests and bring joy to your table.
- Customizable Garnishes: While fresh raspberries are a perfect adornment, you can easily customize the decoration to suit your personal taste or the occasion.
Essential Ingredients for Your Chocolate Raspberry Cake
To create this magnificent three-layer chocolate raspberry cake, you’ll need a selection of high-quality ingredients, mostly pantry staples. Ensuring your perishable ingredients are at room temperature is crucial for the best cake texture and a smooth, lump-free batter and buttercream. Please refer to the detailed recipe card below for precise ingredient quantities and full instructions.
For the Decadent Chocolate Cake Layers:
- All-Purpose Flour: The foundation of our cake structure, providing tender crumb.
- Granulated Sugar: Sweetens the cake and contributes to its moistness.
- Unsweetened Cocoa Powder: The key to a rich, deep chocolate flavor. Choose a good quality one!
- Baking Soda & Baking Powder: These leavening agents work together to give the cake its light and airy texture.
- Salt: A pinch of salt enhances all the flavors and balances the sweetness.
- Large Eggs: Vital for structure, richness, and binding the ingredients. Remember to let them come to room temperature before starting the recipe for optimal emulsification.
- Milk: Use 2% or whole milk for the best richness and moisture. Like eggs, ensure it’s at room temperature.
- Vegetable Oil: Contributes significantly to the cake’s moistness and tender crumb, keeping it soft for days.
- Vanilla Extract: A crucial flavor enhancer, bringing warmth and depth to the chocolate.
- Boiling Water: This seemingly unusual ingredient is a secret weapon for intensifying chocolate flavor and ensuring a perfectly moist cake. It helps to bloom the cocoa powder, releasing its full aromatic potential.
For the Silky Chocolate Buttercream:
- Unsalted Butter: The base of our rich buttercream. It’s imperative that this is also softened to room temperature for a smooth, fluffy frosting.
- Unsweetened Cocoa Powder: Infuses the frosting with a lovely chocolate flavor.
- Powdered Sugar: Also known as confectioners’ sugar, it gives the buttercream its characteristic smooth texture and sweetness.
- Milk: Used to adjust the consistency of the frosting, making it wonderfully creamy.
- Vanilla Extract: Complements the chocolate, adding a fragrant touch to the buttercream.
To Assemble and Garnish Your Masterpiece:
- Raspberry Preserves: The sweet and tart star of our filling. Using store-bought preserves is a convenient shortcut that tastes fantastic.
- Fresh Raspberries: Essential for a beautiful and delicious garnish. Make sure to wash and dry them thoroughly to prevent any excess water from affecting your frosting. For an extra burst of flavor and texture, you can also gently fold some halved fresh raspberries into the jam filling.
Natural vs. Dutch Process Cocoa Powder: Decoding Your Chocolate Flavor
Understanding the difference between natural and Dutch process cocoa powder can significantly impact the flavor profile and appearance of your chocolate cakes. Both types will work in this chocolate raspberry cake recipe, but they offer distinct characteristics:
Natural Cocoa Powder: This is the most common type found in grocery stores. It is acidic and typically pairs with baking soda, which is an alkali, to create leavening. Natural cocoa has a lighter color and a sharp, fruity chocolate flavor.
Dutch Process Cocoa Powder: This cocoa powder has been treated with an alkalizing agent to neutralize its acidity. This process results in a darker color and a milder, less bitter, and more intense chocolate flavor. Because it’s neutral, Dutch process cocoa is often used with baking powder, or sometimes with a combination of both baking powder and baking soda if there are other acidic ingredients in the recipe.
For this Chocolate Raspberry Cake, either type will yield a delicious result. If you opt for Dutch process cocoa, expect a deeper, richer, almost “fudgier” chocolate taste and a darker cake crumb. If you use natural cocoa, the cake will have a slightly lighter color and a more pronounced, bright chocolate flavor. Experiment to discover which you prefer!
Crafting Your Chocolate Raspberry Cake: A Step-by-Step Guide
Creating this beautiful layer cake is a rewarding process, and with a little planning, it’s entirely manageable. Remember to account for the essential cooling time; your cake layers must be completely cool before you begin assembling and frosting, or your buttercream will melt and slide. Patience is key to a perfectly structured cake!
Step 1: Preparing the Moist Chocolate Cake Layers
Preheat and Prepare Pans: Begin by preheating your oven to a precise 350°F (175°C). Prepare three 8-inch round cake pans by coating them thoroughly with a nonstick baking spray. For an extra layer of protection and easy release, place a parchment paper circle at the bottom of each pan. This ensures your beautiful cake layers won’t stick.
Combine Dry Ingredients: In the large bowl of a stand mixer fitted with the paddle attachment (or a large mixing bowl if using a hand mixer), combine all your dry ingredients. Whisk together the all-purpose flour, granulated sugar, unsweetened cocoa powder, baking soda, salt, and baking powder. This step helps to aerate the flour and ensures all the leavening agents are evenly distributed.
Complete the Batter: Add the room temperature eggs, milk, vegetable oil, and vanilla extract directly to the dry ingredients in the mixing bowl. Beat the mixture on medium-high speed for exactly two minutes. This vigorous mixing incorporates air, developing the cake’s structure and ensuring a tender crumb. Finally, carefully stir in the boiling water. The hot water helps to “bloom” the cocoa powder, intensifying its chocolate flavor and contributing to an incredibly moist cake.
Bake to Perfection: Divide the silky batter evenly among the three prepared cake pans. You can use a kitchen scale for precise division, ensuring even layers. Bake for approximately 35 to 45 minutes. To check for doneness, gently poke the center of the cake with your finger; if it springs back, it’s ready. A wooden skewer inserted into the center should also come out clean.
Cooling Process: Once baked, remove the cakes from the oven and let them cool in their pans for just 5 minutes. This allows them to firm up slightly. Then, carefully invert them onto wire racks to finish cooling completely. It’s absolutely critical that the cakes are entirely cool before moving on to frosting and assembly, which can take a couple of hours.
Step 2: Whipping Up the Rich Chocolate Buttercream
Cream Butter and Cocoa: In the clean bowl of your stand mixer, combine the softened unsalted butter and unsweetened cocoa powder. Beat these two ingredients together on medium speed until the mixture is light, fluffy, and well combined. This process aerates the butter, which is essential for fluffy buttercream.
Gradually Add Sugar: With the mixer on low speed, begin slowly adding the powdered sugar, one cup at a time. Mix until each addition is fully incorporated into the butter and cocoa mixture before adding more. This prevents a sugar cloud explosion and ensures a smooth consistency.
Achieve Fluffy Perfection: Once all the powdered sugar is incorporated, slowly pour in the milk and vanilla extract. Increase the mixer speed to medium-high and beat for about 2 minutes. The buttercream should transform into a light, airy, and wonderfully fluffy consistency. If your buttercream appears stiff, don’t worry! Continue mixing for an additional minute or two; this extra beating time helps to incorporate more air, making it softer and easier to spread.
Step 3: Assembling Your Elegant Layer Cake
Level the Cakes: With your cakes completely cooled, use a long serrated knife or a cake leveler to carefully trim off any domed tops. This creates perfectly flat layers, which are essential for a stable and even cake. Place your first leveled cake layer on a cake plate or a sturdy cardboard cake circle.
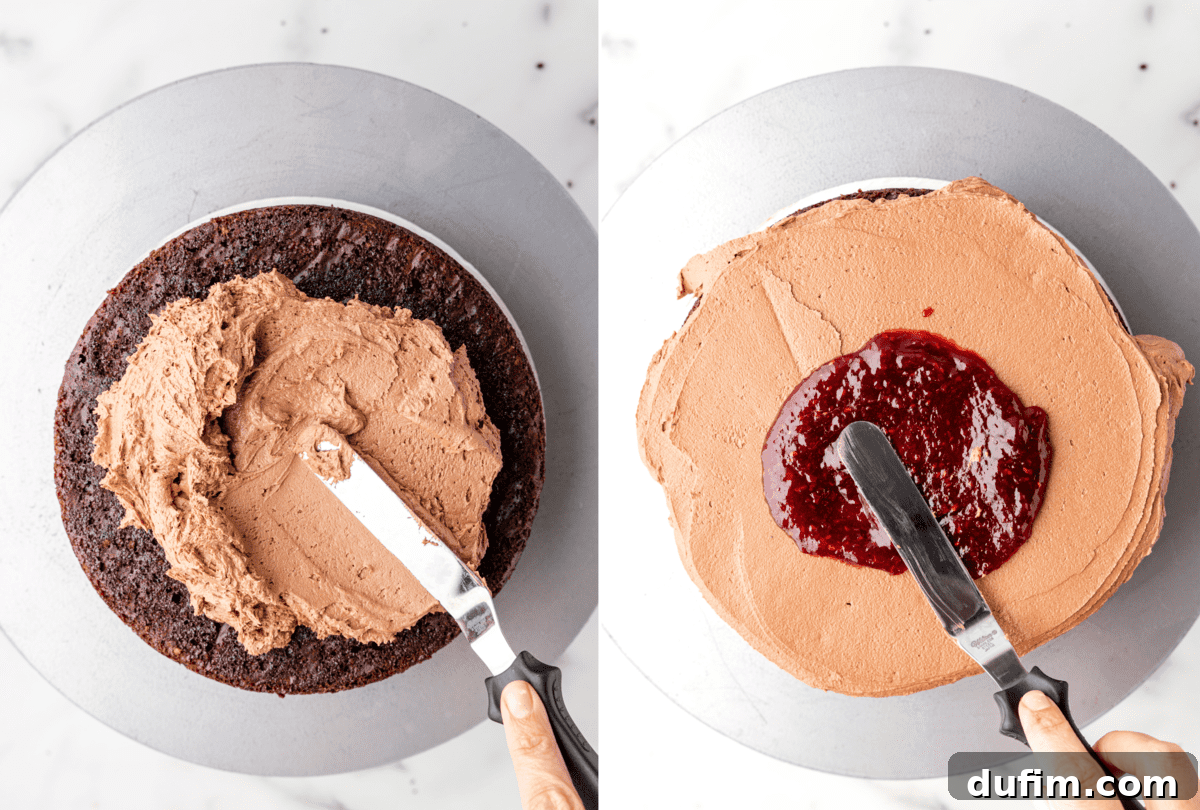
Stacking and Filling: Spread an even, quarter-inch thick layer of the luscious chocolate buttercream over the first cake layer. Next, spoon half of the raspberry preserves evenly over the buttercream. Gently place the second cake layer on top, repeating the buttercream and raspberry preserves steps. Finally, carefully place the third and final cake layer on top, ensuring it’s centered and level.
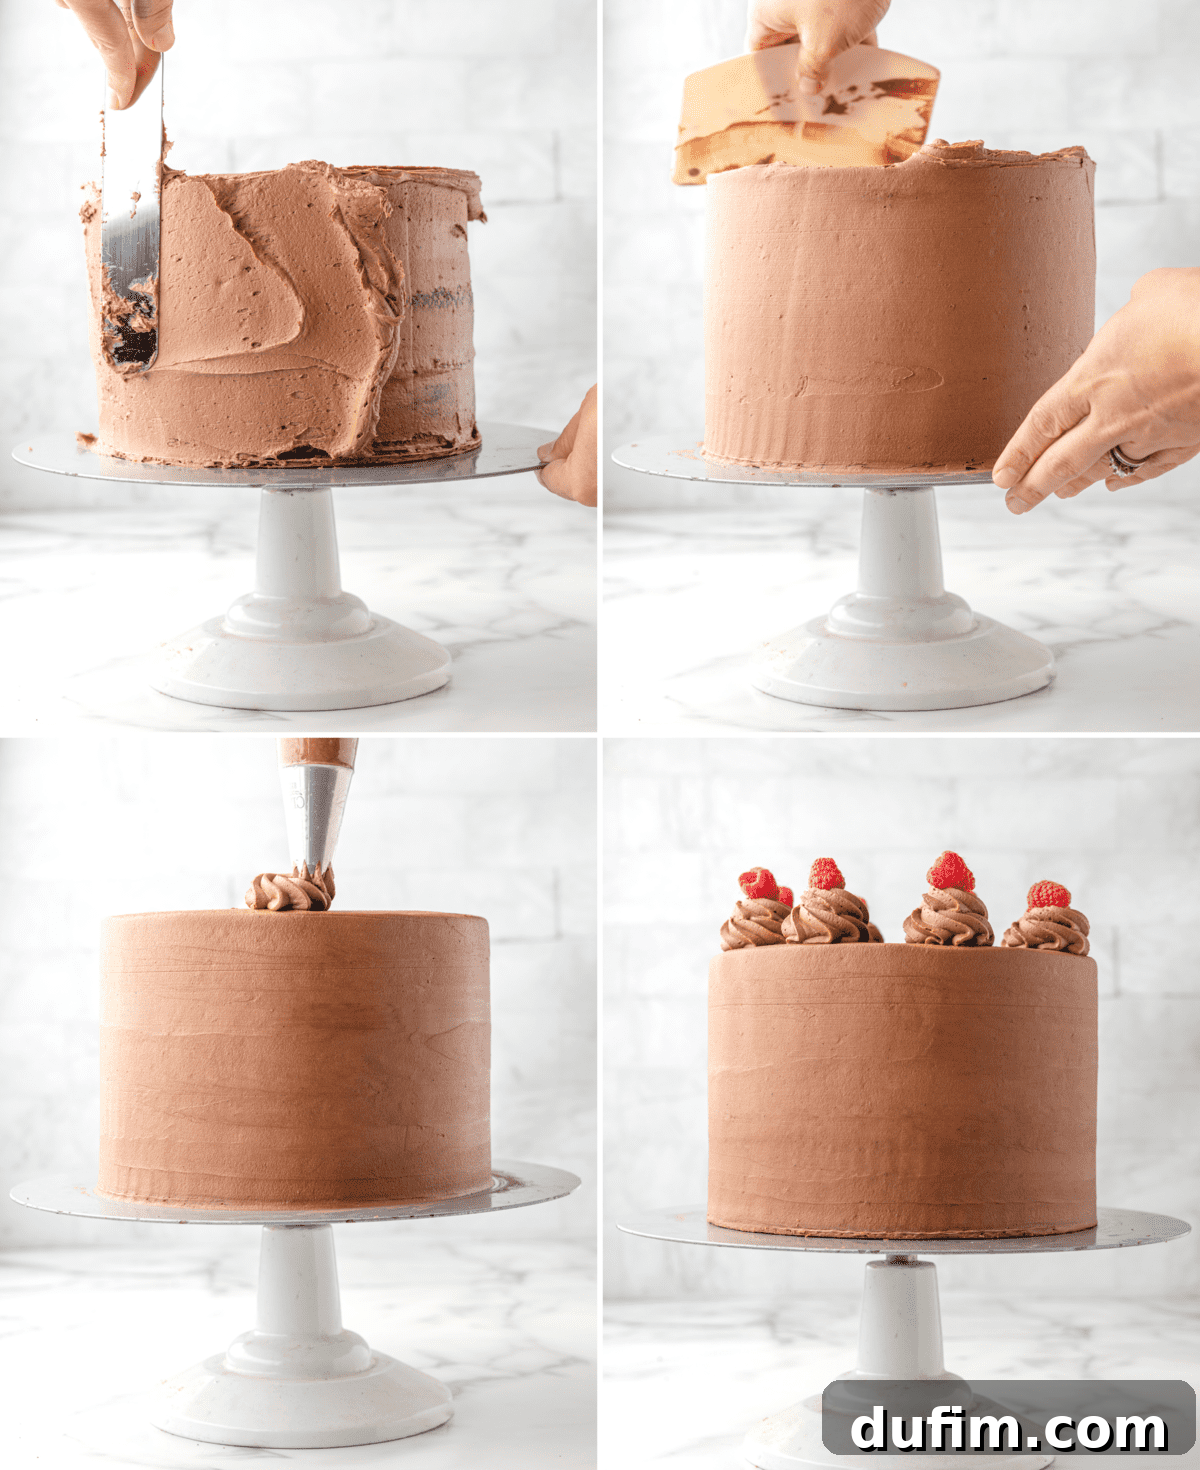
The Essential Crumb Coat: Using an offset spatula or a bench scraper, apply a very thin layer of chocolate buttercream around the entire cake – sides and top. This is known as a “crumb coat,” and its purpose is to trap any loose crumbs, preventing them from mixing into your final layer of frosting. Once applied, refrigerate the cake for a crucial 15-20 minutes. This chilling time allows the crumb coat to firm up, making the final frosting application much smoother and neater.
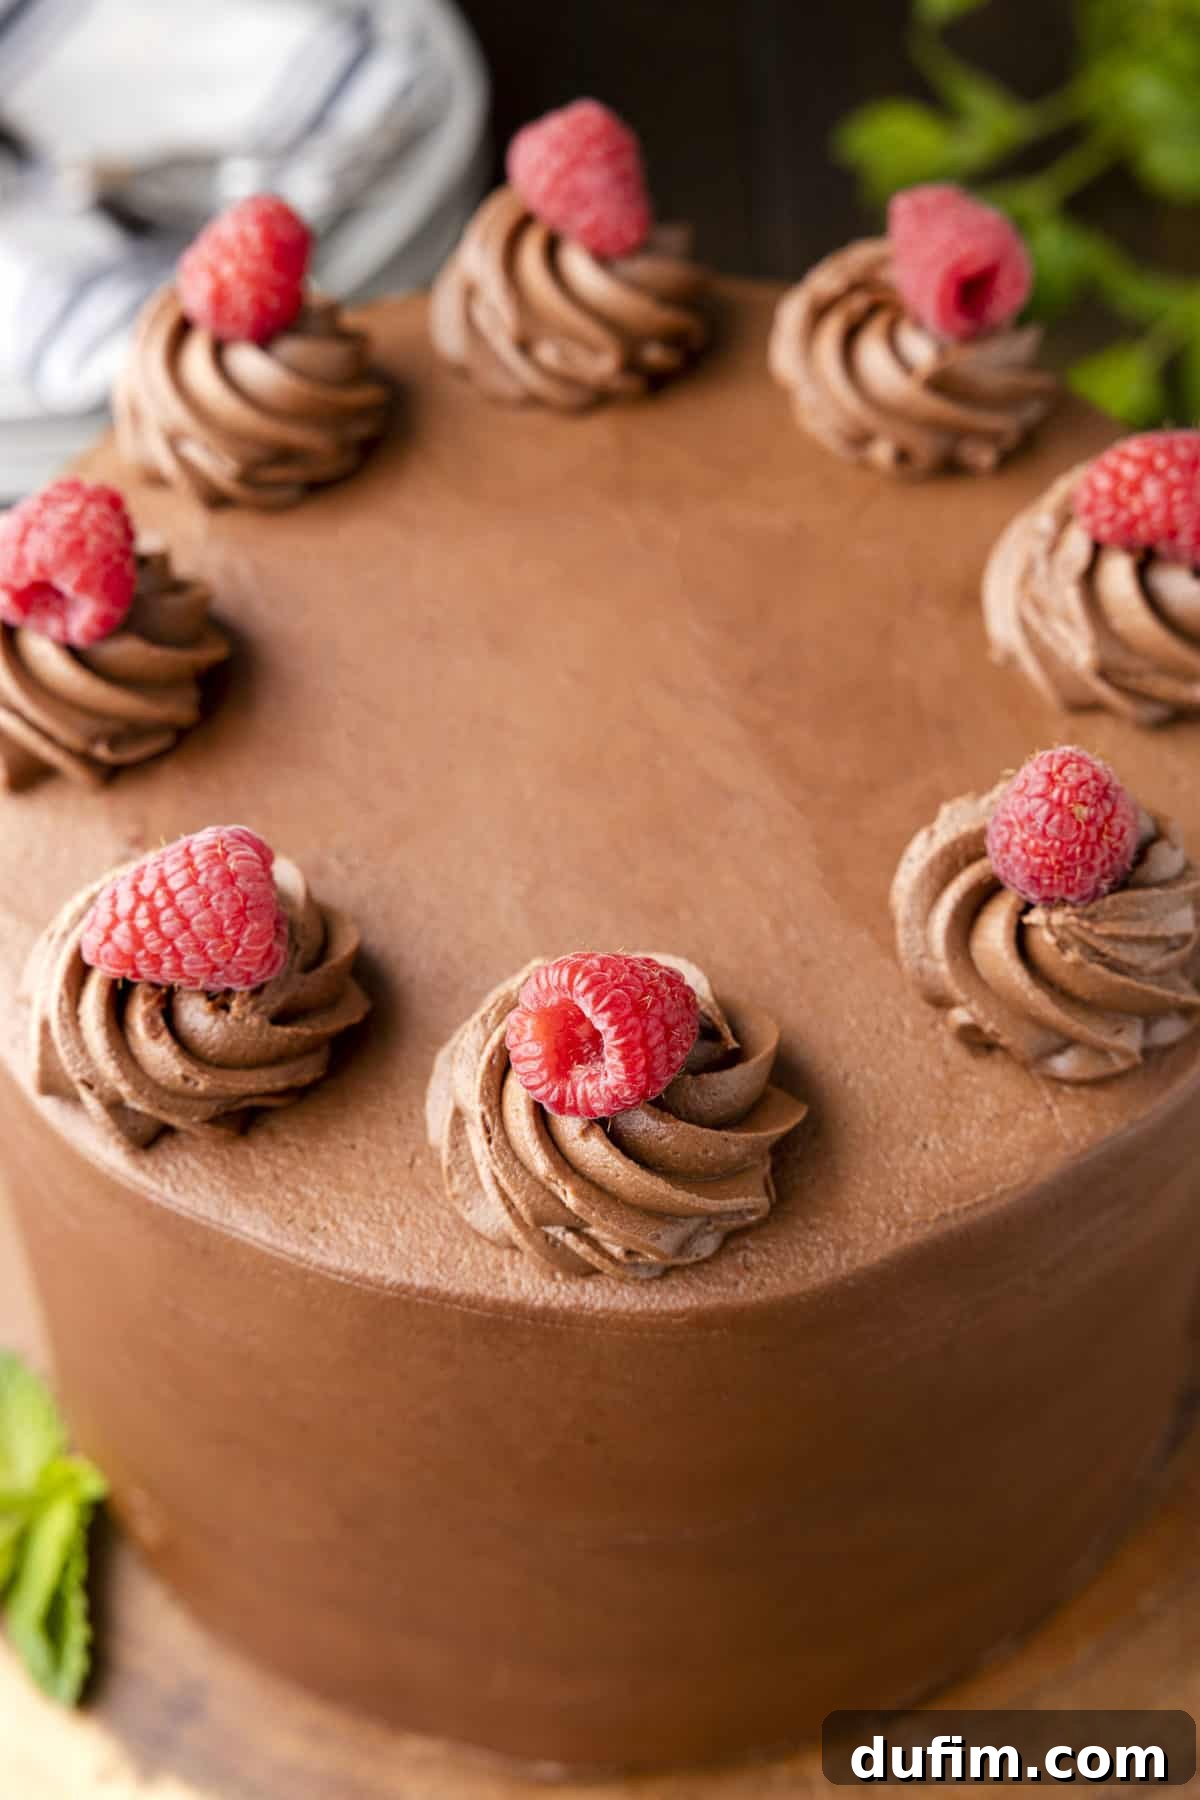
Final Frosting and Decoration: Remove the cake from the refrigerator. Now, spread a generous, thicker layer of the remaining chocolate buttercream evenly over the entire cake. Use an offset spatula or bench scraper to smooth the sides and top for a professional finish. For a beautiful decorative touch, fit a pastry bag with a star tip and pipe elegant swirls of frosting along the top edge of the cake, as pictured. Complete your masterpiece by gently placing a fresh raspberry on top of each piped swirl, adding a pop of color and natural sweetness.
Refrigerating Cakes: When and Why?
A common question among home bakers is whether to refrigerate a cake before frosting. The primary rule is that your cake layers must be completely cool before any frosting touches them. Frosting a warm cake is a recipe for disaster, as the buttercream will simply melt and slide off, taking crumbs with it. So, no, there’s generally no need to refrigerate an unfrosted cake before its initial frosting if it’s already at room temperature.
However, there’s one critical exception: the crumb coat. After you apply that initial thin layer of buttercream (the crumb coat), it’s highly recommended to pop the cake into the refrigerator for 15-20 minutes. This short chilling period allows the crumb coat to firm up and effectively seal in all those loose crumbs. This makes the application of your final layer of frosting much easier, ensuring a perfectly smooth, crumb-free finish that looks professional and clean. This quick chill is a game-changer for layer cake perfection!
Expert Tips for Assembling and Frosting a Flawless Layer Cake
If you’re new to the world of layer cakes, the idea of stacking and frosting might seem a little daunting. But fear not! With a few simple tricks and the right approach, you’ll find it’s much easier than you anticipate. Here are some invaluable tips to help you create a perfect Chocolate Raspberry Cake every time:
- Ensure Perfectly Even Cake Layers: Achieving a level cake is fundamental for a stable and aesthetically pleasing dessert. Since this recipe calls for three layers, carefully trimming off any domed tops is crucial. Without this step, your cake will inevitably be taller in the middle and slope towards the edges, making stacking difficult and leading to an uneven final product. If you own a specialized cake leveler, it’s the ideal tool for this task. Otherwise, a long, sharp serrated knife works beautifully. I find it easiest to do this on a rotating cake stand or turntable: hold the knife steady at the desired height on the edge of the dome, then slowly rotate the turntable, allowing the knife to smoothly slice through the cake.
- Mastering Smooth Sides with the Right Tools: For that coveted, smooth, bakery-quality finish on the sides of your cake, a bench scraper is your best friend. This simple tool allows you to achieve incredibly sleek and even frosting application. Hold the bench scraper firmly against the side of the cake, maintaining a consistent angle, and rotate your cake stand or lazy Susan. The scraper will effortlessly smooth out the buttercream. If you’re a frequent baker, investing in a dedicated cake scraper, specifically designed for this purpose, will truly elevate your decorating game.
- Do Not Skip the Crumb Coat and Chilling: This two-part process is perhaps the most important secret to a professional-looking layer cake. As mentioned, the crumb coat is a thin layer of frosting applied first to trap any loose crumbs, ensuring your final layer of buttercream is perfectly smooth and free of unsightly specks. More importantly, for a cake with a jam or fruit filling like this Chocolate Raspberry Cake, the chilled crumb coat acts as a protective barrier. It effectively seals in the raspberry preserves, preventing them from oozing out from between the layers or bleeding into your pristine outer frosting. Chilling allows the buttercream to firm up, creating a sturdy foundation for subsequent layers of frosting and decorations. This step genuinely makes a significant difference in the final appearance and stability of your cake.
- Room Temperature Ingredients Are Key: For both the cake batter and the buttercream, ensure all cold ingredients like eggs, milk, and butter are at room temperature. This allows them to emulsify properly, creating a smooth, homogenous batter that bakes evenly and a creamy, lump-free frosting that whips up beautifully fluffy.
- Measure Accurately: Baking is a science. Use kitchen scales for dry ingredients like flour and sugar for the most accurate results, as cup measurements can vary. This consistency ensures the perfect texture every time.
Storing Your Chocolate Raspberry Cake
While this magnificent chocolate raspberry cake is truly at its peak of freshness and flavor on the day it’s made, it can certainly be enjoyed for several days beyond that. To keep it tasting delicious, store any leftover cake in an airtight container in the refrigerator. This prevents it from drying out and helps the flavors meld beautifully. When you’re ready to enjoy another slice, simply remove the cake from the refrigerator and let it sit at room temperature for about 15-20 minutes before serving. This brief period allows the cake and frosting to soften slightly, bringing out their best texture and flavor.
Can This Chocolate Raspberry Cake Be Frozen?
Absolutely! This chocolate raspberry cake freezes beautifully, making it an excellent option for meal prepping desserts or saving slices for later enjoyment. To freeze the cake, whether it’s whole or in individual slices, ensure it’s well-chilled first. Then, wrap it tightly and thoroughly in at least two layers of plastic wrap, followed by a layer of aluminum foil. This double protection helps prevent freezer burn. Place the wrapped cake in a freezer-safe container or a heavy-duty freezer bag to further protect it. Properly stored, the cake can be frozen for up to three months. To thaw, transfer the frozen cake to the refrigerator overnight. Once thawed, let it come to room temperature for a short while before serving for the best possible texture and flavor.
Chocolate Raspberry Cake
By: Beth
Summary: This cake looks and tastes like it came from a high-end bakery, but it’s easy to make at home!
Prep Time: 1 hour
Cook Time: 30 minutes
Chilling Time: 30 minutes
Total Time: 2 hours
Servings: 12 servings
Equipment
- 8 inch cake pan (x3)
- Large Mixing Bowl
- Stand Mixer (or Hand Mixer)
- Spatula
- Serrated Knife or Cake Leveler
- Wire Racks
- Parchment Paper
- Pastry Bag & Star Piping Tip (optional, for decoration)
Ingredients
Chocolate Cake:
- 3 cups (360g) all-purpose flour
- 3 cups (594g) granulated sugar
- 1 cup (84g) unsweetened cocoa powder
- 1 Tbsp baking soda
- 1 tsp salt
- 1 tsp baking powder
- 3 large eggs, room temperature
- 1 ½ cups (354ml) milk (2% or whole), room temperature
- 1 cup (236ml) vegetable oil
- 2 tsp vanilla extract
- 1 ½ cups (354ml) boiling water
Chocolate Buttercream:
- 2 cups (452g) unsalted butter, 4 sticks, room temperature
- 1 cup (84g) unsweetened cocoa powder
- 8 cups (904g) powdered sugar
- ¼ cup (59g) milk
- 2 tsp vanilla extract
To Assemble:
- 1 ¼ cups raspberry preserves
- Fresh raspberries, to garnish
Instructions
Cake:
- Heat oven to 350°F (175°C). Spray three 8-inch cake pans with nonstick baking spray and add a parchment circle to the bottoms of each.
- In the bowl of your mixer, whisk together the flour, sugar, cocoa powder, baking soda, salt, and baking powder.
- Add the eggs, milk, oil, and vanilla to the mixing bowl. Beat the mixture on medium-high speed for two minutes. Carefully stir in the boiling water until just combined.
- Pour the batter equally between the three prepared cake pans.
- Bake for 35 to 45 minutes, or until a wooden skewer inserted into the center comes out clean and the cake springs back when gently touched.
- Let the cakes cool in the pans for five minutes, then carefully invert them onto wire racks to cool completely before frosting. This step is crucial for easy handling and preventing crumbly frosting.
Chocolate Buttercream:
- In the bowl of your mixer, cream together the softened butter and cocoa powder until light and fluffy.
- With the mixer on low speed, gradually add the powdered sugar, mixing until all of it is incorporated.
- Slowly pour the milk and vanilla extract into the buttercream. Increase the speed to medium-high and mix until the frosting is light and fluffy, about two minutes. If it seems stiff, continue mixing for another minute or two to incorporate more air.
Cake Assembly:
- Using a serrated knife or cake leveler, trim off the domed tops of your cooled cake layers to create flat, even surfaces.
- Place one cake layer on a serving plate or a cardboard cake circle. Spread a layer of chocolate buttercream on top, approximately a quarter-inch thick. Evenly spread half of the raspberry preserves over the buttercream.
- Gently place the second cake layer on top and repeat the buttercream and raspberry preserves steps. Finish by placing the third and final cake layer on top.
- Apply a thin layer of buttercream around the entire cake (top and sides). This is your crumb coat. Refrigerate the cake for 15-20 minutes to allow the crumb coat to set and trap any loose crumbs.
- Remove the cake from the refrigerator. Apply a thicker, final layer of buttercream around the cake and smooth out the edges using an offset spatula or bench scraper for a polished finish.
- If desired, fit a pastry bag with a star piping tip and pipe decorative swirls of buttercream onto the top edge of your cake.
- Finally, adorn each buttercream swirl (or simply scatter them beautifully) with fresh raspberries to garnish your decadent chocolate raspberry cake.
Notes
- Always use good quality cocoa powder, as it significantly impacts the cake’s overall chocolate flavor.
- Using room temperature ingredients for both the cake batter and the buttercream is crucial. This ensures better emulsification, a more uniform batter, and a smoother, fluffier frosting.
- If your buttercream feels too stiff after mixing, don’t hesitate to beat it for an extra minute or two. This helps incorporate more air, making it wonderfully light and spreadable.
- Do not skip the crumb coat and subsequent chilling time for the cake. This step is vital for locking in crumbs and preventing your cake layers from sliding around during final frosting and transportation.
- A lazy Susan or a dedicated cake turntable will make frosting and decorating your cake much easier, allowing for smooth, even turns.
- How to Store: For optimal freshness, this cake is best enjoyed on the day it’s baked. However, any leftovers can be stored in an airtight container in the refrigerator for up to one week. For the best taste and texture, allow slices to sit at room temperature for a few minutes before serving.
- How to Freeze: You can successfully freeze this Chocolate Raspberry Cake for up to three months. Wrap the entire cake or individual slices tightly in plastic wrap, then place it in a freezer-safe container or bag. Thaw the cake overnight in the refrigerator before serving.