
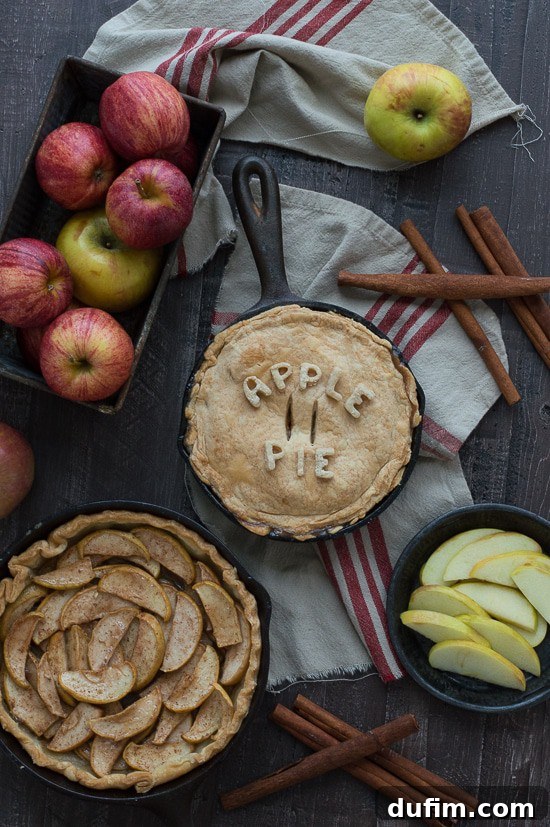
Rustic Skillet Apple Pie: A Delightful Fall Tradition
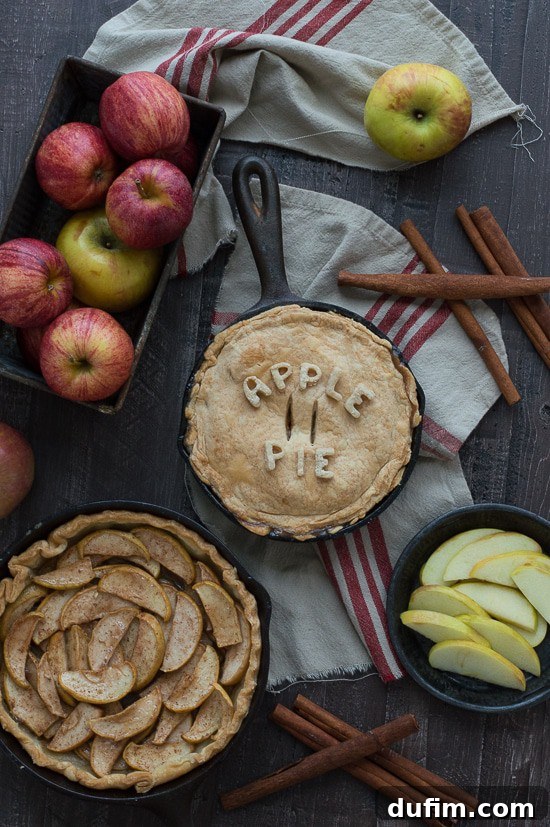
As the leaves begin to turn vibrant shades of red and gold, there’s an undeniable charm that sweeps through the air, beckoning us indoors to embrace the warmth of our kitchens. This autumn, I’ve embarked on a delightful culinary journey, marking several exciting firsts in my baking adventures. From mastering the intricate art of a lattice crust to discovering the magic of baking in a cast iron skillet, each step has been a joy. And now, I’m thrilled to share my very first, incredibly satisfying attempt at crafting the quintessential fall dessert: a homemade apple pie, baked to perfection in a trusty cast iron skillet. There’s truly nothing holding me back this season when it comes to creating comforting, delicious treats for family and friends.
The Indispensable Cast Iron Skillet: A Baker’s Best Friend
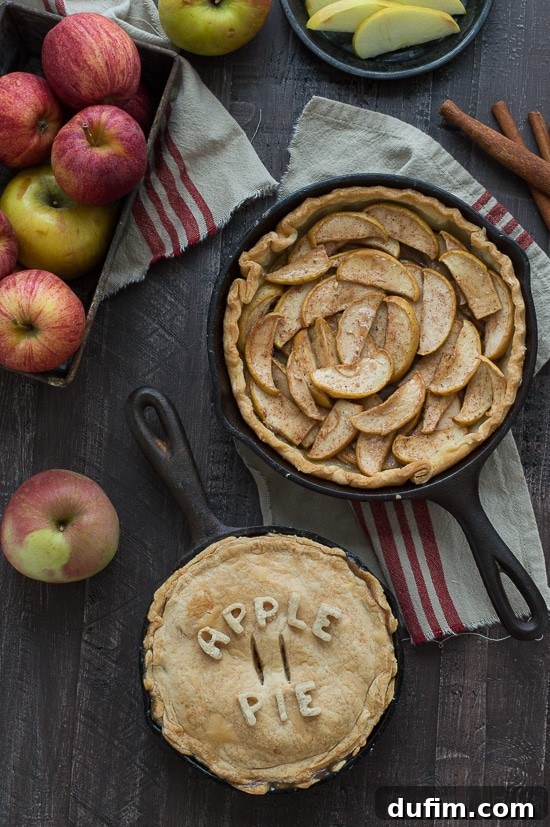
Using a cast iron skillet for baking brings a rustic charm and superior cooking performance that few other pans can match. The even heat distribution ensures a perfectly golden crust, while its ability to retain heat keeps your pie warm long after it comes out of the oven. If you’re new to cast iron, the first step is always proper seasoning. I diligently followed the straightforward instructions from The Kitchn on how to season a cast iron skillet, and I was pleasantly surprised by how simple the process truly is.
How to Season Your Cast Iron Skillet: A Quick Guide
Seasoning a cast iron skillet creates a natural, non-stick surface and protects the pan from rust. It’s a vital step for any new or newly cleaned cast iron cookware. Here’s a simple method:
- Preheat your oven to 325ºF (160ºC).
- Thoroughly wash your cast iron skillet with hot water and a stiff brush (avoid soap, especially on already seasoned pans, as it can strip the seasoning. For a brand new pan, a little soap is fine, but rinse very well).
- Dry the skillet completely. Ensuring it’s bone dry is crucial to prevent rust. You can even place it on the stovetop over low heat for a few minutes to evaporate any residual moisture.
- Apply a very thin, even coat of vegetable oil (or flaxseed oil, grapeseed oil) all over the pan – inside, outside, and the handle. Use a paper towel to rub it in, then use a fresh paper towel to wipe off as much excess oil as possible. The key is thin layers.
- Place the pan upside down in the preheated oven for 1 hour. It’s a good idea to put a baking sheet or aluminum foil on the rack below your skillet to catch any dripping oil, preventing a smoky mess.
- After 1 hour, turn off the oven and allow the pan to cool completely inside the oven. This slow cooling helps the seasoning bond effectively to the iron.
I honestly thought seasoning involved salt and some elaborate ritual, but a quick search on Google revealed its true simplicity. This foundational step prepares your skillet for countless delicious meals and desserts, promising years of non-stick, flavorful cooking.
Crafting Your Skillet Apple Pie: From Dough to Deliciousness
With your cast iron skillet perfectly seasoned and ready, it’s time to dive into the heart of the matter: making the pie itself! One of the beautiful aspects of this skillet apple pie recipe is its flexibility. You have the freedom to choose between homemade pie dough or a convenient store-bought option. In the grand scheme of things, the ultimate goal is a warm, fragrant apple pie, bubbling with cinnamon-spiced fruit. While I am a firm believer in simplifying wherever possible, I did opt for homemade dough for this particular skillet pie. You’ll find my tried-and-true recipe for a flaky, buttery crust in the recipe section below, perfect for those who enjoy the process of baking from scratch.
Choosing Your Skillet Size: One Pie or Two?
This versatile apple pie recipe can be adapted to various skillet sizes. For this baking adventure, I utilized both a 6.5-inch and an 8-inch skillet. This allows for delightful variations: you can bake a larger pie for generous servings, or create two smaller pies for different occasions or simply to have extra on hand. The smaller skillet yields approximately two giant servings, perfect for an intimate dessert, while the larger one caters to a crowd. The choice is entirely yours, or why not make both and enjoy the best of both worlds?
The Art of Apple Selection: Building the Perfect Filling
The success of any apple pie hinges on the apples themselves. For a filling that holds its shape and delivers a balanced sweet-tart flavor, a mix of apple varieties is often best. Firm, crisp apples that don’t turn to mush during baking are ideal. Some popular choices include:
- Granny Smith: Known for their tartness and firm texture, they provide a great counterpoint to the sweetness of the other ingredients.
- Honeycrisp: Sweet, crisp, and juicy, they add a wonderful depth of flavor and maintain their texture.
- Fuji: A sweet and crunchy apple that blends well with tarter varieties.
- Braeburn: Offers a nice balance of sweet and tart with a firm flesh.
- Golden Delicious: A sweeter apple that softens beautifully and adds moisture to the filling.
Peeled, cored, and sliced or diced, your apple selection forms the delicious core of this comforting dessert. Paired with cinnamon, nutmeg, brown sugar, and a hint of lemon, the aroma alone will fill your kitchen with pure autumnal bliss.
Adding a Personal Touch: Decorative Pie Crust Letters
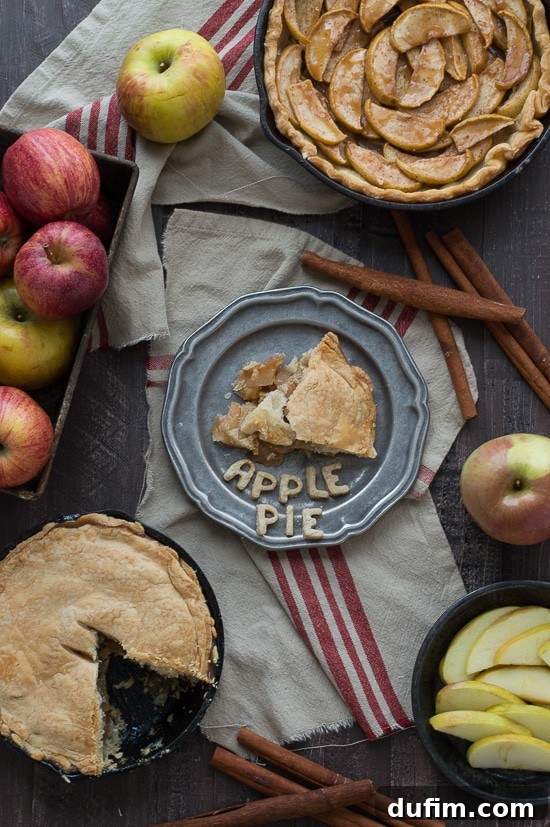
Beyond the delightful aroma and exquisite taste, there’s an element of visual charm that makes this pie truly special: the adorable pie crust letters! I must confess a little secret: one of the main reasons I decided to make apple pie was the sheer desire to play with pie crust letters and spell out fun messages. It’s an incredibly simple yet effective way to add a personalized and heartwarming touch to your baked goods. Once your pie has finished baking and has cooled sufficiently, you can “glue” these crispy, golden letters onto the pie’s surface using a small dab of caramel sauce on the back of each letter. The caramel not only acts as an adhesive but also adds another layer of decadent flavor.
For an extra creative twist, I also experimented with an open-face apple pie, lavishly drizzled with caramel sauce and adorned with the cheerful “Happy Fall” lettering. This showcases the beautiful apple filling and makes for an irresistible presentation. The versatility of pie crust cutouts extends beyond letters too; consider using small leaf, apple, or pumpkin-shaped cookie cutters for festive decorations. These small details transform a simple pie into a memorable centerpiece, perfect for gatherings or just a cozy evening at home.
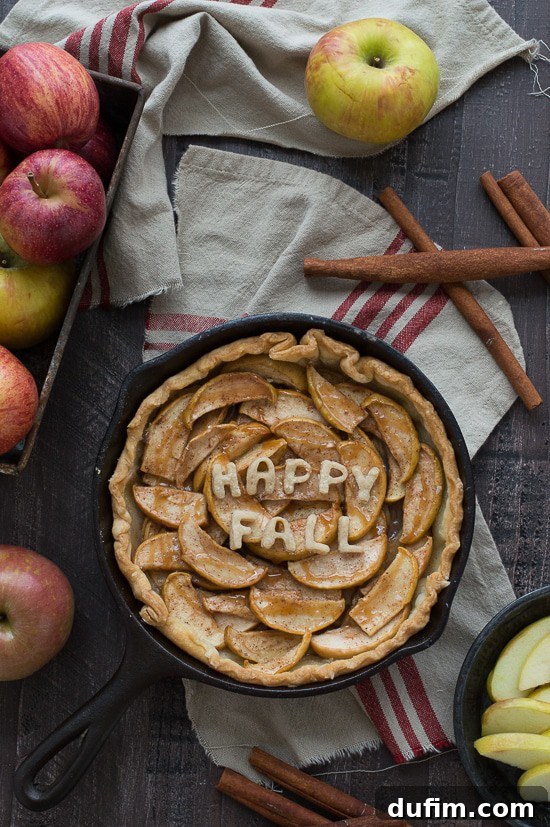
There’s something uniquely charming about an apple pie that proudly declares its identity – like one saying “Apple Pie!” It’s a whimsical touch that brings a smile to everyone’s face, reinforcing the joy of homemade baking. These decorative elements make your pie not just a dessert, but a conversation starter and a true expression of seasonal cheer.
Serving Suggestions and Expert Tips for Your Skillet Apple Pie
A freshly baked skillet apple pie is a masterpiece on its own, but a few accompaniments can elevate it to an even higher level of indulgence. A scoop of vanilla bean ice cream slowly melting over a warm slice is a classic pairing that’s hard to beat. For those who love a rich contrast, a dollop of freshly whipped cream or an extra drizzle of homemade caramel sauce can transform each bite. Don’t shy away from a slice of sharp cheddar cheese – a traditional pairing in some regions that offers a delightful savory note against the sweet apples.
Tips for Pie Perfection:
- Prevent a Soggy Bottom: Ensure your pie crust is blind-baked slightly if your recipe allows, or add a thin layer of breadcrumbs or crushed cereal on the bottom crust before adding the filling. The hot skillet also helps caramelize the bottom, preventing sogginess.
- Avoid a Runny Filling: Make sure your apple filling has enough thickening agent (flour or cornstarch). Allowing the pie to cool completely for at least 20 minutes before slicing is crucial, as the filling continues to set as it cools.
- Golden Crust: If your crust is browning too quickly, you can loosely tent the pie with aluminum foil during the last part of baking. An egg wash (1 egg beaten with 1 tbsp water) brushed over the top crust before baking can also give it a beautiful sheen and golden color.
- Rest is Best: Resist the urge to cut into your pie immediately after it comes out of the oven. A 20-minute resting period allows the filling to set and the flavors to meld, ensuring clean slices and a more enjoyable texture.
Baking a skillet apple pie is more than just following a recipe; it’s an experience, a sensory delight that fills your home with warmth and an irresistible aroma. Whether you’re a seasoned baker or trying your hand at pie for the first time, this guide provides all the steps to create a truly memorable dessert. Enjoy the process, savor the results, and create new fall traditions around your table.

Rating: 5 out of 5 stars based on 1 review
You can rate this recipe below!
Skillet Apple Pie
Ingredients
Pie Dough (this will make 2 crusts)
- 2 cups all-purpose flour
- ¼ tsp salt
- ½ cup vegetable shortening
- 1 stick butter, cold and diced (1/2 cup)
- 1 large egg
- 2 tsp white vinegar
- 2 tbsp water, ice cold
Apple Filling for 8-inch Skillet
- 7-8 cups apples, peeled, cored, and sliced/diced
- ⅔ cup granulated sugar
- 3 tbsp all-purpose flour
- 2 tbsp brown sugar, packed
- ½ tsp ground cinnamon
- 1 tsp lemon juice
- ¼ tsp ground nutmeg
- To melt in skillet: 2 tbsp butter + ¼ cup brown sugar
Apple Filling for 6.5-inch Skillet
- 3 cups apples, peeled, cored, and sliced/diced
- ⅓ cup granulated sugar
- 1.5 tbsp all-purpose flour
- 1 tbsp brown sugar, packed
- ½ tsp ground cinnamon
- ½ tsp lemon juice
- ¼ tsp ground nutmeg
- To melt in skillet: 1 tbsp butter + 2 tbsp brown sugar
Instructions
Pie Dough
- In a large bowl, combine the flour and salt.
- Using your fingers or a pastry cutter, cut the vegetable shortening and cold, diced butter into the flour mixture until crumbly. It’s okay to have several pea-sized pieces of butter remaining; these create flakiness.
- In a separate small bowl, whisk together the egg, white vinegar, and ice-cold water.
- Pour the wet mixture over the flour mixture and use a spatula to mix everything together until just combined. The dough should not be overly sticky; you should be able to form it into a ball with your hands.
- Divide the dough into two equal balls. Wrap each ball tightly in plastic wrap, flatten into a disc, and refrigerate for at least 30 minutes or up to 4 days. This chilling step is crucial for an easy-to-roll, flaky crust.
To Prepare the Apple Filling
- Peel, core, and dice or slice the apples into uniform, fairly small pieces. Place the apples in a large mixing bowl.
- Add the lemon juice, granulated sugar, flour, brown sugar, cinnamon, and nutmeg to the apples. Toss gently to combine all ingredients thoroughly, ensuring the apples are evenly coated.
How to Assemble and Bake the Pie
- Remove the chilled pie dough discs from the fridge about 10-15 minutes before you plan to roll them out, allowing them to soften slightly.
- Preheat your oven to 350ºF (175ºC).
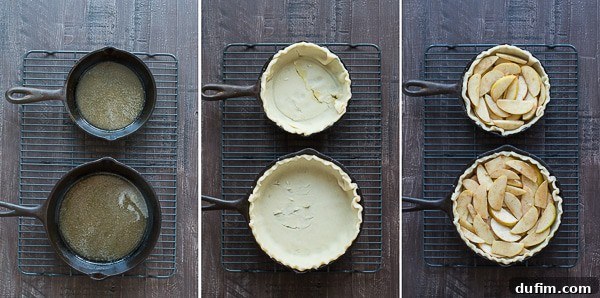
- On the stovetop over medium heat, melt the specified butter and brown sugar for your chosen skillet size directly in the cast iron skillet. Swirl to coat the bottom.
- On a lightly floured surface, use a rolling pin to roll out one of the balls of dough into a large circle, about 1/8-inch thick and large enough to extend slightly over the edges of your skillet.
- Carefully transfer the rolled-out dough into the skillet, nesting it over the melted butter and brown sugar mixture. Trim off any significant excess dough, but leave a small overhang so you can crimp the top and bottom crusts together later.
- Pour the prepared apple filling into the dough-lined skillet, mounding it slightly in the center.
- Roll out the second ball of dough into another circle. This will serve as your top crust (or you can cut it into strips for a lattice design).
- Place the top crust over the apple filling. Trim off any excess dough that hangs over the edges, ensuring a neat fit.
- Crimp the bottom and top crusts together around the edge of the skillet to seal the pie. Create a few small slits in the top crust to allow steam to escape while baking, preventing a soggy crust.
- Bake the 8-inch pie for approximately 1 hour 20 minutes, or the 6.5-inch pie for about 1 hour. Bake until the crust is beautifully golden brown and the apple juices are bubbling thickly through the vents. If the crust browns too quickly, loosely tent with foil.
- Allow the pie to cool on a wire rack for at least 20 minutes before serving. This crucial step allows the filling to set properly.
To Make the Pie Crust Letters (Optional Decoration)
- Roll out any leftover pie dough or a small portion reserved specifically for decorations.
- Use alphabet cookie cutters to cut out your desired letters or shapes.
- Place the cut-out letters on a small baking sheet lined with parchment paper. Bake for 3-5 minutes in the preheated oven (or alongside the pie during the last minutes) until golden and crispy.
- After the letters have cooled completely, you can arrange them directly on top of the baked pie. For better adhesion, “glue” them onto the pie using a small dab of caramel sauce on the back of each letter.
Nutrition Information
Calories: 275kcal | Carbohydrates: 39g | Protein: 3g | Fat: 13g | Saturated Fat: 5g | Polyunsaturated Fat: 2g | Monounsaturated Fat: 4g | Trans Fat: 1g | Cholesterol: 27mg | Sodium: 93mg | Potassium: 113mg | Fiber: 2g | Sugar: 23g | Vitamin A: 236IU | Vitamin C: 4mg | Calcium: 14mg | Iron: 1mg
Nutrition Disclosure
All nutritional values are approximate and provided to the reader as a courtesy. Changing ingredients and/or quantities will alter the estimated nutritional calculations.
Like this recipe? We encourage you to rate and comment below to share your experience!