
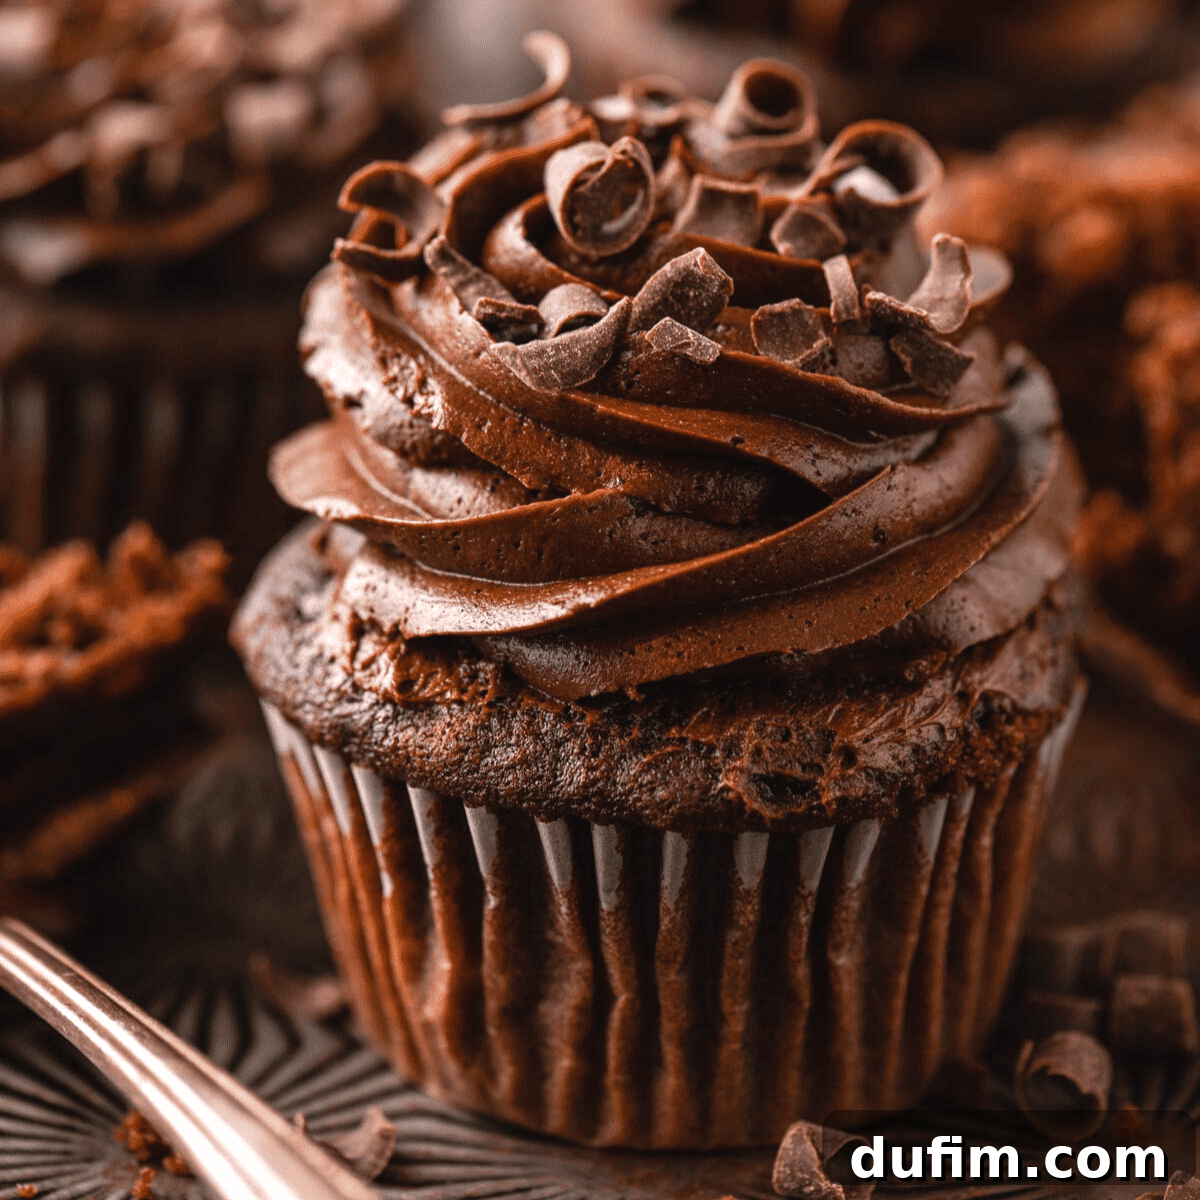
After rigorous testing of six distinct batches, I am thrilled to share the perfected recipe for truly amazing, extra-indulgent chocolate cupcakes. This comprehensive guide will equip you with all the secrets to baking moist, rich, and utterly irresistible chocolate cupcakes, complete with a luscious chocolate frosting. Prepare for this to become your forever go-to chocolate cupcake recipe!
Wickedly, chocolatey, deliciousness. I made these today for Christmas tomorrow. I had to try one today. This will forever be my go-to chocolate cupcake recipe.
-Stacey
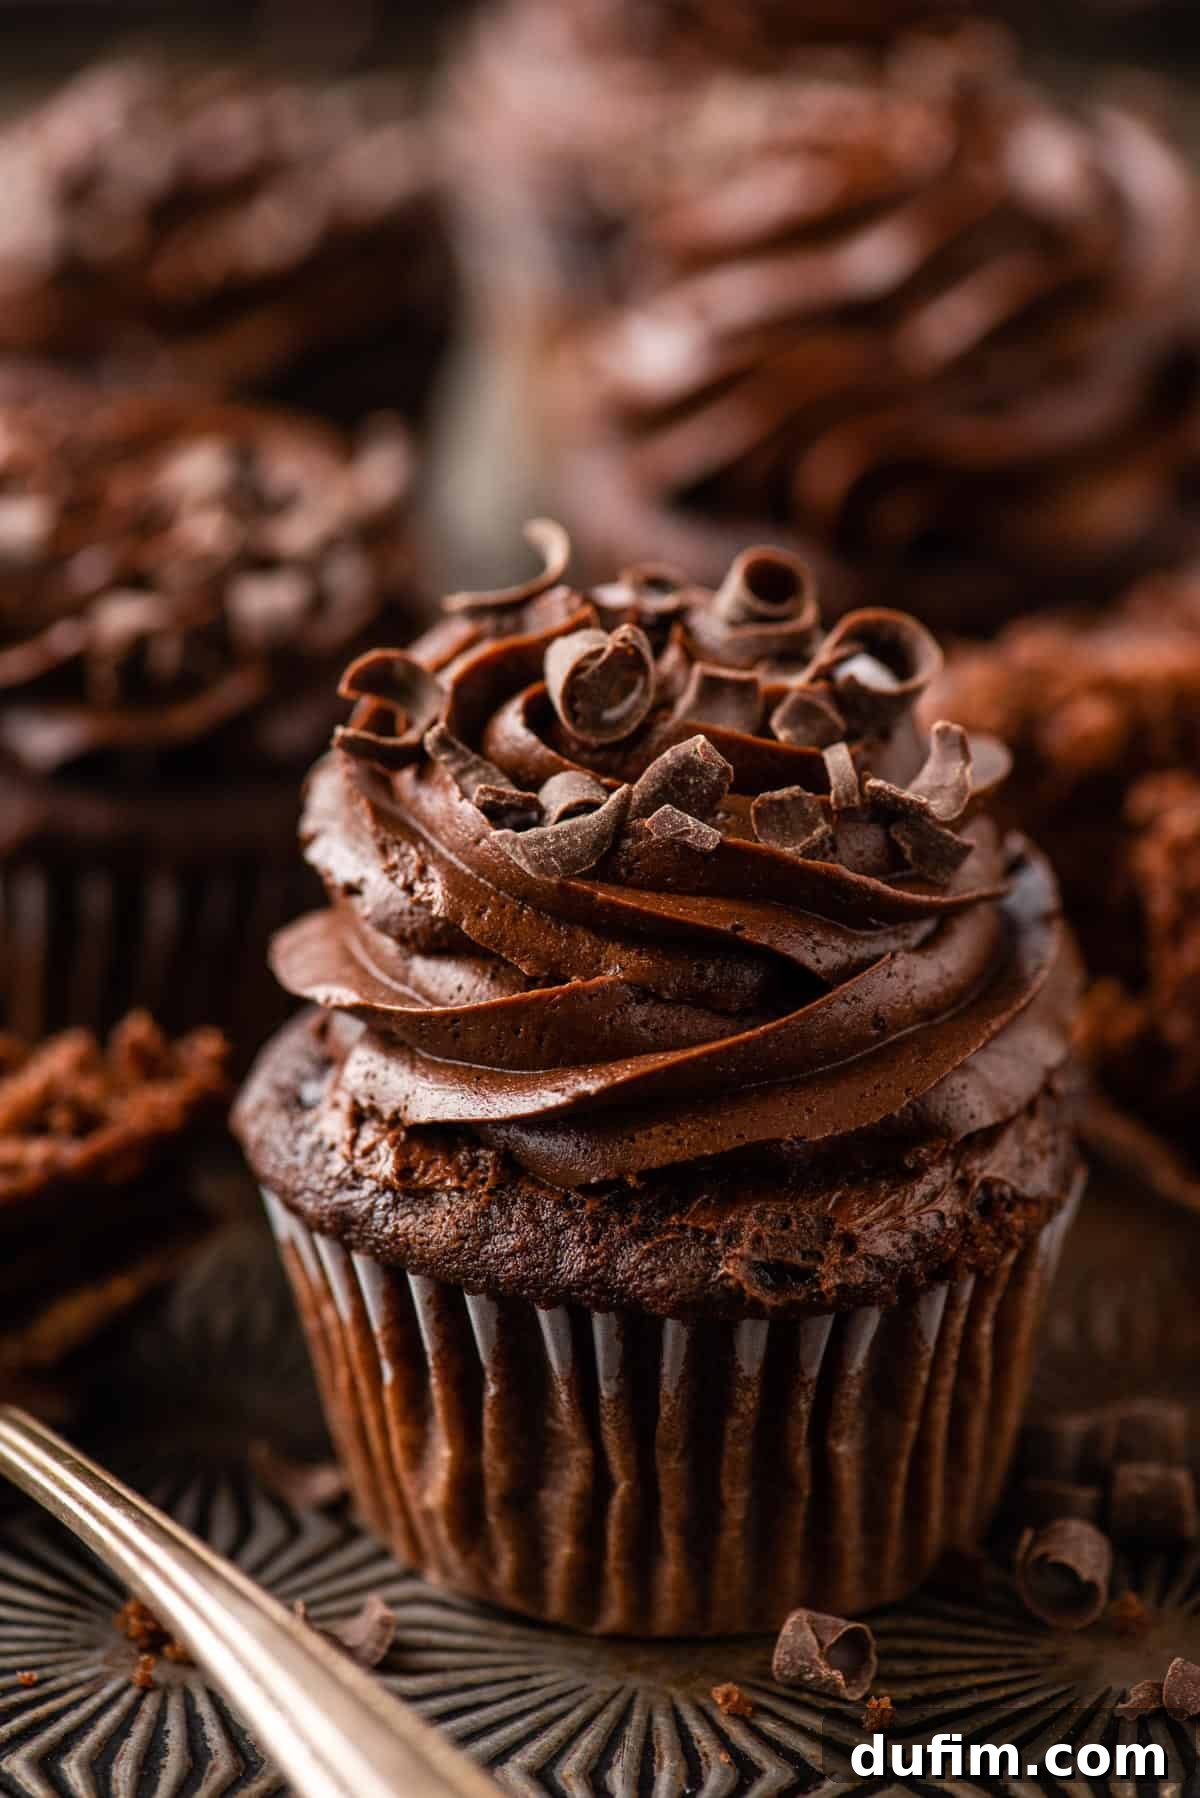
The Quest for the Best Chocolate Cupcake Recipe!
My journey to creating the ultimate classic, homemade chocolate cupcake was a delicious adventure, involving extensive research and, yes, six separate batches of cupcakes. As my husband Ryan would attest, it was all in the name of culinary science!
Out of these six experiments, three were unfortunately quite terrible, two were good but lacked that special something, and one clearly stood out as the undisputed winner. My goal was to develop a recipe that delivered an authentic, deep chocolate flavor, not just from cocoa powder, but from real, melted chocolate. However, I quickly learned that simply adding too much melted chocolate can lead to a dense, brownie-like texture – delicious in its own right, but not what we envision for a light, fluffy cupcake.
This insight drove me to spend extra time in the kitchen, meticulously perfecting the proportions to strike the ideal balance. The result is a chocolate cupcake that is not only bursting with rich chocolate flavor but also boasts an incredibly moist and tender crumb, making it truly the best chocolate cupcake recipe you’ll ever bake.
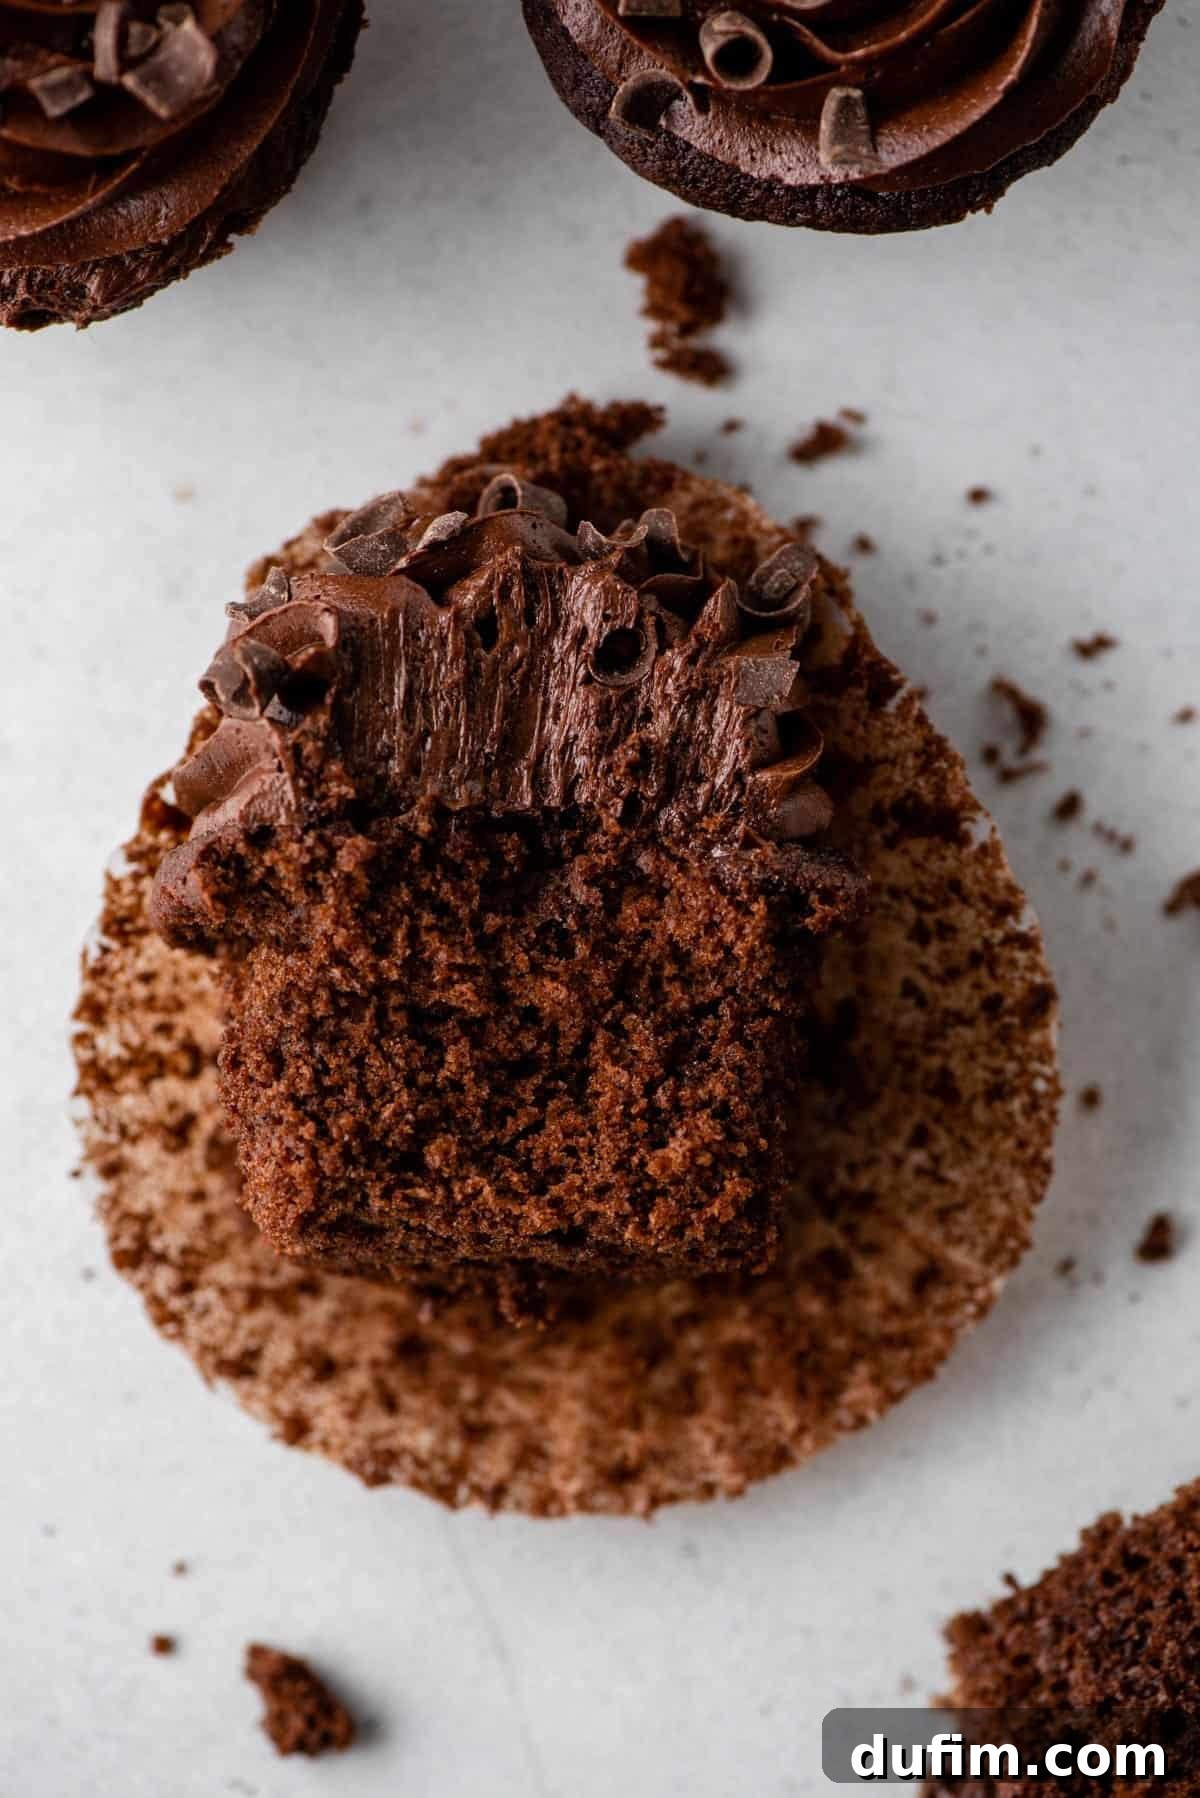
What Makes These Chocolate Cupcakes So Incredibly Moist?
The secret to these cupcakes’ unparalleled moistness lies in a carefully selected combination of rich ingredients. Each plays a crucial role in delivering that tender, melt-in-your-mouth texture:
- Buttermilk: An absolute essential in this recipe, buttermilk adds both incredible moistness and a subtle tang that enhances the overall flavor profile. Its acidity also interacts with the leavening agents, contributing to a lighter crumb. If you don’t have buttermilk on hand, an equal amount of sour cream makes for an excellent substitute.
- Real Melted Chocolate: True chocolate cupcakes demand real chocolate! Incorporating melted bittersweet chocolate directly into the batter significantly intensifies the chocolate flavor, providing a depth that cocoa powder alone cannot achieve. Furthermore, the fat content from the melted chocolate contributes significantly to the cupcakes’ moist texture. Our recipe calls for 3 ounces of bittersweet chocolate baking bar. To melt it perfectly, rough chop the chocolate into smaller pieces, place them in a microwave-safe bowl, and microwave for 2 minutes at 50% power. Stir thoroughly, then repeat in shorter intervals until smooth and fully melted. Ensure you set it aside to cool slightly before adding to the batter.
- Hot Tap Water: This might seem like an unusual addition, but hot water serves a vital purpose: it “blooms” the cocoa powder. This process brings out a more intense, robust chocolate flavor, making every bite undeniably chocolatey. It also helps in activating the baking soda, contributing to the rise and tender texture of the cupcakes.
- Room Temperature Ingredients: Allowing ingredients like butter and eggs to come to room temperature is a small but impactful step. Room temperature butter creams more easily with sugar, creating a light, airy base that traps more air, resulting in a fluffier cupcake. Room temperature eggs emulsify better into the batter, preventing curdling and ensuring a smooth, uniform mixture.
Gather Your Ingredients: What You’ll Need
For precise quantities and detailed instructions, remember to scroll down to the full recipe card at the bottom of this post. Here’s an overview of the key components that will transform simple ingredients into extraordinary chocolate cupcakes.
FOR THE CHOCOLATE CUPCAKES:
- All-Purpose Flour: The foundation of our cupcake structure. Proper measurement is key for ideal texture.
- Unsweetened Natural Cocoa Powder: Opt for a natural cocoa powder, such as Hershey’s brand. It’s crucial not to use Dutch-Processed cocoa powder in this recipe, as the natural acidity is needed to react with the baking soda for perfect leavening.
- Baking Soda and Baking Powder: Our dual leavening agents. Baking soda reacts with the buttermilk’s acidity, while baking powder provides an additional lift, ensuring light and airy cupcakes.
- Salt: A pinch of salt balances the sweetness and enhances all the chocolate flavors.
- Unsalted Butter: Ensure your butter is at room temperature before you begin the recipe. This allows it to cream beautifully with the sugar, incorporating air for a light texture.
- Granulated Sugar: Provides sweetness and helps retain moisture, contributing to the tender crumb.
- Bittersweet Chocolate Baking Bar: Look for this in the baking aisle. Bittersweet chocolate typically contains 60-66% cacao, offering a rich, deep chocolate flavor without being overly sweet. This is the “real chocolate” that makes all the difference.
- Large Eggs: Act as binders, adding richness, structure, and moisture to the batter.
- Buttermilk: As mentioned, this is paramount for achieving that signature moist, tender crumb and a hint of tang.
- Hot Tap Water: Essential for “blooming” the cocoa powder, intensifying its chocolate flavor, and helping to achieve the perfect batter consistency.
FOR THE DECADENT CHOCOLATE FROSTING:
- Unsalted Butter: Softened to room temperature, it forms the creamy base of our frosting.
- Vanilla Extract: A splash of vanilla enhances the overall sweetness and complements the chocolate beautifully.
- Unsweetened Cocoa Powder: For the frosting, either natural cocoa powder or Dutch-process cocoa powder will work perfectly. However, always avoid using hot cocoa mix, as it’s pre-sweetened and will alter the frosting’s flavor and texture.
- Powdered Sugar (Confectioners’ Sugar): Provides sweetness and structure, creating a smooth, pipeable frosting. Sifting is recommended to prevent lumps.
- Milk or Heavy Cream: Used to achieve the ideal consistency for your frosting, allowing you to adjust its thickness to your preference.
How to Make Indulgent Chocolate Cupcakes from Scratch
FOR THE CUPCAKES:
- Prepare Your Workspace: Begin by preheating your oven to 350º F (175º C). Line a standard muffin pan with paper cupcake liners. This ensures easy removal and a clean presentation.
- Melt the Chocolate: Rough chop the bittersweet chocolate baking bar into small pieces. Place them in a microwave-safe bowl. Microwave on 50% power for 2 minutes, then stir. Continue microwaving in 30-second intervals, stirring after each, until the chocolate is completely smooth and melted. Set it aside to cool slightly to room temperature; you don’t want to add hot chocolate to your batter.
- Combine Dry Ingredients: In a medium mixing bowl, thoroughly whisk together the all-purpose flour, unsweetened natural cocoa powder, baking soda, baking powder, and salt. Whisking ensures all leavening agents and flavorings are evenly distributed. Set this bowl aside.
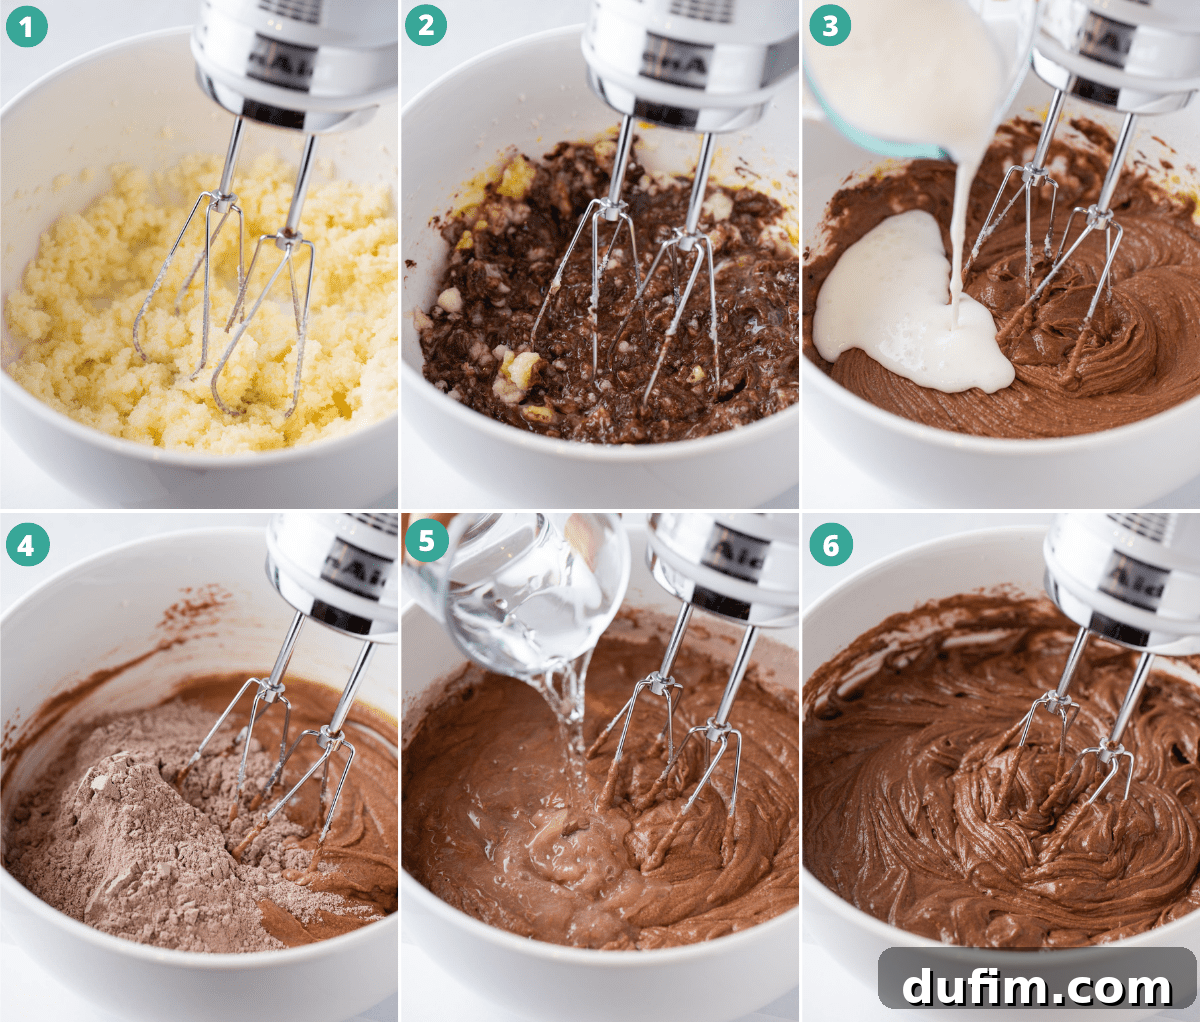
- Cream Wet Ingredients: In a separate large mixing bowl, using an electric mixer, beat the room-temperature unsalted butter and granulated sugar together for 1-2 minutes until the mixture is visibly lightened in color and fluffy. This step incorporates air, crucial for light cupcakes. Next, beat in the cooled melted chocolate and the large eggs one at a time, mixing until just combined after each addition.
- Alternate Wet and Dry: This technique helps create a smooth batter without overmixing. Add half of the buttermilk to the wet ingredients and beat on low speed for about 20 seconds, just until incorporated. Then, add half of the dry ingredient mixture and beat until no streaks of flour remain. Follow with the remaining buttermilk and the hot tap water, beating briefly until the liquids are just mixed in. Finally, add the remaining dry ingredients and mix on the lowest speed until the batter is smooth and uniformly combined. Be careful not to overmix, as this can lead to tough cupcakes.
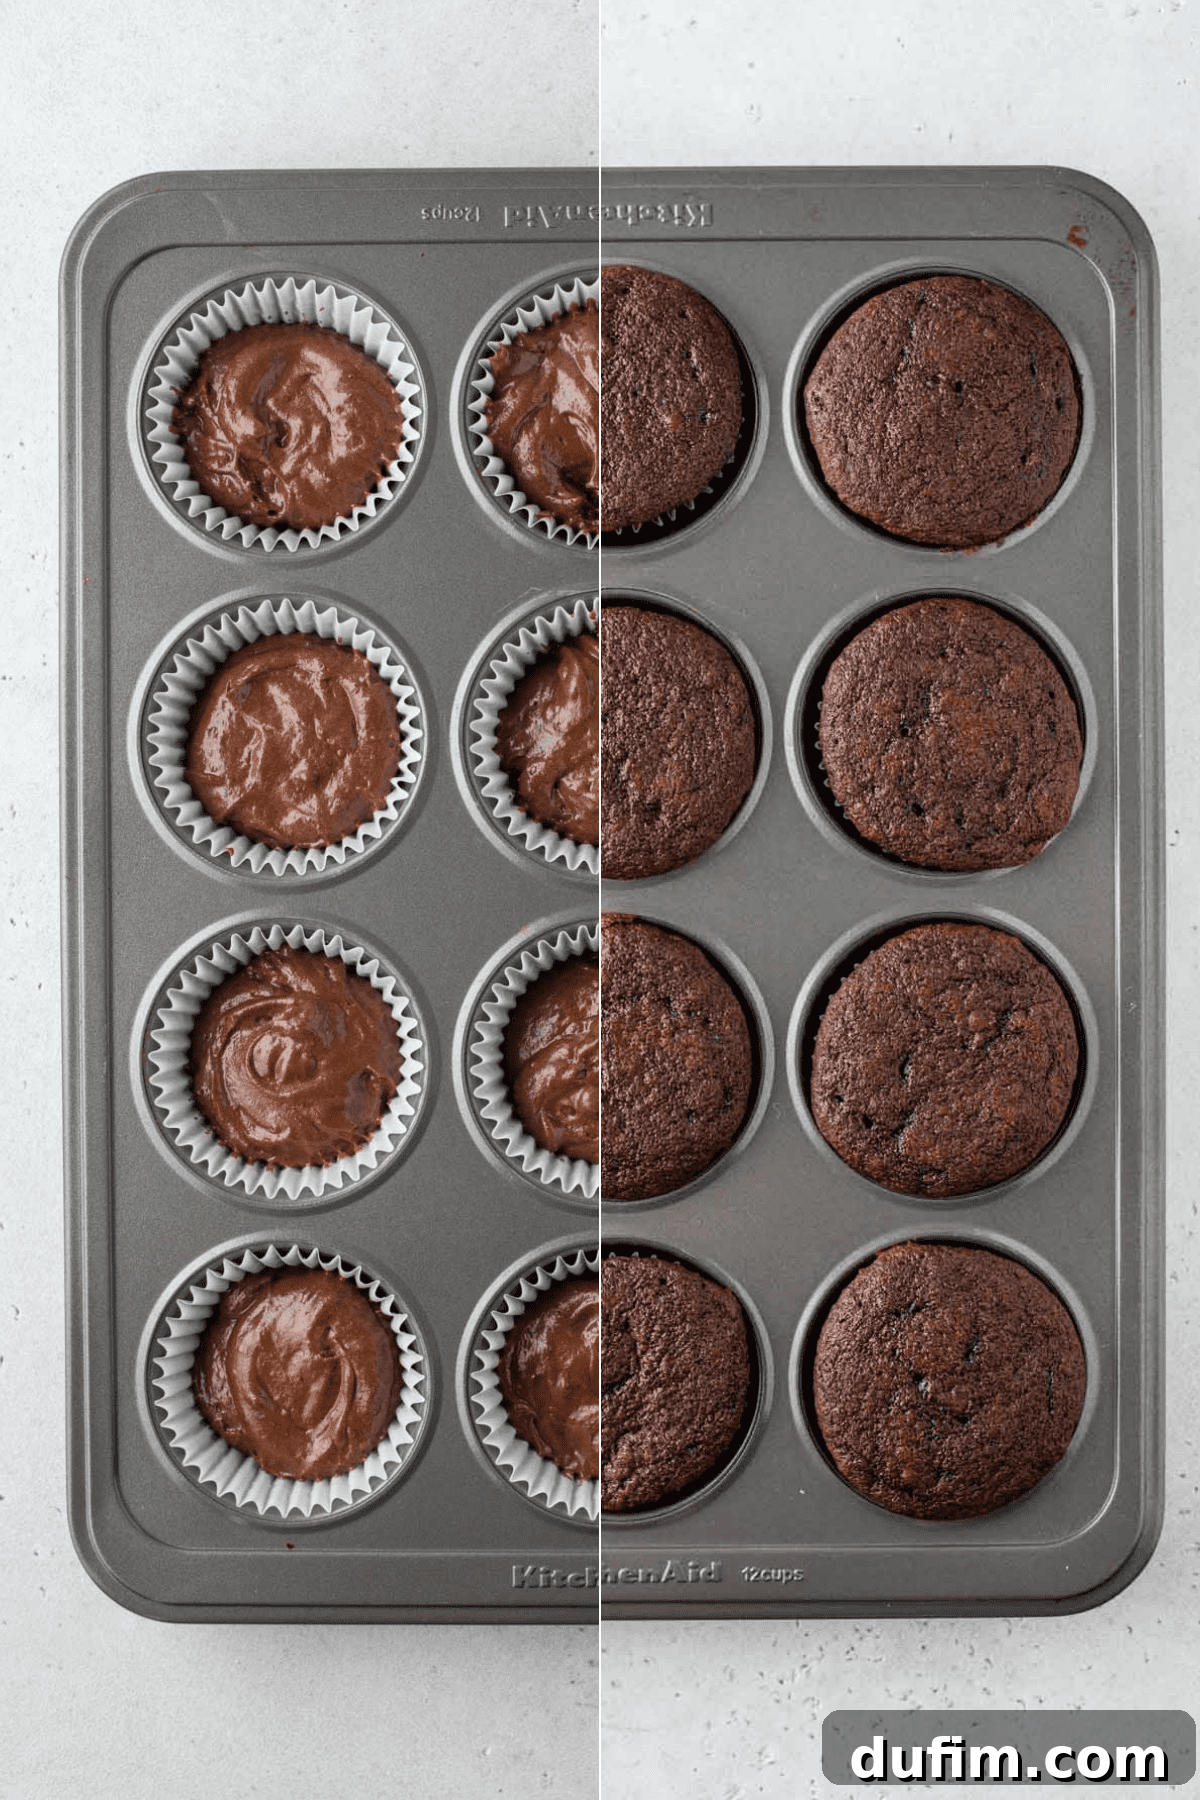
- Bake to Perfection: Divide the prepared batter evenly among the muffin liners, filling each cup no more than halfway full. Overfilling can cause the cupcakes to spill over or bake unevenly. Bake for 17 to 19 minutes at 350ºF (175º C), or until a toothpick inserted into the center of a cupcake comes out with just a few moist crumbs attached. Avoid overbaking, as this is a common culprit for dry cupcakes. Once baked, remove the pan from the oven and let the cupcakes cool in the pan for a few minutes before transferring them to a wire rack to cool completely. It is absolutely essential that the cupcakes are entirely cool before you attempt to frost them, to prevent the frosting from melting.
FOR THE DECADENT CHOCOLATE FROSTING:
- Whip the Butter: In a clean mixing bowl, beat the room-temperature unsalted butter on high speed for a full 3 minutes. This aerates the butter, making your frosting incredibly light and fluffy.
- Incorporate Dry Ingredients: Sift in the unsweetened cocoa powder and 3 cups of powdered sugar. Sifting is a critical step here, as it breaks up any clumps in the cocoa and sugar, ensuring a smooth, lump-free, and delightfully light frosting texture. Beat the frosting on low speed initially until all the dry ingredients are moistened, then increase speed to medium until combined and thick.
- Flavor and Finish: Reduce the mixer speed to low and mix in 3 tablespoons of heavy cream, vanilla extract, and salt. Continue mixing until well combined. At this point, taste the frosting and adjust for sweetness by adding more powdered sugar (1-2 cups more, as needed), beating until fully incorporated. If the frosting appears too thick or stiff for piping, beat in an additional dash or tablespoon of milk or heavy cream until your desired consistency is reached.
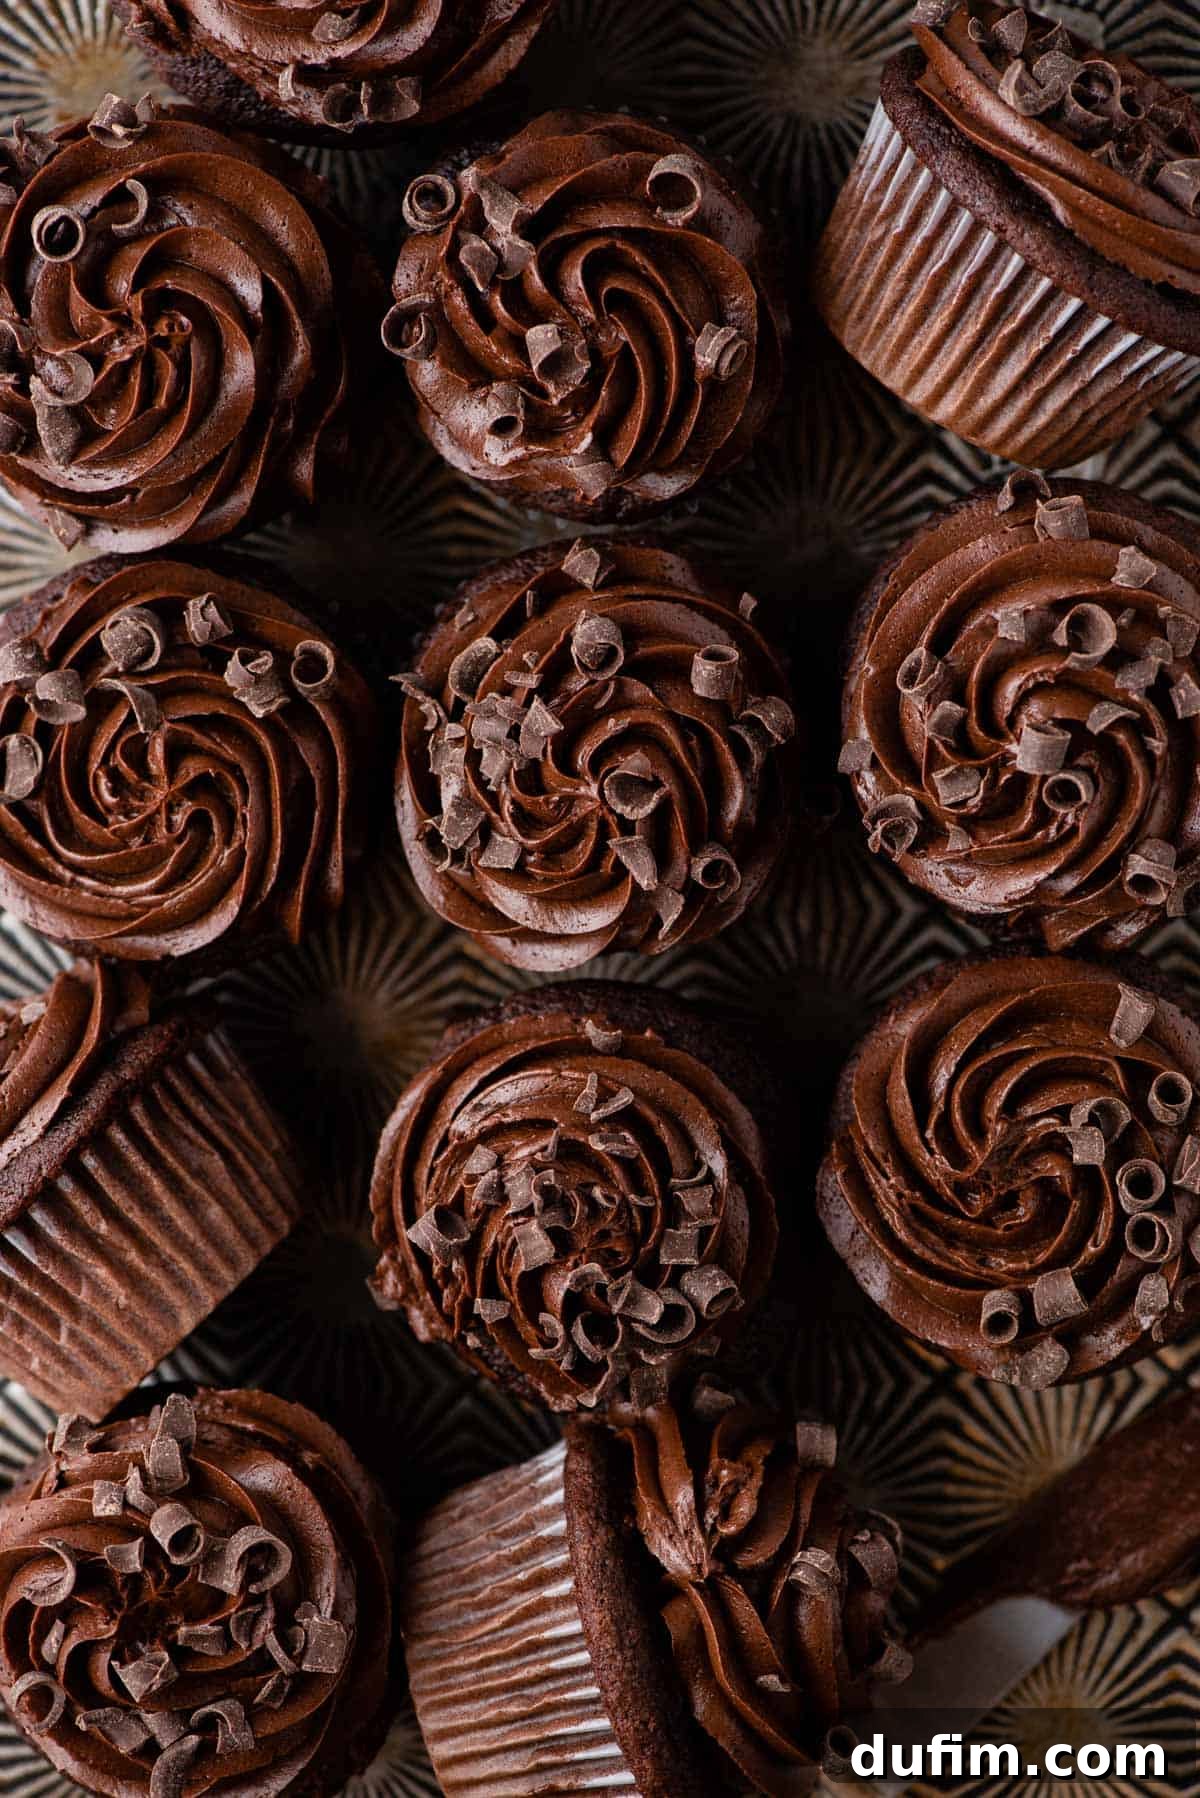
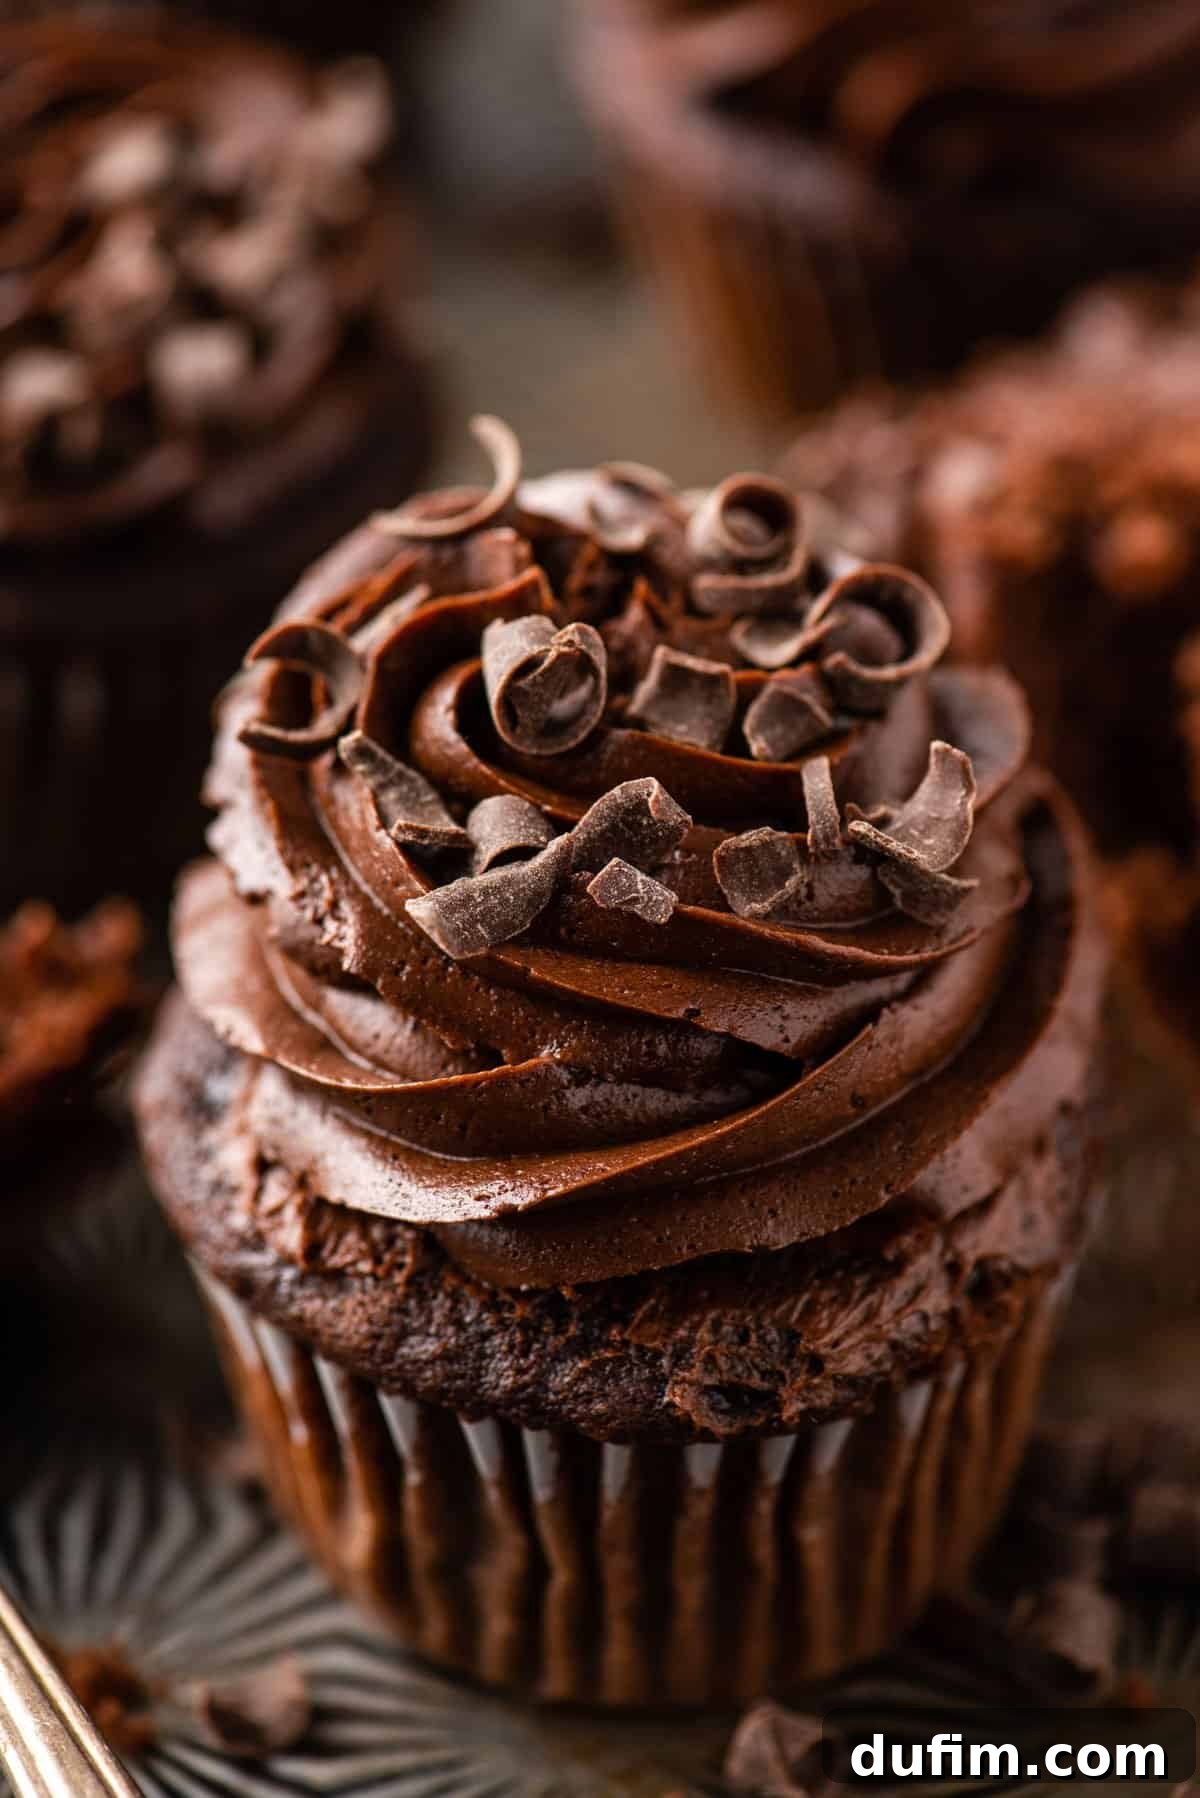
- Frost Your Creations: Fit a piping bag with your preferred piping tip; I highly recommend a Wilton 1M for beautiful swirls. Fill the piping bag about three-quarters of the way full with the prepared chocolate frosting. Pipe the frosting generously onto each cooled cupcake. For an extra touch of elegance, decorate with chocolate curls, sprinkles, or any topping of your choice.
Recommended Frosting Piping Supplies
Having the right tools can make all the difference in achieving bakery-worthy cupcakes. Here are some essential piping supplies I recommend:
- Piping Bags: High-quality, disposable piping bags save on cleanup and make the process effortless. Look for sturdy ones that won’t burst under pressure.
- Piping Tips: For frosting cupcakes, larger piping tips are generally preferred as they create more dramatic and appealing swirls. My go-to tips for beautiful designs include the Wilton 1M (a classic open star for rosettes and swirls), Wilton 2D (a closed star for textured swirls), and Ateco 844 (another excellent open star tip very similar to the 1M).
Mastering the Art: How to Pipe Frosting onto Cupcakes
Achieving that iconic, professional-looking swirl of frosting on your cupcakes is easier than you think with a little practice. I typically use a Wilton 1M piping tip, which is versatile and creates gorgeous rosettes and swirls. The Wilton 2D and Ateco 844 tips are also fantastic alternatives, yielding very similar results.
To pipe the perfect swirl, follow these steps:
- Preparation: Ensure your cupcakes are completely cool. Fill your piping bag, fitted with your chosen tip, about three-quarters full with frosting. Twist the top of the bag to seal and apply gentle pressure to force the frosting towards the tip.
- Start in the Center: Begin by placing the tip in the very center of the cupcake, lightly touching the surface. Apply steady, firm pressure to the piping bag.
- First Swirl (Base Layer): As you apply pressure, move the piping tip in a continuous circular motion, gradually working your way outwards towards the edge of the cupcake. This creates a solid base layer of frosting.
- Second Swirl (Building Up): Once you reach the outer edge, gently lift the tip slightly and begin another circular motion, this time layering the frosting on top of the base layer you just created. Continue swirling inwards, stacking the frosting higher as you move towards the center of the cupcake.
- Finish with a Peak: When you reach the desired height and are back at the center, stop applying pressure to the bag and quickly pull the tip straight up to create a neat peak.
Practice makes perfect! Don’t be discouraged if your first few attempts aren’t flawless. Each cupcake will get better, and even imperfectly piped cupcakes taste just as delicious!
Your Baking Timeline: Total Time Required
Planning your baking session is key to an enjoyable and successful experience. Here’s a breakdown of the time you’ll need for these delightful chocolate cupcakes:
- Batter Preparation: Approximately 15-20 minutes. This includes gathering ingredients, melting chocolate, and mixing the wet and dry components.
- Baking Time: 17-19 minutes. Keep a close eye on your oven, as baking times can vary slightly.
- Cooling the Cupcakes: A crucial and often overlooked step, requiring at least 1 hour, but ideally 1.5 to 2 hours, for the cupcakes to cool completely to room temperature. Patience here prevents your beautiful frosting from melting.
- Frosting Preparation: Around 5-7 minutes. This involves whipping the butter and incorporating the remaining ingredients.
- Frosting Application: 10-15 minutes, depending on your piping speed and desired intricacy.
Allowing adequate cooling time is paramount for the best results, so factor this into your schedule.
The Secret to Perfect Baking: How to Properly Measure Flour
Accurate flour measurement is one of the most critical factors for moist, tender cupcakes. Too much flour can easily lead to dry, dense results. The most precise method is to use a kitchen scale, weighing it in grams. If you don’t have a scale, follow this method for the best results:
- Aerate the Flour: Flour settles and becomes compact in its container. Before measuring, use a whisk or spoon to gently fluff it up. This is different from sifting; you are simply lightening the flour within the bag or container. Do not sift unless the recipe explicitly states to do so.
- Spoon into Measuring Cup: Using a spoon, gently sprinkle the aerated flour into your dry measuring cup. Do not pack it down or tap the cup against the counter, as this will compact the flour and result in an inaccurate, excessive measurement.
- Level Off: Once the cup is mounded with flour, use the flat back of a butter knife or a straight edge to level off the excess, ensuring a precise measurement.
By following this spoon-and-sweep method, you prevent over-measuring, which is a common cause of dry baked goods.
Expert Tips for Chocolate Cupcake Perfection
Achieving consistently perfect chocolate cupcakes is within your reach with these helpful tips:
- Measure Flour Accurately: As highlighted above, using the spoon-and-sweep method is paramount. Scooping directly from the bag compacts the flour, adding too much to your recipe and leading to dry cupcakes.
- Do Not Over-fill Cupcake Liners: For perfectly domed cupcakes that don’t spill over, fill your muffin liners no more than halfway full. This allows ample room for the batter to rise beautifully.
- Avoid Overmixing the Batter: Once you add the dry ingredients to the wet, mix only until just combined. Overmixing develops the gluten in the flour, which can result in tough, chewy cupcakes instead of tender ones.
- Use Room Temperature Ingredients: Ensure butter, eggs, and buttermilk are at room temperature. This helps them emulsify properly, creating a smoother batter and a more consistent texture in the final product.
- Don’t Make Substitutions Unless Noted: Baking is a science, and ingredients often play specific roles. For the best results, especially on your first attempt, follow the recipe as written.
- Cool Completely Before Frosting: This cannot be stressed enough! Warm cupcakes will melt your frosting, turning your beautiful swirls into a sticky mess.
Storing Your Divine Chocolate Cupcakes
To keep your moist chocolate cupcakes fresh and delicious, proper storage is essential:
For short-term enjoyment (2 to 3 days), frosted chocolate cupcakes are best stored at room temperature. Place them in an airtight container to prevent them from drying out, or if they are too tall for a container, loosely cover them with plastic wrap or foil on a plate. This helps maintain their soft texture and prevents the frosting from becoming stiff.
Can I Freeze Chocolate Cupcakes?
Absolutely! These chocolate cupcakes freeze beautifully, allowing you to enjoy them long after baking. To freeze, place the unfrosted cupcakes on a sheet pan and freeze them uncovered for about 30 minutes, or until they are firm. If they are already frosted, freeze them uncovered until the frosting is solid. Once firm, individually wrap each cupcake tightly in plastic wrap, then place them in a freezer bag or an airtight freezer-safe container. They will keep well in the freezer for up to 3 months. When you’re ready to enjoy, simply let them thaw at room temperature for a few hours before serving. If unfrosted, you can then apply fresh frosting.
Beyond Chocolate: Other Frosting Pairings for Your Moist Chocolate Cupcakes
While classic chocolate frosting is undeniably delightful, these versatile chocolate cupcakes pair wonderfully with a variety of other frostings. Don’t hesitate to experiment and find your favorite combination!
- Cream Cheese Frosting
- Salted Caramel Frosting
- Peanut Butter Frosting
- Spiced Buttercream Frosting
- Espresso Frosting
- Peppermint Buttercream
- Pumpkin Buttercream
- Classic Vanilla Frosting
- Chocolate Whipped Cream
- Strawberry Whipped Cream
- Coffee Whipped Cream
- Root Beer Whipped Cream
- Peanut Butter Whipped Cream
Moist Chocolate Cupcake Recipe FAQs
Hot water plays a critical role in intensifying the chocolate flavor of the cocoa powder through a process known as “blooming.” This means that when the hot water is added, it helps to dissolve and activate the cocoa solids, resulting in a much richer, deeper, and more pronounced chocolate taste in your baked goods. It also aids in creating a smooth batter consistency and can help to activate baking soda if there are acidic ingredients present.
Generally, no. If you’re using good quality paper or foil cupcake liners, they are designed to be non-stick and release the cupcakes easily without the need for additional greasing or spraying. Spraying can sometimes even lead to the liners peeling away from the cupcakes. However, if you are unsure of the quality of your liners or if they tend to stick, a very light spray of non-stick cooking spray can be used as a precautionary measure.
Achieving super moist cupcakes is a combination of key ingredients and careful technique. Our recipe excels in this by relying on several moisture-rich components. Buttermilk is an essential ingredient, providing both moisture and a tender crumb due to its acidity. An equal amount of sour cream can be a suitable substitute. The inclusion of real melted chocolate in the batter not only deepens the chocolate flavor but also adds fat and moisture, contributing to a rich, moist texture. Additionally, ensuring all your ingredients are at room temperature helps create a smoother, more emulsified batter that bakes evenly and retains moisture. Finally, not overmixing and not overbaking are crucial to prevent dry cupcakes.
While they might look similar, chocolate cupcakes and muffins have distinct characteristics. Chocolate cupcakes are typically sweeter and have a much lighter, fluffier texture, achieved through creaming butter and sugar together and often incorporating more fat and sugar. They are almost always topped with a rich, decorative frosting, positioning them as a dessert. Chocolate muffins, on the other hand, are generally less sweet, have a denser, heartier crumb, and are often made using the “muffin method” where wet and dry ingredients are mixed separately and then quickly combined. They rarely feature frosting and are more commonly enjoyed for breakfast or as a less indulgent snack.
While chocolate chips can technically be melted, a high-quality chocolate baking bar (bittersweet or semi-sweet) is highly recommended for this recipe. Baking bars are formulated to melt smoothly and evenly, providing a superior flavor and texture to your cupcakes. Chocolate chips often contain stabilizers that prevent them from melting as smoothly, potentially resulting in a grainy texture in your batter. If you must use chocolate chips, opt for good quality semi-sweet chips and melt them very slowly to avoid scorching.
Indulge Further: More Irresistible Chocolate Desserts
If you’re a true chocolate lover, explore these other fantastic recipes that celebrate the rich, decadent flavor of chocolate:
- Doctored Up Chocolate Cupcakes (from a mix)
- Easy Chocolate Cake (from a mix)
- Healthy Chocolate Fudge Cake
- Decadent Chocolate Cheesecake
- How to Make Box Brownies Better
- Double Chocolate Chip M&M Cookies
This recipe is highly rated by fellow bakers!
Moist Chocolate Cupcake Recipe
Beth
25 minutes
17 minutes
1 hour 30 minutes
~2 hours
24 cupcakes
Equipment
-
Glass Mixing Bowl
-
Electric Mixer (e.g., KitchenAid 9-Speed Mixer)
-
Muffin Pan
-
Kitchen Scale (recommended for accuracy)
-
Spatula
Ingredients
Chocolate Cupcakes
- 2 ½ cups (300g) all-purpose flour
- ⅓ cup (28g) natural unsweetened cocoa powder
- ½ tsp baking soda
- 1 tsp baking powder
- 1 tsp salt
- ½ cup (113g) unsalted butter, room temperature (1 stick)
- 1 ½ cups (297g) granulated sugar
- 3 oz bittersweet chocolate baking bar, melted & cooled
- 2 large eggs
- 1 cup (236ml) buttermilk
- ½ cup (118ml) hot tap water
Chocolate Frosting
- 2 cups (452g) unsalted butter, room temperature (4 sticks)
- 1 cup (84g) natural unsweetened cocoa powder
- 4-5 cups (454-567g) powdered sugar
- 3-4 Tbsp heavy whipping cream
- 1 tsp vanilla extract
- ½ tsp salt
Instructions
Chocolate Cupcakes
-
Preheat the oven to 350º F (175°C). Line a muffin pan with muffin liners.
-
Rough chop the bittersweet chocolate baking bar into smaller pieces, place in a microwave safe bowl and microwave for 2 minutes on 50% power. Stir and repeat until melted and smooth. Set aside to cool.3 oz bittersweet chocolate baking bar
-
In a mixing bowl, combine the all-purpose flour, unsweetened natural cocoa powder, baking soda, baking powder, and salt. Whisk well and set aside.2 ½ cups (300g) all-purpose flour, ⅓ cup (28g) natural unsweetened cocoa powder, ½ tsp baking soda, 1 tsp baking powder, 1 tsp salt
-
In a separate large mixing bowl, beat the room-temperature butter and granulated sugar with an electric mixer for 2 minutes, until the mixture is pale and fluffy. Add in the large eggs one at a time, mixing briefly after each. Then, beat in the cooled melted chocolate until just combined (about 30 seconds).½ cup (113g) unsalted butter, room temperature, 1 ½ cups (297g) granulated sugar, 2 large eggs
-
Add in half of the buttermilk to the wet ingredients, beat on low speed for about 20 seconds. Then, add half of the dry ingredients and beat until just combined. Next, add the remaining buttermilk along with the hot water, beating just until the liquid is mixed in. Finally, add the remaining dry ingredients and beat on low speed until the batter is smooth and no streaks of flour remain. Be careful not to overmix.1 cup (236ml) buttermilk, ½ cup (118ml) hot tap water
-
Fill the muffin liners about 1/2 full with batter. Bake for 17-19 minutes at 350º F (175°C), or until a toothpick inserted into the center of a cupcake comes out with only a few moist crumbs. Allow the cupcakes to cool in the pan for a few minutes, then transfer to a wire rack to cool completely before adding the frosting.
Chocolate Frosting
-
In a mixing bowl, beat the room-temperature unsalted butter on high speed for 3 minutes until light and fluffy.2 cups (452g) unsalted butter, room temperature
-
Sift in the cocoa powder and 3 cups of powdered sugar into the bowl. Beat the frosting on low speed until combined and thick, then increase to medium-high and beat until light and fluffy. Sifting helps prevent clumps and ensures a smooth frosting.1 cup (84g) natural unsweetened cocoa powder, 4-5 cups (454-567g) powdered sugar
-
Mix in 3 tablespoons of heavy cream, vanilla extract, and salt until well combined.3-4 Tbsp heavy whipping cream, 1 tsp vanilla extract, ½ tsp salt
-
Taste the frosting and add additional powdered sugar (1-2 cups) if needed for desired sweetness and consistency, mixing on low speed until combined. If the frosting is too thick, beat in an additional tablespoon of heavy cream until it reaches a pipeable consistency.
Assemble
-
Fit a piping bag with your desired piping tip (a Wilton 1M is recommended for beautiful swirls). Fill the bag about three-quarters full with frosting. Pipe the frosting onto the completely cooled cupcakes. Decorate with chocolate curls or sprinkles if desired for an extra festive touch.
Notes
- Yields approximately 24 standard cupcakes.
- Always fill cupcake liners only about 1/2 full to prevent spillage and ensure even baking.
- Moist chocolate cupcakes are best stored at room temperature. Place them in an airtight container or loosely cover them on a plate; they’ll last up to 2 to 3 days.
- How to Properly Measure Flour:
- Fluff the flour with a fork or whisk before measuring.
- Use a spoon to gently scoop the flour into your dry measuring cup.
- Use the back of a butter knife or a straight edge to level off the flour in the measuring cup. This “spoon-and-sweep” method prevents over-measuring.
Sticking the measuring cup straight into the bag of flour will compact it, resulting in too much flour and potentially dry cake.
Nutrition Facts (per cupcake)
Calories: 392 kcal
Carbohydrates: 48g
Protein: 4g
Fat: 23g
Saturated Fat: 14g
Polyunsaturated Fat: 1g
Monounsaturated Fat: 6g
Trans Fat: 1g
Cholesterol: 68mg
Sodium: 207mg
Potassium: 134mg
Fiber: 2g
Sugar: 34g
Vitamin A: 654 IU
Vitamin C: 1mg
Calcium: 41mg
Iron: 2mg
Nutrition Disclosure
All nutritional values are approximate and provided to the reader as a courtesy. Changing ingredients and/or quantities will alter the estimated nutritional calculations.
I hope you enjoy baking and sharing these incredible moist chocolate cupcakes as much as I enjoyed perfecting the recipe for you. Happy baking!