
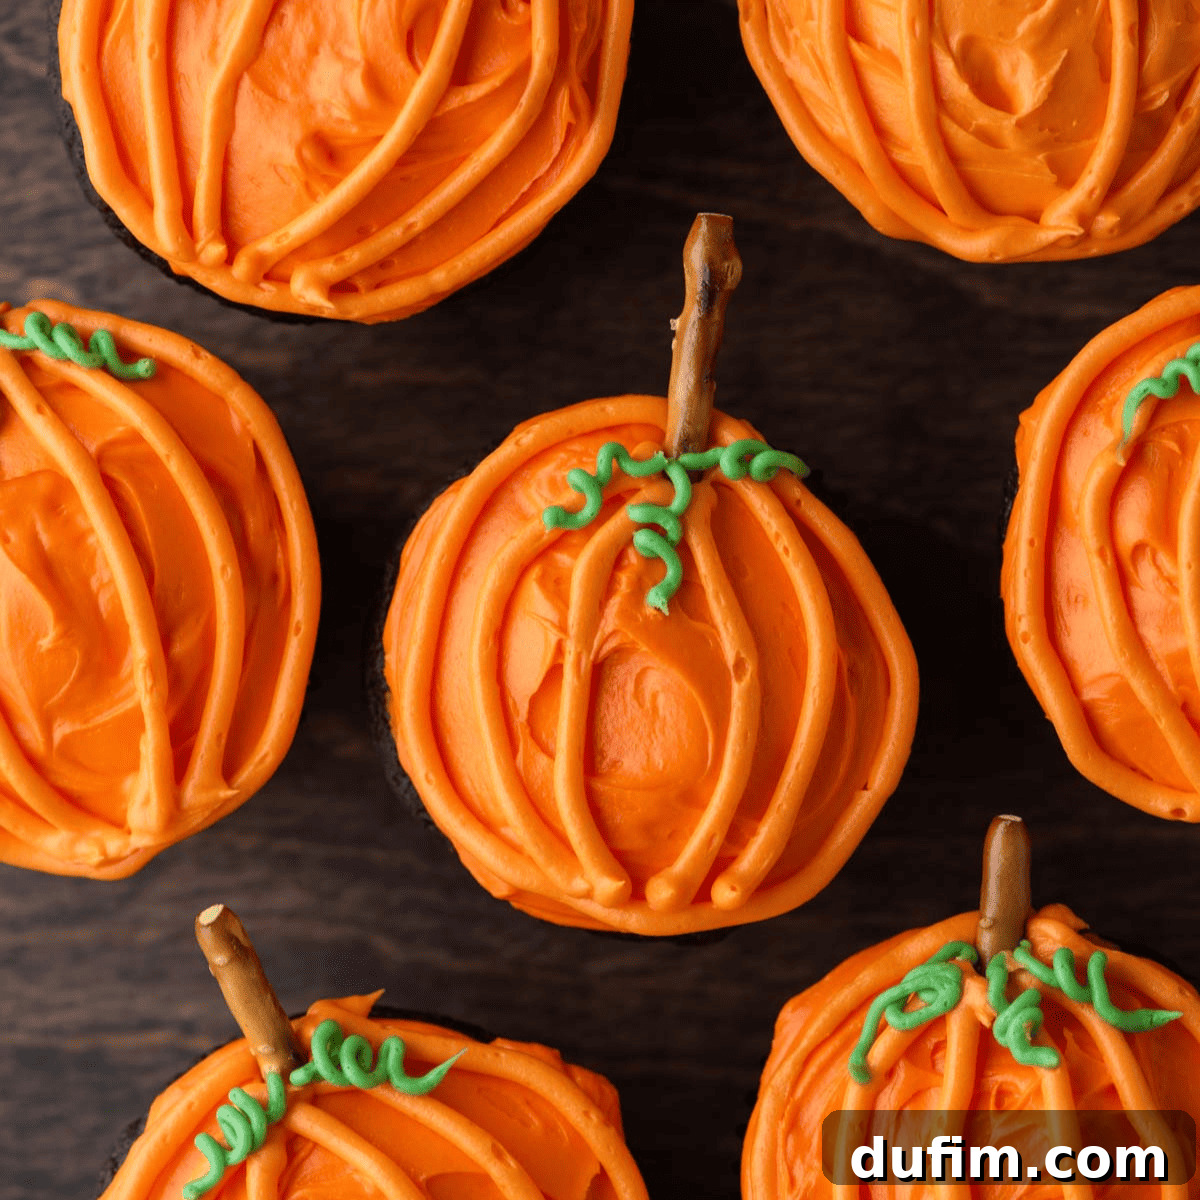
Are you ready to create stunning pumpkin patch cupcakes that will charm everyone with their irresistible look and exquisite taste? My simplified recipe guides you through baking incredibly moist, rich chocolate cupcakes and crafting a smooth, delicious homemade frosting. Follow these straightforward steps, and you’ll master the art of pumpkin cupcake perfection!
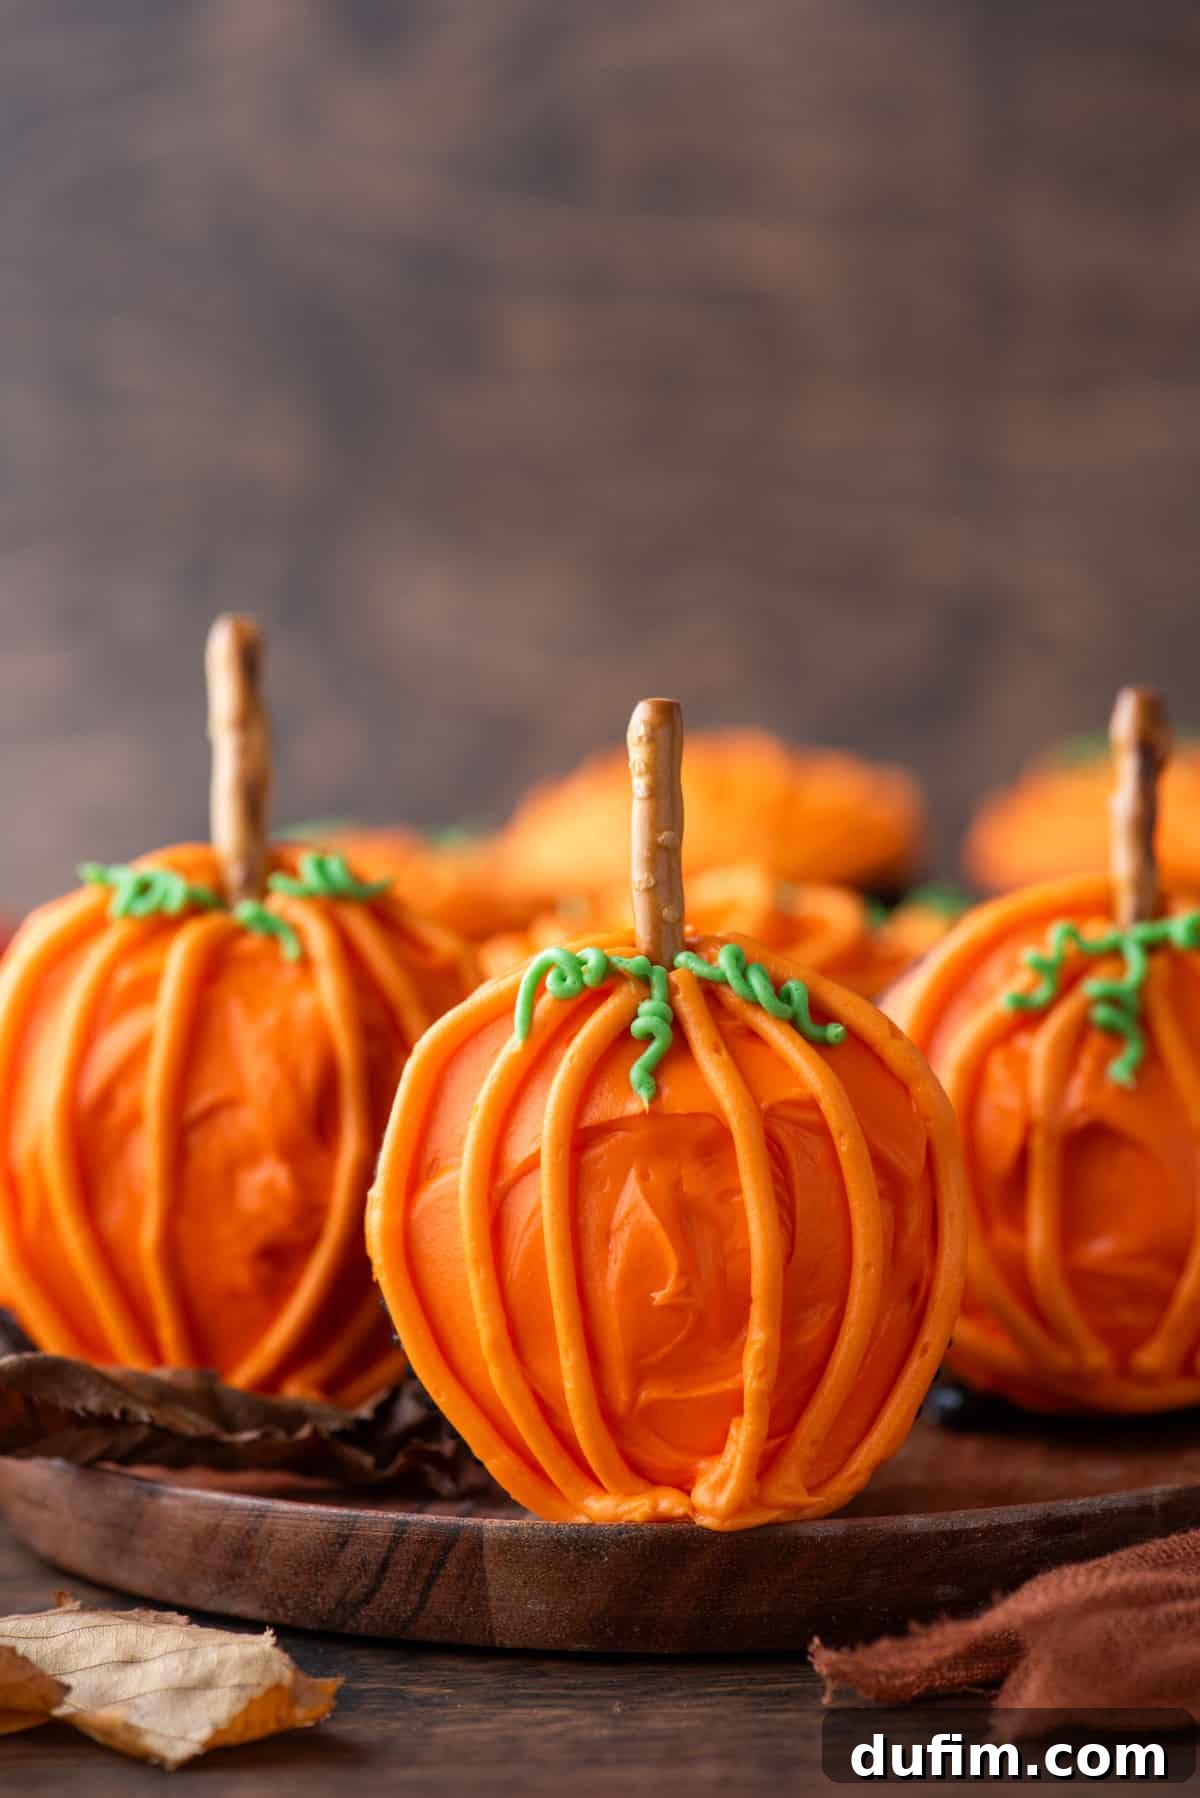
These Pumpkin Patch Cupcakes Are the Ultimate Fall Treat!
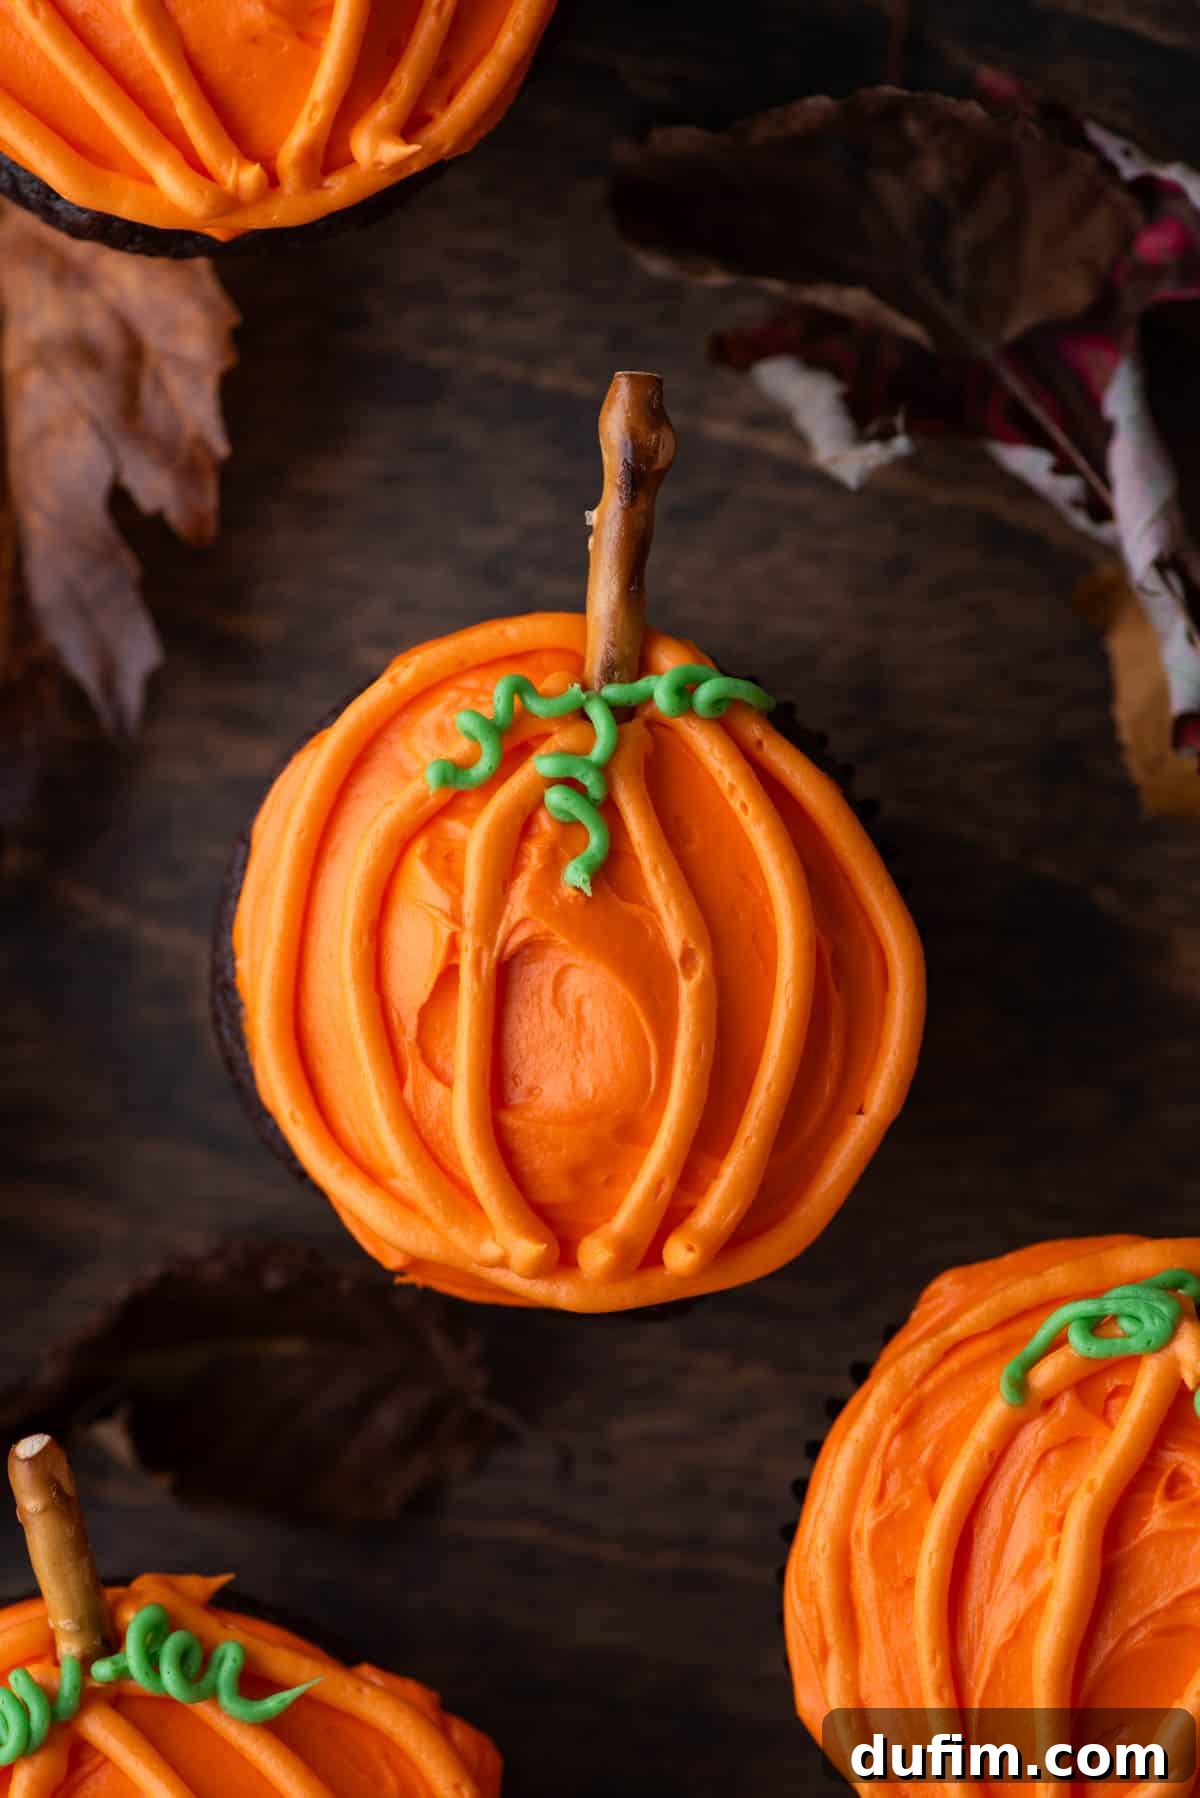
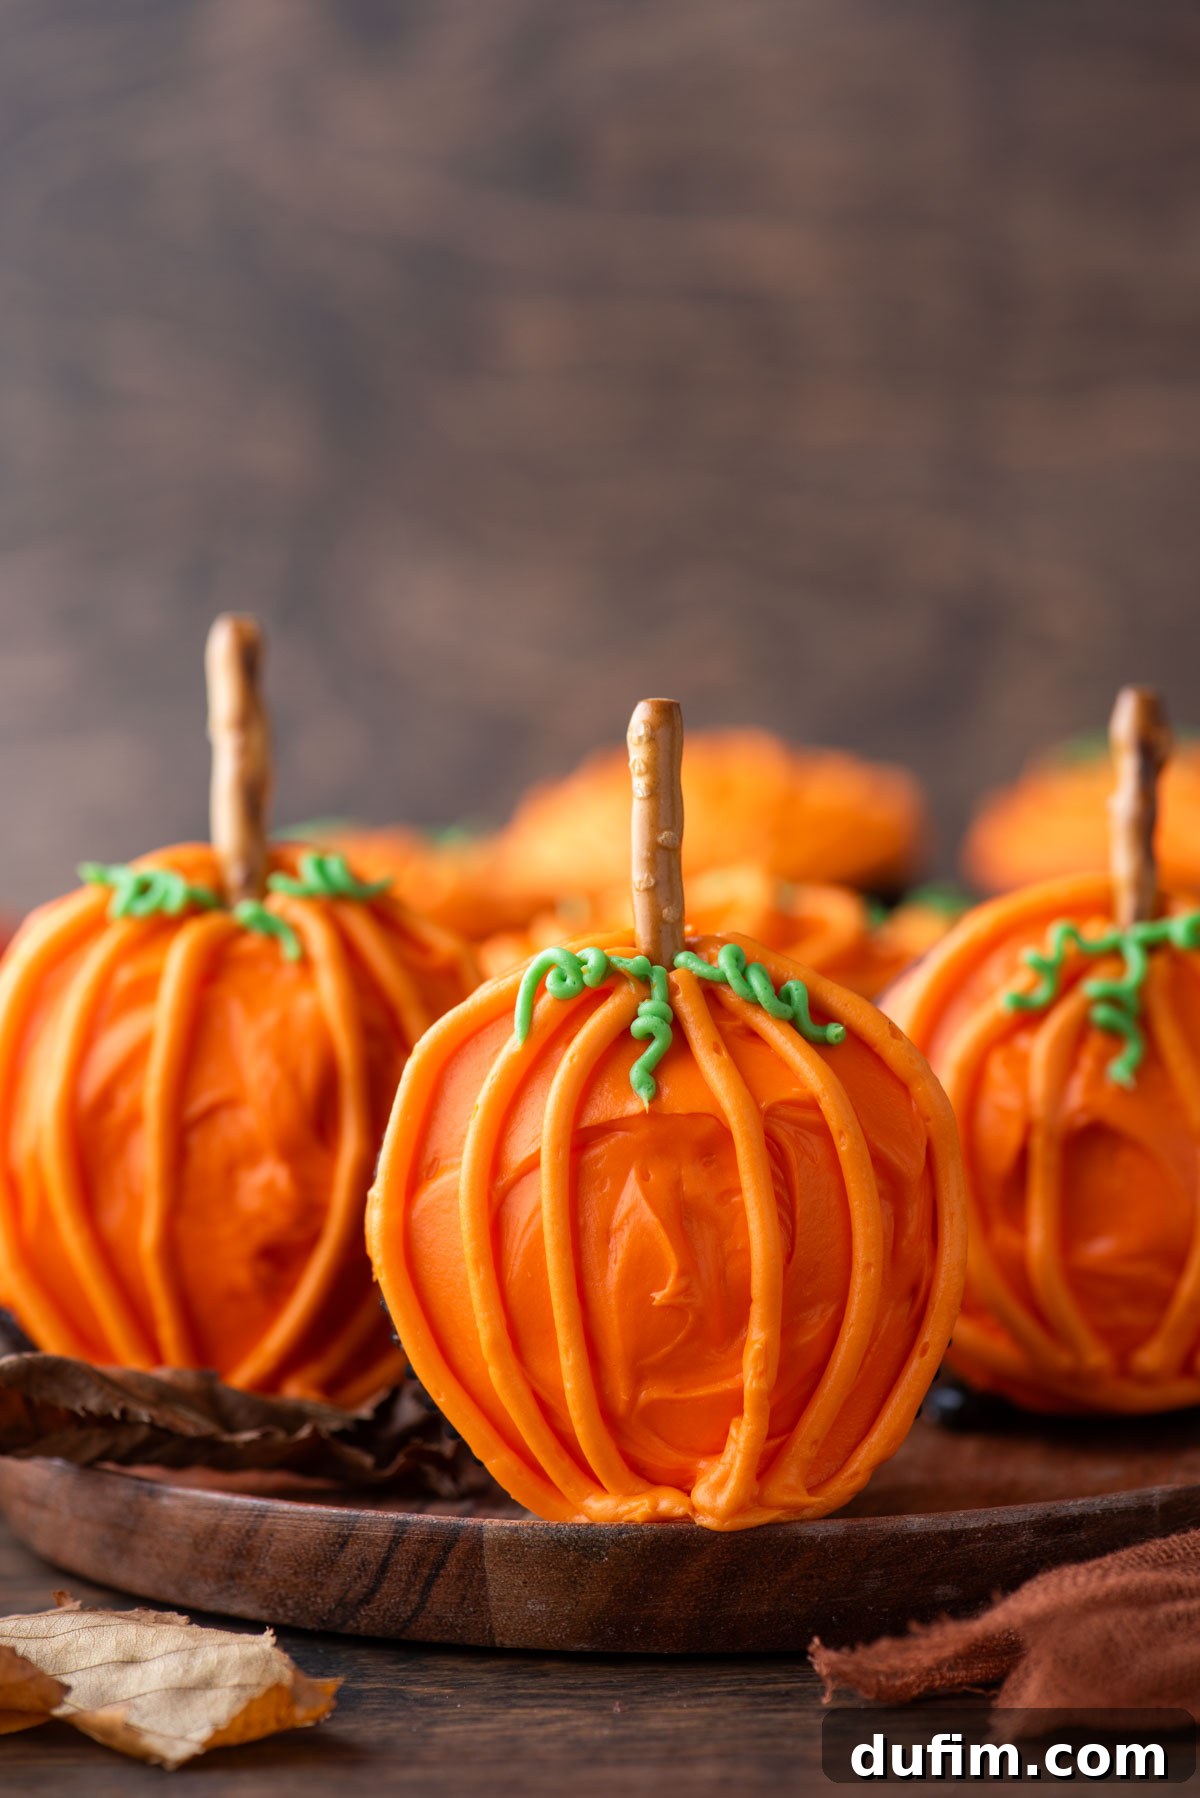
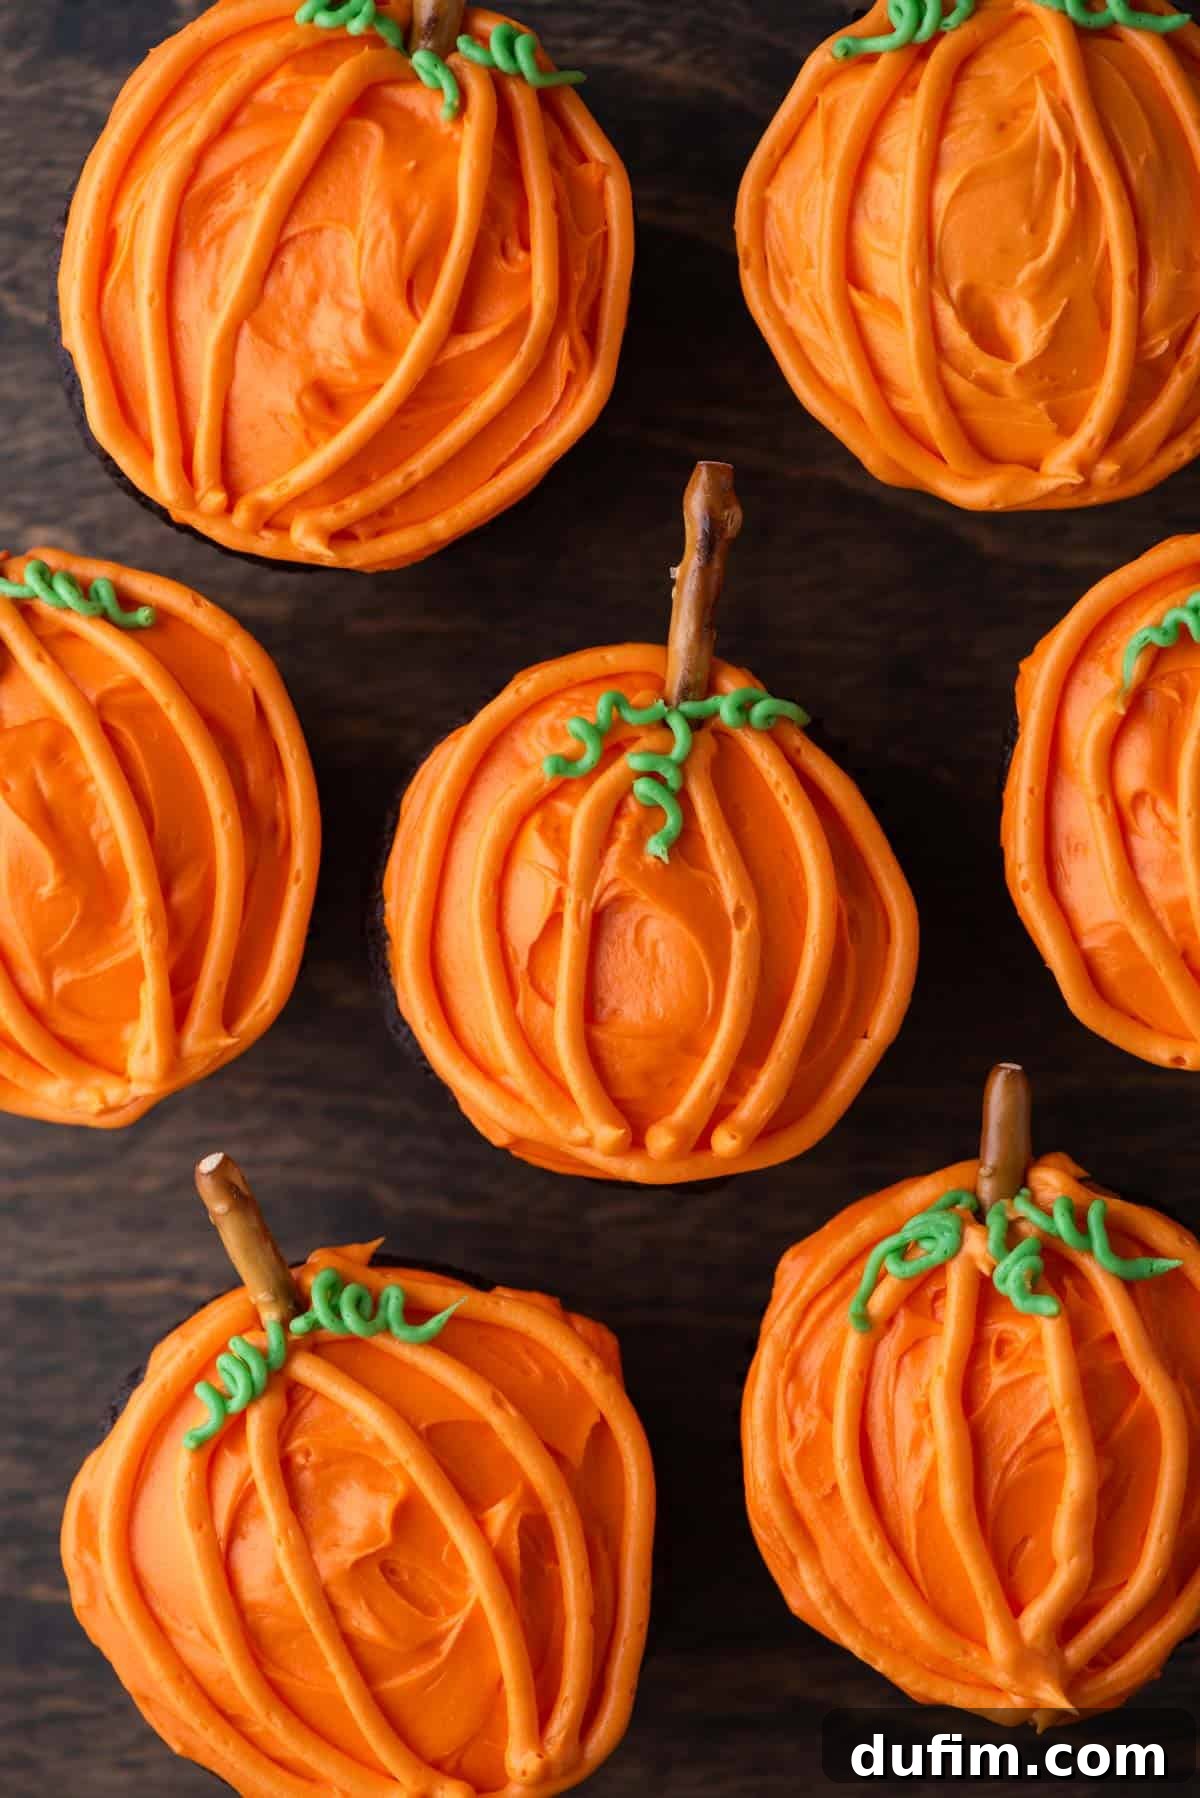
As autumn leaves begin to turn and the air grows crisp, nothing captures the cozy spirit of the season quite like these delightful pumpkin patch cupcakes. This recipe transforms my absolute favorite chocolate cupcake base into charming edible pumpkins, complete with easy homemade vanilla frosting and a crunchy pretzel stick stem. You don’t need to be an experienced baker to bring these “gourd-geous” treats to life; I’ll walk you through each step, ensuring your success from start to finish!
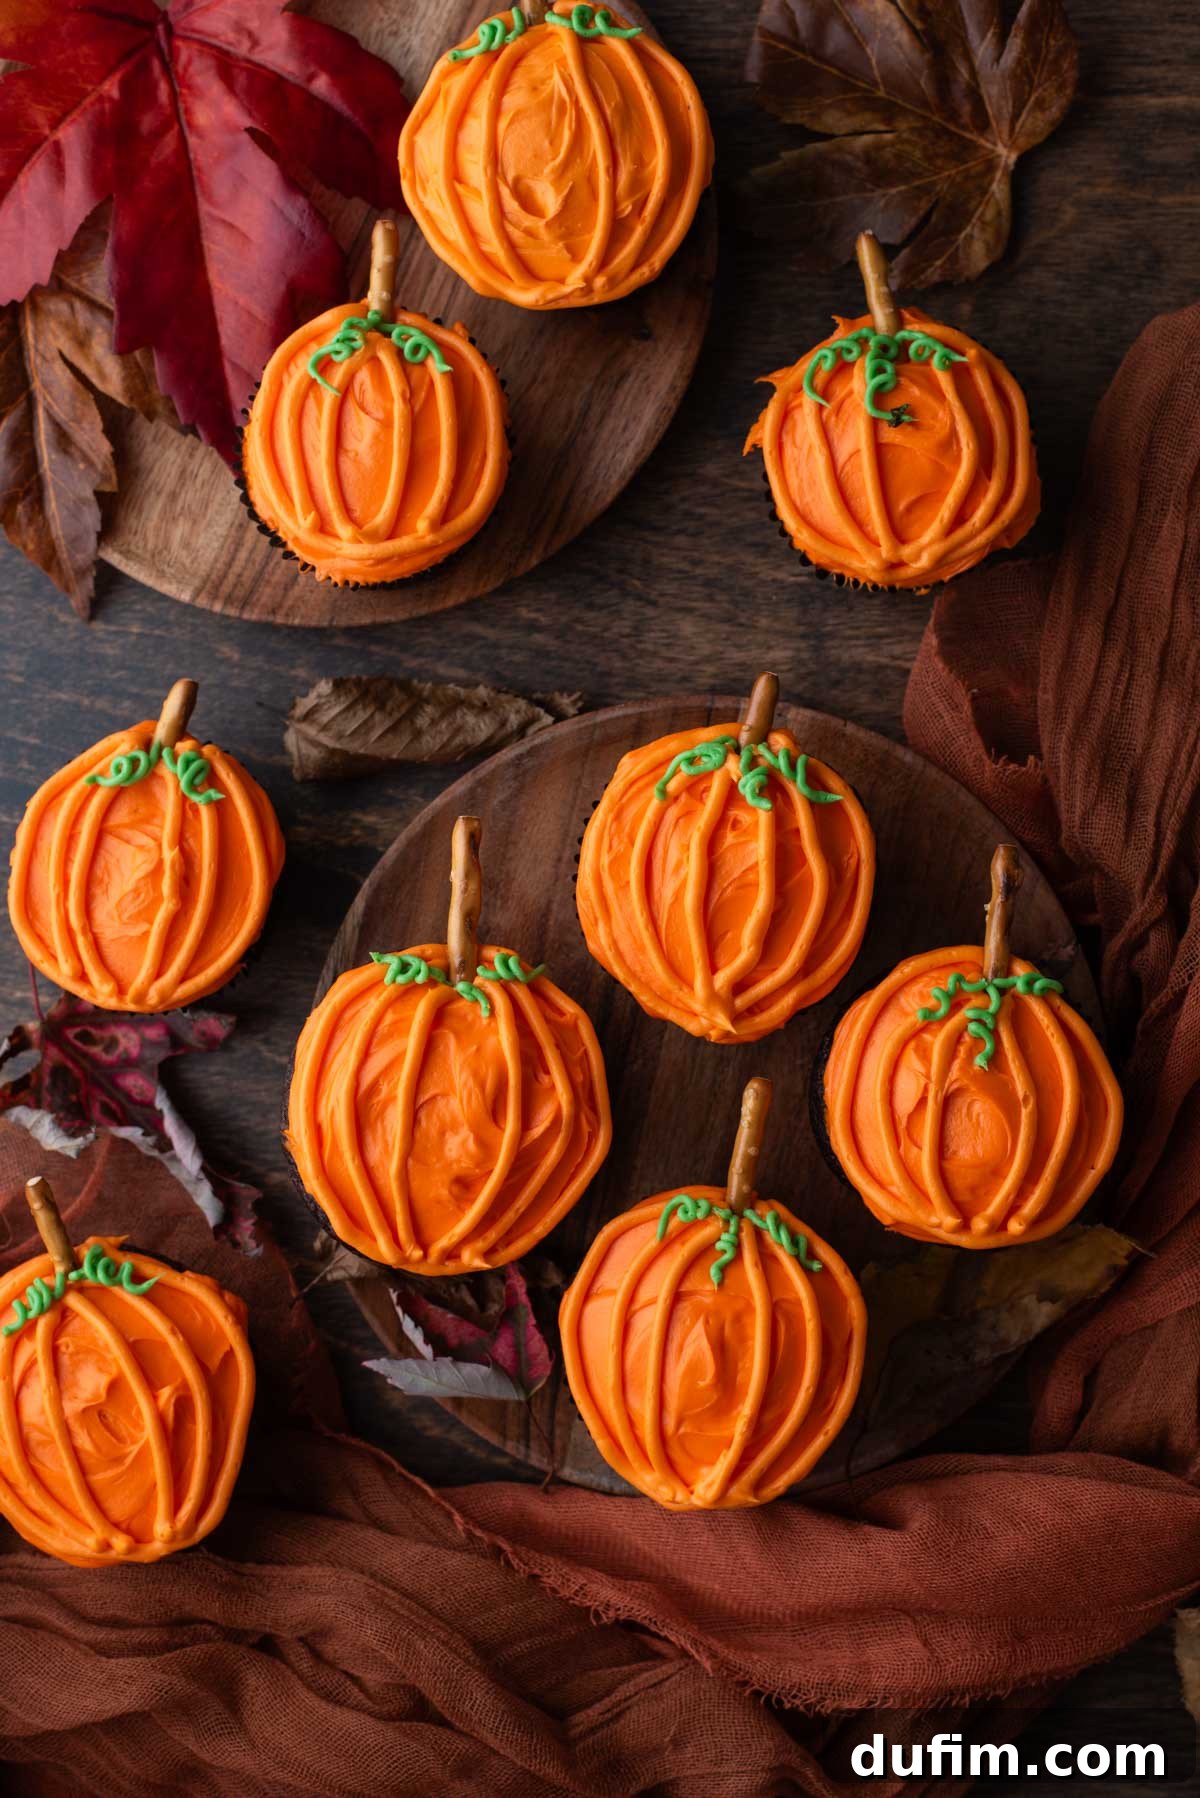
Visiting a pumpkin patch is a cherished family tradition, and these cupcakes bring that joyful experience right into our kitchen. They are truly perfect for any fall occasion: imagine them gracing the dessert table at a school bake sale, delighting guests at a Halloween party, or simply providing a fun, sweet surprise for your loved ones on a quiet afternoon. Their vibrant colors and whimsical design make them an instant hit, creating smiles and lasting memories with every bite.
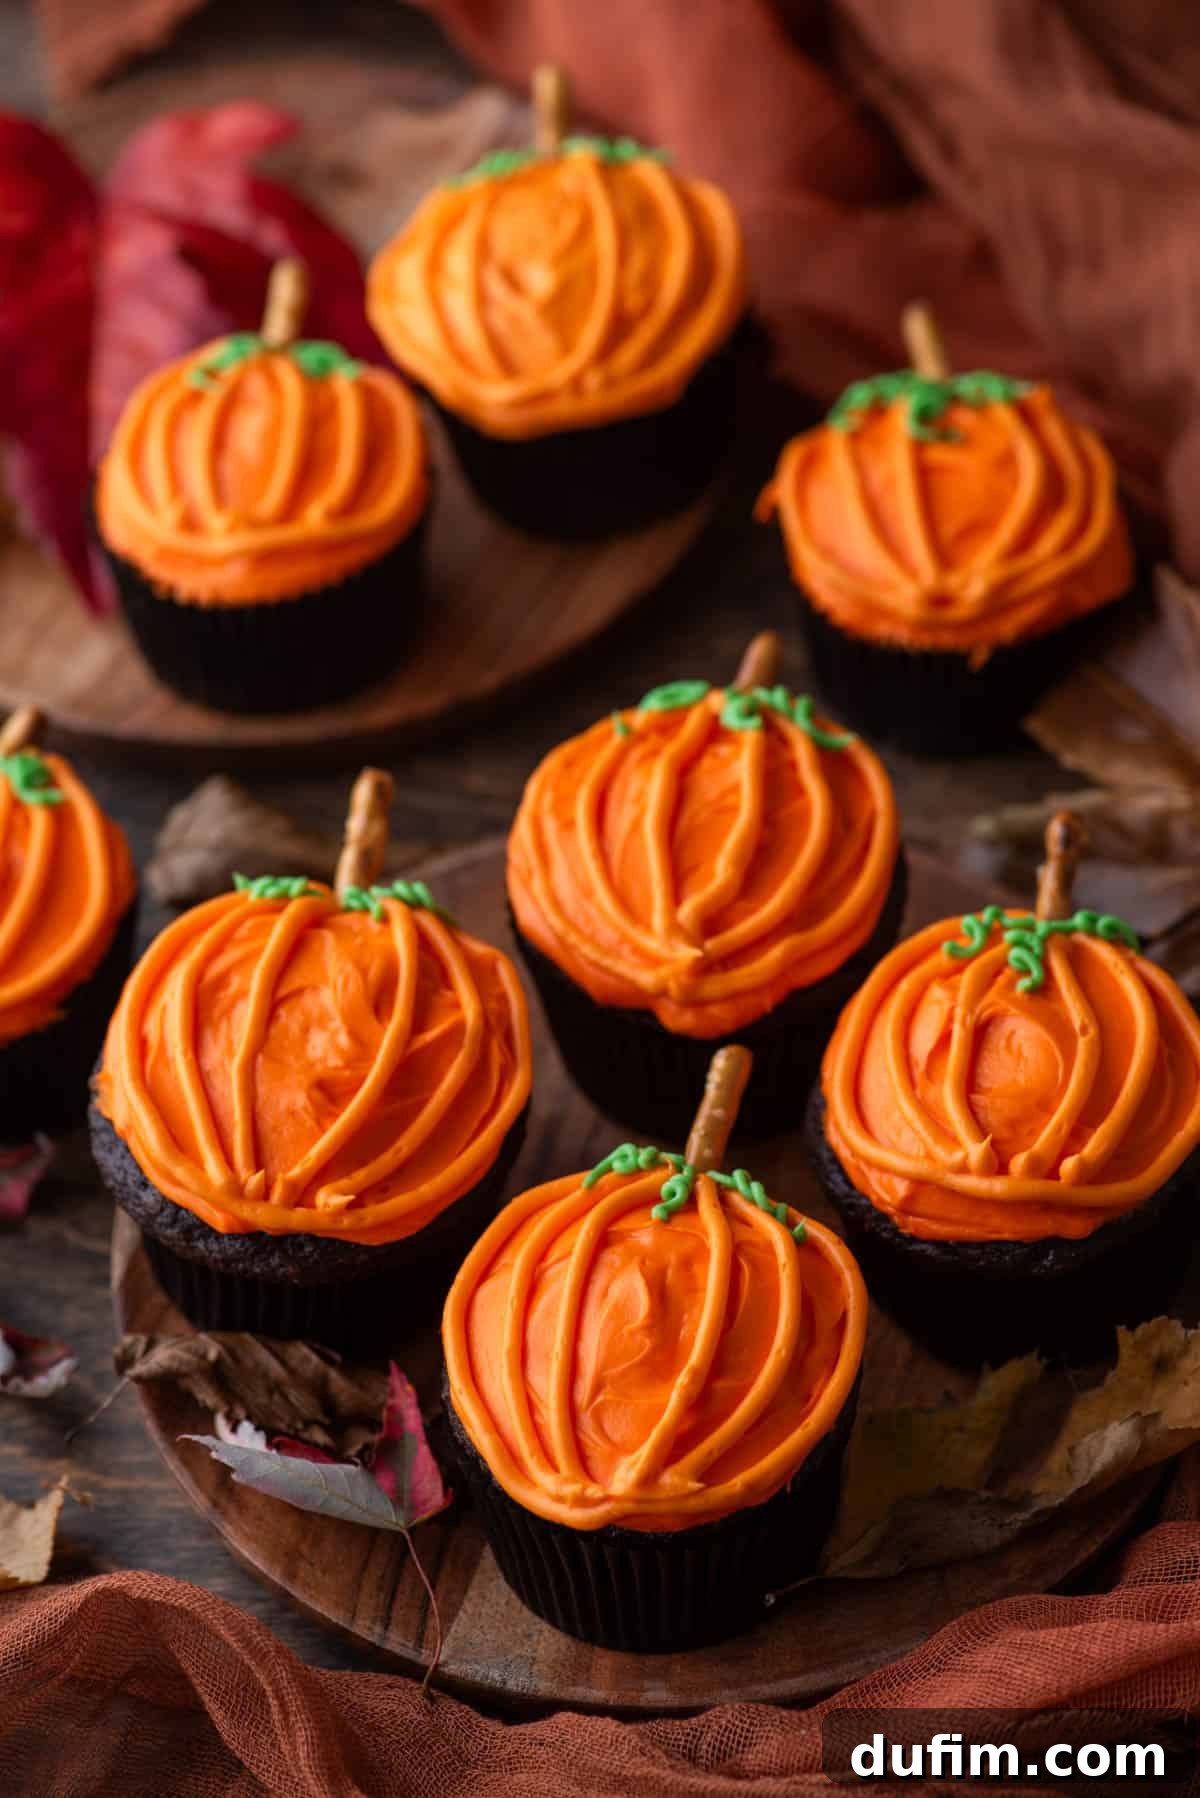
Why You’ll Adore These Pumpkin Patch Cupcakes
Beyond their charming appearance, these cupcakes offer a host of reasons to become your new go-to fall dessert:
- **The Quintessential Fall & Halloween Treat:** Their festive design and comforting flavors make them ideal for any autumn gathering, from harvest festivals to spooky Halloween celebrations. They’re a crowd-pleaser that perfectly embodies the season.
- **Rich, Moist Chocolate Cupcakes:** The foundation of these treats is a deeply flavorful and incredibly tender chocolate cupcake. Made with quality cocoa powder, they provide a delightful contrast to the sweet frosting, ensuring a balanced and satisfying dessert experience.
- **Effortlessly Easy-to-Follow Instructions:** Forget complicated baking projects! This recipe is designed for bakers of all skill levels. Each step is clearly outlined, making the process enjoyable and stress-free.
- **Simple Homemade Frosting & Decorating Techniques:** Learn to whip up a velvety vanilla buttercream that’s a dream to work with. Our decorating guide uses basic piping skills to transform plain cupcakes into adorable pumpkins, complete with a pretzel stem and delicate green vines.
- **Picture-Perfect Pumpkin Design:** The final result is a collection of charming, realistic-looking pumpkins that are almost too cute to eat! Their visual appeal makes them fantastic for impressing guests and creating a festive atmosphere.
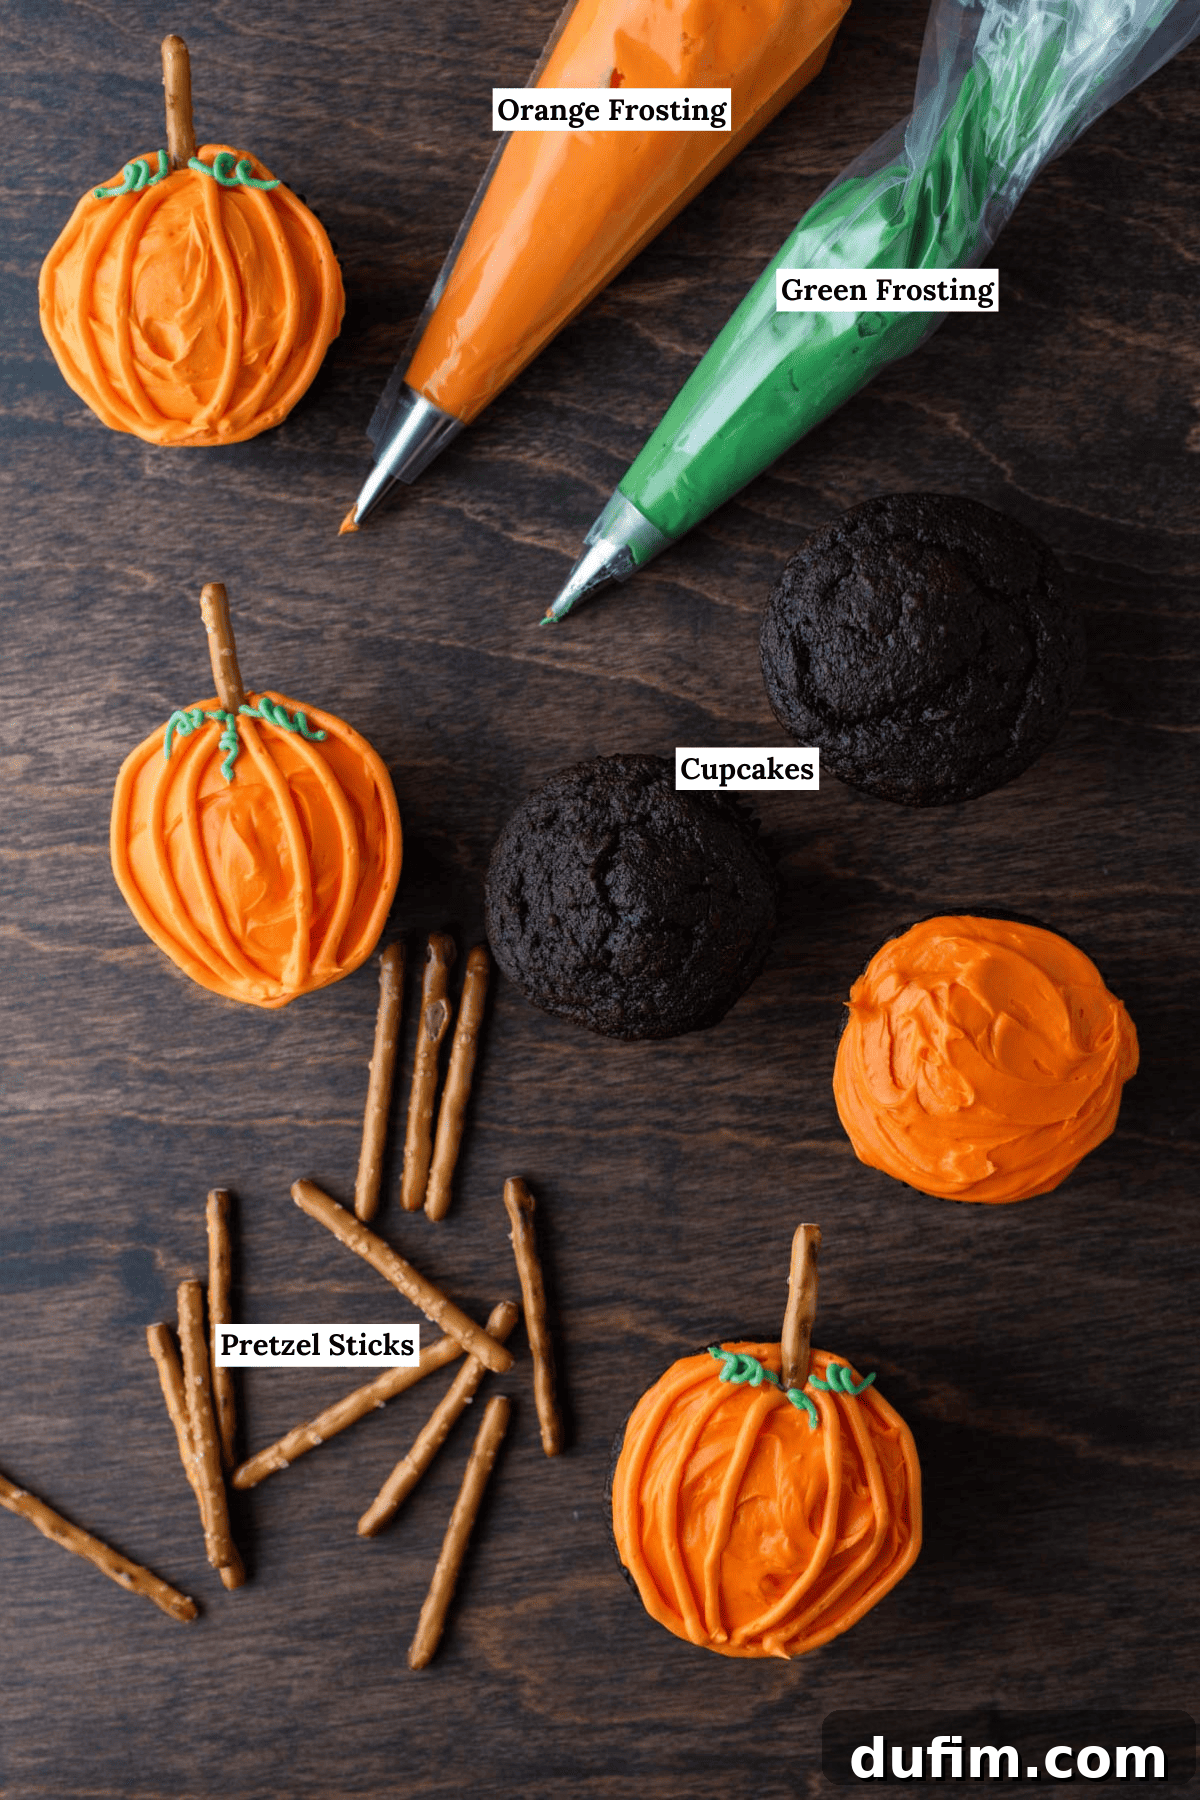
Essential Ingredients & Tools for Your Pumpkin Patch Cupcakes
Crafting these delightful Halloween and Fall pumpkin patch cupcakes is a joy, thanks to their accessible ingredients and minimal specialized equipment. Here’s a detailed list of everything you’ll need to create your batch of festive treats.
For the Moist Chocolate Cupcakes:
The base of these delightful treats is a tender and rich chocolate cupcake. Using high-quality ingredients ensures the best flavor and texture.
- **All-purpose flour:** The structural backbone of our cupcakes. Measure correctly for optimal texture.
- **Cocoa powder:** Use natural unsweetened or Dutch-processed cocoa powder for deep chocolate flavor. Dutch-processed creates a darker crumb and milder taste.
- **Instant coffee granules:** (Optional) A secret ingredient that enhances the chocolate flavor without making the cupcakes taste like coffee.
- **Baking soda:** Works with buttermilk to create lift and tenderness.
- **Baking powder:** Provides additional leavening for a fluffy texture.
- **Salt:** Balances the sweetness and amplifies the chocolate notes.
- **Unsalted butter:** Essential for richness and moisture. Remember to let it come to room temperature for easier creaming and a smoother batter.
- **Granulated sugar:** Provides sweetness and contributes to the cupcakes’ tender crumb.
- **Large eggs:** Bind the ingredients and add structure. Ensure they are at room temperature.
- **Buttermilk:** Adds tanginess, moisture, and reacts with baking soda for leavening. If you don’t have buttermilk, you can make your own by adding 1 tablespoon of white vinegar or lemon juice to a measuring cup, then filling the rest with milk and letting it sit for 5-10 minutes.
- **Hot tap water:** Helps bloom the cocoa powder, intensifying its flavor, and thins the batter to the perfect consistency.
For the Creamy Vanilla Frosting:
This simple buttercream is perfect for piping and holds its shape beautifully for decorating.
- **Unsalted butter:** The base of our rich frosting. Softened to room temperature is crucial for a smooth, lump-free consistency.
- **Vanilla extract:** Provides that classic, comforting vanilla flavor that pairs wonderfully with chocolate.
- **Powdered sugar:** Also known as confectioners’ sugar, it gives the frosting its smooth texture and sweetness. Sifting can prevent lumps.
- **Milk or heavy cream:** Used to adjust the frosting’s consistency if it becomes too thick. Start with a small dash and add more as needed.
Essential Extras for Decorating:
These tools and decorative elements are key to transforming your cupcakes into an adorable pumpkin patch.
- **Piping bag:** Essential for precisely applying frosting and creating decorative details.
- **Wilton 4 piping tip:** Ideal for piping the characteristic pumpkin lines.
- **Wilton 2 piping tip:** Perfect for delicate details like curly green vines.
- **Orange and green gel food coloring:** Gel colors provide vibrant hues without thinning your frosting.
- **Pretzel sticks:** The perfect edible stems for your little pumpkins, adding a delightful salty crunch.
How to Create These Charming Pumpkin Patch Cupcakes
Get ready to embark on a delightful baking journey that will transport you straight to a whimsical pumpkin patch! These cupcakes are not only incredibly tasty but also surprisingly easy and immensely fun to make. Just follow my detailed, step-by-step instructions below, and you’ll have a batch of beautifully decorated pumpkin patch cupcakes ready to impress. For exact measurements and a printable version, refer to the complete recipe card at the end of this article.
Baking the Moist Chocolate Cupcakes:
The secret to an irresistible cupcake lies in its foundation. These chocolate cupcakes are rich, tender, and the perfect canvas for our pumpkin design.
- **Prepare Your Workspace:** Begin by preheating your oven to 350º F (175º C). Line a standard 12-cup muffin tin with cupcake liners. This ensures your cupcakes bake evenly and prevents sticking.
- **Combine Dry Ingredients:** In a medium-sized bowl, whisk together the all-purpose flour, unsweetened natural cocoa powder, instant coffee granules (if using), baking soda, baking powder, and salt. Whisking thoroughly ensures all leavening agents and flavors are evenly distributed. Set this dry mixture aside.
- **Cream Wet Ingredients:** In a large mixing bowl, using an electric mixer (stand mixer or handheld), beat the softened unsalted butter and granulated sugar together for about 2 minutes. Continue beating until the mixture is light, pale, and fluffy. This creaming process incorporates air, which contributes to the cupcakes’ tender texture. Next, add the large eggs, one at a time, beating for 30 seconds after each addition until fully incorporated. Scrape down the sides of the bowl as needed.
- **Alternate Wet and Dry Additions:** To prevent overmixing, we’ll add the remaining ingredients in stages. First, add half of the buttermilk to the wet ingredients, mixing on low speed for about 20 seconds until just combined. Then, add half of the dry flour mixture, mixing until no streaks of flour remain. Next, pour in the remaining buttermilk along with the hot water, mixing briefly until the liquids are just incorporated. Finally, add the remaining dry ingredients and beat on low speed only until the batter is smooth and no dry spots are visible. Be careful not to overmix, as this can lead to tough cupcakes.
- **Bake to Perfection:** Divide the batter evenly among the prepared muffin liners, filling each approximately 1/2 full. Bake for 17-19 minutes, or until a wooden toothpick inserted into the center of a cupcake comes out with a few moist crumbs attached, but no wet batter. Immediately transfer the baked cupcakes to a wire rack to cool completely. Cooling thoroughly is crucial before frosting to prevent the frosting from melting.
Preparing the Velvety Vanilla Frosting:
This easy homemade frosting is perfectly creamy and adaptable, ready to be colored and piped into charming pumpkin designs.
- **Cream Butter and Vanilla:** In a large mixing bowl, combine the softened unsalted butter and vanilla extract. Using an electric mixer, beat on medium speed for 1-2 minutes until the butter is light, fluffy, and pale in color.
- **Gradually Add Powdered Sugar:** With the mixer on low speed, gradually add the powdered sugar, one cup at a time, until it is fully incorporated and the frosting comes together. This prevents a cloud of sugar from forming!
- **Coloring (Optional, but Recommended for Pumpkins!):** If you plan to color your frosting (which you will for these pumpkin cupcakes!), now is the ideal time to do so. Divide the frosting as needed before adding specific colors.
- **Taste and Adjust Consistency:** Taste the frosting and add more powdered sugar if you prefer it sweeter or a bit firmer. If the frosting becomes too thick for piping, add a small dash of milk or heavy cream (start with half a teaspoon) and beat until it reaches your desired creamy consistency.
- **For Extra Fluffiness (Optional):** For an exceptionally light and airy frosting, add 1/4 cup of heavy whipping cream when you add the last portion of powdered sugar. Continue to whip the frosting on medium-high speed for an additional 3-4 minutes. This incorporates more air, creating a wonderfully fluffy texture.
Assembling Your Adorable Pumpkin Patch Cupcakes:
Now for the fun part – transforming your chocolate cupcakes into a festive pumpkin patch!
- **Prepare Green Frosting:** Set aside approximately ¼ cup of the prepared vanilla frosting. Dye this portion vibrant green using your gel food coloring. Transfer the green frosting into a piping bag fitted with a Wilton 2 tip, which is perfect for delicate vines. Set this aside for later use.
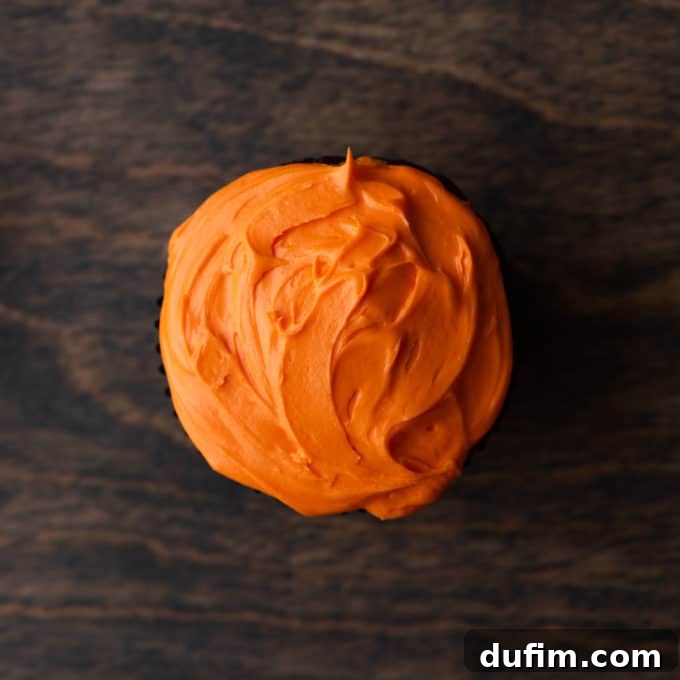
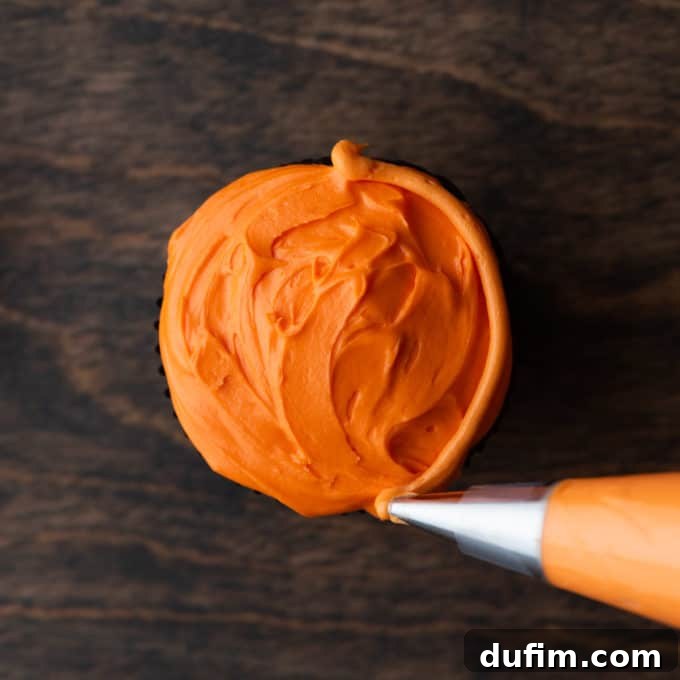
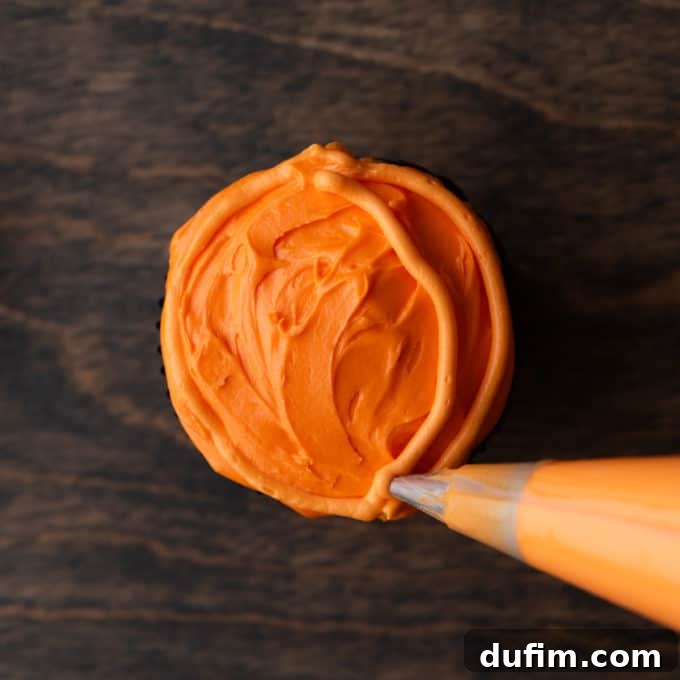
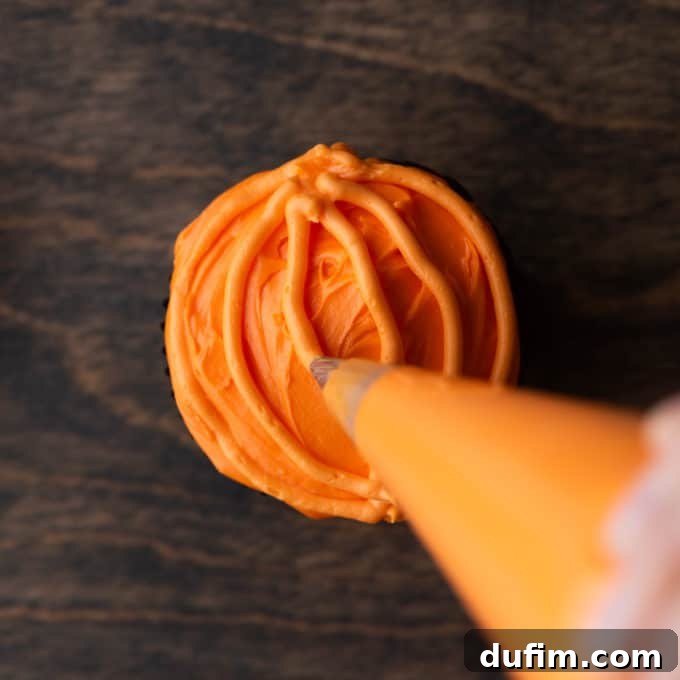
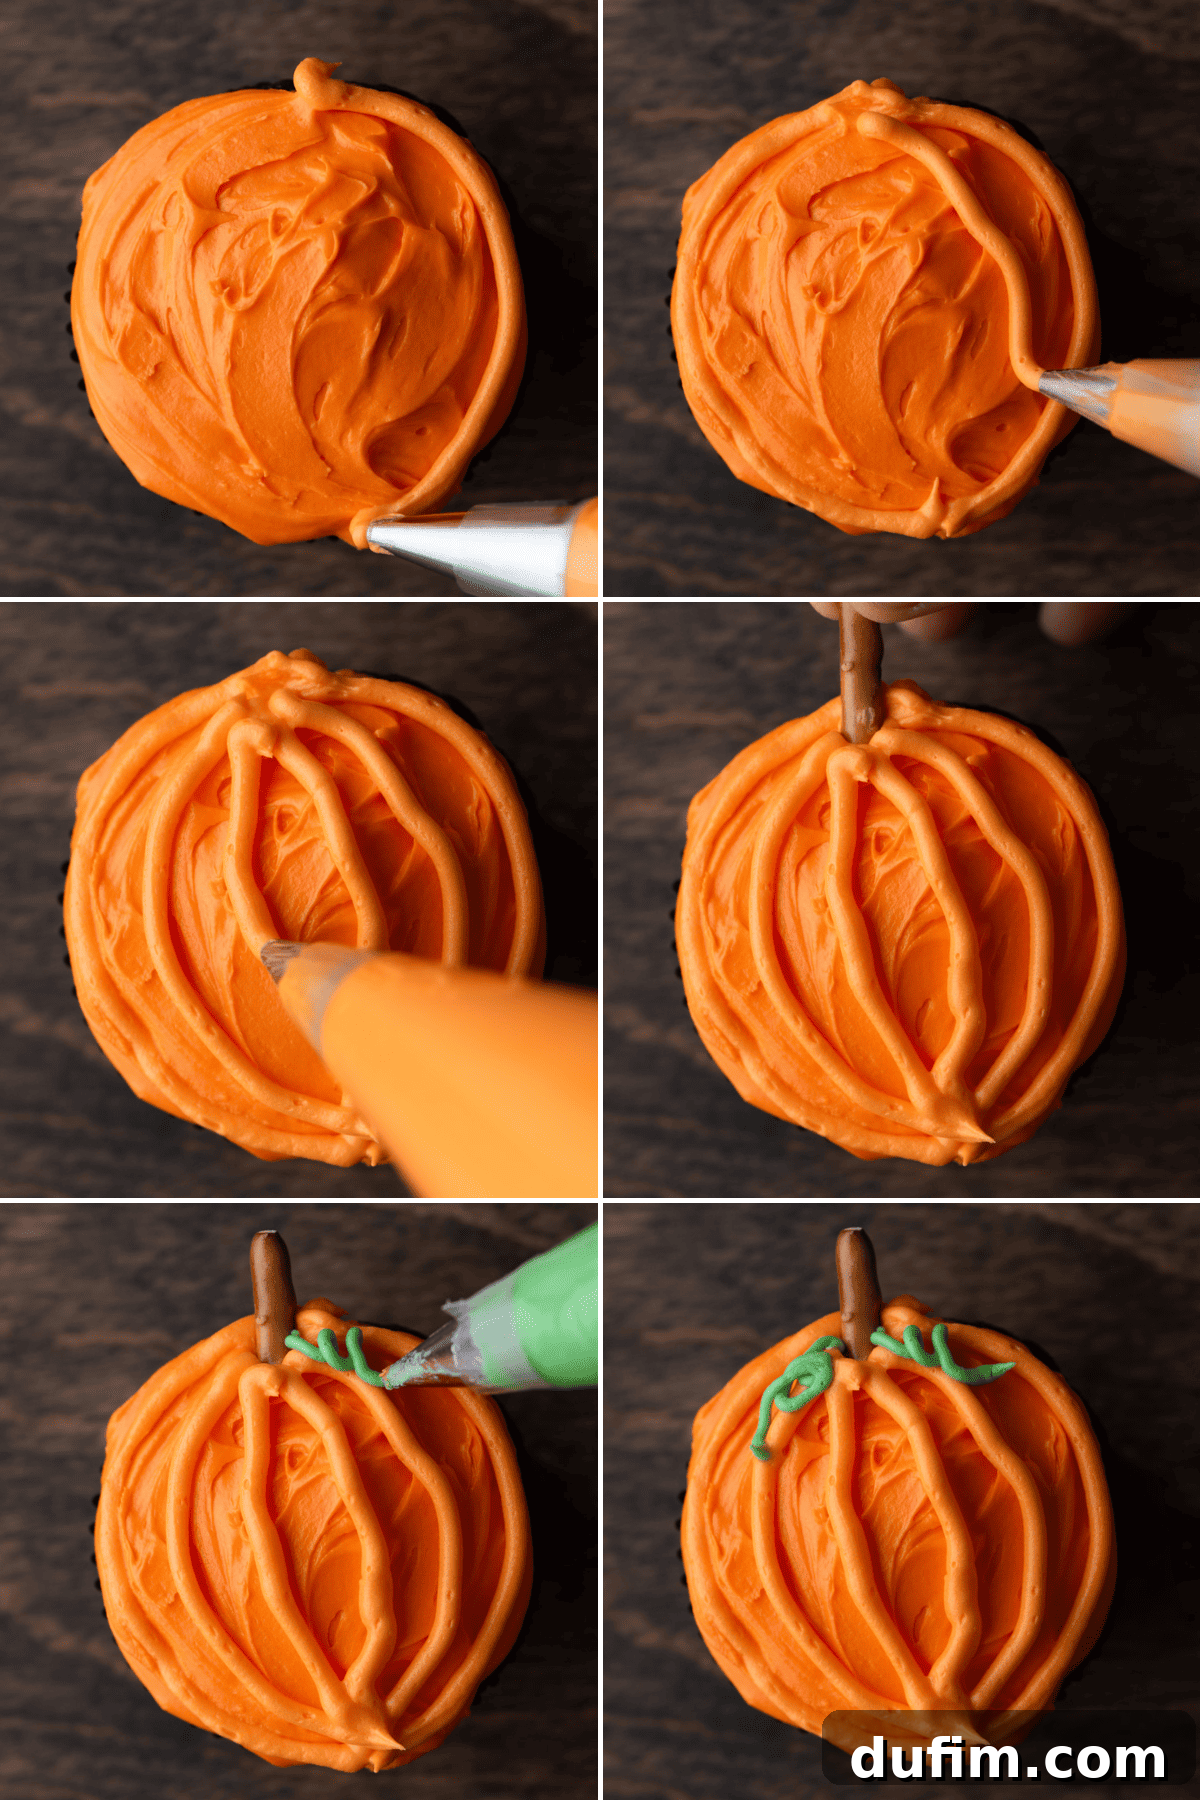
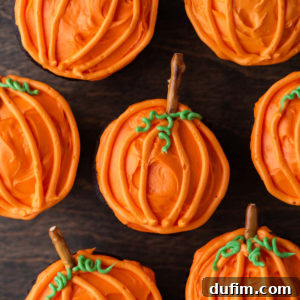
- **Decorate with Orange Frosting:** Dye the remaining (larger portion) of frosting bright orange using your gel food coloring. Once colored, spread a generous, even layer of this orange frosting over the top of each cooled chocolate cupcake. This will form the smooth base of your pumpkin. Transfer the remaining orange frosting into a piping bag fitted with a Wilton 4 tip. Now, pipe a continuous circle around the very edge of each cupcake. This creates the outer boundary of your pumpkin. Next, pipe four curved lines across the top of the cupcake: two lines curving slightly to the right, and two lines curving slightly to the left, emanating from the center. These lines give your pumpkins their characteristic segmented appearance.
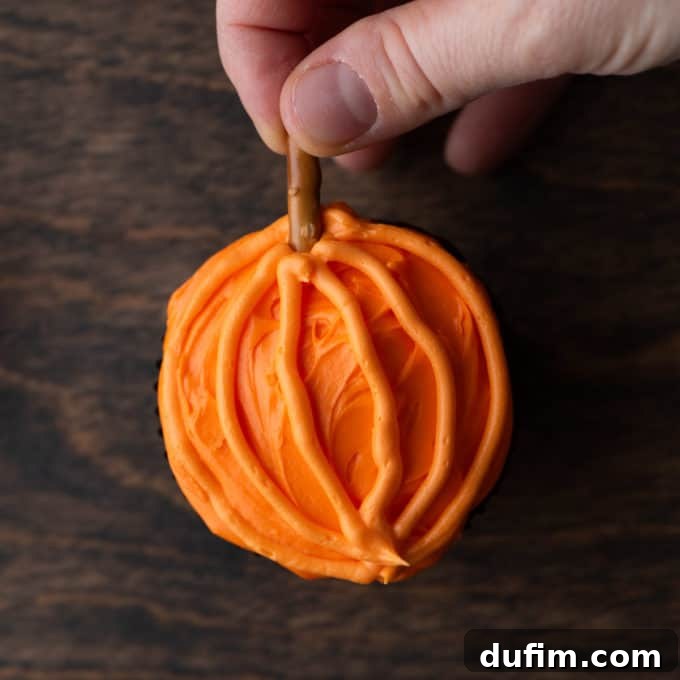
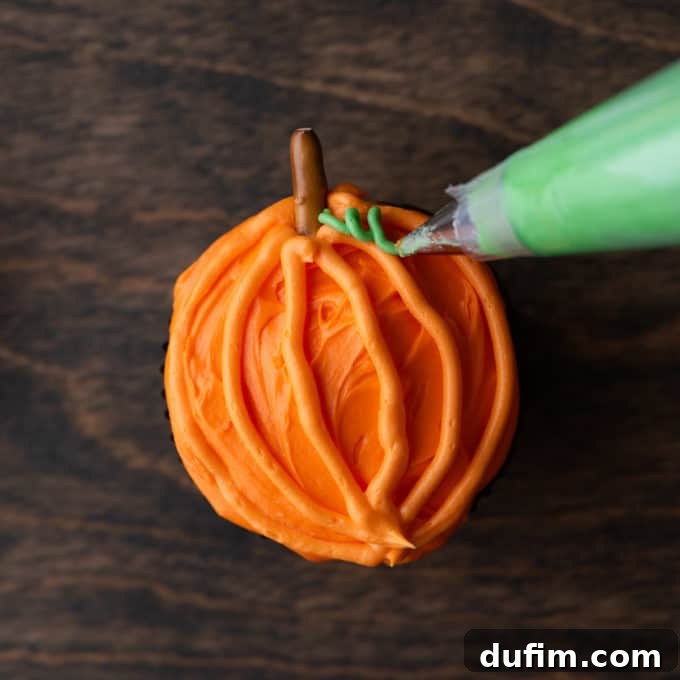
- **Add Stems and Vines:** Break pretzel sticks into smaller, appropriate lengths to serve as your pumpkin stems. Gently insert one piece into the top-center of each frosted pumpkin cupcake. Finally, take your piping bag with the green frosting and Wilton 2 tip. Carefully pipe small, curly green vines around the base of each pretzel stem, adding a realistic and charming touch to your pumpkin patch. Repeat these steps for all remaining cupcakes, creating a beautiful display.
Exciting Substitutions & Creative Variations
While the chocolate cupcake base is a personal favorite, these adorable pumpkin patch designs are wonderfully versatile. Feel free to experiment with different cupcake and frosting flavors to make them uniquely yours!
- **Explore Different Cupcake Flavors:** For a lighter, classic taste, try these pumpkin patch decorations on Vanilla Cupcakes. If you’re a fan of nutty flavors, Peanut Butter Cupcakes would provide an unexpected yet delightful base. You could also infuse the cupcakes themselves with fall spices by adding a teaspoon of cinnamon, nutmeg, and ginger to the chocolate batter for a “spiced chocolate” pumpkin cupcake!
- **Frosting Flavor Twists:** Instead of vanilla buttercream, consider a cream cheese frosting for a slightly tangy counterpoint, or a pumpkin spice buttercream to double down on the autumnal theme. A hint of maple extract in your vanilla frosting would also add a lovely fall touch.
- **Alternative Stems:** If pretzels aren’t your preference, consider using small pieces of chocolate-covered pretzels, green candy sticks, or even real small cinnamon sticks for an aromatic stem.
- **Extra Decorations:** For added flair, sprinkle a few green or brown nonpareils around the base of the pumpkin to mimic dirt, or use edible glitter for a magical sparkle. You could also pipe tiny white “stitches” with white frosting to make them look like Frankenstein pumpkins for a spooky twist!
Storing & Freezing Your Pumpkin Patch Cupcakes
To ensure your pumpkin patch cupcakes remain as delicious and beautiful as when they were first made, proper storage is key. Due to the creamy frosting and delicate decorations, these festive treats are truly best enjoyed on the day they are created. The pretzels can soften over time, and the frosting’s texture is optimal when fresh.
However, if you have leftovers or need to prepare them slightly in advance, they can be stored in an airtight container at room temperature for up to 2 days. To prevent the decorations from smudging, choose a container with enough height or use individual cupcake carriers. Avoid refrigerating the fully decorated cupcakes if possible, as it can dry out the cake and sometimes cause condensation to form on the frosting, affecting its appearance.
If you’re planning to bake ahead for a big event, I highly recommend baking the chocolate cupcakes a day or two in advance. Store the cooled, unfrosted cupcakes in an airtight container. Prepare the frosting separately and store it in the refrigerator. Then, assemble and decorate your pumpkin patch cupcakes just a few hours before serving to ensure they are at their freshest and most visually appealing. The unfrosted cupcakes can also be frozen for up to 3 months; simply thaw them at room temperature before frosting.
Craving an Assortment of Spooktacular Halloween Cupcakes?
The spooky season calls for a variety of creative and fun treats! If you’re hosting a Halloween party or just want to fill your home with festive cheer, check out these other easy and imaginative Halloween cupcake recipes. They’re perfect for creating a diverse and delightful dessert spread that will impress all your ghoulish guests!
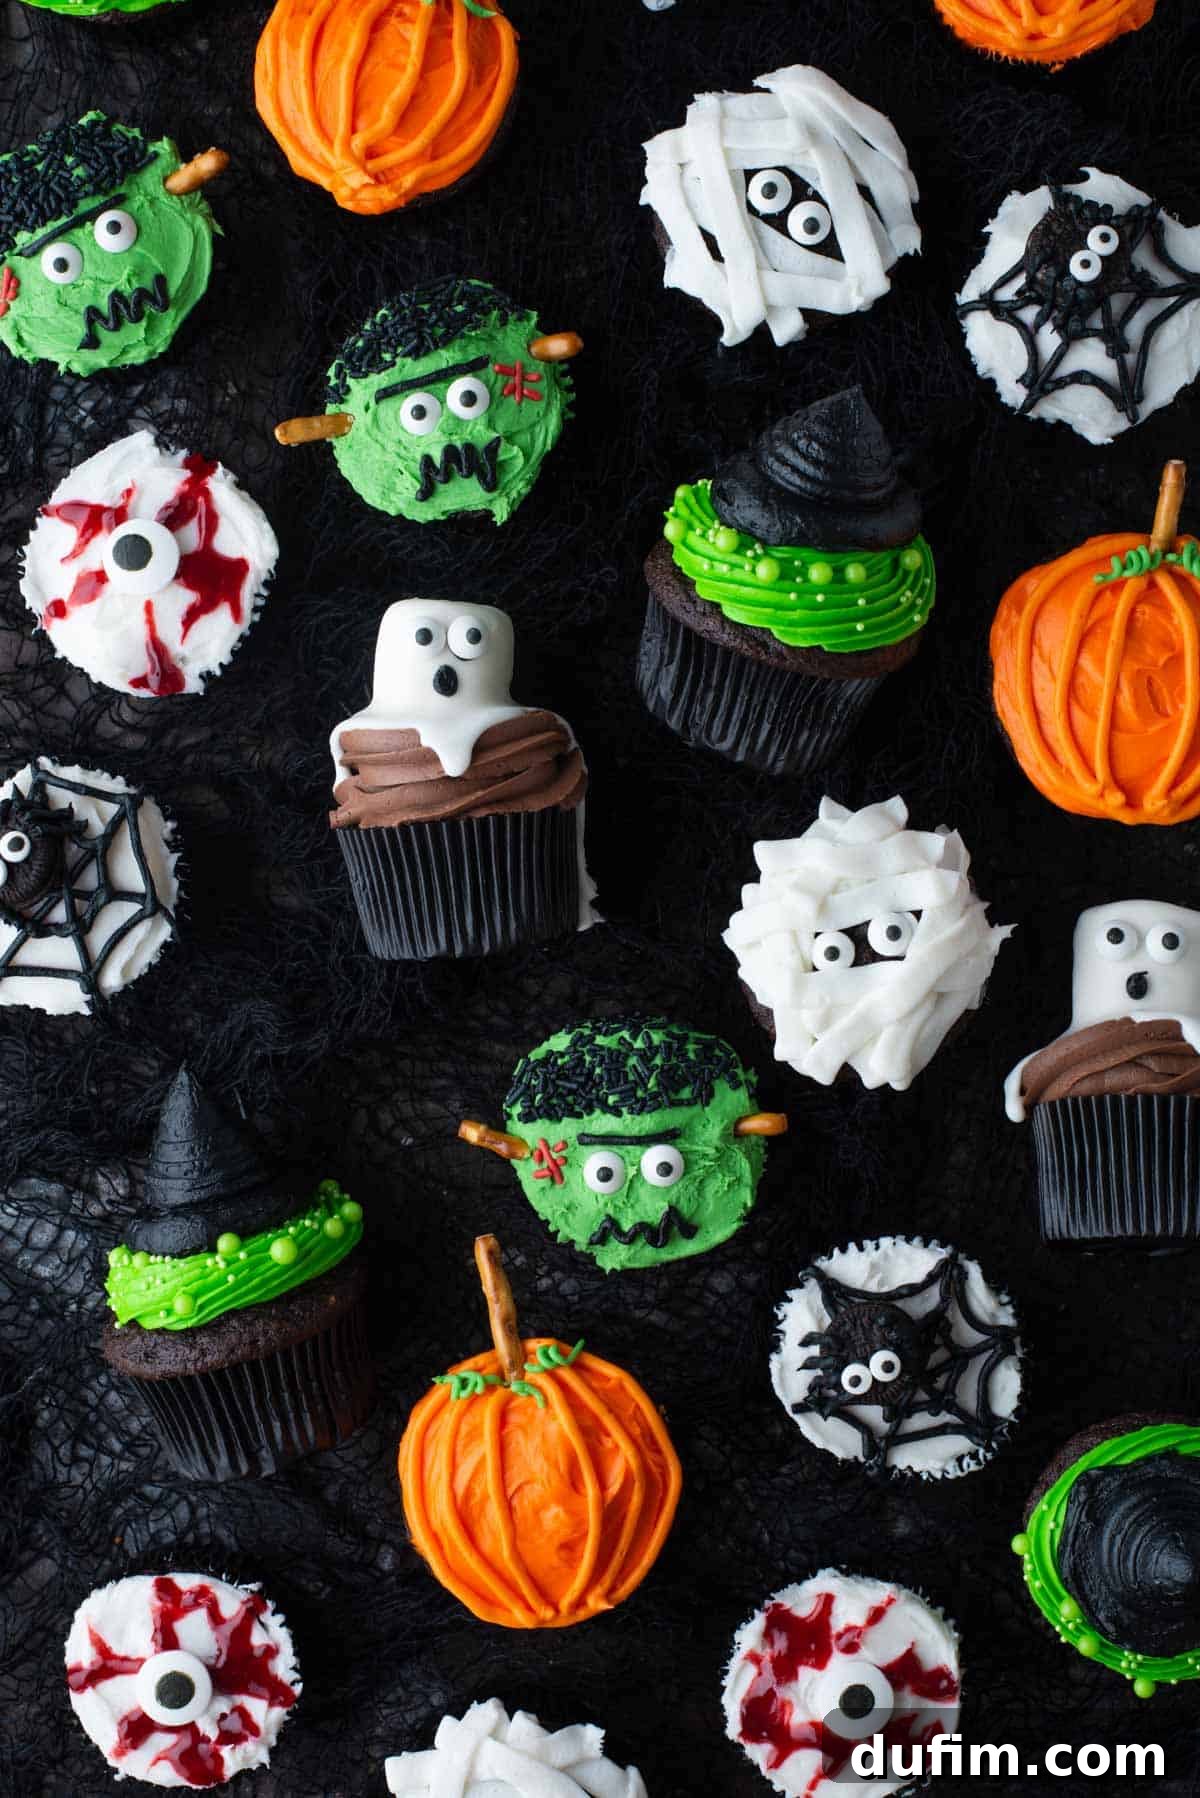
- Frankenstein Cupcakes: A monstrously fun green treat!
- Mummy Cupcakes: Wrapped in spooky sweetness.
- Witch Hat Cupcakes: Cast a delicious spell on your guests.
- Eyeball Cupcakes: Creepily captivating and tasty.
- Spider Web Cupcakes: Intricate and delightful.
- Ghost Cupcakes: Eerily adorable and easy to make.
- Spider Cupcakes: Spooky, crawly, and utterly delicious.
Explore More Delightful Pumpkin Recipes
If you can’t get enough of the wonderful flavors of pumpkin this season, you’re in luck! I have a fantastic collection of other pumpkin-inspired treats that are perfect for enjoying throughout the fall. From cookies to donuts, these recipes celebrate the rich, comforting taste of pumpkin in every bite.
- Pumpkin Blossom Cookies: Soft, chewy, and bursting with fall flavor.
- Pumpkin Donuts: A cozy breakfast or dessert treat.
- Pumpkin Spice Scotcheroos: A delightful twist on a classic bar.
- Mini Pumpkin Pie Rice Krispie Treats: A quick and easy no-bake pumpkin delight.
Tap stars to rate!
Pumpkin Patch Cupcakes
Beth
35 minutes
19 minutes
30 minutes
24
cupcakes
Rate
Equipment
-
Glass Mixing Bowl
-
Muffin Pan
-
KitchenAid 9-Speed Mixer
Ingredients
Chocolate Cupcakes
- 2 cups (240g) all purpose flour
- ¾ cup (63g) cocoa powder, natural unsweetened or dutch processed cocoa powder
- 1 tsp instant coffee granules such as Folger’s, optional
- ½ tsp baking soda
- 1 tsp baking powder
- 1 tsp salt
- ½ cup (113g) unsalted butter, 1 stick, room temperature
- 1 ½ cups (297g) granulated sugar
- 2 large eggs
- 1 cup (236ml) buttermilk
- ½ cup (118ml) hot tap water
Frosting
- 1 ½ cups (339g) unsalted butter, 3 sticks, room temperature
- 1 tsp vanilla extract
- 2-3 cups (227-339g) powdered sugar
- dash milk or heavy cream if frosting becomes too thick
Extras
- Piping bag
- Wilton 4 piping tip
- Wilton 2 piping tip
- Orange and green gel food coloring
- Pretzel sticks
Instructions
Chocolate Cupcakes
-
Preheat the oven to 350º F (175°C). Line a muffin pan with cupcake liners.
-
In a mixing bowl, combine the all-purpose flour, unsweetened natural cocoa powder, instant coffee granules (if using), baking soda, baking powder, and salt. Whisk well and set aside.2 cups (240g) all-purpose flour,
3/4 cup (63g) cocoa powder,
1 tsp instant coffee granules such as Folger’s (optional),
½ tsp baking soda,
1 tsp baking powder,
1 tsp salt -
In a separate large mixing bowl, beat the softened butter and granulated sugar with an electric mixer for 2 minutes, until pale and fluffy. Add in the large eggs, one at a time, beating for 30 seconds after each addition.1/2 cup (113g) unsalted butter,
1 ½ cups (297g) granulated sugar,
2 large eggs -
Add in half of the buttermilk, beat for about 20 seconds. Add in half of the dry ingredients, beat until just combined. Add the remaining buttermilk plus the hot water, beat until the liquid is mixed in, then add the remaining dry ingredients and beat on low speed until combined. Do not overmix.1 cup (236ml) buttermilk,
½ cup (118ml) hot tap water -
Fill the muffin liners 1/2 full with batter. Bake for 17-19 minutes at 350º F (175°C) or until a few moist crumbs remain on a toothpick inserted into the center. Allow the cupcakes to cool completely on a wire rack before frosting.
Frosting
-
In a large mixing bowl, combine the room temperature butter and vanilla extract. Beat using an electric mixer until fluffy and pale, about 1-2 minutes.1 ½ cups (339g) unsalted butter,
1 tsp vanilla extract -
Gradually add the powdered sugar, mixing on low speed until fully combined and smooth.2-3 cups (227-339g) powdered sugar
-
If you are adding food coloring, do so now. Divide the frosting first if using multiple colors.
-
Taste the frosting and adjust for sweetness by adding more powdered sugar if desired. If the frosting becomes too thick for piping, add a dash of milk or heavy cream (½ tsp at a time) and beat until it reaches your desired consistency.dash milk or heavy cream if frosting becomes too thick
-
For an extra fluffy frosting, add in 1/4 cup heavy whipping cream when adding the last bit of powdered sugar, then whip for 3-4 minutes on medium-high speed.
Assemble
-
Remove ¼ cup of the prepared frosting and dye it green using gel food coloring. Transfer this green frosting to a piping bag fitted with a Wilton 2 tip. Set aside.Piping bag,
Orange and green gel food coloring,
Wilton 2 piping tip -
Dye the remaining large portion of frosting orange with orange gel food coloring. Spread a generous, even amount of this orange frosting on top of each cooled cupcake. Transfer the remaining orange frosting to a piping or pastry bag fitted with a Wilton 4 tip. Pipe a continuous circle around the edge of each cupcake. Then, pipe 4 curved lines across the top: two curving slightly to the right from the center, and two curving slightly to the left from the center, creating the pumpkin segments.Wilton 4 piping tip
-
Gently break pretzel sticks into shorter pieces to serve as the pumpkin stems. Insert one piece into the top-center of each decorated pumpkin. Using the reserved green frosting and Wilton 2 tip, pipe small, curly green vines near the pretzel stem on each cupcake to complete the pumpkin patch look. Repeat with all remaining cupcakes.Pretzel sticks
Video
Watch our video tutorial to see how easy it is to create these beautiful pumpkin patch cupcakes!

Nutrition Disclosure
All nutritional values are approximate and provided to the reader as a courtesy. Changing ingredients and/or quantities will alter the estimated nutritional calculations. For precise nutritional information, it is recommended to calculate based on the specific ingredients and brands used.
Love this recipe? Share your thoughts and rate it below!