
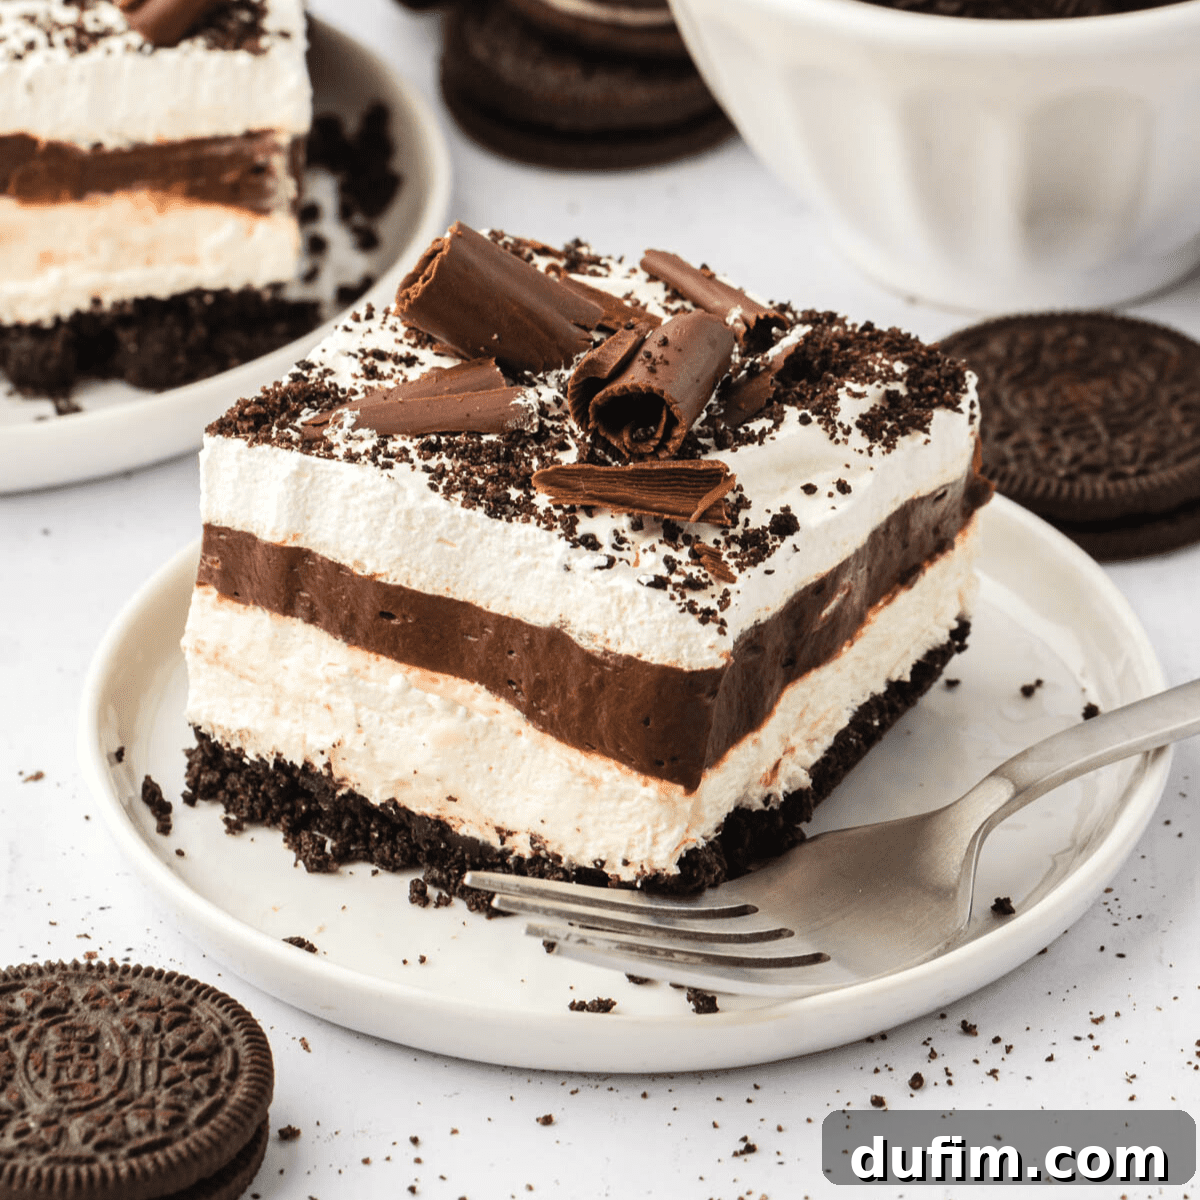
The Ultimate No-Bake Chocolate Lasagna: 5 Layers of Pure Bliss
Unlock the secrets to crafting the perfect chocolate lasagna – a dessert that strikes an exquisite balance between rich sweetness and refreshing creaminess, all without ever becoming soggy. You’re in luck! As a seasoned chocolate lasagna enthusiast, I’m excited to share my tried-and-true, foolproof steps for creating this show-stopping, no-bake masterpiece. In just 20 minutes of active preparation, you can assemble a magnificent 5-layer dessert that promises pure chocolate indulgence and is guaranteed to become a go-to favorite for any occasion.
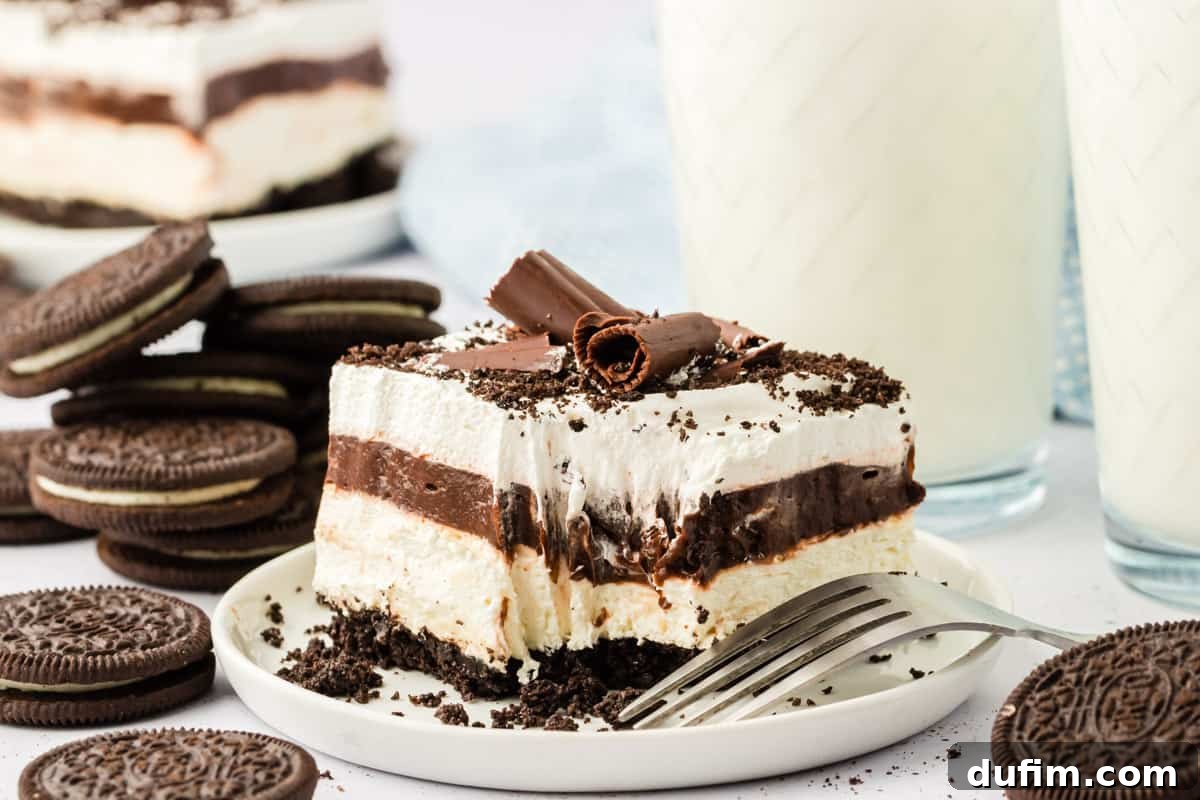
This no-bake chocolate lasagna recipe stands as the epitome of decadent yet effortless chocolate desserts. Imagine a symphony of textures and flavors: a sturdy, crunchy Oreo cookie crust forms the base, followed by an incredibly smooth and tangy cheesecake filling. Next comes a luscious layer of rich chocolate pudding, all crowned with a cloud of light and airy whipped topping. The final flourish of crunchy Oreo pieces and delicate chocolate shavings makes this dessert not just delicious, but also visually stunning.
Its ease of preparation makes this budget-friendly dessert a universal crowd-pleaser. It’s remarkably light yet deeply indulgent, striking the perfect balance for a wide array of events. Whether you’re hosting a vibrant summer party, contributing to a community potluck, celebrating a special occasion, or simply needing a quick and satisfying chocolate fix, this lasagna fits the bill. Its no-bake nature makes it especially appealing during warmer months when turning on the oven is less desirable.
I have meticulously tested every trick in the book – from perfecting the ratio for an ideal Oreo crust that stays firm and crisp, to mastering the technique for creating elegant, flawless chocolate shavings. You can confidently follow my step-by-step instructions, assured that each detail has been refined for maximum success and incredible flavor. Prepare to bring this sensational chocolate lasagna to your next social gathering and watch it disappear in record time – it’s truly that irresistible!
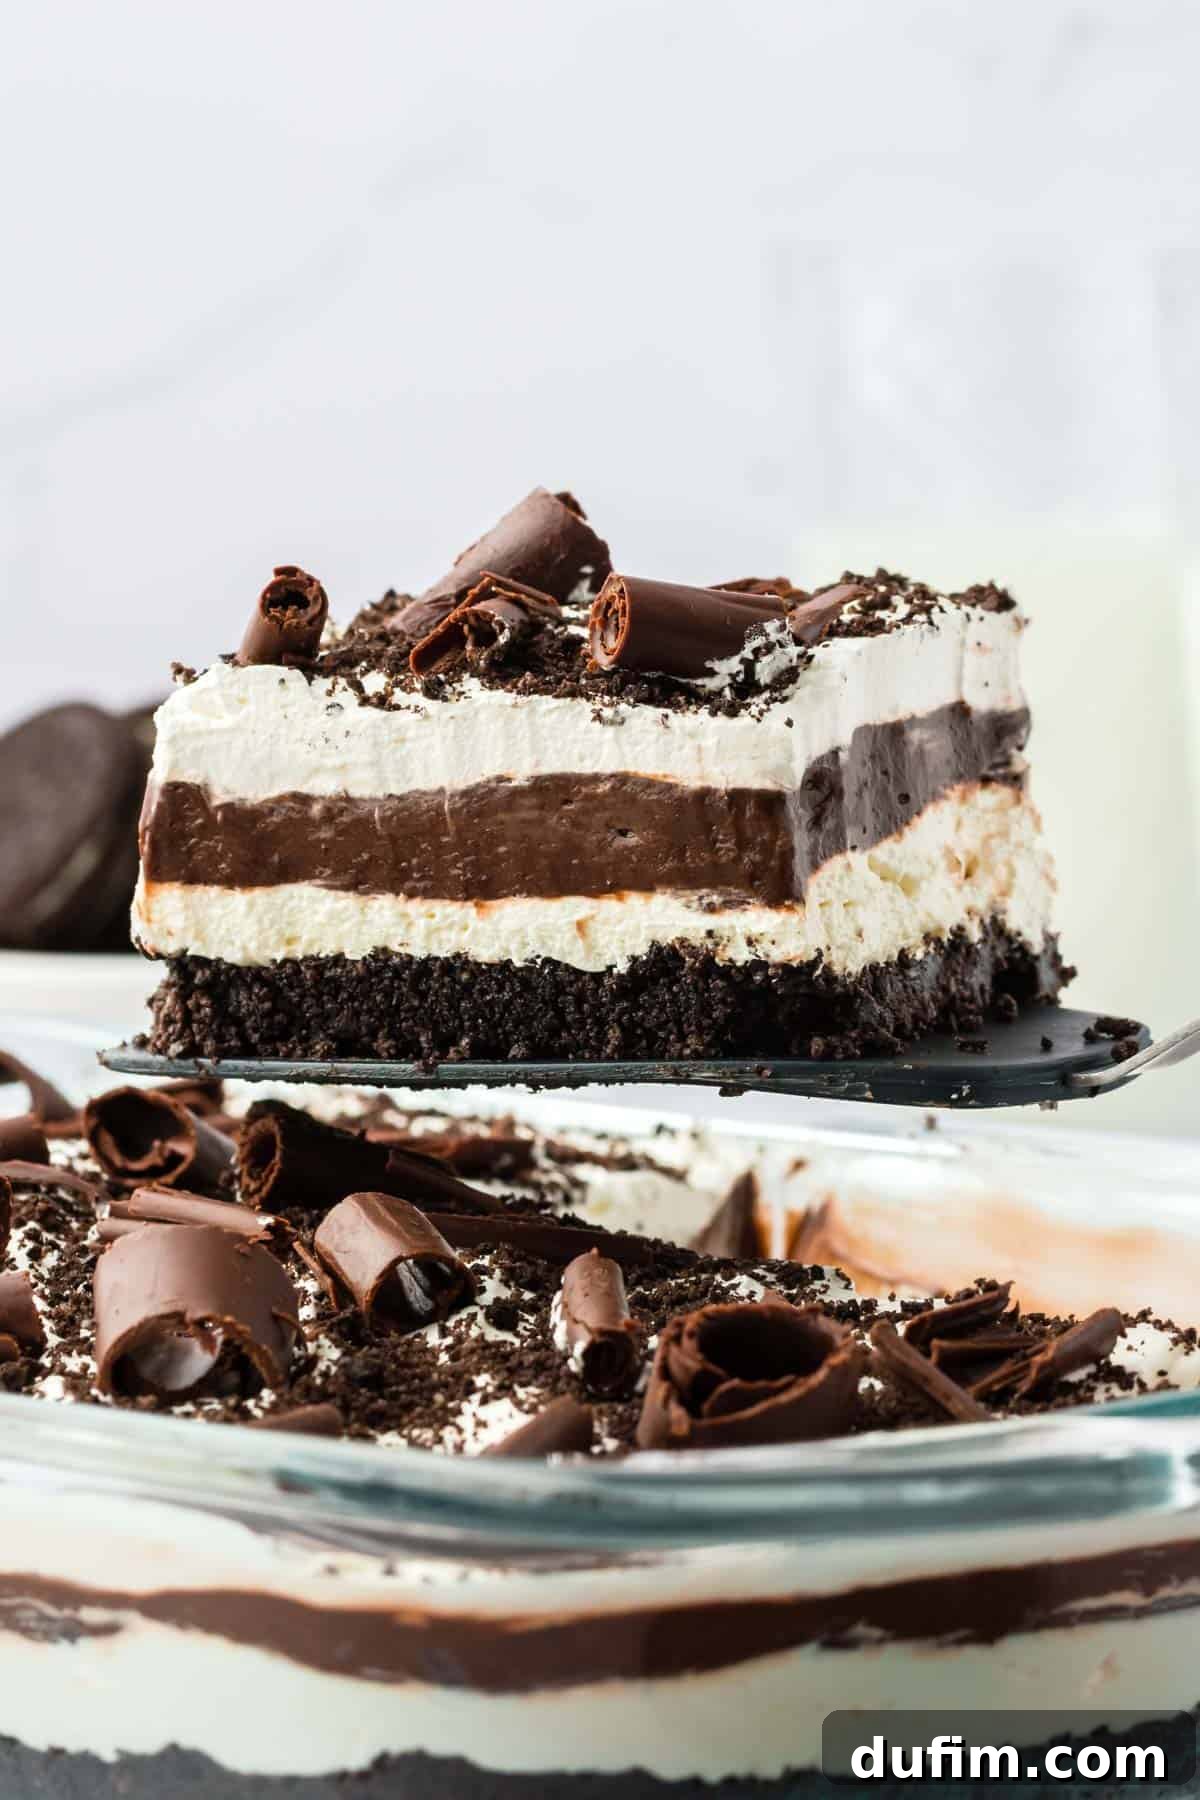
Why You’ll Adore This No-Bake Chocolate Lasagna Recipe
This delightful dessert is much more than just a sweet treat; it’s a convenient, versatile, and utterly delicious creation designed to simplify your dessert-making while maximizing flavor. Here are just a few compelling reasons why this chocolate lasagna will quickly become a cherished staple in your recipe collection:
- **Effortless No-Bake Indulgence:** Say goodbye to hot ovens and complex baking techniques! This chocolate lasagna is a true no-bake wonder, perfect for satisfying your sweet tooth, especially on warm days or when you prefer to keep things simple and cool in the kitchen. It’s a fantastic solution for dessert cravings without the fuss.
- **Lightning-Fast Prep Time:** You’ll be amazed at how quickly this impressive dessert comes together. With only 20 minutes of active preparation, you can assemble all the layers with minimal fuss. The majority of the time is dedicated to chilling, allowing the distinct layers to set perfectly and for the flavors to meld into a harmonious, irresistible treat.
- **Infinitely Customizable:** While the classic 5-layer recipe is undeniably perfect as is, this dessert offers a wonderful canvas for culinary creativity. Explore various cookie crusts beyond Oreos, experiment with different pudding flavors, or pile on a myriad of unique toppings to make it uniquely yours. (Don’t miss our detailed variations section below for exciting ideas!)
- **Guaranteed Crowd-Pleaser:** Whether it’s a casual family dinner, a lively potluck with friends, a holiday celebration, or a simple get-together, this chocolate lasagna is always a resounding hit. Its appealing layered presentation and universally loved flavors guarantee smiles, satisfied guests, and frequent requests for your secret recipe.
- **Perfect Make-Ahead Masterpiece:** Planning for a busy day or an upcoming event? This is your go-to dessert! You can easily prepare this chocolate lasagna hours or even a full day in advance. It actually benefits from ample chill time, which works perfectly with a busy schedule, allowing you to focus on other tasks while your dessert becomes perfectly set and delicious.
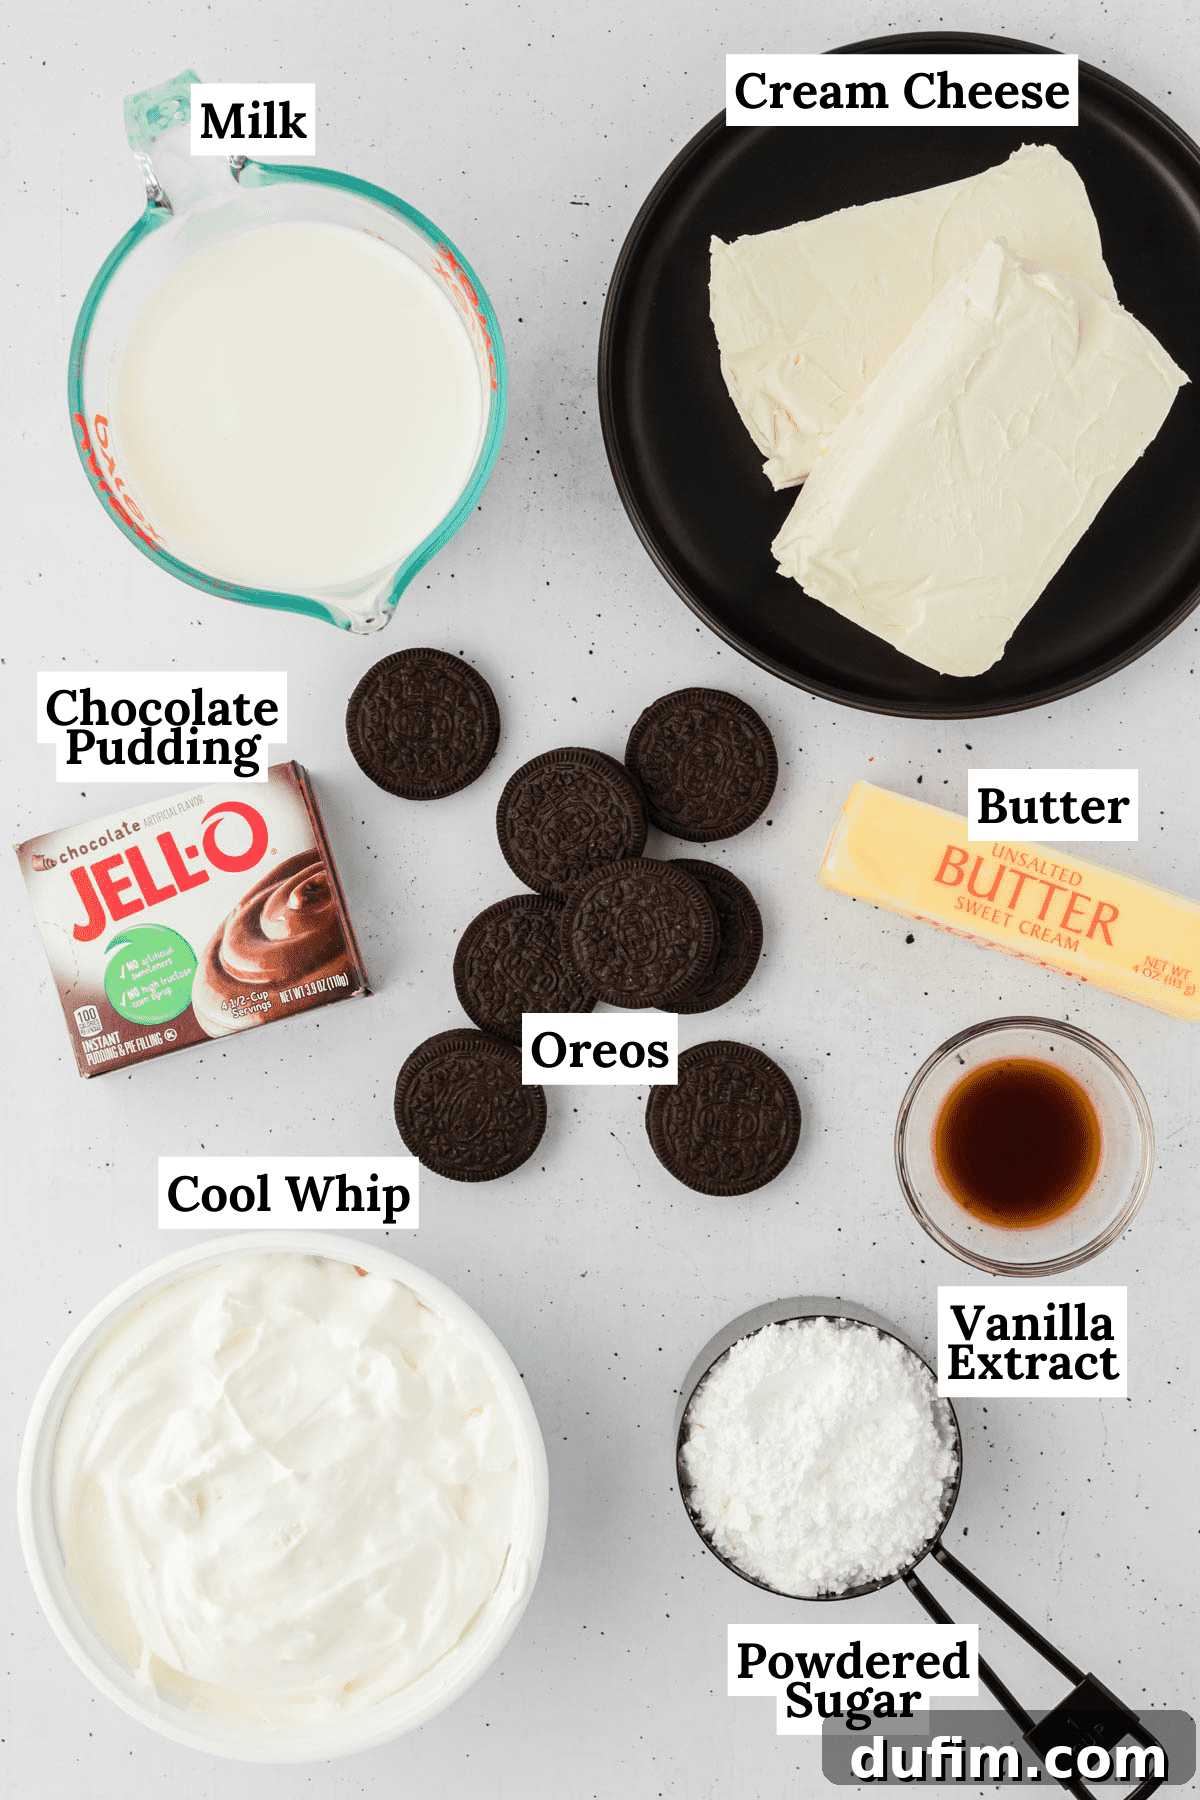
Essential Ingredients for Your No-Bake Chocolate Lasagna
Crafting this incredible no-bake chocolate lasagna is remarkably simple, thanks to a concise list of readily available ingredients. The true beauty of this dessert lies in its ease, and using high-quality components ensures a truly decadent and memorable experience. Below is a detailed breakdown of what you’ll need for each of the five spectacular layers, along with a few helpful notes. For precise measurements and step-by-step instructions, please refer to the detailed recipe card at the very end of this article.
1. The Irresistible Oreo Cookie Crust Layer
The foundation of our chocolate lasagna is a rich, dark, and perfectly crunchy Oreo crust. This layer provides a delightful texture and flavor contrast to the creamy layers above.
- **Oreo Cookies:** You’ll need one standard 14.3 oz package of original Oreo cookies, which typically contains about 36 cookies. For maximum flavor and texture, use the whole cookie, including the cream filling. There’s no need to meticulously scrape out the cream!
- **Unsalted Butter (Melted):** This is the essential binder that transforms those crushed Oreos into a firm, flavorful, and perfectly set crust. Using unsalted butter gives you better control over the overall saltiness of your dessert.
2. The Creamy Cheesecake Layer
This light, tangy, and subtly sweet layer adds a wonderful richness and helps to cut through the sweetness of the chocolate, creating a beautifully balanced flavor profile that keeps every bite exciting.
- **Cream Cheese (Softened):** For the absolute best flavor and luxurious creamy texture, full-fat cream cheese is highly recommended. It is crucial to ensure your cream cheese is fully softened to room temperature before beating, as this prevents lumps and ensures a silky-smooth filling.
- **Powdered Sugar (Confectioners’ Sugar):** Unlike granulated sugar, powdered sugar dissolves effortlessly into the cream cheese, giving the cheesecake layer a flawlessly smooth texture without any undesirable graininess.
- **Vanilla Extract:** A splash of pure vanilla extract is essential. It enhances the inherent sweetness and deepens the creamy notes of the cheesecake layer, adding a warm, aromatic dimension.
- **Whipped Topping (Cool Whip):** This light and airy whipped topping is carefully folded into the cream cheese mixture, making it incredibly fluffy, smooth, and wonderfully easy to spread. Opting for a pre-made whipped topping like Cool Whip saves significant time and effort compared to whipping fresh cream.
3. The Decadent Chocolate Pudding Layer
This is the true heart of the “chocolate” in our chocolate lasagna, providing an intense cocoa flavor and a wonderfully smooth, comforting consistency that everyone loves.
- **Instant Chocolate Pudding Mix:** You’ll need two standard 3.9 oz packages of instant pudding mix. It’s vital to use “instant” pudding and not the “cook-and-serve” variety, as the instant version sets quickly without any cooking required. Feel free to experiment with dark chocolate or even chocolate fudge pudding mixes for varying intensities of chocolate flavor.
- **Cold Milk:** This ingredient is absolutely crucial for the instant pudding to set properly. While whole milk typically yields the creamiest, thickest pudding, 2% milk will also work very well and still provide a rich texture.
4. The Fluffy Whipped Topping Layer
A generous, final layer of light and fluffy whipped topping crowns the entire dessert. This layer adds a refreshing contrast, a delicate texture, and a beautiful, inviting finish to the chocolate lasagna.
- **Whipped Topping (Cool Whip):** The second container of thawed whipped topping forms this essential final creamy layer, adding height, a delicate sweetness, and an ethereal texture to the top of your dessert.
5. The Finishing Touch: Delicious Toppings
These carefully selected toppings are not merely decorative; they add vital visual appeal, an extra layer of crunch, and a burst of flavor, elevating your chocolate lasagna from great to absolutely unforgettable.
- **Reserved Oreo Crumbs:** A small amount (typically one tablespoon) of the initial Oreo crumbs is specifically set aside for this final sprinkle. This adds a cohesive look, reinforces the Oreo theme, and provides an extra delightful crunch.
- **Chocolate Curls or Shavings:** These add an undeniably elegant touch and another layer of rich chocolate flavor. Creating your own from a solid chocolate bar is surprisingly easy and rewarding!
- **Additional Topping Ideas to Spark Your Creativity:**
- **Crushed Nuts:** Elevate the texture and introduce a nutty flavor with a sprinkle of finely chopped almonds, walnuts, or pecans for a delightful crunchy contrast.
- **Fresh Berries:** Introduce a vibrant burst of color and refreshing tartness with beautifully sliced strawberries, sweet raspberries, or juicy blueberries, especially perfect for summer.
- **Chocolate or Caramel Drizzle:** For an extra layer of sweetness and an artful visual flair, drizzle chocolate syrup, luscious caramel sauce, or even a tangy raspberry coulis over the top.
- **Colorful Sprinkles:** Add a fun and festive pop of color with rainbow or chocolate sprinkles, making it especially great for birthday celebrations or themed parties.
- **Grated Chocolate:** A simple yet incredibly effective way to add more concentrated chocolate richness and a subtle texture. Use a microplane or fine grater for the best results.
- **Mini Chocolate Chips:** Sprinkle a handful of mini chocolate chips over the top for delightful, concentrated bursts of chocolatey goodness in every single bite.
- **Sea Salt Flakes:** A tiny pinch of flaky sea salt can do wonders. It enhances the depth and richness of the chocolate and provides a gourmet touch by perfectly balancing the sweetness.
- **Fresh Mint Leaves:** For a sophisticated garnish and a refreshing aromatic contrast, carefully place a few fresh mint leaves on top just before serving.
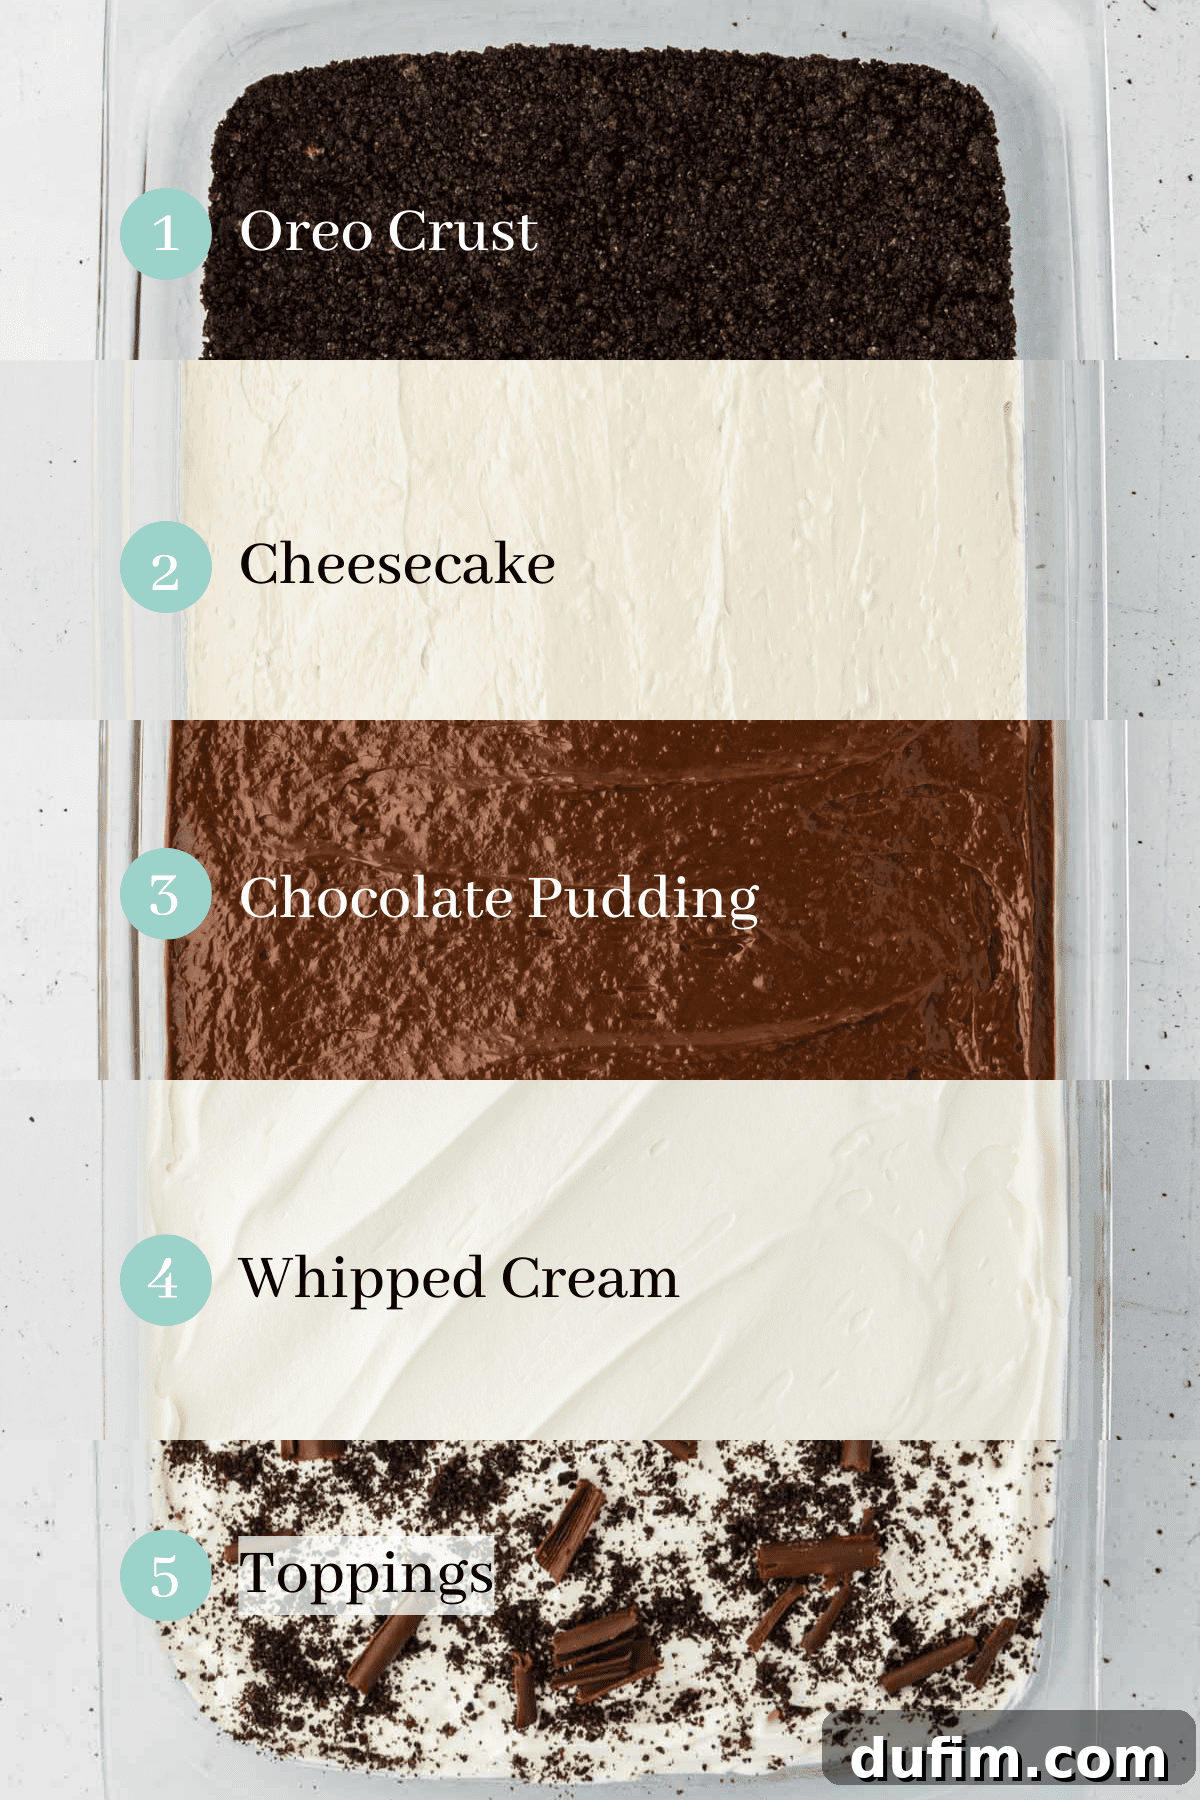
How to Assemble Your Decadent No-Bake Chocolate Lasagna
Creating this easy chocolate lasagna is a straightforward and incredibly rewarding process that yields truly impressive results. Follow these simple, layered steps to build your way to dessert perfection. Remember, the full recipe details, including precise measurements for each ingredient, are conveniently available in the comprehensive recipe card located below.
- **Prepare the Oreo Cookie Crumbs:** Take the entire package of Oreo cookies (14.3 oz) and place them into a food processor or a sturdy blender. Pulse the cookies until they are finely ground into even crumbs, resembling coarse sand. Carefully measure out 1 tablespoon of these fine crumbs and set them aside in a small bowl; these will be used later for the final decorative topping of your lasagna.
- **Form the Oreo Crust:** In a medium-sized mixing bowl, combine the remaining Oreo cookie crumbs with the thoroughly melted unsalted butter. Stir the mixture vigorously until all the crumbs are evenly moistened and the mixture appears thick, dark, and cohesive.
- **Press the Crust into the Pan:** Transfer the buttered Oreo crumb mixture into a standard 9×13 inch baking pan. Using the bottom of a flat-surfaced glass or your clean fingers, firmly and evenly press the mixture across the entire bottom of the pan to form a compact and sturdy crust. Ensure it’s as level and tightly packed as possible.
- **Beat the Cream Cheese:** If using the same mixing bowl, carefully wipe it out thoroughly. Add the fully softened cream cheese to the clean bowl. Using an electric mixer (either a handheld mixer or a stand mixer fitted with the paddle attachment), beat the cream cheese on medium speed for approximately 90 seconds, or until it becomes wonderfully light, airy, and completely smooth, with no lumps remaining.
- **Create the Cheesecake Layer:** To the fluffy cream cheese, add the powdered sugar and vanilla extract. Beat again until these ingredients are just combined and the mixture is smooth. Next, gently fold in one of the 8 oz containers of thawed whipped topping (Cool Whip) until no streaks remain and the mixture is uniformly smooth and airy. Carefully spread this luscious cheesecake mixture evenly over your prepared Oreo crust, ensuring it forms a distinct, smooth, and consistent layer. Place the pan in the refrigerator to chill for at least 10 minutes; this helps the layer set slightly before adding the next.
- **Prepare and Add the Chocolate Pudding Layer:** Rinse and thoroughly dry your mixing bowl once more. In the clean bowl, whisk together the two packages of instant chocolate pudding mix and the cold milk. Continue whisking continuously for about 2-3 minutes, or until the mixture visibly thickens to a rich, pudding-like consistency. Work quickly, as instant pudding sets rapidly. Promptly spread this thick chocolate pudding evenly over the chilled cheesecake layer. Return the pan to the refrigerator for another 10 minutes to allow the pudding layer to set even further.
- **Apply the Final Whipped Topping and Garnishes:** Retrieve the partially set dessert from the refrigerator. Carefully and evenly spread the remaining 8 oz container of thawed whipped topping (Cool Whip) over the chocolate pudding layer, creating a soft, cloud-like, and inviting top. Now, sprinkle the reserved 1 tablespoon of Oreo crumbs evenly over this whipped topping. For an extra touch of elegance and chocolatey goodness, generously sprinkle on your homemade or store-bought chocolate shavings or curls. (Remember the tip: to make delicate chocolate shavings, use a vegetable peeler on a chocolate bar, and use a spoon to transfer them to prevent melting from your finger’s warmth!)
- **Chill for Perfection:** To allow all the layers to fully set and for the flavors to meld beautifully, cover the entire pan with plastic wrap or aluminum foil. Place it back in the refrigerator and allow the chocolate lasagna to chill for a minimum of 2 hours. For the absolute best results in terms of firmness and flavor, I recommend chilling it for ideally 4-6 hours, or even overnight. This dessert is best served within 48 hours for optimal freshness, texture, and taste.
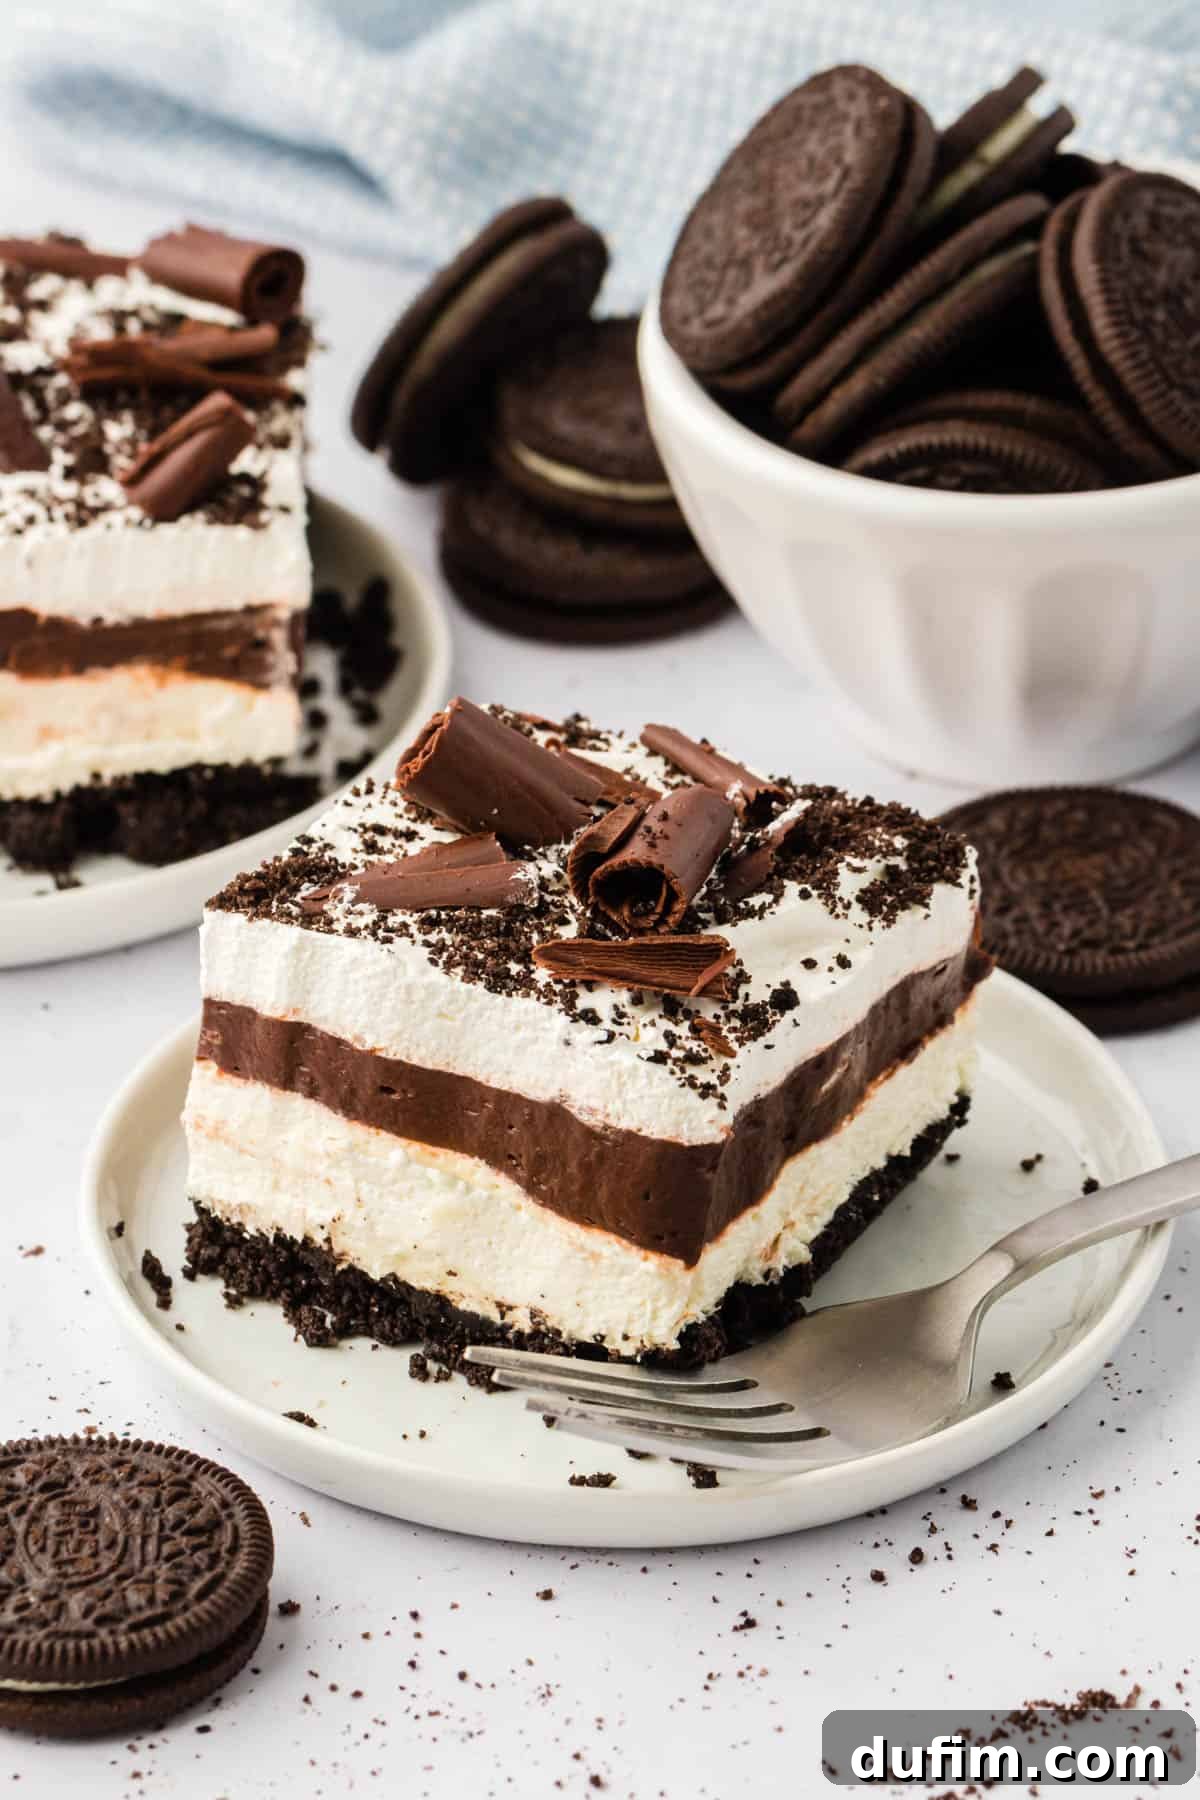
Expert Tips for a Flawless Chocolate Lasagna
Achieving chocolate lasagna perfection is simpler than you might imagine, especially with these helpful hints and expert advice. These tips will ensure your dessert is not only incredibly delicious but also beautifully presented and perfectly structured every single time you make it.
- **Mastering the Crushed Oreos Without Equipment:** If you don’t have access to a food processor or blender, there’s no need to fret! Simply place your Oreo cookies in a large, heavy-duty Ziploc bag, ensuring it’s sealed securely. Then, use a rolling pin or the bottom of a heavy pot to crush them into fine crumbs. The goal is to achieve a consistent, sand-like texture. For ultimate convenience, you can often find pre-made Oreo pie crusts or bags of crushed Oreo crumbs in the baking aisle of most well-stocked grocery stores.
- **Choosing the Right Oreos:** For the best possible crust, it’s highly recommended to opt for regular Oreo cookies, rather than the “Double-Stuffed” variety. The traditional balance of cookie to cream in regular Oreos yields the ideal texture and flavor when crushed and combined with butter. There’s absolutely no need to painstakingly remove the cream filling; the whole cookies, once blended, create wonderfully rich, dark, and flavorful crumbs.
- **Instant Pudding is Essential:** This recipe explicitly calls for *instant* chocolate pudding mix for a reason. Using “cook-and-serve” pudding will not yield the same quick-setting results and will likely lead to a runny or improperly set layer, compromising the structure of your lasagna. Always double-check your package to ensure it clearly states “instant.” For an even deeper and more intense chocolate flavor, consider trying dark chocolate or chocolate fudge instant pudding mixes.
- **Crafting Perfect Chocolate Shavings:** For an elegant and professional-looking topping, creating your own chocolate shavings or curls is surprisingly simple and adds a special touch. Take a standard-sized Hershey’s chocolate bar (or any solid block of your favorite chocolate) and a clean vegetable peeler. Hold the chocolate bar firmly and draw the peeler along one of its edges to create beautiful, delicate curls and fine shavings. To prevent these delicate chocolate pieces from melting prematurely from the warmth of your hands, use a spoon to carefully transfer them directly onto your chilled chocolate lasagna.
- **Preventing a Soggy Crust:** A common concern with layered desserts is a soggy bottom crust. To ensure your Oreo crust remains delightfully crisp, make sure to press it very firmly and evenly into the pan. Additionally, chilling the crust briefly (as instructed) before adding the creamy cheesecake layer helps to solidify the butter, creating a crucial barrier against moisture from the subsequent layers. Do not skip these intermittent chilling steps!
- **Patience with Chilling Time:** While the active preparation time for this dessert is wonderfully quick, ample chilling time is absolutely crucial for success. Each layer needs sufficient time to set properly, and the entire lasagna benefits immensely from at least 2 hours (but preferably 4-6 hours or even overnight) in the refrigerator. This allows all the flavors to fully meld and the structure to firm up completely. Rushing this step can unfortunately result in a messy presentation and less defined layers.
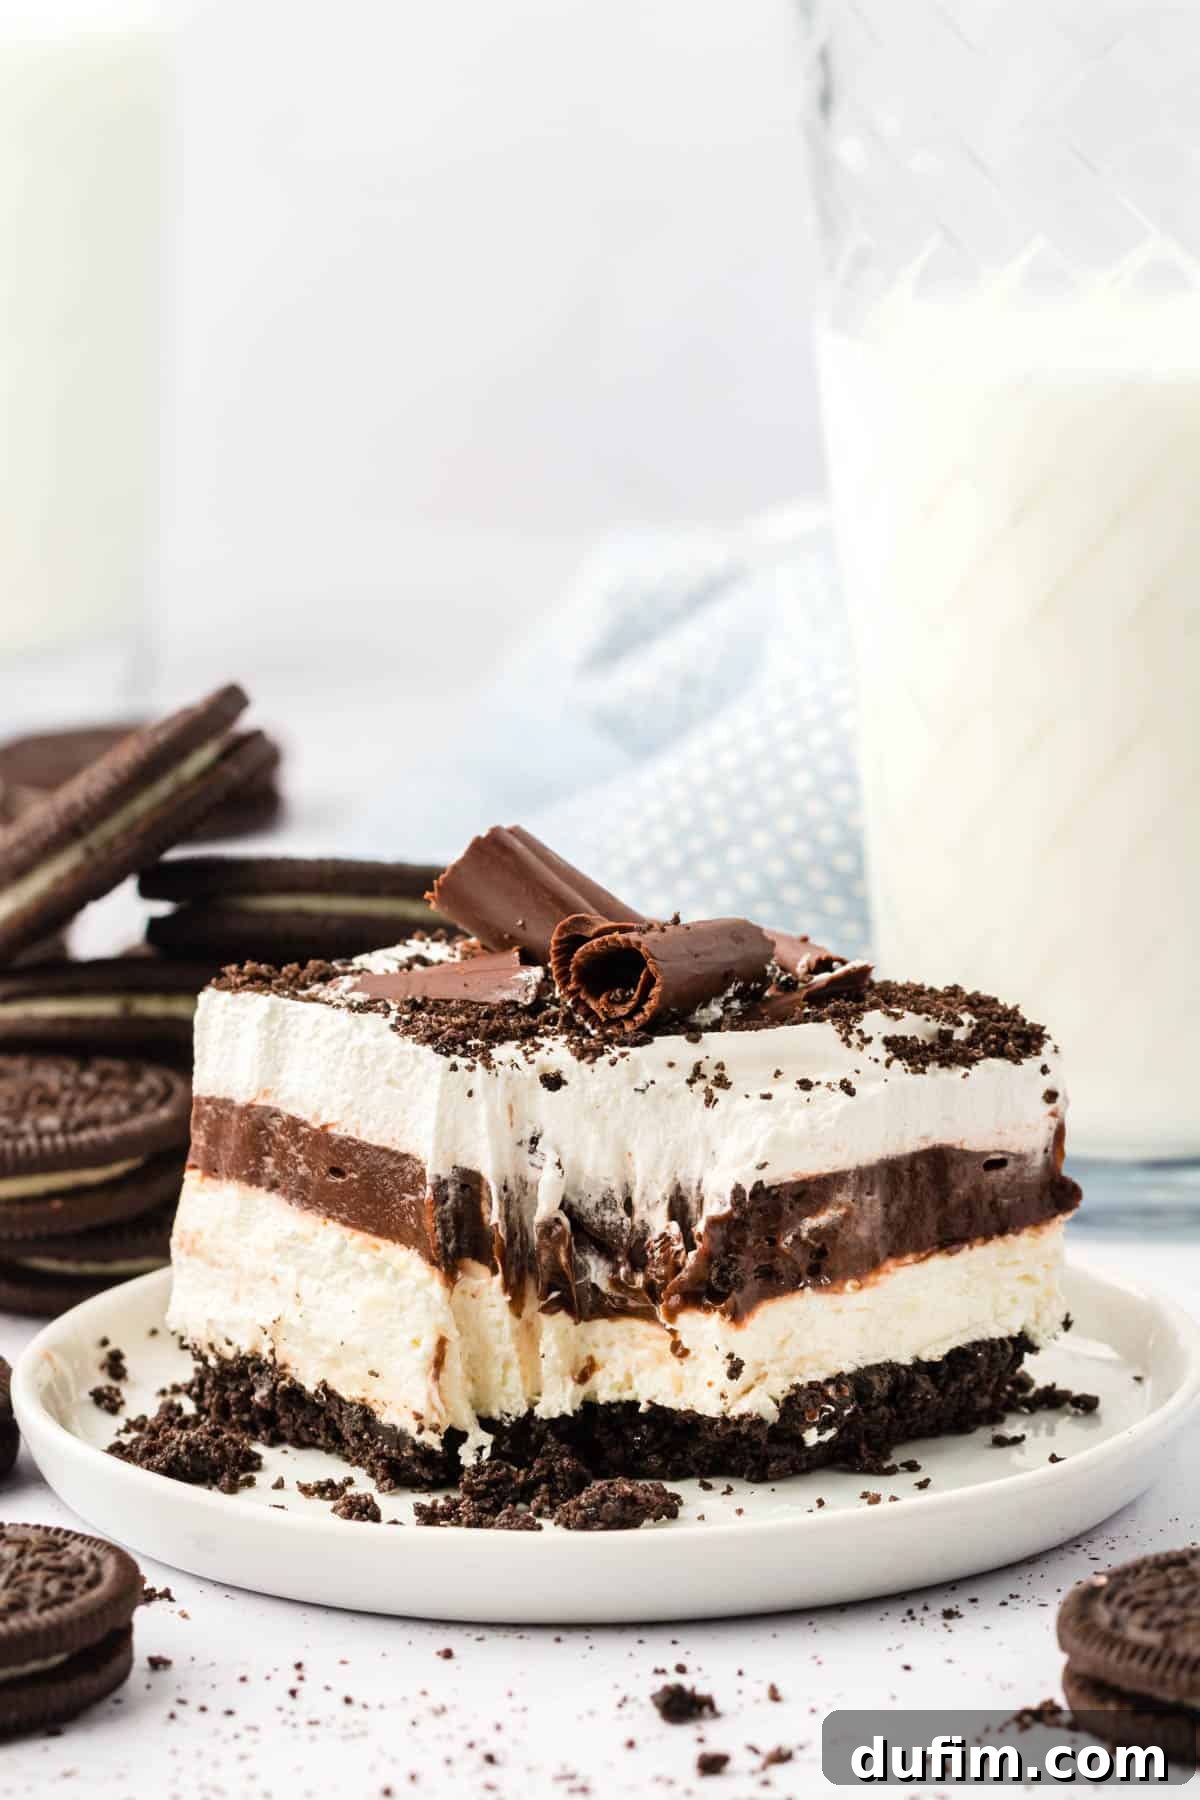
No-Bake Chocolate Lasagna: Recipe Variations and Customizations
One of the most exciting aspects of this no-bake chocolate lasagna recipe is its incredible versatility. While the classic version is undeniably perfect and always a hit, don’t hesitate to unleash your creativity and tailor it to your personal taste preferences, seasonal ingredients, or for different celebratory occasions. Here are some exciting variations and customization ideas to inspire your next dessert masterpiece:
- **Embrace Double (or Triple) Chocolate Extravaganza:** For the ultimate chocolate lover, amplify the cocoa factor even further! Consider stirring in some mini chocolate chips or even contrasting white chocolate chips into either the creamy cheesecake layer or the rich pudding layer for added texture and bursts of flavor. You could also swap out the plain whipped topping for a rich and decadent chocolate whipped cream for an extra layer of cocoa goodness. A beautiful swirl of chocolate syrup through the whipped topping before chilling also adds a stunning visual and an extra dimension of flavor.
- **Experiment with Different Cookie Crusts:** The iconic Oreo crust is fantastic, but why limit yourself? The base is ripe for experimentation!
- **Graham Cracker Crust:** A timeless and beloved alternative that offers a slightly less intense chocolate flavor and a buttery, subtly sweet foundation.
- **Vanilla Wafers:** Crushed vanilla wafers would provide a delicate, buttery, and sweetly mild foundation, complementing the chocolate layers beautifully.
- **Blonde Oreos or Golden Oreos:** These offer a lighter, vanilla-flavored alternative to the traditional chocolate Oreos, creating a beautiful color and flavor contrast.
- **Peanut Butter Cookies:** For a delightful and irresistible chocolate-peanut butter combination, use crushed peanut butter cookies for a rich and nutty crust.
- **Biscoff Cookies:** A crust made from crushed Biscoff (speculoos) cookies would add a unique, spiced caramel note that pairs wonderfully with chocolate.
- **Explore Pudding Flavor Swaps:** While chocolate pudding is a star here, the pudding layer can be a fantastic opportunity to introduce new flavors!
- **Vanilla Pudding:** For a classic and universally loved chocolate-vanilla combination that’s always a winner.
- **Butterscotch Pudding:** Adds a rich, buttery caramel note that pairs surprisingly well with chocolate.
- **Coconut Cream Pudding:** For a delightful tropical twist, especially good if you’re planning a chocolate-coconut themed topping.
- **Pistachio Pudding:** Offers a unique color and a subtle nutty, slightly sweet flavor that’s both unexpected and delicious.
- **White Chocolate Pudding:** Creates a creamy white layer for a striking visual contrast against the dark Oreo crust.
- **Elevate Your Toppings Game:** The sky’s truly the limit when it comes to garnishing your chocolate lasagna! Beyond the suggested nuts, fresh fruit, and delicious drizzles, consider these creative additions:
- **Toffee Bits:** Adds a wonderful chewy, buttery crunch that complements the chocolate perfectly.
- **Caramelized Popcorn:** A fun, unexpected textural element that brings a sweet and salty surprise.
- **Chopped Candy Bars:** M&M’s, Snickers bits, Heath bar crumbles, Reese’s Peanut Butter Cups – whatever your favorite candy is, chop it up and sprinkle it on!
- **Shredded Coconut:** Especially tasty if you’re leaning into a tropical or chocolate-coconut theme. Toasted coconut would add even more depth.
- **Espresso Powder:** A light dusting over the whipped topping can beautifully deepen and enhance the complex flavors of the chocolate without adding a coffee taste.
- **Candied Orange Peel:** For a sophisticated and zesty touch that pairs exquisitely with rich chocolate.
- **Mini Marshmallows:** For a s’mores-inspired twist, especially if lightly toasted with a kitchen torch (carefully!).
- **Individual Servings:** Instead of preparing one large pan, consider assembling this dessert in individual ramekins, small clear glasses, or mason jars. This makes for an elegant presentation, perfect portion control, and is ideal for dinner parties or grab-and-go treats.
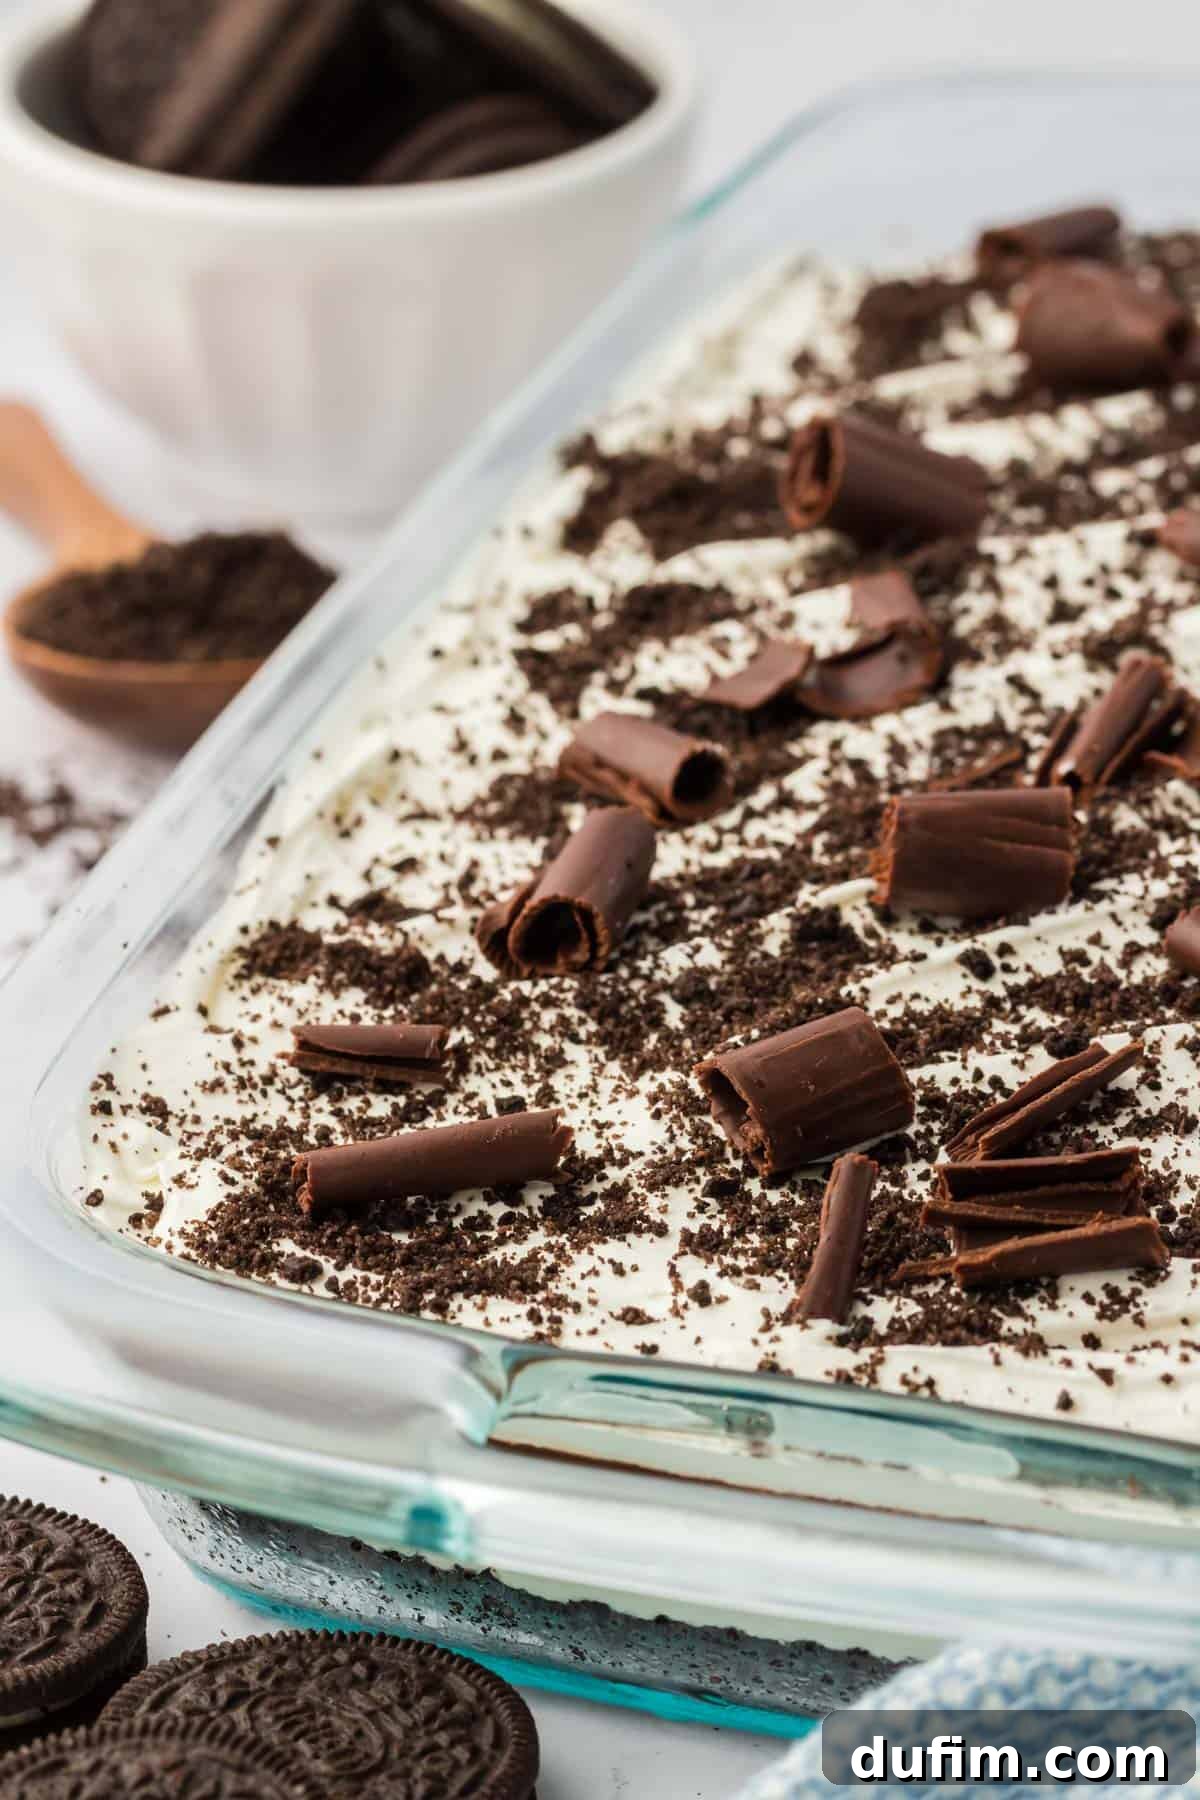
Storing and Freezing Your Chocolate Lasagna Dessert
One of the many convenient benefits of this no-bake chocolate lasagna is its excellent make-ahead and storage capabilities. This makes it perfect for planning ahead for events, managing holiday prep, or simply enjoying delicious leftovers for days. Proper storage is key to ensuring your dessert remains fresh, flavorful, and structurally sound.
Refrigeration:
To store your prepared chocolate lasagna, tightly cover the entire pan with plastic wrap or aluminum foil. If you’ve already sliced portions, it’s best to transfer individual slices to an airtight container. This dessert is at its absolute best when served within 48 hours of preparation, as the crust is perfectly crisp and the whipped topping is at its fluffiest. While it will still be delicious, beyond this timeframe, the Oreo crust might start to soften slightly, and the whipped topping may lose some of its initial airy texture, though it will remain enjoyable for up to 3-4 days in the refrigerator.
Freezing:
Yes, you can absolutely freeze this delightful chocolate lasagna, which is a fantastic feature for meal prep, unexpected guests, or simply stocking up for future cravings! To freeze, ensure the entire lasagna is fully chilled and set in the refrigerator first. Then, cover the pan tightly with several layers of plastic wrap, followed by an additional layer of heavy-duty aluminum foil to provide maximum protection against freezer burn. Alternatively, you can slice the lasagna into individual portions, wrap each slice separately and securely in plastic wrap, and then place them into a freezer-safe container or freezer bag. Frozen chocolate lasagna can be successfully stored for up to two months without significant loss of quality.
When you’re ready to indulge, simply transfer the frozen lasagna (either the whole pan or individual slices) to the refrigerator and let it thaw slowly overnight. By morning, you’ll have a perfectly delicious, ready-to-serve dessert that tastes just as good as if it were freshly made. This method is incredibly convenient for those last-minute potlucks, unexpected drop-ins, or when a sudden, irresistible chocolate craving strikes without any extra work.
More Irresistible Chocolate Recipes to Explore
If you’re a devoted chocolate enthusiast, your culinary adventure certainly doesn’t have to end with this incredible chocolate lasagna. There’s a vast world of cocoa-infused delights waiting to be discovered! Here are some other cherished chocolate recipes that are sure to delight your taste buds and expand your dessert repertoire. From elegant individual treats to comforting classics, there’s a chocolate creation for every mood and every occasion:
- Mini Chocolate Cheesecakes: Perfectly portioned and intensely rich, these individual cheesecakes are ideal for a sophisticated dessert or when you crave a small, luxurious treat.
- Double Chocolate Chip Cookies: A beloved classic elevated with an abundance of extra chocolate, yielding wonderfully chewy, decadent cookies that are always a guaranteed hit with everyone.
- Chocolate Cupcakes: Fluffy, moist, and utterly satisfying, these tender chocolate cupcakes are a staple for any celebration, adaptable to countless frostings and decorations.
- Easy Chocolate Mousse: Light as air and intensely chocolatey, this elegant dessert offers a luxurious texture and deep flavor, yet is surprisingly simple and quick to prepare.
Chocolate Lasagna Recipe Card
Here’s the complete, streamlined recipe for your ultimate no-bake chocolate lasagna, designed for maximum ease and incredible deliciousness. This recipe yields approximately 20 generous servings, making it perfect for sharing with family and friends at any gathering!
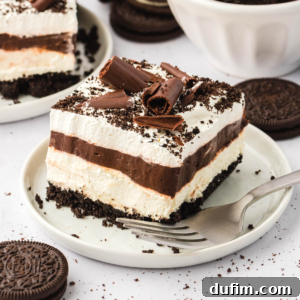
No-Bake Chocolate Lasagna with Oreos
By: Beth
Prep Time: 20 minutes
Chill Time: 2 hours (minimum)
Servings: 20
The ultimate no-bake chocolate lasagna is perfectly balanced in sweetness and texture. Follow these tried-and-true steps to create a stunning 5-layer dessert in just 20 minutes of active prep, guaranteed to impress at any gathering!
Equipment
- 9×13 inch glass baking pan
- Large Mixing Bowl
- Spatula
- Kitchen Scale (optional, for precise measurements)
- Electric Mixer (handheld or stand mixer)
- Food Processor or Blender (for crushing Oreos)
- Vegetable Peeler (for chocolate shavings)
Ingredients
Oreo Crust Layer
- 14.3 oz package Oreo cookies (approx. 36 cookies)
- 6 Tbsp (86g) unsalted butter, melted
Cheesecake Layer
- 12 oz (342g) cream cheese, softened to room temperature
- 1 cup (113g) powdered sugar
- 1 tsp vanilla extract
- 8 oz (226g) whipped topping (Cool Whip), thawed (one container)
Pudding Layer
- Two 3.9 oz packages instant chocolate pudding mix
- 2 ¾ cup (650g) cold milk (whole or 2%)
Top Layer & Garnish
- 8 oz (226g) whipped topping (Cool Whip), thawed (remaining container)
- Oreo crumbs (1 tablespoon reserved from crust preparation)
- Chocolate Curls / Shavings (from a chocolate bar)
Instructions
- **Prepare Oreo Crumbs:** In a food processor or blender, blend the Oreo cookies until fine crumbs are formed. Remove 1 tablespoon of crumbs and set aside for topping.
- **Make Oreo Crust:** In a mixing bowl, combine the remaining Oreo crumbs and melted butter. Stir thoroughly until the crumbs are completely moistened.
- **Press Crust:** Firmly press the crust mixture into the bottom of a 9×13 inch pan using your fingers or the back of a glass to form a compact, even layer.
- **Beat Cream Cheese:** Wipe out the mixing bowl. Add the softened cream cheese and beat with an electric mixer for approximately 90 seconds until it is light, fluffy, and completely smooth.
- **Create Cheesecake Layer:** Beat in the powdered sugar and vanilla extract until just combined. Gently fold in one 8 oz container of thawed whipped topping. Spread this cheesecake mixture evenly over the Oreo crust. Refrigerate for 10 minutes.
- **Prepare Pudding Layer:** Rinse and dry the mixing bowl. Whisk together the two packages of instant chocolate pudding mix and the cold milk for about 2-3 minutes, or until the mixture visibly thickens. Promptly spread this pudding evenly over the chilled cheesecake layer. Refrigerate for another 10 minutes.
- **Add Top Layer & Garnish:** Spread the remaining 8 oz container of thawed whipped topping over the set pudding layer. Sprinkle the reserved 1 tablespoon of Oreo crumbs and chocolate curls/shavings over the top. (Tip: Use a vegetable peeler on a chocolate bar for curls, and a spoon to transfer them to avoid melting.)
- **Chill Thoroughly:** Cover the pan with plastic wrap or foil and refrigerate for at least 2 hours (preferably 4-6 hours or overnight) until all layers are fully set. This dessert is best served within 48 hours for optimal freshness.
Nutrition Information (per serving, approximate)
All nutritional values are approximate and provided to the reader as a courtesy. Changing ingredients and/or quantities will alter the estimated nutritional calculations.
- Calories: 282 kcal
- Carbohydrates: 33g
- Protein: 4g
- Fat: 15g
- Saturated Fat: 8g
- Polyunsaturated Fat: 1g
- Monounsaturated Fat: 5g
- Trans Fat: 0.1g
- Cholesterol: 34mg
- Sodium: 241mg
- Potassium: 159mg
- Fiber: 1g
- Sugar: 24g
- Vitamin A: 428 IU
- Calcium: 88mg
- Iron: 3mg