
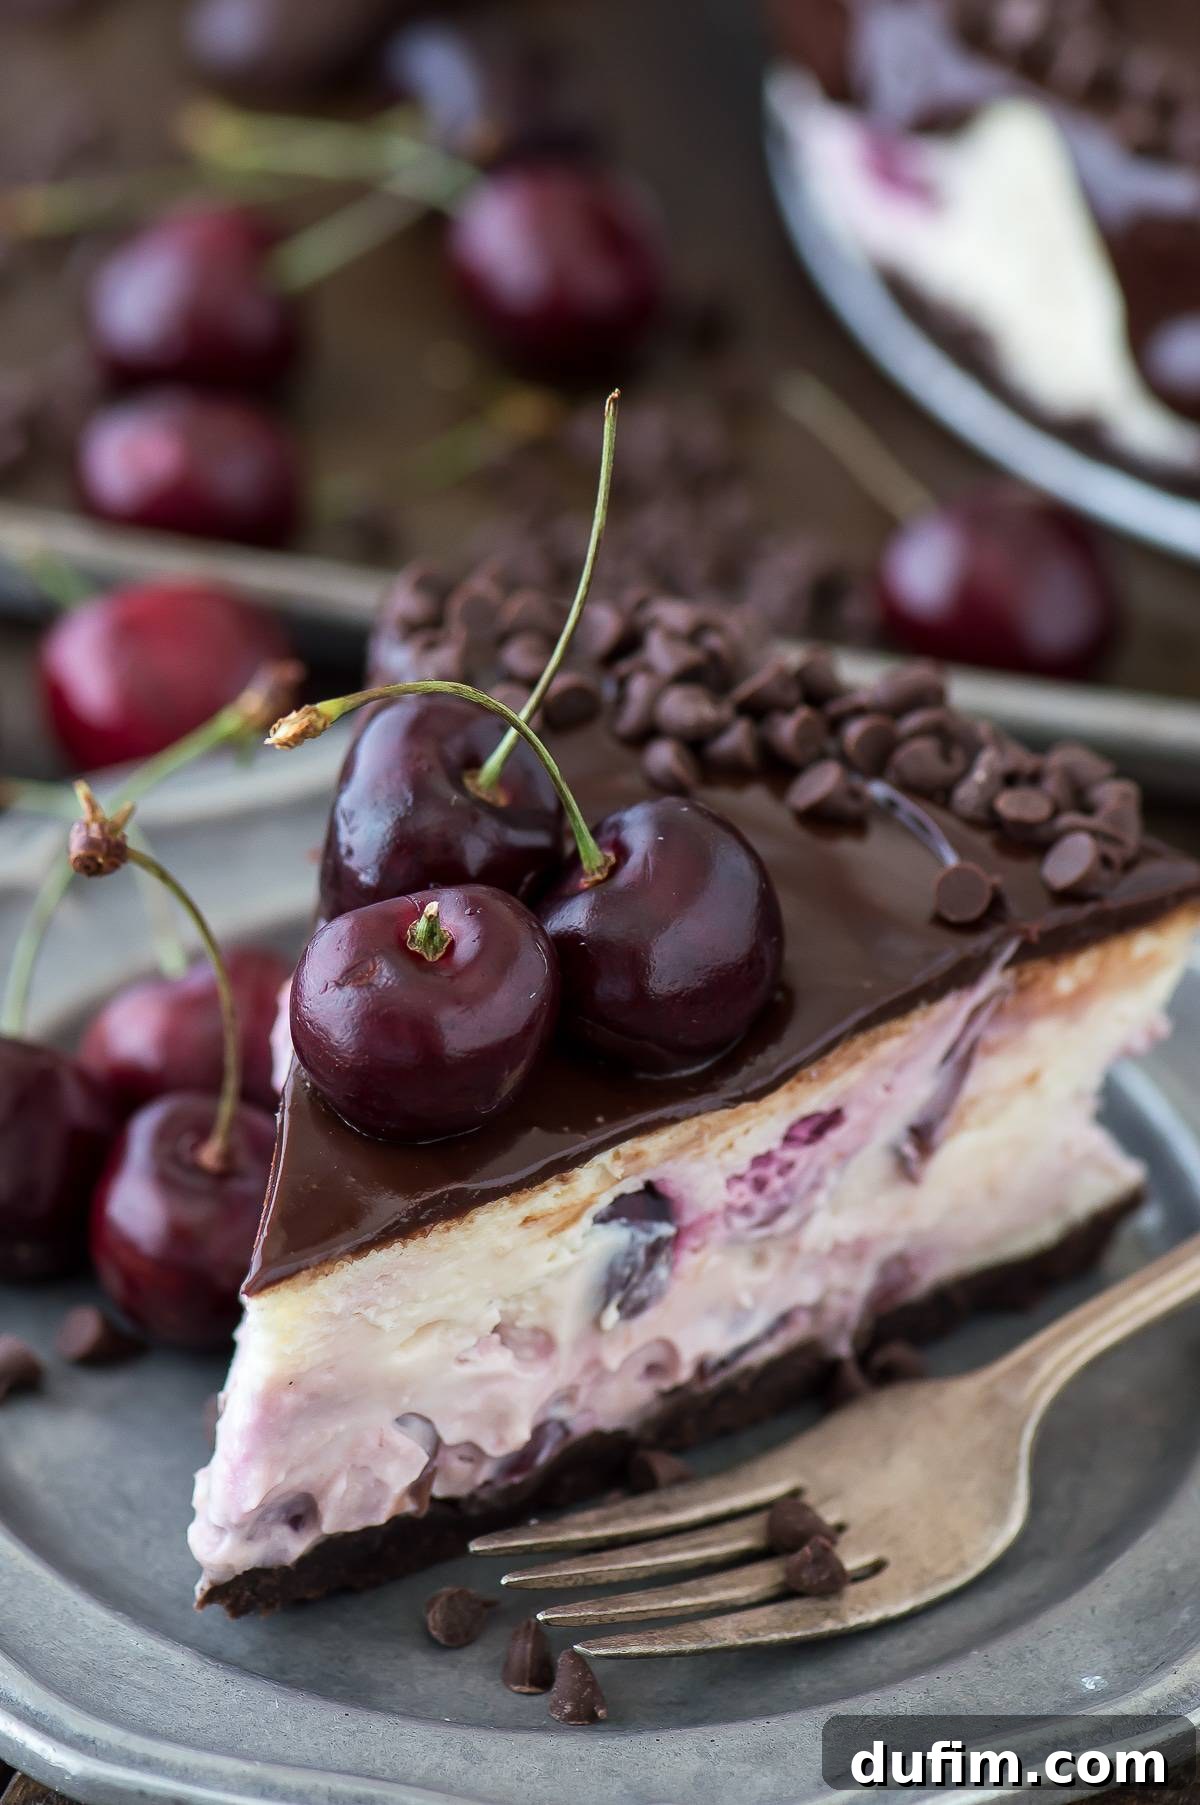
Indulge in the ultimate dessert experience with our fresh chocolate cherry cheesecake recipe, featuring a rich chocolate crust, plump fresh cherries baked right into the creamy filling, and generously drizzled with a luxurious ganache.
“This has been my go-to cheesecake for the past few years!!! Everyone loves it – and it’s easy, great, and beautiful!!”
– Judy
Decadent Chocolate Cherry Cheesecake: Your Guide to a Flawless Homemade Dessert
There’s something uniquely enchanting about a perfectly baked cheesecake. It’s a dessert that speaks of celebration, comfort, and pure indulgence. But what elevates a great cheesecake to an extraordinary one? For us, it’s the magical combination of rich chocolate and vibrant fresh cherries. This chocolate cherry cheesecake recipe is not just a dessert; it’s an experience, designed to impress with its layers of flavor and stunning appearance.
Imagine a velvety smooth cheesecake filling, studded with bursts of juicy, tart cherries, all nestled atop a crisp, buttery chocolate graham cracker crust. Then, picture it crowned with a glossy, dark chocolate ganache and adorned with even more fresh cherries and mini chocolate chips. Sounds like a dream, right? This recipe makes that dream a delicious reality, proving that an elegant dessert doesn’t have to be overly complicated. We’re here to guide you through every step, ensuring your homemade chocolate cherry cheesecake is nothing short of spectacular.
One of the most satisfying aspects of baking is selecting the finest ingredients. When it comes to cherries, I often find myself perplexed by grocery store pricing. Those beautifully packaged bags might display a tempting “$2.99,” only for the fine print to reveal “per pound,” suddenly transforming a seemingly affordable treat into a nine-dollar surprise at checkout! It’s a common frustration many home bakers face when trying to budget for fresh, seasonal produce.
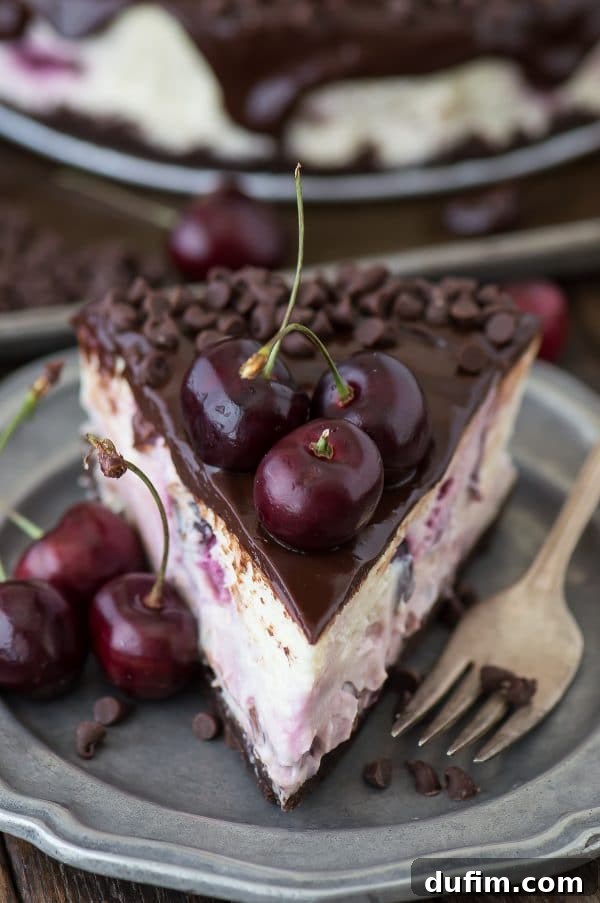
That’s why I’ve learned to appreciate stores like Aldi, where the price displayed is the price you pay for the entire container. It allows for clearer decision-making in the produce aisle, so you know exactly what you’re investing in for your cherry dessert. Fresh cherries, with their bright tartness and sweet undertones, are truly versatile. They’re fantastic in cakes, muffins, atop chocolate cakes, or folded into homemade ice cream. Their rich flavor complements chocolate in a way few other fruits can, making them the perfect partner for this decadent cheesecake.
Crafting the Perfect Chocolate Crust
Every exceptional cheesecake begins with an outstanding crust, and for our chocolate cherry delight, a chocolate graham cracker crust is non-negotiable. The deep cocoa notes in the crust provide a fantastic foundation, complementing the sweet-tart cherries and creamy filling. You’ll need about 1 ½ cups of finely pulsed chocolate graham cracker crumbs and 5 tablespoons of melted butter to create this irresistible base. The key is to ensure the crumbs are very fine so they bind together beautifully and create a dense, sturdy layer that can support the rich cheesecake filling.
Before you even think about the filling, preparing your springform pan is crucial. Cheesecake is a delicate bake, and a water bath is your secret weapon against cracks. To protect your crust from moisture, wrap the bottom and sides of your 8-inch springform pan with at least three layers of heavy-duty aluminum foil. This creates a reliable barrier, preventing any water from seeping in during the baking process. Once the pan is ready, press your buttered crumbs evenly into the bottom. A flat-bottomed glass or measuring cup works wonders for compacting the crumbs firmly. For an extra touch, you can extend the crumbs slightly up the sides of the pan.
Pre-baking the crust is a vital step that ensures it’s firm and flavorful. Pop your crust into a preheated oven at 350°F (175°C) for 8-10 minutes, or until it looks golden and smells wonderfully toasted. This quick bake sets the crust, preventing it from becoming soggy once the creamy filling is added. After pre-baking, allow the crust to cool completely to room temperature. This temperature contrast is important for maintaining the crust’s integrity and achieving that perfect texture.
The Irresistible Cheesecake Filling
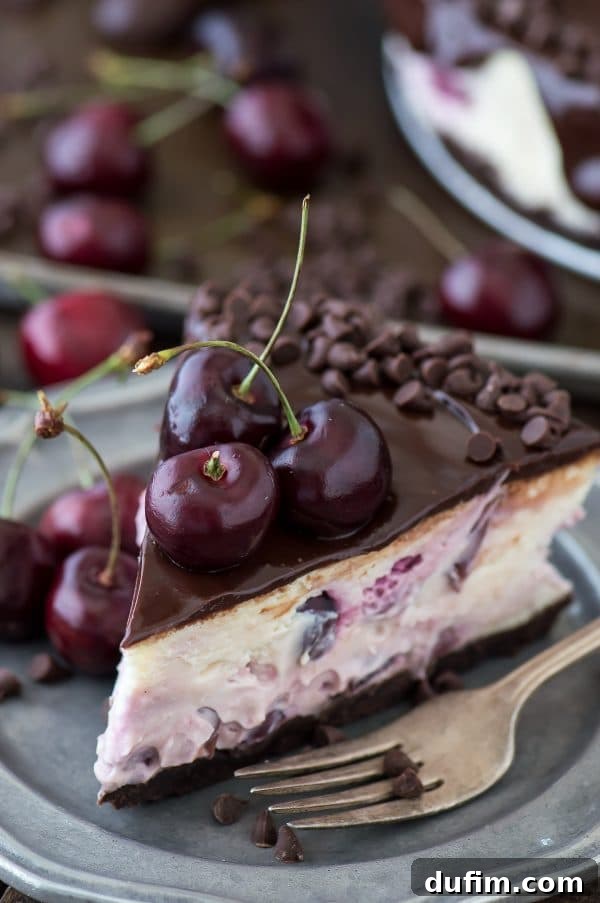
Now for the star of the show: the incredibly creamy cheesecake filling. The base of any great cheesecake is, of course, a generous amount of full-fat cream cheese. For this recipe, we call for 24 ounces (three standard blocks) to ensure that luxurious, rich texture. It’s a no-judgment zone when it comes to cream cheese – embrace the decadence! Alongside the cream cheese, you’ll need granulated sugar for sweetness, a hint of pure vanilla extract to enhance the flavors, large eggs for structure and richness, and our special ingredient: flavored coffee creamer.
Using a flavored coffee creamer, specifically International Delight’s Sweet Cream or French Vanilla, adds an unparalleled depth of flavor and moisture that heavy cream simply can’t match. It’s a simple swap that makes a remarkable difference in the final taste and texture of your homemade cheesecake. You’ll need about ½ cup (118ml) of your chosen creamer. The final essential component for the filling is 1 cup (160g) of fresh, chopped cherries. These delightful fruit pieces will be baked directly into the cheesecake, offering sweet and tangy pockets of flavor throughout each slice.
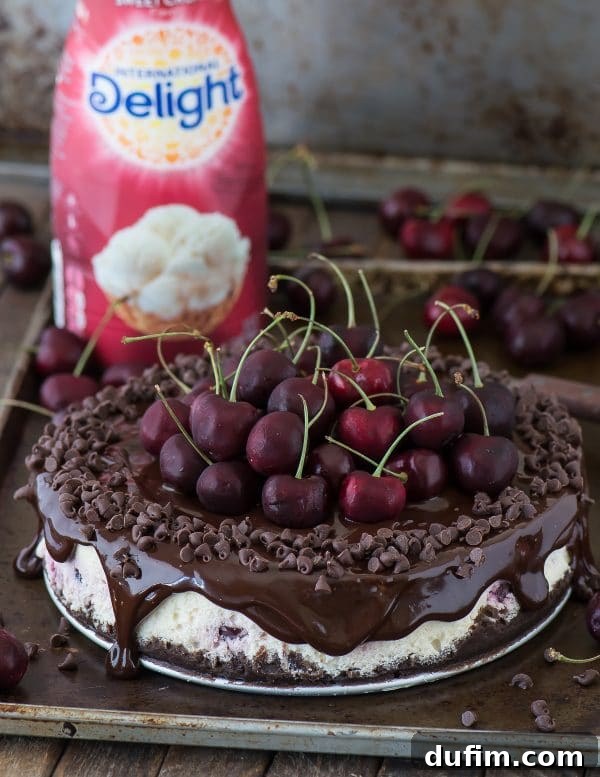
When preparing the filling, ensure all your ingredients, especially the cream cheese and eggs, are at room temperature. This is vital for achieving a smooth, lump-free batter. Begin by beating the softened cream cheese in a large mixing bowl until it’s perfectly smooth and creamy, which usually takes about 2-3 minutes. Next, gradually incorporate the granulated sugar and vanilla extract, beating until just combined. Then, slowly add the coffee creamer, mixing until fully integrated. The final step for the wet ingredients is to add the eggs, one at a time, beating just until each egg is incorporated before adding the next. Overmixing the eggs can introduce too much air, leading to cracks in your finished cheesecake. Finally, gently fold in the chopped fresh cherries with a spatula. This gentle mixing ensures the cherries are evenly distributed without overworking the batter.
Mastering the Bake: Water Bath and Slow Cooling Secrets
Two crucial techniques will ensure your cheesecake bakes evenly, remains moist, and emerges from the oven crack-free:
- Embrace the Water Bath: Don’t be intimidated by the idea of a water bath! While it might sound unusual to place your cheesecake pan in water, it’s the ultimate secret to creating a perfectly moist, creamy, and evenly baked cheesecake. The water bath creates a humid environment in the oven, preventing the edges of the cheesecake from baking faster than the center, which is a common cause of cracks. To set it up, simply place your foil-wrapped springform pan (with the cooled crust and filling) into a larger pan, like a 9×13-inch baking dish. Carefully pour hot water into the larger pan until it reaches about 1-2 inches below the top edge of your springform pan. I find it easiest to place the larger pan (with the springform inside) on a baking sheet before adding water, making it much simpler to transfer to and from the oven.
- Master the Slow Cool: Patience is key once your cheesecake is baked. Rushing the cooling process is another major culprit behind cracks. After the cheesecake has baked for the specified time and the center still has a slight wobble (it will set as it cools), turn off your oven and crack the oven door open slightly. Allow the cheesecake to cool gradually inside the oven for at least 60-90 minutes, or until it reaches room temperature. This gentle cooling prevents a sudden temperature shock that can cause the cheesecake to contract and crack. Only after it has completely cooled in the oven should you remove it, carefully remove the foil, and transfer it to the refrigerator. For the best texture and flavor, refrigerate your cheesecake overnight, or for a minimum of 6 hours, before serving. This allows it to firm up perfectly and for the flavors to fully meld.
The Grand Finale: Decadent Ganache and Fresh Garnishes
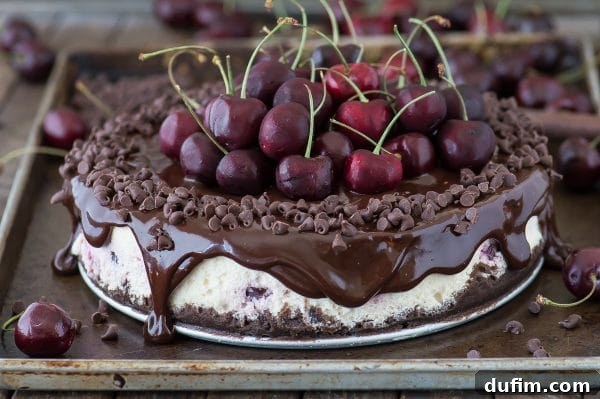
Once your chocolate cherry cheesecake has cooled completely and chilled overnight, it’s time for the crowning glory: the chocolate ganache. This rich, glossy topping adds another layer of deep chocolate flavor and a beautiful presentation. Making ganache is surprisingly simple. You’ll need just two ingredients: heavy whipping cream and quality chocolate chips. Heat the heavy cream until it just reaches a boil, then pour it over the chocolate chips in a heatproof bowl. Let it sit for a minute or two to allow the residual heat to melt the chocolate, then stir until it’s perfectly smooth and shiny. Allow the ganache to cool for 5-7 minutes; it should still be pourable but slightly thickened.
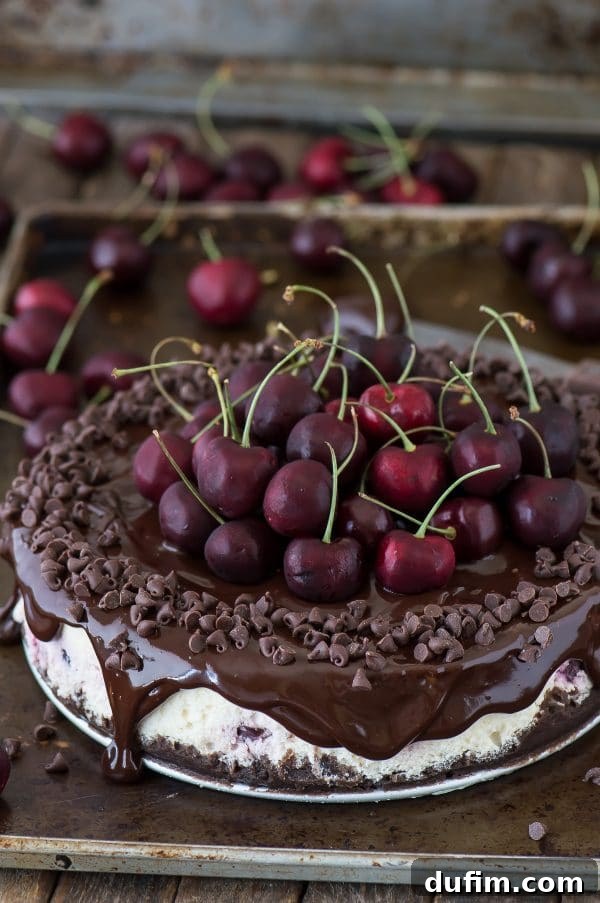
Carefully unmold your chilled cheesecake from the springform pan. The pan should naturally release the cheesecake, though you might need to gently run a thin knife around the edge if any parts are sticking. Pour or spoon the slightly cooled chocolate ganache over the top of the cheesecake, gently spreading it to the edges with a spatula, allowing some to elegantly drip down the sides. For a truly irresistible finish, sprinkle mini chocolate chips around the perimeter of the cheesecake, and then arrange a generous pile of fresh, vibrant cherries in the center. The visual appeal of this dessert is almost as delightful as its taste.
This recipe transforms fresh ingredients and simple techniques into an unforgettable decadent dessert. The combination of a crunchy chocolate crust, creamy cherry-studded filling, and a luxurious ganache creates a symphony of textures and flavors that will leave everyone asking for more. Enjoy the process, and savor every exquisite bite of your homemade chocolate cherry cheesecake!
Tap stars to rate!
Chocolate Cherry Cheesecake
By: Beth
10 minutes
1 hour
7 hours
8 hours 10 minutes
12 servings
Rate
Fresh chocolate cherry cheesecake recipe with a chocolate crust, fresh cherries baked into the cheesecake, dripping with ganache.
Equipment
- 8 inch springform pan
- Glass Mixing Bowl
- KitchenAid 9-Speed Mixer
- My favorite spatula!
- Kitchen Scale
Ingredients
Cheesecake
- 24 oz (678g) full-fat cream cheese (3 packages)
- ½ cup (99g) granulated sugar
- 1 tsp vanilla extract
- ½ cup (118ml) International Delight Sweet Cream Creamer
- 3 large eggs
- 1 cup (160g) chopped fresh cherries
Crust
- 1 ½ cups (170g) chocolate graham cracker crumbs
- 5 Tbsp (72g) butter, melted
Chocolate Ganache
- ¼ cup (59ml) heavy whipping cream
- ¾ cup (129g) chocolate chips
To top the cheesecake
- Mini chocolate chips
- Fresh cherries
Instructions
Crust
- Preheat the oven to 350º F (175°C).
- Pulse the chocolate graham crackers or similar chocolate crackers/cookies in a blender or food processor until very fine. Measure out 1 ½ cups of crumbs. Combine the crumbs with the 5 Tbsp (72g) melted butter in a small bowl and mix well until incorporated.
- Before adding the crumbs to the pan, wrap the bottom and sides of an 8-inch springform pan in 3 layers of aluminum foil. This will help keep the water out during the water bath.
- Add the crumbs to the prepared 8-inch pan, distribute them evenly, using a cup or the bottom of something flat to press the crumbs firmly into the pan. If desired, you can extend the crumbs slightly up the sides of the pan.
- Place the pan in the oven and bake the crust for 8-10 minutes or until golden.
- Remove the pan from the oven and allow it to cool completely to room temperature before adding the cheesecake mixture.
- Turn the oven down to 325º F (160°C).
Cheesecake
- In a large mixing bowl, beat the 24 oz (678g) cream cheese until smooth, about 2-3 minutes.
- Add in the ½ cup (99g) granulated sugar and 1 tsp vanilla extract, then beat again until combined.
- Add in the ½ cup (118ml) International Delight creamer, beat again to combine fully.
- Add in the 3 large eggs, ONE at a time, beating just until each egg is incorporated before adding the next. Do not overmix.
- Beat the mixture for 1 additional minute to ensure everything is well combined and smooth.
- Add in the 1 cup (160g) chopped cherries, then gently mix with a spatula until evenly distributed.
- Pour the cheesecake mixture on top of the cooled crust in the springform pan.
- Place the 8-inch round pan inside a larger 9×13-inch cake pan. Carefully fill the 9×13-inch pan with water, filling it about 1 inch below the top of the aluminum foil on the 8-inch pan.
- For easier handling, I recommend placing the cake pan (with the water bath setup) on top of a large baking sheet before transferring it to the oven.
- Place the water bath with cheesecake inside in the oven and bake at 325º F (160°C) for 60 minutes.
- The cheesecake is done when the center still wobbles a little when you gently jiggle the pan. The edges of the cheesecake should look firmer than the center.
- Once your cheesecake looks done, turn the oven off and open the oven door a little. Allow the cheesecake to cool to room temperature inside the oven before removing – this could take 60-90 minutes.
- Once cooled, remove the cheesecake from the oven. Carefully take off the aluminum foil and place the cheesecake (still in the pan) in the fridge for at least 6 hours or overnight to chill and set completely.
- Before serving, carefully unmold the cheesecake from the pan. Allow the pan to do most of the work; some parts of the cheesecake may stick, but it should naturally separate from the pan edges.
Chocolate Ganache
- Place the ¾ cup (129g) chocolate chips in a heatproof bowl.
- In a small saucepan over medium heat, bring the ¼ cup (59ml) heavy whipping cream to a boil. Once boiling, immediately pour the hot heavy cream over the chocolate chips. Allow the mixture to sit for 1-2 minutes, melting the chocolate chips, then stir well with a whisk until smooth and glossy.
- Allow the chocolate ganache to cool for 5-7 minutes until it’s slightly thickened but still pourable.
To assemble
- Pour/spoon the chocolate ganache on top of the chilled cheesecake, using a spatula to spread it evenly around.
- Add mini chocolate chips on top of the ganache, around the edge of the cheesecake, for an appealing border.
- Arrange fresh cherries in the center of the cheesecake to complete the presentation.
- Serve immediately. Cover and refrigerate any leftovers for up to 3-4 days.
Nutrition
All nutritional values are approximate and provided to the reader as a courtesy. Changing ingredients and/or quantities will alter the estimated nutritional calculations.
- Calories: 409kcal
- Carbohydrates: 25g
- Protein: 6g
- Fat: 32g
- Saturated Fat: 18g
- Polyunsaturated Fat: 2g
- Monounsaturated Fat: 8g
- Trans Fat: 1g
- Cholesterol: 134mg
- Sodium: 287mg
- Potassium: 140mg
- Fiber: 1g
- Sugar: 19g
- Vitamin A: 1088IU
- Vitamin C: 1mg
- Calcium: 79mg
- Iron: 1mg