
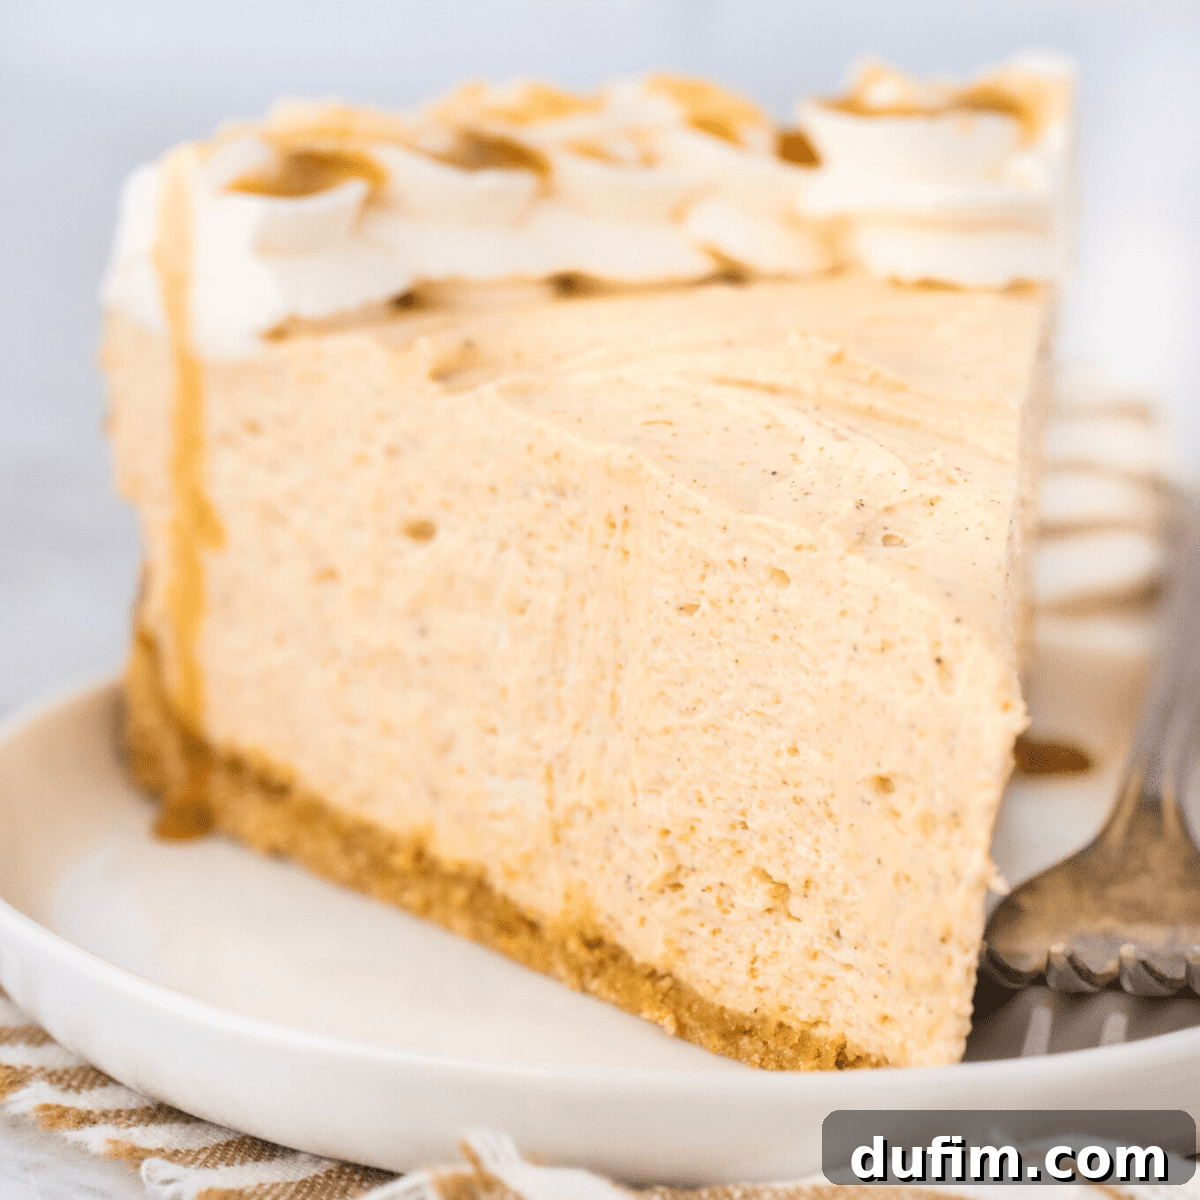
After dedicating a full ten days to rigorous testing, I’ve finally perfected this no-bake pumpkin cheesecake recipe, ensuring the ideal consistency that truly sets it apart. My commitment to a flawless no-bake cheesecake means you can now bypass all my trial-and-error and benefit from the precise techniques and tips for achieving this autumnal delight. Get ready to create a pumpkin cheesecake that’s thick, fluffy, and undeniably perfect.
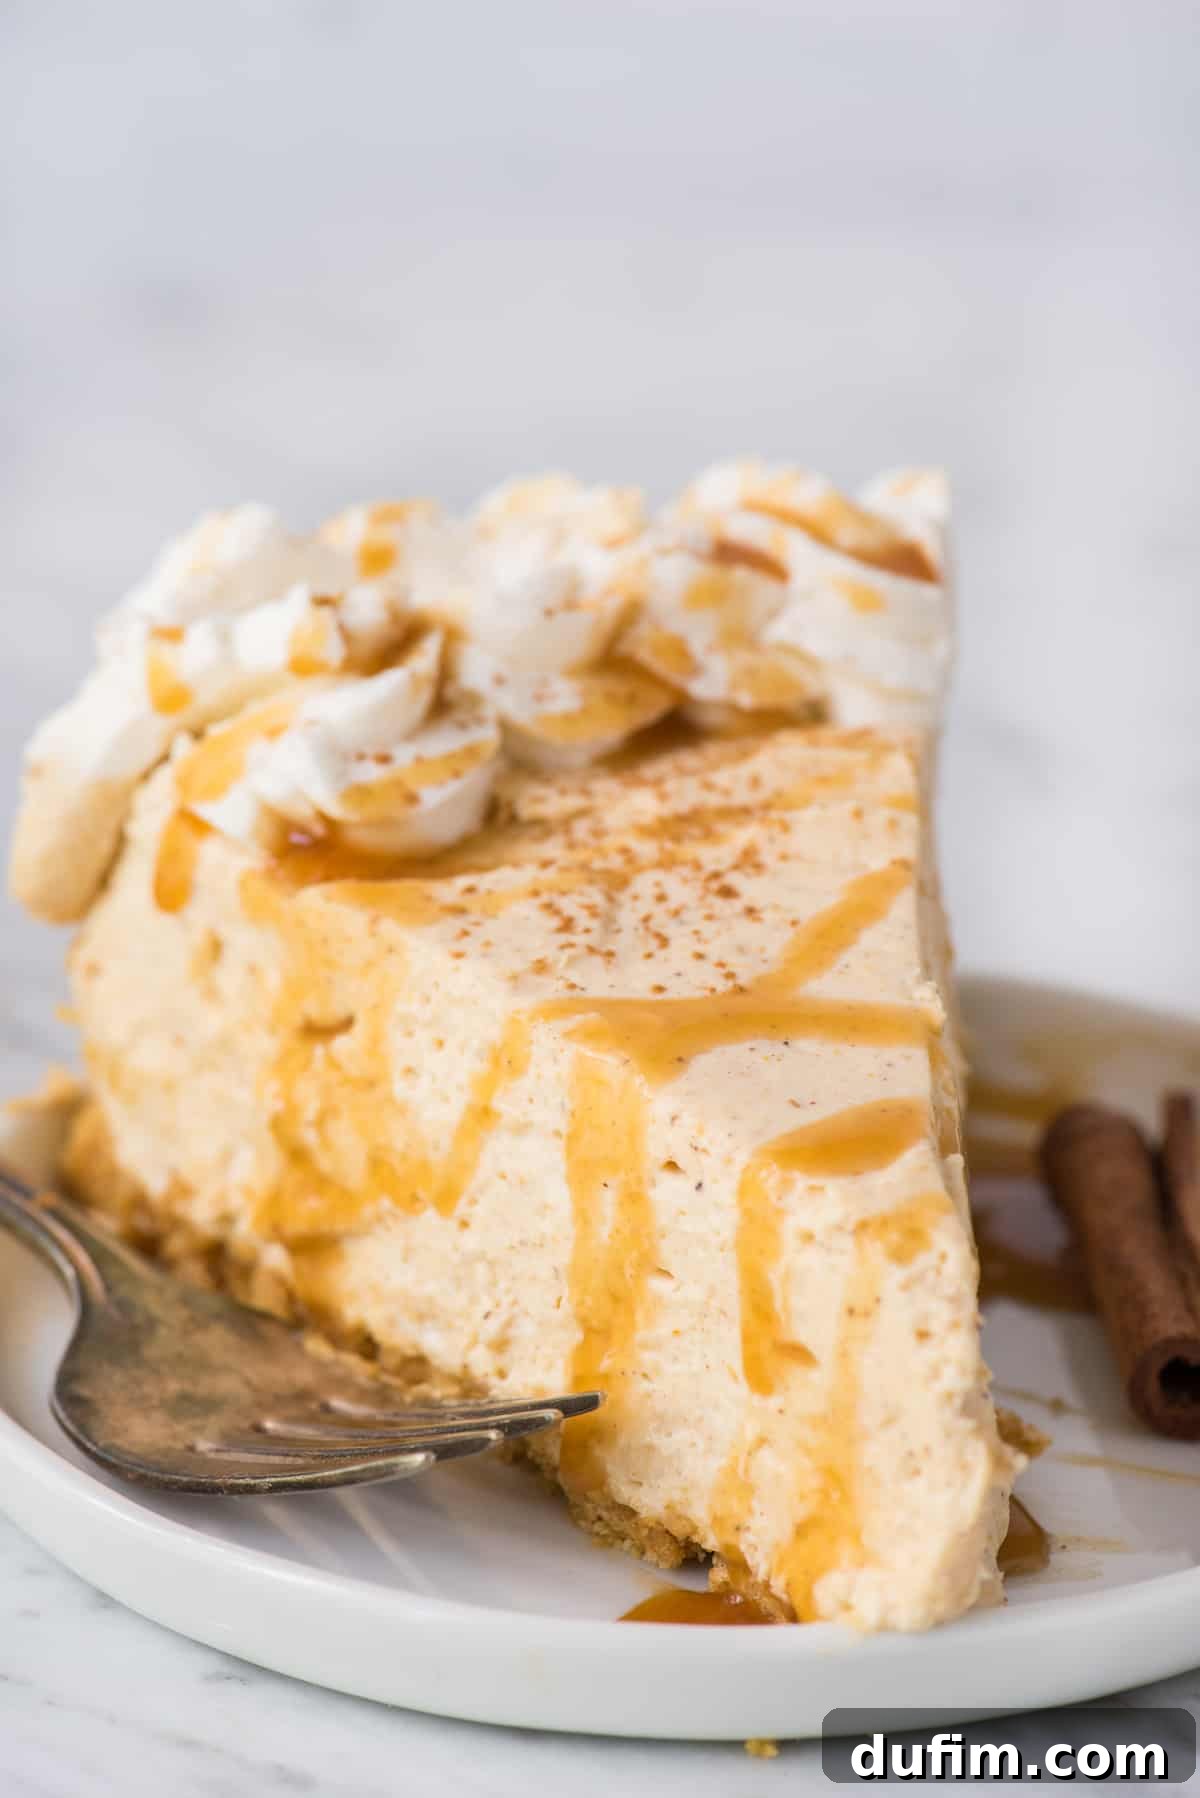
From the outset, my goal was clear: to create a remarkable no-bake pumpkin cheesecake without relying on gelatin or sweetened condensed milk for stabilization. This meant meticulously refining the process to achieve that coveted thick and creamy texture. The journey involved significant experimentation, but the result is a truly exceptional recipe that I am thrilled to share with you, promising a delightful treat for any occasion, especially during the festive fall season.
Through countless batches, I pinpointed a crucial method for whipping and chilling the filling that guarantees success every time. This detailed approach, which you’ll find elaborated in the “How to Make No Bake Pumpkin Cheesecake” section below, is the cornerstone of this recipe’s perfect set.
One of my most significant discoveries during testing was the absolute necessity of blotting excess moisture from the pumpkin puree. This simple yet vital step is often overlooked but proved to be a game-changer for the cheesecake’s structure and firmness. These are the invaluable insights that only dedicated trial and error can provide. The good news for you is that I’ve done all the hard work, so you can achieve a flawless no-bake pumpkin cheesecake on your very first attempt!
Keep reading to uncover all my expert tips, smart tricks, detailed storage recommendations, and so much more, ensuring your no-bake pumpkin cheesecake is nothing short of spectacular.
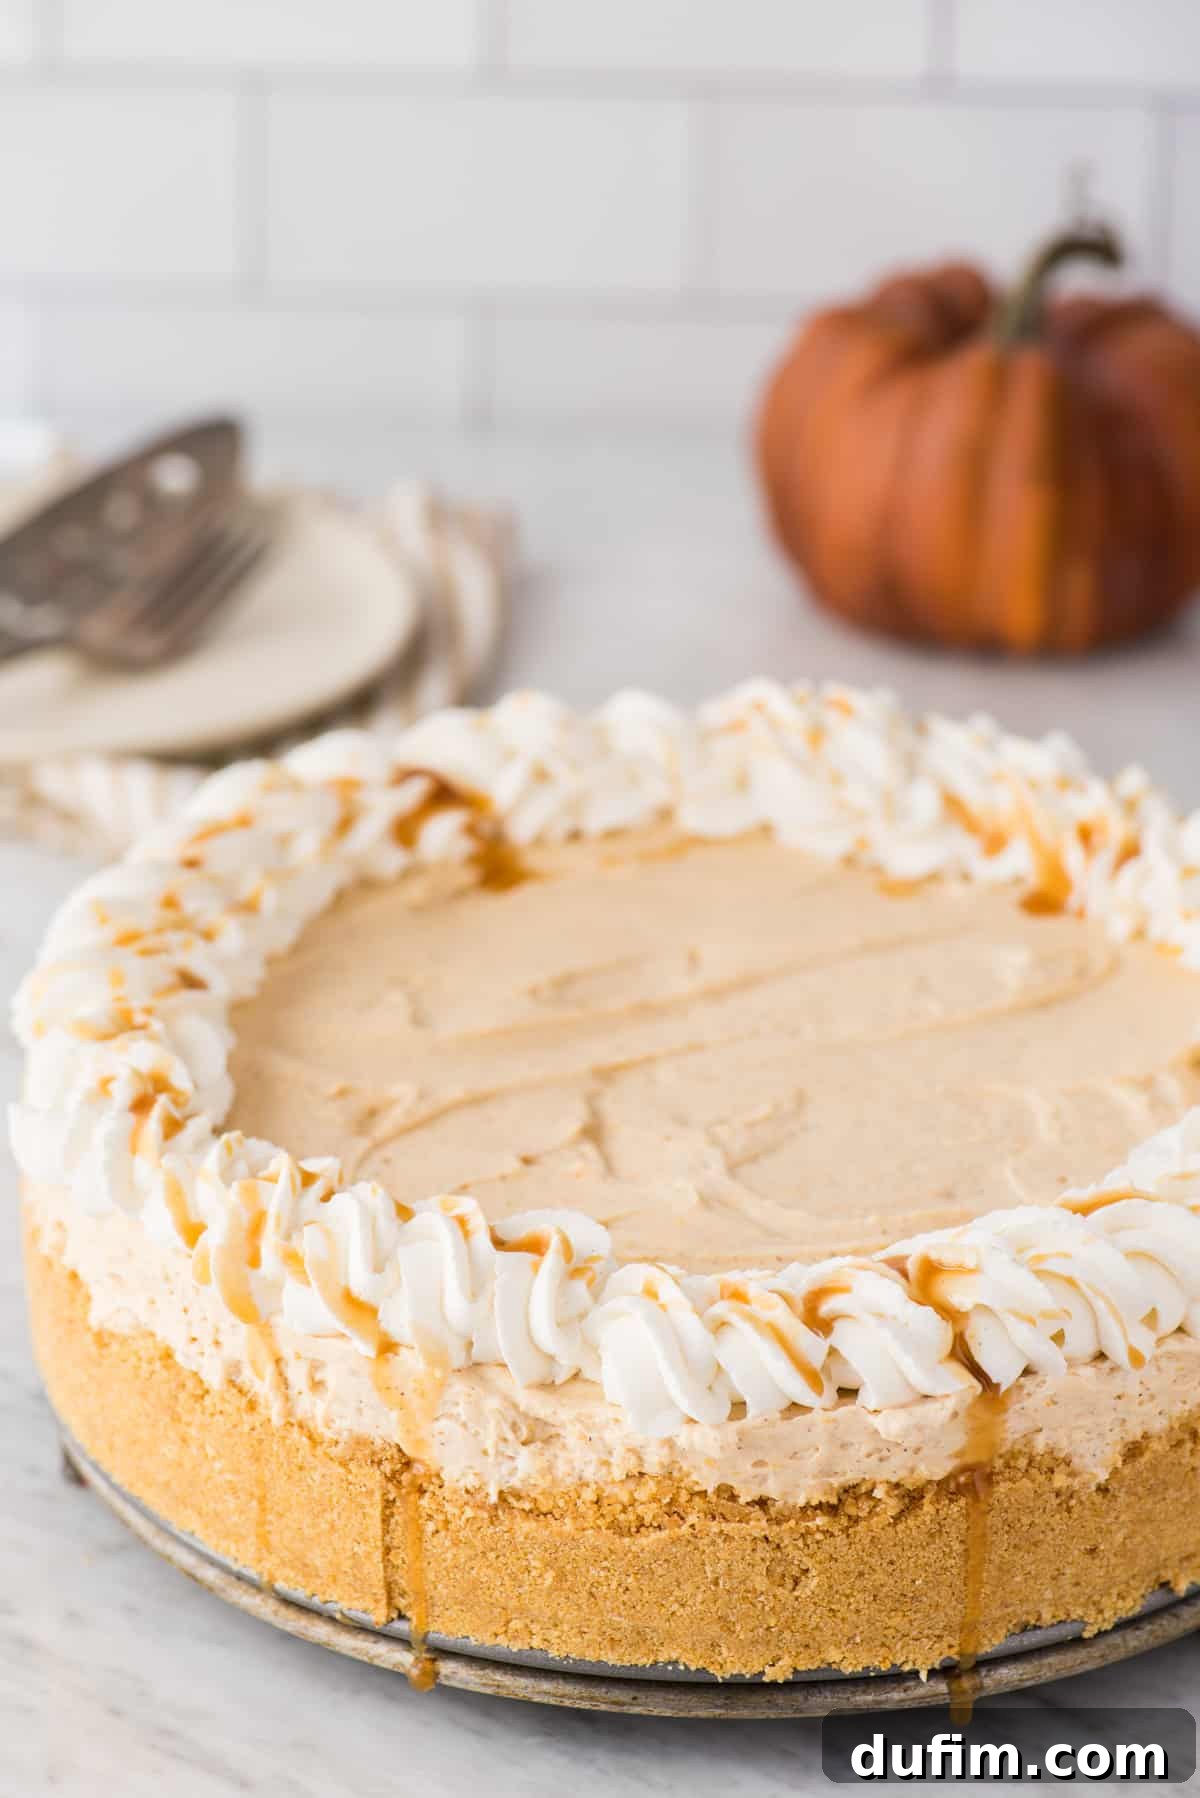
Essential Ingredients for Your Pumpkin Masterpiece
Creating an irresistible no-bake pumpkin cheesecake starts with a careful selection of fresh, high-quality ingredients. Each component plays a vital role in achieving that perfect creamy texture and classic fall flavor. Here’s a detailed look at what you’ll need:
- Graham Cracker Crumbs: Forms the sweet, buttery foundation of our crust. Freshly crushed graham crackers offer the best texture and flavor.
- Brown Sugar: Adds a rich, molasses-like sweetness to both the crust and the filling, complementing the pumpkin beautifully.
- Unsalted Butter: Essential for binding the crust ingredients together, creating a firm base. Make sure it’s melted for easy incorporation.
- Full-Fat Cream Cheese: The star of the show! Room temperature, full-fat cream cheese is crucial for a smooth, rich, and stable cheesecake filling. Avoid low-fat varieties as they can result in a runny consistency.
- Powdered Sugar (Confectioners’ Sugar): Provides sweetness and helps achieve a silky-smooth texture in the filling without any graininess.
- Pumpkin Puree: The heart of the pumpkin flavor. Be sure to use 100% pure pumpkin puree, not pumpkin pie filling, and remember the critical step of removing excess moisture (detailed below) for a firm set.
- Cinnamon: A warm, aromatic spice that is foundational to pumpkin flavor.
- Nutmeg: Offers a delicate, slightly sweet, and woody spice note that pairs wonderfully with pumpkin.
- Ground Ginger: Adds a hint of peppery warmth and zing, enhancing the overall spice profile.
- Ground Cloves: Provides a strong, sweet, and pungent aroma, rounding out the classic pumpkin spice blend.
- Heavy Whipping Cream: When whipped to stiff peaks, this ingredient provides the crucial lift and fluffy texture that stabilizes the no-bake filling without gelatin. Ensure it’s very cold for optimal whipping.
- Vanilla Extract: A splash of pure vanilla extract enhances all the flavors, adding depth and a touch of sweetness to the creamy filling.
Crafting the Perfect Graham Cracker Crust
A great no-bake cheesecake begins with an outstanding crust. This simple graham cracker crust is not only easy to make but provides the perfect buttery, sweet counterpoint to the creamy pumpkin filling. Here’s how to prepare it:
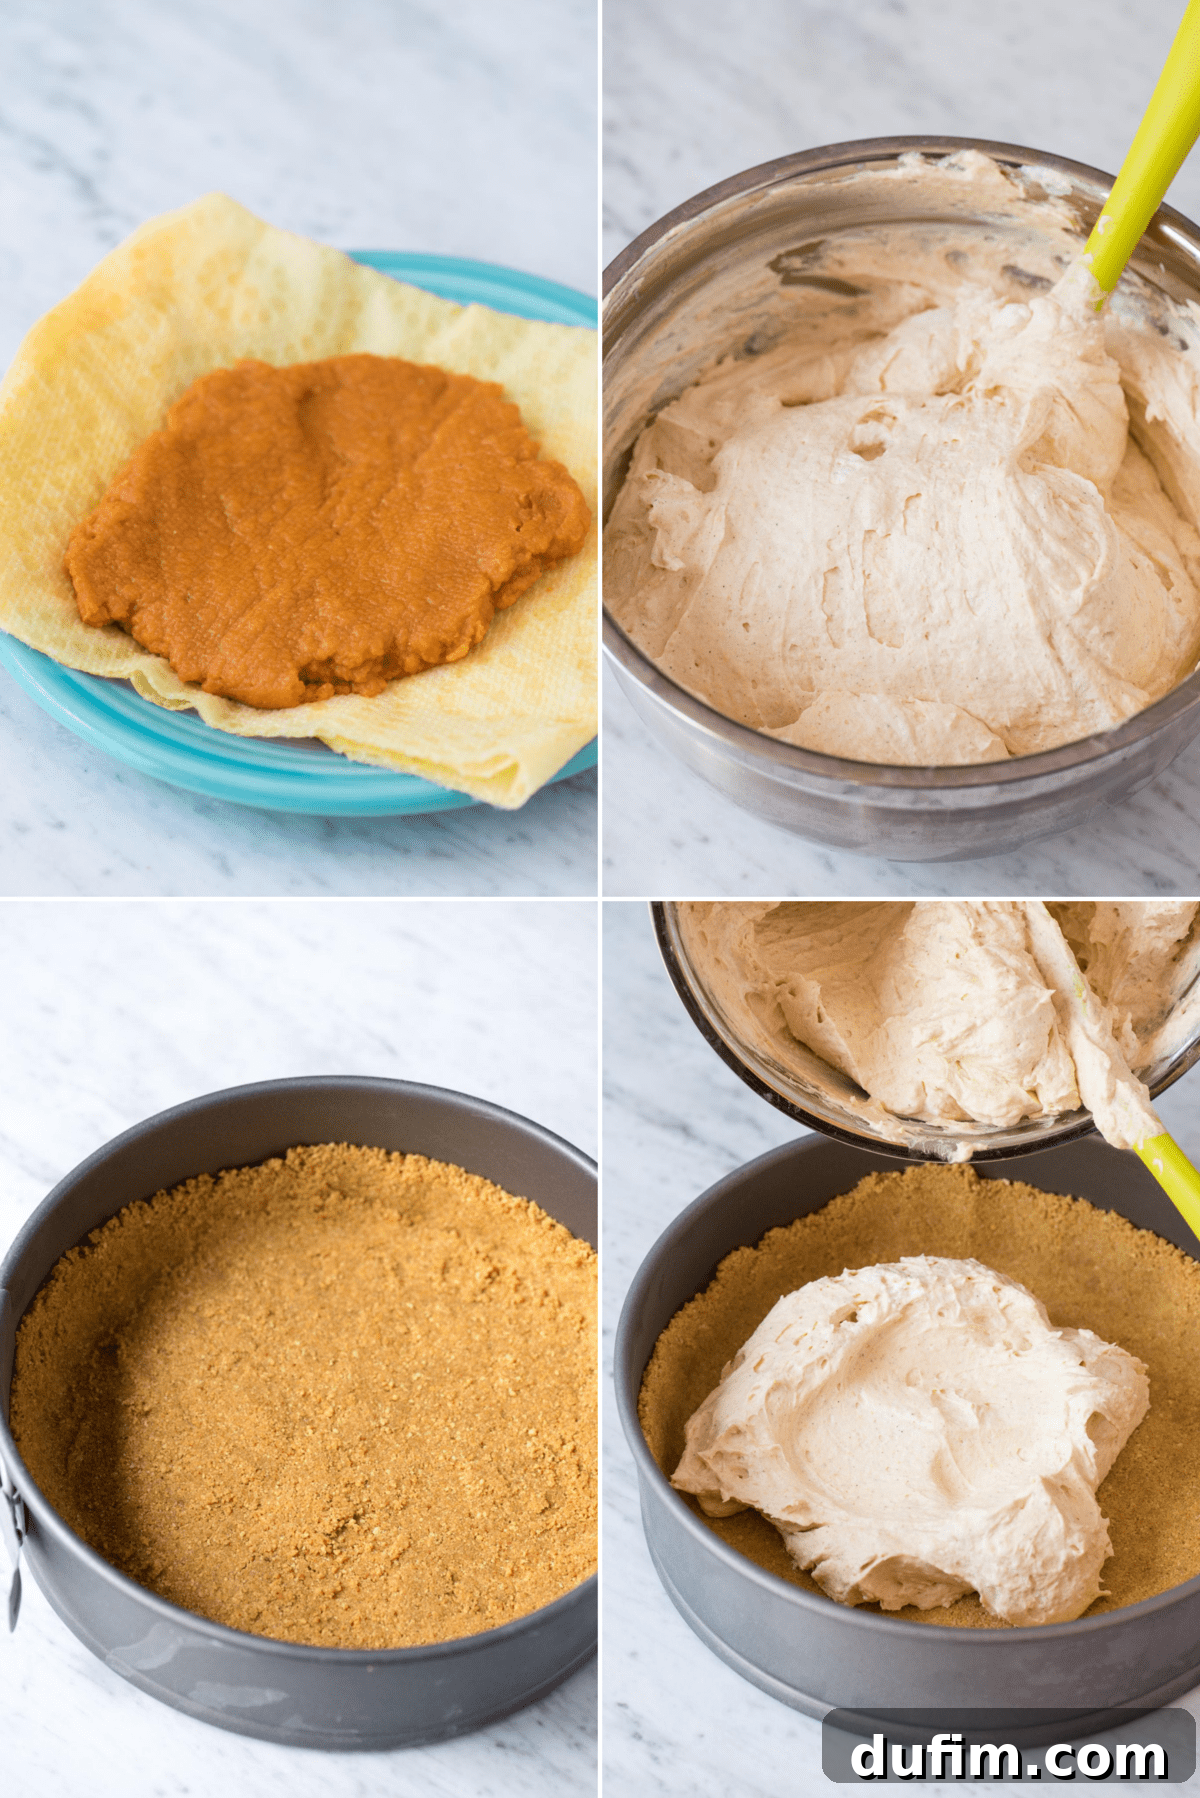
In a medium mixing bowl, combine the finely crushed graham cracker crumbs, a touch of brown sugar for added depth, and the melted unsalted butter. Stir these ingredients thoroughly until the mixture takes on the consistency of wet sand – thick and uniform. This ensures that every crumb is coated with butter, which is essential for a sturdy crust.
Next, transfer this delectable crumb mixture into an ungreased 8 or 9-inch springform pan. While a springform pan is ideal for easy serving and clean slices, a standard pie pan can also be used if preferred. Begin by using your fingertips to gently spread the mixture evenly across the bottom of the pan. Then, for a truly compacted and firm crust, use the bottom of a flat cup or measuring cup (a 1/2 cup measure works wonderfully) to press the crumbs firmly against the bottom and slightly up the sides of the pan. The more compacted the crust, the less likely it is to crumble when sliced.
Once pressed, place the prepared crust into the freezer for at least 15 minutes. This chilling period is vital as it allows the butter to solidify, setting the crust and preventing it from becoming soggy once the filling is added. If you prefer to get a head start, you can prepare the crust a day or two in advance. Simply cover it tightly with foil or plastic wrap and store it in the refrigerator until you’re ready to assemble your cheesecake.
Step-by-Step: Mastering Your No-Bake Pumpkin Cheesecake Filling
Achieving a perfectly firm yet fluffy no-bake cheesecake filling without gelatin or condensed milk requires a specific technique. My extensive testing revealed that the key lies in how the ingredients are incorporated. Learn from my initial challenges, where the cheesecake struggled to firm up, and follow this foolproof method for success every time.
The secret to a stable, luscious filling is to whip the cream cheese and powdered sugar separately from the heavy whipping cream. This ensures each component reaches its optimal texture before being gently combined, leading to a wonderfully thick and stable cheesecake.
STEP 1 – Prepare the Cream Cheese Mixture
Begin by ensuring your full-fat cream cheese is at room temperature. This is crucial for a smooth, lump-free mixture. In a large mixing bowl, combine the softened cream cheese with the specified amount of powdered sugar. Using an electric mixer, beat these two ingredients together for 1-2 minutes until the mixture is incredibly creamy, light, and completely smooth, with no lumps remaining. Next, add in your prepared pumpkin puree (remember to remove excess moisture!) and the delightful blend of fall spices: cinnamon, nutmeg, ground ginger, and ground cloves. Beat again on medium speed until all ingredients are just combined and evenly distributed. Avoid overmixing at this stage. Set this fragrant pumpkin cream cheese mixture aside.
STEP 2 – Whip the Heavy Cream to Stiff Peaks
This step is paramount for the structure of your no-bake cheesecake. For the best results, place a clean metal mixing bowl and your beaters in the freezer for about 15 minutes beforehand. A chilled bowl and beaters will help the heavy cream whip up faster and hold its stiff peaks more effectively. Once chilled, pour the very cold heavy whipping cream into the bowl. Add the remaining powdered sugar and the vanilla extract. Beat with an electric mixer, starting on low speed and gradually increasing to high, until stiff peaks form. Stiff peaks mean that when you lift the beaters, the whipped cream stands up firmly without collapsing. This process typically takes about 4-5 minutes, depending on your mixer and cream temperature. Be careful not to overbeat, as it can turn into butter.
STEP 3 – Gently Combine for Fluffy Perfection
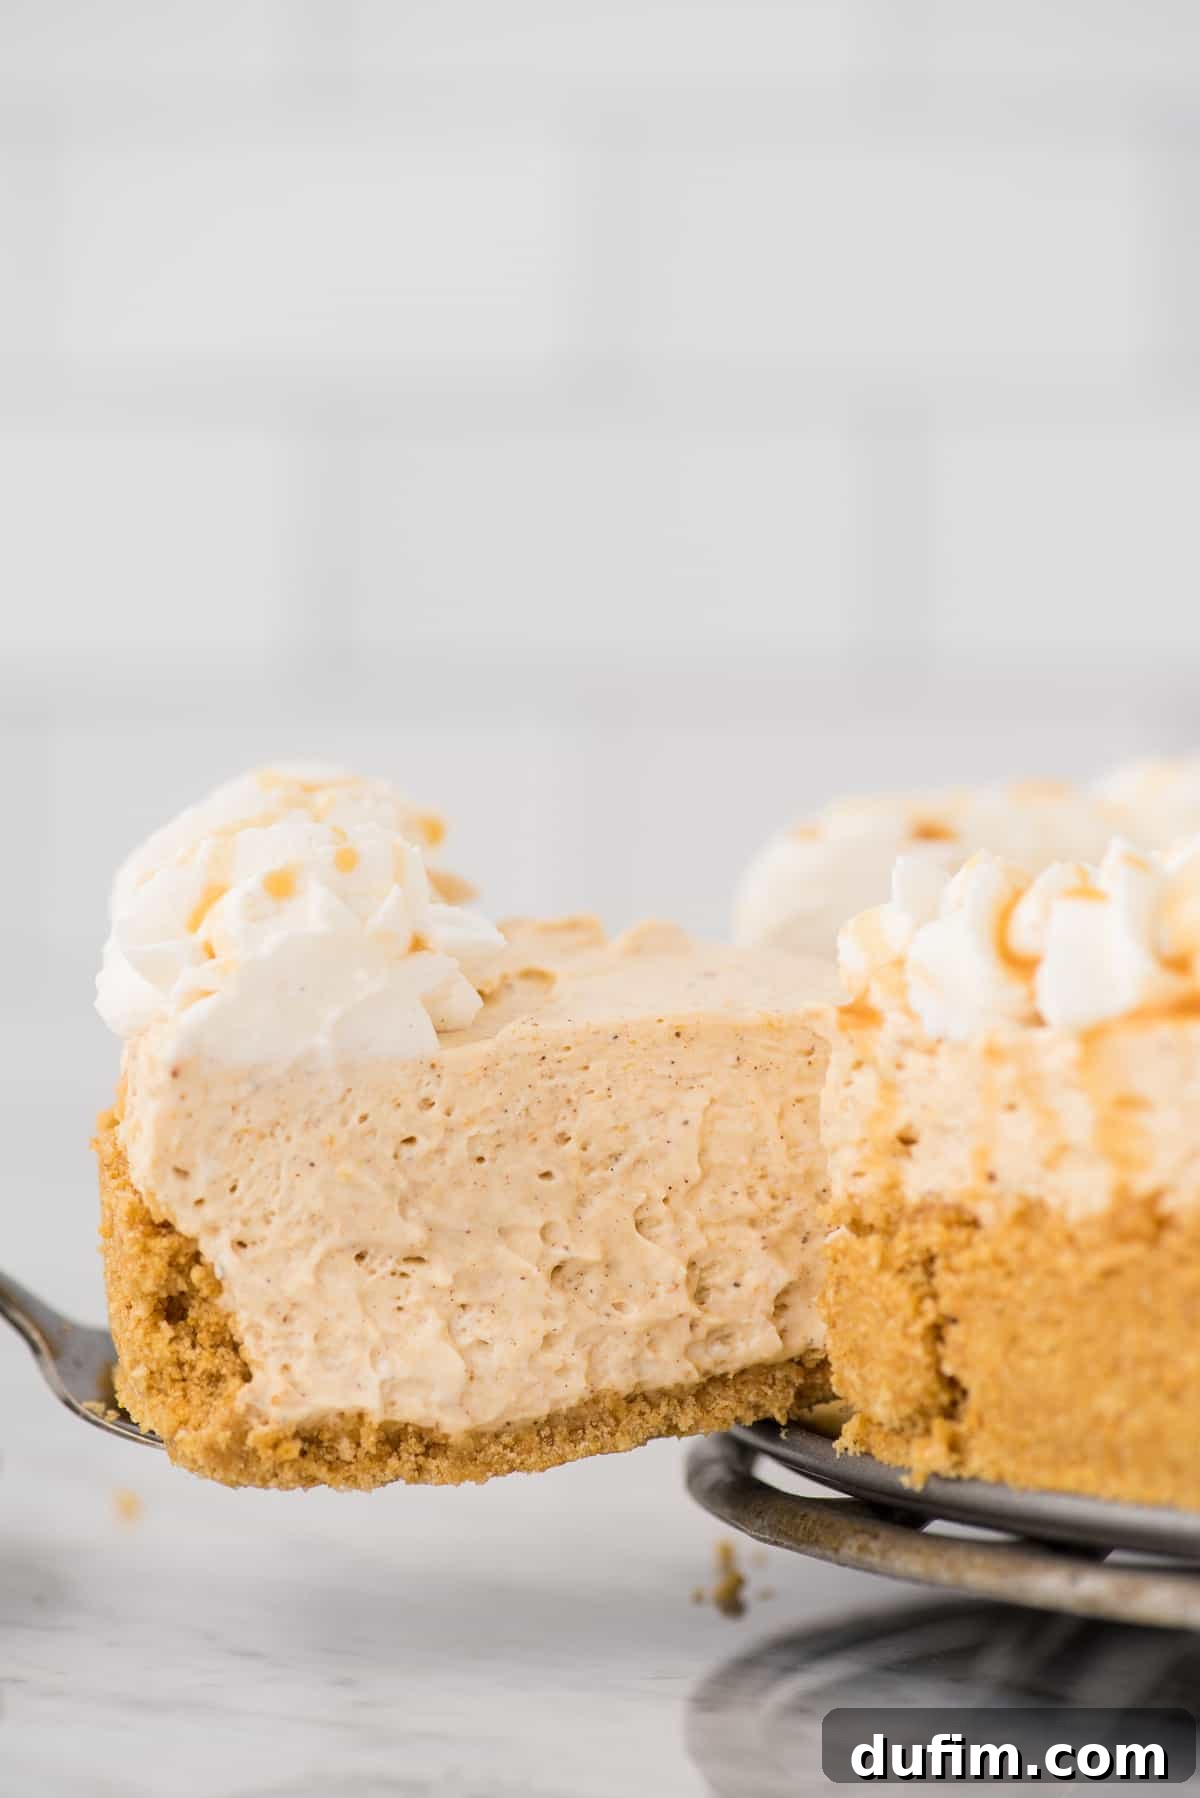
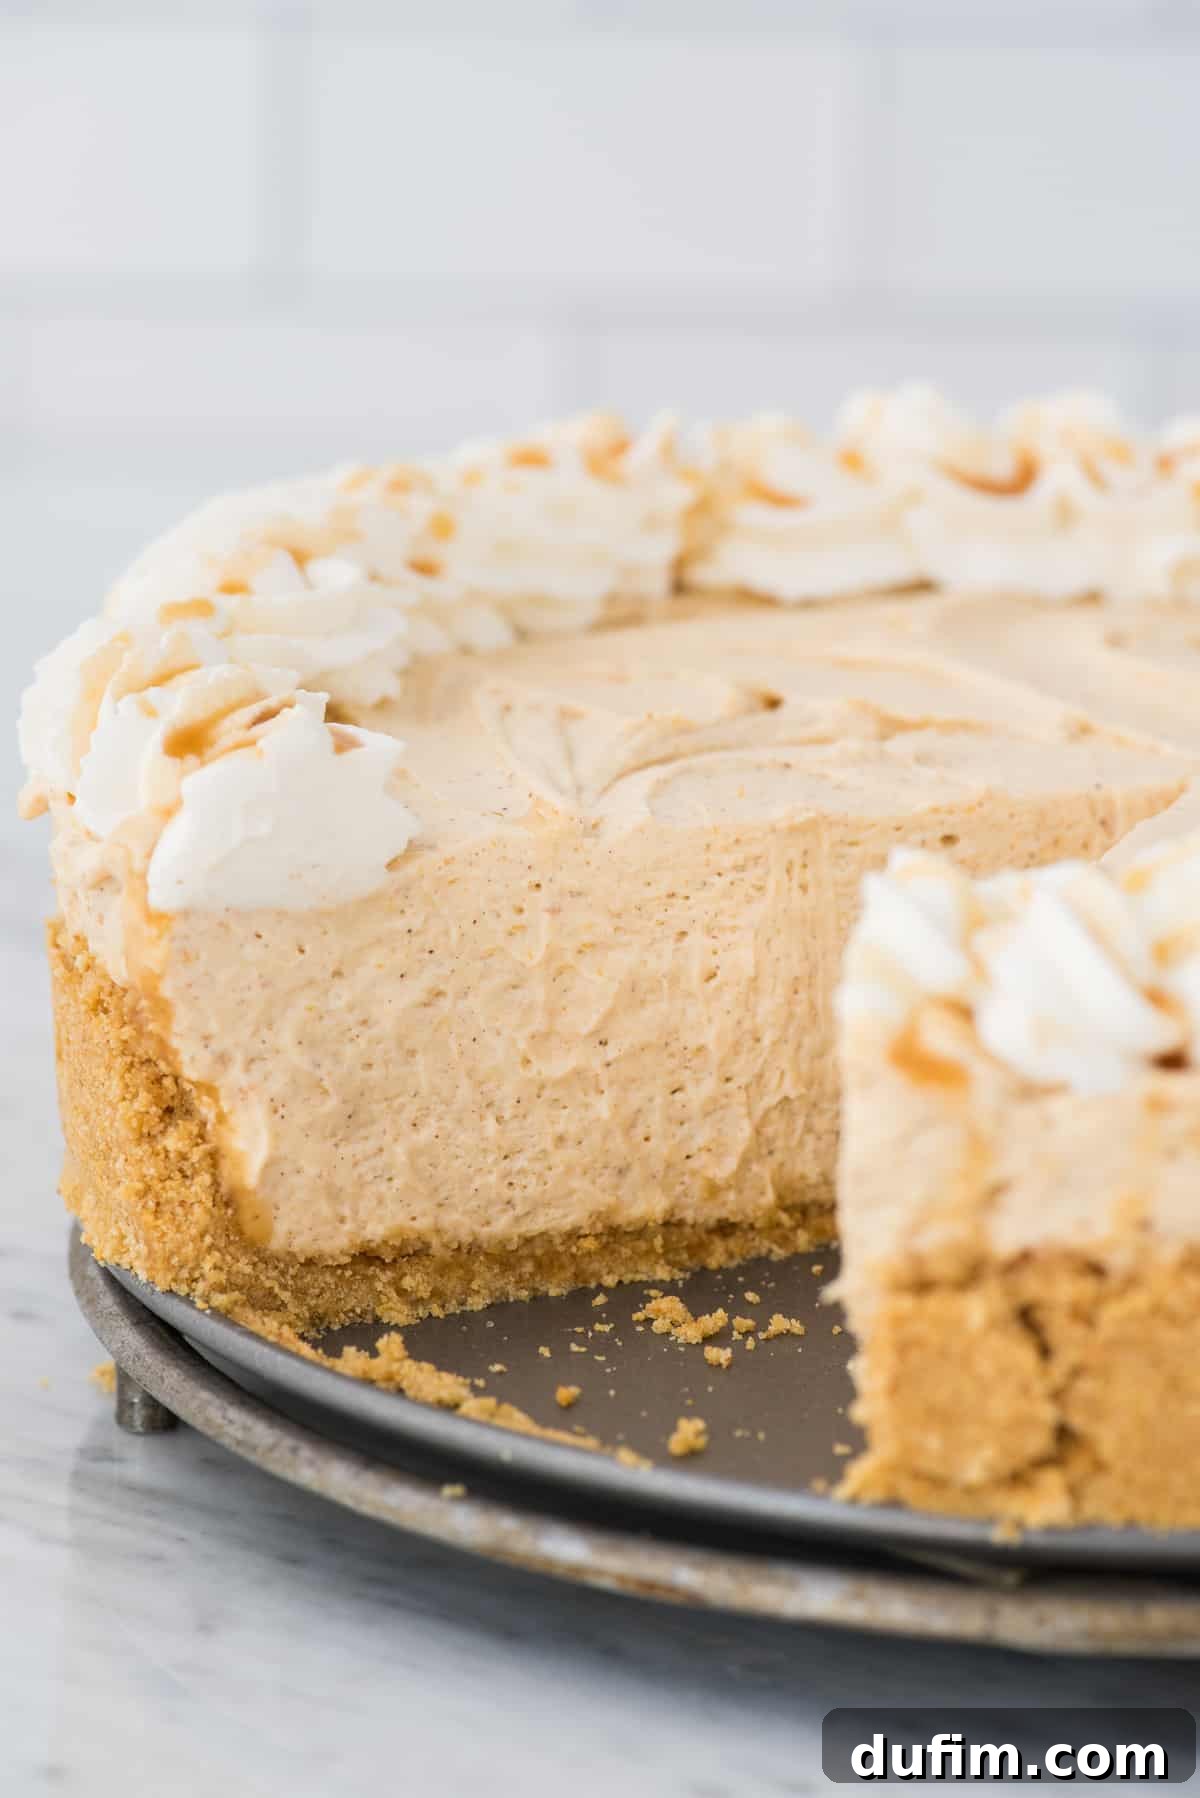
Now it’s time to bring these two amazing components together. Add the whipped pumpkin cream cheese mixture into the bowl with the stiff-peaked whipped cream. Using your electric mixer on the lowest speed, mix for just about 30 seconds, or until the two mixtures are just combined and you can no longer distinguish between the cream cheese mixture and the whipped cream. Alternatively, for an even lighter texture, you can gently fold them together using a rubber spatula. The goal is to incorporate them without deflating the air from the whipped cream. The final result should be a beautifully thick, airy, and fluffy filling that holds its shape remarkably well.
STEP 4 – The All-Important Chill Time
This is arguably the most crucial step for any no-bake cheesecake. Once your delicious filling is prepared, scoop it evenly into your chilled graham cracker crust and smooth the top with an offset spatula. Cover the cheesecake tightly with plastic wrap to prevent it from absorbing any refrigerator odors and to maintain moisture. Place it in the refrigerator to chill for a minimum of 6 hours. However, for the absolute best results – a cheesecake that is perfectly firm, stable, and easy to slice cleanly – I highly recommend chilling it overnight. This extended chilling period allows all the ingredients to fully set and firm up, transforming the mixture into a luscious, sliceable cheesecake.
Total Time Snapshot for Your No-Bake Pumpkin Cheesecake
Planning your dessert just got easier! Here’s a quick breakdown of the time commitment needed for this delightful no-bake pumpkin cheesecake:
- Graham Cracker Crust Preparation: Approximately 3 minutes of active work.
- Cheesecake Filling Preparation: Around 15 minutes of active mixing. (During this time, the crust can be chilling in the freezer as instructed.)
- Crucial Chilling Period: A minimum of 6 hours in the refrigerator, with overnight chilling being highly recommended for optimal setting and flavor development.
Pro Tips for No-Bake Pumpkin Cheesecake Success
Beyond the core recipe, a few clever tips and tricks can elevate your no-bake pumpkin cheesecake from good to absolutely extraordinary. These insights address common questions and challenges, ensuring your dessert is a triumph.
Cool Whip vs. Homemade Whipped Cream: Your Choice
While this recipe champions homemade whipped cream for its superior texture and natural flavor, you absolutely can substitute Cool Whip for convenience. If opting for Cool Whip, use two standard 8 oz (approximately 226g each) containers. Make sure the Cool Whip is thawed in the refrigerator before folding it into the cream cheese mixture. This substitution simplifies the process, making it even quicker to get your no-bake cheesecake assembled.
Store-Bought Crust Convenience
Short on time or just prefer an easier route? A store-bought graham cracker crust is a perfectly acceptable and delicious shortcut! Any good quality, pre-made graham cracker crust found in your local grocery store will work wonderfully for this no-bake pumpkin cheesecake. Just make sure it’s the appropriate size (8 or 9-inch) to accommodate the filling quantity, saving you a few minutes in the kitchen without compromising on flavor.
The Critical Step: Removing Excess Moisture from Pumpkin Puree
This is a game-changer for your cheesecake’s firmness! Pumpkin puree naturally contains a lot of moisture, which can make your no-bake filling runny and prevent it from setting properly. To counteract this, spread your pumpkin puree onto a few layers of paper towels placed on a plate. Fold additional paper towels over the puree, completely enclosing it. Gently press down on the folded paper towels to absorb the excess liquid. Within just a few minutes, you’ll notice the paper towels soaking up a surprising amount of moisture. This simple step ensures your cheesecake filling achieves that desired thick, rich consistency. You can refer to the top right-hand image in the collage provided earlier for a visual demonstration of this technique.
Achieve Flawless Slices Every Time
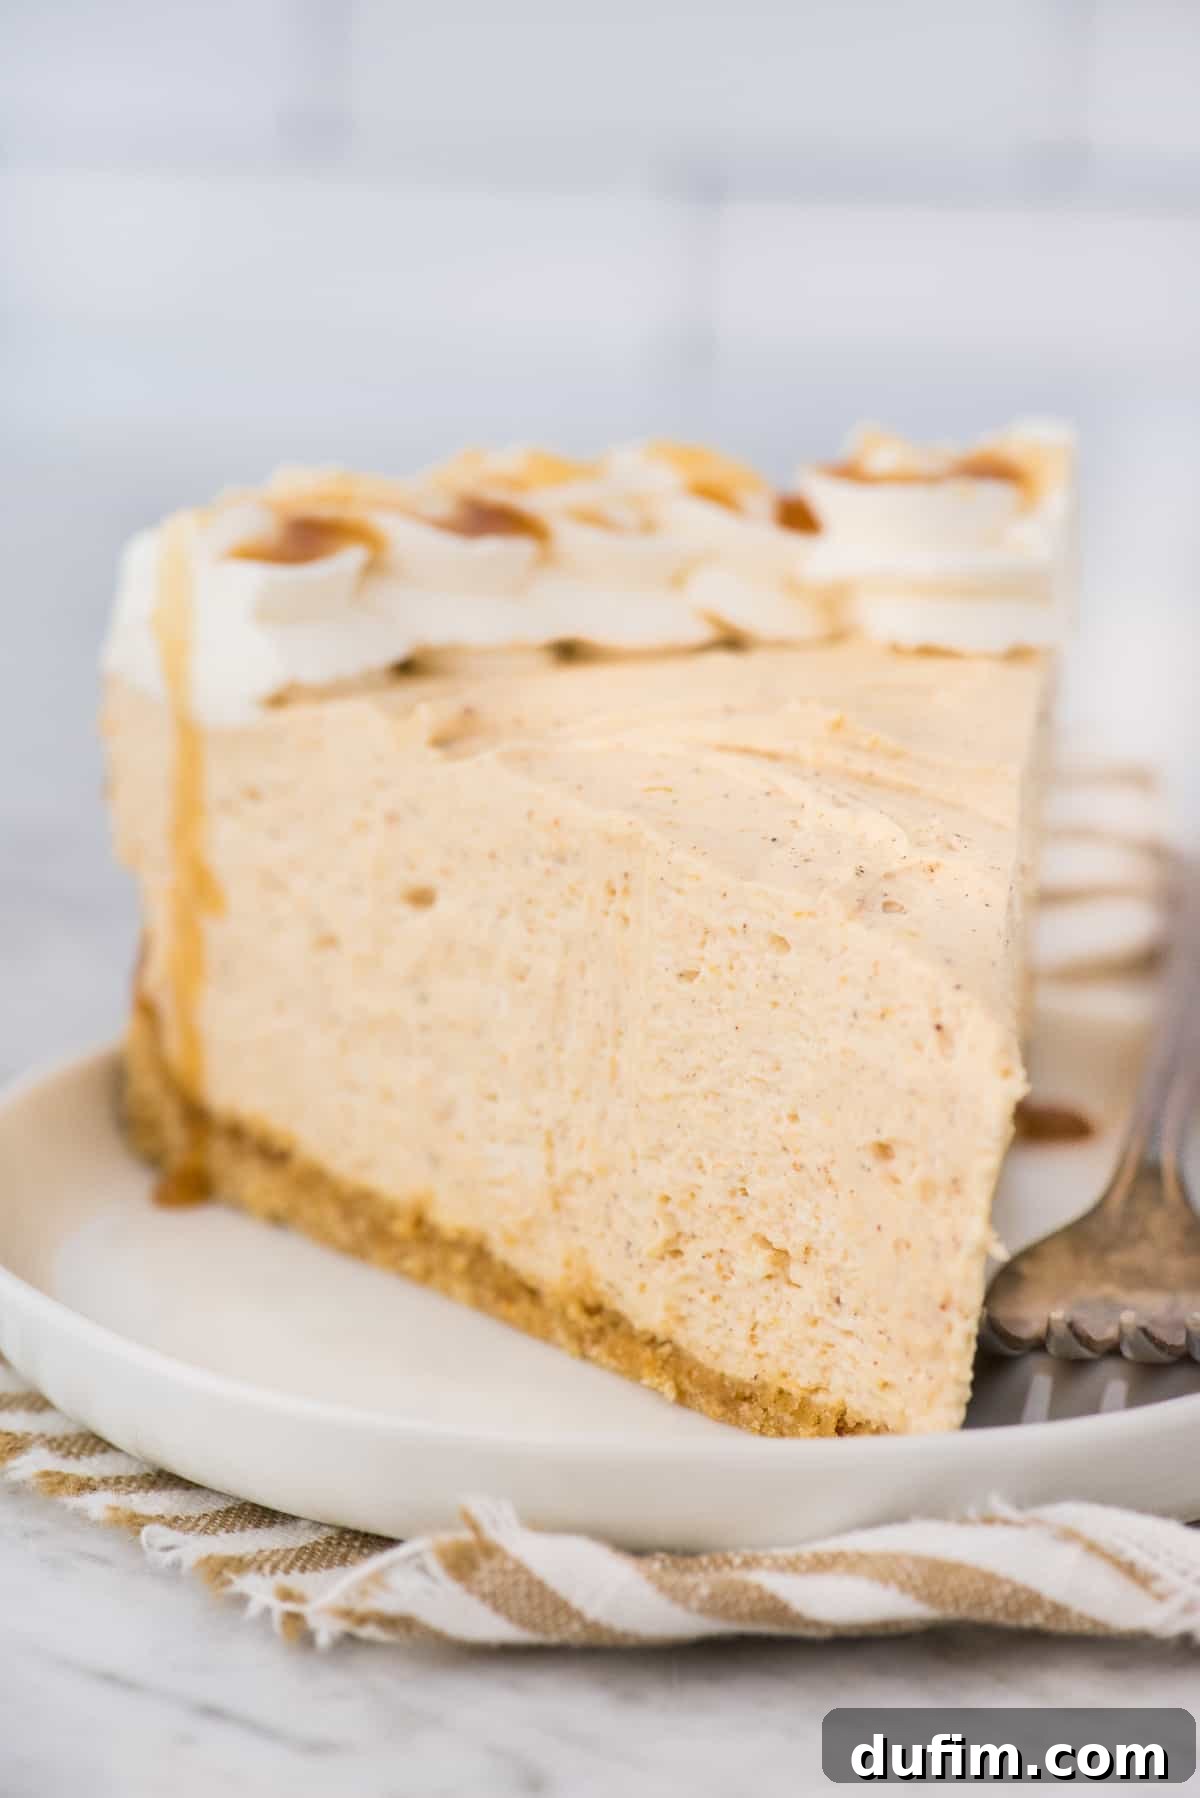
Presentation matters, especially with a dessert this beautiful! To achieve perfectly crisp, clean slices of your no-bake pumpkin cheesecake, there’s a trick of the trade: wipe your knife clean after every single cut. While it might seem a little tedious, this extra step prevents crumbs and filling from dragging onto the next slice, ensuring each piece looks as pristine as it tastes. For the best results, use a long, sharp knife, warming it slightly under hot water before wiping it dry for an even smoother cut.
Storage Solutions: Fridge & Freezer
This no-bake pumpkin cheesecake is not only delicious but also stores well, making it a fantastic make-ahead dessert. You can store your covered cheesecake in the refrigerator for up to 5 days. For optimal freshness and to prevent it from drying out or absorbing other food odors, it’s best to place it inside a cake keeper. Alternatively, securely covering the top of the cheesecake with several layers of plastic wrap will also work effectively.
While you can freeze the entire cheesecake for longer storage, I strongly advise against freezing it simply to speed up the chilling process. Freezing to set will significantly alter the delicate, creamy texture of the no-bake filling. However, if you wish to prepare it well in advance or save leftovers, freeze the cheesecake by first wrapping it thoroughly in plastic wrap, then adding another layer of aluminum foil for extra protection against freezer burn. To thaw, remove the cheesecake from the freezer, discard all wrapping, place it in a cake keeper or covered dish, and let it thaw slowly in the refrigerator overnight. This gentle thawing method helps preserve as much of the original texture as possible.
More Irresistible Fall Desserts
If you’ve fallen in love with the flavors of this pumpkin cheesecake, you’ll be thrilled to explore more of our favorite autumnal treats. These recipes are perfect for cozy evenings, holiday gatherings, or simply satisfying your sweet tooth with classic fall tastes.
- Pumpkin Cheesecake Brownies: A decadent fusion of fudgy brownies and spiced pumpkin cheesecake swirl – pure indulgence!
- Caramel Apple Cookies: Soft, chewy cookies packed with apple bits and drizzled with luscious caramel, embodying the essence of fall.
- Mini Pumpkin Pie Rice Krispies: A fun, easy, and adorable twist on a classic treat, flavored with all your favorite pumpkin pie spices.
- Pumpkin Whipped Cream: Elevate any dessert with this spiced, airy whipped cream – perfect for topping coffee, pies, or this very cheesecake!
Frequently Asked Questions (FAQs) about No-Bake Pumpkin Cheesecake
The primary way to thicken a no-bake cheesecake filling, especially one without gelatin or condensed milk, is through proper chilling and the correct whipping of ingredients. The combination of full-fat cream cheese, whipped to a creamy consistency, and heavy whipping cream, beaten to stiff peaks, creates a stable emulsion. The subsequent chilling period in the fridge (at least 6 hours, preferably overnight) is crucial as it allows the fats in the cream cheese and whipped cream to firm up, resulting in a thick, sliceable cheesecake. Removing excess moisture from ingredients like pumpkin puree also contributes significantly to a firmer set.
No, for a classic no-bake cheesecake, the crust typically does not require baking. The base is usually made from crushed cookies (like graham crackers) combined with melted butter. When this mixture is pressed firmly into a pan and then chilled in the refrigerator or freezer, the butter solidifies, creating a stable and firm crust that holds its shape beautifully without the need for an oven. This method keeps the entire dessert truly “no-bake.”
Several factors can prevent your no-bake cheesecake from setting properly. The most common reason is insufficient chilling time; it needs at least 6 hours, but overnight is always best. Another major factor is the consistency of your whipped cream – if it’s not beaten to stiff peaks, it won’t provide enough structure. Using low-fat cream cheese or not blotting excess moisture from ingredients like pumpkin puree can also result in a runny filling. Finally, overmixing the combined cream cheese and whipped cream can deflate the air, making the cheesecake soft. Ensure all dairy ingredients are full-fat and very cold when whipped, and allow ample chilling time.
The versatility of cheesecake crusts is endless! If you’re looking for alternatives to graham crackers, consider crushed digestive biscuits, Oreo cookies (especially for a chocolate twist), gingersnaps for a spicier base, or vanilla wafers for a classic, mild flavor. For something unique, try crushed pretzels for a delightful salty-sweet contrast. If you prefer a nuttier profile, a crust made from finely ground almonds or pecans mixed with butter creates a rich, sophisticated base. For gluten-free options, simply use your favorite gluten-free cookies or a blend of oats and nuts.
Pumpkin No Bake Cheesecake
Beth
20
6
6 20
12 servings
Equipment
-
KitchenAid 9-Speed Mixer
-
8 inch springform pan
-
Glass Mixing Bowl
-
Rubber Spatula
Ingredients
CRUST
- 1 ½ cups (170g) graham cracker crumbs, about 9 graham crackers
- ¼ cup (54g) brown sugar
- 6 Tbsp (86g) unsalted butter, 3/4 stick, melted
NO BAKE CHEESECAKE FILLING
- 16 oz (452g) full fat cream cheese, room temperature
- 1 cup (113g) powdered sugar (for cream cheese mixture)
- ½ cup (114g) pumpkin puree, excess moisture removed with paper towel method, see notes
- 1 tsp cinnamon
- ½ tsp nutmeg
- ½ tsp ground ginger
- ¼ tsp ground cloves
- 2 cups (473ml) heavy whipping cream, equal to 1 pint, very cold
- ½ cup (56g) powdered sugar (for whipping cream)
- 2 tsp vanilla extract
Instructions
BEFORE YOU BEGIN
-
Place a metal mixing bowl and the beaters of your electric mixer in the freezer for 15 minutes. This chilling is essential for successfully whipping the heavy cream.
GRAHAM CRACKER CRUST
-
In a medium mixing bowl, combine the graham cracker crumbs, brown sugar, and melted butter. Stir thoroughly until a thick, uniform mixture forms.1 1/2 cups (170g) graham cracker crumbs, 1/4 cup (54g) brown sugar, 6 Tbsp (86g) unsalted butter
-
Press the crust mixture firmly into an ungreased 8 or 9-inch springform pan. Use your fingers and the bottom of a flat cup (a 1/2 measuring cup works well) to evenly distribute and compact the crust on the bottom and slightly up the sides of the pan. A well-compacted crust is key for stability.
-
Place the prepared crust in the freezer for at least 15 minutes to firm up before adding the filling. If preparing in advance, cover the crust with foil or plastic wrap and refrigerate.
NO BAKE CHEESECAKE FILLING
-
To remove excess moisture from the pumpkin puree, spread it on a few layers of paper towels placed on a plate. Fold more paper towels over the puree to fully enclose it. Gently press down for a few minutes to absorb moisture. This is crucial for the cheesecake to set correctly.
-
In a separate mixing bowl, beat the room temperature full-fat cream cheese and 1 cup of powdered sugar with an electric mixer for 1-2 minutes until completely smooth and creamy. Add the blotted pumpkin puree, cinnamon, nutmeg, ground ginger, and ground cloves. Beat until just combined. Set this pumpkin cream cheese mixture aside.16 oz (452g) full fat cream cheese, 1/2 cup (114g) pumpkin puree, 1 tsp cinnamon, 1/2 tsp nutmeg, 1/2 tsp ground ginger, 1/4 tsp ground cloves, 1 cup (113g) powdered sugar
-
Remove the chilled metal mixing bowl and beaters from the freezer. Pour in the very cold heavy whipping cream, add the remaining 1/2 cup powdered sugar, and vanilla extract. Beat with an electric mixer on high speed until stiff peaks form, which typically takes about 4-5 minutes. The whipped cream should be thick and hold its shape firmly.2 cups (473ml) heavy whipping cream, 1/2 cup (56g) powdered sugar, 2 tsp vanilla extract
-
Gently add the pumpkin cream cheese mixture to the whipped cream. Using your electric mixer on the lowest speed, mix for about 30 seconds, just until the two mixtures are fully incorporated and appear uniform. Alternatively, you can use a spatula to gently fold them together, preserving as much air as possible. The final filling should be thick and fluffy.
-
Scoop the cheesecake filling into the chilled graham cracker crust and smooth the top with an offset spatula. Cover the cheesecake tightly with plastic wrap and place it in the fridge to set for a minimum of 6 hours. For the best, most stable results, chilling overnight is highly recommended.
-
Before serving, run an offset spatula or a thin knife around the inside edge of the springform pan to loosen the cheesecake, then carefully remove the outer ring. Use a sharp knife to cut the cheesecake into slices. For perfectly crisp and clean slices, remember to wipe your knife clean with a damp cloth after every single cut. This small effort ensures a beautiful presentation!
Notes
You can substitute 2 tsp of pumpkin pie spice for the individual cinnamon, nutmeg, ginger, and cloves called for in the filling if desired. Adjust to your preferred spice level.
Nutrition
Carbohydrates: 31g |
Protein: 4g |
Fat: 34g |
Saturated Fat: 20g |
Polyunsaturated Fat: 1g |
Monounsaturated Fat: 9g |
Trans Fat: 1g |
Cholesterol: 111mg |
Sodium: 208mg |
Potassium: 133mg |
Fiber: 1g |
Sugar: 23g |
Vitamin A: 2853IU |
Vitamin C: 1mg |
Calcium: 82mg |
Iron: 1mg
Nutrition Disclosure
All nutritional values are approximate and provided to the reader as a courtesy. Changing ingredients and/or quantities will alter the estimated nutritional calculations.
Loved this recipe? Share your thoughts below!