
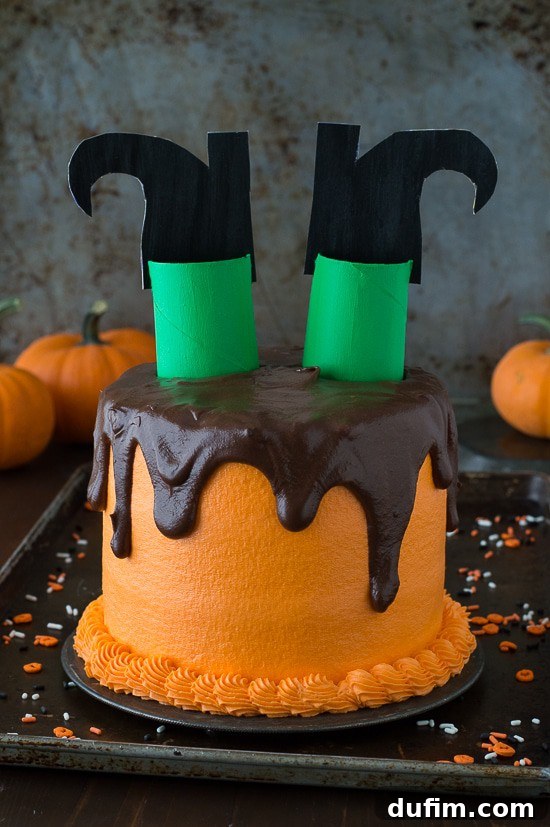
Melted Witch Cake: The Ultimate Spooktacular Halloween Dessert
Prepare for some serious Halloween enchantment because the Melted Witch Cake is making its grand appearance! I’ve been bubbling with excitement to share this whimsical and wonderfully fun Halloween cake creation. As a true admirer of all things Halloween and ridiculously cute holiday-themed desserts, I can confidently say this cake embodies everything I adore about the season. It’s not just a treat; it’s a statement piece, a conversation starter, and an absolute delight for both the eyes and the taste buds.
Imagine a dessert that captures the playful spirit of Halloween while delivering layers of moist cake and rich frosting. This Melted Witch Cake does exactly that, combining vibrant colors with a touch of spooky charm. Whether you’re hosting a grand Halloween bash or simply looking for a unique dessert to share with family, this recipe is guaranteed to cast a delicious spell on everyone who tries it. Let’s dive into how you can bring this magical confection to life in your own kitchen!
The Enchanting Tale of the Melted Witch Cake
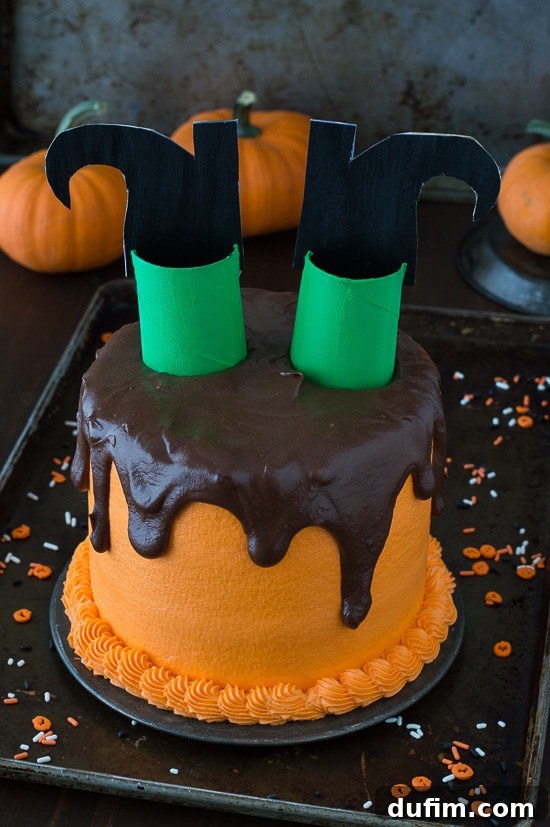
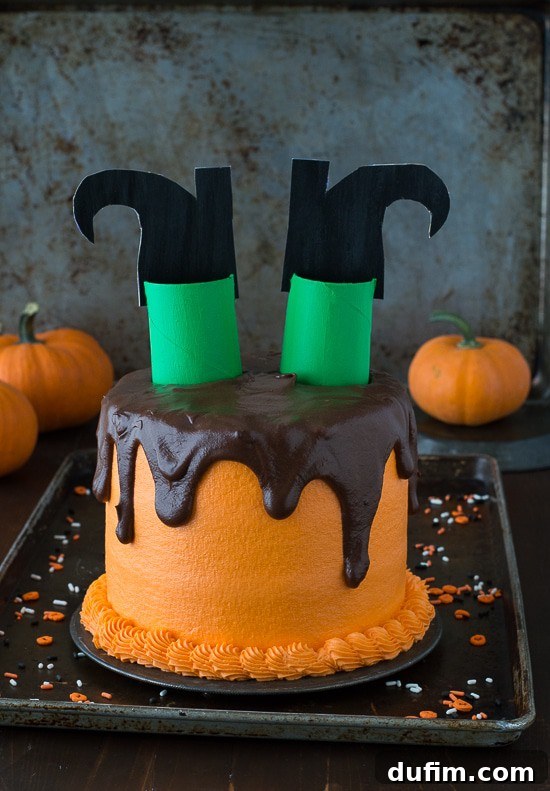
The core concept behind any “melted witch” dessert is a nod to a classic magical mishap – the witch has, quite literally, melted into the sweet treat. My inspiration for this delightful design harks back to the iconic scene from the “Wizard of Oz,” where Dorothy’s splash of water causes the Wicked Witch of the West to dramatically declare, “I’m melting! I’m melting!” Only in our culinary version, instead of water, our poor witch has succumbed to an irresistible cascade of luscious buttercream and decadent chocolate ganache. Frankly, if I were faced with such a delicious demise, I think I’d be quite happy about it!
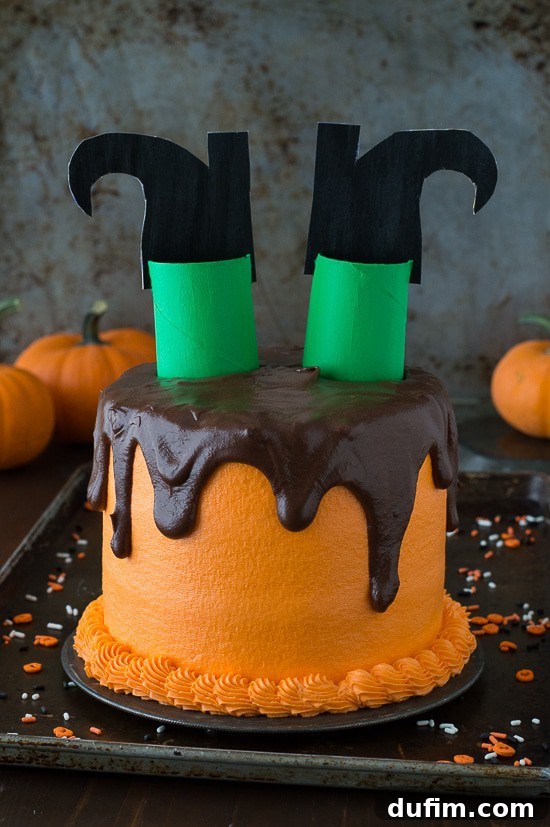
This cake is more than just a recipe; it’s an opportunity to weave a narrative into your Halloween celebrations. It invites smiles, sparks conversation, and adds an unforgettable touch of whimsy to your dessert table. The playful imagery of the witch’s legs protruding from the rich chocolate ganache creates a humorous and slightly mischievous vibe, perfectly capturing the essence of Halloween. It’s a treat that tells a story, making your celebration even more special and memorable.
Crafting the Iconic Witch Legs: A Fun and Easy DIY
One of the most eye-catching and talked-about elements of this Melted Witch Cake is undoubtedly the witch’s legs. While these whimsical additions are not edible, I promise you they are incredibly simple and fun to create. You don’t need to be an expert crafter or artist to make them; a little creativity and a few household items are all it takes!
For the witch’s legs, I repurposed toilet paper tubes, cutting them down to a height of just over two inches. These tubes provide the perfect cylindrical base for our witchy appendages. Once cut, I gave them a vibrant coat of green paint, a classic witchy hue. For the shoes, I freehanded the design onto a piece of cardboard salvaged from an old cereal box. I surprised myself with my impromptu drawing skills, but the truly fantastic news for you is that you don’t need any artistic talent at all! You can easily print a copy of my witch shoe template RIGHT HERE and simply trace them onto your cardboard. After cutting out the shoe shapes, I painted both sides a sleek black.
Assembling the legs is straightforward. Cut small slits directly opposite each other on the top edge of each toilet paper tube. These slits will act as anchors for the cardboard shoes. Carefully insert the painted cardboard shoes into these slits, ensuring they are secure. Once your beautiful cake is fully assembled and frosted, you’ll gently place these charming witch legs on top, pushing them ever so slightly into the luscious chocolate ganache to hold them in place. This simple DIY step adds a delightful three-dimensional element that brings the entire melted witch concept to life, making your Halloween cake truly unique and unforgettable.
A Glimpse Inside: The Candy Corn Colored Layers
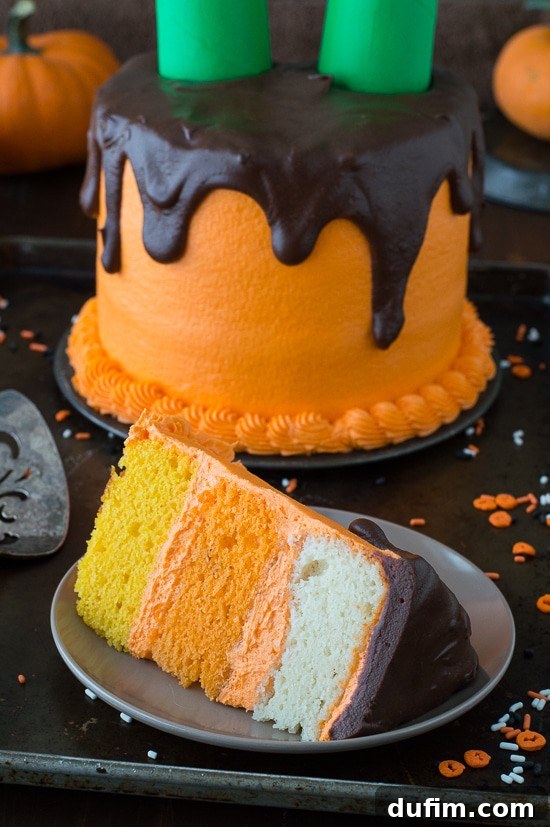
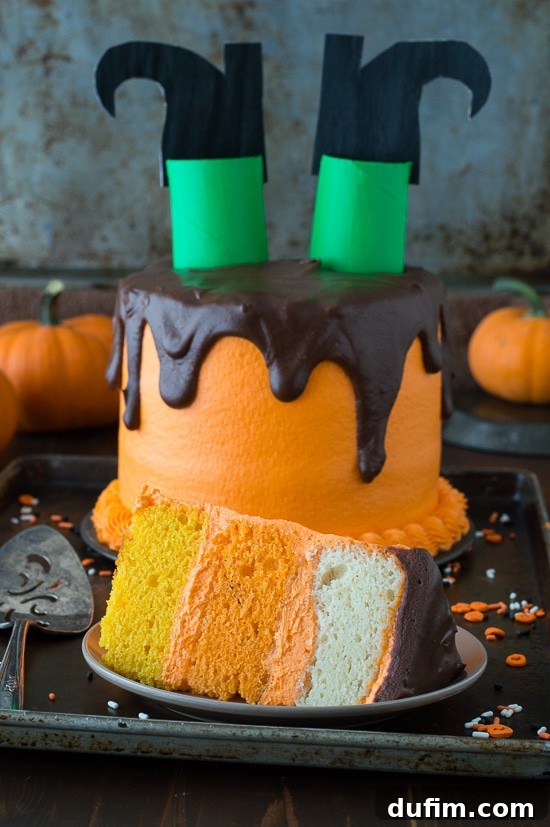
Beyond its amusing exterior, this Melted Witch Cake holds another delightful Halloween secret: its interior! Did you happen to notice the vibrant candy corn colored layers when a slice is revealed? This colorful surprise is yet another heartfelt tribute to all things Halloween, adding an extra layer of festivity and fun to every bite. The distinct bands of yellow, orange, and white create a striking visual impact that perfectly complements the playful theme of the cake.
Achieving these distinct, brightly colored layers is simpler than you might think and adds a professional touch to your homemade cake. It involves dividing your cake batter and carefully tinting each portion with high-quality gel food coloring. Gel food colorings are preferred over liquid ones as they provide a more intense hue without thinning the batter. You’ll bake each colored layer separately, ensuring they cool completely before stacking. This meticulous layering not only looks fantastic but also builds anticipation with every slice. Imagine the delight on your guests’ faces when they discover this cheerful, candy corn-inspired surprise hidden within your spooky masterpiece!
Mastering the Art of Cake Decorating: Tips for a Flawless Finish
Creating a truly spectacular cake, like our Melted Witch Cake, often involves more than just baking. It’s about the artistry of assembly and decoration. If you’re eager to hone your baking and frosting skills, we have some invaluable resources to guide you. For those starting their cake journey, our comprehensive guide on how to bake a cake covers all the fundamentals, from ingredient selection to perfect baking times. Coupled with this, our essential post on how to make buttercream will ensure you have the silkiest, most delicious frosting imaginable.
For more experienced bakers who aim for a flawlessly smooth finish, I highly recommend checking out my friend Lindsay’s fantastic tutorial. Her detailed guide, complete with pictures and videos, walks you through the techniques for achieving that coveted perfectly smooth cake exterior. I personally rely on similar equipment and embrace many of the techniques Lindsay shares, as they truly make a difference in the final presentation of your cake. Mastering these techniques will elevate your Melted Witch Cake from delightful to absolutely breathtaking, ensuring that every angle is picture-perfect.
Essential Equipment for Your Melted Witch Cake
Having the right tools can make all the difference in your baking experience, especially when creating a multi-layered masterpiece like the Melted Witch Cake. Here’s a list of essential equipment that will help you achieve perfect results:
- Glass Mixing Bowl: Ideal for mixing batters and frostings, allowing you to easily see ingredients as they combine.
- Favorite Spatula: A good quality spatula is crucial for scraping bowls, folding ingredients, and spreading frosting smoothly.
- Bake Even Cake Strips: These amazing strips help your cake layers bake evenly, preventing domed tops and dry edges, ensuring a flat surface for easy stacking.
- KitchenAid 9-Speed Mixer: A powerful stand or hand mixer is indispensable for whipping butter and sugar until fluffy, and for creating light, airy buttercream.
- 6-inch Round Cake Pans: You’ll need at least one, but having multiple makes baking the colored layers more efficient.
- Parchment Paper: For lining cake pans to prevent sticking.
- Offset Spatula: Essential for spreading frosting between layers and smoothing the crumb coat.
- Icing Smoother or Bench Scraper: To achieve those perfectly smooth, professional-looking sides on your frosted cake.
- Piping Bag and Wilton 32 Tip: For adding decorative borders and intricate details to your cake.
- Cooling Racks: To allow your cake layers to cool completely and prevent condensation.
Investing in these basic tools will not only make baking this witch cake a breeze but will also enhance your overall baking repertoire for future culinary adventures.
Tap stars to rate!
Melted Witch Cake
Rate
Equipment
-
Glass Mixing Bowl
-
My favorite spatula!
-
Bake Even Cake Strips
-
KitchenAid 9-Speed Mixer
Ingredients
For one 6 inch layer (repeat this recipe for each layer)
- 3 Tbsp (43g) butter, softened
- 5 ½ Tbsp sugar
- 1 ½ large egg whites
- ¼ cup (57g) sour cream
- ½ tsp vanilla extract
- ½ cup + 1 Tbsp (68g) all purpose flour
- ¾ tsp baking powder
- ¼ tsp salt
- Gel food coloring: orange and yellow
Buttercream
- 1 cup (226g) butter, softened
- ½ cup (118ml) vegetable shortening
- 1 tsp vanilla extract
- 5-7 cups (567-791g) powdered sugar
- Orange gel food coloring
Chocolate Ganache
- ¾ cup (129g) chocolate chips
- ½ cup (118ml) heavy cream
Witch’s Legs
- toilet paper tube, cut down to 2 inches tall, painted green (you’ll need 2)
- cardboard, painted black for the shoes. [Get shoe print out here].
Instructions
To bake the cake
- Preheat the oven to 350º F.
- Using butter, grease the bottom and sides of an 6 inch round cake pan or springform pan and line the bottom with a round piece of parchment paper. To ensure even baking, place a bake even strip around the pan. You can make your own homemade bake even strip by cutting a towel or shirt to fit the size of your pan. Get the fabric really wet, then squeeze out the dripping water but do not squeeze it too dry. Secure the fabric around the pan with a safety pin.
- In a mixing bowl, combine the butter and sugar, beat using an electric mixer until fluffy. Add in the egg whites, beat again.
- Add in the sour cream and vanilla extract, mix until smooth.
- In a smaller bowl, combine the flour, baking powder and salt, gently mix with a spoon. Gradually add half of the flour mixture to the wet ingredients, do not dump it in, rather take spoonfuls of the flour mixture and gently shake it over the wet ingredients, as if you were sifting in the flour. Fold in the mixture until no flour remains. Repeat with the other half of the flour, folding it in and scraping the sides and bottom of the bowl to incorporate everything.
- Add in the food coloring, according to which layer you are baking, mix well so the color is even.
- Scrape the batter into the prepared cake pan, using a spatula to evenly spread it out.
- Bake for 23-25 minutes, or until a toothpick inserted in the center comes out clean.
- Once the cake is done, allow it to cool in the pan on a cooling rack for 10 minutes. After 10 minutes, carefully remove the cake from the pan. If using a springform pan, remove the sides and bottom. Allow the cake to cool completely on a cooling rack. Once cool, remove the parchment paper round from the bottom of the cake. If you need to level the top of your cake, do so now using either a cake lever or knife. Make sure the cake is completely cooled, then wrap the cake in plastic wrap and place it in the refrigerator. This cake is good for up to one week like this.
- Repeat this recipe until all the cake layers are baked.
Buttercream
- In a large mixing bowl, combine the butter and vegetable shortening, beat using an electric mixer until fluffy, about 2 minutes.
- Add in the vanilla extract, beat using an electric mixer.
- Begin to add the powdered sugar, about 1-2 cups at a time, mixing by hand first, then with the electric mixer. Continue adding powdered sugar until the frosting reaches your desired taste and consistency.
- Add in your desired amount of orange gel food coloring. Start with a little and add more to achieve your preferred shade. Beat the frosting using the mixer one last time to ensure even color distribution.
Chocolate Ganache
- Place chocolate chips in a medium heat-proof bowl.
- In a small pot over low heat, gently heat the heavy cream until it just begins to simmer, but do not allow it to boil.
- Pour the hot heavy cream over the chocolate chips. Allow the mixture to stand undisturbed for 1-2 minutes, letting the heat melt the chocolate.
- Use a spatula to stir the mixture gently from the center outwards until it becomes completely smooth and glossy.
- Allow the ganache to cool to room temperature before adding it to the cake. It should be thick enough to drizzle but not too firm.
To assemble the cake
- Spread a small amount of buttercream on a 6-inch round cardboard cake circle to secure the cake. Place your first layer of cake on top of the cardboard. Apply buttercream on top of the first layer and spread it as evenly as possible with an offset spatula. Adjust the amount of frosting between layers to your preference.
- Repeat this process for each subsequent layer of cake until all layers are stacked and frosted. Now, it’s time for a crumb coat. The crumb coat is a thin layer of frosting that seals in any loose crumbs, creating a clean base for your final frosting layer. Using your offset spatula, spread a thin layer of buttercream around the sides and the top of the cake. It’s often easiest to start with a generous amount of frosting on the cake and then scrape off the excess as needed.
- Place the entire cake in the freezer for 20 minutes or in the fridge for 30 minutes to allow the crumb coat to firm up.
- Once the crumb coat is firm, begin to add the second, final layer of frosting. Spread an even layer of frosting on the top of the cake. Next, either pipe the frosting or spread it evenly around the sides of the cake. Use a spatula or an icing smoother to smooth out the frosting, scraping off any excess as you go. For an ultra-smooth finish, gently press a Viva brand paper towel (or any smooth, lint-free paper towel) against the frosted cake and rub a fondant smoother over it. Repeat this process, moving the paper towel around the entire cake until desired smoothness is achieved.
- Place the finished cake in the fridge for another 20-30 minutes. This chilling step will ensure the cake is cold, which helps the chocolate ganache set more quickly and cleanly when applied.
- To pipe a decorative frosting border around the bottom of the cake, transfer some buttercream into a piping bag fitted with a Wilton 32 star tip. Pipe the border using the classic shell technique, or any design you prefer.
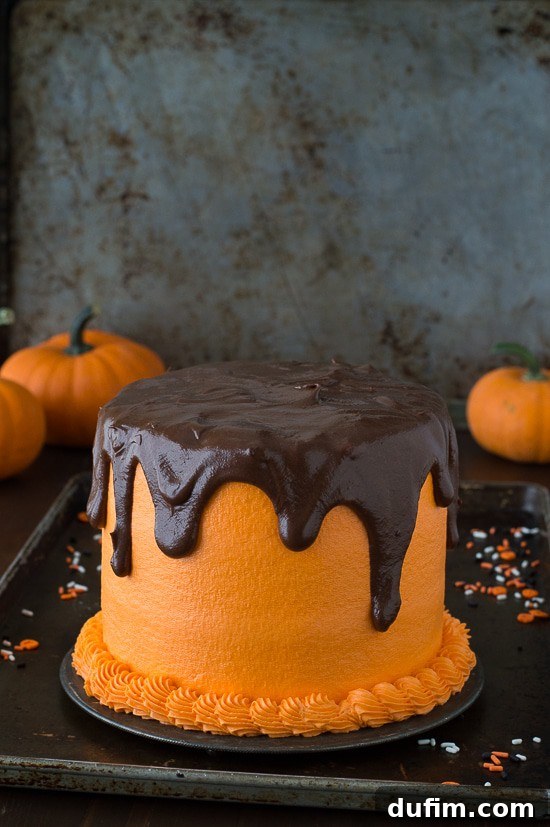
- Once the ganache has cooled to room temperature and is of drizzling consistency, use a spoon to carefully drizzle it around the sides of the cake, allowing it to drip attractively down the edges. Once the sides are coated, fill in the middle of the cake with the remaining ganache and spread evenly with the back of the spoon. Allow the ganache to set for about 10 minutes.
- Finally, place the whimsical witch’s legs in the center of the cake, pushing them gently into the slightly set ganache to secure them.
- Serve your spectacular Melted Witch Cake and enjoy the delighted reactions!
Baker’s Notes
I know our recipe calls for 1 & 1/2 egg whites, which might seem a bit unusual. Don’t worry, just do your best to measure out half of an egg white as accurately as possible. A little trick I use is to whisk a large egg white with a fork first, then use a tablespoon to measure out approximately half of it. Precision isn’t paramount here, a slight variation won’t impact the cake significantly.
For best results, ensure all your ingredients, especially butter and sour cream, are at room temperature before you begin mixing. This helps in creating a smooth, emulsified batter that bakes evenly and results in a tender cake crumb. Don’t overmix the cake batter once the flour is added; this can lead to a tough cake. Mix only until just combined. The bake-even strips are truly a secret weapon for perfectly flat cake layers, saving you time on leveling!
Nutrition
Nutrition
Nutrition Disclosure
All nutritional values are approximate and provided to the reader as a courtesy. Changing ingredients and/or quantities will alter the estimated nutritional calculations.
More Spooktacular Halloween Treats to Try!
If you’ve fallen in love with the festive spirit of our Melted Witch Cake, you’re in luck! We have a cauldron full of other bewitching Halloween treats that are just as fun to make and even more delightful to devour. Extend your Halloween baking adventure with these creative and delicious ideas, perfect for parties, trick-or-treaters, or simply enjoying the spooky season at home.
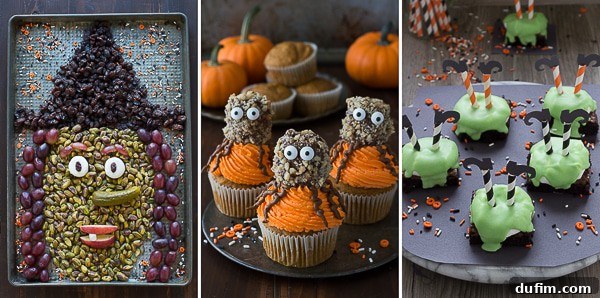
- Halloween Witch Platter: A delightful assortment of themed snacks and sweets, perfect for grazing at your Halloween party.
- Pumpkin Walnut Spider Cupcakes: Moist pumpkin cupcakes topped with a spooky spider design – a delicious and eerie delight.
- Melted Witch Brownies: If you love the cake, you’ll adore these rich, fudgy brownies featuring the same charming melted witch concept.
Each of these recipes offers a unique way to celebrate Halloween with homemade goodness. They are designed to be enjoyable for bakers of all skill levels, ensuring that your holiday season is filled with delicious, spooky fun.
Frequently Asked Questions About the Melted Witch Cake
Can I prepare the Melted Witch Cake ahead of time?
Absolutely! The cake layers can be baked, cooled, and wrapped tightly in plastic wrap, then stored in the refrigerator for up to one week or frozen for up to two months. The buttercream can also be made a few days in advance and stored in an airtight container in the fridge; just bring it to room temperature and re-whip before use. The witch legs can be made weeks ahead of time. This makes assembly on the day of your event much smoother.
Can I use a different cake flavor for this recipe?
Yes, certainly! While the candy corn colored layers add a festive touch, you can easily substitute your favorite vanilla, chocolate, or even a spooky red velvet cake recipe. Just remember to adjust the food coloring if you want to maintain a multi-colored interior. The key is to ensure the cake recipe is suitable for layering.
Are the witch legs edible?
No, the witch’s legs are decorative and made from non-edible materials like toilet paper tubes and cardboard. Please inform your guests that these elements should be removed before serving and eating the cake. They are solely for visual effect and fun!
How should I store the Melted Witch Cake?
Once assembled and decorated, the Melted Witch Cake should be stored in an airtight cake carrier or under a cake dome at room temperature for up to 2-3 days. If your kitchen is warm or if it contains fresh cream elements, refrigeration is best. Just be aware that refrigeration can sometimes dry out cakes; bringing it to room temperature for about an hour before serving will improve the texture.
What are some tips for achieving perfectly smooth cake layers?
To get perfectly smooth cake layers, use bake-even strips around your cake pans to prevent doming. Always allow your cake layers to cool completely before leveling (if needed) and frosting. A thin “crumb coat” of frosting is essential to trap loose crumbs before applying the final, thicker layer. Using a bench scraper or icing smoother, along with a smooth paper towel and fondant smoother, as mentioned in the instructions, can help achieve a professional, silky-smooth finish.
Conclusion: Your Spooky Sweet Masterpiece Awaits!
The Melted Witch Cake is more than just a dessert; it’s a delightful centerpiece that embodies the playful and spooky spirit of Halloween. From its vibrant candy corn-colored layers to the charmingly comical witch legs, every element is designed to bring smiles and spark conversations at your festive gatherings. We hope this detailed guide empowers you to create a truly spectacular cake that will be the highlight of your Halloween celebrations.
Don’t hesitate to get creative with your decorations and truly make this cake your own. Whether you’re a seasoned baker or just starting out, the process of bringing this melted witch to life is an enjoyable journey filled with fun and delicious rewards. So grab your aprons, gather your ingredients, and prepare to enchant your friends and family with this unforgettable Halloween masterpiece. We’d love to hear about your creations and see your photos in the comments below!