
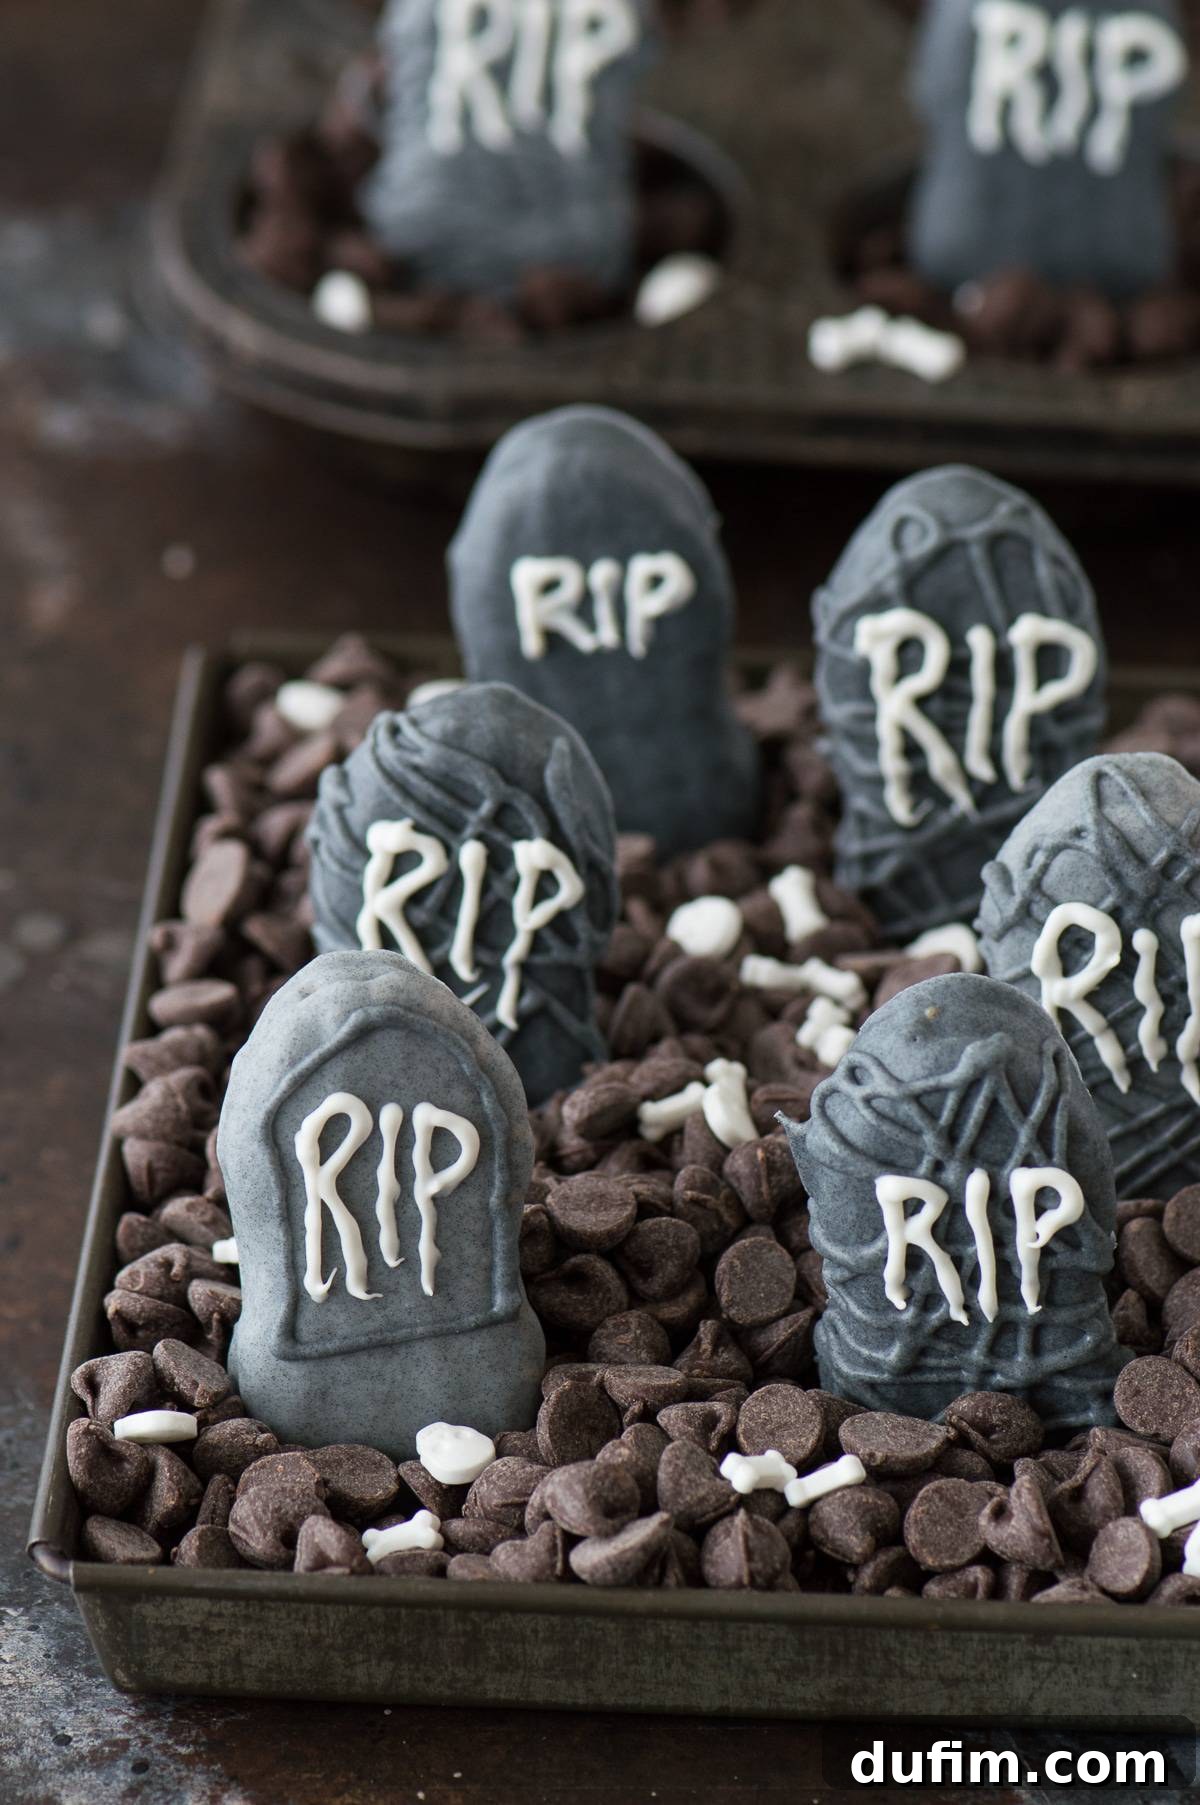
Unlock Spooky Fun: Easy Nutter Butter Tombstones for a Haunting Halloween Display!
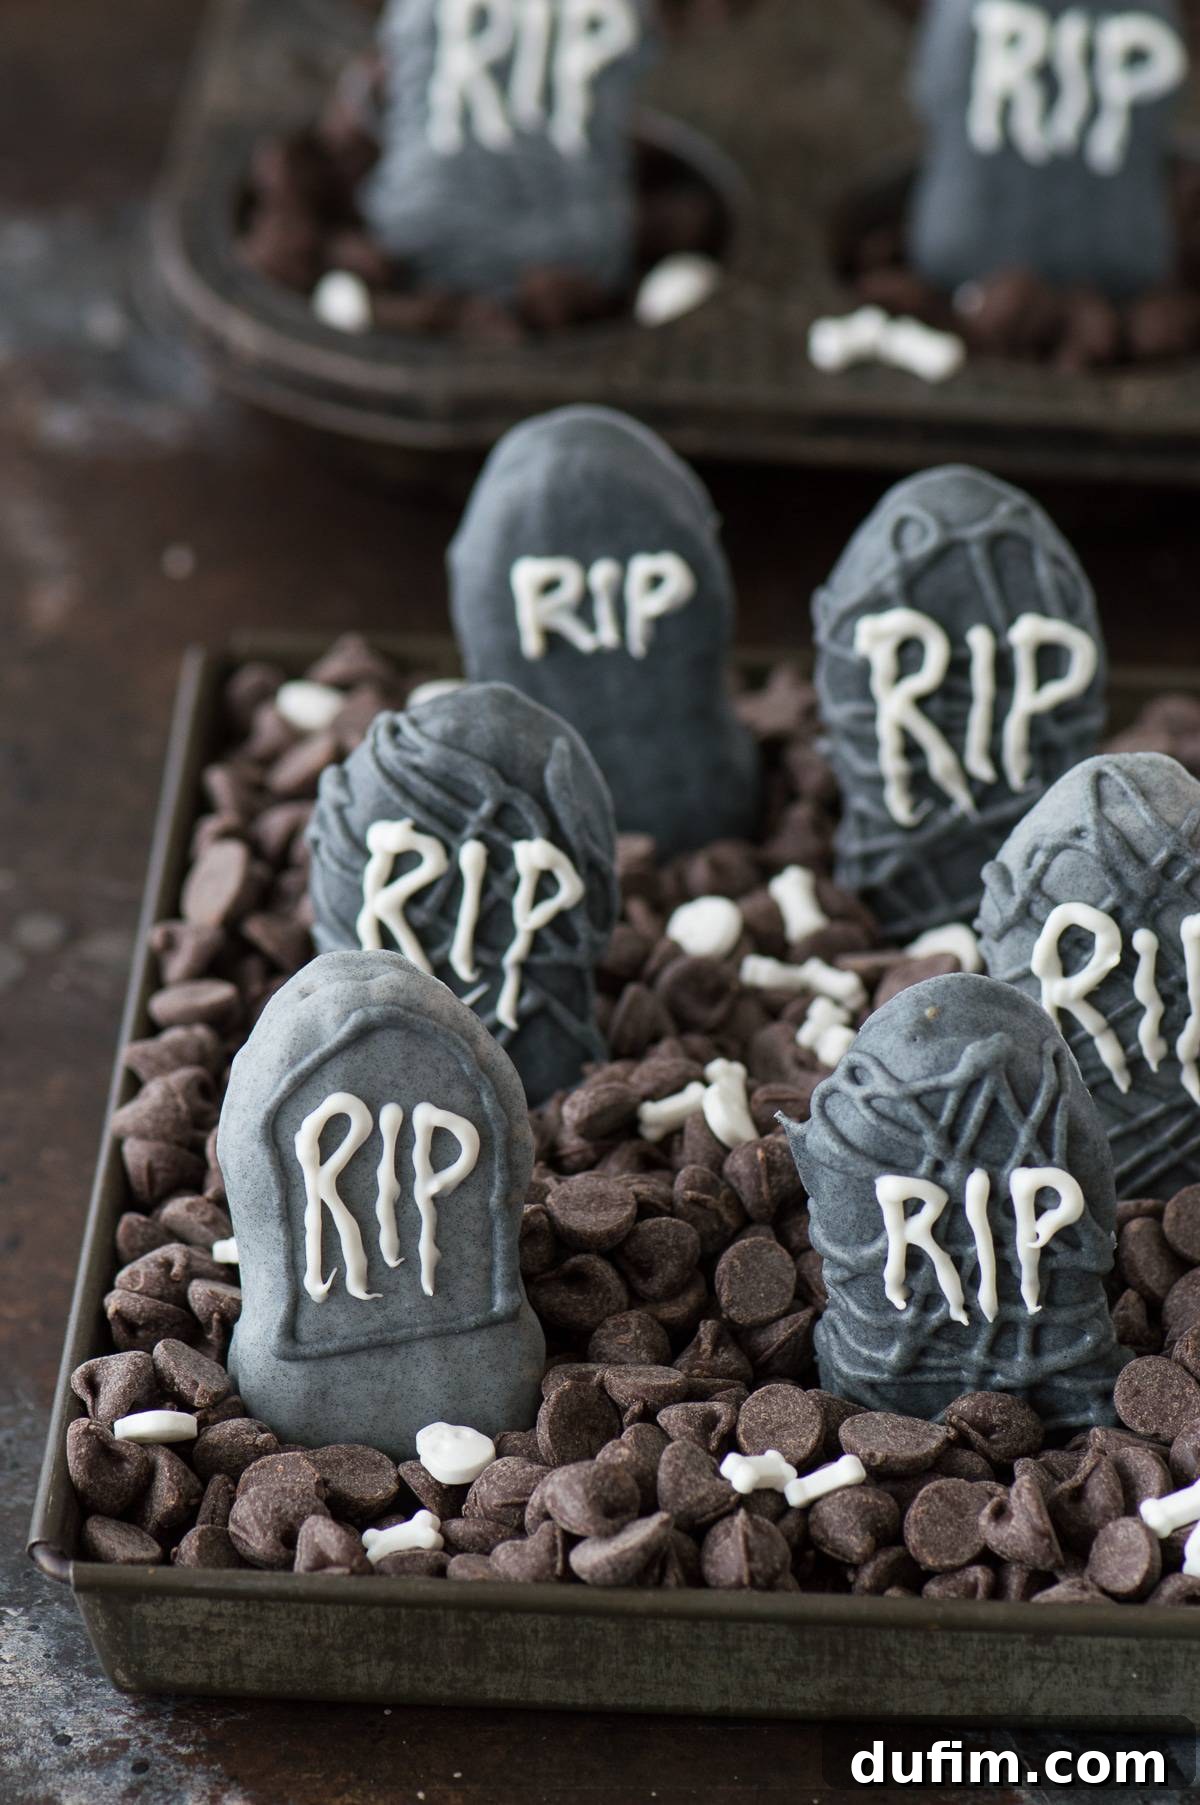
“I made these Nutter Butter Tombstones for our staff Halloween lunch, and they were a huge hit! Displayed them in a chocolate chip graveyard, and everyone loved how cute and spooky they looked!”
-Kara
Halloween is just around the corner, and what better way to celebrate than with deliciously spooky treats that are as fun to make as they are to eat? If you’ve ever found yourself scrolling through Pinterest for clever Halloween dessert ideas, you’ve likely seen the incredible versatility of Nutter Butter cookies. Their distinct peanut shape makes them the perfect canvas for a variety of festive figures, and this year, we’re transforming them into eerie, yet adorable, Nutter Butter Tombstones. This recipe isn’t just about crafting a tasty treat; it’s about creating a memorable Halloween experience, complete with a clever graveyard display that will impress all your ghoulish guests.
These Nutter Butter Tombstones are the ultimate easy Halloween treat, requiring minimal ingredients and effort for maximum spooky impact. Whether you’re planning a full-blown Halloween bash, contributing to a potluck, or simply looking for a fun activity to do with the kids, these chocolate-dipped delights are guaranteed to be a crowd-pleaser. We’ll guide you through making these charming graveyard markers and, even better, show you an incredibly simple yet effective way to display them, turning a mere plate of cookies into a hauntingly beautiful edible scene. Get ready to sink your teeth into the sweetest, spookiest tombstones you’ve ever tasted!
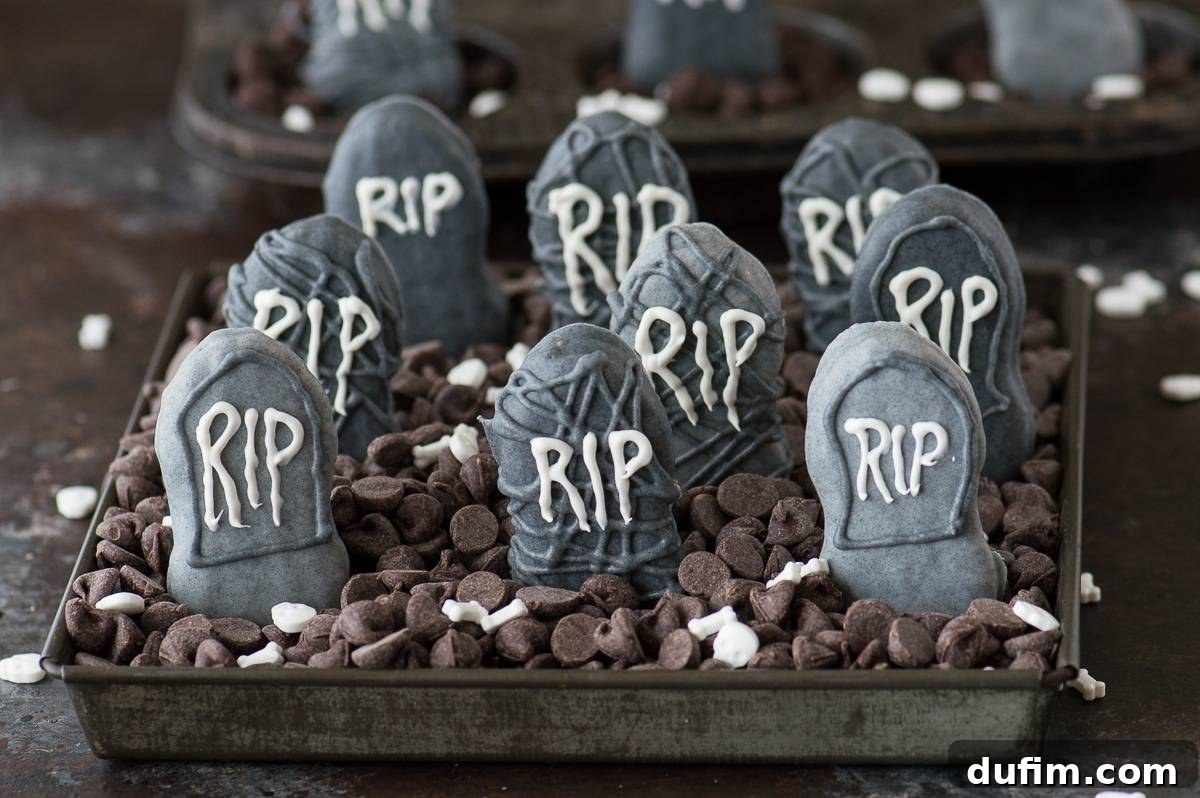
The Versatility of Nutter Butter Cookies for Halloween
The iconic peanut shape of Nutter Butter cookies makes them surprisingly versatile when it comes to crafting cute and creepy Halloween figures. Forget complex baking or intricate decorating skills; all you truly need are a few bags of various colored candy melts or a simple chocolate base, a pack of Nutter Butters, and your imagination. From pumpkins and ghosts to bats and, of course, tombstones, these peanut butter sandwich cookies provide the perfect foundation for countless edible creations. Their slightly irregular, organic shape naturally lends itself to the rustic, aged look of a tombstone, making them an ideal choice for this particular Halloween project.
Beyond their shape, Nutter Butters offer a delightful peanut butter crunch that complements the sweet chocolate coating beautifully. This combination of textures and flavors ensures that while your Halloween treats look amazing, they taste even better. They’re a nostalgic favorite for many, adding an extra layer of comfort and familiarity to these festive sweets. So, if you’re looking for a simple yet effective way to unleash your creativity this Halloween without spending hours in the kitchen, Nutter Butter cookies are your secret weapon.
Mastering the Art of Gray: Candy Melts vs. Almond Bark
Throughout my blog, I often refer to “colored candy melts,” assuming most avid bakers and crafters are familiar with them. However, a recent conversation with my mom revealed that this isn’t always the case, especially when she asked how I achieved the vibrant green for my Frankenstein pretzels. So, let’s demystify the magic behind colored chocolate.
Option 1: Wilton Candy Melts for Easy Coloring
Wilton, a well-known company in cake and decorating supplies, produces a fantastic range of colored chocolate melts, commonly known as candy melts. These convenient disks come in an impressive array of colors, making it incredibly easy to achieve virtually any shade you desire for your Halloween treats. You can typically find Wilton candy melts at major retailers like Walmart, Party City, and even craft stores. I’ve personally found Party City to be consistently well-stocked, but if they’re out of a particular color, Walmart usually comes to the rescue.
While Wilton offers a vast spectrum of colors, gray isn’t typically one of them in their standard line. However, this isn’t a problem! You can easily create a custom gray shade by combining white candy melts with a small amount of black candy melts. Start with white and gradually add tiny pieces of black, stirring until you reach your desired tombstone gray. This method is straightforward and guarantees a smooth, even color, perfect for a classic tombstone look.
Option 2: The Speckled Gray Secret (Almond Bark & Gel Food Coloring)
Last year, while I was busy making tombstone cupcakes, I stumbled upon a fantastic accidental discovery that I absolutely adore. Instead of mixing Wilton candy melts for gray, I used white chocolate almond bark combined with black gel food coloring. The result was nothing short of awesome: a beautifully speckled gray color that truly made the tombstones resemble authentic weathered rock.
The beauty of this method lies in the fact that the gel food coloring doesn’t fully absorb into the almond bark, creating subtle streaks and speckles that mimic the natural imperfections of stone. This unique texture adds a layer of realism to your Nutter Butter Tombstones that traditional candy melts can’t quite achieve. I wholeheartedly recommend trying this technique for your Nutter Butter Tombstones if you’re aiming for that extra touch of authenticity.
An added bonus of the almond bark and gel food coloring method is the ease with which you can create varying shades of gray. Simply melt your white chocolate almond bark, add a small amount of black gel food coloring to achieve a lighter gray, and reserve a portion of it in a separate bowl. Then, add a bit more black gel food coloring to the remaining chocolate to create a darker, more dramatic gray. This allows you to craft a diverse collection of tombstones, giving your edible graveyard a dynamic and visually interesting appearance. So, there you have it: two reliable methods to achieve the perfect gray chocolate for your spooky creations!
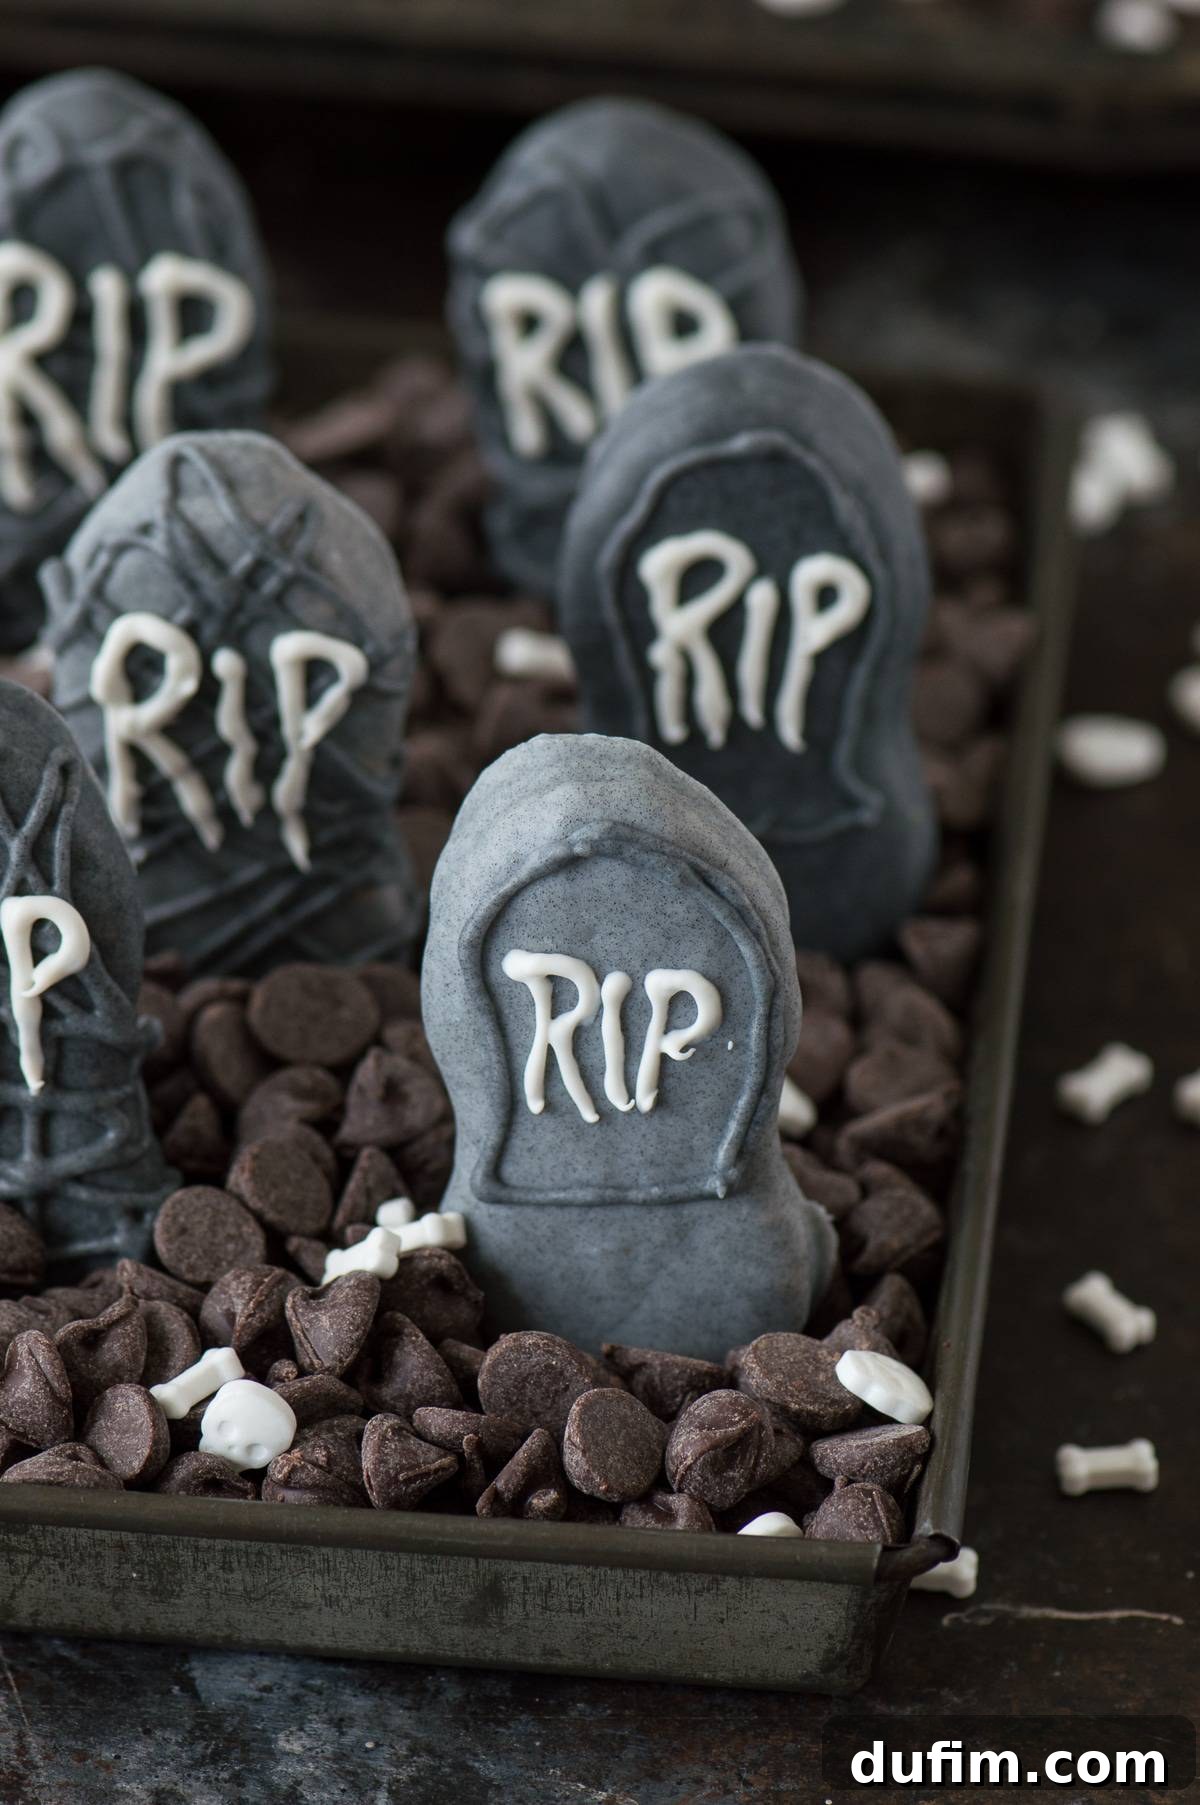
Crafting Your Spooky Nutter Butter Tombstones
With your gray chocolate ready, it’s time to transform those innocent Nutter Butters into hauntingly delicious tombstones. The process is straightforward, making it a fantastic project for all skill levels. Ensure your workspace is prepared by lining a baking sheet with a silicone baking mat or parchment paper; this will prevent your dipped cookies from sticking and make cleanup a breeze.
When dipping, patience is key. Immerse each Nutter Butter cookie fully into the melted gray chocolate, ensuring an even coat. Use a fork to gently lift the cookie, tapping it lightly against the side of the pot to allow any excess chocolate to drip off. This step is crucial for achieving a smooth, professional finish. For a seamless transfer from fork to baking sheet, a toothpick can be your best friend, helping to slide the dipped cookie off without disturbing the chocolate coating. Repeat this process with all your Nutter Butters, embracing the different shades of gray you’ve prepared to add depth to your graveyard.
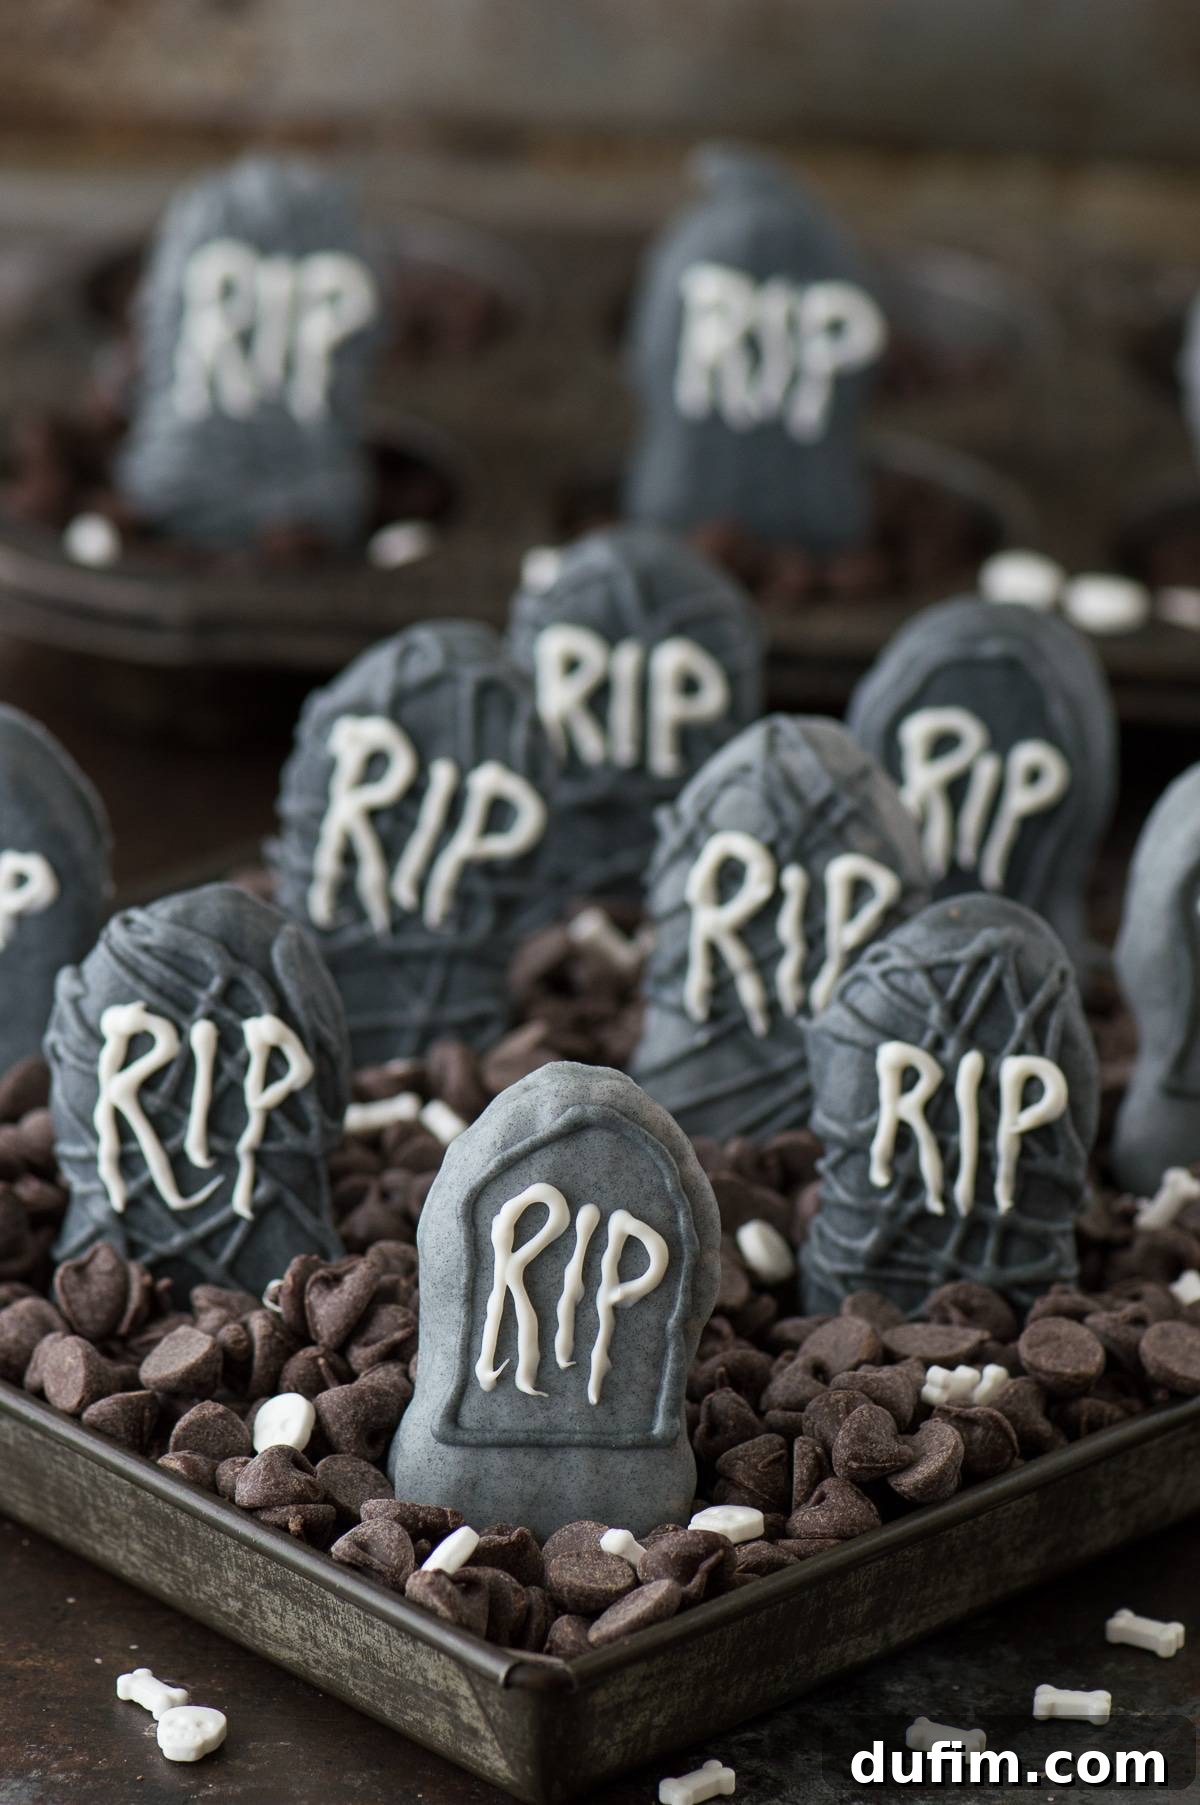
After dipping, the chocolate needs to set. To speed things up, especially if you’re eager to move on to decorating, pop your baking sheet into the refrigerator for about 10-15 minutes. Once the chocolate is firm to the touch, your tombstones are ready for their final details. For the classic “RIP” lettering, melt a small amount of white chocolate almond bark (or white candy melts) with a touch of vegetable shortening for a smooth consistency. Transfer this white chocolate to a squeeze bottle or a piping bag with a very fine tip for precise writing. You can also add spooky details like criss-crossing lines, cracks, or even etched outlines using leftover gray chocolate for an extra eerie effect. Let these details set before adding the “RIP” to prevent smudging. These thoughtful touches will elevate your Nutter Butter Tombstones from simple cookies to edible works of Halloween art.
Bringing Your Graveyard to Life: Creative Display Ideas
While the Nutter Butter Tombstones are fantastic on their own, presenting them in an imaginative way truly brings the Halloween spirit to life. I knew I wanted my tombstones to look like they were emerging from a spooky graveyard, and I found the perfect, effortless solution: a bed of chocolate chips! This simple yet effective display transforms a plain tray of treats into a captivating scene.
To create your own chocolate chip graveyard, select a shallow serving dish or an 8-inch square pan. I used an entire 24oz bag of chocolate chips to fill my shallow pan, creating a rich, dark “dirt” base. You might need a few large bags, depending on the size and depth of your chosen pan, so plan accordingly. Don’t worry about buying extra; chocolate chips are always useful for future baking adventures!
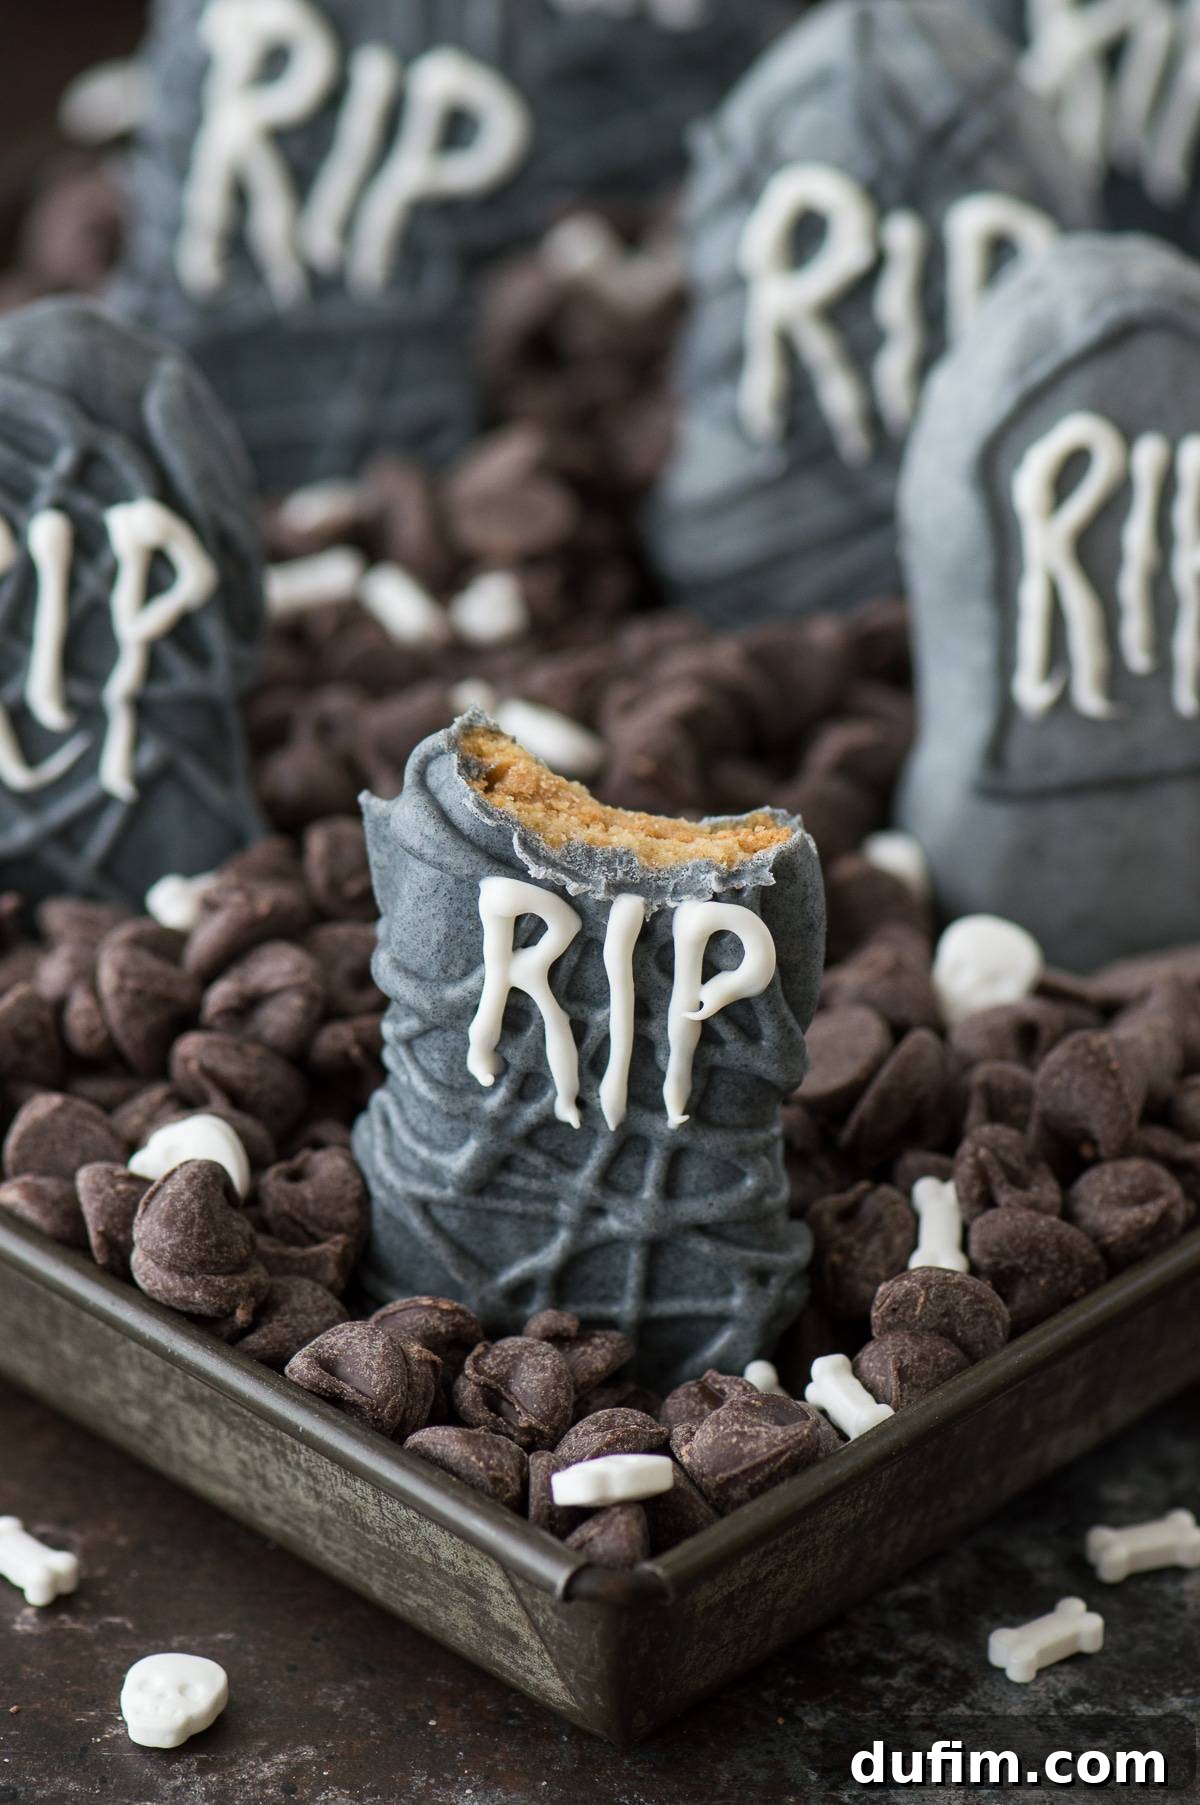
Once your pan is filled with chocolate chips, arrange your Nutter Butter Tombstones. The chips provide a soft, moldable surface, allowing you to easily stand the tombstones upright and adjust their positions to create a realistic, slightly uneven graveyard effect. To complete the macabre scene, sprinkle some skeleton bone sprinkles (Wilton brand offers excellent options) over the “graveyard” soil. These tiny bones scattered amongst the chocolate chips add a wonderfully eerie touch, suggesting hidden secrets beneath the surface.
For even more creative variations, consider using crushed Oreo cookies or chocolate cookie crumbs instead of chocolate chips for a finer, more realistic “dirt” texture. You could also add other edible graveyard elements such as gummy worms peeking out from the “soil,” small plastic spiders for extra creepiness, or tiny candy pumpkins and ghosts to fill out the scene. The possibilities are endless, and with minimal effort, you can turn your Nutter Butter Tombstones into a truly unforgettable Halloween centerpiece. This engaging display not only makes the treats more visually appealing but also adds an element of storytelling to your Halloween spread, delighting both children and adults alike.
Why These Nutter Butter Tombstones Are a Halloween Must-Have
These Nutter Butter Tombstones aren’t just another Halloween treat; they’re a symbol of effortless holiday fun. Their simplicity makes them incredibly accessible, even for those who might shy away from complex baking projects. You don’t need to be a seasoned pastry chef to create these impressive-looking cookies; a few basic ingredients and a little enthusiasm are all it takes. This ease of preparation means more time to enjoy the Halloween festivities and less time stressing in the kitchen.
Beyond their simplicity, these tombstones are wonderfully versatile. They are perfect for school parties, office potlucks, neighborhood gatherings, or as a special snack for your family on Halloween night. Kids absolutely adore helping with the dipping and especially the “RIP” writing, turning the preparation into a fun, interactive activity that builds excitement for the holiday. The combination of the classic Nutter Butter cookie with a sweet chocolate coating is a flavor profile that appeals to nearly everyone, ensuring your graveyard treats will disappear quickly.
Moreover, the customizable nature of these tombstones allows for endless creativity. Experiment with different shades of gray, add unique etchings, or even use colorful candy melts for vibrant, whimsical tombstones if traditional spooky isn’t your style. The graveyard display itself offers a chance to get imaginative with various “dirt” bases and embellishments. In short, Nutter Butter Tombstones encapsulate the spirit of Halloween: a little bit spooky, a lot of fun, and deliciously memorable. They are a definitive must-have for adding a charming, edible touch to your holiday celebrations.
More Spine-Chilling Halloween Treat Ideas
- Ghost Popcorn Balls
- Halloween Sugar Cookies
- Bubbling Witch’s Cauldron Brownies
- Frankenstein Pretzels
Tap stars to rate!
Nutter Butter Tombstones
Rate
Equipment
-
Glass Mixing Bowl
-
Silicone Baking Mat
-
Baking Sheet
Ingredients
- Nutter Butter cookies
- White chocolate, vanilla almond bark
- Small amount of vegetable shortening
- Black gel food coloring
- Chocolate chips
- Skeleton bone sprinkles
Instructions
-
Open the package of Nutter Butters and line a baking sheet with a silicone baking mat or parchment/wax paper.Nutter Butter cookies
-
Before melting the almond bark, reserve a small amount to be melted later for the “RIP” lettering.
-
In a small pot over low heat, begin to melt the white chocolate almond bark with about a tablespoon of vegetable shortening. Stir occasionally until the chocolate is smooth and fully melted. Stir in a small amount of black gel food coloring, adding more if needed until you achieve your desired gray color. Once the chocolate is ready, carefully dip one Nutter Butter cookie at a time into the pot, spooning chocolate over it to ensure it’s fully coated. Use a fork to remove it from the pot, gently tapping the fork against the pot’s edge to remove excess chocolate. A toothpick can assist in transferring the Nutter Butter from the fork onto the lined baking sheet without smudging.White chocolate, Small amount of vegetable shortening, Black gel food coloring
-
Repeat this process, dipping as many Nutter Butters as you desire. For varied tombstone looks, you can add more black gel food coloring to the remaining chocolate to create different shades of gray.
-
Allow the chocolate on the Nutter Butters to fully set before proceeding with decoration. Placing the baking sheet in the refrigerator can significantly speed up this setting process.
-
Now for the creative part! You can leave the tombstones plain and simply write “RIP” on them, or you can add intricate detailing. On some tombstones, I drew criss-crossing lines to create a spooky, weathered effect, and on others, I outlined the tombstone shape itself. Use leftover gray chocolate and a squeeze bottle or a fine piping tip to add these details. If you choose to add details, ensure this chocolate sets completely before moving on to the “RIP” lettering.
-
In a separate small pot over low heat, melt the previously reserved portion of white chocolate almond bark along with a tiny amount of vegetable shortening. Once melted and smooth, transfer the white chocolate to a squeeze bottle or piping bag with a fine tip and carefully pipe “RIP” onto each tombstone. Allow this chocolate lettering to set firmly.
-
To assemble your spooky graveyard, fill a shallow pan or serving dish with chocolate chips. Gently move the chips around to create small indentations and help position the finished tombstones securely. Sprinkle skeleton bone sprinkles over the entire graveyard scene to complete the eerie yet delightful look.Chocolate chips, Skeleton bone sprinkles
Video
A video demonstration of how to make Nutter Butter Tombstones is coming soon!
Notes
Nutrition
Nutrition Disclosure
All nutritional values are approximate and provided to the reader as a courtesy. Changing ingredients and/or quantities will alter the estimated nutritional calculations.
Like this recipe? Rate and comment below!