
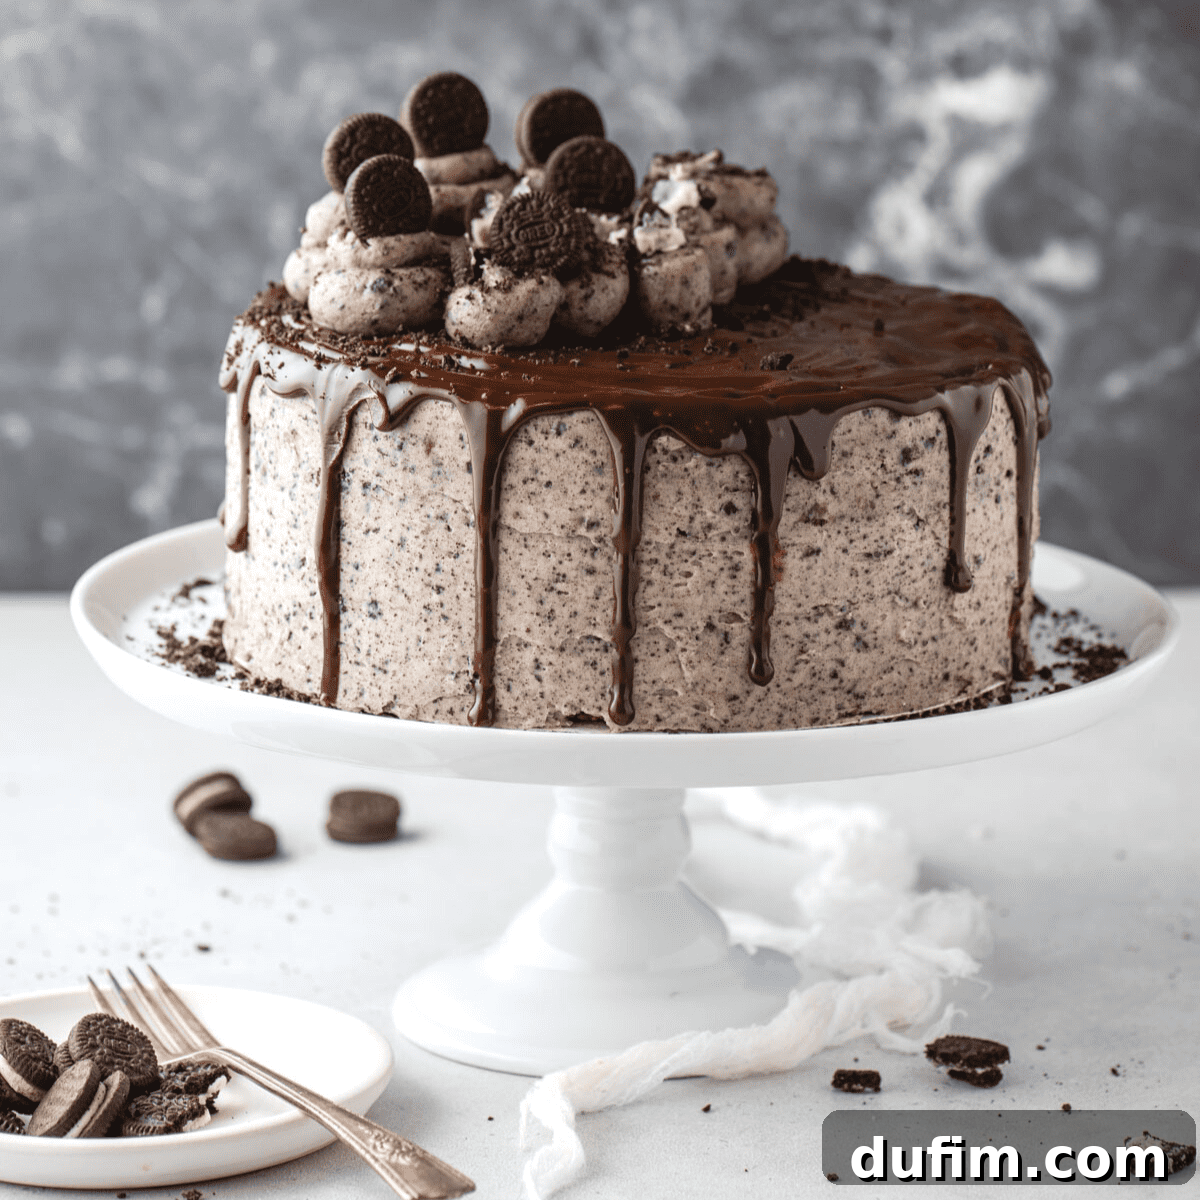
The Ultimate Homemade Oreo Layer Cake: A Bakery-Style Delight for Every Celebration
Prepare to impress with this show-stopping Oreo layer cake recipe that has captured the hearts of countless families! Experience firsthand why this recipe is a trusted favorite for birthday parties, holiday gatherings, and any special occasion demanding a truly decadent dessert. Even if you have minimal baking experience, my clear, step-by-step guide empowers you to create this visually stunning and incredibly delicious cake right in your own kitchen.
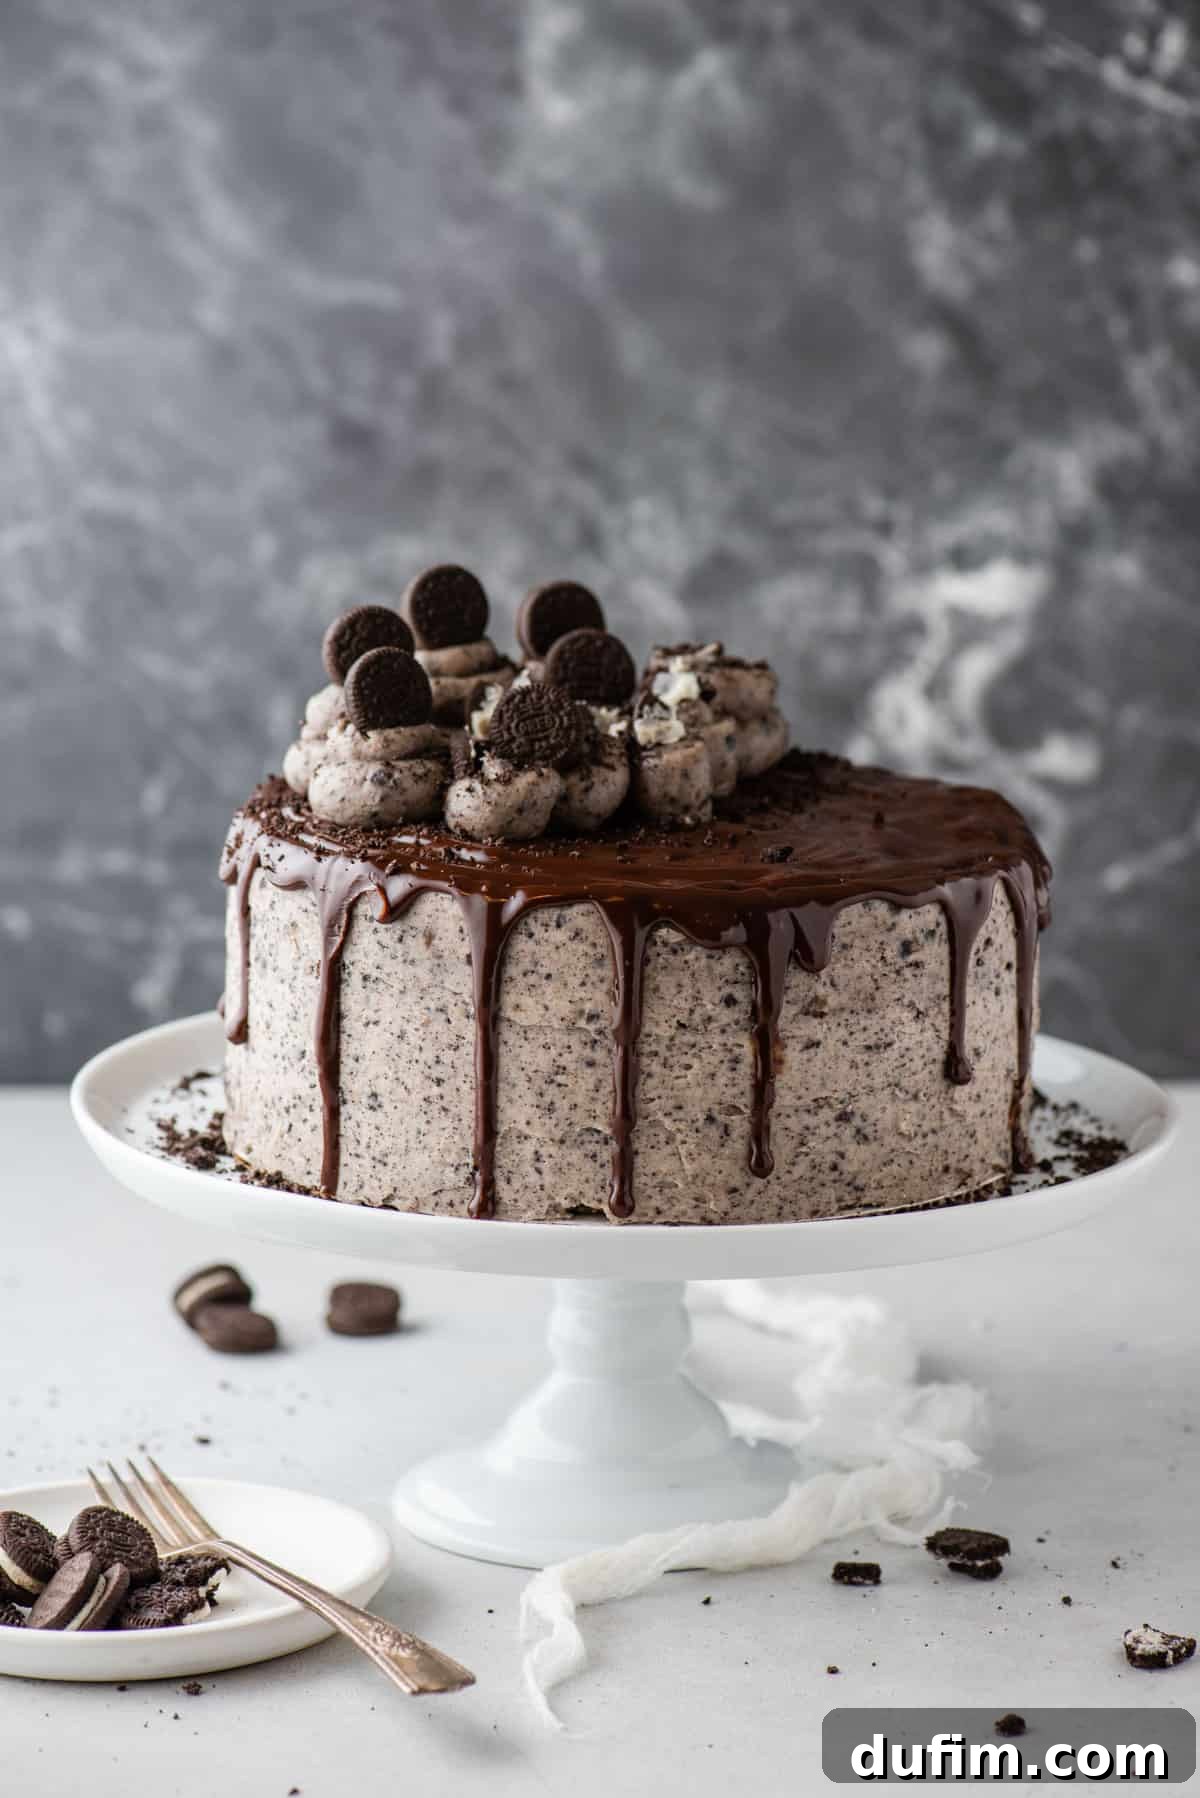
An Ode to Oreo Lovers: Your Dream Cake Awaits
If you’re among those who can’t resist adding a package of Oreos to your grocery cart, then congratulations – you’ve found your new favorite cake! This extraordinary Oreo birthday cake recipe is meticulously crafted for the ultimate cookies-and-cream experience, incorporating America’s favorite cookie into every single component. From the deeply flavored cake layers to the luscious frosting and the decorative topping, Oreos are the star of this sensational dessert.
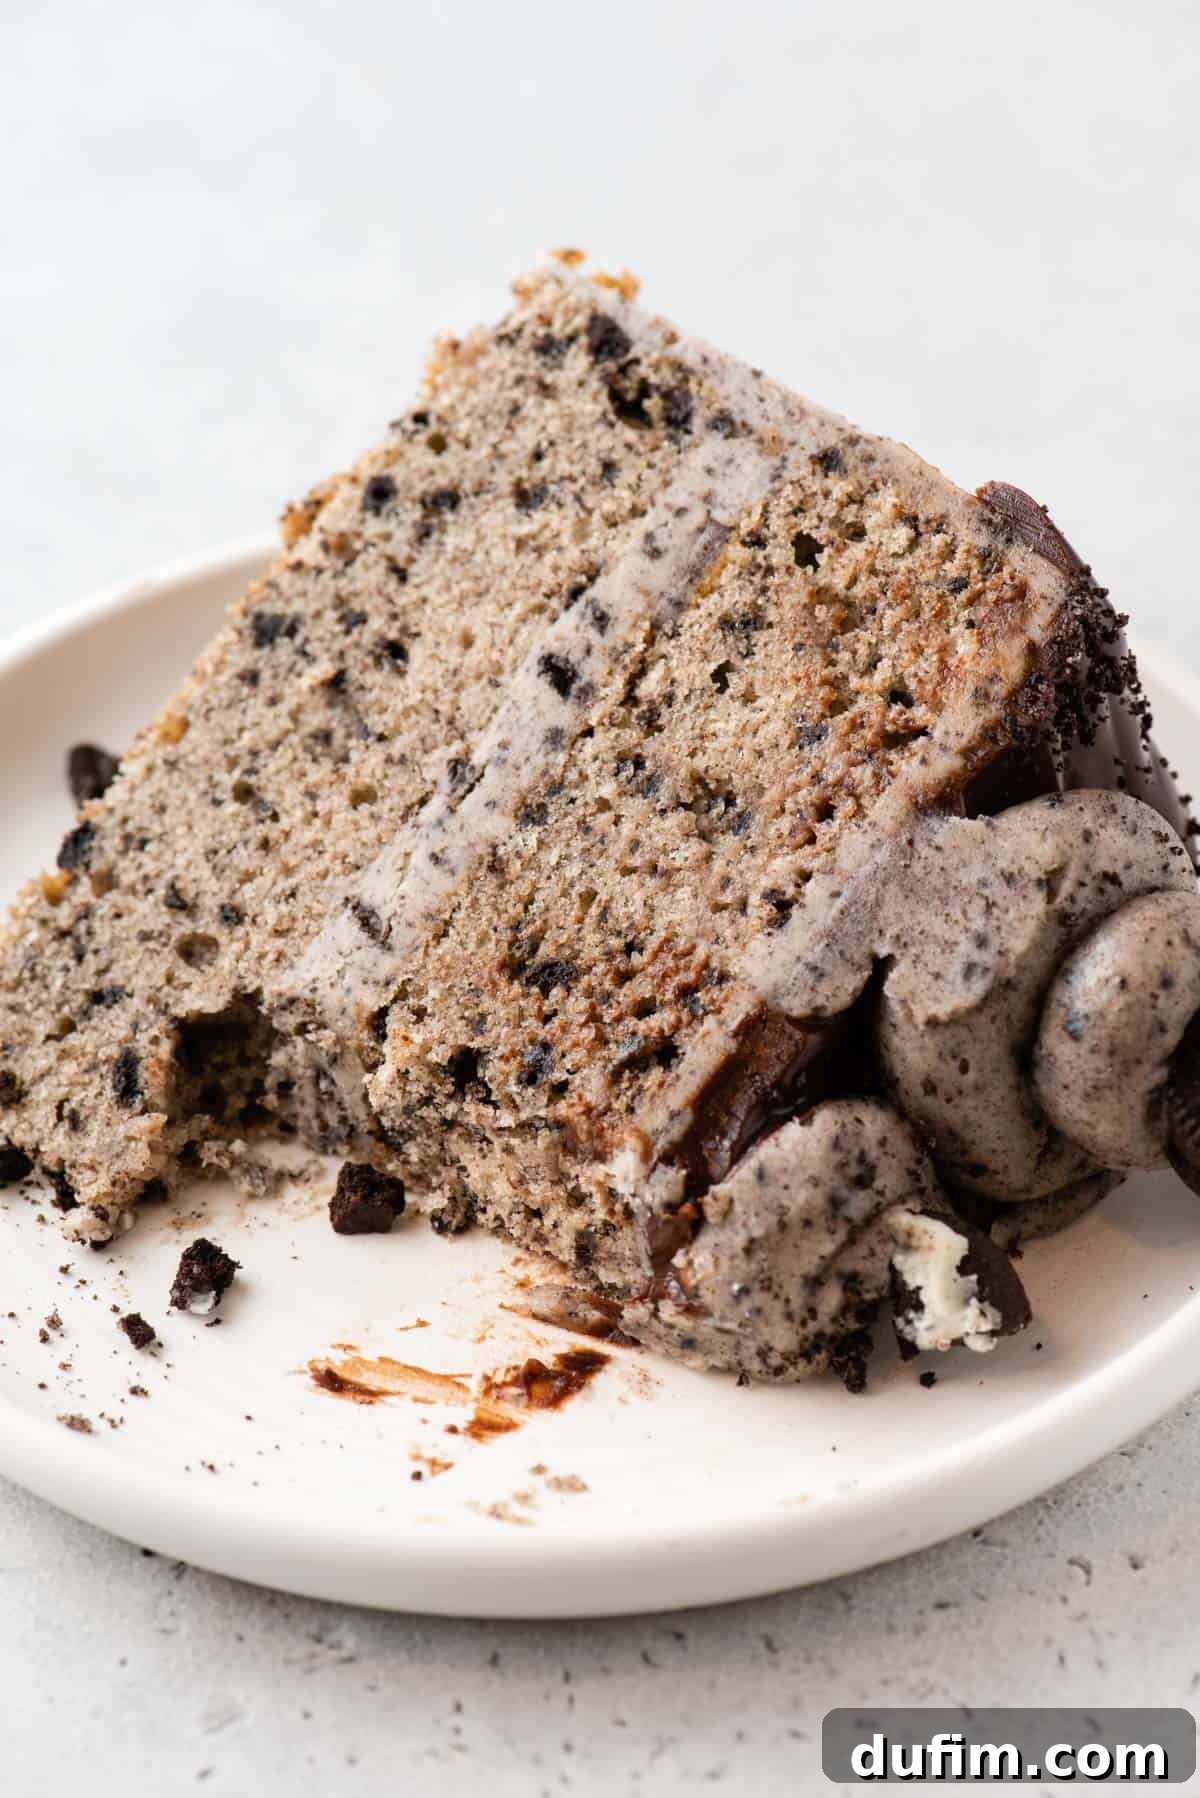
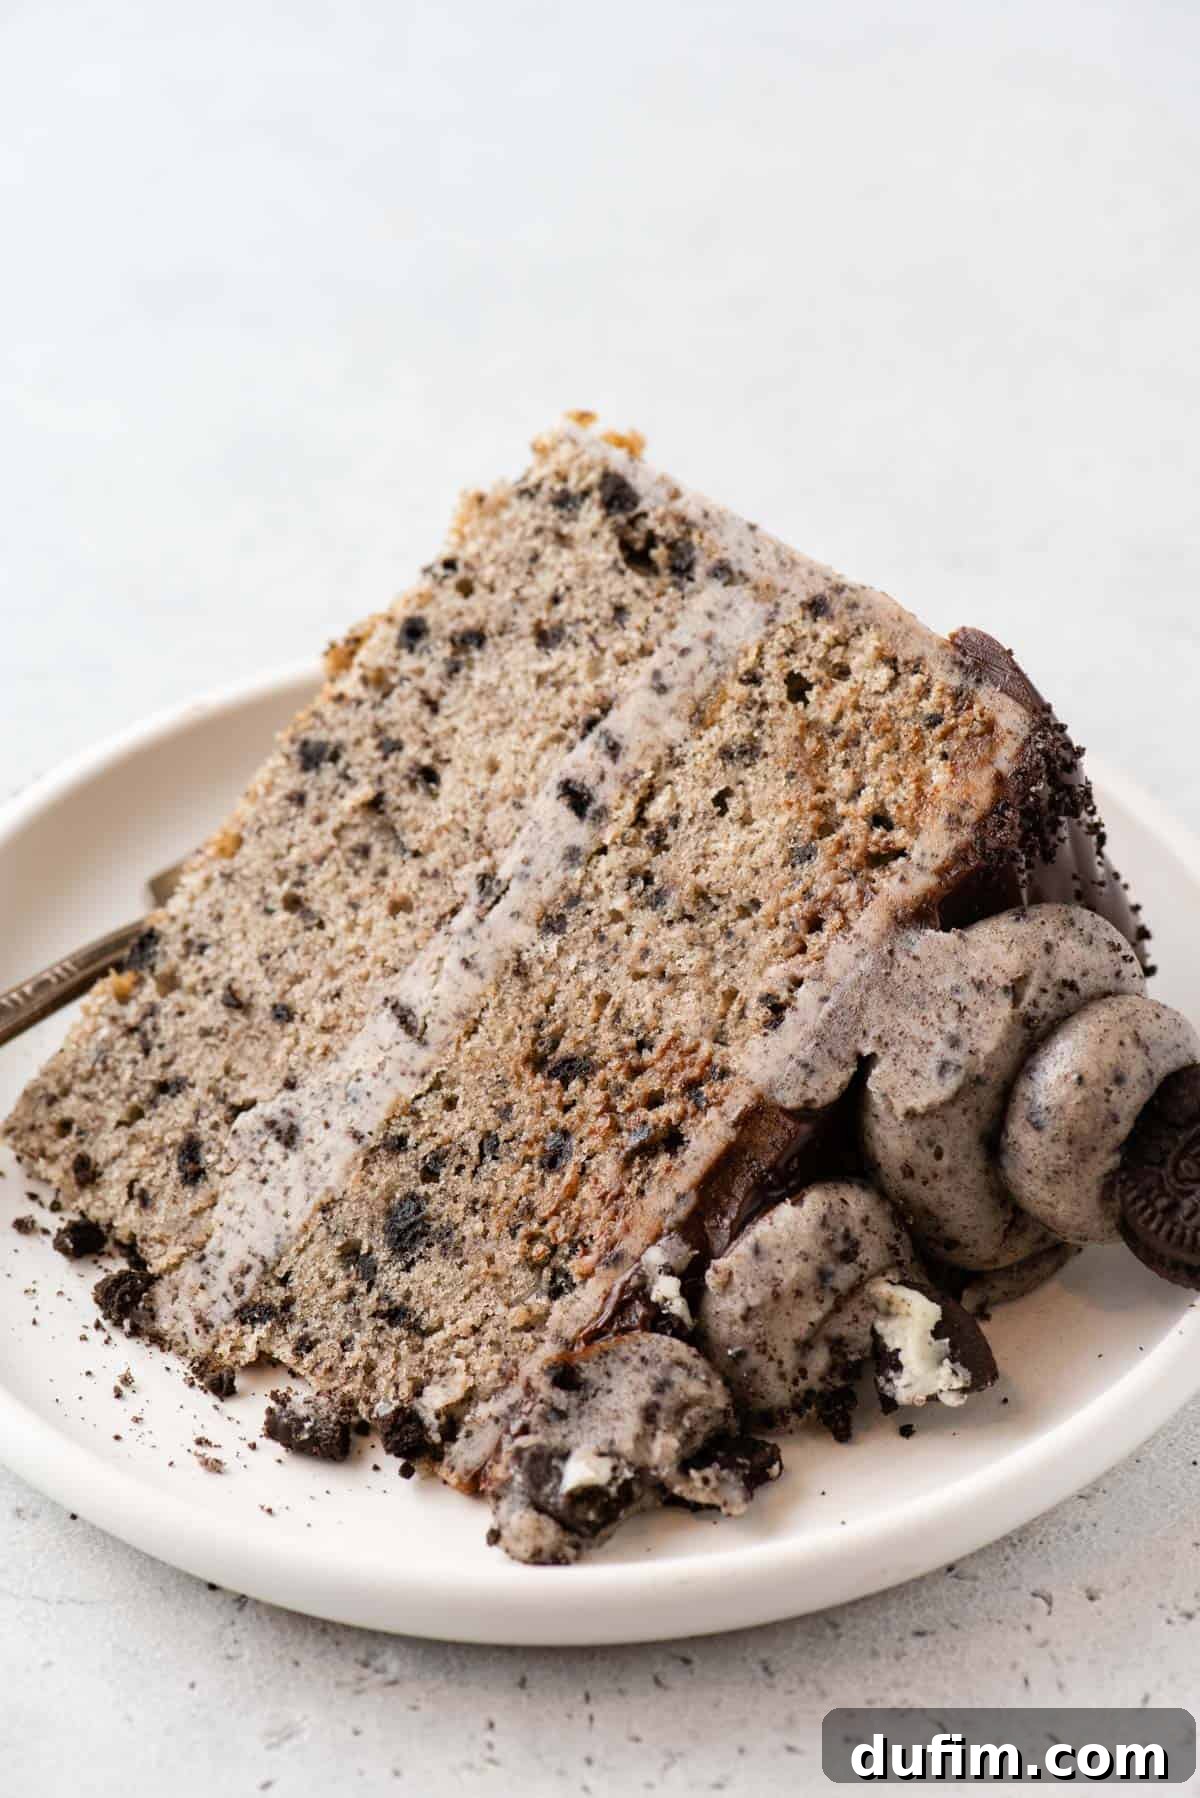
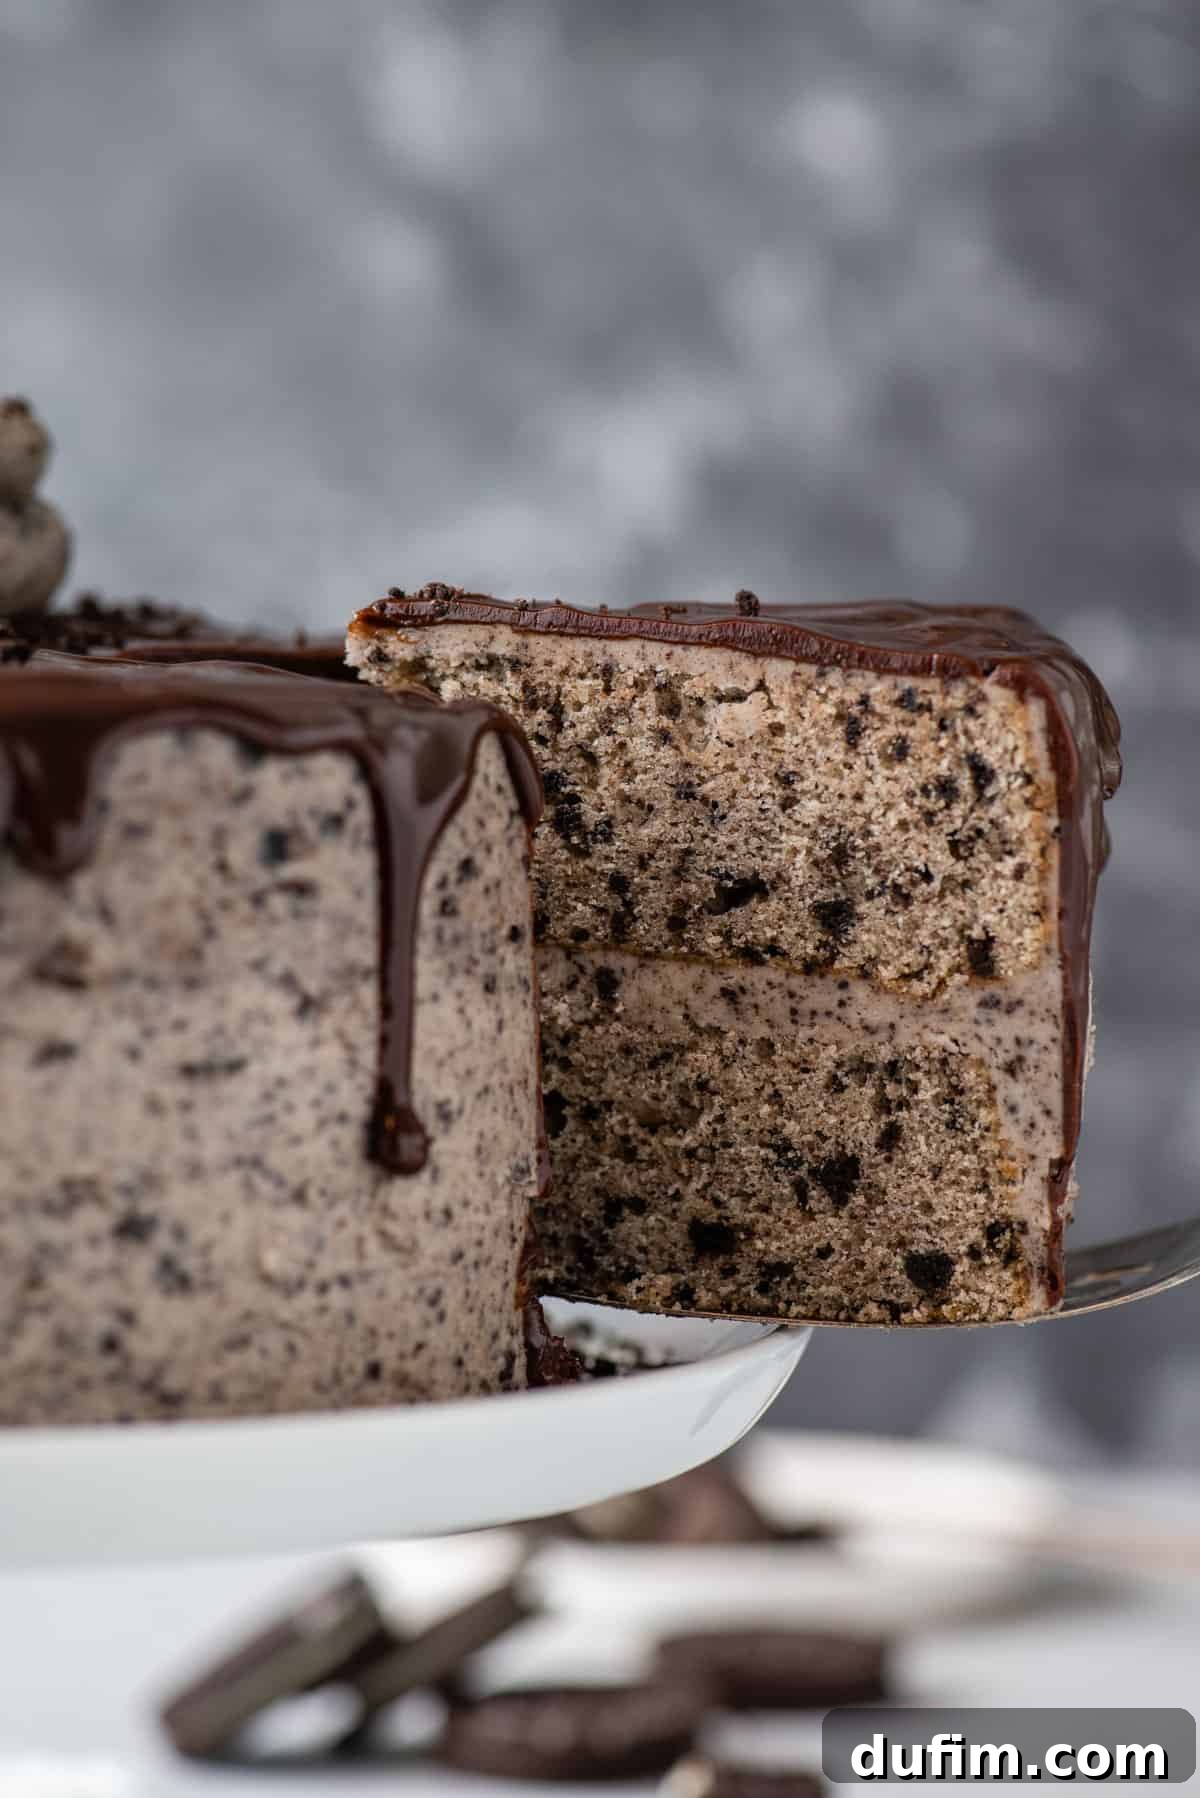
Just the cake layers alone boast a generous cup and a half of finely crushed Oreo crumbs, ensuring that the iconic cookies-and-cream flavor bursts through with every moist, tender bite. This isn’t just a cake with a hint of Oreo; it’s a celebration of the beloved cookie, promising an authentic and satisfying taste that true Oreo aficionados will adore.
Beyond the delightful crunch and flavor of Oreos, let’s talk about the cake itself. Its light, incredibly fluffy, and remarkably moist texture is achieved through a secret ingredient: sour cream. While sour cream introduces a subtle, balancing tang, its primary role is to infuse the cake batter with unparalleled moisture without altering its consistency or making it too thin. This clever addition is a technique I frequently employ in my cake and cupcake recipes, serving as my personal secret weapon against dry, crumbly cakes. It ensures your homemade Oreo layer cake remains wonderfully moist and fresh for days, allowing you to savor every slice.
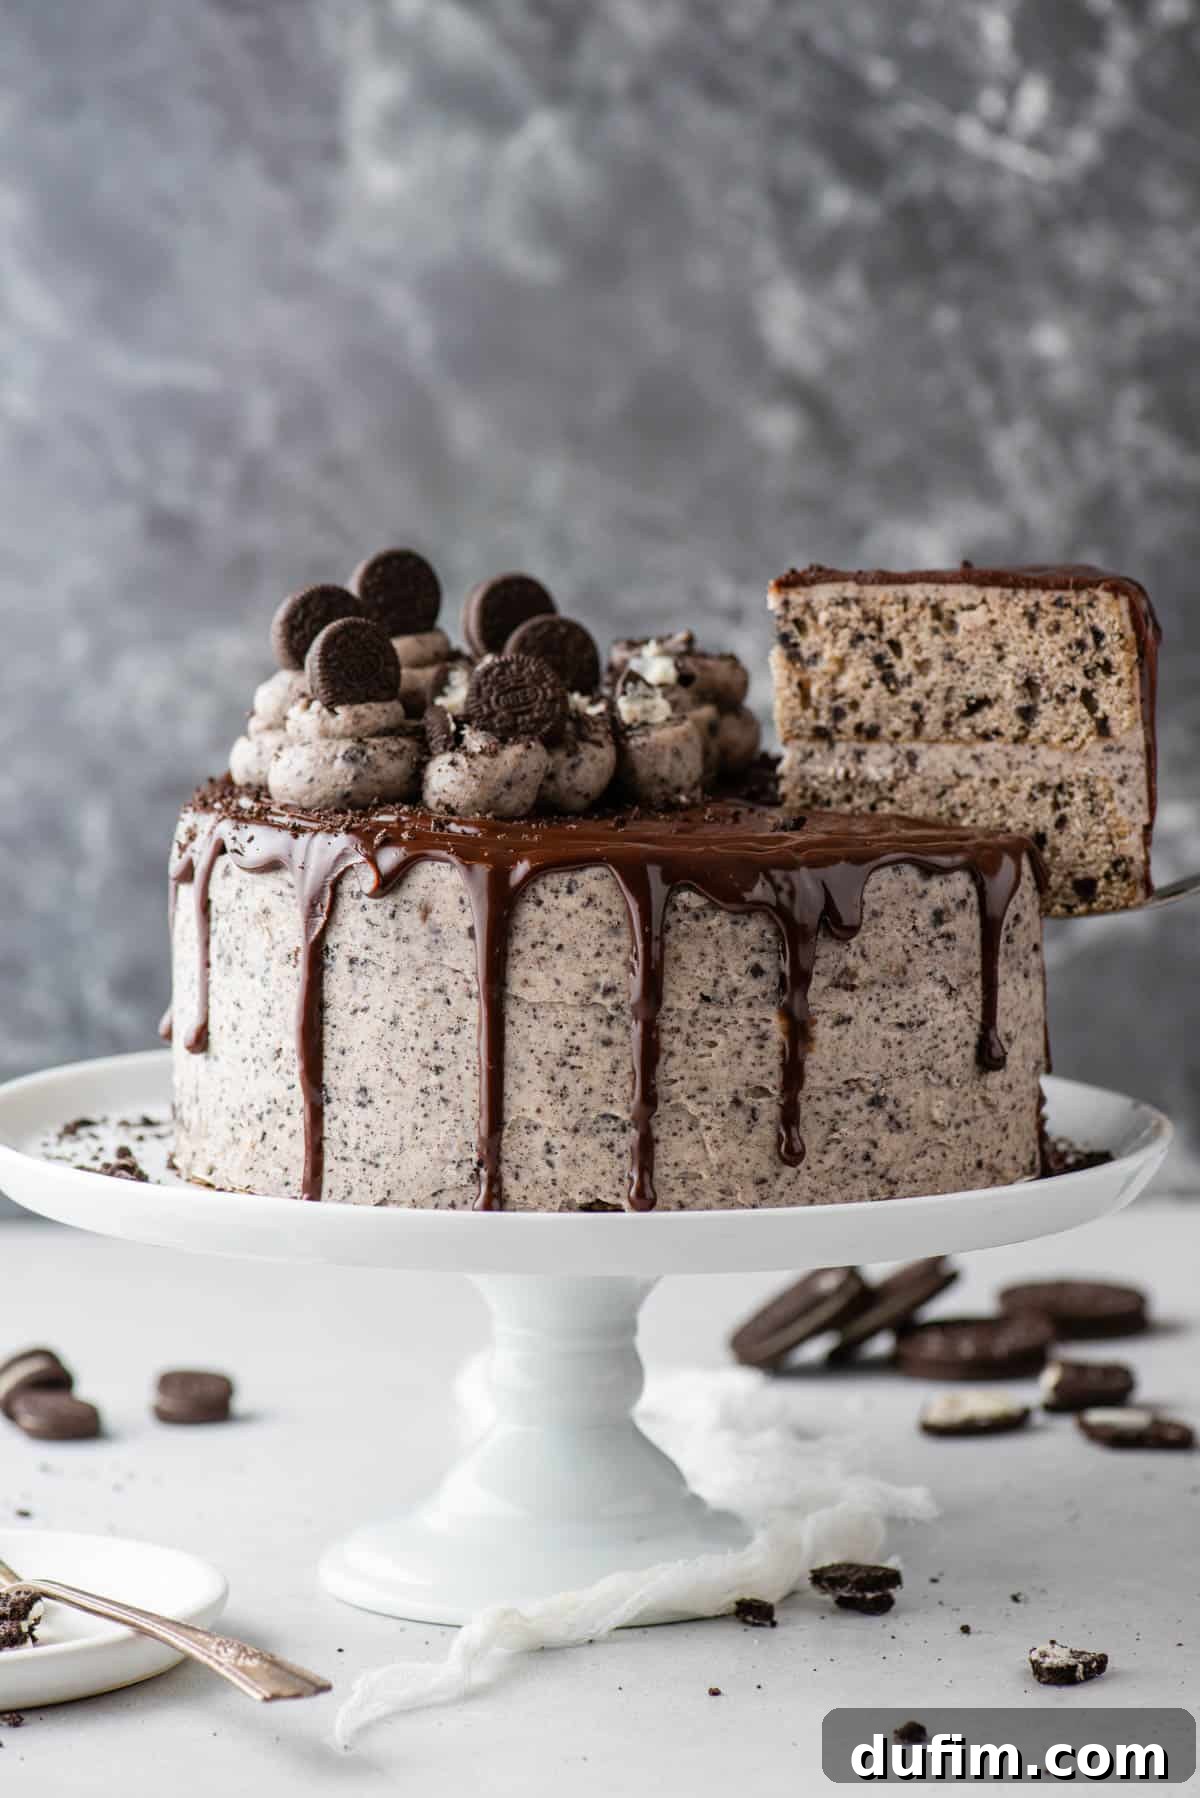
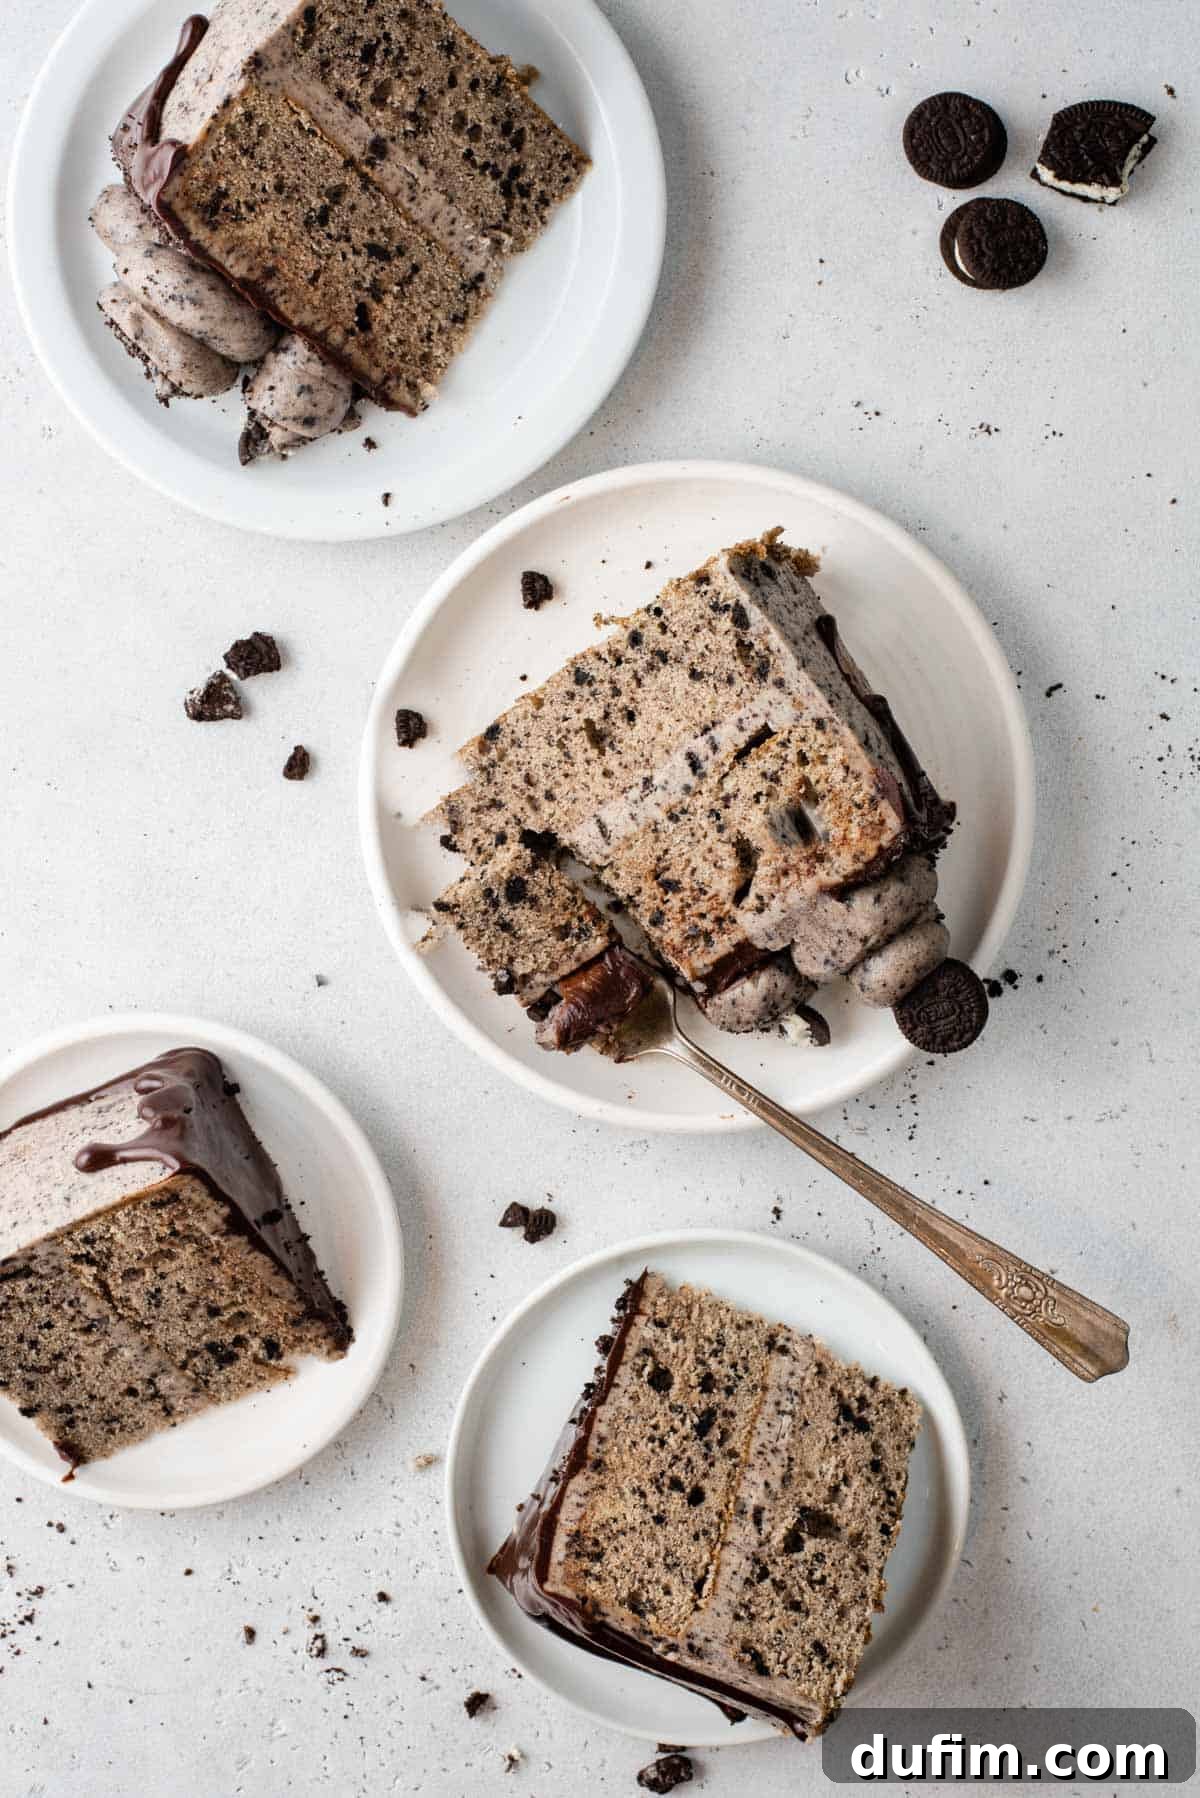
Once baked to perfection, these delectable cake layers are generously enrobed in a rich, velvety Oreo frosting. The frosting, also packed with crushed Oreos, adds another layer of irresistible flavor and texture. To elevate its appearance and taste, a smooth, glossy chocolate ganache is artfully drizzled over the top, creating elegant drips down the sides. Finally, a few swirls of extra Oreo frosting are piped onto the cake, completing this professional-looking masterpiece. There’s truly no need to splurge on an expensive Oreo birthday cake from a high-end bakery when achieving such stunning, bakery-quality results is so simple and enjoyable to do right at home!
Craving more delicious Oreo creations? Explore my extensive collection of irresistible Oreo recipes! You might love my easy Oreo Sheet Cake, a quick Oreo Mug Cake for a single serving treat, the simple yet delightful Oreo Fudge, or the creamy, dreamy Oreo Pudding Pie for your next dessert adventure!
Essential Ingredients for Your Homemade Oreo Cake
Gathering your ingredients is the first exciting step towards creating this magnificent Oreo layer cake. Below is a comprehensive list of everything you’ll need. For precise quantities and detailed instructions, please refer to the complete recipe card at the end of this post.
For the Moist Oreo Cake Layers
- Unsalted Butter: Ensure it’s softened to room temperature for smooth incorporation into the batter.
- Granulated Sugar: Provides the perfect sweetness and contributes to the cake’s tender crumb.
- Large Eggs: Also at room temperature, for better emulsion and a lighter cake structure.
- Sour Cream: The key ingredient for exceptional moisture and a subtle tang.
- Milk: Skim, 1%, or 2% milk will work to achieve the ideal batter consistency.
- Vanilla Extract: Enhances the overall flavor profile of the cake.
- All-Purpose Flour: The structural foundation of our cake.
- Baking Powder: Our leavening agent, ensuring a light and fluffy rise.
- Salt: A pinch of salt balances the sweetness and brings out the other flavors.
- Oreo Crumbs: Approximately 15 whole Oreos, finely crushed, for that unmistakable cookies-and-cream taste.
For the Decadent Oreo Frosting
- Unsalted Butter: Softened to room temperature is crucial for a smooth, creamy frosting.
- Vanilla Extract: A classic pairing that complements the chocolate and cream flavors.
- Salt: Just a touch to cut through the sweetness and enhance the rich flavors.
- Oreo Crumbs: About 9 whole Oreos, crushed, for texture and intense Oreo flavor in the frosting.
- Powdered Sugar: Also known as confectioners’ sugar, essential for a smooth, lump-free frosting.
- Heavy Whipping Cream: Adds richness and helps achieve the perfect fluffy consistency.
For the Glossy Chocolate Ganache
- Heavy Whipping Cream: Provides the liquid base for a silky smooth ganache.
- Chocolate Chips: Semi-sweet chocolate chips are recommended for a balanced chocolate flavor that isn’t overly sweet.
Mastering Oreo Crumbs for this Oreo Birthday Cake
Creating perfect Oreo crumbs is simple and essential for both the cake batter and the frosting. The easiest method is to use a food processor: simply add your whole Oreos (yes, including the cream filling!) and pulse until they transform into fine, uniform crumbs. This ensures an even distribution of flavor and texture throughout your cake.
Alternatively, if you don’t have a food processor, you can place the Oreos in a sturdy zip-top bag and crush them with a rolling pin. While this method requires a bit more effort to achieve consistently fine crumbs, it’s certainly effective. Remember, there’s no need to meticulously scrape out the cream filling; the entire cookie, filling and all, contributes to the rich flavor and texture of your finished cake.
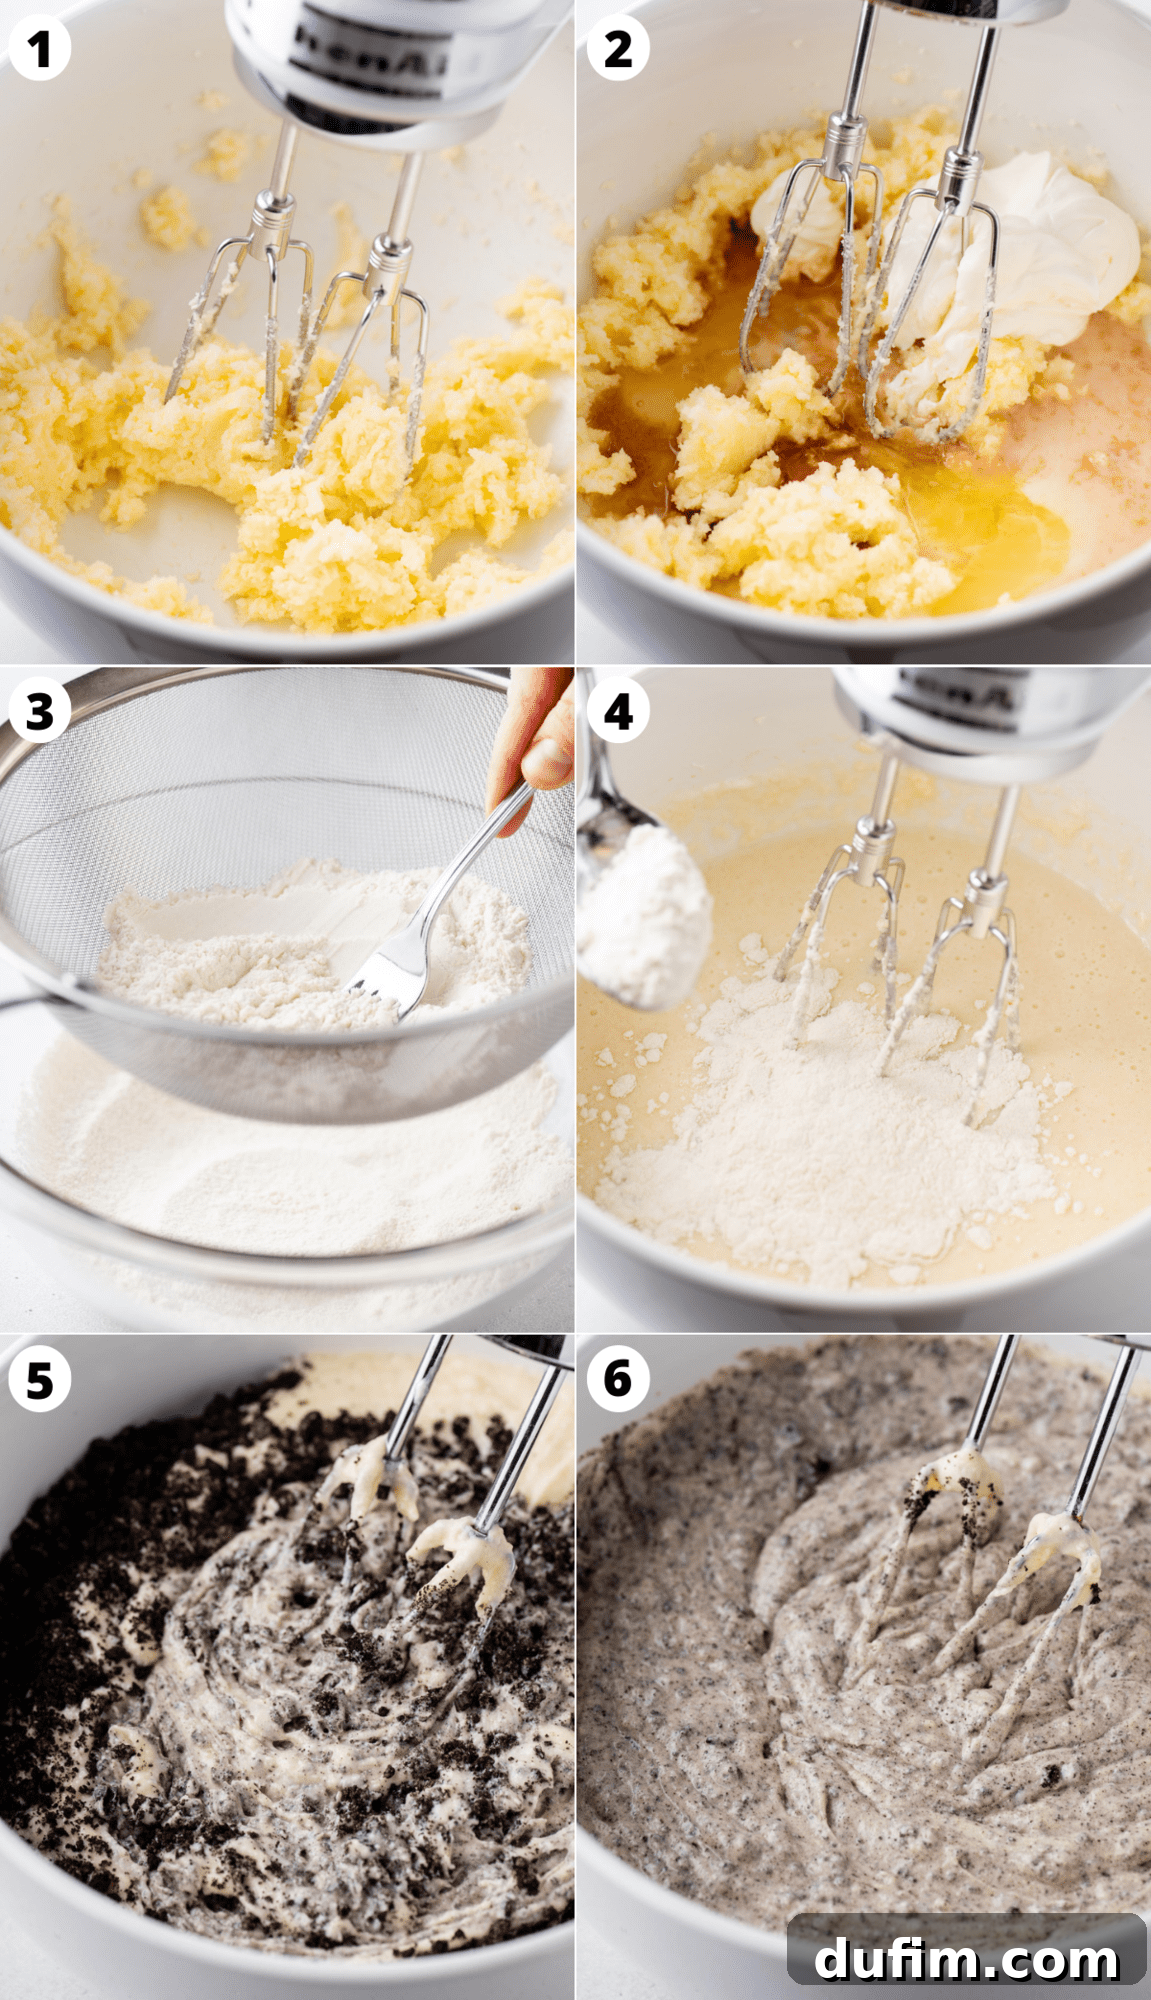
How to Make an Irresistible Oreo Cake: Step-by-Step
Don’t let the multiple components of this Oreo cake intimidate you. Each step is straightforward and manageable, even for novice bakers. If you’re short on time, consider baking the cake layers one day and preparing the frosting and assembling the cake the next. This flexible approach makes it easier to create what promises to be the best cookies-and-cream cake you’ve ever tasted, delivering that coveted bakery-style quality right from your home kitchen!
Crafting the Perfect Oreo Cake Layers
- Prepare Your Pans: Begin by preheating your oven to 350ºF (175ºC). Generously grease two 8-inch springform pans with butter, making sure to coat the sides and bottom thoroughly. For effortless cake removal, line the bottom of each pan with a circle of parchment paper. This preparation ensures your beautiful cake layers release perfectly every time.
- Combine Wet Ingredients: In a large mixing bowl, cream together the softened unsalted butter and granulated sugar using an electric mixer. Beat on medium-high speed for 1 to 2 minutes until the mixture is light and fluffy. Next, incorporate the room temperature eggs, sour cream, milk, and vanilla extract. Beat lightly until just combined, being careful not to overmix.
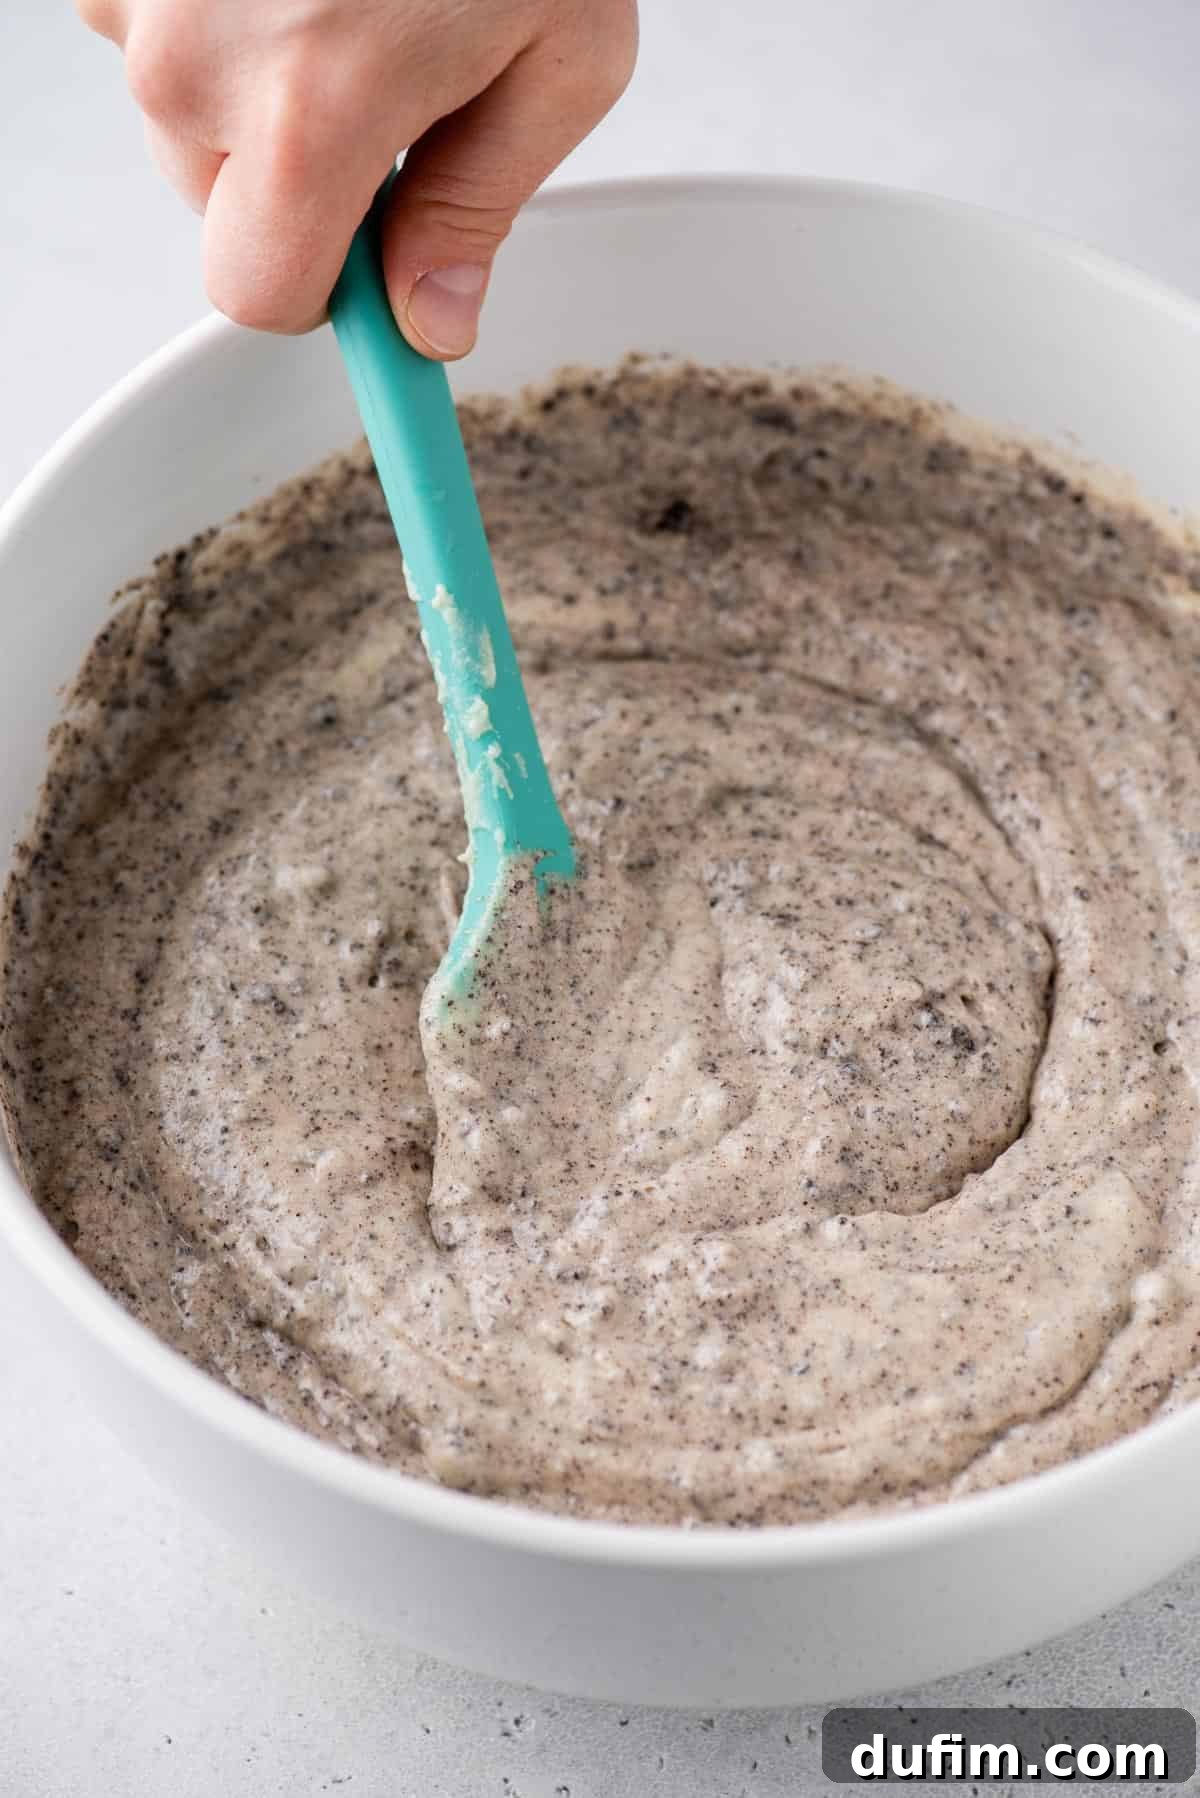
- Complete the Batter: In a separate bowl, sift together the all-purpose flour, baking powder, and salt. Sifting helps to aerate the dry ingredients, contributing to a lighter, fluffier cake. Gradually add the dry flour mixture to the wet ingredients, a few spoonfuls at a time, mixing on low speed until just incorporated. Overmixing can lead to a tough cake, so stop as soon as no dry streaks remain. Finally, gently fold in the crushed Oreo crumbs until evenly distributed. Divide the batter equally between your two prepared cake pans. If using bake-even strips, apply them around the outside of the pans for a perfectly flat top.
- Bake to Perfection: Place both cake pans on the center rack of your preheated oven. Bake for approximately 33 to 39 minutes, or until a wooden toothpick inserted into the center of the cakes comes out clean. Baking times may vary slightly depending on your oven, so keep a close eye on them.
- Cool Completely: Once baked, remove the cakes from the oven and allow them to cool in their pans for 20 to 30 minutes. This crucial resting period helps the cakes firm up. After this initial cooling, carefully invert them onto a wire rack to cool completely. Ensuring the cakes are fully cool before frosting prevents the frosting from melting.
Whipping Up the Dreamy Oreo Frosting
- Beat the Butter: In a clean mixing bowl, beat the room temperature unsalted butter on high speed for 1 to 2 minutes until it becomes exceptionally light and fluffy. This aeration is key to a perfectly smooth frosting.
- Initial Mixing: Add the vanilla extract, salt, and 1 cup of the crushed Oreo crumbs to the beaten butter. Gradually add the first 2 cups of powdered sugar. Beat on low speed until all ingredients are thoroughly incorporated and the mixture starts to thicken.
- Achieve Fluffiness: Incorporate the remaining powdered sugar and the heavy whipping cream. Increase the mixer speed to medium and beat for 1 to 2 minutes, or until the frosting is fully combined, smooth, and wonderfully fluffy. Adjust the consistency with a little more powdered sugar for a stiffer frosting or a splash more cream for a thinner consistency, if desired.
Preparing the Silky Chocolate Ganache
- Melt and Warm: Combine the chocolate chips and heavy cream in a microwave-safe bowl. Microwave for 20 to 30 seconds, or until the heavy cream just begins to bubble around the edges. Be careful not to overheat.
- Stir and Cool: Remove the bowl from the microwave and let the mixture stand undisturbed for 1 minute. This allows the residual heat to melt the chocolate chips completely. After one minute, use a spatula to gently stir the mixture until it becomes completely smooth, glossy, and uniform. It’s crucial to allow the ganache to cool to room temperature before applying it to the cake. If the ganache is too warm, it will be too thin and simply run off the cake, creating a messy rather than a beautiful drip effect.
Assembling Your Masterpiece: Putting it All Together
- Level Your Cakes: Once the cake layers are completely cooled, use a cake leveler or a long serrated knife to carefully trim off any domes from the tops, creating perfectly flat surfaces. This ensures your cake layers stack neatly and evenly. To secure the cake during assembly and frosting, spread a small dollop of Oreo frosting onto the center of your cake plate or stand; this acts as a “glue.”
- Layer and Frost: Place the first leveled cake layer onto the frosting-secured cake plate. Measure approximately 3/4 to 1 cup of the prepared Oreo frosting and spread it evenly over the top of this first layer. Carefully place the second cake layer on top. Now, use an offset spatula to spread the remaining frosting evenly around the sides and the top of the entire cake, creating a smooth and uniform coating. Remember to reserve about 1/2 cup of frosting if you plan to pipe additional decorations on top.
- Add the Ganache Drip: Ensure your chocolate ganache has cooled to room temperature and is thick but still pourable. Using a spoon or a squeeze bottle for more control, carefully drizzle the ganache around the edges of the top cake layer, allowing it to elegantly drip down the sides. Once the edges are done, fill in the middle of the cake with the remaining ganache and spread it smoothly with the back of your spoon. To set the ganache and prevent smudging, refrigerate the cake for about 10 minutes.
- Final Flourishes: Once the ganache is set, transfer your reserved 1/2 cup of Oreo frosting to a piping bag fitted with a large round piping tip. Pipe decorative swirls or rosettes around the edge of the cake, or artfully along one side, as shown in the pictures. For the ultimate finishing touch, adorn each frosting swirl with a mini Oreo cookie, adding both visual appeal and an extra crunch. Slice, serve, and enjoy the applause for your incredible homemade Oreo cake!
What Can I Use If I Don’t Have a Piping Bag?
Don’t worry if you don’t own a professional piping bag! A simple plastic zip-top bag can easily be repurposed for piping frosting. Just spoon your frosting into one corner of the bag, then snip off a small piece of that corner. You can insert a piping tip into this hole if you have one, or simply use the bag as is. While a tip offers more control over intricate designs, squeezing the frosting directly from the cut hole will still allow you to create charming swirls and decorations.
Oreo Cake Recipe: Pro Tips and Tricks for Success
To ensure your homemade Oreo layer cake turns out absolutely perfect and worthy of any celebration, keep these simple yet effective tips in mind:
- Stick to Original Oreos: While the vast array of Oreo flavors on grocery store shelves can be tempting, for this particular recipe, I highly recommend using classic original Oreos. Their distinct dark cookie and white cream filling contribute to the traditional cookies-and-cream aesthetic and flavor profile that makes this cake so beloved. Using flavored Oreos might alter the appearance and taste, potentially deviating from the expected bakery-style result.
- Crush Oreos Thoroughly: For both the cake batter and especially the frosting, aim for finely crushed Oreo crumbs. Uniform crumbs integrate better into the batter, ensuring consistent flavor throughout the cake. When making the frosting, very fine crumbs are crucial to prevent any larger pieces from clogging your piping tip, ensuring smooth, beautiful decorations.
- Utilize Room Temperature Ingredients: This tip applies to most baking, but it’s especially important here. Ensure your butter, eggs, and sour cream are all at room temperature. This allows them to emulsify properly, creating a smoother batter and a more uniform, tender cake crumb. Cold ingredients can result in a lumpy batter and a denser cake.
- Don’t Overmix the Batter: Once you’ve added the dry ingredients to the wet, mix just until they are incorporated. Overmixing develops the gluten in the flour, which can lead to a tough, chewy cake rather than a tender, fluffy one. A few streaks of flour are better than an overmixed batter.
- Consider Bake-Even Strips: For cakes with perfectly flat tops that require minimal leveling, bake-even strips are a game-changer. These strips wrap around the outside of your cake pans, insulating the edges and allowing the cake to bake more evenly. This prevents the edges from setting too quickly and the center from doming excessively. If you don’t use them, simply trim the domed tops of your cooled cake layers with a serrated knife before assembly.
- Use an Oven Thermometer: Oven temperatures can fluctuate and vary from what the dial indicates. An inexpensive oven thermometer placed inside your oven will give you an accurate reading, helping you maintain the correct baking temperature and ensuring your cakes bake perfectly.
Storing and Preserving Your Oreo Cake
Proper storage ensures your delicious Oreo layer cake remains fresh and enjoyable for as long as possible. Once assembled, the cake can be stored at room temperature, tightly wrapped in plastic wrap or placed under a cake dome. It will maintain its freshness and delightful texture for up to 3 days. If your kitchen tends to be very warm, or for extended freshness, refrigeration is recommended.
Freezing Your Homemade Oreo Cake for Later
This homemade Oreo cake freezes exceptionally well, making it perfect for preparing ahead of time or enjoying leftovers at a later date. You have the option to freeze the cake layers on their own or the entire decorated cake.
To freeze unfrosted cake layers: Once completely cooled, wrap each individual cake layer tightly in several layers of plastic wrap, then an additional layer of aluminum foil. This double protection prevents freezer burn. Store them in the freezer for up to 3 months. When you’re ready to assemble, simply thaw the layers overnight in the refrigerator before proceeding with the frosting and assembly steps.
To freeze a whole cake or individual slices: For a whole cake, place it uncovered on a parchment-lined baking sheet and freeze until the frosting is solid (this prevents the frosting from sticking to the plastic wrap). Once firm, wrap the entire cake tightly in several layers of plastic wrap, followed by aluminum foil. For individual slices, wrap each slice similarly. Place the wrapped cake or slices into a large freezer bag or an airtight freezer-safe container. Freeze for up to 3 months. To serve, thaw the cake or slices in the refrigerator overnight or for several hours at room temperature before enjoying. This ensures you always have a delightful Oreo treat on hand!
“Excellent recipe! Added 1 tsp of espresso powder to the frosting… it was fantastic!”
-Aimee
Discover More Show-Stopping Cake Recipes
If you loved creating and tasting this Oreo layer cake, you’ll be thrilled to explore more of my exquisite cake recipes. Each one is designed to bring bakery-quality desserts to your home kitchen:
- Irresistible Butterfinger Cake
- Decadent Chocolate Raspberry Cake
- Bright and Zesty Lemon Layer Cake
- Refreshing Orange Cake
Tap stars to rate!
Homemade Oreo Cake
Beth
15
minutes
37
minutes
1
hour
30
minutes
2
hours
22
minutes
12
servings
Rate
Equipment
-
Glass Mixing Bowl
-
My favorite spatula!
-
KitchenAid 9-Speed Mixer
-
8 inch springform pan
-
Kitchen Scale
Ingredients
Oreo Cake
- 1 cup (226g) unsalted butter, room temperature, 2 sticks
- 1 ½ cups (297g) granulated sugar
- 3 large eggs
- 1 cup (236ml) sour cream
- ½ cup (118ml) milk, skim, 1% or 2%
- 1 tsp vanilla extract
- 2 ½ cups (300g) all purpose flour
- 2 tsp baking powder
- ½ tsp salt
- 1 ½ cups (180g) Oreo crumbs, 15 whole Oreos
Oreo Frosting
- 2 cups (452g) unsalted butter, room temperature, 4 sticks
- 1 tsp vanilla extract
- ¼ tsp salt
- 1 cup (125g) Oreo crumbs, 9 whole Oreos
- 3-4 cups (339-454g) powdered sugar
- 3 Tbsp heavy whipping cream
Chocolate Ganache
- ⅓ cup (79ml) heavy whipping cream
- ¾ cup (129g) chocolate chips, I used semi-sweet
Instructions
Oreo Cake
- Preheat the oven to 350º F (175ºC). Grease two 8-inch springform pans with butter (butter the sides and bottom) and line each pan with a parchment paper circle for easy cake removal. Set aside.
- In a mixing bowl, combine the softened butter and granulated sugar. Beat using an electric mixer for 1-2 minutes until light and fluffy. Add in the eggs, sour cream, milk, and vanilla extract. Beat lightly with the electric mixer until just combined.
1 cup (226g) unsalted butter,
1 1/2 cups (297g) granulated sugar,
3 large eggs,
1 cup (236ml) sour cream,
1/2 cup (118ml) milk,
1 tsp vanilla extract - In a separate mixing bowl, combine the flour, baking powder, and salt. Sift the dry ingredients together to ensure an extra fluffy cake. Gradually add the flour mixture to the wet ingredients a few spoonfuls at a time. Mix until just incorporated, being careful not to overmix. Gently stir in the Oreo crumbs.
2 1/2 cups (300g) all purpose flour,
2 tsp baking powder,
1/2 tsp salt,
1 1/2 cups (180g) Oreo crumbs - Evenly divide the batter between the 2 pans, with approximately 2 & 1/2 cups of batter in each pan. If using bake-even cake strips, secure them around the outside of the pans.
- Bake both pans on the same rack in the center of the oven for 33-39 minutes or until a toothpick inserted in the center comes out clean. Baking times will vary depending on your oven and size of pan you’re using.
- Allow the cakes to cool for 20-30 minutes in the pans before removing them and allowing them to cool completely on a wire cooling rack.
Oreo Frosting
- In a mixing bowl, beat the softened unsalted butter on high speed for 1-2 minutes until light and fluffy.
2 cups (452g) unsalted butter
- Add in the vanilla extract, salt, Oreo crumbs, and 2 cups of powdered sugar. Beat the frosting on low speed until all ingredients are combined and the frosting starts to thicken.
1 tsp vanilla extract,
1/4 tsp salt,
1 cup (125g) Oreo crumbs,
3-4 cups (339-454g) powdered sugar - Add in the remaining powdered sugar (if using more) and heavy whipping cream. Beat on medium speed for 1-2 minutes until fully combined, smooth, and fluffy.
3 Tbsp heavy whipping cream
Chocolate Ganache
- Place the chocolate chips and heavy cream in a microwave-safe bowl. Microwave for 20-30 seconds, or until the heavy cream begins to bubble slightly. Allow the mixture to stand undisturbed for 1 minute to melt the chocolate. Use a spatula to stir the mixture until it is completely smooth and glossy. It is crucial to allow the ganache to come to room temperature before adding it to the cake; if it’s too warm, it will be too thin and run off the cake.
1/3 cup (79ml) heavy whipping cream,
3/4 cup (129g) chocolate chips
Assemble
- If needed, level the cooled cake layers using a cake leveler or a long serrated knife to remove any domed tops for even stacking.
- Spread a small amount of frosting on the bottom of your cake plate or stand; this acts as “glue” to prevent the cake from sliding during assembly. Place one cake layer over the frosting. Measure 3/4 to 1 cup of Oreo frosting and evenly spread it on top of the first layer. Top with the second cake layer and spread the remaining frosting around the sides and top of the cake using an offset spatula, reserving about 1/2 cup of frosting for piping decorations on top if desired.
- Once the ganache has reached room temperature and is thick but pourable, use a spoon or a squeeze bottle to drizzle the ganache around the edges of the cake, allowing it to drip down the sides for a beautiful effect. Fill in the middle of the cake with the remaining ganache and spread it evenly with the back of the spoon. Place the cake in the fridge for 10 minutes to allow the ganache to set before proceeding with piping.
- Using a piping bag fitted with a large round piping tip, pipe the reserved frosting around the top edge of the cake or artfully along one side, as pictured. Top each frosting swirl with a mini Oreo cookie for an added decorative touch.
- Slice and serve your magnificent homemade Oreo cake. Cover any leftover cake tightly with plastic wrap and store on the counter for up to 3 days to maintain freshness.
Nutrition
Calories:
681
kcal
|
Carbohydrates:
98
g
|
Protein:
7
g
|
Fat:
30
g
|
Saturated Fat:
17
g
|
Polyunsaturated Fat:
2
g
|
Monounsaturated Fat:
7
g
|
Trans Fat:
1
g
|
Cholesterol:
109
mg
|
Sodium:
386
mg
|
Potassium:
148
mg
|
Fiber:
1
g
|
Sugar:
69
g
|
Vitamin A:
831
IU
|
Vitamin C:
0.2
mg
|
Calcium:
101
mg
|
Iron:
2
mg
Nutrition Disclosure
All nutritional values are approximate and provided to the reader as a courtesy. Changing ingredients and/or quantities will alter the estimated nutritional calculations.
Like this recipe? Rate and comment below!