
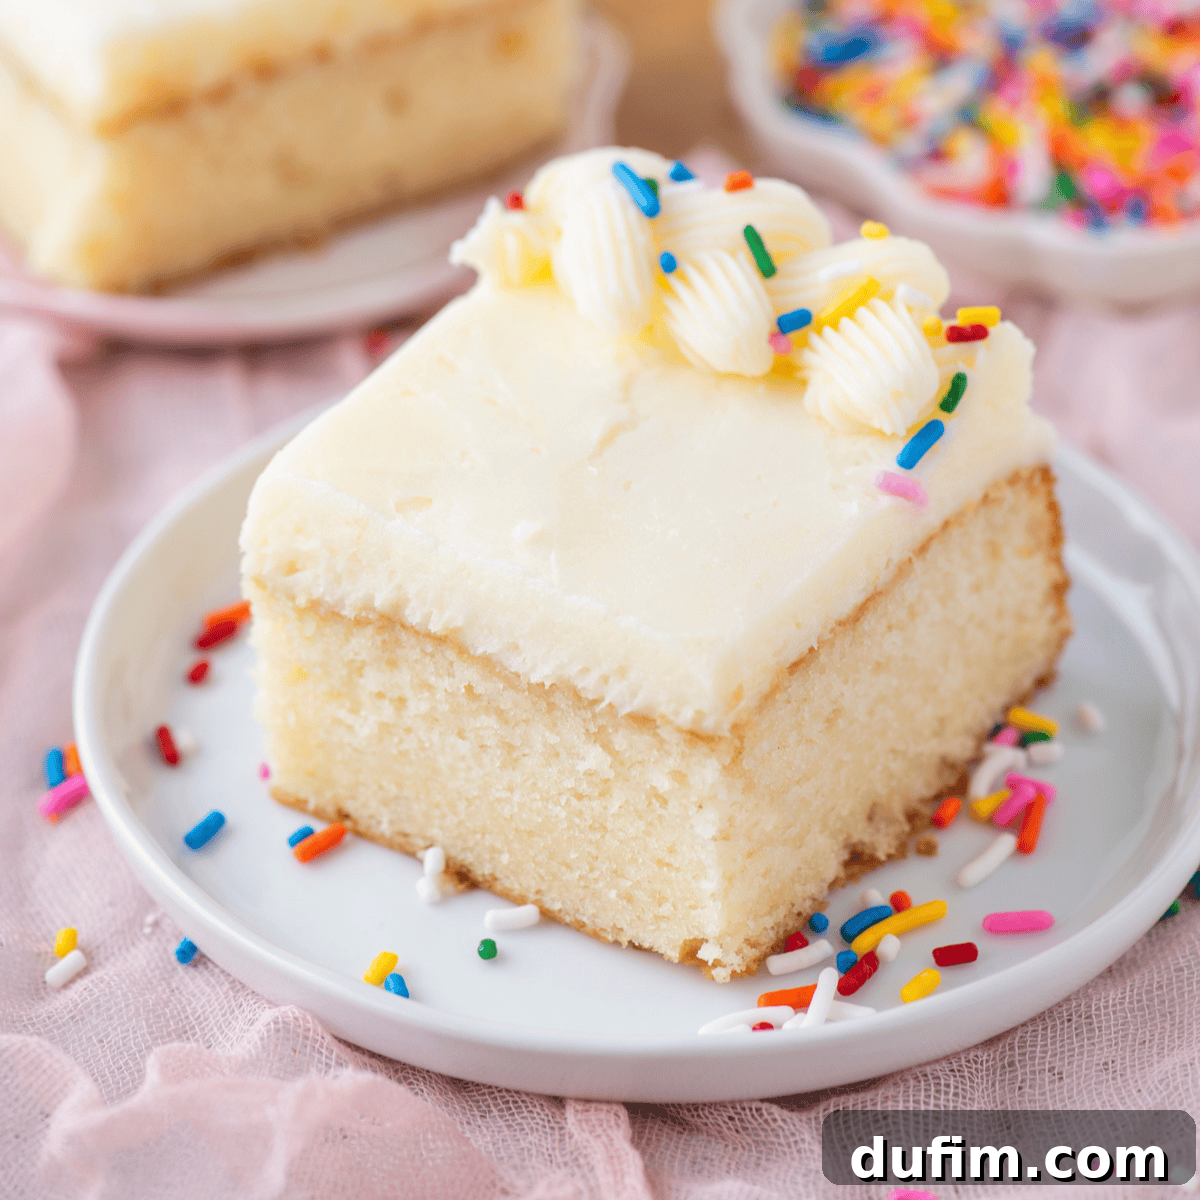
Layer cakes, while undeniably stunning, aren’t always the most practical choice for a busy weeknight or a bustling backyard gathering. Their multi-tiered structure often demands extra time, effort, and presentation finesse. That’s precisely why I decided to transform my wildly popular white layer cake recipe into a simpler, single-pan delight. I meticulously tested this beloved recipe specifically for a 9×13 inch pan, ensuring flawless batter volume, optimal bake time, and that signature soft, fluffy texture. The result is a truly exceptional white sheet cake that tastes as incredible as it looks, all with zero fuss. This recipe empowers home bakers to create a show-stopping dessert without the complexities of assembling multiple layers, making it perfect for any occasion.
Why the 9×13 Inch Cake Series is a Game-Changer for Home Bakers
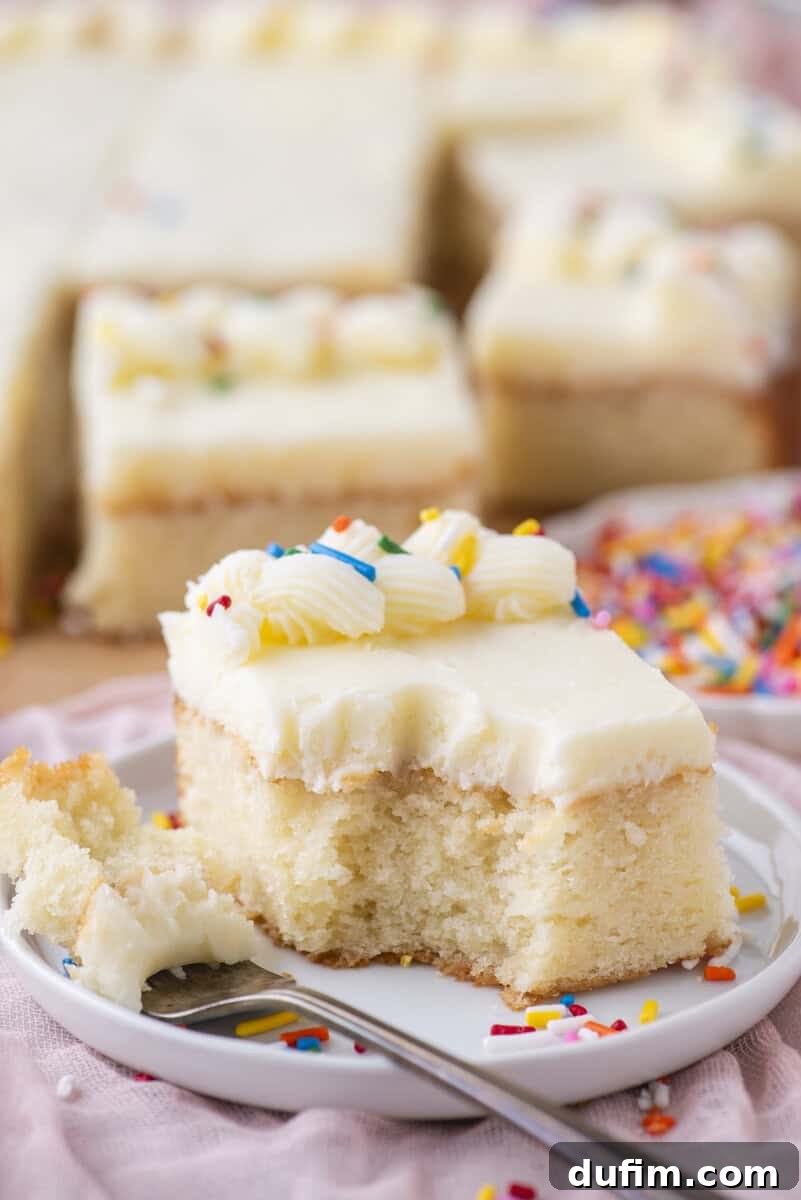
The inspiration for converting my favorite layer cakes into convenient 9×13 inch versions came directly from my incredible community of home bakers. A recent poll among my Instagram followers revealed that a resounding 70% prefer the ease and versatility of 9×13 inch cakes over traditional layer cakes. This statistic spoke volumes, highlighting a clear demand for simplified yet equally delicious baking options. Therefore, I embarked on a mission to systematically convert my best cake recipes, one by one, to fit the beloved 9×13 pan. Each recipe undergoes rigorous testing to fine-tune aspects like batter fit, bake time, and overall texture, ensuring the final result is every bit as satisfying as its layered counterpart.
This particular white sheet cake recipe started with a thoughtful reader question: could my classic vanilla cake be adapted to become a true white cake? Instead of simply speculating, I rolled up my sleeves and got to testing. Through careful experimentation, I discovered that swapping out four whole eggs for five egg whites was the key to achieving the desired characteristics. This subtle but significant change resulted in a cake with a noticeably lighter, more delicate crumb, a beautifully pale color that lives up to its “white cake” name, and a texture that is wonderfully soft and fluffy without being fragile. This perfected formula quickly became one of my most cherished layer cake recipes, and I’m thrilled to confirm that it translates just as beautifully, if not more conveniently, into a 9×13 inch pan. It’s a testament to the fact that great flavor and texture don’t always require intricate construction.
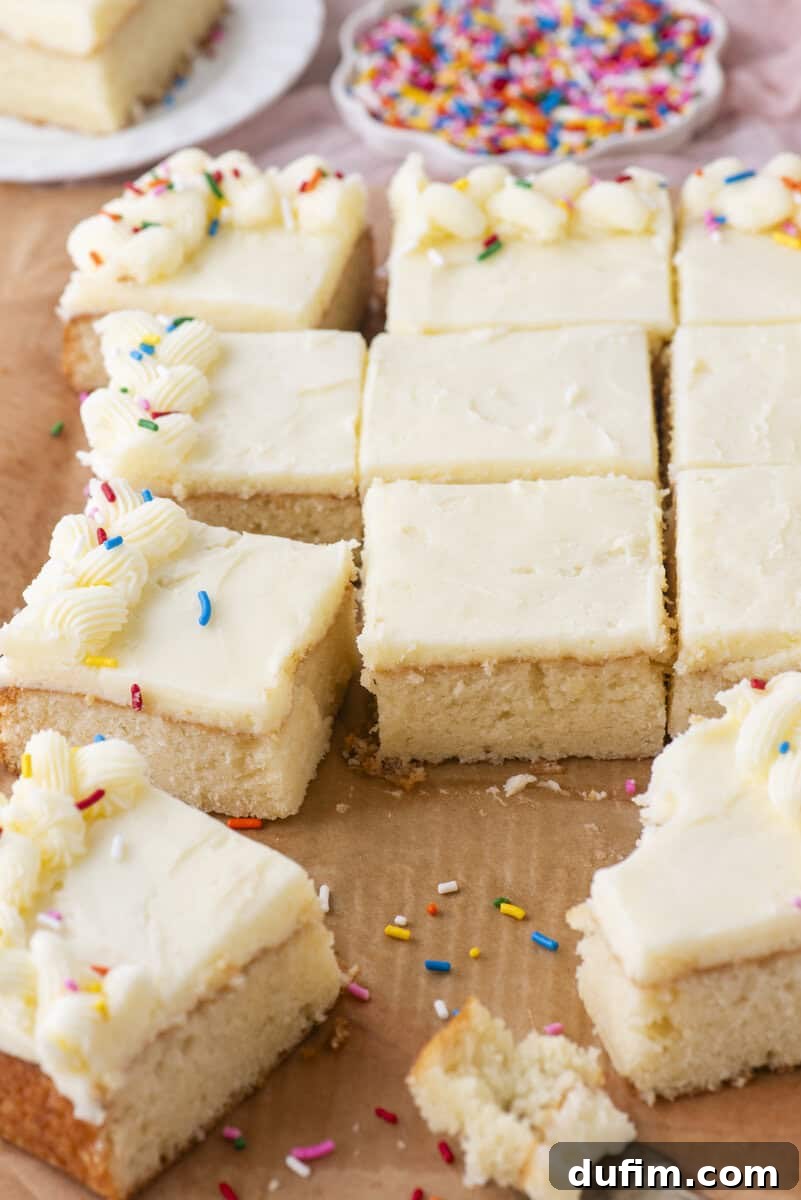
When converting this recipe to a 9×13 inch format, my primary concern was ensuring the batter volume would be just right. I’m delighted to report that it fit the pan perfectly, with no worries of overflow or an underfilled cake. The ideal bake time consistently landed between 32-39 minutes across multiple tests. I carefully monitored results in both light and dark pans, as these can behave quite differently in the oven, and I’ve provided precise guidance so you can achieve perfect results regardless of your bakeware. This extensive testing means you can walk into your kitchen with confidence, knowing this recipe is truly foolproof.
With over a decade of dedicated baking and recipe testing experience, I can confidently say this is one of those recipes I’d proudly present to anyone. Whether you’re celebrating a birthday, bringing a dessert to a potluck, or simply craving a delicious treat on an ordinary Tuesday, this 9×13 white cake is consistently reliable, elegantly classic, and genuinely delectable. It’s designed to bring joy and ease to your baking, making every slice a moment to savor.
Unveiling the Secret to a True White Cake: More Than Just Pale Yellow
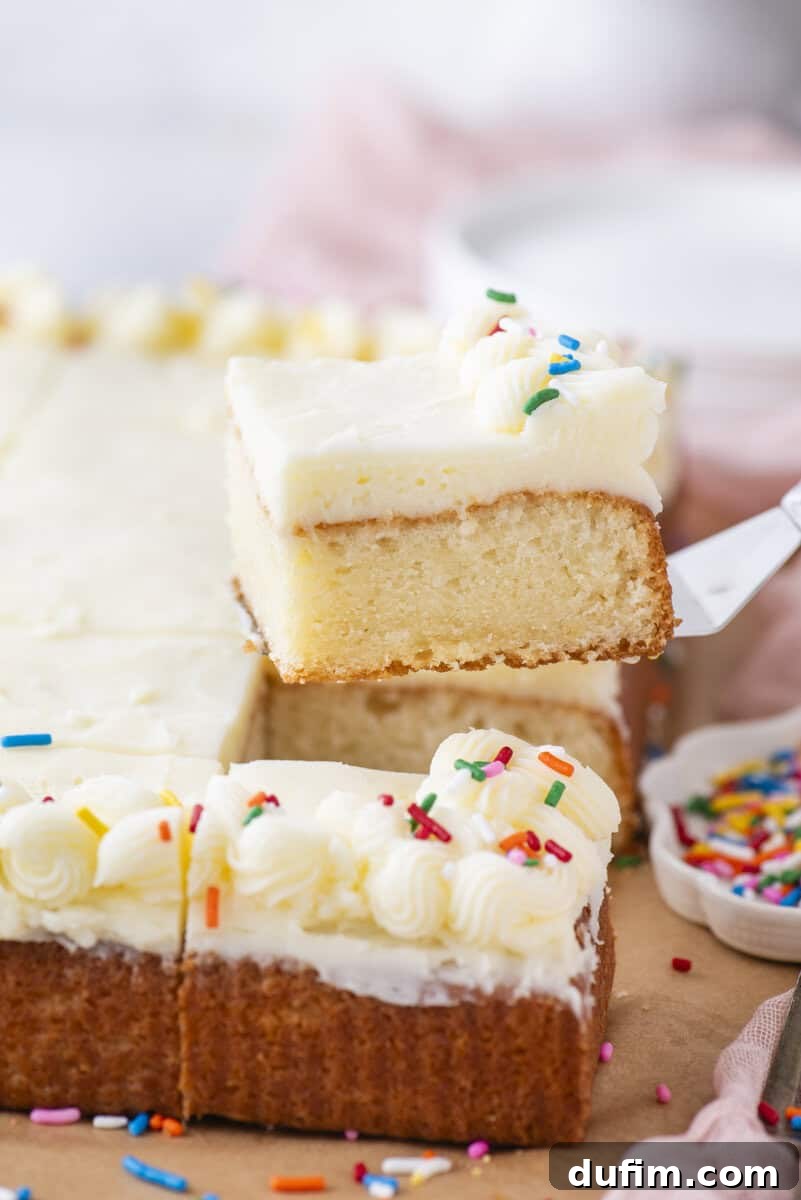
Many recipes claim the title of “white cake,” yet when you slice into them, the crumb often reveals a distinct yellow hue. While there’s absolutely nothing wrong with a delicious yellow cake, if your goal is a pristine, truly white cake, certain details become paramount. Achieving that classic pale, ethereal appearance requires intentional ingredient choices that go beyond simply calling it “white.”
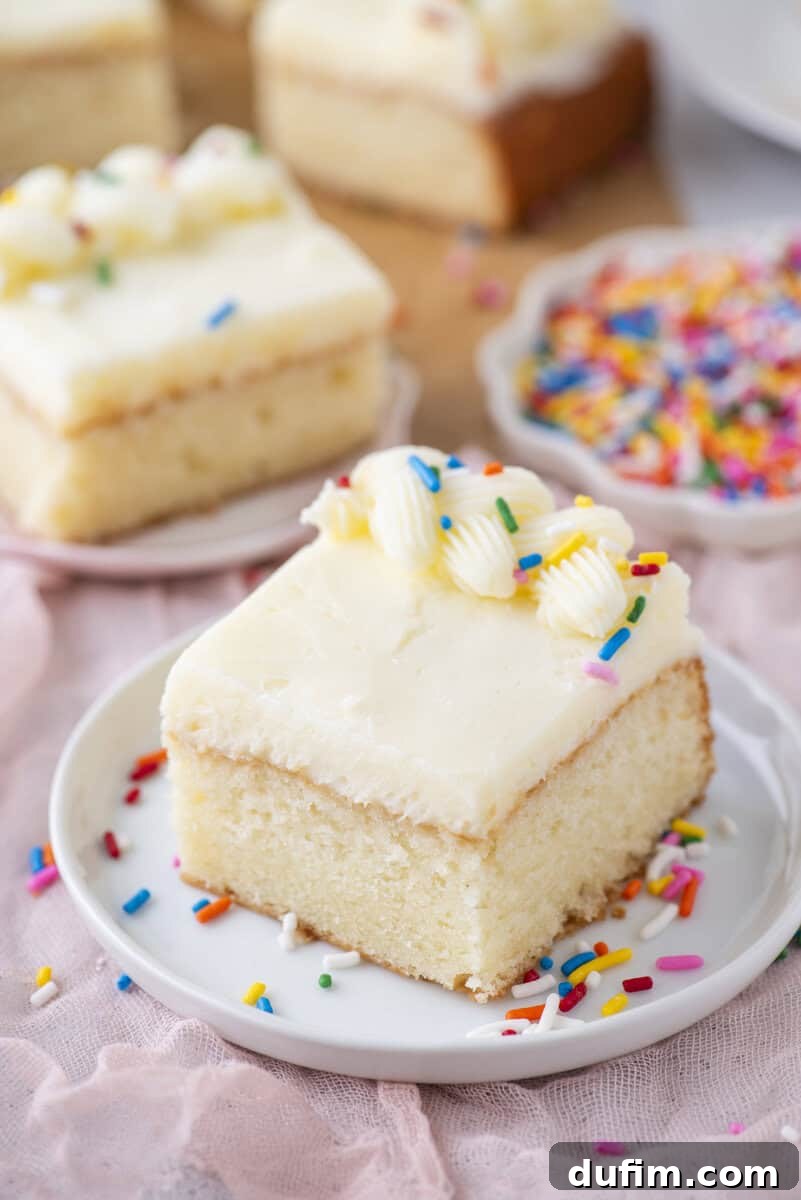
The most crucial distinction lies in the use of **egg whites exclusively** instead of whole eggs. Egg yolks are responsible for carrying both fat and natural pigments, which contribute to the characteristic yellow color and richness of many cakes. By removing the yolks, we eliminate these pigments, allowing the cake’s color to remain pure and pale. Furthermore, egg whites contribute to a lighter, more delicate crumb structure, making the cake airy and tender. In this recipe, five egg whites replace four whole eggs, and the difference in both color and texture is immediately noticeable and truly transformative.
The second essential detail for a genuine white cake is **clear vanilla extract**. Traditional vanilla extract, derived from vanilla beans, naturally possesses an amber color that will inevitably tint your cake batter, resulting in an off-white or ivory crumb. Clear vanilla extract, on the other hand, provides all the delightful vanilla flavor without any added color, ensuring your cake maintains its pure white appearance from the inside out. While regular vanilla extract will certainly provide excellent flavor, if the visual purity of a white cake is important to you, investing in clear vanilla extract is a small step that yields a significant aesthetic difference. These two straightforward swaps – egg whites and clear vanilla – are not complicated, but they are deliberate and fundamental to distinguishing a true white cake from a merely light-colored vanilla cake.
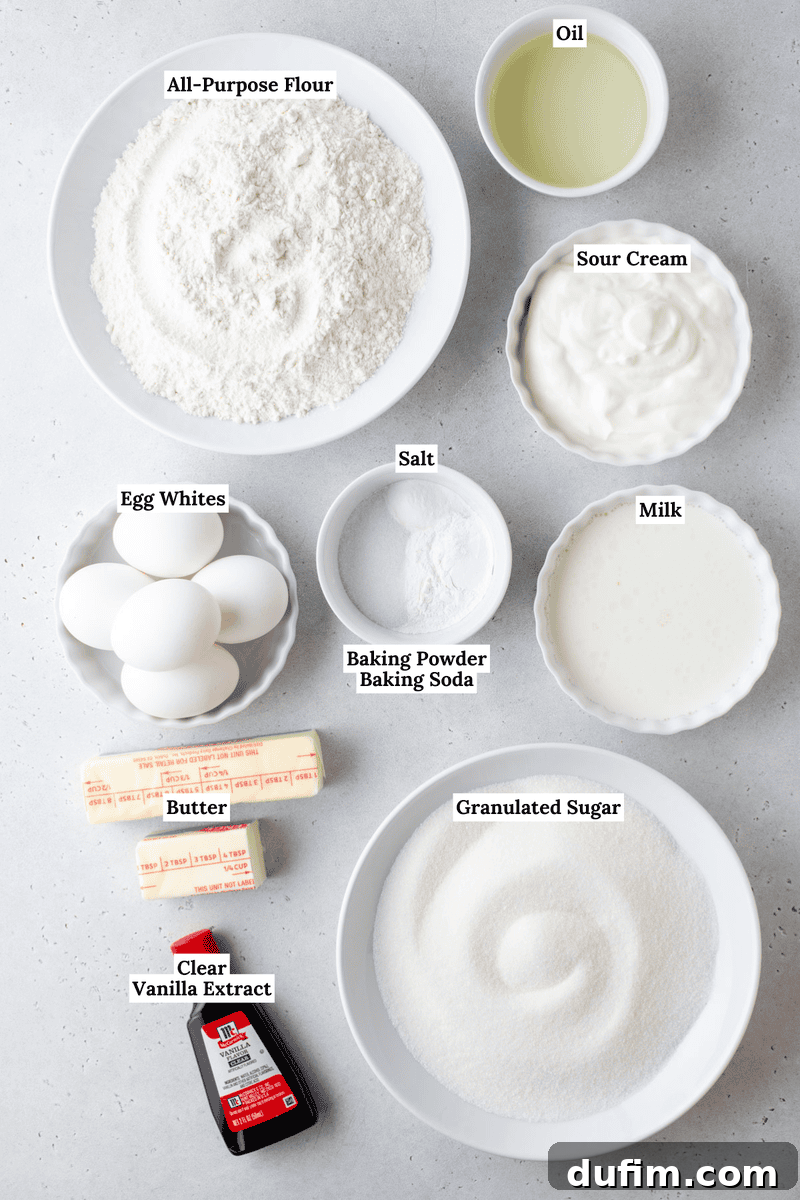
Key Ingredients for the Perfect 9×13 White Sheet Cake and Their Roles
Every ingredient in this recipe plays a crucial role in delivering a moist, fluffy, and truly white sheet cake. Understanding their purpose will not only enhance your baking skills but also help you troubleshoot or make informed substitutions. For the full ingredient list and precise measurements, you can always jump to the full recipe card below.
- Egg Whites: These are the stars of our white cake, performing a dual function. Firstly, by excluding egg yolks, we eliminate any yellow tint, ensuring a beautifully pale crumb. Secondly, the protein in egg whites provides structure and contributes to an incredibly light and delicate texture. Five egg whites are carefully measured to replace four whole eggs, yielding a significant difference in both the visual appeal and airy feel of the cake.
- Clear Vanilla Extract: This is an essential ingredient for maintaining the cake’s pristine white color. Unlike standard vanilla extract, which is amber-colored and can impart a slight yellow hue, clear vanilla delivers all the aromatic vanilla flavor without compromising the pure white aesthetic of your batter and finished cake. While regular vanilla can be used for flavor, clear vanilla is a must for color accuracy.
- Sour Cream: Often considered a secret weapon in baking, sour cream is the powerhouse ingredient that guarantees this cake remains incredibly moist and tender for days. Its high-fat content adds richness, while its acidity works with the leavening agents to create a softer crumb. It also introduces a subtle tang that beautifully balances the sweetness of the cake, offering a complexity that milk alone cannot achieve. Full-fat sour cream is highly recommended for the best results.
- Butter plus Oil: This is an intentional and highly effective combination for superior cake texture. Butter provides an unbeatable depth of flavor and contributes to the cake’s overall structure, creating that classic rich taste. Vegetable oil, on the other hand, is crucial for lasting moisture. Cakes made with oil tend to stay softer and fresher for longer, preventing them from drying out quickly. Together, these fats produce a cake that is wonderfully soft, richly flavored, and maintains its excellent texture even after sitting out for a while.
- **All-Purpose Flour:** Provides the main structure of the cake. Sifting it helps prevent lumps and incorporates air, contributing to a lighter texture.
- **Granulated Sugar:** Sweetens the cake and helps tenderize the crumb. It also aids in moisture retention.
- **Baking Powder & Baking Soda:** These are our chemical leavening agents. Baking powder provides initial lift, while baking soda reacts with the acidic sour cream to create additional rise and a tender crumb.
- **Salt:** A small but mighty ingredient that enhances all the other flavors, balancing the sweetness and adding complexity.
- **Milk:** Adds necessary liquid to the batter, helping to create a smooth consistency and a moist cake. Whole milk is generally preferred for its richness.
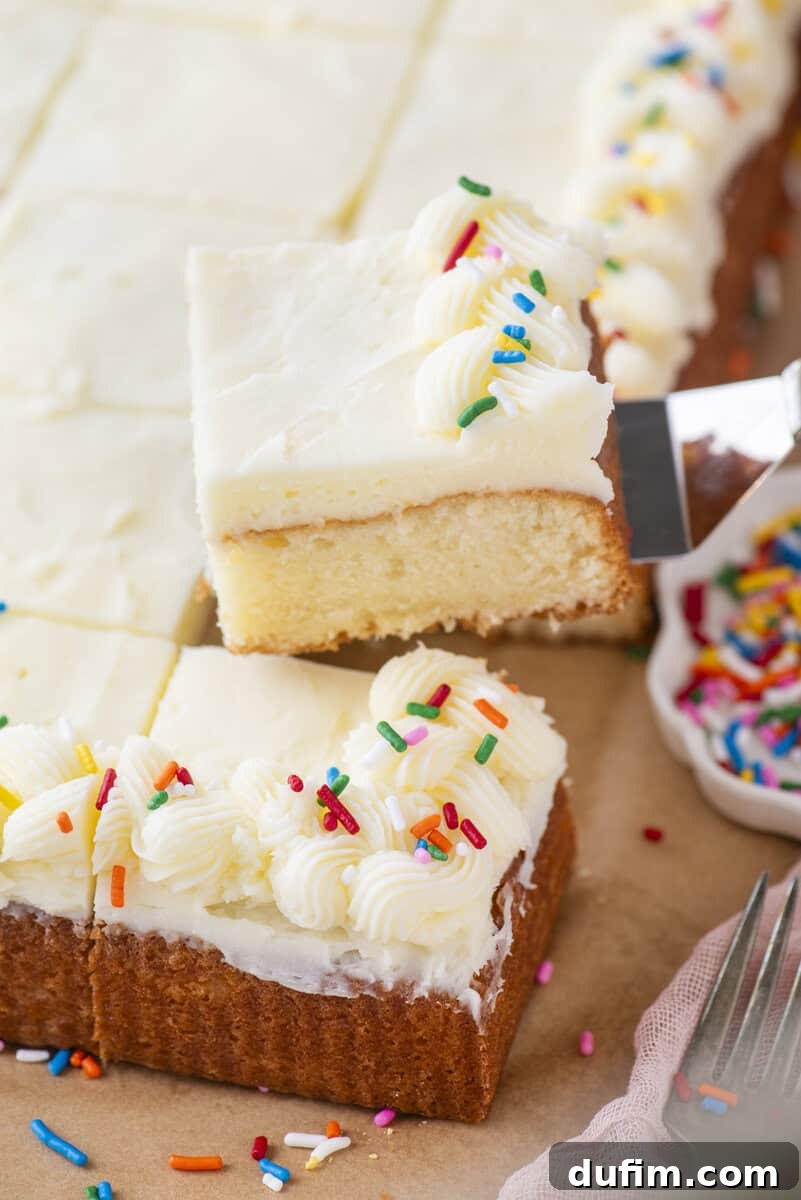
Mastering the Art of White Sheet Cake: A Step-by-Step Guide
Creating this stunning white sheet cake is a straightforward and rewarding process. Follow these simple steps to bake a dessert that will truly impress, or skip ahead to the detailed instructions in the recipe card below for quick reference.
1. Prepare Oven and Pan: Begin by preheating your oven to 350ºF (180ºC). This ensures the oven is at the correct temperature when the cake goes in, promoting an even bake. Thoroughly spray a 9×13 inch baking pan with non-stick cooking spray, or grease it with butter and dust with flour, tapping out any excess. For extra assurance and easy removal, you can also line the bottom with parchment paper. Set your prepared pan aside.
2. Combine Dry Ingredients: In a medium-sized mixing bowl, whisk together the all-purpose flour, baking powder, baking soda, and salt. Whisking ensures these ingredients are evenly distributed, which is crucial for uniform leavening and flavor throughout the cake. This step prevents pockets of leavening agents that can cause an uneven rise or bitter taste.
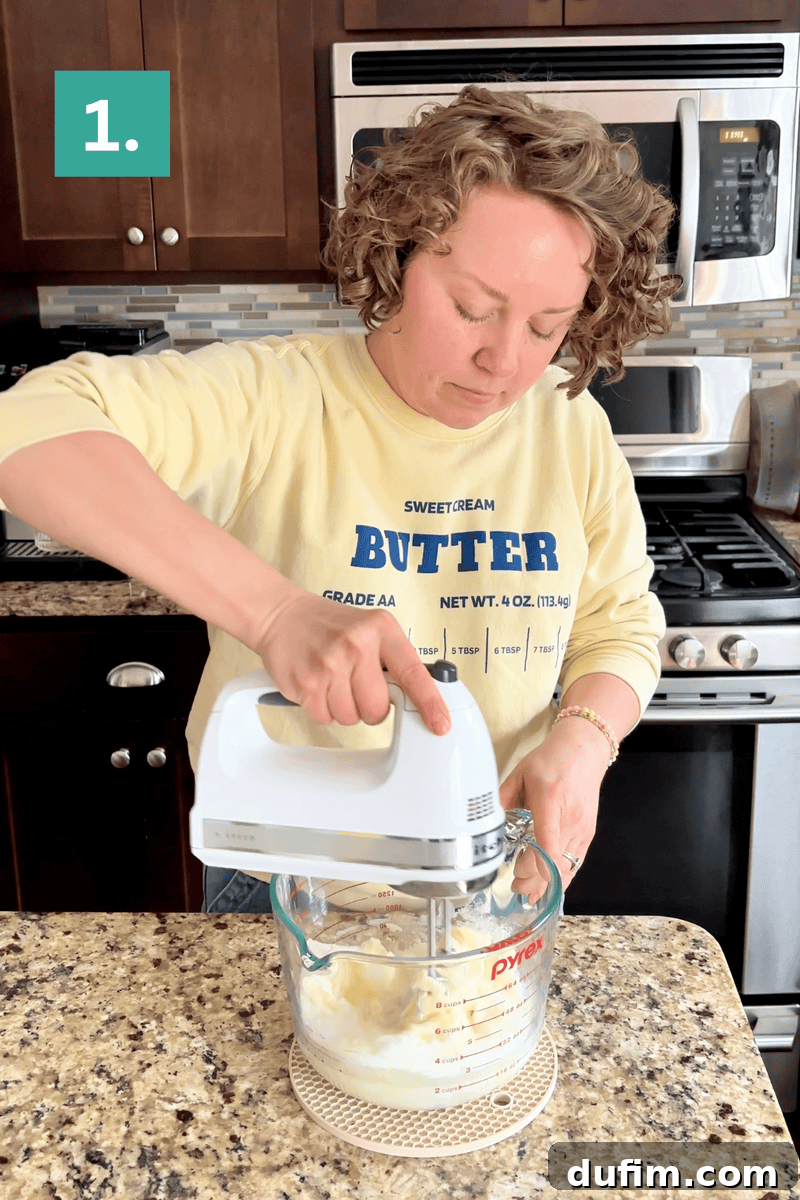
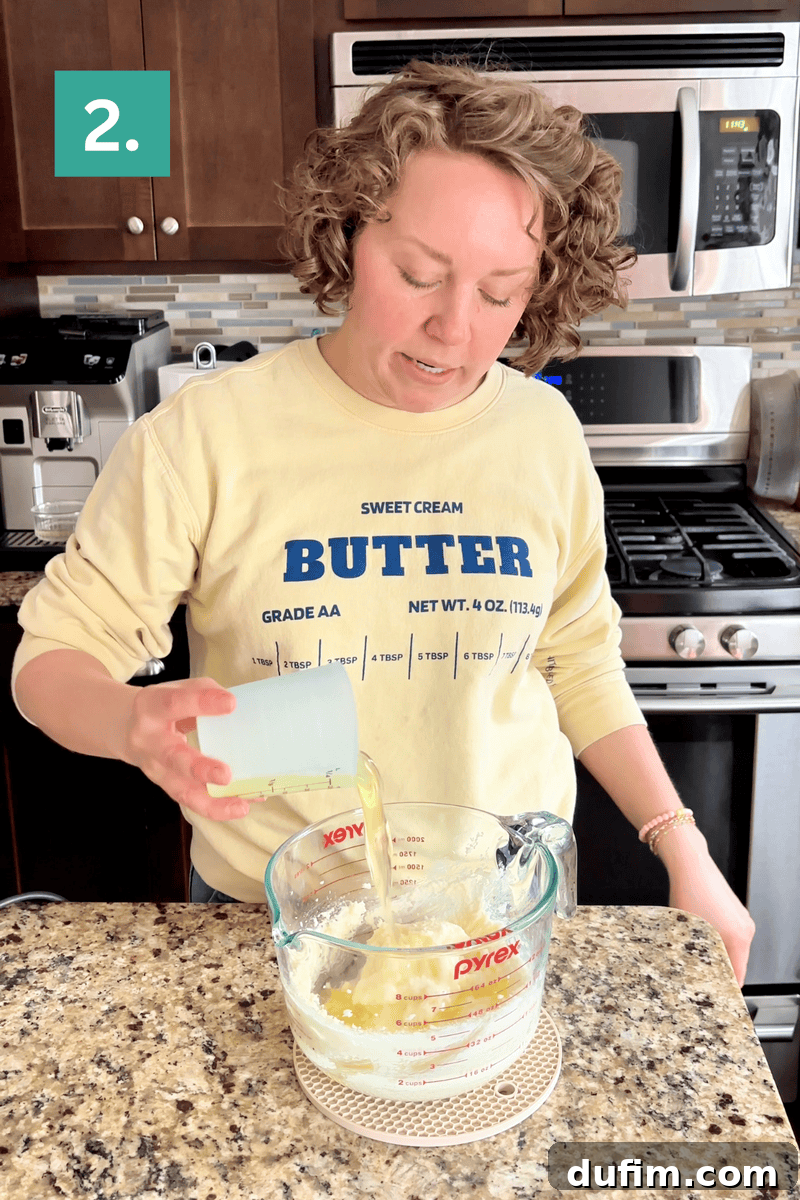
3. Cream Wet Ingredients: In a large mixing bowl, combine the room temperature unsalted butter, granulated sugar, and vegetable oil. Using an electric mixer, beat these ingredients together for 1-2 minutes until the mixture is light, fluffy, and pale in color. This creaming process incorporates air, which is essential for a tender cake crumb. Ensure the butter is truly at room temperature for optimal creaming.
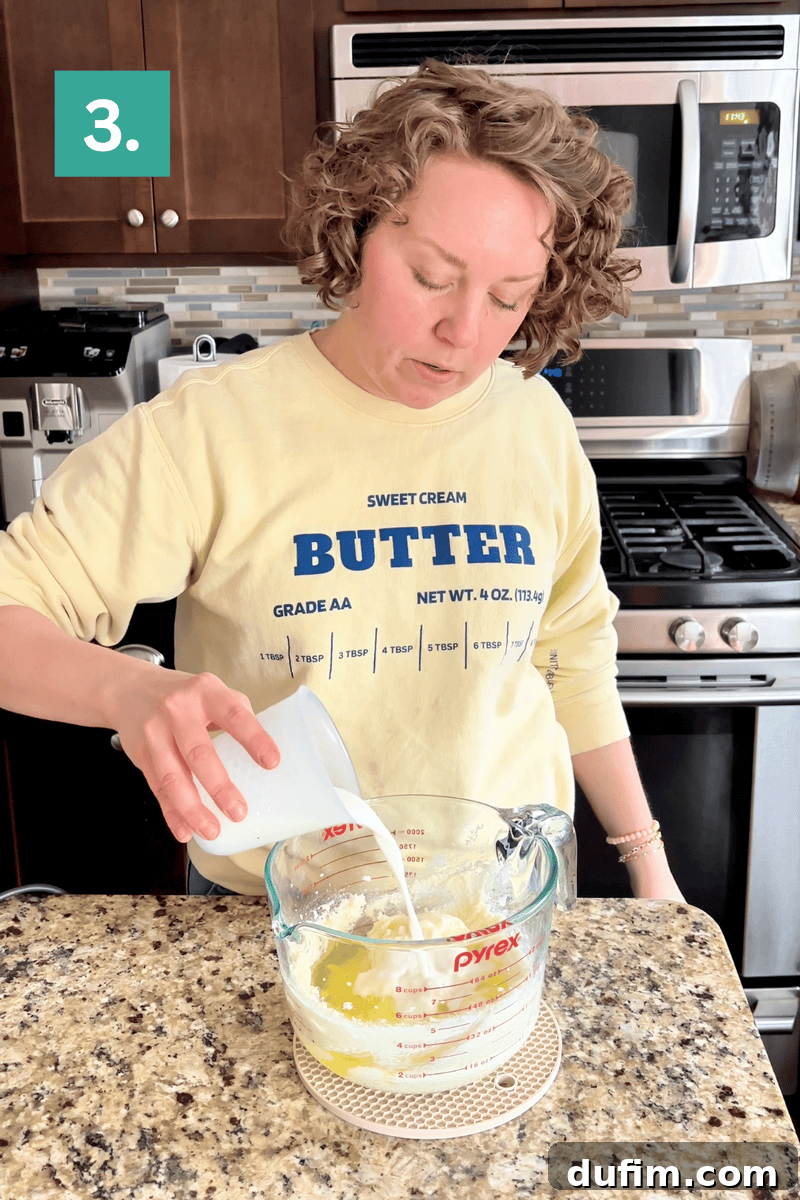
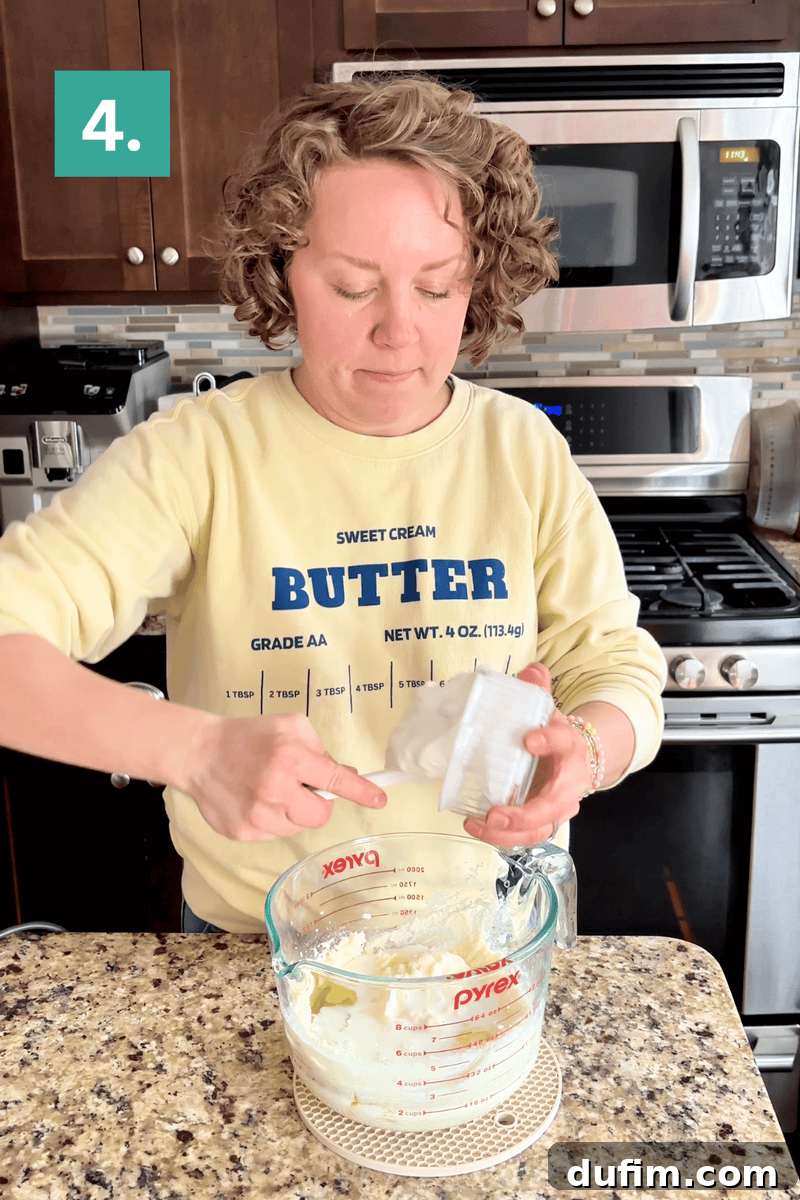
4. Incorporate Remaining Wet Ingredients: To the creamed butter mixture, add the room temperature egg whites, sour cream, milk, and clear vanilla extract. Beat with the electric mixer on medium speed until all ingredients are fully incorporated and the mixture is smooth. Scrape down the sides of the bowl as needed to ensure everything is well combined.
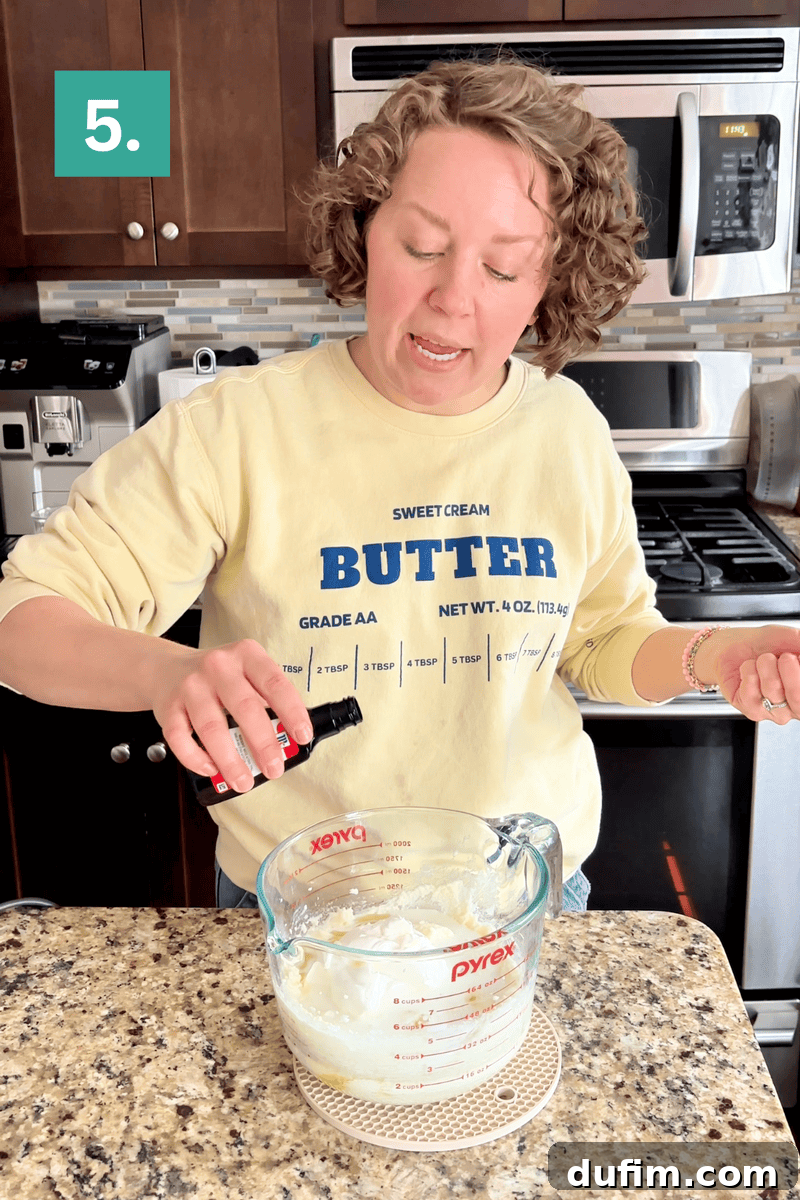
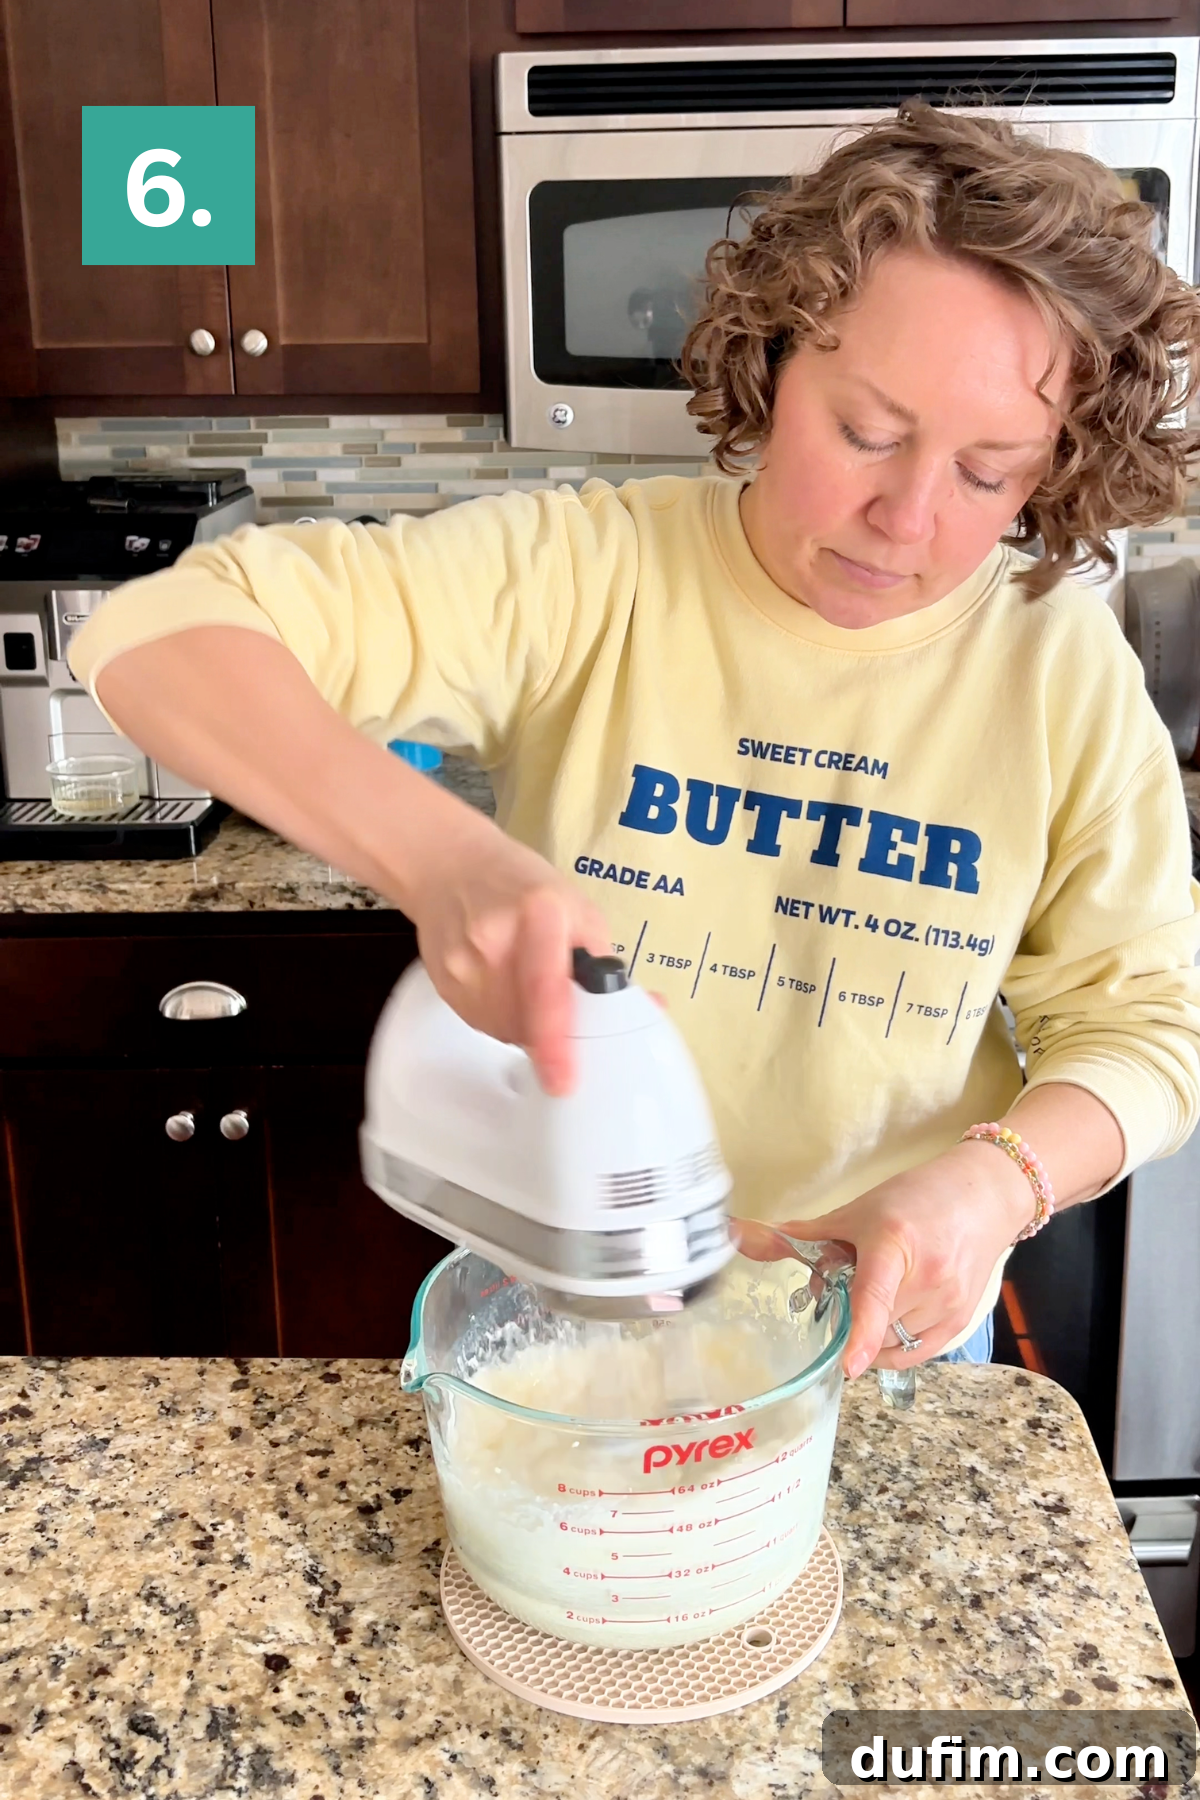
5. Gently Combine Wet and Dry Ingredients: Gradually add the prepared flour mixture to the wet ingredients in three additions, mixing on low speed with your electric mixer (or by hand with a spatula) just until the flour is incorporated. It’s crucial not to overmix the batter, as this can develop the gluten too much, leading to a tough, dense cake. Mix until no dry streaks of flour remain, but stop as soon as it’s combined.
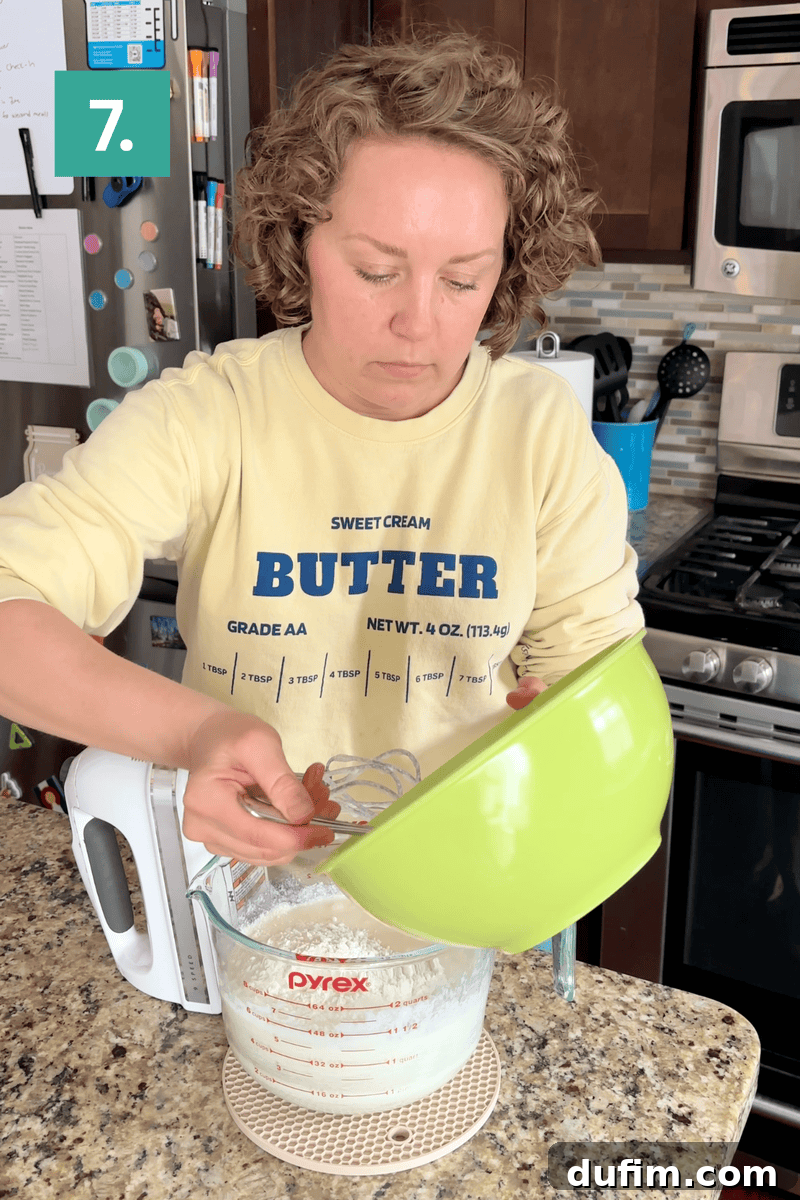
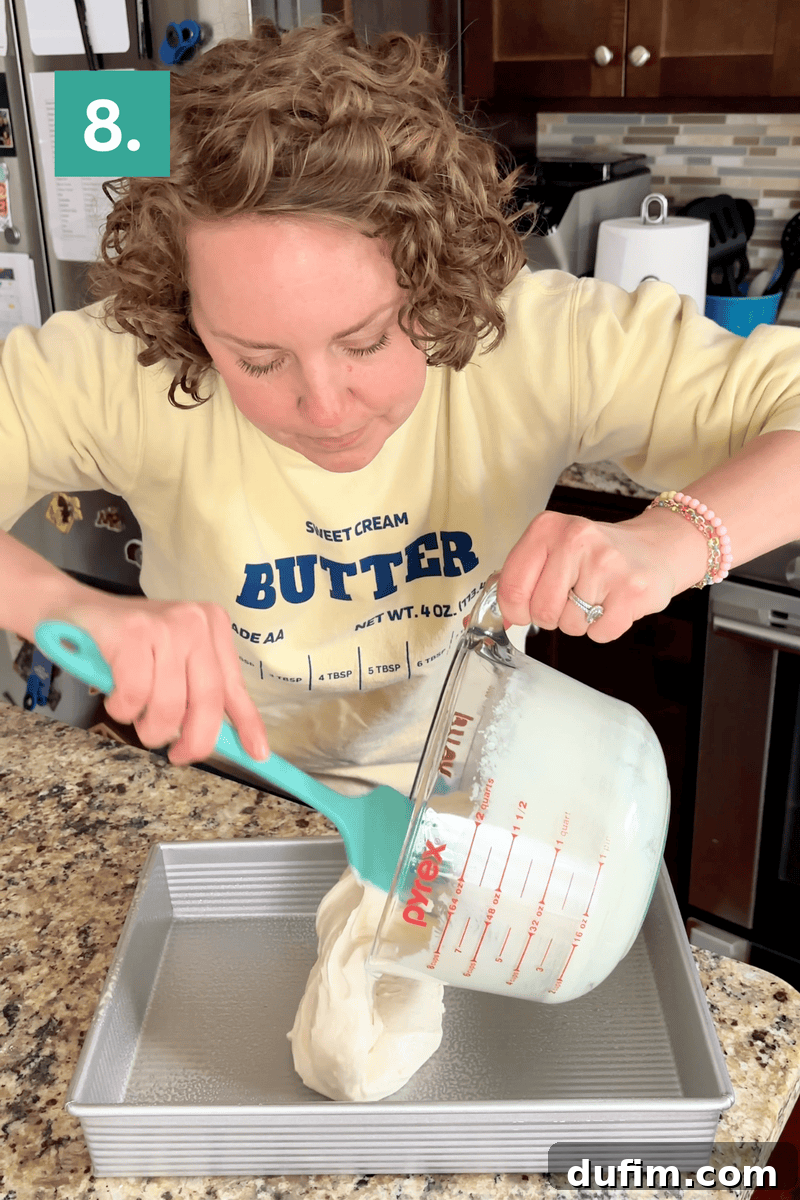
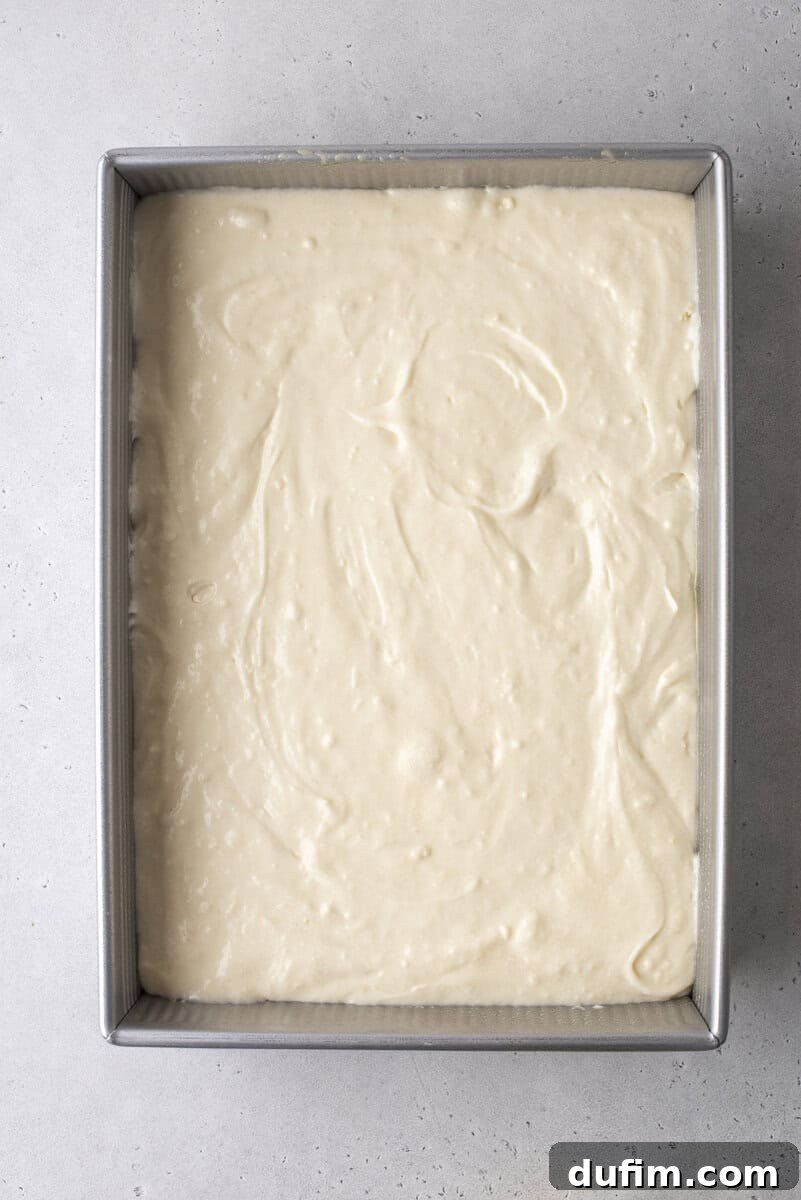
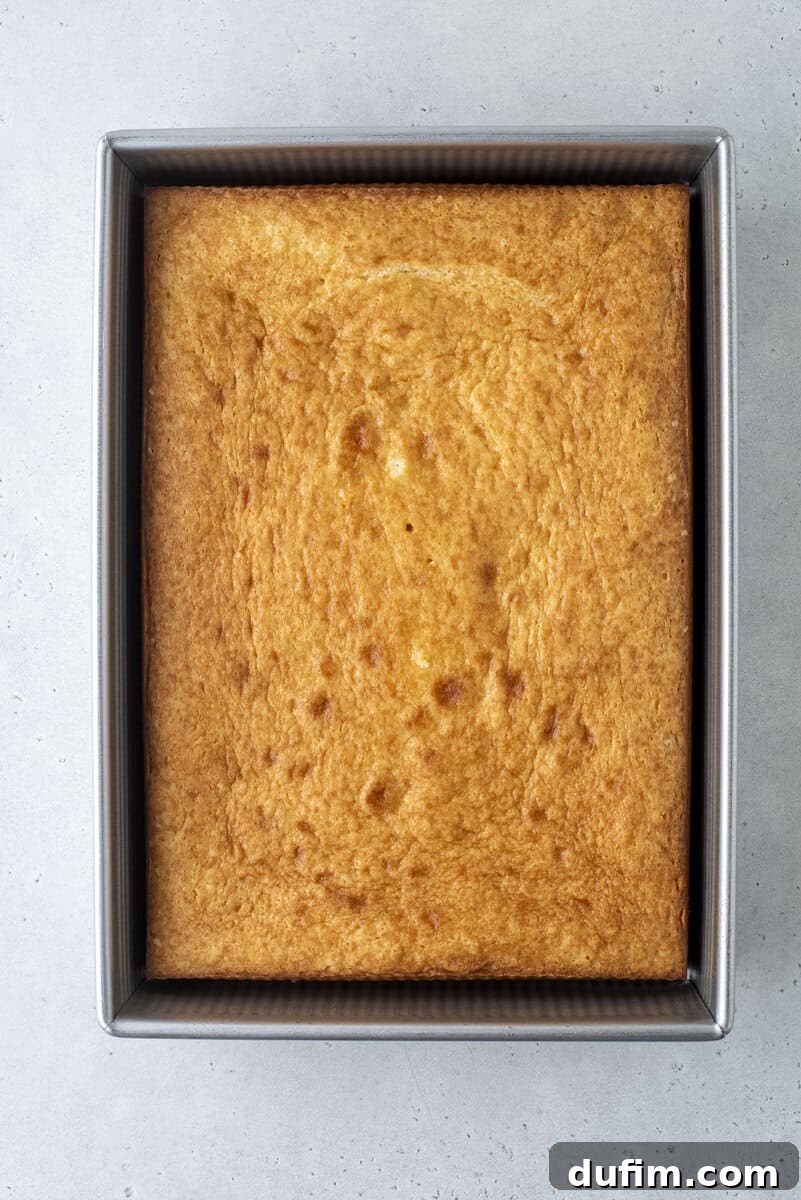
6. Transfer and Bake: Pour the finished cake batter into your prepared 9×13 inch pan. Use a spatula to gently spread the batter evenly across the pan, ensuring consistent thickness for an even bake. Place the pan in the preheated oven and bake for 32-39 minutes. The cake is done when a toothpick inserted into the very center comes out clean or with a few moist crumbs attached. Remember, light-colored pans tend to bake slower and more evenly, typically requiring closer to the 37-39 minute mark, while darker pans absorb heat faster and may finish closer to 32-34 minutes. Trust your toothpick!
7. Cool Completely: Once baked, remove the cake from the oven and allow it to cool completely in the pan on a wire rack. This step is critical; frosting a warm cake will cause the buttercream to melt and slide right off. Cooling also allows the cake’s structure to set fully, resulting in a cleaner slice. Patience here is key for a beautifully frosted cake.
Crafting the Perfect Whipped Vanilla Buttercream Frosting
A delicious cake deserves an equally delicious frosting. This whipped vanilla buttercream is the ideal complement to our fluffy white sheet cake, offering a light texture and rich vanilla flavor.
1. Begin Combining Ingredients: In a clean mixing bowl, combine the room temperature unsalted butter, vanilla extract, and a pinch of salt. Using an electric mixer, beat these ingredients together for 1-2 minutes until they are beautifully light and fluffy. This aeration process is key to a truly whipped frosting.
2. Mix in Powdered Sugar: Gradually add 4 cups of powdered sugar, mixing on low speed. This slow addition prevents a cloud of sugar from engulfing your kitchen! Continue mixing until the sugar is fully incorporated and the mixture is smooth. If you prefer a stiffer frosting, you can add more powdered sugar later.
3. Incorporate Heavy Cream: Pour in ¼ cup of heavy cream. Increase the mixer speed to high and beat the frosting until it becomes incredibly light, fluffy, and spreadable. The heavy cream adds richness and helps achieve that dreamy, whipped consistency. You can add a tablespoon or two more heavy cream if you desire a thinner consistency, but add it slowly.
4. Taste and Adjust: Always taste your frosting! This is your chance to adjust the sweetness. If you prefer it sweeter, gradually add more powdered sugar, beating until smooth after each addition. If it’s too sweet, a tiny pinch more salt can sometimes help balance it, or a drop of lemon juice if suitable for the flavor profile.
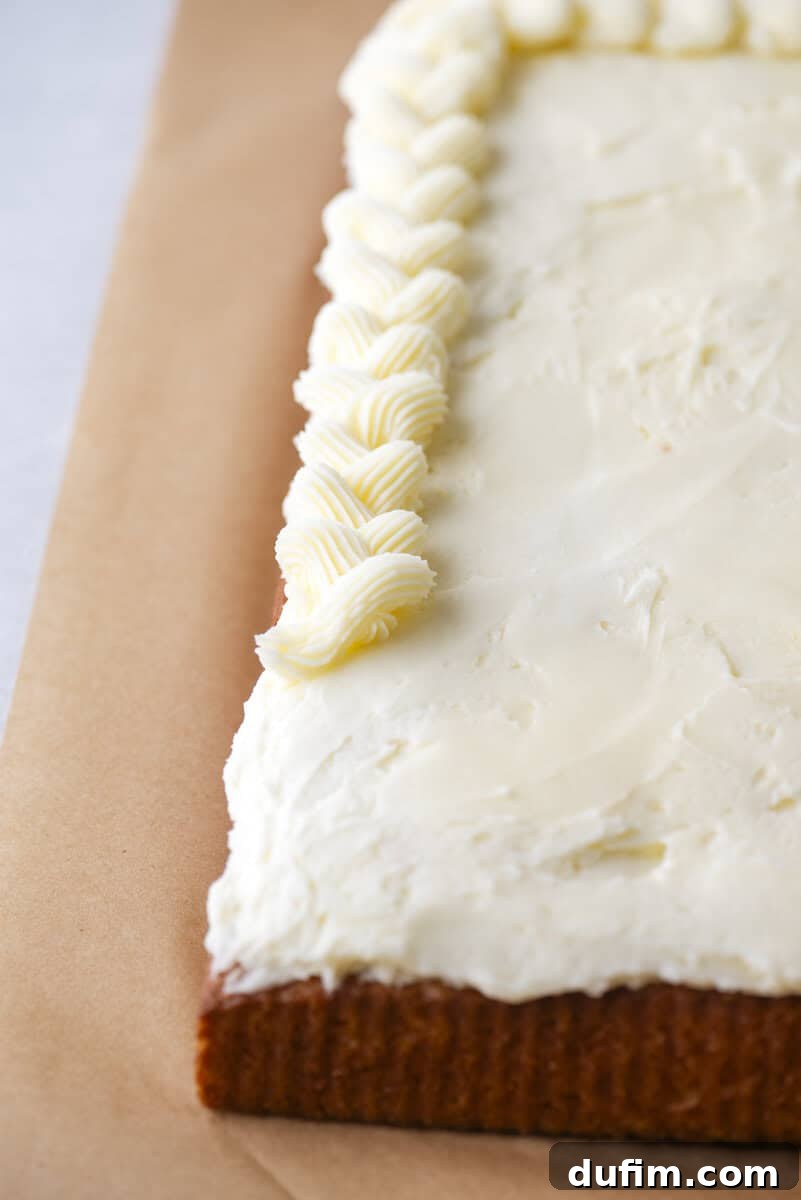
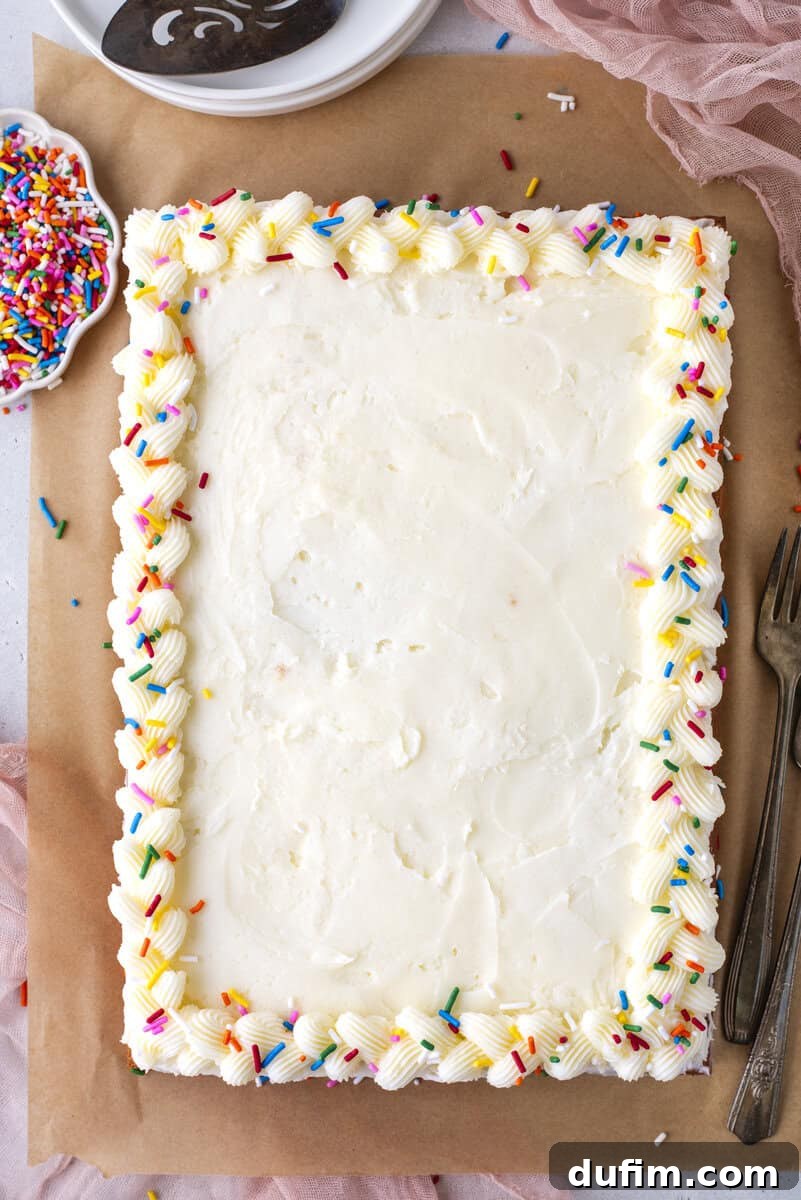
5. Spread and Decorate: Once the cake is completely cool, spread the prepared frosting evenly over the top using an offset spatula. For a festive touch, decorate with colorful sprinkles, chocolate shavings, or fresh fruit if desired. The smooth white canvas of the cake makes it a perfect base for any decoration.
Exploring Delicious Frosting Variations for Your White Sheet Cake
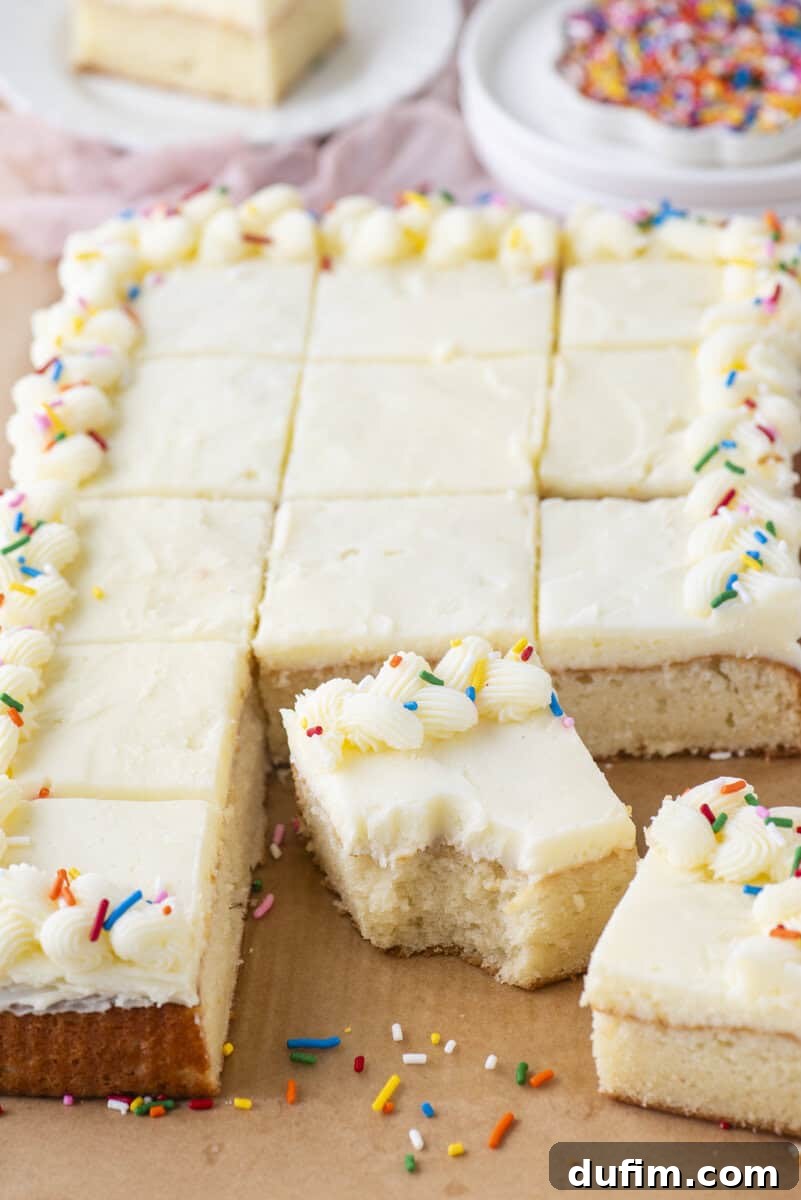
While the classic vanilla buttercream included in this recipe is a perfect and always-loved pairing for our white sheet cake, its neutral and clean flavor profile makes it an incredibly versatile canvas for a wide array of frosting options. Don’t be afraid to get creative and customize your cake to suit your taste or the occasion! The beauty of this white cake lies in how beautifully it complements almost any frosting you choose to put on it.
For a whimsical and festive touch, especially for birthdays, my vibrant funfetti frosting transforms this cake into a party in every bite. If you’re seeking a bright and tangy contrast to the sweetness, a zesty lemon cream cheese frosting adds a refreshing burst of flavor. For a truly gorgeous presentation and a delightful fruity sweetness, my strawberry cream cheese frosting is an absolute dream atop a pure white cake. And if you prefer something lighter and less rich, a simple cool whip frosting provides an airy, delicate finish.
But why stop there? If you want to venture into entirely different flavor profiles, consider my indulgent oreo frosting, which turns this classic white cake into a cookies-and-cream masterpiece. Alternatively, a rich and decadent chocolate frosting offers a timeless combination that is just as satisfying and equally delicious, creating a beautiful flavor contrast that everyone will love.
A quick note on aesthetics: if you plan to pipe a decorative border around the edges of your cake, similar to the elegant designs you see in my photos, you will definitely need more frosting than the base recipe yields. The recipe card’s notes section specifically includes a larger frosting batch for this purpose. This is not a minor difference in volume, so please do not try to stretch the standard recipe and be left wondering why you ran out halfway around the pan. Making the slightly larger batch is absolutely worth the effort for that professional, finished look.
Tips for Storing, Freezing, and Making Ahead Your 9×13 White Sheet Cake
One of the many advantages of this 9×13 white sheet cake is its adaptability for storage and make-ahead convenience. These tips ensure your cake remains fresh, moist, and delicious, whether you’re serving it immediately or saving it for later.
- At Room Temperature: Once frosted, the cake retains its incredible softness and moisture, thanks to the sour cream and oil in the batter. Cover the cake tightly with plastic wrap or transfer it to an airtight cake carrier. It will stay fresh and delightful at room temperature for up to three days. Keep it away from direct sunlight or heat sources.
- In the Refrigerator: For extended freshness, you can store the frosted cake, covered, in the refrigerator for up to five days. To enjoy the best texture, remove the cake from the fridge about 30 minutes before serving. This allows it to come back to room temperature, softening the frosting and restoring the cake’s tender crumb.
- Make Ahead: This recipe is perfect for preparing in advance. Bake the cake as directed, then let it cool completely. Once cool, wrap the unfrosted cake tightly in multiple layers of plastic wrap to prevent it from drying out. You can store it at room temperature for up to 24 hours before you’re ready to frost and serve. This is an excellent strategy for splitting your baking tasks across two days, reducing stress on the day of your event. The frosting can also be made ahead and refrigerated for up to three days; simply bring it to room temperature and beat it briefly with an electric mixer until fluffy again before spreading.
- Freezer: To preserve your white cake for an even longer period, the freezer is your best friend. For best results, freeze the cake unfrosted. Wrap the completely cooled cake tightly in plastic wrap, then add another layer of aluminum foil for extra protection against freezer burn. It can be stored in the freezer for up to two months. When you’re ready to enjoy, thaw the cake overnight on the countertop, still wrapped, then frost as usual. This method ensures you always have a delicious homemade cake ready for unexpected guests or cravings.
Frequently Asked Questions About This 9×13 White Sheet Cake
Absolutely! This recipe adapts beautifully to gluten-free baking. Simply substitute the all-purpose flour with a high-quality 1:1 gluten-free flour blend. Brands like King Arthur’s Gluten Free Measure for Measure Flour are excellent choices and have yielded fantastic results in my testing, producing a gluten-free white cake that is just as moist and delicious as the original.
While you can use salted butter in a pinch, it’s generally recommended to use unsalted butter for both the cake and the frosting. If you do opt for salted butter, make sure to reduce the added salt in both the cake batter and the frosting by half. Keep in mind that the sodium content in salted butter can vary significantly between brands, so using unsalted butter allows for more precise control over the overall saltiness and ensures the most consistent and balanced flavor.
The best substitute for sour cream in this recipe is full-fat plain Greek yogurt. It offers a very similar fat content and tanginess, which are crucial for the cake’s moisture and tender crumb. Avoid using low-fat or non-fat versions, as these will alter the moisture level and potentially the texture of the finished cake, making it less rich and possibly drier.
Yes, you can certainly use regular vanilla extract, and your cake will still taste wonderful. The flavor difference is minimal. The main distinction will be the color of your cake: it will have a slightly ivory or pale yellow tint instead of the pure, bright white crumb. If the true white color is important for your presentation, then clear vanilla extract is definitely worth sourcing.
Yes, pan color has a more significant impact on bake time than many people realize. Dark-colored or non-stick pans absorb heat more quickly and efficiently, leading to faster baking, especially around the edges and bottom. This means cakes in dark pans often finish closer to the shorter end of the recommended bake time (around 32-34 minutes). In contrast, light-colored or shiny metal pans reflect heat, resulting in a slower, more even bake, which typically requires a longer bake time (closer to 37-39 minutes). Always start checking for doneness at the earliest recommended time, regardless of your pan type.
This recipe is designed to yield approximately 20 generous servings in a 9×13 inch pan, which is ample for most family gatherings or medium-sized parties. If you need to serve a significantly larger crowd, it’s generally recommended to bake two separate 9×13 inch cakes rather than attempting to double the recipe into a much larger pan. Scaling a recipe into a different pan size would require substantial adjustments to the bake time and can sometimes compromise the cake’s texture and rise.
Explore More Easy and Delicious Cake Recipes:
- Texas Sheet Cake Recipe with Sour Cream
- Irresistible Poke Cake
- Refreshing Lemon Sheet Cake
- Easy Caramel Cake (Doctored Mix)
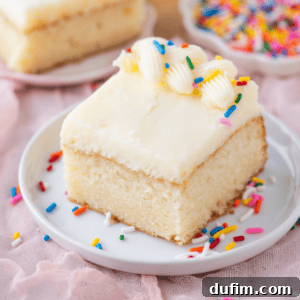
9×13 White Sheet Cake
Ingredients
Cake
- 2 ½ cups (300g) all-purpose flour
- 2 tsp baking powder
- ½ tsp baking soda
- 1 tsp salt
- ¾ cup (170g) unsalted butter, room temperature
- 1 ¾ cups (346g) granulated sugar
- ¼ cup (50g) vegetable oil
- 5 large egg whites, room temperature
- 1 cup (227g) sour cream
- ½ cup (113g) milk, I used whole milk
- 1 Tbsp clear vanilla extract
Frosting *See Notes
- 1 ½ cups (339g) unsalted butter, room temperature
- 1 Tbsp vanilla extract
- ⅛ tsp salt
- 4-6 cups (454–681g) powdered sugar
- ¼ cup heavy cream, more as needed, can substitute milk
Instructions
Cake
-
Preheat the oven to 350ºF (180ºC). Spray a 9×13 inch pan with non-stick cooking spray. Set aside.
-
In a small mixing bowl combine the flour, baking powder, baking soda, and salt.2 ½ cups (300g) all-purpose flour, 2 tsp baking powder, ½ tsp baking soda, 1 tsp salt
-
In a large mixing bowl combine the butter, sugar, and vegetable oil, beat using an electric mixer, 1-2 minutes until fluffy.¾ cup (170g) unsalted butter, 1 ¾ cups (346g) granulated sugar, ¼ cup (50g) vegetable oil
-
Add in the egg whites, sour cream, milk, and vanilla extract. Beat with the electric mixer.5 large egg whites, 1 cup (227g) sour cream, ½ cup (113g) milk, 1 Tbsp clear vanilla extract
-
Gradually add the flour mixture to the wet ingredients, mixing just until the flour is incorporated.
-
Pour the batter into the prepared pan and spread evenly with a spatula.
-
Bake for 32-39 minutes or until a toothpick inserted into the center comes out clean. Light pans take longer to bake than dark pans.
-
Allow the cake to cool completely before frosting.
Frosting
-
In a mixing bowl, combine the butter, vanilla extract and salt, beat using an electric mixer until fluffy, 1-2 minutes.1 ½ cups (339g) unsalted butter, 1 Tbsp vanilla extract, ⅛ tsp salt
-
Gradually add 4 cups of powdered sugar mixing on low until combined.4-6 cups (454–681g) powdered sugar
-
Add in ¼ cup of heavy cream, beating on high until the frosting is whipped and fluffy.¼ cup heavy cream
-
Taste to determine if you want more powdered sugar.
-
Spread the frosting over the cake and decorate with sprinkles if desired.
Notes
2 ½ cups (565g) unsalted butter, room temperature
2 Tbsp vanilla extract
⅛ tsp salt
6-10 cups (681-1135g) powdered sugar
4-7 Tbsp heavy cream
- Gluten-Free: For a gluten-free version, use a 1:1 gluten-free baking flour blend in place of all-purpose flour. I’ve had excellent results with King Arthur’s Measure for Measure Gluten Free Flour.
- To Store: Keep the frosted cake covered tightly with plastic wrap or in an airtight container at room temperature for up to three days. The unique combination of sour cream and oil in the batter ensures it stays wonderfully soft and moist.
- To Make Ahead: Bake the cake and let it cool completely. Once cooled, wrap it tightly in plastic wrap and store it at room temperature for up to 24 hours before you plan to frost it. The frosting can also be prepared in advance and refrigerated for up to three days; simply bring it to room temperature and beat it briefly with an electric mixer until fluffy again before spreading.
- To Freeze: For longer storage, wrap the unfrosted cake tightly in plastic wrap, then wrap it again in aluminum foil. Freeze for up to two months. When ready to serve, thaw the cake overnight on the countertop (still wrapped) and then frost as usual.

Nutrition
Nutrition Disclosure
All nutritional values are approximate and provided to the reader as a courtesy. Changing ingredients and/or quantities will alter the estimated nutritional calculations.