
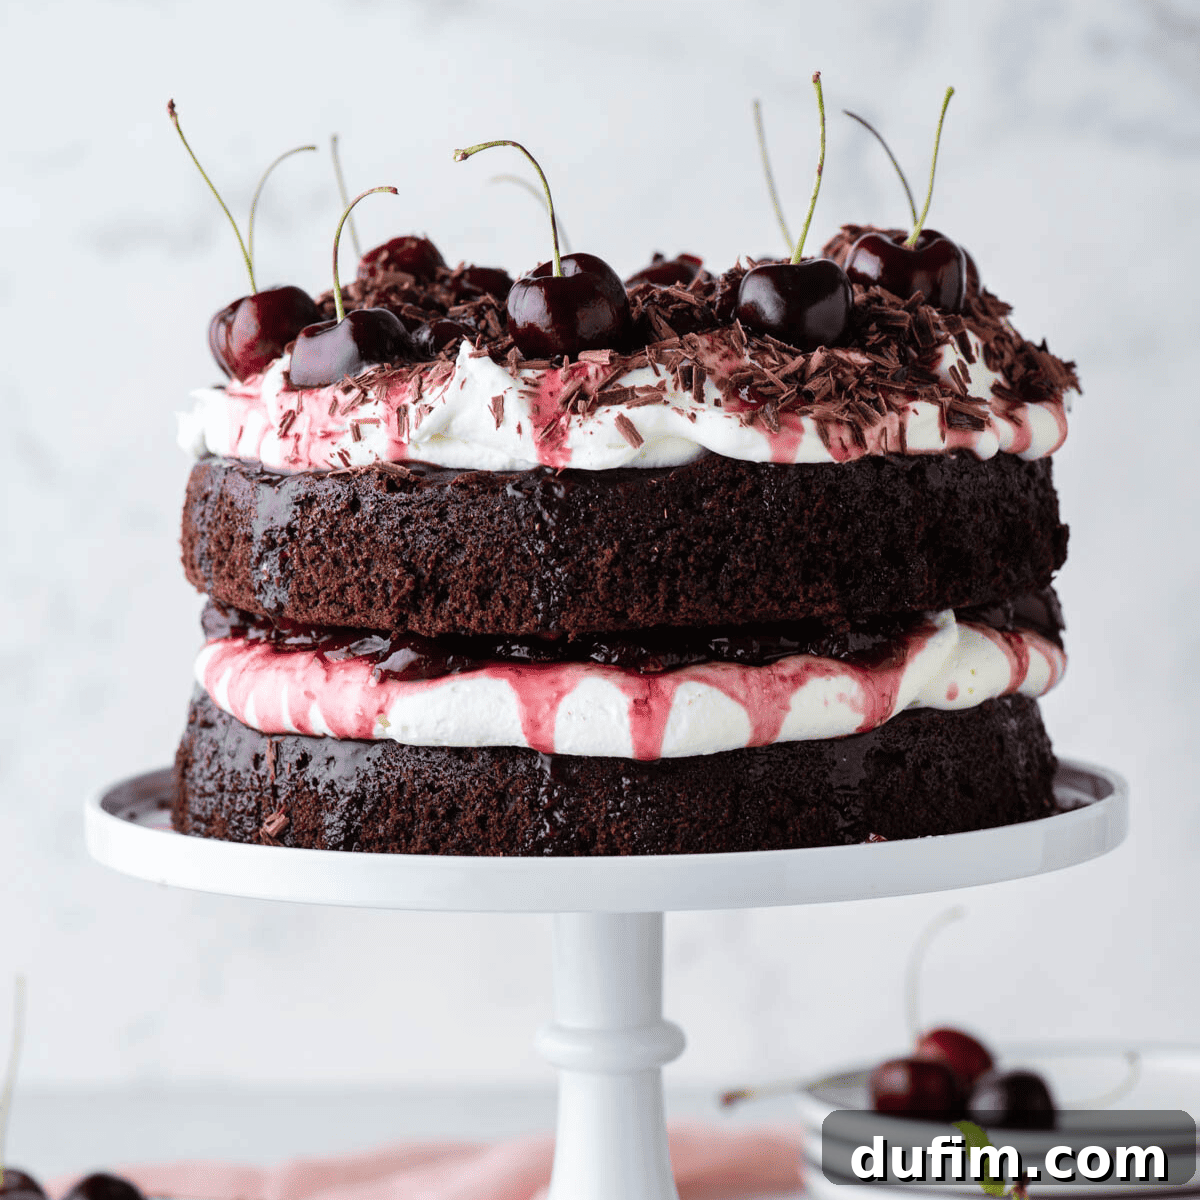
Are you ready to create a show-stopping dessert that combines the luxurious richness of chocolate with the sweet tang of juicy cherries? This Black Forest Cake recipe promises an impressive presentation with a surprisingly simple baking process, proving that bakery-worthy results are well within reach for any home baker.
Forget the need for fresh cherries or complex liquor infusions. My perfected version utilizes a quick, vibrant cherry sauce crafted from readily available canned dark sweet cherries, ensuring you can indulge in this classic delight year-round. Paired with an incredibly moist chocolate cake—where we “bloom” the cocoa powder for an intensified flavor profile—and a velvety, stable whipped cream, this cake is designed to be kid-friendly and alcohol-free, making it a perfect treat for everyone.
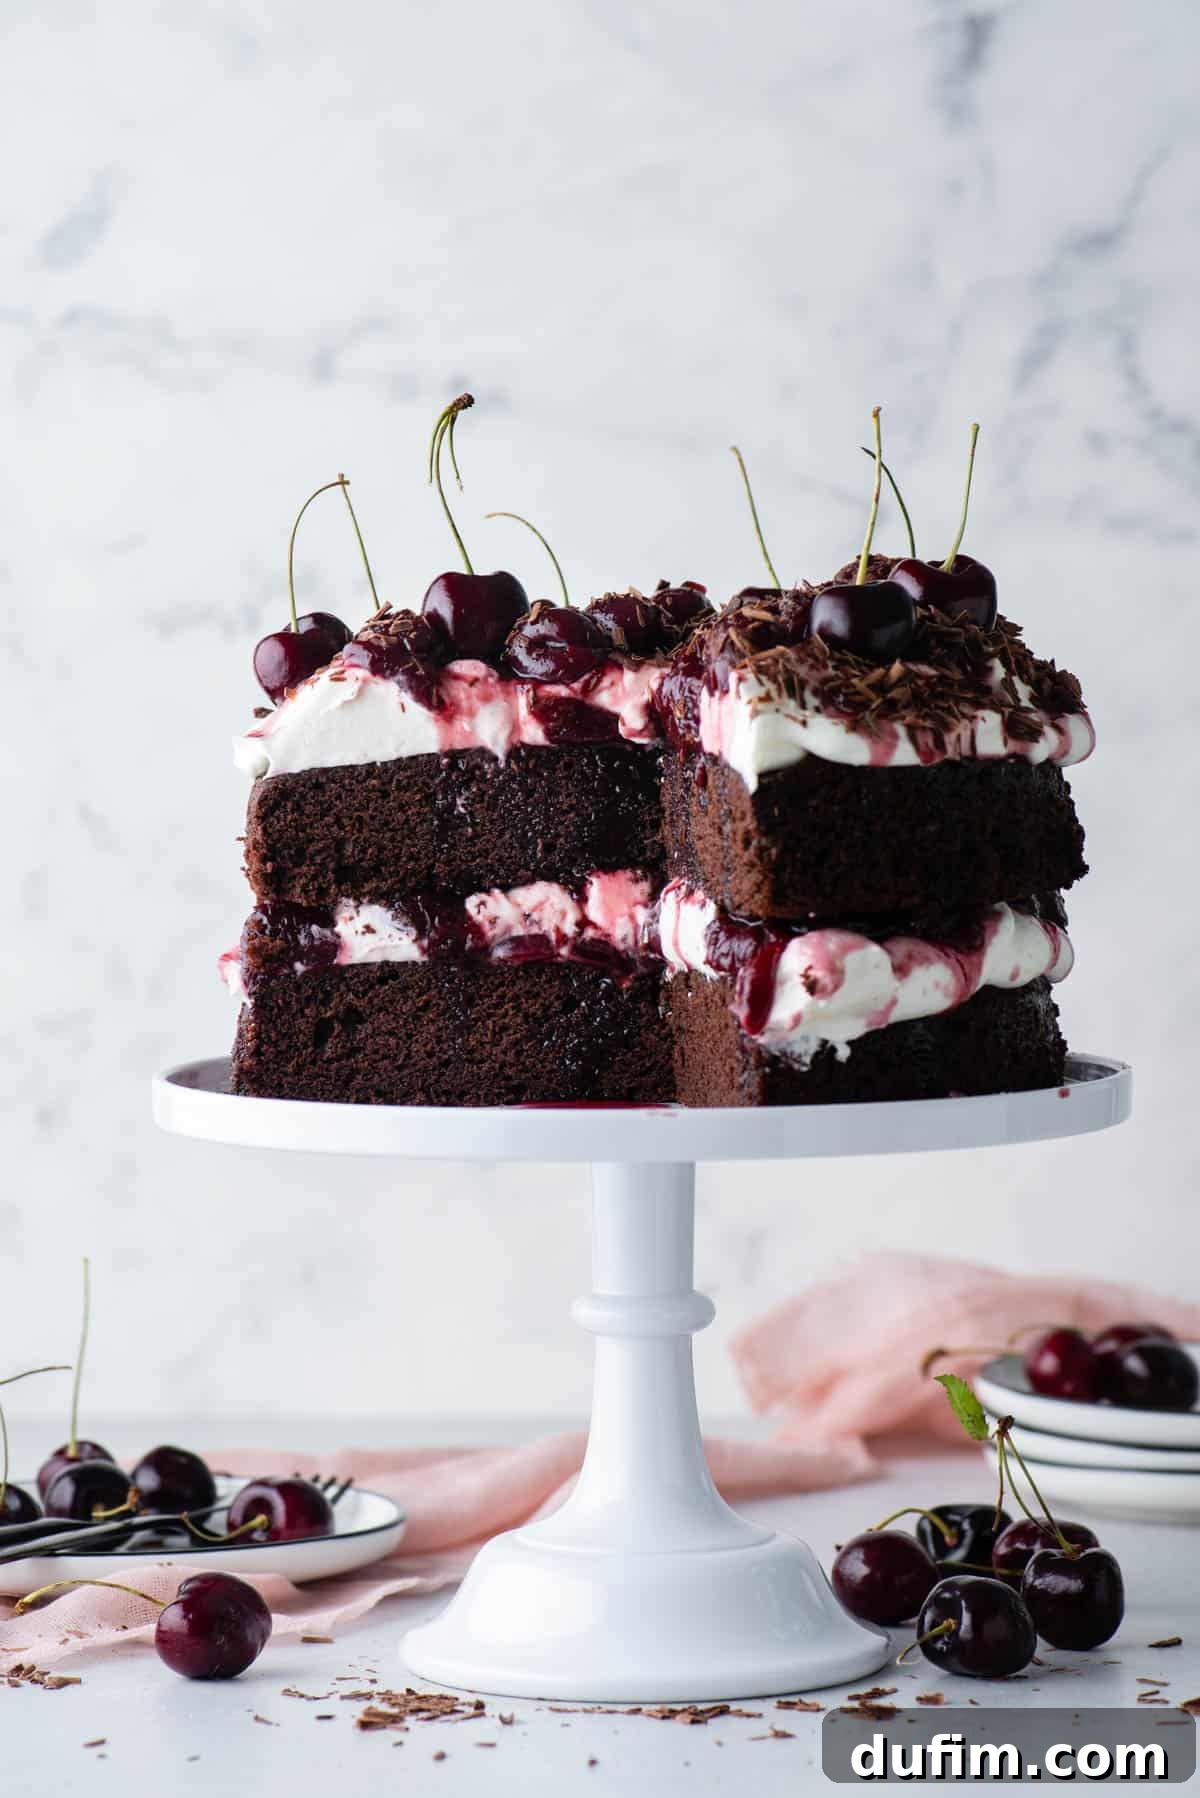
“When I tell y’all this cake was delicious! I was dreaming of the perfect Black Forest cake for my birthday and this one lived up to my expectations!”
-Allison
As a passionate home baker dedicated to perfecting classic desserts, I developed this Black Forest Cake recipe with approachability in mind. My goal was to empower home bakers to create a show-stopping, bakery-quality dessert without the intimidation often associated with such elaborate treats. After years of testing and refining, I focused on crafting a family-friendly version that sacrifices none of the decadent flavor or stunning visual appeal of the traditional German masterpiece. If you cherish the exquisite pairing of rich chocolate and vibrant cherries as much as I do, this recipe is guaranteed to become a cherished favorite.
Traditional Black Forest Cake, or Schwarzwälder Kirschtorte, often features a hint of Kirschwasser (cherry liqueur). However, this recipe deliberately omits alcohol, making it suitable for all ages and occasions. Instead, we harness the intense, natural sweetness and robust flavor of dark sweet cherries packed in heavy syrup. This ingenious substitution ensures a profoundly fruity and satisfying taste that everyone can enjoy, without compromising the authentic Black Forest experience.
The magic of this recipe lies in its carefully crafted components: an effortlessly fast cherry sauce that liberates you from seasonal constraints, an ultra-moist chocolate cake base that boasts maximum flavor thanks to bloomed cocoa powder, and a perfectly stabilized whipped cream that holds its shape beautifully. You’ll be astonished at how straightforward it is to assemble these elements into a Black Forest Cake that not only looks like it came from a professional patisserie but tastes even better.
Originating from Germany’s picturesque Black Forest region, this beloved dessert is a symphony of flavors and textures. It traditionally comprises delicate layers of chocolate sponge cake, generous dollops of whipped cream, and a luscious sweet cherry filling. Our recipe honors this heritage while making it accessible and enjoyable for a broader audience.
Why You’ll Adore This Black Forest Cake Recipe
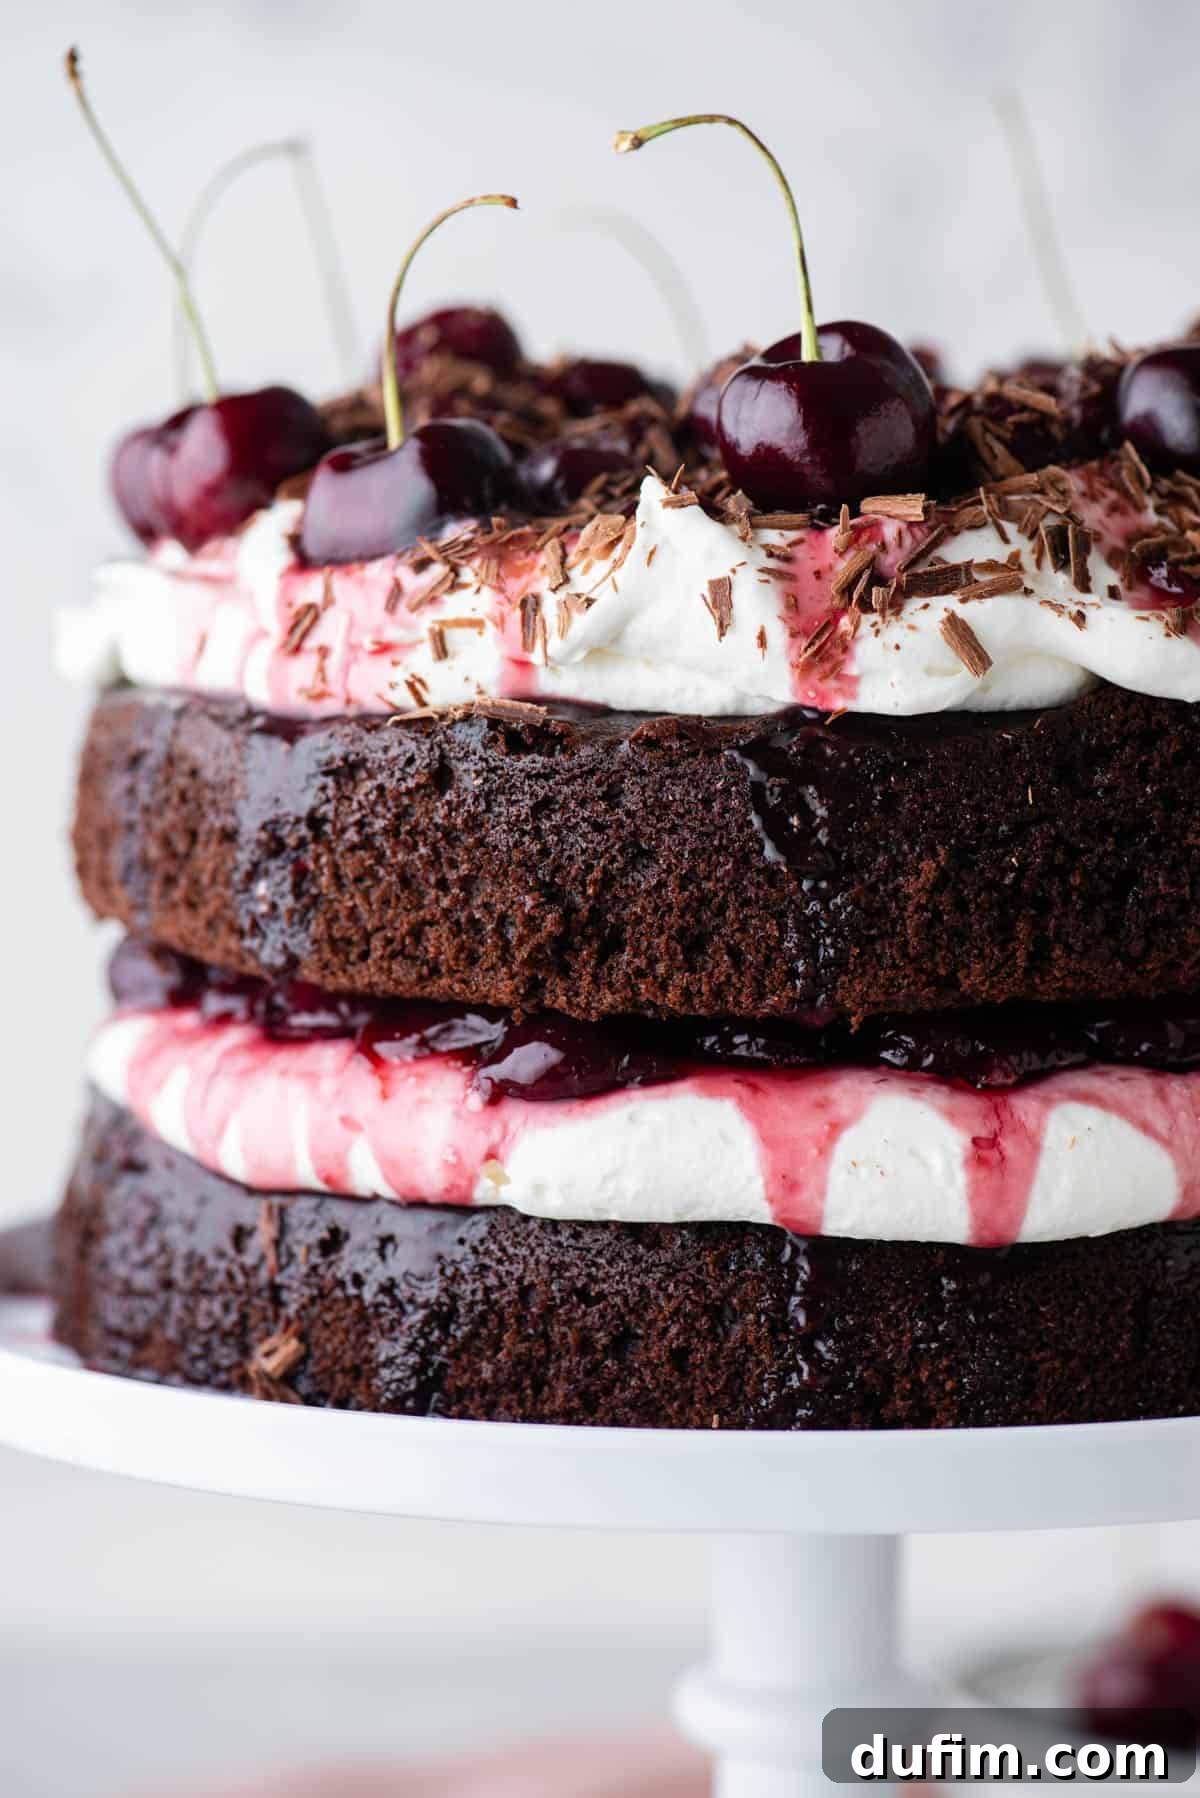
There are countless reasons why this Black Forest Cake will quickly become a household favorite. Its unique charm lies in the perfect interplay of flavors and textures. The deep, rich chocolate cake layers provide a robust foundation, beautifully complemented by the bright, tartness of the cherries, all enveloped in a cloud of fluffy, sweet whipped cream. This harmonious blend offers a dessert that is both profoundly indulgent and surprisingly refreshing.
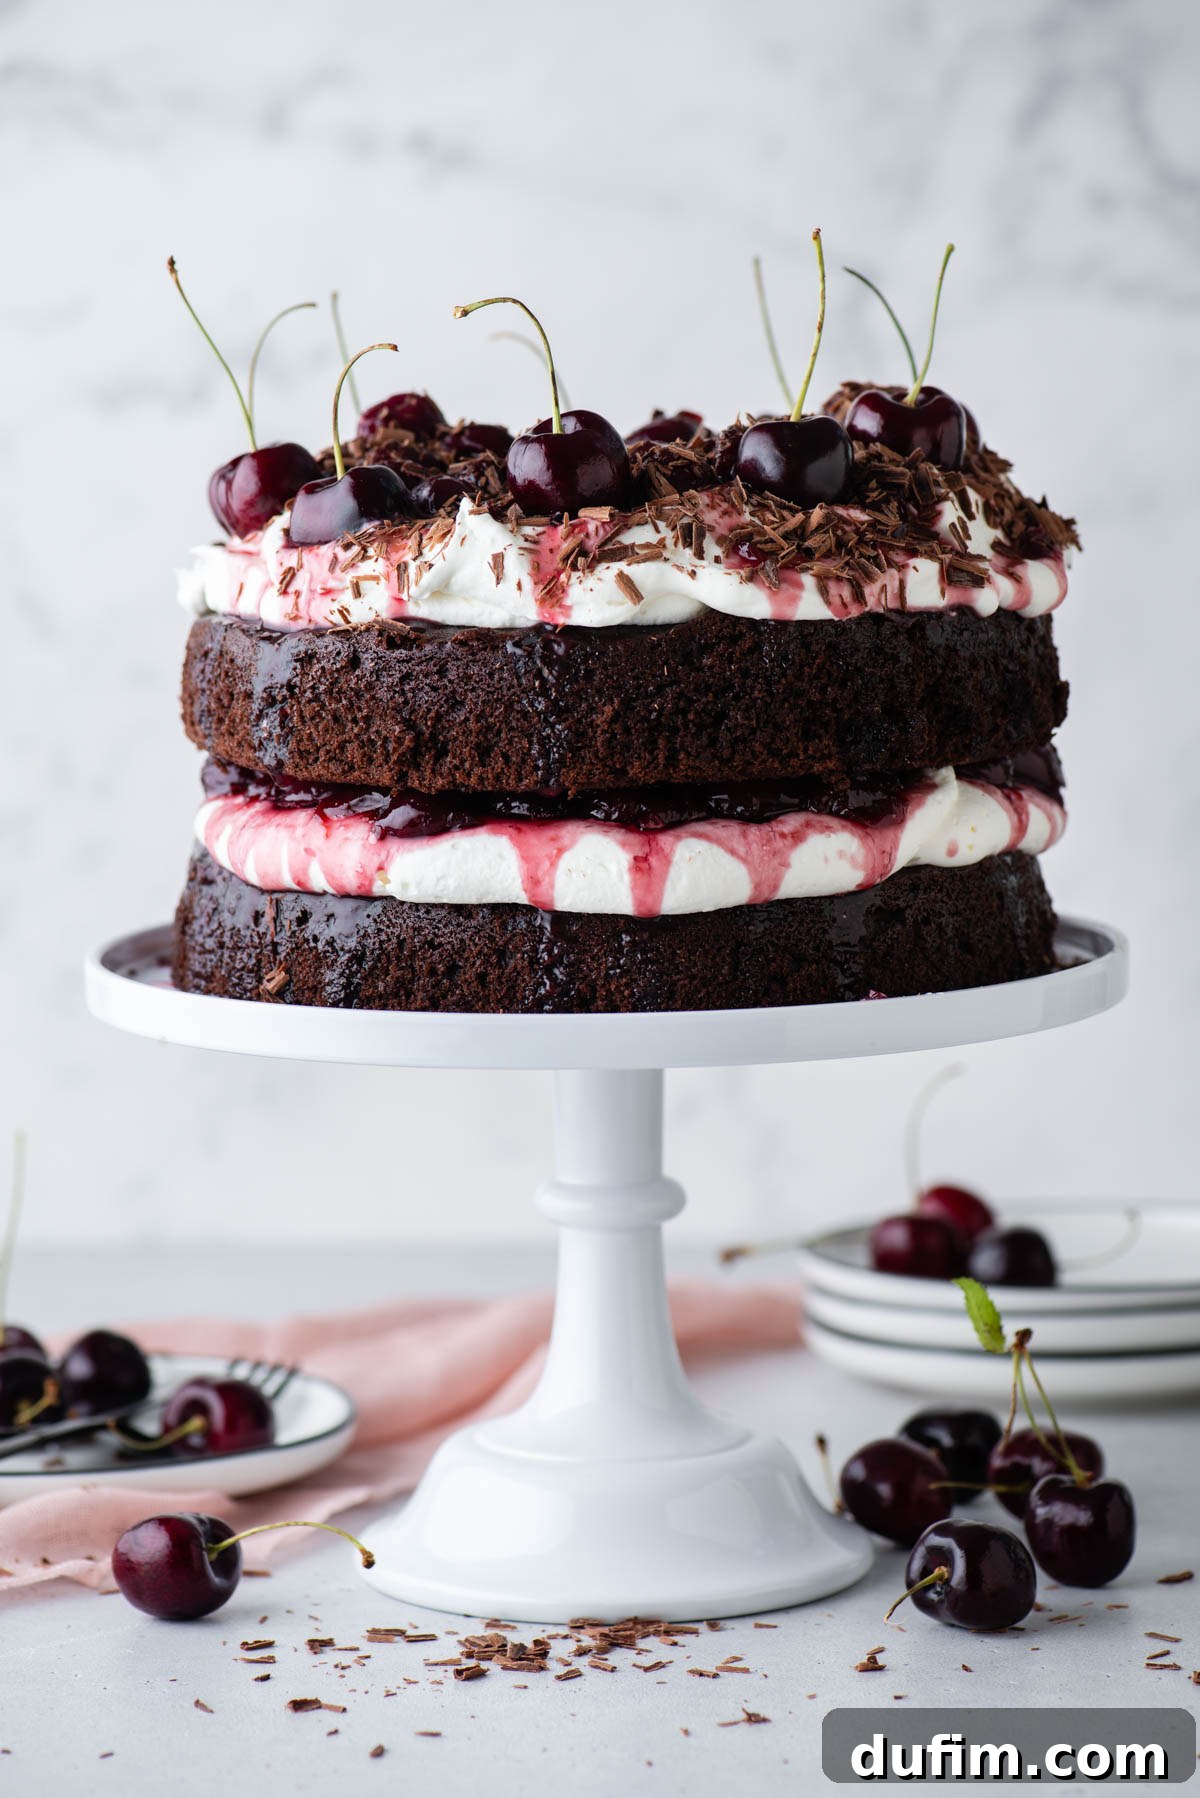
Beyond its incredible taste, this cake is a visual marvel. The striking contrast between the dark chocolate cake, the pristine white whipped cream, and the vibrant ruby-red cherries creates a feast for the eyes, guaranteed to impress guests at any gathering. Moreover, its no-alcohol formulation means it’s a delightful choice for family celebrations, children’s parties, or simply a comforting dessert any day of the week. The use of pantry-staple canned cherries also makes it incredibly convenient, allowing you to whip up this masterpiece whenever the craving strikes, without waiting for cherry season.
Essential Ingredients for Your Black Forest Cake with Cherries
Crafting this exquisite Black Forest Cake is a delightful journey composed of three distinct, yet perfectly complementary, parts: the intensely moist chocolate cake, the luscious sweet cherry sauce, and the irresistibly light and stable whipped cream. Each component plays a crucial role in achieving absolute cake perfection. The full, precise measurements for each ingredient are provided in the comprehensive recipe card further down this page.
For the Ultimate Chocolate Cake Layers
- All-purpose flour: The structural backbone of our moist cake.
- Dutch-processed cocoa powder: Provides a deeper, richer chocolate flavor and a darker hue compared to natural cocoa, and interacts perfectly with baking soda.
- Instant coffee granules (optional): Not for coffee flavor, but to enhance and deepen the chocolate notes. Folger’s or similar brands work well.
- Baking soda & Baking powder: Our dual leavening agents, ensuring a light and airy crumb.
- Salt: A flavor enhancer that balances the sweetness and brings out the chocolate’s depth.
- Unsalted butter: Contributes to the cake’s tenderness and rich flavor. Ensure it’s at room temperature for proper creaming.
- Granulated sugar: Sweetens the cake and helps create a tender texture.
- Eggs: Provide structure, richness, and moisture. Also best at room temperature.
- Buttermilk: Its acidity reacts with the baking soda for lift and keeps the cake incredibly moist and tender.
- Hot tap water: Helps bloom the cocoa powder, further intensifying the chocolate flavor, and contributes to the cake’s moistness.
For the Velvety Sweet Cherry Sauce
- Dark Sweet Cherries in heavy syrup: The star of our filling! Canned cherries make this recipe accessible year-round and provide a consistent, rich flavor.
- Granulated sugar: Sweetens the sauce to perfection, complementing the tartness of the cherries.
- Cornstarch: Acts as a thickening agent, giving the cherry sauce its lovely, spoonable consistency.
For the Perfect Stabilized Whipped Cream
- Cream cheese, softened: The secret ingredient for stabilized whipped cream! It adds a subtle tang and ensures the cream holds its shape without weeping, even after several days.
- Powdered sugar: Sweetens the whipped cream and also aids in stabilization.
- Cold heavy whipping cream: The essential base for light and fluffy whipped cream. Ensure it’s very cold for optimal whipping.
- Vanilla extract: A classic enhancer that adds a warm, inviting aroma and flavor to the cream.
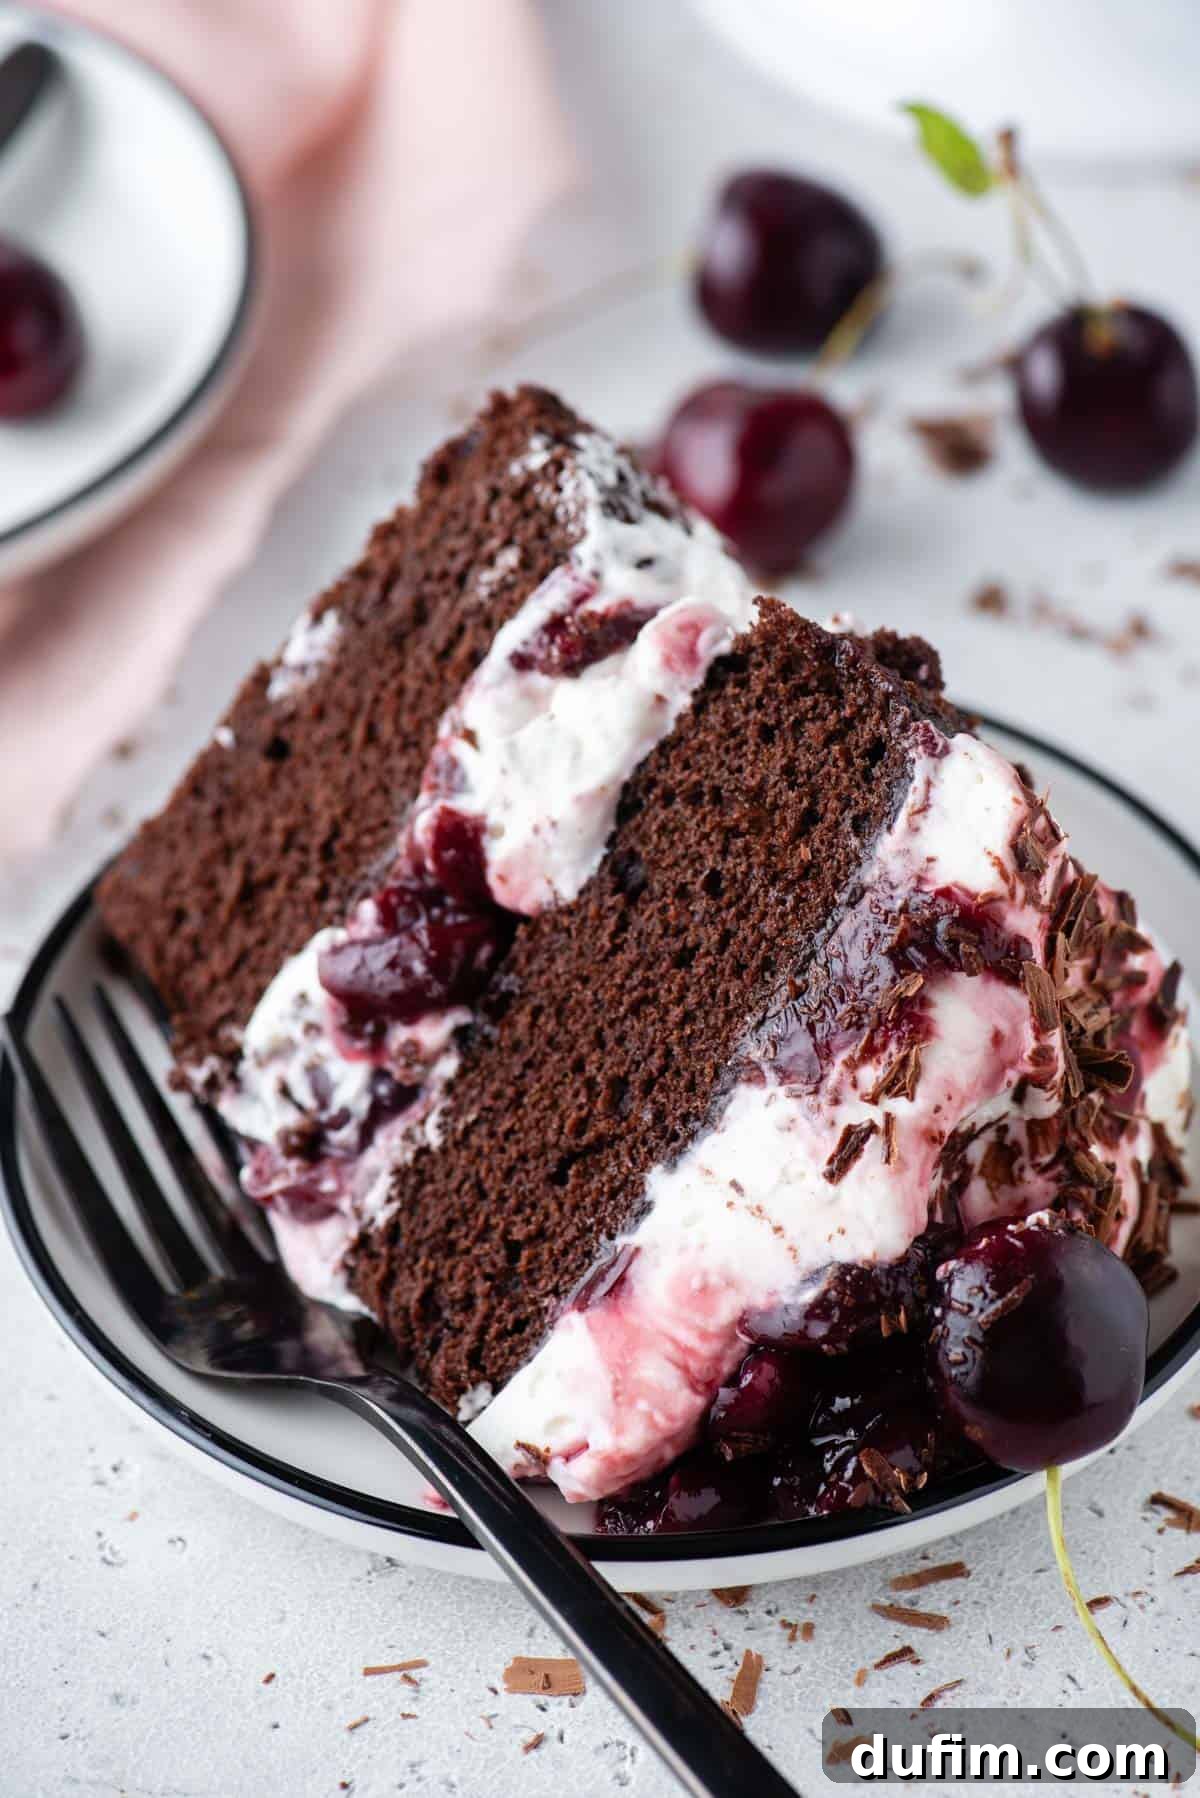
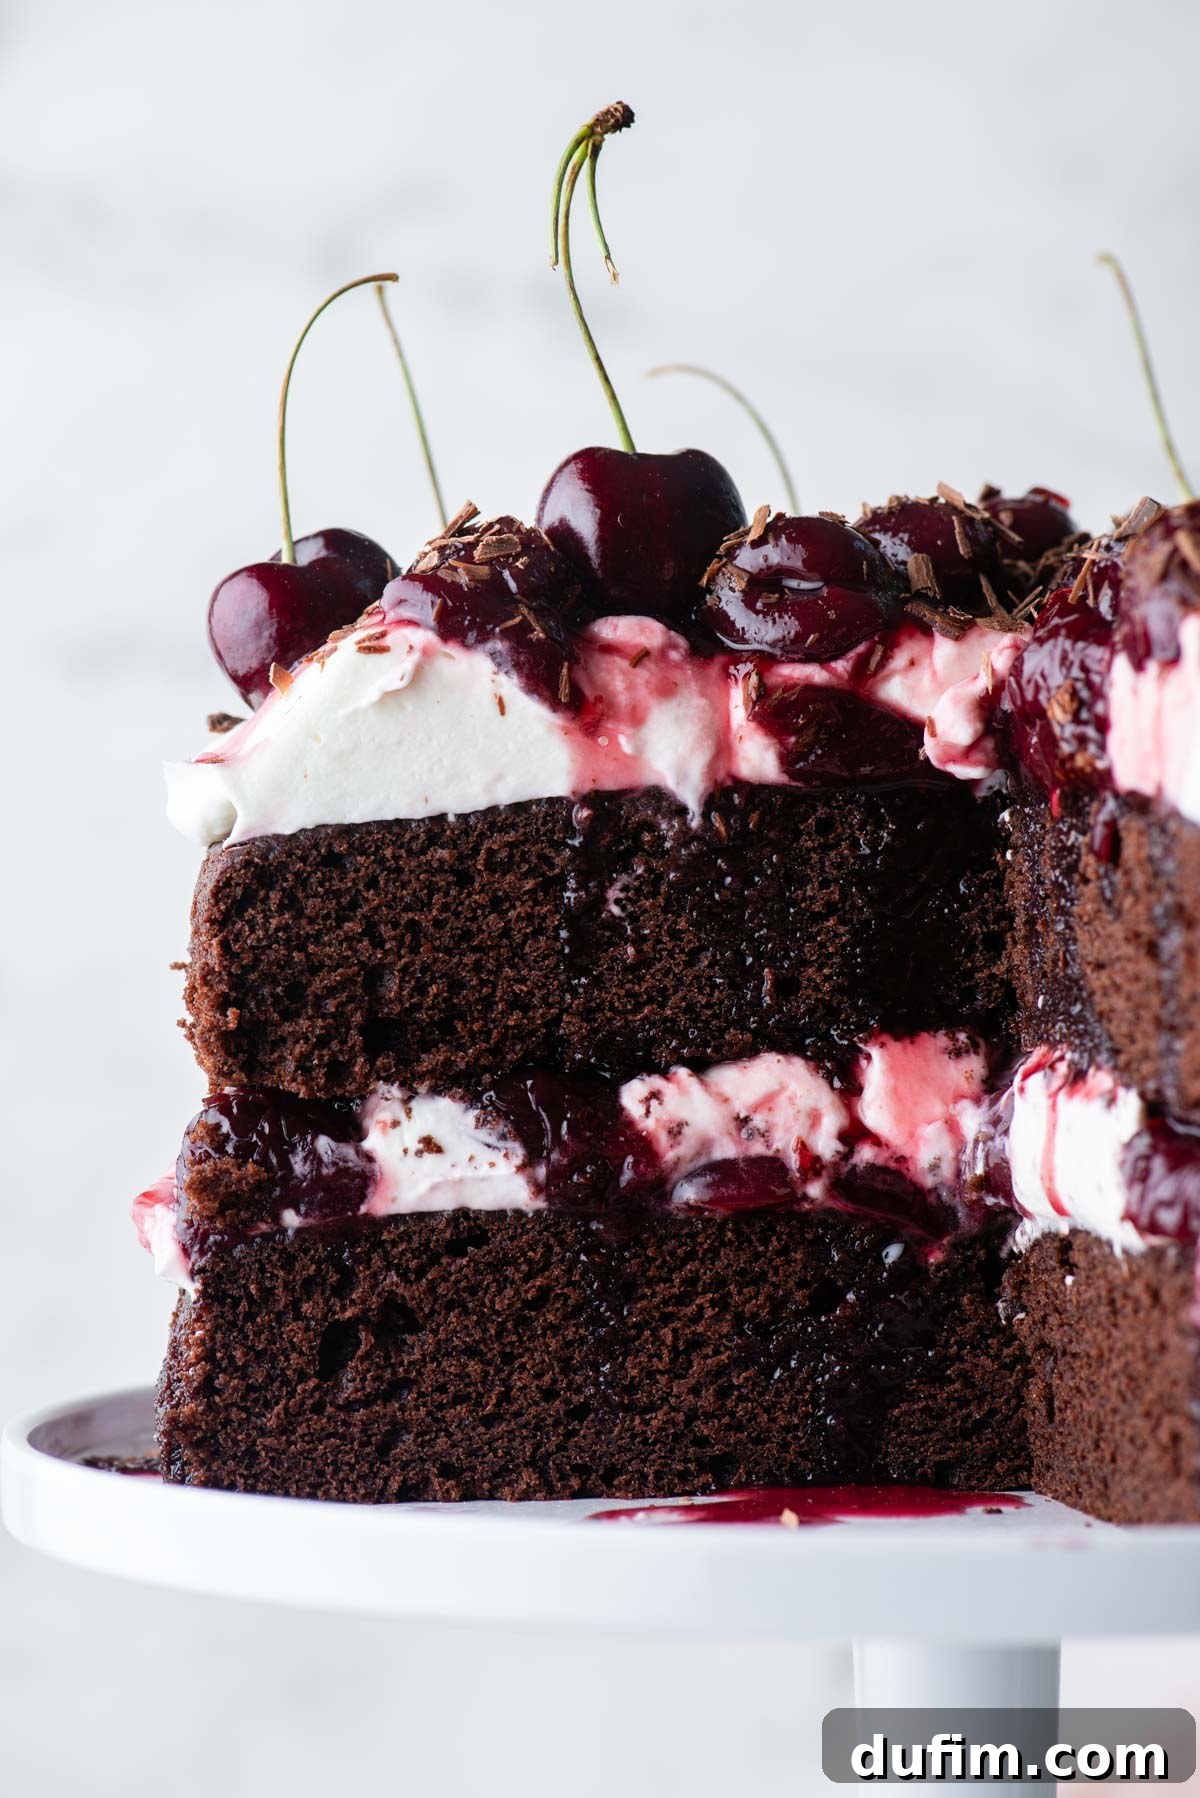
Crafting Your Homemade Black Forest Cherry Cake: Step-by-Step Guide
This traditional German dessert, though appearing complex, is made accessible through our detailed instructions. Follow these steps to create a stunning presentation and an even more impressive taste. Remember, precise measurements and the full ingredient list are available in the recipe card below.
The Moist Chocolate Cake Layers
- Prepare your pans: Preheat your oven to 350ºF (175ºC). Generously grease two 8 or 9-inch springform pans with butter. For guaranteed easy release, butter the sides and bottom thoroughly, then line the bottom of each pan with a circle of parchment paper. Set these prepared pans aside.
- Combine dry ingredients: In a large mixing bowl, whisk together the all-purpose flour, Dutch-processed cocoa powder, instant coffee granules (if using, as it amplifies chocolate flavor without adding coffee taste), baking soda, baking powder, and salt. Whisk well to ensure all leavening agents are evenly distributed. Set this dry mixture aside.
- Cream wet ingredients: In a separate, larger mixing bowl, use an electric mixer to beat the room-temperature unsalted butter and granulated sugar for about 2 minutes. Beat until the mixture is visibly pale and fluffy, indicating air has been incorporated. Crack in the eggs, one at a time, beating for an additional 30 seconds after each addition until fully combined.
- Alternate wet and dry additions: Begin by adding half of the buttermilk to the wet ingredients and beat for approximately 20 seconds until just incorporated. Next, add half of the dry ingredients mixture and beat on low speed until just combined. Follow with the remaining buttermilk and the hot tap water, mixing until the liquids are integrated. Finally, add the remaining dry ingredients, beating on low speed only until no streaks of flour remain. Be careful not to overmix, which can lead to a dry cake.
- Portion and prepare for baking: Evenly divide the cake batter between your two prepared springform pans. Aim for about 2 ½ cups of batter in each pan. If you’re using bake-even cake strips, now is the time to secure them around the outside of your pans. These strips help cakes bake more evenly and prevent doming.
- Bake to perfection: Place both pans on the same rack in the center of your preheated oven. Bake for 33-37 minutes. The cake is done when a toothpick inserted into the center comes out clean or with a few moist crumbs attached. Keep in mind that baking times can vary significantly based on your specific oven and the exact size of the pans used.
- Cooling the cakes: Once baked, remove the cakes from the oven and allow them to cool in their pans for 20-30 minutes. This crucial resting period helps the cakes firm up before you attempt to remove them. After this time, carefully invert the cakes onto a wire cooling rack to cool completely. Ensure they are entirely cool before proceeding with assembly to prevent the whipped cream from melting.
The Delectable Sweet Cherry Sauce
- Combine ingredients: In a medium saucepan, combine the contents of both cans of dark sweet cherries (including the heavy syrup), granulated sugar, and cornstarch. Whisk these ingredients together thoroughly over high heat until the mixture begins to boil.
- Thicken the sauce: Once boiling, reduce the heat to medium. Allow the sauce to simmer, stirring occasionally, for 5-10 minutes. It will gradually thicken to a beautiful, glossy consistency. The cornstarch will ensure it sets perfectly.
- Cool completely: Remove the saucepan from the heat. It is imperative that the cherry sauce cools completely before you add it to your cake layers. Warm sauce will melt your whipped cream, ruining the cake’s structure. You can speed up cooling by transferring it to a shallow dish or placing the saucepan in an ice bath.
The Stabilized Whipped Cream
- Chill your equipment: For the best whipped cream, place a metal or glass mixing bowl and your electric mixer beaters in the freezer for at least 15 minutes. Cold equipment helps the cream whip up faster and hold its volume better.
- Cream cheese base: Remove the chilled bowl from the freezer. Add the softened cream cheese and powdered sugar to the bowl. Beat with an electric mixer for 1 minute, or until the mixture is smooth, creamy, and free of lumps. This creates the stable base for our whipped cream.
- Whip to stiff peaks: Pour in the very cold heavy whipping cream and vanilla extract. Increase the mixer speed to high and beat for 4-5 minutes. Continue beating until stiff peaks form—this means that when you lift the beaters, the cream stands up firmly. The whipped cream should be scoopable with a spoon and maintain its shape beautifully. Be careful not to overbeat, or it will turn grainy.
Assembling Your Masterpiece: The Black Forest Chocolate Cake
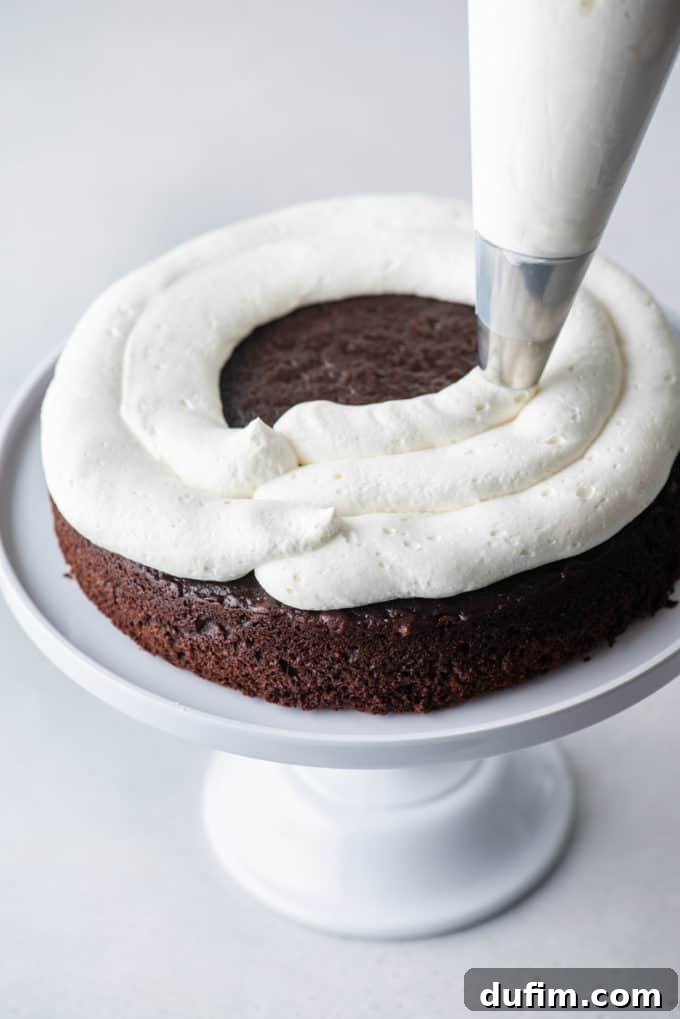
- First Cake Layer: Carefully place one of your completely cooled chocolate cake layers onto your chosen serving platter or cake stand.
- Whipped Cream Base: Using a piping bag with a star tip (for a decorative look) or simply an offset spatula, pipe or spread a generous, even layer of the stabilized whipped cream over the top of the first cake layer. Create a slight border around the edge to contain the cherry filling.
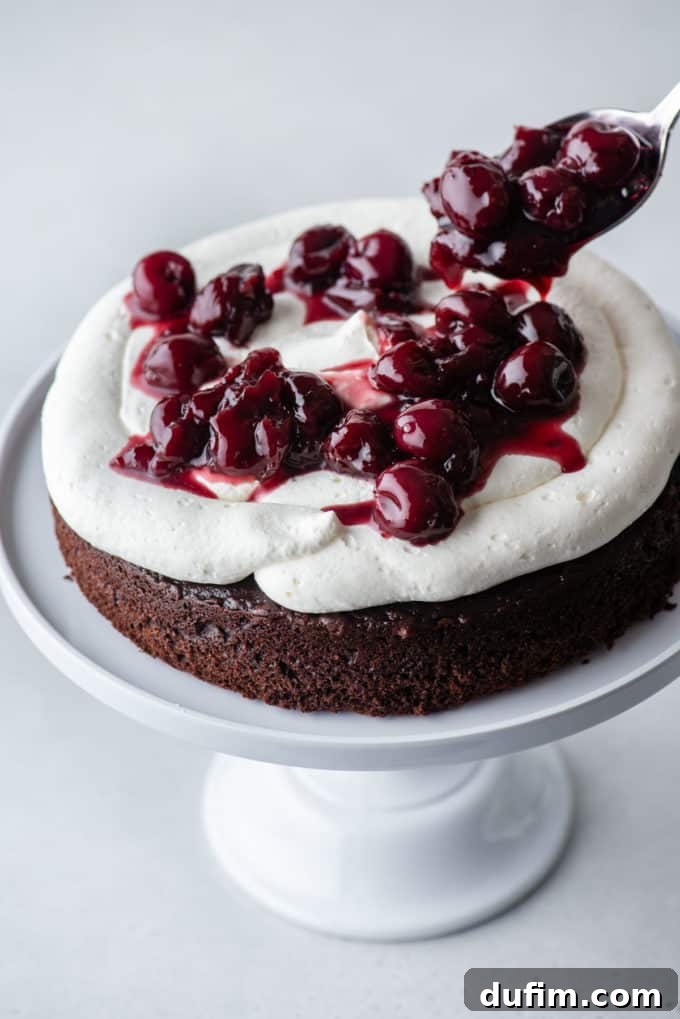
- Cherry Filling: Spoon a generous amount of the cooled sweet cherry sauce over the whipped cream, spreading it gently to the edges of the whipped cream border.
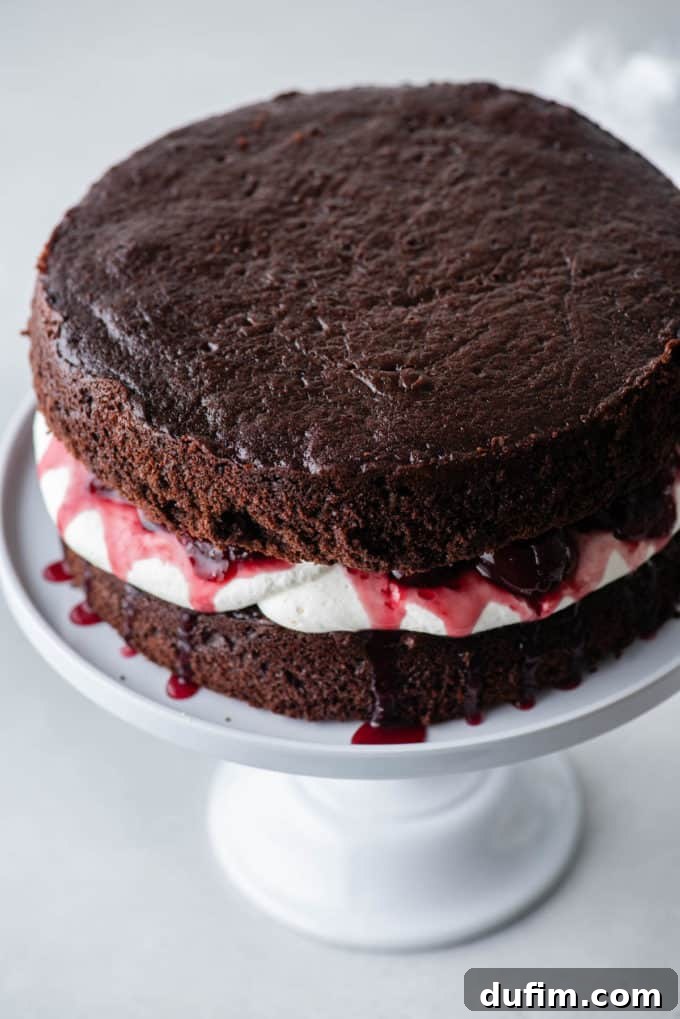
- Second Cake Layer: Gently place the second chocolate cake layer directly on top of the cherry filling, aligning it carefully.
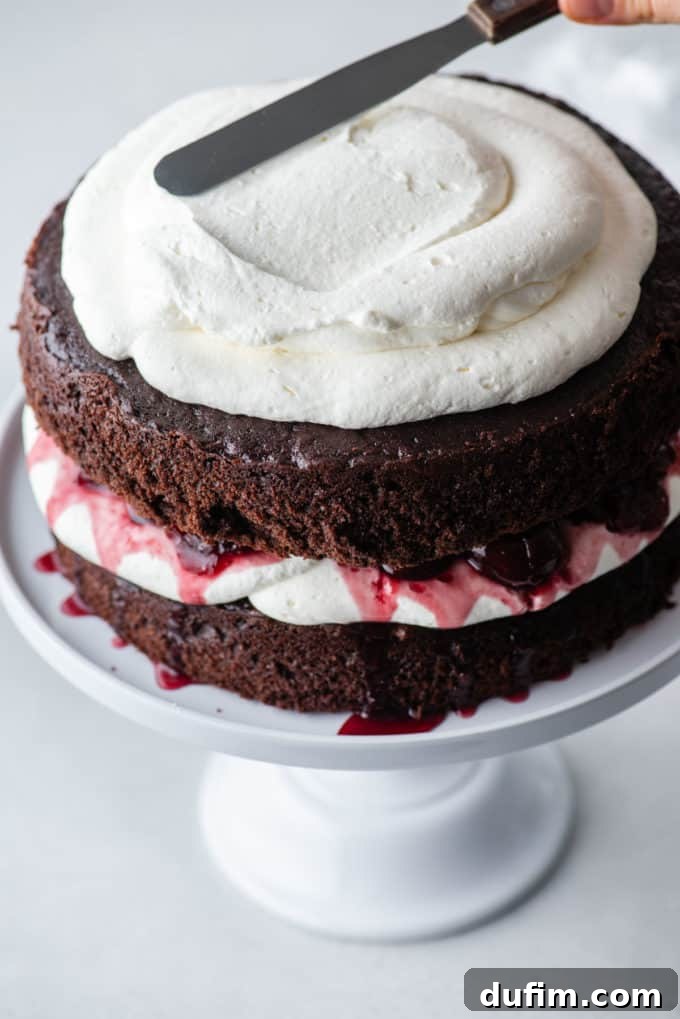
- Top Whipped Cream Layer: Pipe or spread another generous amount of whipped cream over the entire top surface of the second cake layer. If desired, you can also spread a thin layer around the sides for a partially frosted look, or leave the sides exposed to showcase the beautiful layers.
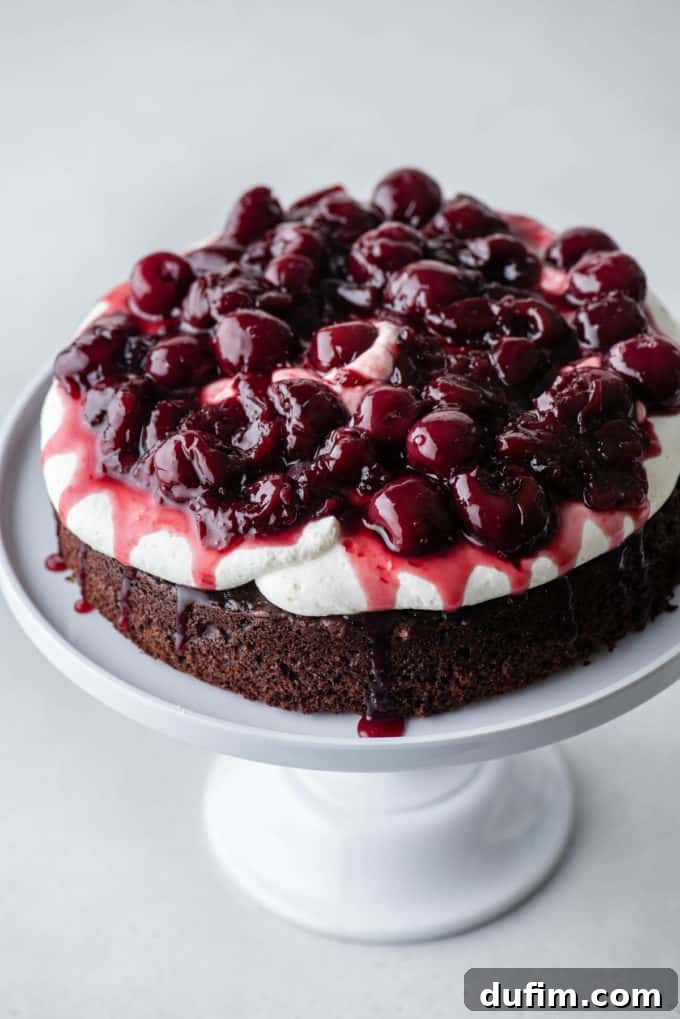
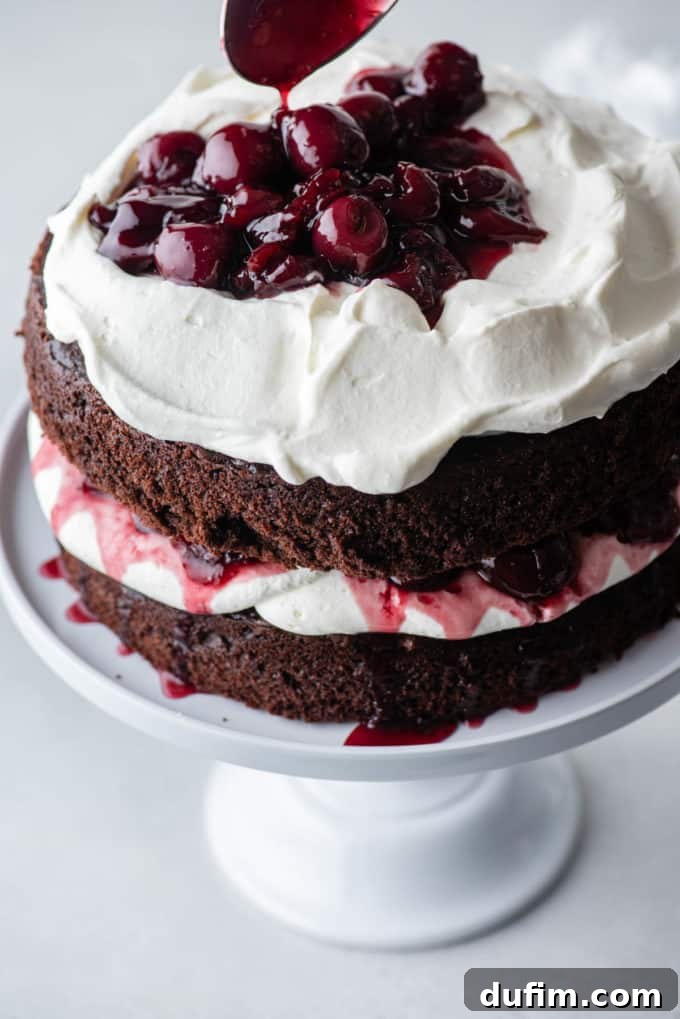
- Final Cherry Embellishment: Spoon additional cherry sauce artfully on top of the whipped cream. You can create a full covering or just a decorative dollop in the center.
- Garnish and Serve: For the classic Black Forest finish, adorn the top of the cake with elegant chocolate shavings and a few extra fresh (or well-drained canned) cherries.
Pro Tip for Chocolate Shavings: The simplest way to create elegant chocolate shavings and curls is by using a regular vegetable peeler on a solid chocolate bar (a standard Hershey’s bar works wonderfully). For best results, slightly warm the chocolate bar in the microwave for about 5 seconds. This makes it pliable. Then, firmly draw the vegetable peeler along the long side of the bar to create beautiful curls. If the chocolate seems to break rather than curl, warm it for a few more seconds until you achieve the desired effect. These delicate shavings add both visual appeal and an extra touch of chocolate flavor.
Exciting Variations for Your Black Forest Cake Recipe
While this Black Forest Cake recipe is absolutely perfect in its classic form, its versatility allows for exciting variations to suit different tastes and occasions. Don’t hesitate to experiment and make this delicious dessert uniquely your own:
Introduce a Nutty Crunch: For an added layer of texture and a subtle earthy flavor, consider folding finely chopped nuts like toasted almonds, hazelnuts, or even walnuts into your cake batter. Alternatively, sprinkle them between the whipped cream and cherry layers, or use them as a decorative garnish on top of the cake. This provides a delightful contrast to the softness of the cake and cream.
Deconstructed Black Forest Parfaits: Transform this layered cake into charming individual desserts by creating parfaits. Crumble the chocolate cake layers into glasses or small bowls, then layer them alternately with dollops of whipped cream, generous spoonfuls of cherry sauce, and a sprinkle of chocolate shavings. These parfaits are not only visually appealing but also a convenient serving option for larger gatherings.
Infuse the Whipped Cream with New Flavors: While vanilla is a classic choice, don’t shy away from experimenting with other flavor extracts in your stabilized whipped cream. A hint of almond extract can complement the cherries beautifully, while a touch of orange or lemon zest can add a refreshing, citrusy brightness that cuts through the richness of the chocolate and cream. A dash of rum extract could also provide a subtle warmth for an “adult” version without actual alcohol.
Berry Swap: Explore Other Fruit Fillings: If cherries aren’t your favorite, or if you simply want to try something new, this recipe is adaptable to other berry fillings. Raspberries or strawberries offer a wonderfully tart contrast to the chocolate, while blueberries can provide a milder sweetness. Simply prepare your chosen berries in a similar sauce method, adjusting sugar to taste, to create a delightful chocolate-berry fusion cake.
Expert Tips for Black Forest Cake Success
Achieving a truly exceptional Black Forest Cake involves a few key techniques. Follow these expert tips to ensure your homemade masterpiece is nothing short of perfection:
- The Importance of Room Temperature Butter: This cannot be stressed enough! Using butter that is properly at room temperature (soft enough to indent with a finger but still cool) is critical for successful creaming with sugar. It allows for optimal air incorporation, resulting in a lighter, more evenly textured cake batter and, ultimately, a tender, moist cake. Cold butter won’t cream properly, and melted butter will lead to a dense cake.
- Choose the Right Cherries: For the most authentic and delicious cherry sauce in this recipe, always opt for canned dark sweet cherries in heavy syrup. These cherries offer a rich, concentrated flavor and the perfect sweetness. Avoid using fresh cherries (unless you are prepared to pit and cook them extensively, and adjust sweetness), maraschino cherries (which are too sweet and artificially flavored), or sour cherries (which will require significant sugar adjustments). The heavy syrup from the canned cherries is essential for the sauce’s base flavor and consistency.
- Chill Your Whipped Cream Tools: When preparing the homemade stabilized whipped cream, do not skip the step of chilling your mixing bowl and beaters in the freezer for at least 15 minutes. This simple yet vital trick helps the heavy cream whip up faster, achieves maximum volume, and ensures a stable, stiff-peaked cream that won’t deflate or weep, keeping your Black Forest Cake beautiful and delicious for longer.
- Don’t Overmix the Cake Batter: Once you add the dry ingredients to the wet, mix only until just combined. Overmixing develops the gluten in the flour, leading to a tough and dry cake. A few small lumps are perfectly fine and will disappear during baking.
- Cool Cakes Completely: Patience is a virtue in cake baking! Ensure your cake layers are completely cool before assembling. Attempting to frost a warm cake will melt your beautiful whipped cream, leading to a messy and unstable dessert.
- Use Quality Cocoa: Since chocolate is a primary flavor, use a good quality Dutch-processed cocoa powder. The “blooming” process with hot water will bring out its full, deep chocolate notes.
Serving Your Elegant Black Forest Chocolate Cherry Cake
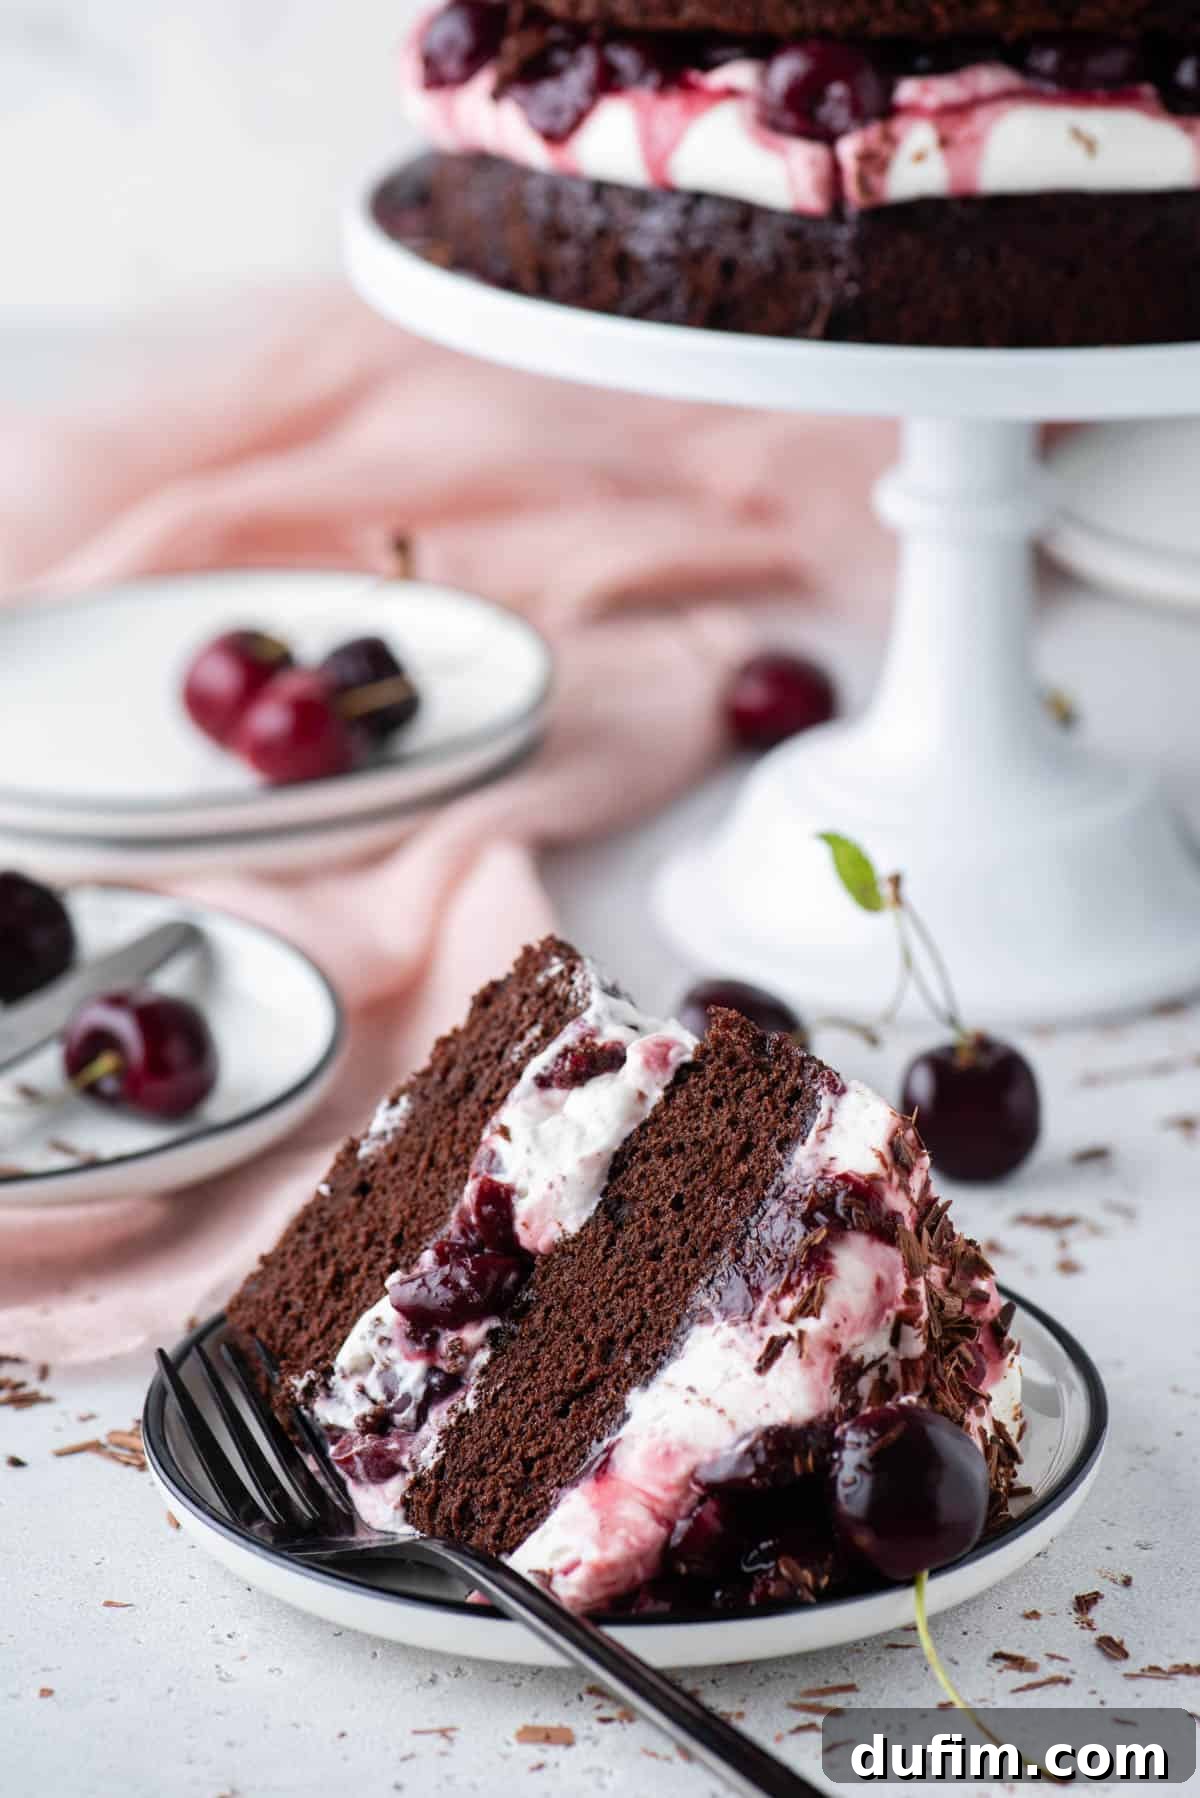
Your beautifully assembled Black Forest Cake is not just a dessert; it’s a centerpiece. Its layered appearance and rich garnishes make for a stunning display on any dessert table, perfect for special occasions or simply elevating an everyday meal. When you’re ready to enjoy, use a long, sharp, thin-bladed knife to slice the cake into neat portions. For the cleanest cuts, wipe the knife clean with a warm, damp cloth between each slice.
Serve each luscious slice on individual dessert plates to fully appreciate its intricate layers of chocolate cake, creamy whipped cream, and vibrant cherry filling. For those who can’t get enough of the cloud-like topping, consider offering an extra bowl of stabilized whipped cream on the side, allowing your guests the delightful option of adding more to their serving. A few extra fresh or drained canned cherries and a sprinkle of chocolate shavings on the plate can further enhance the presentation and dining experience.
Storing Your Black Forest Chocolate Cake
To preserve the freshness and exquisite taste of your Black Forest Cake, proper storage is essential. Due to its whipped cream and cherry filling, the cake requires refrigeration. Any leftover cake should be carefully covered with plastic wrap or stored in an airtight cake container to prevent it from drying out or absorbing refrigerator odors. When stored correctly in the refrigerator, this cake will maintain its delicious quality for up to 3 days.
- Refrigeration Best Practices: For optimal enjoyment, consume the cake within 2-3 days of baking. Always keep it in an airtight container in the refrigerator to keep the cake layers moist, the whipped cream fresh, and the cherry filling vibrant.
- Freezing Not Recommended: While many cakes can be frozen, I do not recommend freezing this particular Black Forest Cake. The stabilized whipped cream, while durable in the fridge, can change texture upon thawing, becoming watery or grainy. The cake layers themselves also fare better when refrigerated rather than frozen to maintain their ideal moisture content.
Black Forest Cherry Cake Recipe FAQs
While all Black Forest cakes are chocolate cakes, not all chocolate cakes are Black Forest cakes. The key distinction lies in the specific components and assembly. A general chocolate cake focuses solely on the chocolate flavor. Black Forest cake, however, is a very specific type of chocolate cake that features distinct layers of chocolate sponge cake, a sweet cherry filling, and abundant whipped cream, often enhanced with cherry liqueur (though our recipe is alcohol-free).
Black Forest cake, known in its native tongue as Schwarzwälder Kirschtorte, is proudly German. It originated in the stunning Black Forest (Schwarzwald) region of Germany, a place famous for its dark fir trees, which are said to inspire the cake’s name and dark chocolate appearance.
The traditional German name for Black Forest cake is “Schwarzwälder Kirschtorte,” which translates literally to “Black Forest Cherry Torte.” It’s also sometimes referred to as “Black Forest Gateau” in French, with “gateau” signifying a rich and elaborate cake.
Traditionally, the filling of a Black Forest cake is a luscious cherry filling made from sour cherries, sugar, and a significant splash of Kirsch (cherry brandy). However, in our family-friendly recipe, we omit the alcohol and instead create a sweet cherry sauce using canned dark sweet cherries, sugar, and cornstarch, ensuring a rich, fruity flavor that everyone can enjoy.
Absolutely! While many traditional Black Forest cakes do contain Kirsch, this specific recipe has been carefully developed to be entirely alcohol-free. This makes it a perfectly safe and delicious dessert for children and adults who prefer to avoid alcohol. It’s truly kid-safe and mom-approved!
For those who want to avoid alcohol, the best substitute to capture that bold cherry flavor is to rely on the natural juices and intense flavor of dark sweet cherries, particularly canned varieties packed in heavy syrup. In this recipe, the heavy syrup from the canned cherries, combined with a touch of sugar and cornstarch, creates a robust and delicious cherry sauce that stands in perfectly for the traditional Kirsch-infused filling.
More Delightful Cake Recipes to Explore
- Irresistible Oreo Layer Cake
- Decadent Butterfinger Cake
- Rich Chocolate Raspberry Cake
- Festive Chocolate Peppermint Bundt Cake
Tap stars to rate!
Ultimate Black Forest Cake Recipe
Rate
Equipment
-
Glass Mixing Bowl
-
Electric Mixer (e.g., KitchenAid 9-Speed)
-
8 or 9-inch Springform Pans (2)
-
Spatula
Ingredients
Chocolate Cake
- 2 cups (240g) all-purpose flour
- ¾ cup (63g) Dutch-processed cocoa powder
- 1 tsp instant coffee granules (such as Folger’s), optional
- ½ tsp baking soda
- 1 tsp baking powder
- 1 tsp salt
- ½ cup (113g) unsalted butter, 1 stick, room temperature
- 1 ½ cups (297g) granulated sugar
- 2 large eggs
- 1 cup (236ml) buttermilk
- ½ cup (118ml) hot tap water
Sweet Cherry Sauce
- 2 cans Dark Sweet Cherries in heavy syrup, 15 oz each
- ½ cup (99g) granulated sugar
- 2 tsp cornstarch
Stabilized Whipped Cream
- 4 oz (114g) cream cheese, softened
- 1 cup (113g) powdered sugar
- 4 cups (944g) cold heavy whipping cream
- 2 tsp vanilla extract
Instructions
Chocolate Cake
-
Preheat the oven to 350º F (175ºC). Grease two 8 or 9-inch springform pans with butter, and line each pan with a parchment paper circle for easy cake removal. Set aside.
-
In a mixing bowl, combine the all-purpose flour, Dutch-processed cocoa powder, instant coffee granules, baking soda, baking powder, and salt. Whisk well and set aside.
-
In a separate mixing bowl, beat the room-temperature butter and granulated sugar with an electric mixer for 2 minutes until pale and fluffy. Add in the eggs, beating for 30 seconds after each addition.
-
Add in half of the buttermilk, beat for about 20 seconds. Add in half of the dry ingredients, beat just until combined. Add the remaining buttermilk plus the hot water, beat until mixed in. Finally, add the remaining dry ingredients and beat on low speed until just combined, being careful not to overmix.
-
Evenly divide the batter between the 2 pans, with approximately 2 ½ cups of batter in each. If using bake-even cake strips, secure them around the pans.
-
Bake both pans on the same rack in the center of the oven for 33-37 minutes or until a toothpick inserted in the center comes out clean. Baking times will vary.
-
Allow the cakes to cool for 20-30 minutes in the pans before removing them and allowing them to cool completely on a cooling rack.
Sweet Cherry Sauce
-
In a medium saucepan over high heat, combine the 2 cans of cherries (with syrup), granulated sugar, and cornstarch. Bring to a boil, whisking frequently.
-
Once boiling, reduce the heat to medium and simmer until the mixture thickens, about 5-10 minutes.
-
Allow the sauce to cool completely before adding to the cake.
Stabilized Whipped Cream
-
Place a metal or glass mixing bowl and beaters in the freezer for 15 minutes.
-
Remove the bowl from the freezer. Add the softened cream cheese and powdered sugar, and beat with an electric mixer for 1 minute or until smooth and creamy.
-
Add in the cold heavy whipping cream and vanilla extract. Beat with an electric mixer on high speed for 4-5 minutes, or until stiff peaks form and the cream is scoopable and holds its shape.
Assemble the Cake
-
On a serving platter or cake stand, place one layer of chocolate cake.
-
Pipe or spread a generous amount of whipped cream over the cake, creating a slight border.
-
Use a spoon to add a generous amount of cooled cherry sauce on top of the whipped cream.
-
Add the second layer of cake, gently placing it over the filling.
-
Pipe or spread a generous amount of whipped cream over the top of the second cake layer.
-
Spoon more cherry sauce on top of the whipped cream for decoration.
-
Top the cake with chocolate shavings and additional cherries.
-
Tip for Chocolate Shavings: Take a cold chocolate bar and use a vegetable peeler to make curls. If the chocolate breaks, warm the bar slightly in the microwave for 5-10 seconds until it curls easily.
Video
Notes
Nutrition
Carbohydrates: 50g |
Protein: 6g |
Fat: 31g |
Saturated Fat: 19g |
Polyunsaturated Fat: 1g |
Monounsaturated Fat: 8g |
Trans Fat: 0.2g |
Cholesterol: 114mg |
Sodium: 272mg |
Potassium: 178mg |
Fiber: 2g |
Sugar: 35g |
Vitamin A: 1200IU |
Vitamin C: 0.4mg |
Calcium: 91mg |
Iron: 2mg
Nutrition Disclosure
All nutritional values are approximate and provided to the reader as a courtesy. Changing ingredients and/or quantities will alter the estimated nutritional calculations.
Like this recipe? We’d love to hear from you! Rate and comment below!