
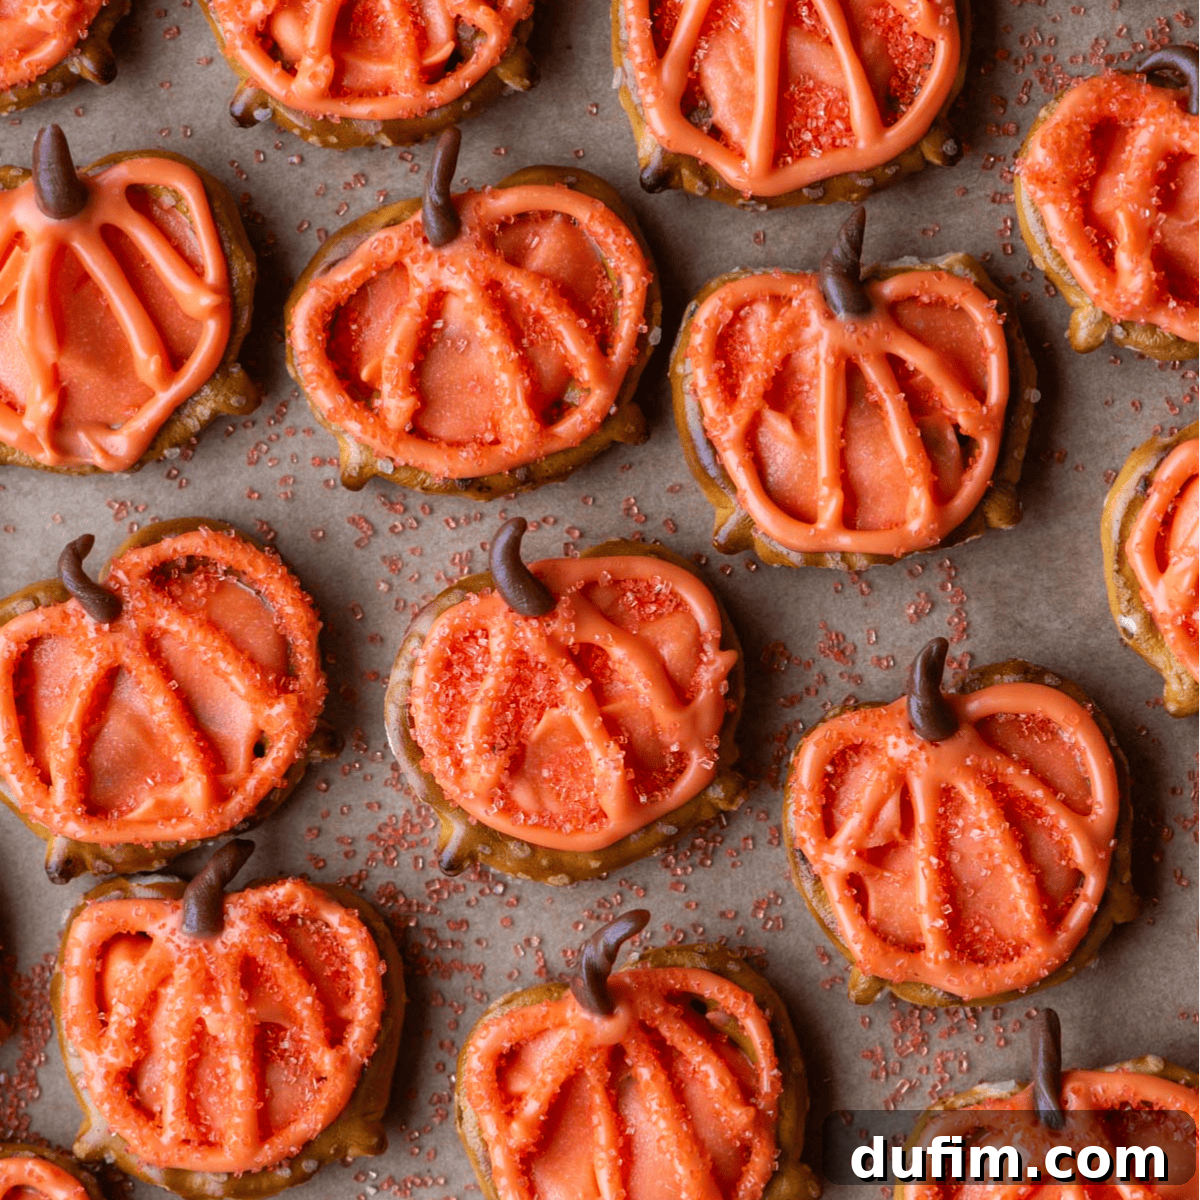
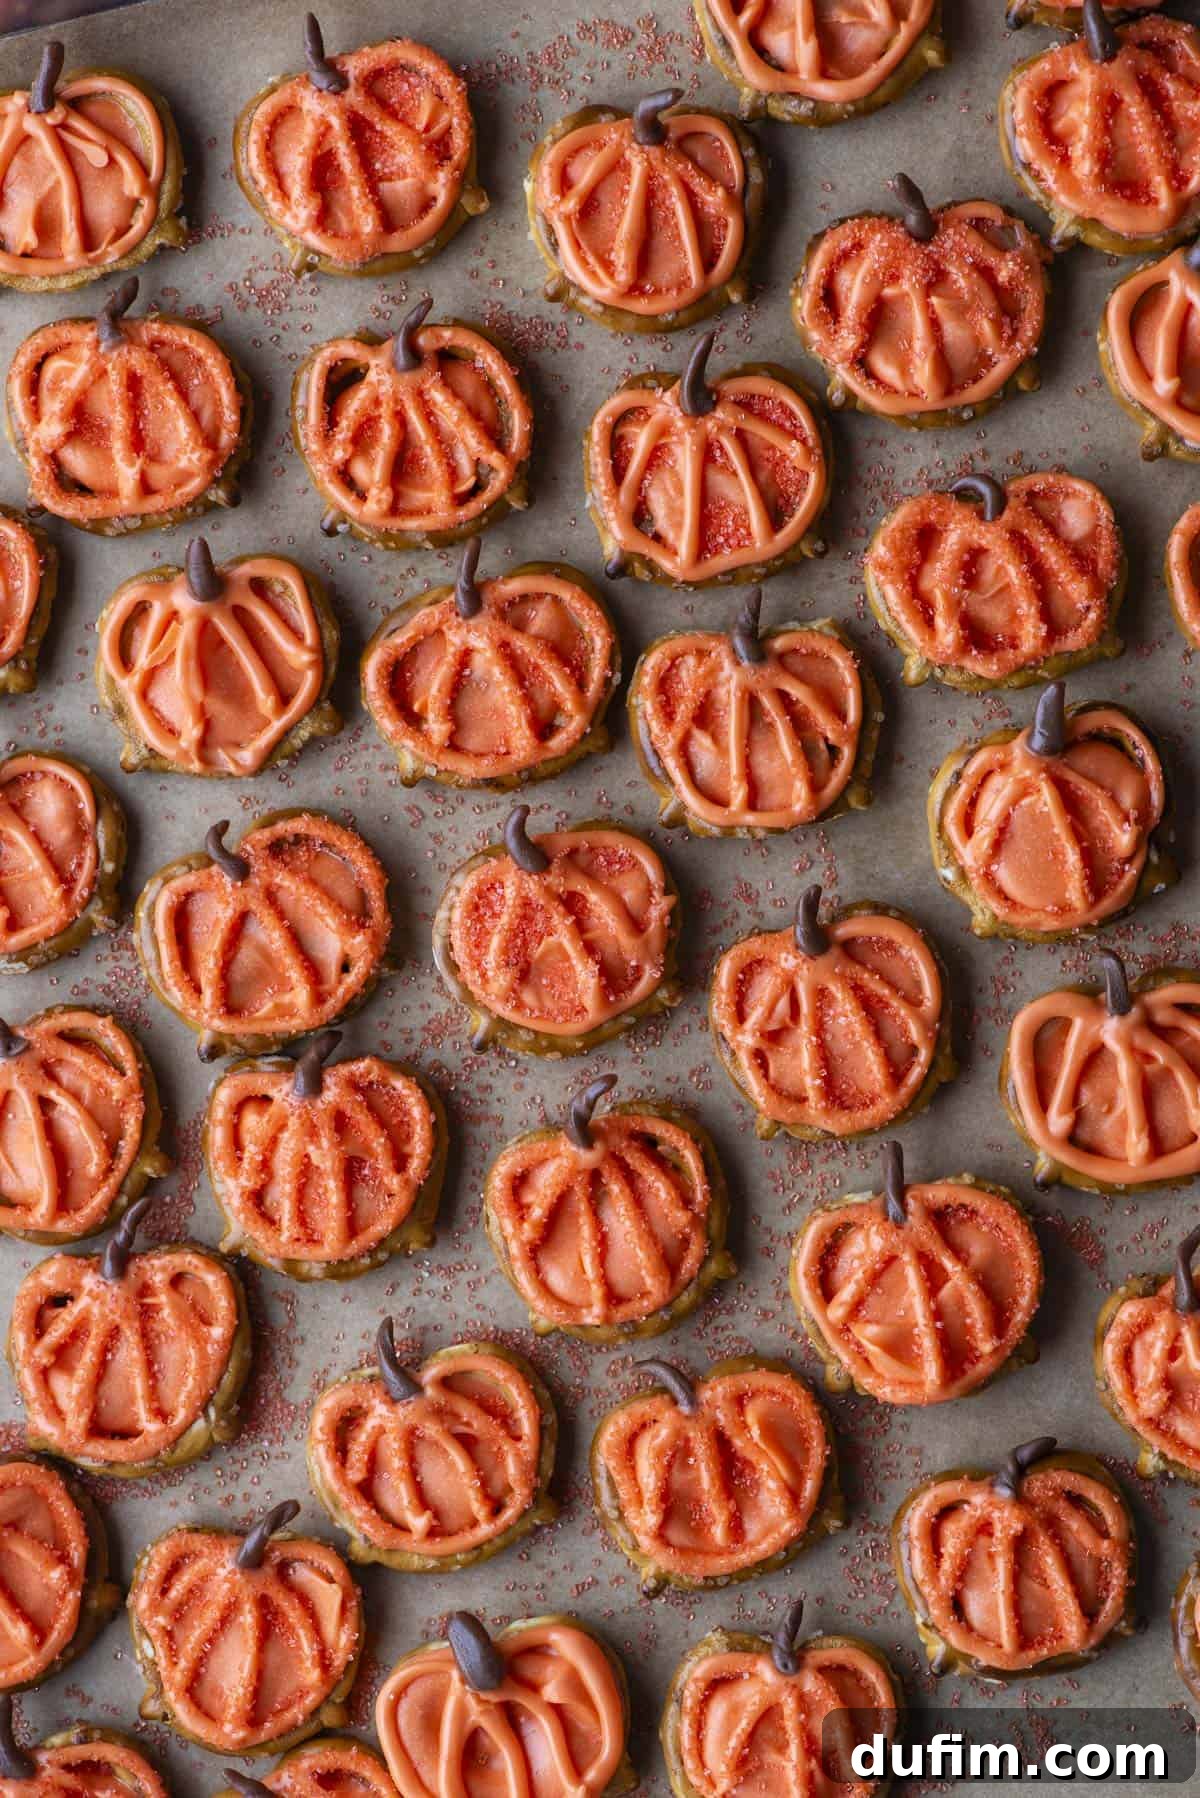
Welcome to the ultimate guide for creating irresistible mini pretzel pumpkins! These charming treats are not only incredibly easy to make but also serve as a delightful and festive addition to any autumn gathering. Whether you’re planning for Halloween, a harvest festival, or Thanksgiving, these pretzel pumpkins are guaranteed to be a hit with both kids and adults. With minimal ingredients like crunchy pretzels, vibrant candy melts, and simple decorations, you can transform ordinary snacks into extraordinary, party-ready pumpkins in a matter of minutes. The best part? No complicated tools or advanced baking skills are required; just gather a few common kitchen items and get ready for some creative fun!
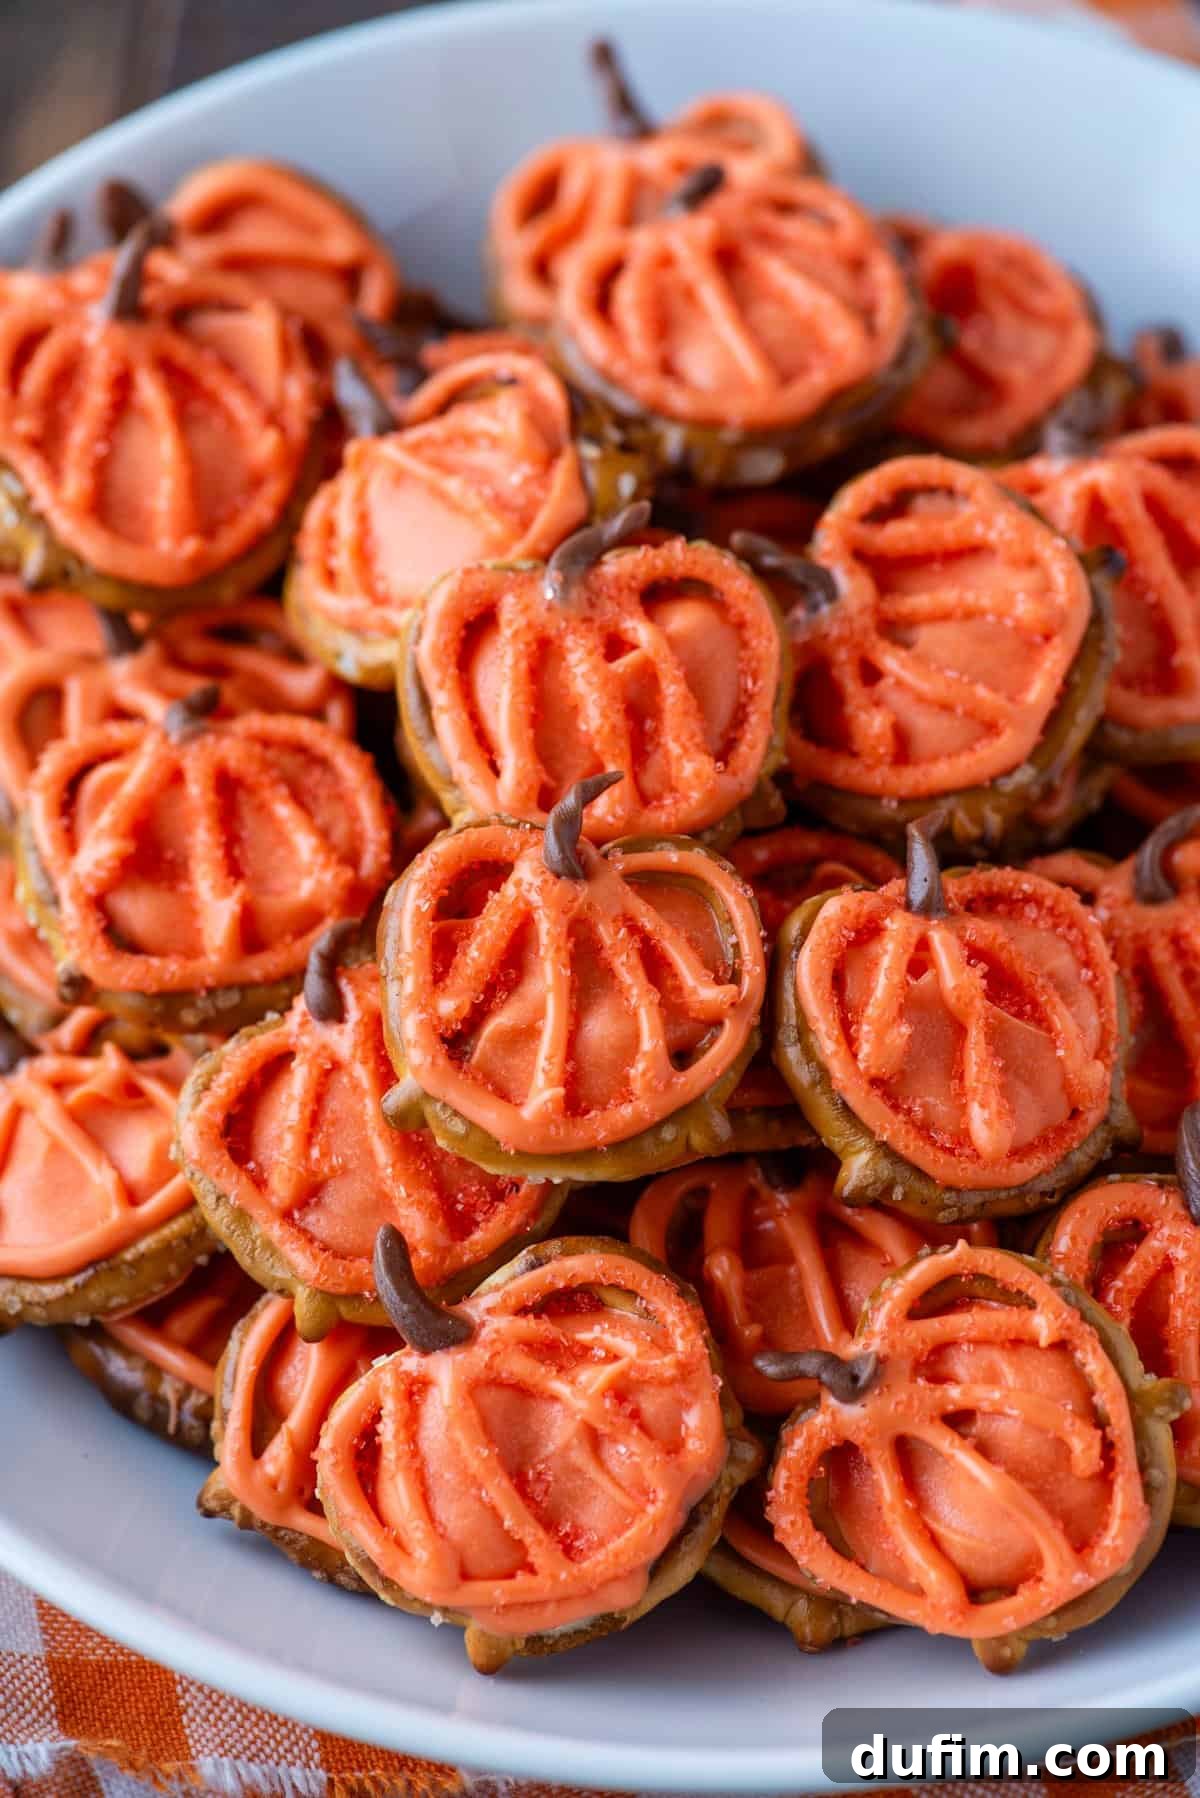
Why These Mini Pretzel Pumpkins Are a Must-Try Fall Treat
If you’re searching for a treat that combines simplicity with creative flair, look no further than these mini pretzel pumpkins. They stand out as a fantastic choice for several reasons, making them a favorite in homes and classrooms alike:
- Effortless Creation: Forget lengthy baking sessions and complex ingredient lists. These no-bake delights come together swiftly, proving that delicious and beautiful treats don’t require hours in the kitchen.
- Kid-Friendly Fun: This recipe is perfect for little hands! Children can actively participate in melting candy, filling pretzels, and adding decorations, making it a wonderful activity for family bonding or classroom projects. The process is safe, engaging, and yields immediate, satisfying results.
- Versatile for Any Occasion: While perfectly suited for Halloween, these pretzel pumpkins are equally fantastic for Fall harvest parties, school events, or even as a unique addition to your Thanksgiving dessert table. Their festive appearance instantly brightens any setting.
- Budget-Friendly Ingredients: With just three core ingredients – pretzels, candy melts, and Tootsie Rolls – this recipe is kind to your wallet. You likely have most of what you need already, and any additional decorative items are optional and inexpensive.
- Quick Turnaround Time: From start to finish, including setting time, you can have a batch of these adorable pumpkins ready in under an hour. This makes them ideal for last-minute party preparations or when a craving for a sweet, festive snack strikes.
- Crowd-Pleasing Appeal: The combination of salty pretzels and sweet candy melts is universally loved. Add in the cute pumpkin design, and you have a treat that disappears quickly at any gathering.
Essential Tools for Crafting Your Pretzel Pumpkins
One of the many advantages of this recipe is its minimal requirement for specialized equipment. You truly can make these delightful treats using items you probably already have in your kitchen, embodying the spirit of ease and flexibility.
- Baking Sheet: A standard baking sheet provides a flat surface for arranging your pretzels and letting the candy set.
- Parchment Paper or Silicone Mat: Essential for preventing the candy from sticking to the baking sheet. Both options work wonderfully and make for easy cleanup.
- Microwave-Safe Bowl: For melting your candy melts. A heat-safe bowl can also be used for a double-boiler method if preferred.
- Small Spoon or Butter Knife: Perfect for carefully filling the pretzel centers with melted candy. These common utensils help in creating that perfect pumpkin shape.
- Piping Bag or Squeeze Bottle (Optional, but Recommended for Details): While not strictly necessary, a piping bag fitted with a small round tip or a simple squeeze bottle (like those used for condiments) will make outlining and piping the pumpkin ridges much easier and more precise.
- Plastic Sandwich Bag (Alternative to Piping Bag): If you don’t have a piping bag, a plastic sandwich bag with a tiny corner snipped off works just as well for controlled piping.
- Toothpicks: Handy for adjusting the Tootsie Roll stems or fine-tuning any piped details before the candy sets.
Ingredients & Smart Substitutions for Your Pretzel Pumpkins
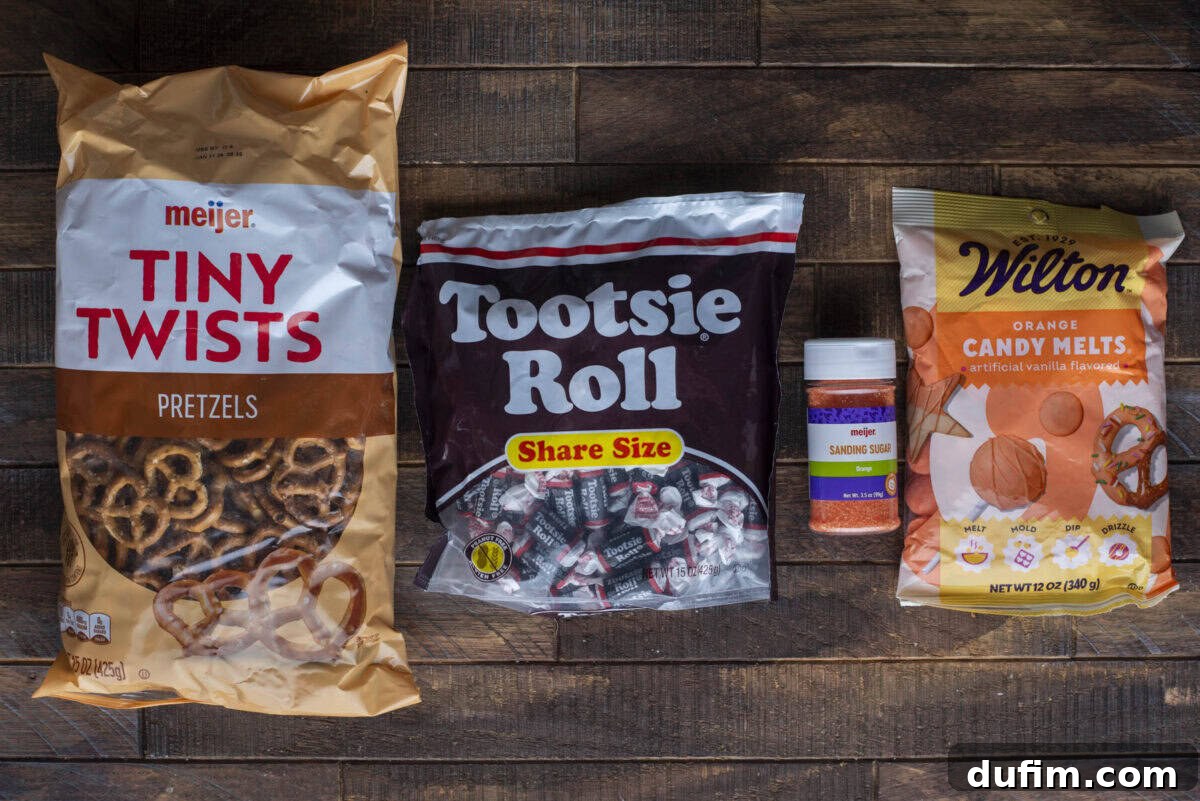
Crafting these adorable Fall-themed pretzels requires only a handful of ingredients, making it a simple and accessible recipe for anyone. Here’s a detailed look at what you’ll need and some clever substitutions to suit your pantry or dietary needs.
- Mini Pretzels: The foundation of our pumpkin shape. Mini pretzel twists work best as their natural holes create the perfect frame for the candy “pumpkin” body.
- Substitution: You could also use small circular pretzels for a slightly different look. For a gluten-free option, simply opt for gluten-free mini pretzels, which are widely available in most grocery stores.
- Tootsie Rolls: These delightful chewy candies are ideal for shaping into the little brown stems of your pumpkins. Their pliable texture makes them easy to manipulate.
- Substitution: If Tootsie Rolls aren’t available, you have a few creative alternatives:
- Brown M&Ms: Press a single brown M&M gently into the top.
- Green M&Ms or Green Sour Straws: For a vibrant green stem, use these instead. Cut sour straws into tiny pieces and shape.
- Chocolate Chips: A small dark chocolate chip placed point-down can also mimic a stem.
- Small pieces of thin chocolate bar: Cut into tiny rectangles.
- Substitution: If Tootsie Rolls aren’t available, you have a few creative alternatives:
- Orange Candy Melts: These are crucial for the vibrant orange color and smooth finish of your pumpkins. They melt easily and set quickly, providing a professional look. I recommend having at least two bags on hand, especially if making a larger batch, to ensure you have enough for both filling and detailing.
- Substitution:
- White Candy Melts + Orange Food Coloring: If you can’t find orange candy melts, use white ones and tint them with oil-based food coloring (gel food coloring works too, but ensure it’s suitable for candy melts to avoid seizing). Standard liquid food coloring might make the candy seize up.
- Almond Bark (Vanilla Flavored) + Orange Food Coloring: Similar to white candy melts, almond bark can be melted and colored.
- White Chocolate Chips + Orange Food Coloring: Use high-quality white chocolate for best results, and be very careful when adding food coloring as chocolate is more sensitive to moisture than candy melts.
- Substitution:
- Orange Sanding Sugar (Optional, but Recommended): This adds a beautiful, sparkling texture to your pumpkins, making them even more visually appealing.
- Substitution/Alternative: Other orange sprinkles, or even a dusting of plain granulated sugar for a subtle shimmer.
How to Make Mini Pretzel Pumpkins: A Step-by-Step Guide
Creating these charming pumpkin pretzels is a fun and straightforward process. Follow these detailed steps to achieve perfect, festive treats every time!
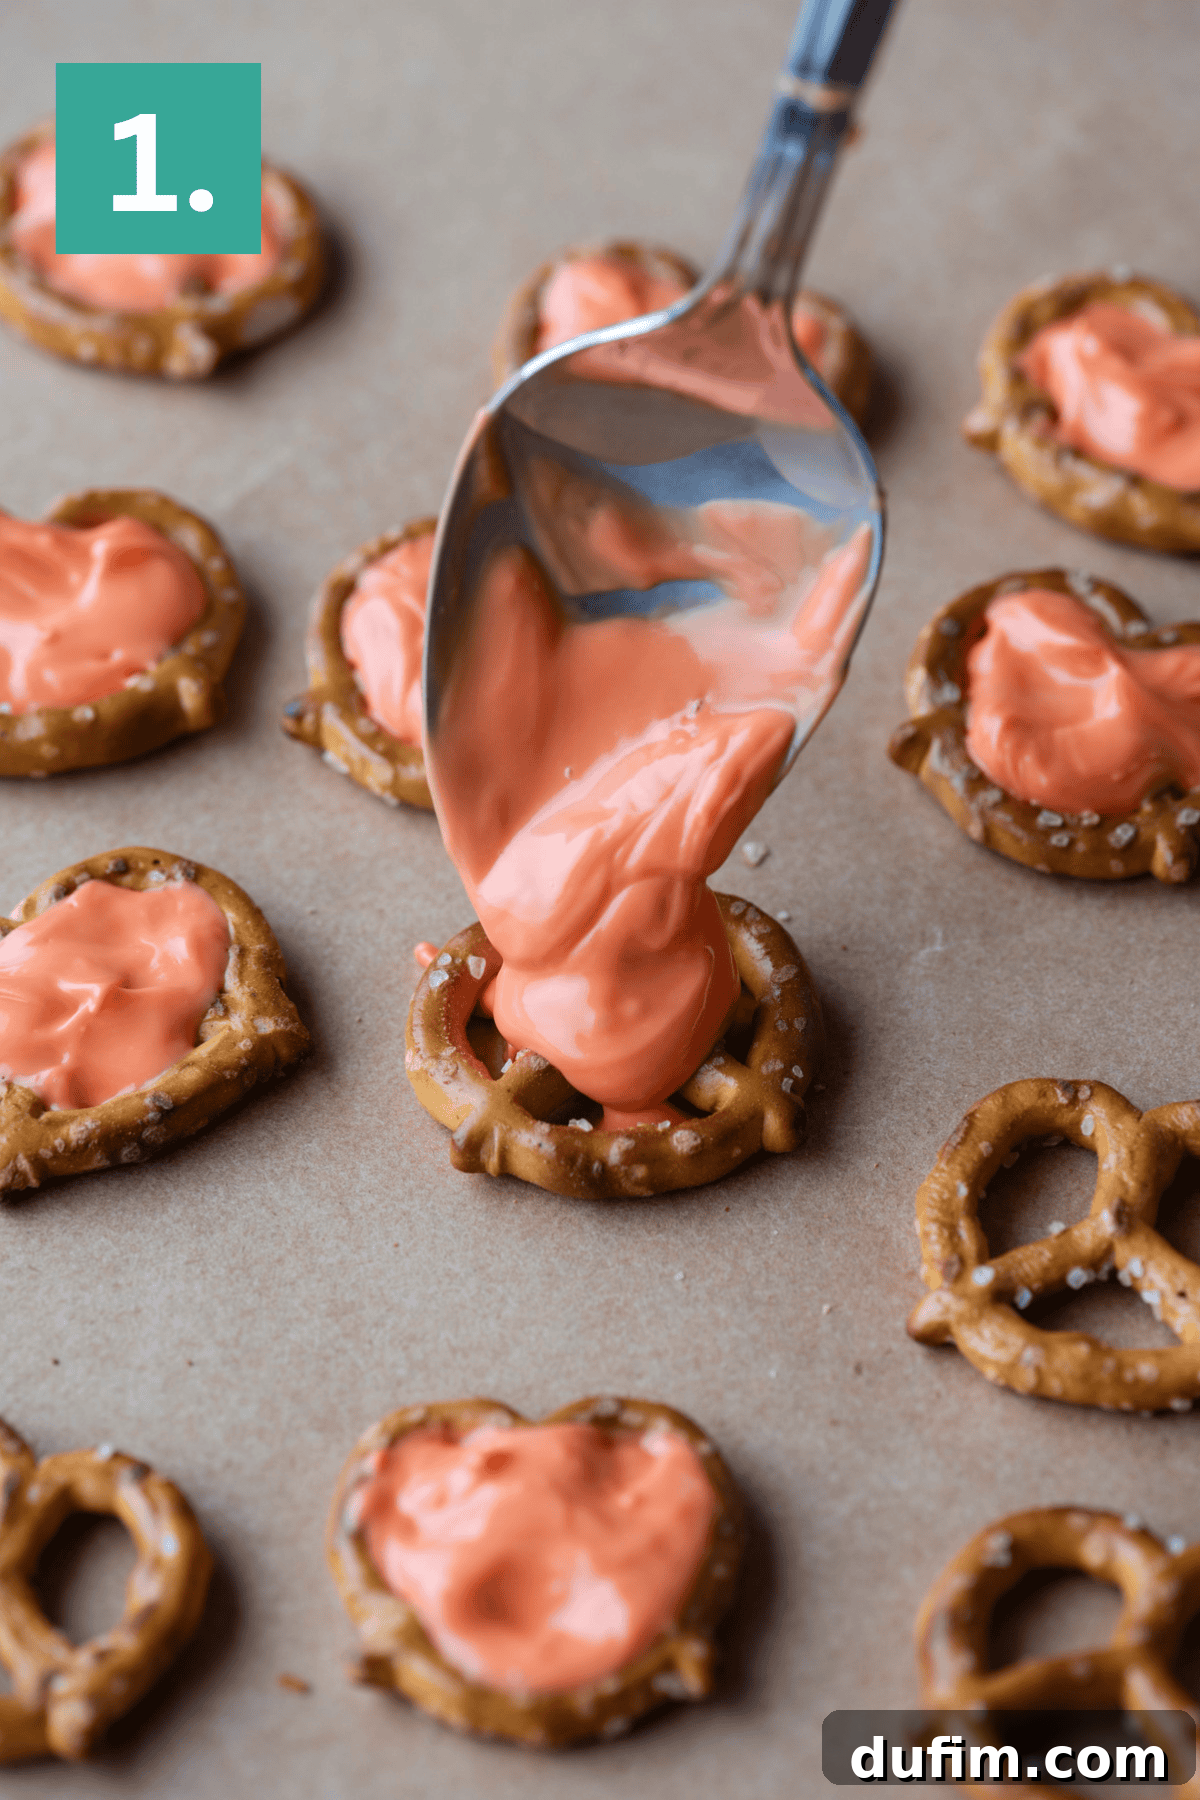
- Melt the Candy Wafers: Carefully melt the orange candy wafers. The easiest method is to follow the package directions for microwave melting. Alternatively, place them in a microwave-safe bowl and heat at 50% power in 2-minute intervals, stirring thoroughly after each interval, until the candy is completely smooth and free of lumps. You can also use a double boiler on the stovetop for a more controlled melt. Ensure the candy is fluid enough for easy pouring but not overly hot.
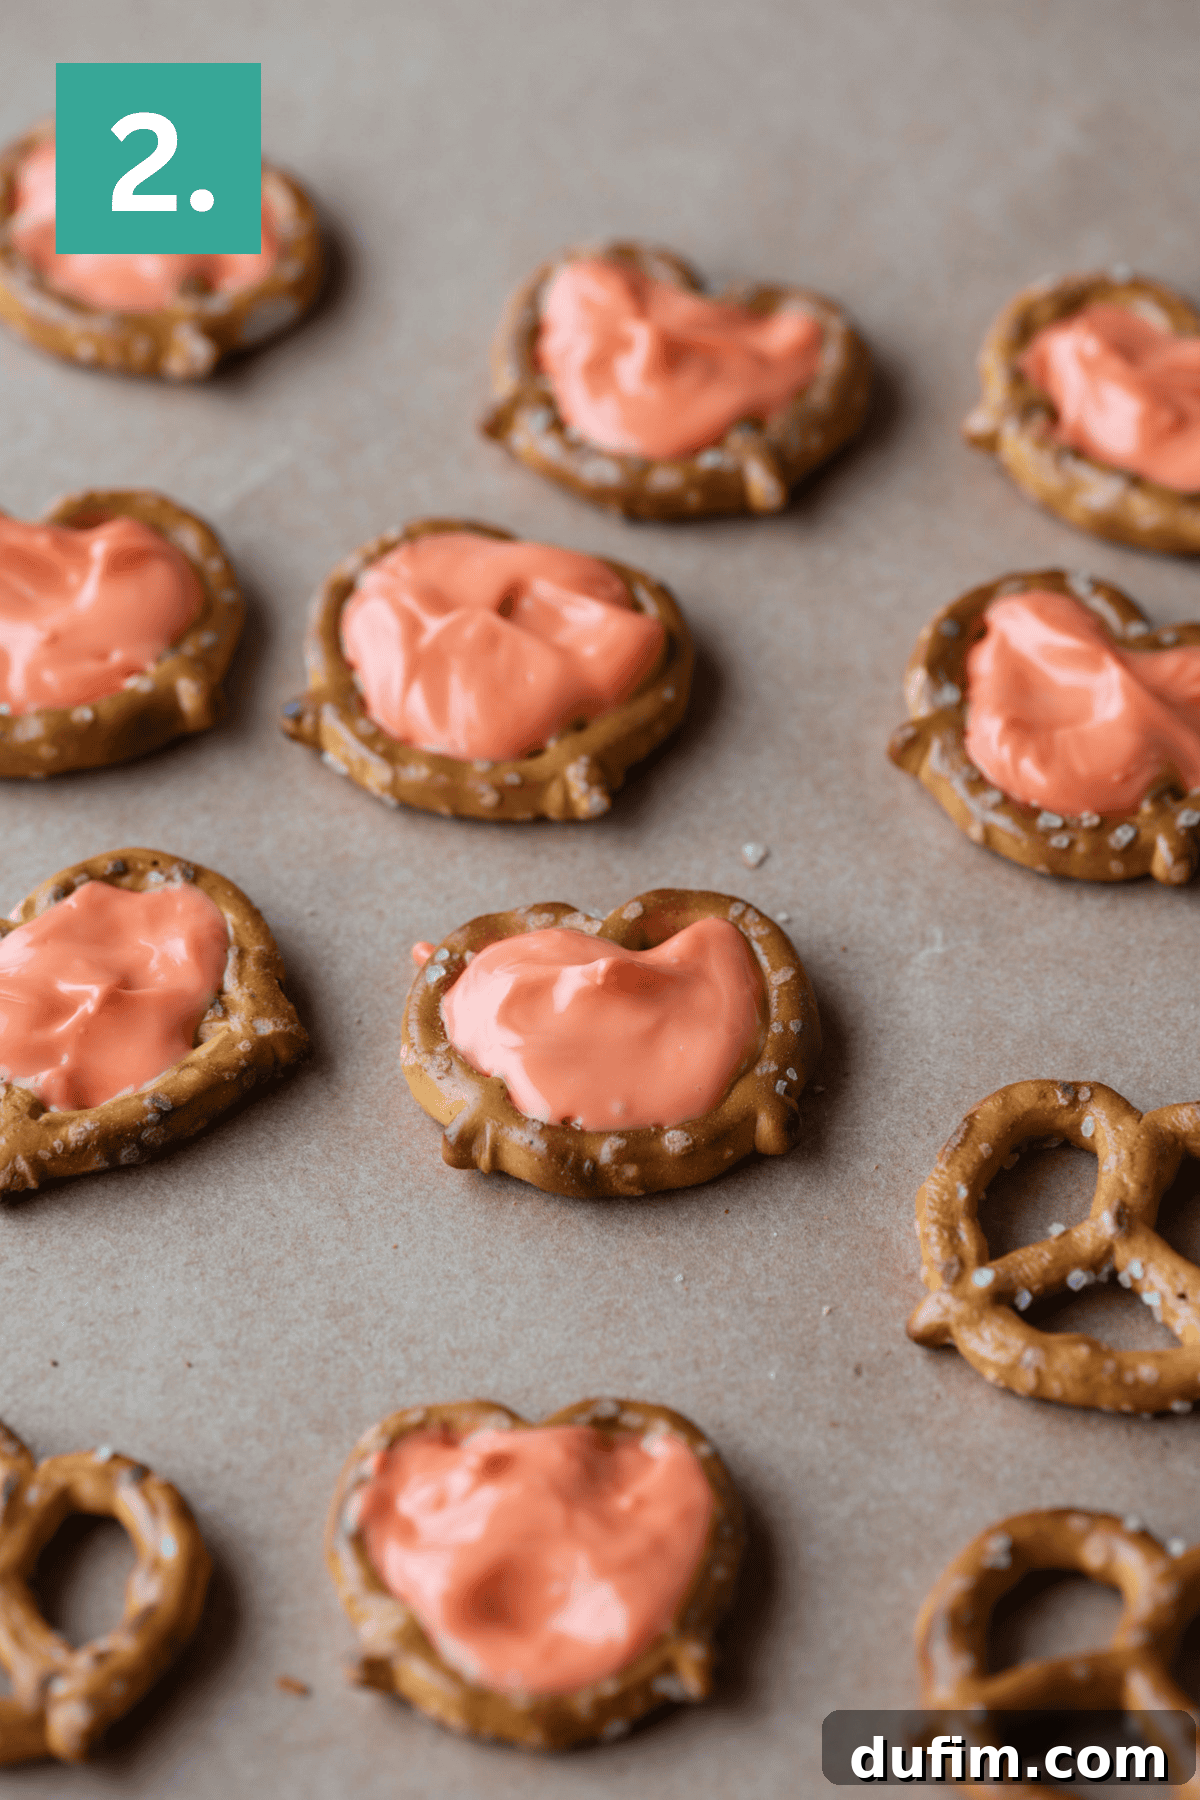
- Prepare and Fill Pretzels: Line a baking sheet with parchment paper or a silicone mat. This step is crucial for easy removal once the candy sets. Arrange your mini pretzels on the lined sheet, leaving a small space between each one to prevent them from sticking together. Using a small spoon or the tip of a butter knife, carefully fill the centers of the pretzel twists with the melted orange candy. Aim to create a solid, pumpkin-like shape framed by the pretzel. If your candy starts to thicken and become difficult to work with, simply reheat it briefly until it reaches the desired consistency again.
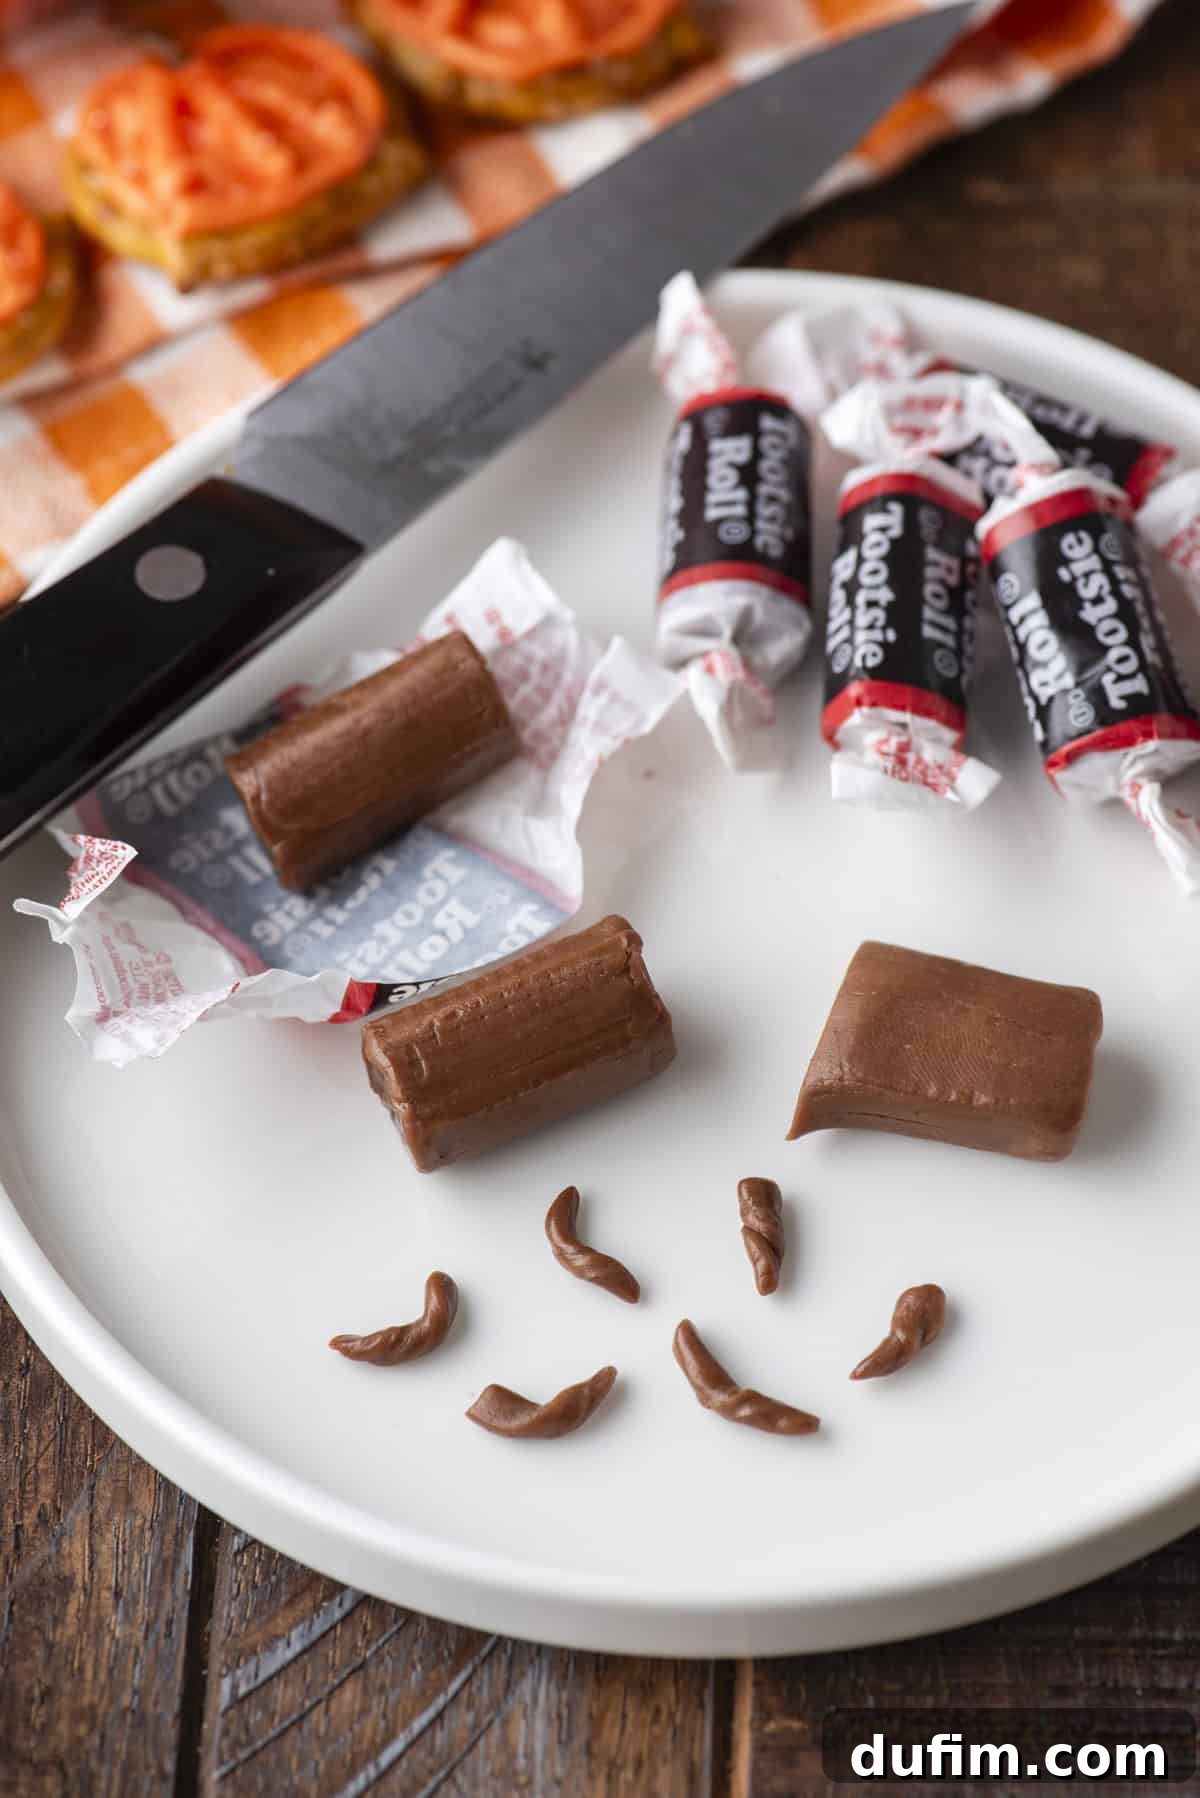
- Craft the Tootsie Roll Stems: While your filled pretzels begin to set slightly (they don’t need to be fully firm yet), prepare your pumpkin stems. Unwrap a few Tootsie Rolls. Take a very small piece from a Tootsie Roll, then cut that piece in half or even smaller, depending on the desired stem size. Roll and twist these small pieces between your fingers to shape them into miniature pumpkin stems. They don’t have to be perfect; a little rustic charm adds character! Set these aside on a separate piece of parchment paper.
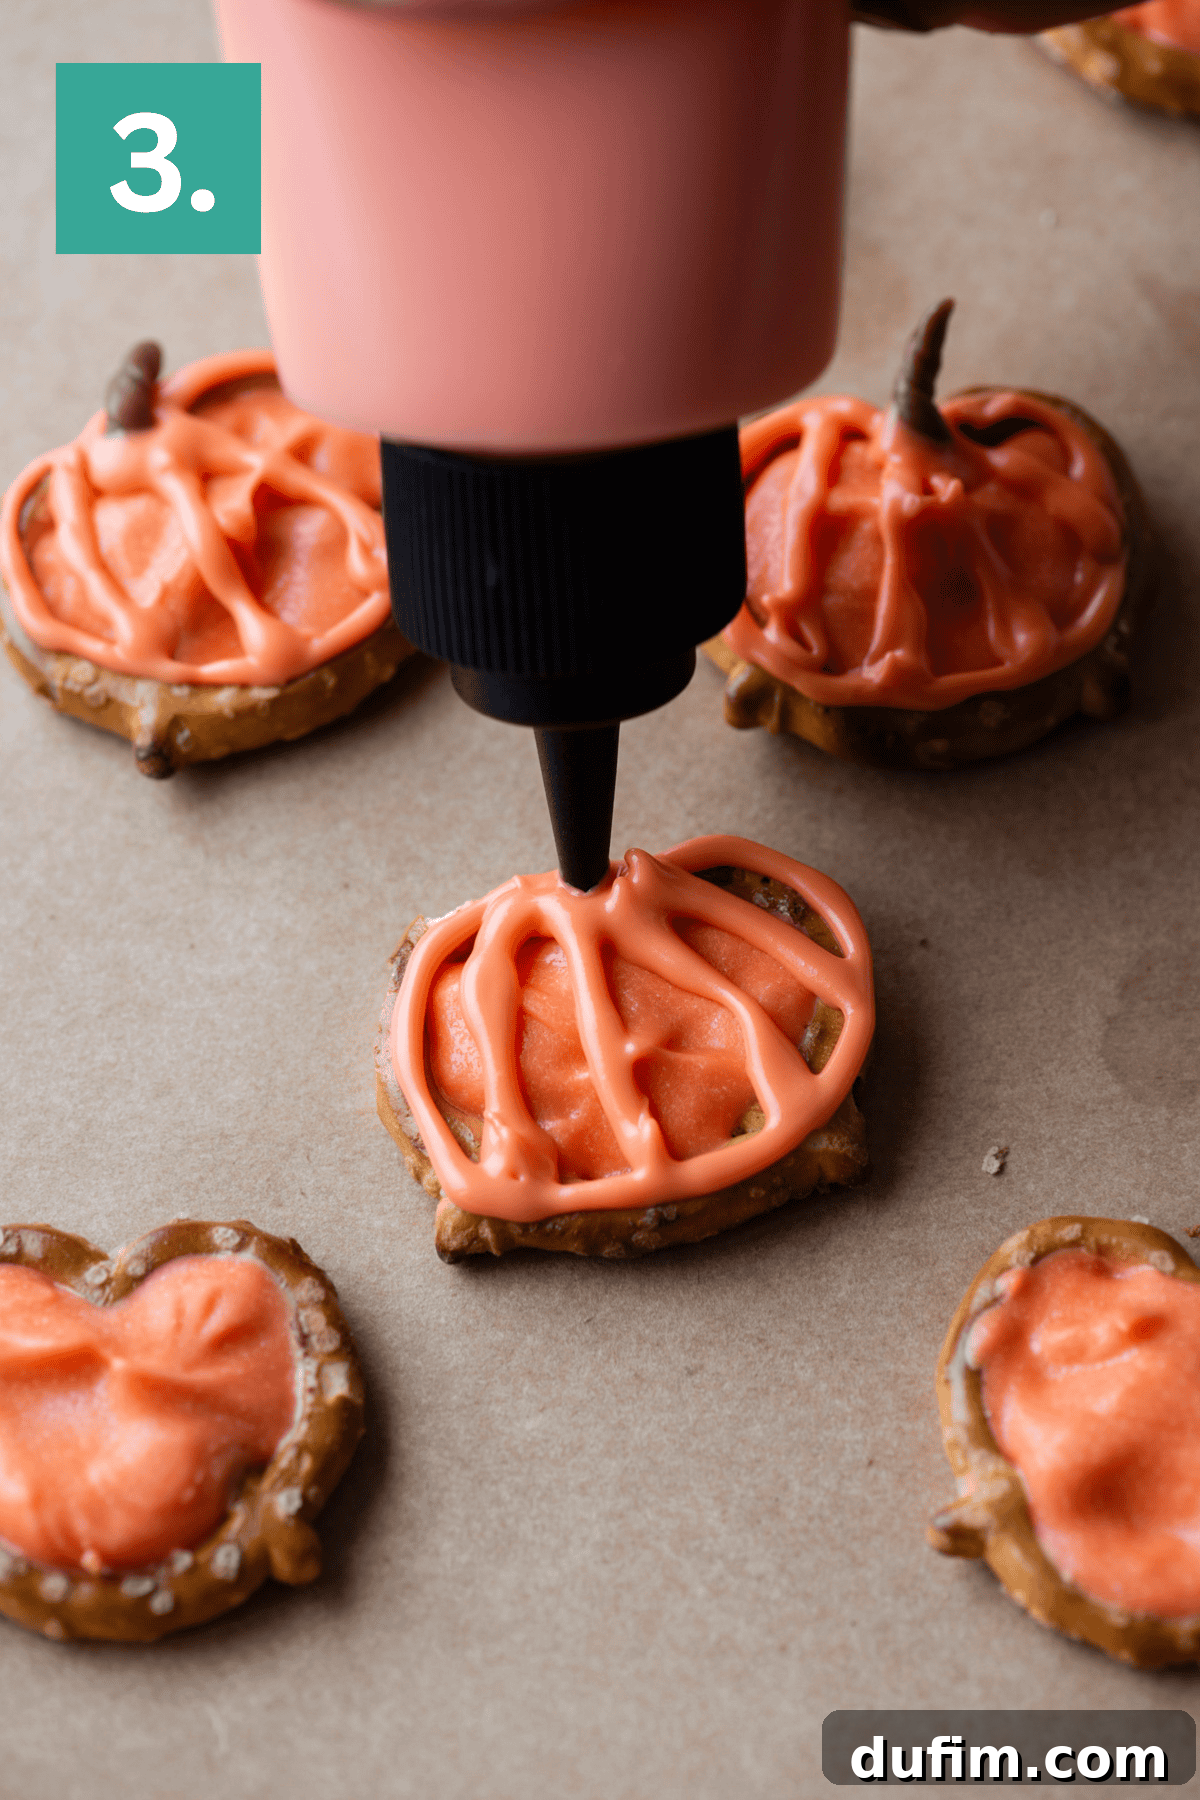
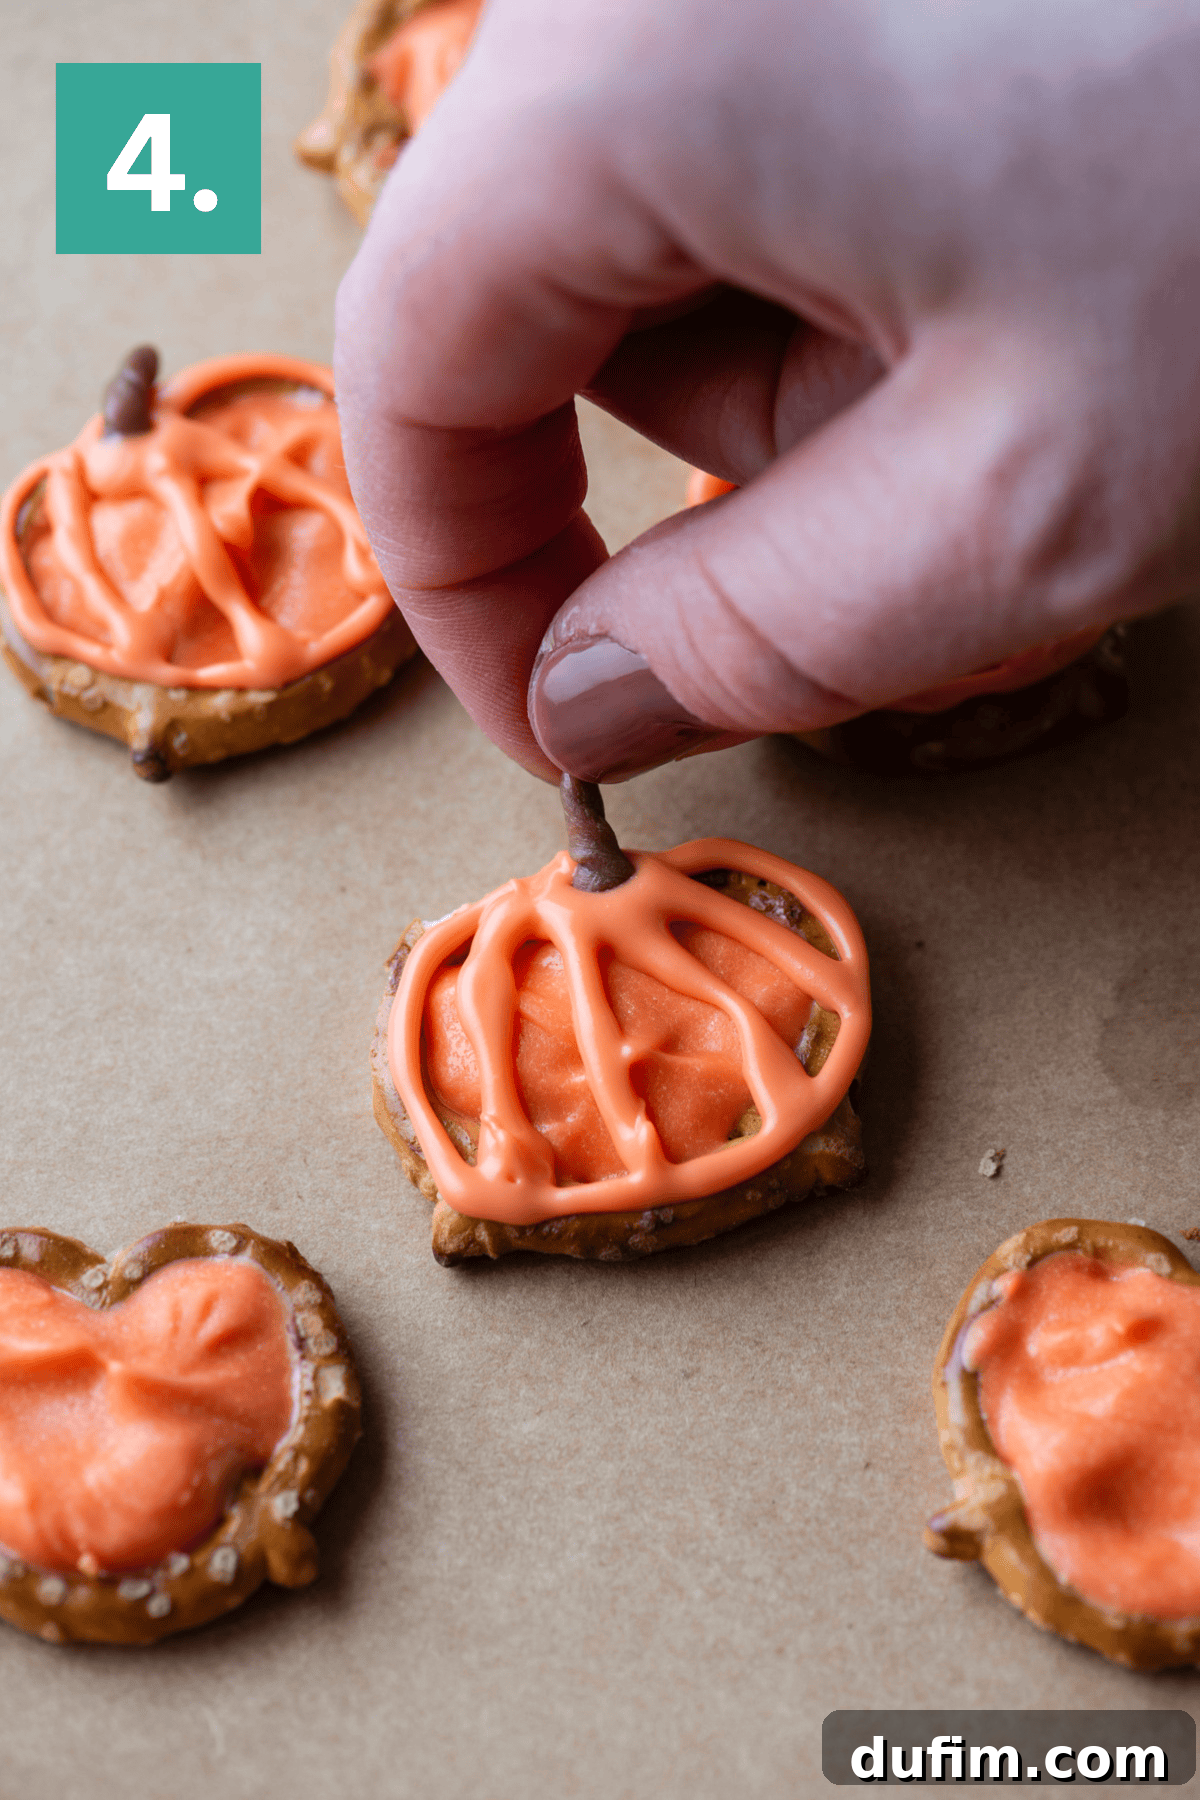
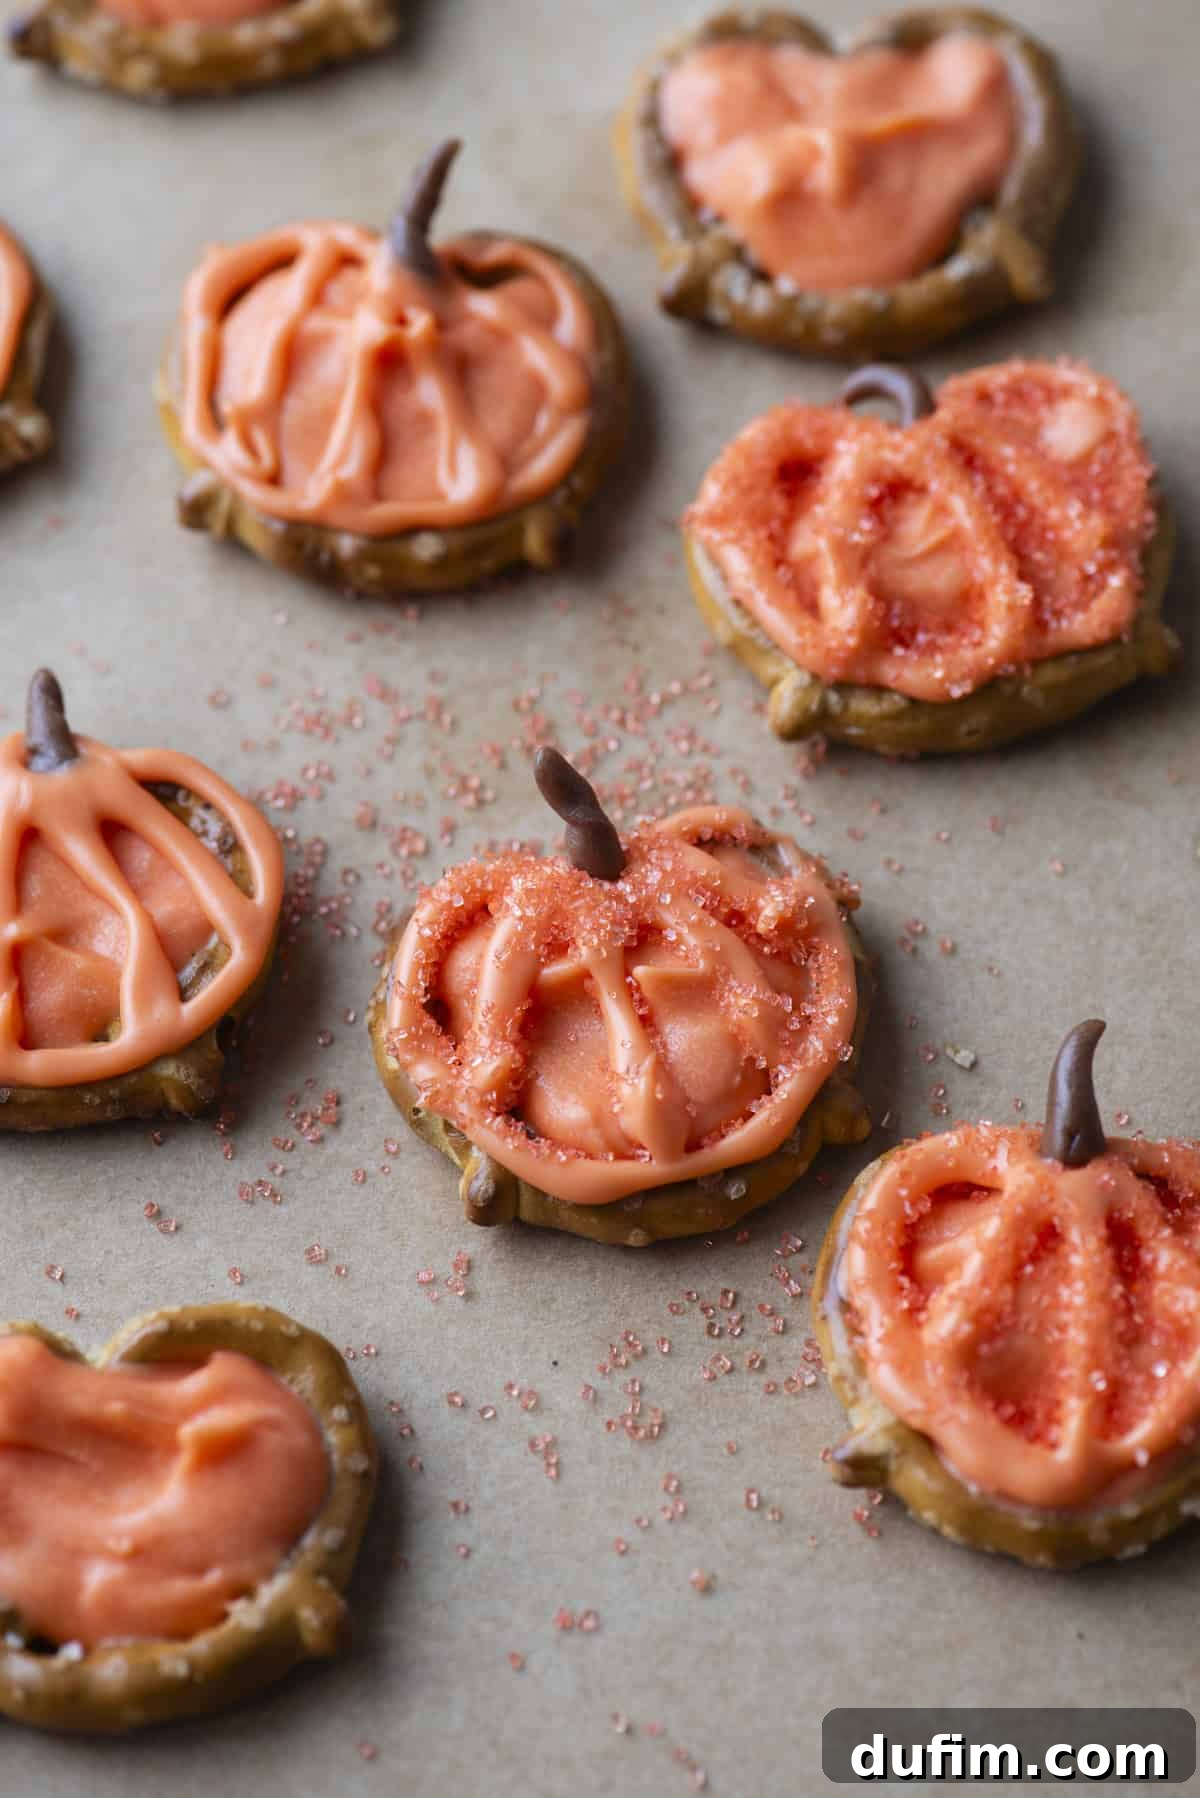
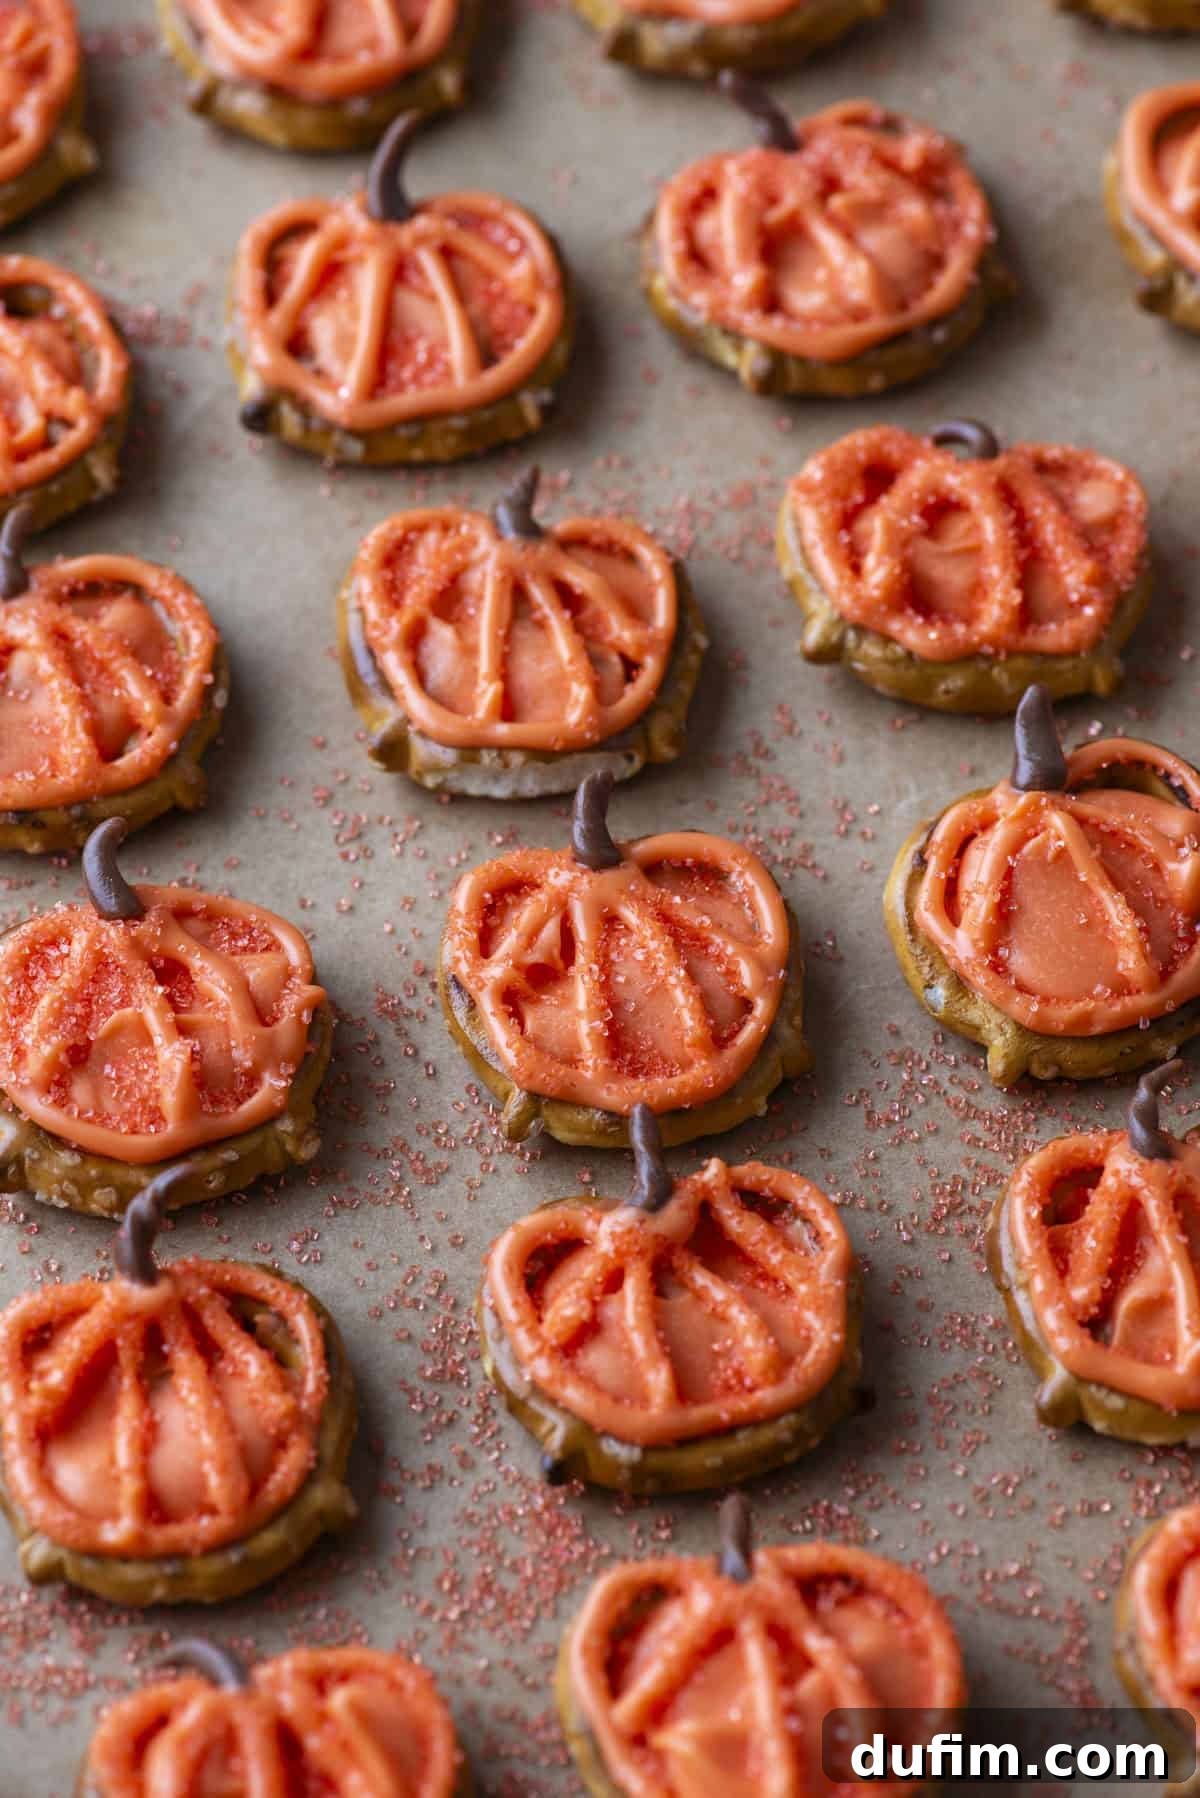
- Add Decorative Details: For the finishing touches, melt another package of orange candy melts. This second batch is specifically for detailing, so aim for a slightly thinner consistency if possible, for easier piping. Transfer the melted candy to a squeeze bottle with a small round tip or a piping bag with a fine tip (or a plastic bag with a tiny corner snipped off). Carefully outline the pretzel pumpkin shape, then pipe several vertical lines from top to bottom to mimic the distinct ridges of a pumpkin. Finally, add a small dot of melted candy where the top arches of the pretzel meet – this will be where your stem is placed.
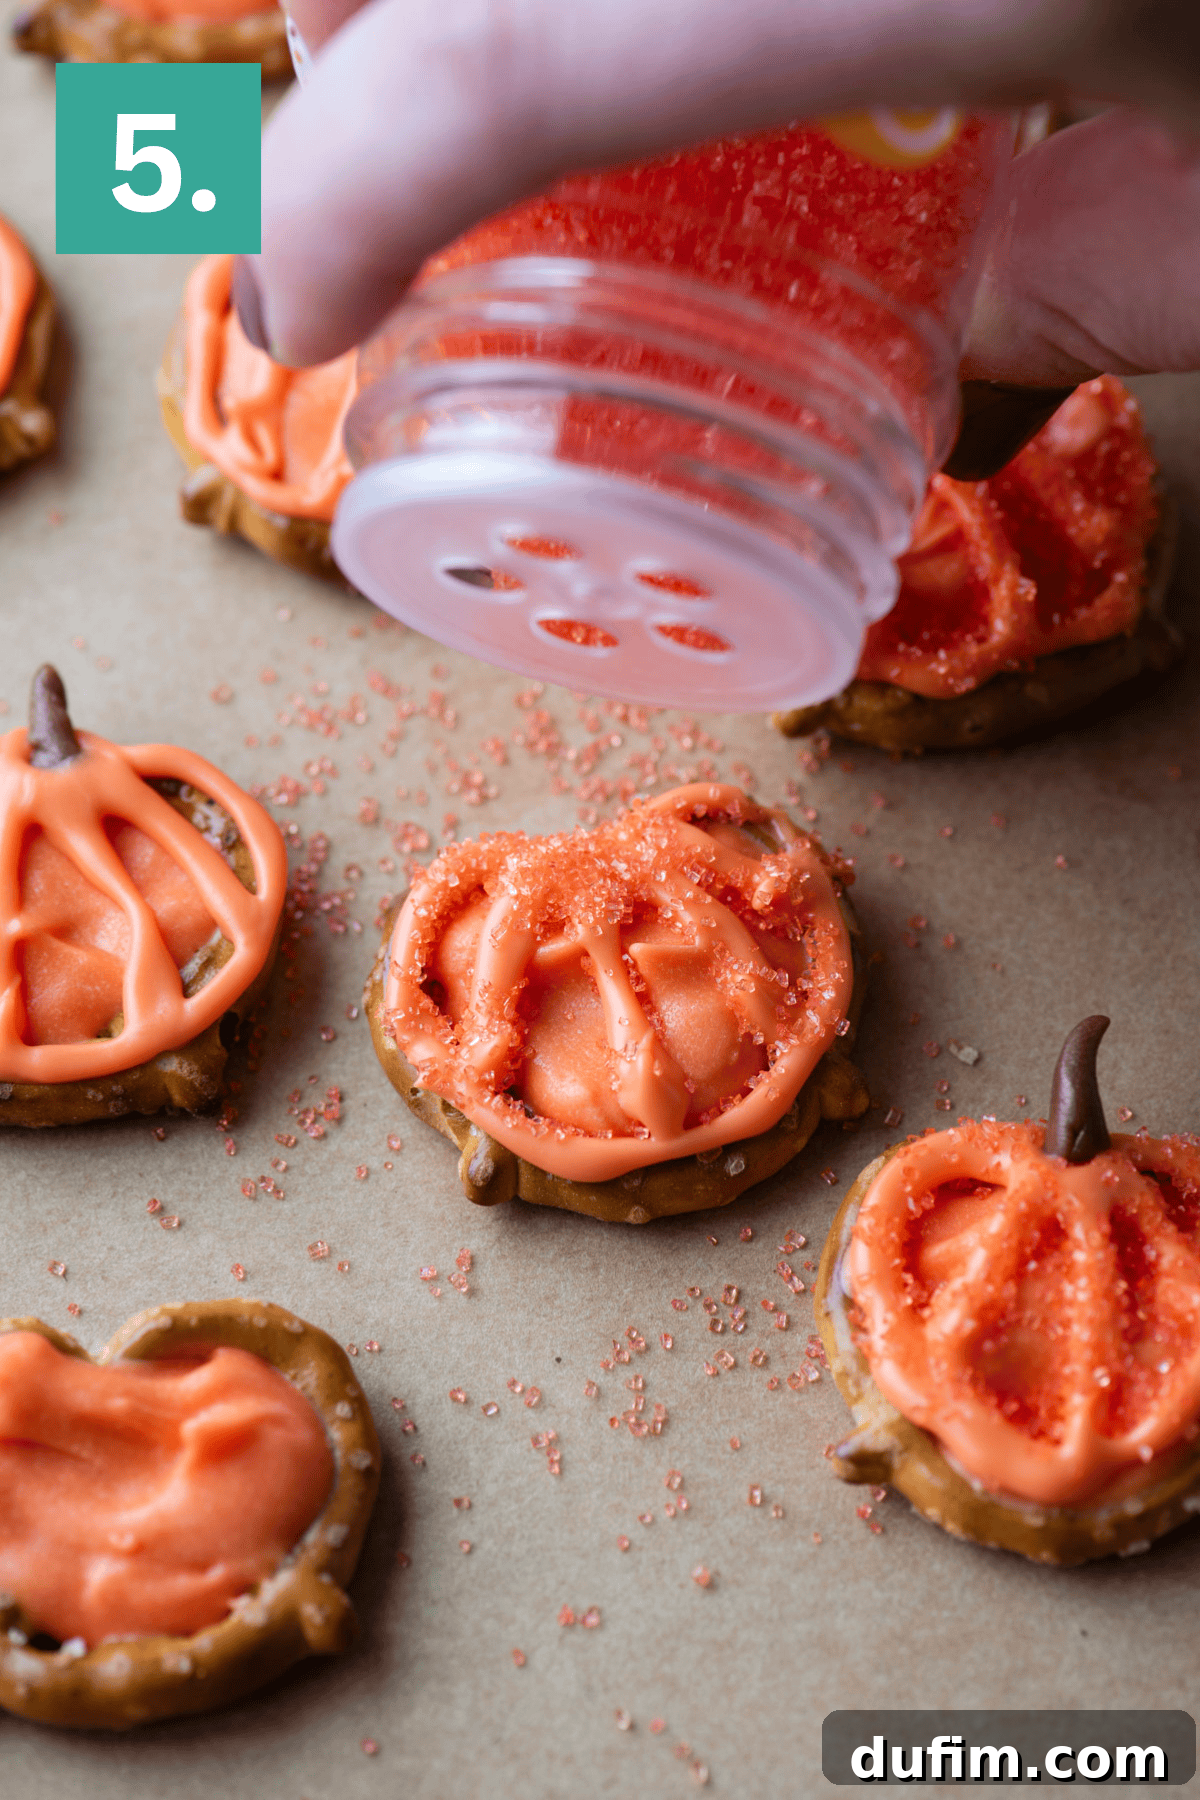
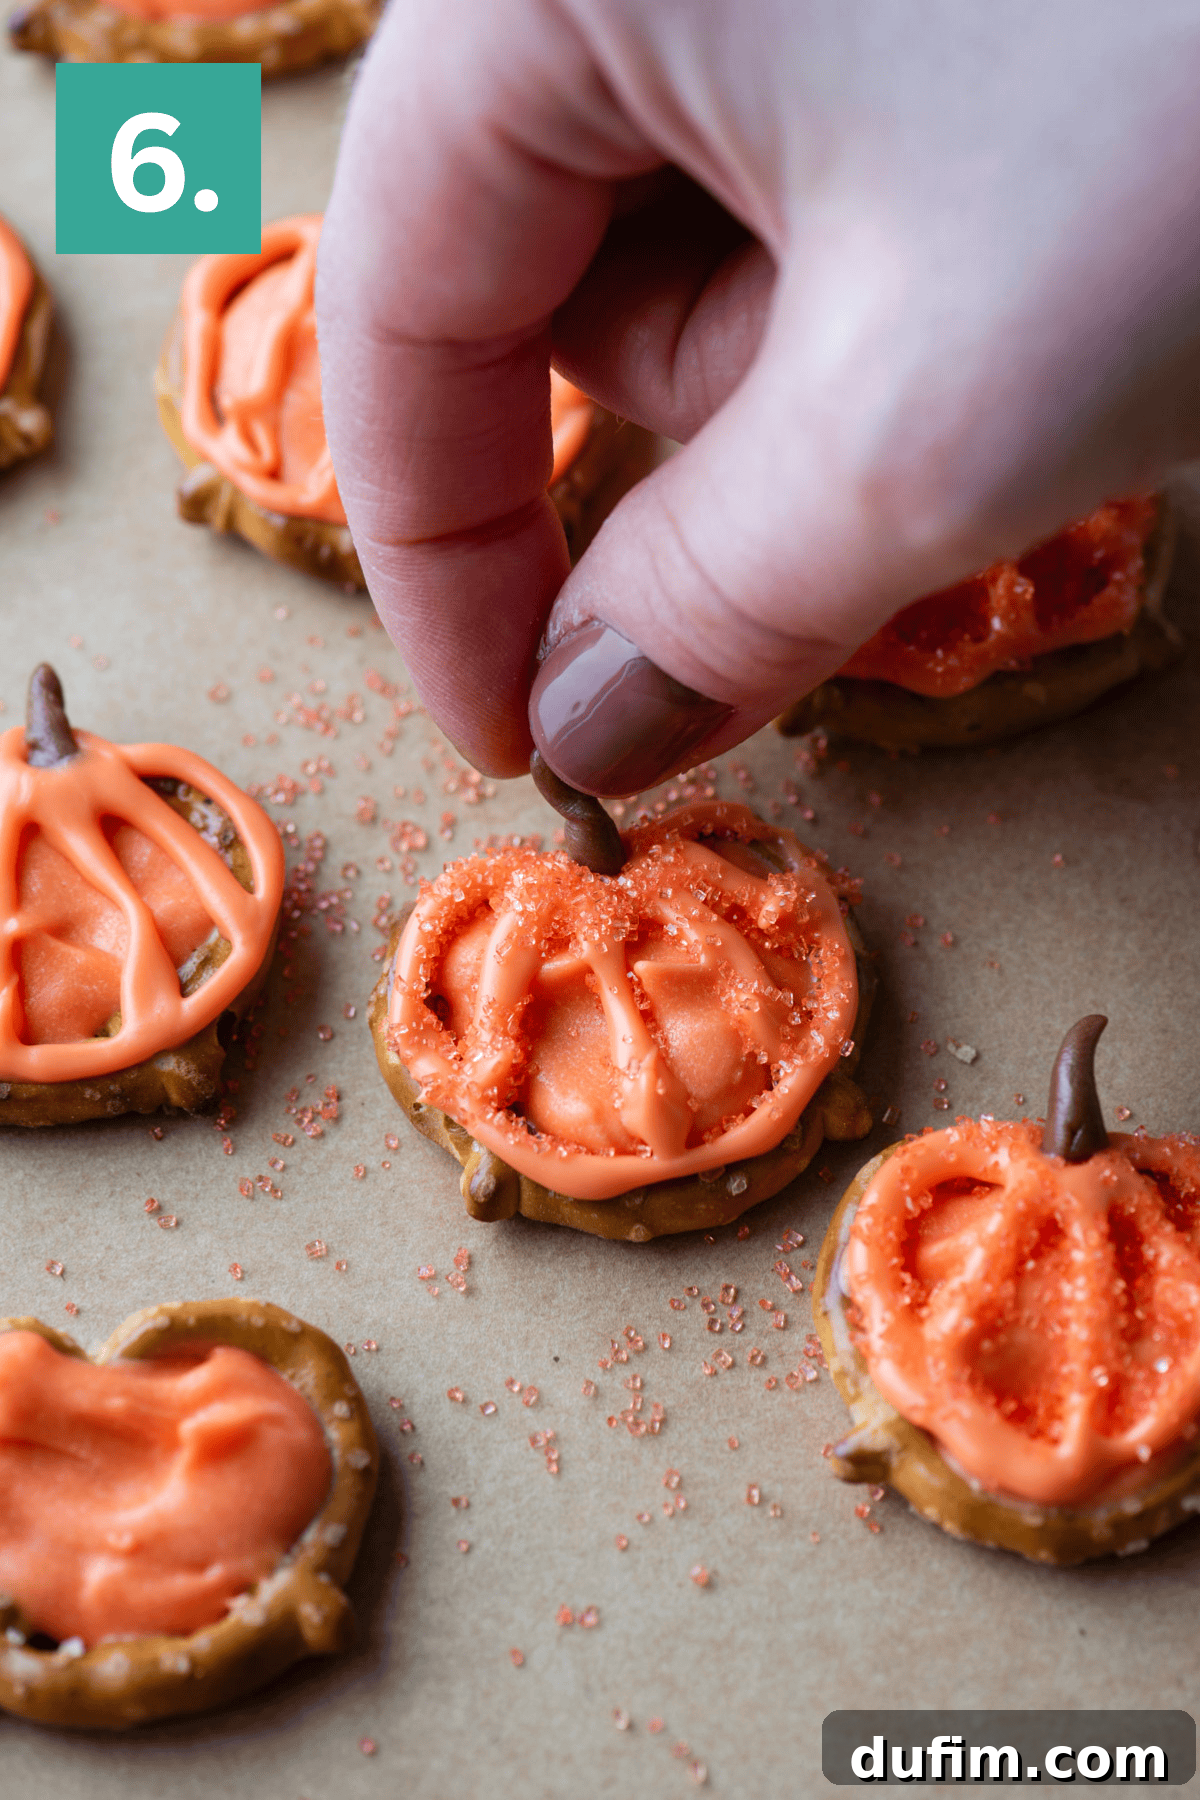
- Garnish and Attach Stems: For an extra festive touch, immediately sprinkle orange sanding sugar over the piped outline and ridges while the candy is still wet. This will ensure the sugar adheres beautifully. Next, take one of your prepared Tootsie Roll stems and gently press it onto the dot of melted candy at the top of each pumpkin. If needed, use a toothpick to carefully adjust the stem’s position until it looks just right.
- Allow Candy to Set: This is the final, and perhaps most patient, step! Let your beautifully decorated pretzel pumpkins sit undisturbed at room temperature until the candy has fully hardened and set. This typically takes about 30 minutes, but it can vary based on humidity and room temperature. Once firm, they can be easily peeled off the parchment paper or silicone mat.
Troubleshooting Common Pretzel Pumpkin Issues
Even with a simple recipe, things can sometimes go awry. Here are some quick fixes for common problems you might encounter:
- Candy Melts Too Thick: If your candy is too thick to spread or pipe smoothly, add a tiny amount of coconut oil or vegetable shortening (about 1/4 teaspoon per cup of melts) and stir until it reaches a smoother consistency. Reheat gently if necessary.
- Candy Melts Seized: If your candy turns grainy and hard, it likely came into contact with water. Unfortunately, seized candy is difficult to recover. Always use dry utensils and bowls.
- Pretzels Breaking: Handle pretzels gently, especially when filling. If many are breaking, try a different brand or a slightly thicker pretzel.
- Stems Not Sticking: Ensure the dot of melted candy for the stem is still wet when you press the Tootsie Roll. If it’s already hardened, add a fresh, tiny drop of melted candy before placing the stem.
- Candy Setting Too Fast: Work in smaller batches if your environment is cool, or if the candy is cooling quickly. Reheat your candy melts frequently to maintain a workable consistency.
Storage and Make-Ahead Tips
Planning ahead? These pretzel pumpkins are perfect for preparing in advance!
- To Store: Once fully set, store your mini pretzel pumpkins in an airtight container or a Ziploc bag at room temperature. They will stay fresh for up to 1-2 weeks, though they are best enjoyed within the first few days. Avoid refrigeration, as it can cause condensation and make the candy “sweat.”
- To Make Ahead: You can prepare the filled pretzels (steps 1 and 2) a day or two in advance. Store the plain, set pretzels in an airtight container. When you’re ready to decorate, simply resume with step 3 (making stems) and continue with detailing. This is a fantastic way to spread out the work for parties!
Creative Variations & Customization
While the classic orange pumpkin is adorable, don’t hesitate to get creative with your pretzel treats!
- Color Theme Swaps:
- Ghosts: Use white candy melts, chocolate chips for eyes, and maybe a tiny pretzel piece for a mouth.
- Frankenstein Monsters: Green candy melts, mini chocolate chips for eyes, and black edible marker for stitches.
- Vampire Bats: Dark chocolate melts, two candy eyes, and broken pretzel pieces for wings.
- Alternative Toppings:
- Chocolate Chips: Sprinkle mini chocolate chips over the wet candy for extra texture.
- Sprinkles: Beyond sanding sugar, experiment with Halloween-themed sprinkles, nonpareils, or even edible glitter.
- Crushed Nuts: For a more grown-up flavor, finely chop pecans or walnuts and sprinkle them on.
- Different Pretzel Shapes: While twists are traditional, larger pretzel rods could be dipped and decorated, or even waffle pretzels for a different canvas.
Serving Suggestions and Occasions
These mini pretzel pumpkins are incredibly versatile and perfect for various occasions:
- Party Platters: Arrange them beautifully on a platter with other fall treats like cookies or fruit.
- School Lunchboxes: A fun and unexpected treat for kids to find in their lunch.
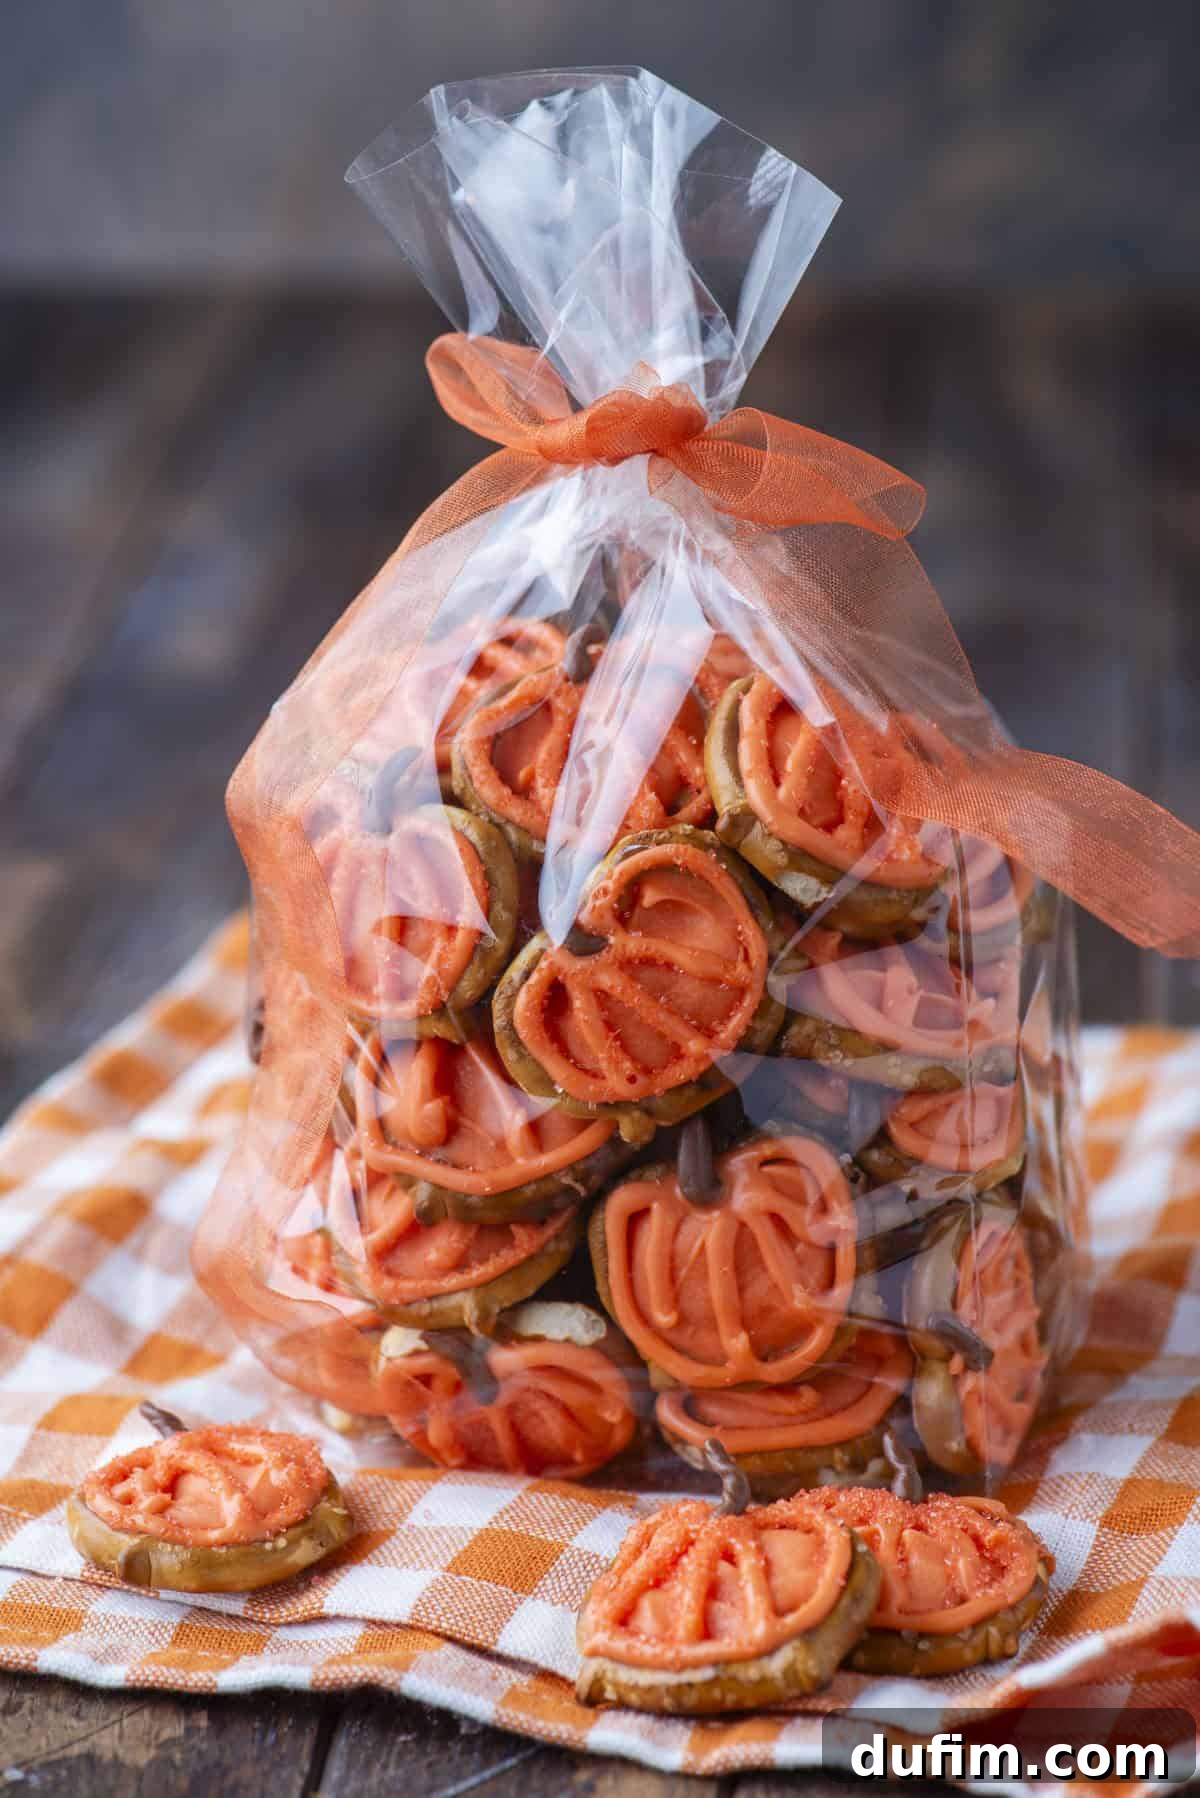
- Homemade Gifts: Package them in small clear bags with festive ribbons for a thoughtful, edible gift.
- Dessert Bar: Ideal for a Halloween or Fall-themed dessert bar alongside cupcakes and other sweets.
- Movie Night Snack: A perfect crunchy, sweet-and-salty snack for a cozy autumn movie night.
More Pumpkin Recipes to Savor This Season
If you’re loving all things pumpkin, be sure to check out these other delightful recipes that celebrate the flavors of fall:
- Pumpkin Donuts
- Mini Pumpkin Pie Rice Krispie Treats
- Pumpkin Blossom Cookies
- Pumpkin Patch Cupcakes
★
★
★
★
Tap stars to rate!
Mini Pretzel Pumpkins
Beth
20 minutes
30 minutes
Rate
Ingredients
Instructions
-
Melt the candy wafers according to the package directions, or place them in a microwave-safe bowl and heat at 50% power in 2-minute intervals, stirring after each, until smooth.Orange Candy Melts
-
Line a baking sheet with parchment paper or a silicone mat and arrange the mini pretzels with space between each. Use a small spoon to fill the centers with the melted candy, creating pumpkin shapes framed by the pretzels. If the candy starts to firm up, simply reheat.Mini Pretzels
-
Once all the pretzels are filled, allow them to set while you prepare the stems. Cut a very small piece off a Tootsie Roll, then cut that in half. Shape and twist the pieces into little pumpkin stems and set aside.Tootsie Rolls
-
Then melt another package of candy melts and transfer it to a squeeze bottle or piping bag fitted with a small round tip. Outline the pretzels, then pipe vertical lines to mimic pumpkin ridges. Add a dot of melted candy where the pretzel arches meet. For extra detail, sprinkle orange sanding sugar over the outline while it’s still wet. Press a Tootsie Roll stem on the dot. Use a toothpick to adjust the position if needed.Orange Sanding Sugar
-
Let the pumpkins sit until the candy sets, about 30 minutes. Peel off the parchment.
Video
Notes
To Store: Store in a ziploc bag or airtight container.
To Make Ahead: Prepare through step 2, then resume with step 3 when ready.
Nutrition Disclosure
All nutritional values are approximate and provided to the reader as a courtesy. Changing ingredients and/or quantities will alter the estimated nutritional calculations.
Like this recipe? Rate and comment below!