
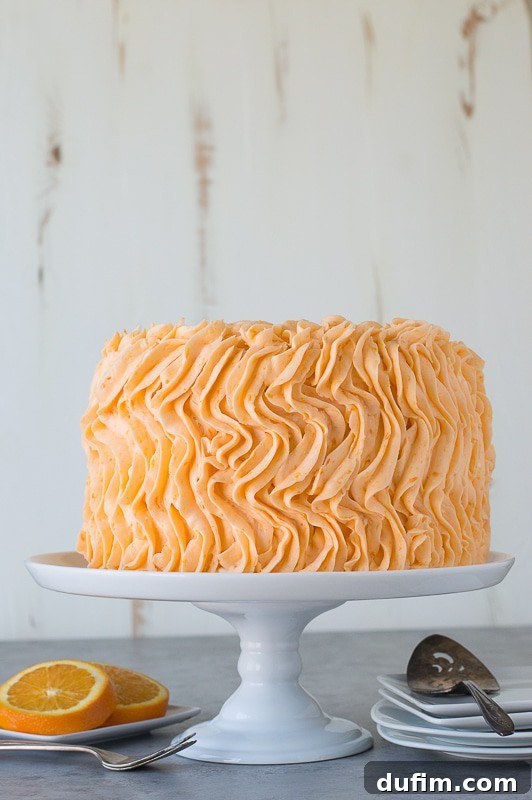
Delightful Orange Poppyseed Cake with Fresh Orange Buttercream
Indulge in a truly refreshing dessert experience with this exquisite three-layer Orange Poppyseed Cake, beautifully complemented by a luscious and vibrant fresh orange buttercream. This recipe promises a burst of natural citrus flavor that will awaken your senses and leave a lasting impression.
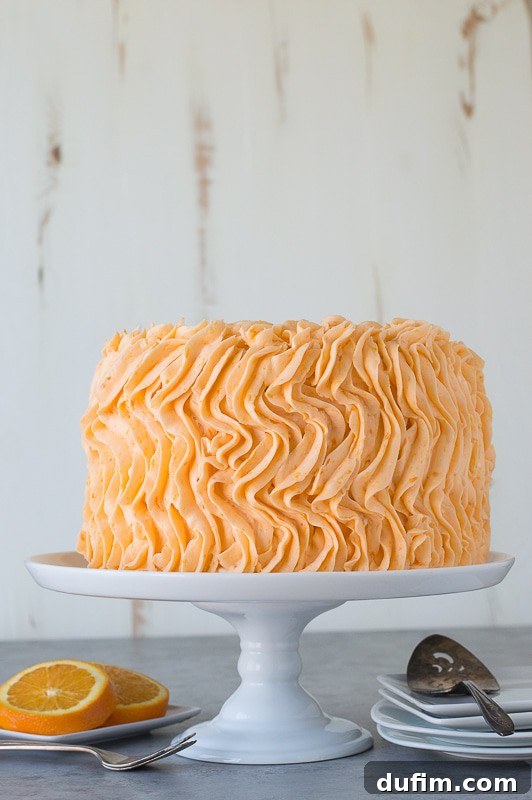
The Unmistakable Aroma of Fresh Oranges
Can you almost smell the bright, zesty fragrance of fresh oranges radiating from this cake? It’s an aroma that immediately signals a truly refreshing treat. This isn’t just a hint of orange; it’s a full, vibrant embrace of citrus goodness. We achieve this profound flavor by incorporating generous amounts of fresh orange zest directly into each cake layer. The buttercream then takes it to another level with both fresh orange zest and real orange juice, creating an unparalleled taste experience.
During a recent bible study, this cake was met with rave reviews, with one person specifically commenting on how incredibly fresh and “orangey” the flavor was. And yes, that’s precisely the point! There are no artificial orange extracts or synthetic flavors here. Our commitment to using only fresh oranges ensures that every bite delivers an authentic, bright, and invigorating taste that truly stands out from other citrus desserts.
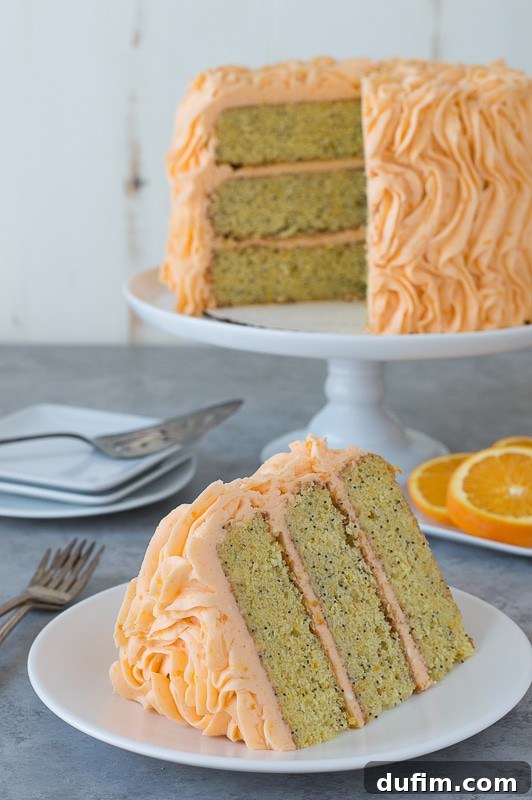
Imagine a world where your computer could release scents based on what you’re viewing. While that might make us perpetually hungry, the idea highlights how powerful scent is. My hope is that through these images and the detailed description, you can almost experience the intoxicating aroma of this orange cake. It’s a smell that promises pure delight, and a taste that absolutely delivers.
Mastering the Frilly Frosting Technique
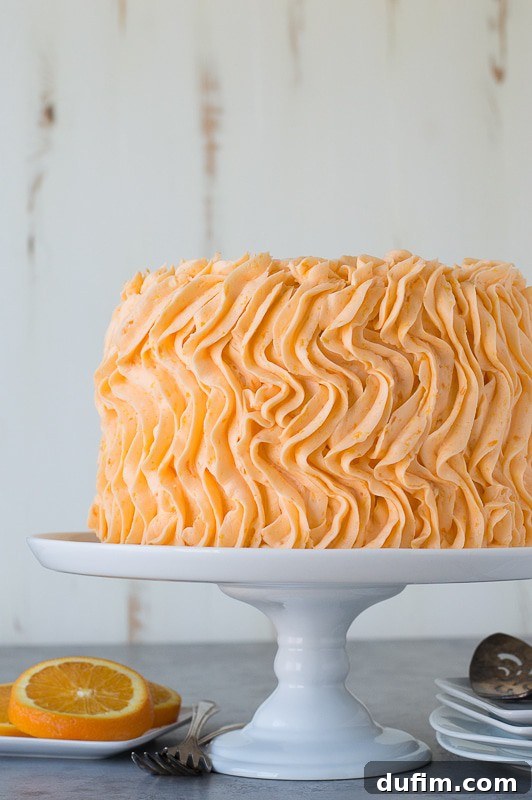
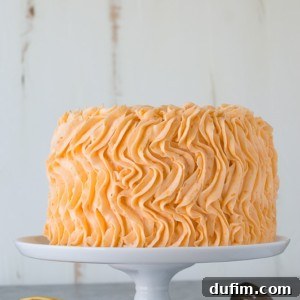
Beyond its incredible flavor, this Orange Poppyseed Cake boasts a charmingly “frilly” appearance, thanks to a simple yet elegant frosting technique. I began at the base of the cake, piping continuous, curvy lines of buttercream upwards to the top. This method is repeated around the entire cake until it’s fully covered, creating a beautiful, textured finish that’s both visually appealing and surprisingly easy to achieve.
While my attempts are modest, this technique is inspired by the breathtakingly beautiful frilly frosted cakes created by I Am Baker. Amanda, the talent behind I Am Baker, is truly a role model when it comes to cake decorating, and her work constantly inspires me to explore creative ways to present my baked goods. This specific style adds an inviting, whimsical touch to an already irresistible cake, making it perfect for celebrations or a delightful weekend treat.
The Ultimate Orange Poppyseed Cake Recipe
This recipe guides you through creating a stunning three-layer cake, each layer infused with a subtle crunch from poppyseeds and a bright burst of orange. The cake is then generously frosted with a homemade buttercream that is light, creamy, and intensely flavored with fresh orange zest and juice. Get ready to bake a showstopper!
Rate this recipe by leaving a comment below!
Orange Poppyseed Cake
Beth
10 minutes
35 minutes
20 minutes
1 hour 5 minutes
16 servings
Rate
Ingredients
Orange Poppyseed Cake (make this recipe once for each layer)
- 1 ½ sticks butter, room temperature (3/4 cups)
- ¾ cup sugar
- zest of 1 & 1/2 oranges
- 3 large eggs
- 1 cup flour
- 1 ½ tsp baking powder
- ½ tsp salt
- 1 tbsp poppyseeds
Orange Buttercream (this should make enough frosting to frost the cake using the frilly or rose technique)
- 3 sticks butter, room temperature (1 1/2 cups)
- 1 ½ cups vegetable shortening
- juice of 3 oranges
- zest of 3 oranges
- 10-13 cups powdered sugar
Instructions
To Bake the Cake Layers
-
Preheat your oven to 350 degrees F (175 C). Prepare an 8-inch round cake pan or springform pan by greasing the bottom and sides thoroughly. Line the bottom with a round piece of parchment paper to prevent sticking and ensure easy release.
-
For perfectly level cake layers, consider using a bake-even strip around the pan. You can easily make your own by cutting a towel or old cotton shirt to fit your pan’s circumference. Dampen the fabric thoroughly, wring out excess water (it should be wet but not dripping), and secure it tightly around the cake pan with a safety pin. This helps the cake bake more evenly by insulating the sides.
-
In a large mixing bowl, combine the room-temperature butter, sugar, and fresh orange zest. Beat these ingredients using an electric mixer on medium-high speed until the mixture is light, pale, and fluffy, typically for 2-3 minutes.
-
Add the large eggs one at a time, beating lightly after each addition until just combined. Scrape down the sides of the bowl as needed to ensure all ingredients are incorporated.
-
In a separate, smaller bowl, whisk together the flour, baking powder, and salt. This ensures the leavening agents and salt are evenly distributed.
-
Gradually add about half of the dry flour mixture to the wet ingredients. Do not simply dump it in; instead, gently sprinkle spoonfuls of the flour mixture over the wet ingredients, as if sifting. Carefully fold it in with a spatula until no dry streaks of flour remain. Avoid overmixing, which can lead to a tough cake.
-
Repeat the process with the remaining half of the flour mixture, folding it in until just combined. Be sure to scrape the sides and bottom of the bowl with your spatula to fully incorporate all ingredients.
-
Finally, gently fold in the poppyseeds until they are evenly distributed throughout the batter. Mix just enough to incorporate them.
-
Scrape the cake batter into your prepared cake pan, using a spatula to spread it out evenly. Bake for 30-40 minutes. If you are using a bake-even strip, this may slightly increase your baking time, so be sure to test for doneness. The cake is ready when a toothpick inserted into the center comes out clean or with moist crumbs attached, and the center is set.
-
Once baked, allow the cake to cool in the pan on a wire cooling rack for 10 minutes. This allows the cake to set slightly before removal.
-
After 10 minutes, carefully invert the cake onto the cooling rack. If using a springform pan, simply release the sides and bottom. Remove the parchment paper from the bottom of the cake. Allow the cake layer to cool completely on the rack. If your cake has a domed top, now is the time to level it using a serrated knife or a cake leveler for a flat surface.
-
For best results when frosting, wrap the cooled cake layer tightly in plastic wrap and place it in the refrigerator. Chilled cake layers are much easier to handle and frost, preventing crumbs from mixing into your buttercream. You can keep cake layers refrigerated for up to one week, or frozen for longer. Repeat these steps until you have all three cake layers baked and cooled. Approximately 30 minutes to 1 hour before you plan to assemble and frost the cake, place the layers in the freezer to firm them up, making them even easier to work with.
To Make the Orange Buttercream
-
In a large mixing bowl, combine the room-temperature butter and vegetable shortening. Beat these together using an electric mixer on medium-high speed until the mixture is light, airy, and fluffy, typically for 3-5 minutes.
-
Gently stir in the fresh orange juice and orange zest by hand with a spatula. This infuses the buttercream with its vibrant citrus flavor.
-
Begin adding the powdered sugar, about 2-3 cups at a time, mixing by hand with a sturdy spatula to prevent a “sugar cloud” in your kitchen. Continue adding powdered sugar gradually until the frosting reaches your desired consistency and sweetness. It should no longer look wet and should be thick enough to hold its shape. Once all the powdered sugar is incorporated, use your electric mixer one last time on medium speed for 1-2 minutes to ensure the frosting is incredibly smooth, airy, and truly ready for decorating.
To Assemble and Frost the Cake
-
Remove your cake layers from the freezer. They should be firm and cold, which makes them much easier to handle without crumbling.
-
For easier assembly and frosting, I highly recommend placing your cake on a turntable. Spread a small dollop of buttercream onto an 8-inch round cardboard cake circle (or directly onto your serving plate) to act as an anchor for the first layer.
-
Place your first cake layer squarely on the cardboard. Apply a generous amount of orange buttercream on top of this layer and spread it as evenly as possible using an offset spatula. Repeat this process for the second and third cake layers, stacking them carefully.
-
Once all layers are stacked, it’s time for the “crumb coat.” This thin layer of buttercream is crucial for sealing in any loose crumbs and creating a smooth canvas for your final frosting. Using your offset spatula, spread a very thin layer of buttercream around the sides and top of the entire cake. It doesn’t need to be perfect, just covered.
-
Place the entire crumb-coated cake on the turntable (or carefully transfer it) into the freezer for 20 minutes. This will quickly firm up the crumb coat, making the final frosting much cleaner.
-
To apply the frilly piping method for the final frost, fit a large piping bag with a Wilton 2D tip (or a similar large star tip). Fill the bag with your remaining orange buttercream, pushing it down to remove air bubbles, and twist the top tightly. Begin piping curvy, vertical lines at the bottom edge of the cake, moving upwards to the top edge. Overlap each line slightly to create a continuous, ruffled effect. Repeat this around the entire circumference of the cake until the sides are fully covered. For the top, start in the center and pipe concentric curvy lines or rosettes to cover the surface. Once frosted, the cake can be left at room temperature if you plan to serve it the same day. For longer storage, loosely cover the cake with plastic wrap to prevent it from drying out and place it in the refrigerator.
Nutrition
Per Serving:
- Calories: 771kcal
- Carbohydrates: 91g
- Protein: 2g
- Fat: 46g
- Saturated Fat: 21g
- Polyunsaturated Fat: 7g
- Monounsaturated Fat: 15g
- Trans Fat: 4g
- Cholesterol: 103mg
- Sodium: 355mg
- Potassium: 35mg
- Fiber: 1g
- Sugar: 83g
- Vitamin A: 845IU
- Vitamin C: 1mg
- Calcium: 45mg
- Iron: 1mg
Nutrition Disclosure
All nutritional values are approximate and provided to the reader as a courtesy. Changing ingredients and/or quantities will alter the estimated nutritional calculations.
Serving and Storage Tips for Your Orange Poppyseed Cake
To fully appreciate the moist texture of the cake and the creamy richness of the buttercream, allow your Orange Poppyseed Cake to come to room temperature for about 30-60 minutes before serving. This enhances the flavors and ensures a delightful eating experience. This cake is absolutely perfect for any occasion, from a casual brunch to a festive gathering. It pairs wonderfully with a cup of freshly brewed coffee, a calming herbal tea, or even a glass of sparkling wine.
If you have leftovers (which is unlikely!), store the cake loosely covered with plastic wrap in the refrigerator for up to 3-4 days. For longer storage, individual slices can be wrapped tightly in plastic wrap and then aluminum foil, and frozen for up to one month. Thaw frozen slices in the refrigerator overnight before bringing them to room temperature to serve.