
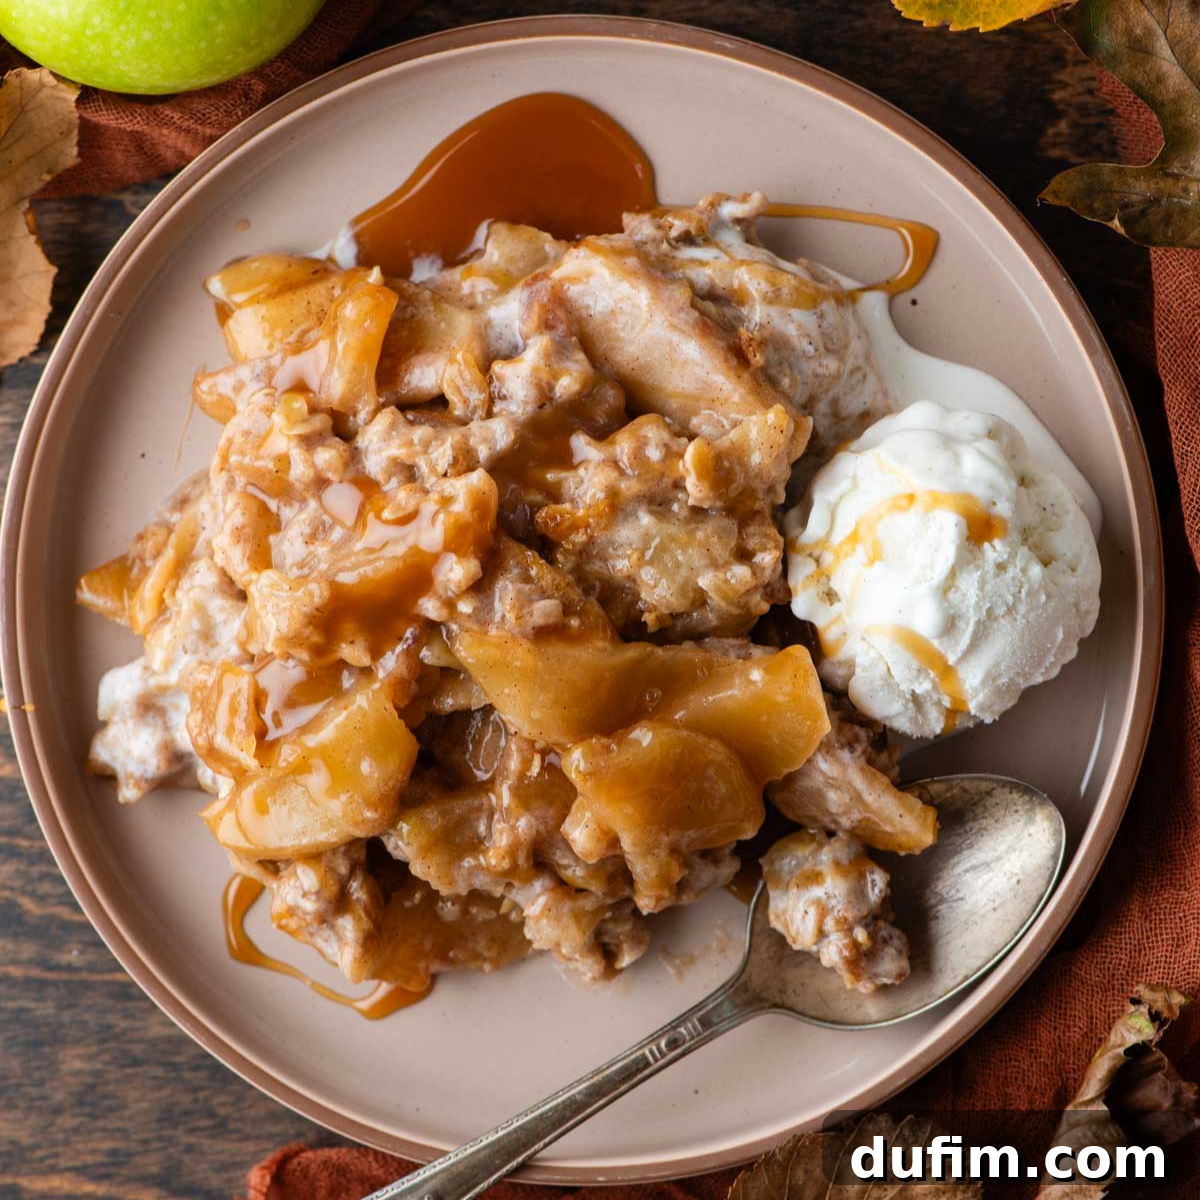
Prepare to enchant your taste buds and impress everyone with the ultimate apple crisp recipe! Featuring a tender, warm apple filling infused with aromatic spices, crowned by an irresistibly crunchy and sweet oat crumble topping, this dessert is a true delight.
Even better, this beloved treat comes together in just 5 simple steps, requiring only 10 minutes of active prep time when you follow our detailed guide below.
I made this apple crisp for a family gathering last weekend, and it was an absolute hit! The recipe is incredibly easy to follow, and the taste is simply divine. It’s officially my go-to apple crisp recipe now. My family declared it the best they’ve ever had!
– Roxie
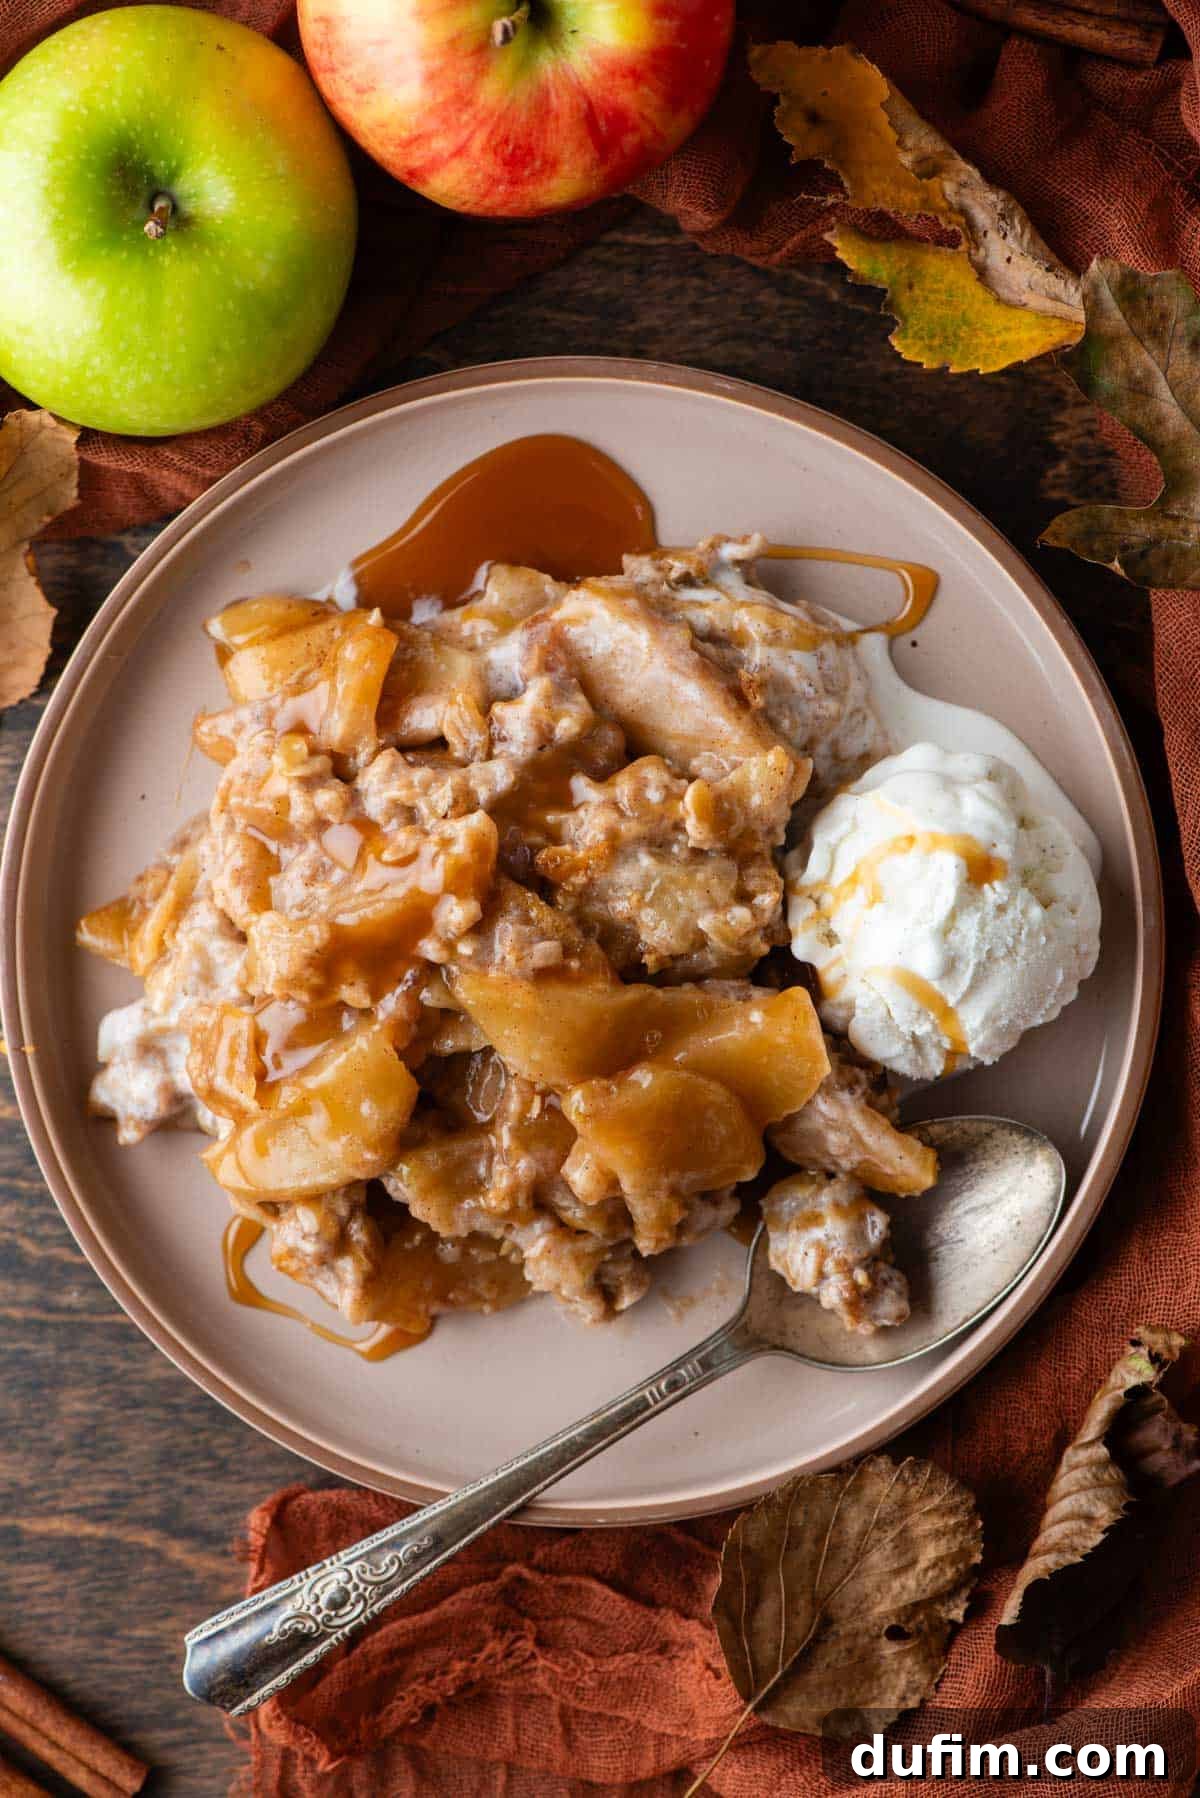
The Ultimate Homemade Apple Crisp: Your Go-To Fall Dessert!
Just thinking about this warm, fragrant apple dessert makes my mouth water – it’s truly that good! This recipe takes a classic dessert, brimming with fresh, juicy apples, and elevates it with a signature touch that guarantees perfection every time.
There’s nothing quite like the comforting aroma of warm apples and cinnamon wafting through your home on a crisp day. This apple crisp is not just a personal favorite; it’s a cherished family tradition that brings everyone together, creating lasting memories around the dinner table.
During the vibrant apple season, this recipe is our absolute favorite way to utilize freshly picked apples. If you’re planning an apple-picking adventure, be sure to set aside a generous basketful specifically for this effortlessly delicious homemade apple crisp!
Apple Crisp vs. Apple Crumble: What’s the Difference?
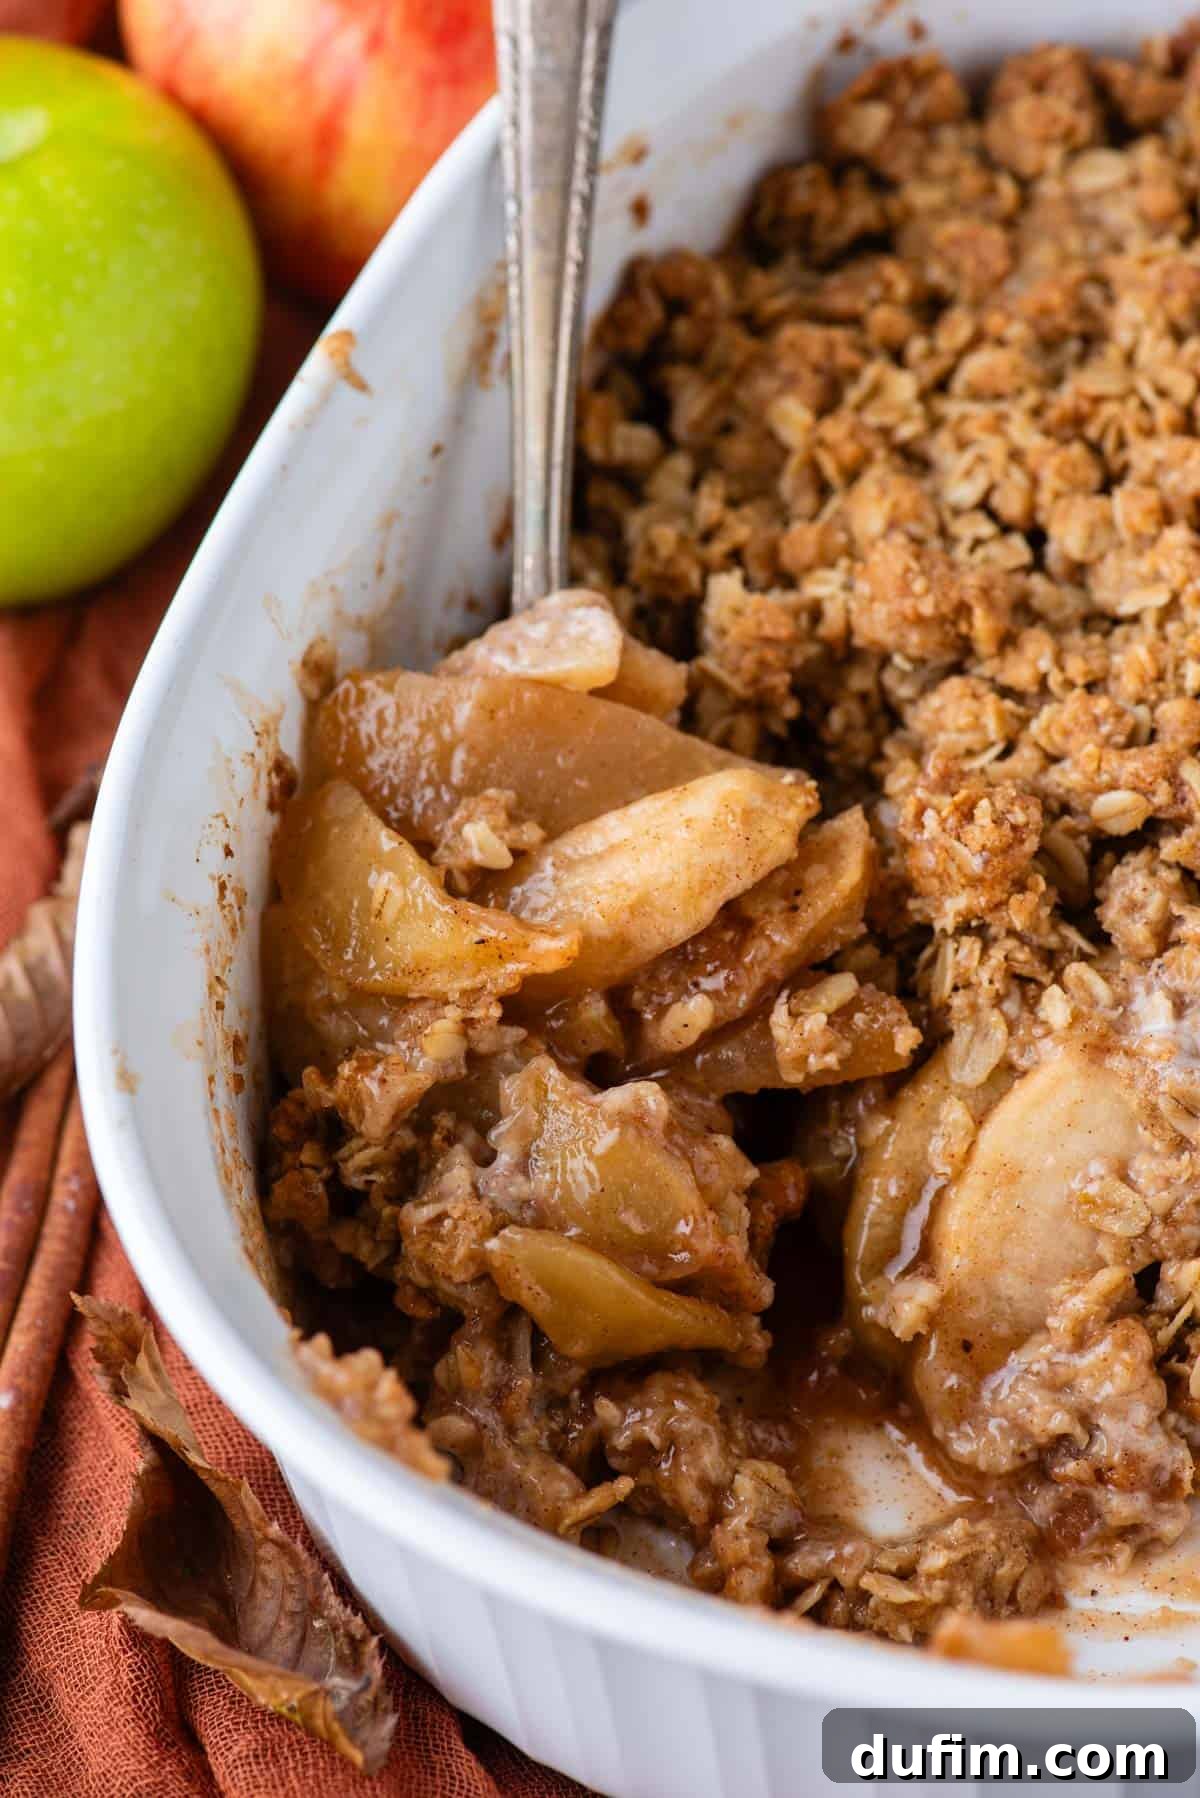
While often used interchangeably, there’s a subtle yet distinct difference between an apple crisp and an apple crumble, primarily found in their delightful toppings. An apple crisp, like this recipe, traditionally features a topping that includes oats, which bake into a wonderfully crisp, almost streusel-like texture. Sometimes nuts are also added for extra crunch and flavor.
In contrast, an apple crumble typically sports a topping that is more akin to a streusel, made primarily with flour, sugar, and butter. This yields a more uniform, cake-like crumb without the chewy texture provided by oats. Understanding this distinction helps appreciate the unique characteristics that make each dessert special.
Essential Ingredients for the Best Oatmeal Apple Crisp
Crafting this classic apple crisp is a journey to flavor perfection, beginning with tender, cinnamon-spiced apples and culminating in an utterly irresistible oat crumble topping. By following our easy steps and using these carefully selected ingredients, this will undoubtedly become one of your most cherished apple desserts. Continue reading for the complete list of ingredients and precise measurements, ensuring your crisp turns out perfectly every time.
For the Luscious Apple Filling:
- Fresh Apples: The star of the show! We highly recommend using firm, crisp, and slightly tart varieties such as Granny Smith, Jonagold, Honeycrisp, Braeburn, or Pink Lady. These apples hold their shape beautifully during baking and provide a delightful balance to the sweet topping.
- Brown Sugar: Adds a deep, molasses-rich sweetness that complements the apples perfectly, contributing to a wonderfully caramelized flavor.
- Cornstarch: Our secret weapon for achieving a perfectly thickened apple filling. It prevents the dessert from becoming watery, ensuring a rich, saucy texture that clings to every apple slice.
- Ground Cinnamon: The quintessential spice for apple desserts, bringing warmth, comfort, and a fragrant aroma that defines fall baking.
- Ground Nutmeg: A subtle hint of nutmeg enhances the cinnamon, adding depth and complexity to the overall flavor profile of the apple filling.
For the Irresistible Oat Crumble Topping:
- Old-Fashioned Rolled Oats: These are crucial for that signature chewy, yet crisp texture that distinguishes an apple crisp. They toast beautifully, adding a nutty dimension.
- All-Purpose Flour: Provides structure to the crumble, binding the ingredients together to create those delightful, crumbly clusters.
- Brown Sugar: Sweetens the topping and contributes to its rich, caramelized notes. For an adventurous twist, you can even swap some or all of the brown sugar for a decadent caramel sauce to create an indulgent caramel apple crisp!
- Ground Cinnamon: Echoes the spice in the filling, tying the two layers together with a harmonious warmth.
- Salt: A pinch of salt is essential to balance the sweetness and enhance all the other flavors in the topping, preventing it from tasting flat.
- Unsalted Butter: Cold and cubed, butter is key to creating a tender, flaky crumble. It coats the dry ingredients, preventing them from mixing into a paste and instead forming delightful crumbs when cut in.
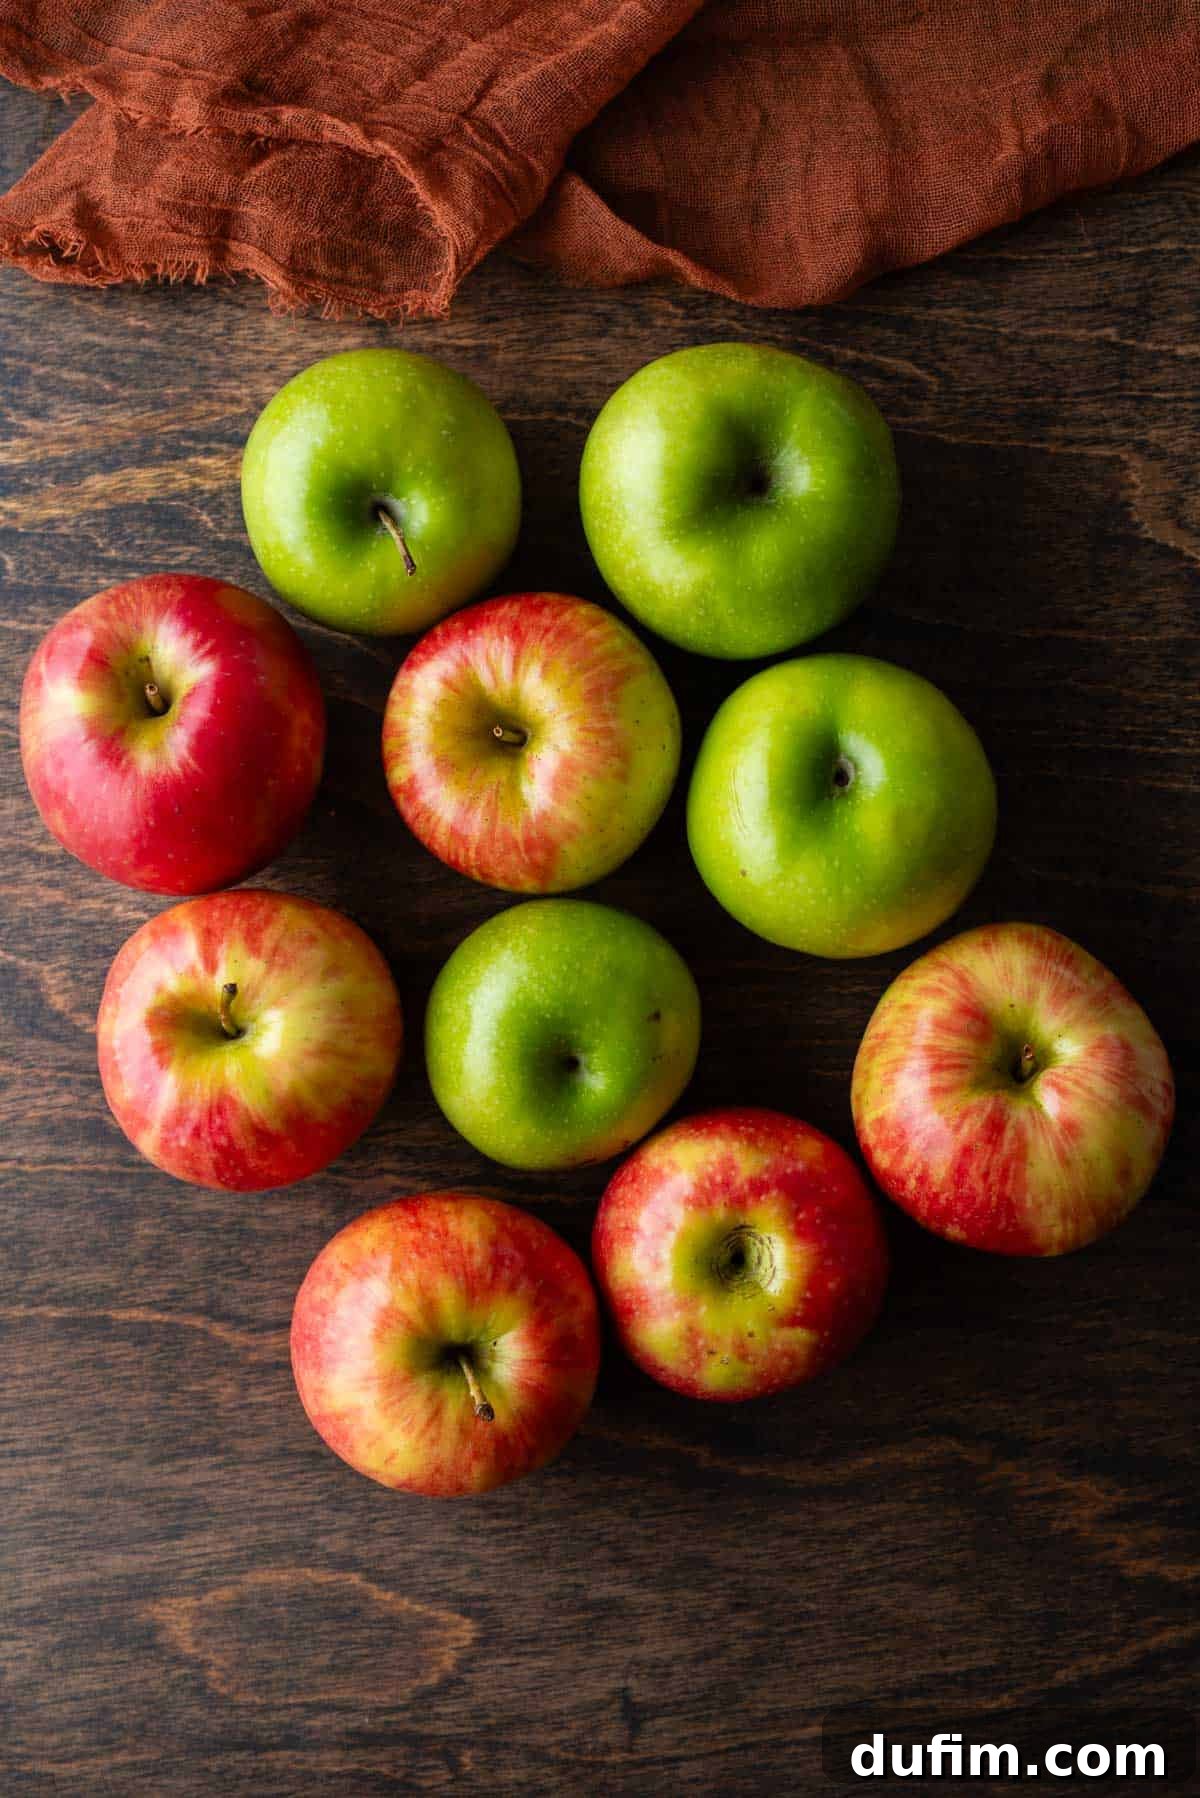
Choosing the Best Apples for Apple Crisp
The choice of apples can significantly impact the final texture and flavor of your apple crisp. To achieve the perfect balance of sweet and tart, and a filling that remains tender but not mushy, we highly recommend using a combination of apples or specific varieties known for their baking qualities. Our top recommendations include:
- Granny Smith: Offers a firm texture and tartness that cuts through the sweetness of the sugar and topping.
- Honeycrisp: Known for its exceptional crispness and sweet-tart flavor, it holds up well during baking.
- Jonagold: A delicious blend of sweet and tart, with a firm texture that softens beautifully.
- Braeburn: Provides a pleasant tartness and spicy aroma, maintaining its shape after baking.
- Pink Lady (Cripps Pink): Sweet with a slightly tart finish, they have a firm flesh that becomes tender when baked.
Feel free to experiment with one or a combination of these varieties to find your personal favorite for the ultimate apple crisp!
Step-by-Step Guide: How to Make Apple Crisp with Oats
This effortless apple crisp recipe can be prepared in just 5 straightforward steps, making it an ideal choice for both novice and experienced bakers. Once you experience its comforting flavors and easy preparation, it’s sure to become your most treasured fall dessert. Below, you’ll find comprehensive instructions, including all measurements and ingredients to ensure your baking success.
Crafting the Perfect Apple Filling:
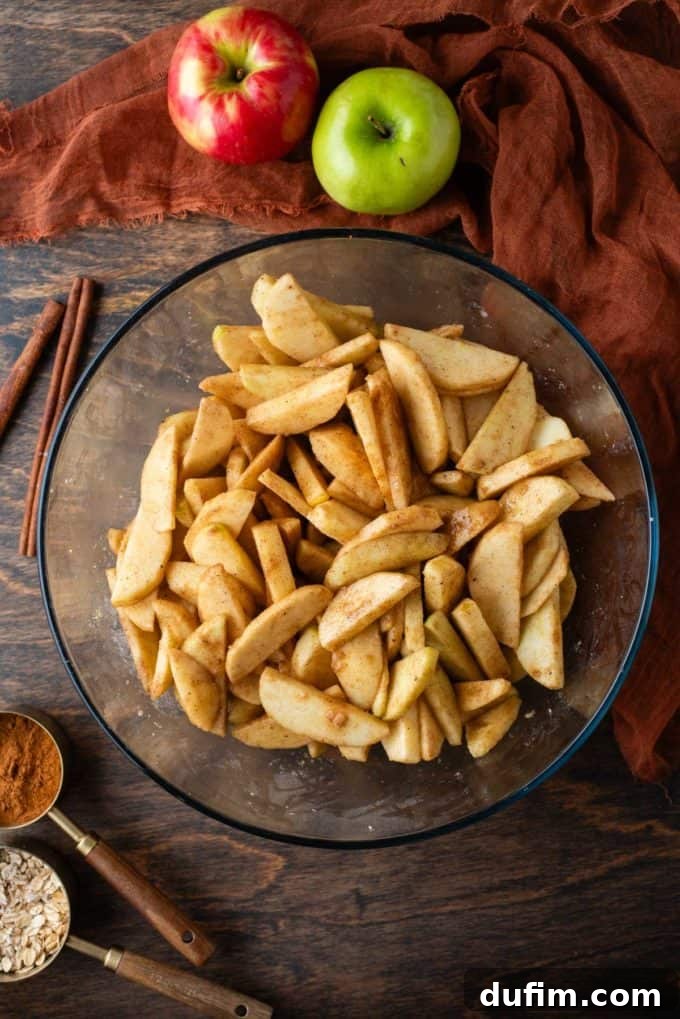
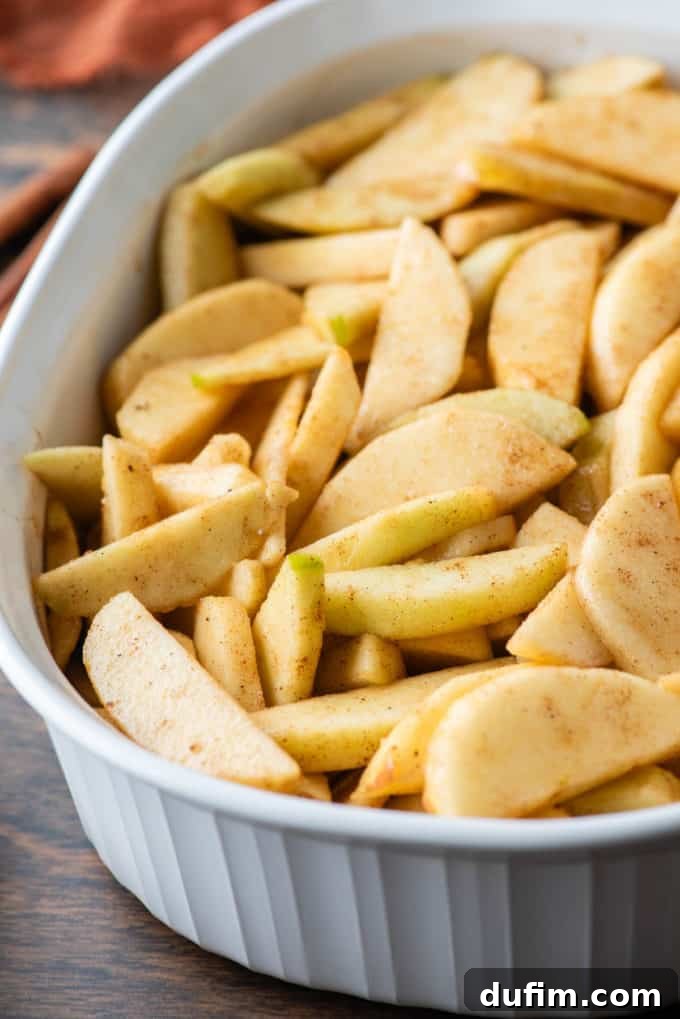
- Prepare the Apples: Begin by peeling approximately 7 cups of apples. You can either dice them into 1-inch by 1/2-inch cubes for a chunkier filling or slice them into 1/2-inch thick pieces for a more classic presentation. The choice is yours, but consistency in size ensures even cooking.
- Combine Filling Ingredients: Preheat your oven to a comforting 350ºF (175ºC). In your chosen baking dish – a versatile 2 to 2.5-quart dish works best, such as an 8×8 inch, 8-inch round, 9×9 inch, 9-inch round, or 7×11 inch pan – gently combine the prepared apples with the brown sugar, cornstarch, ground cinnamon, and ground nutmeg. Use a spoon or spatula to toss everything together thoroughly, ensuring each apple piece is beautifully coated with the spice mixture.
Creating the Irresistible Topping:
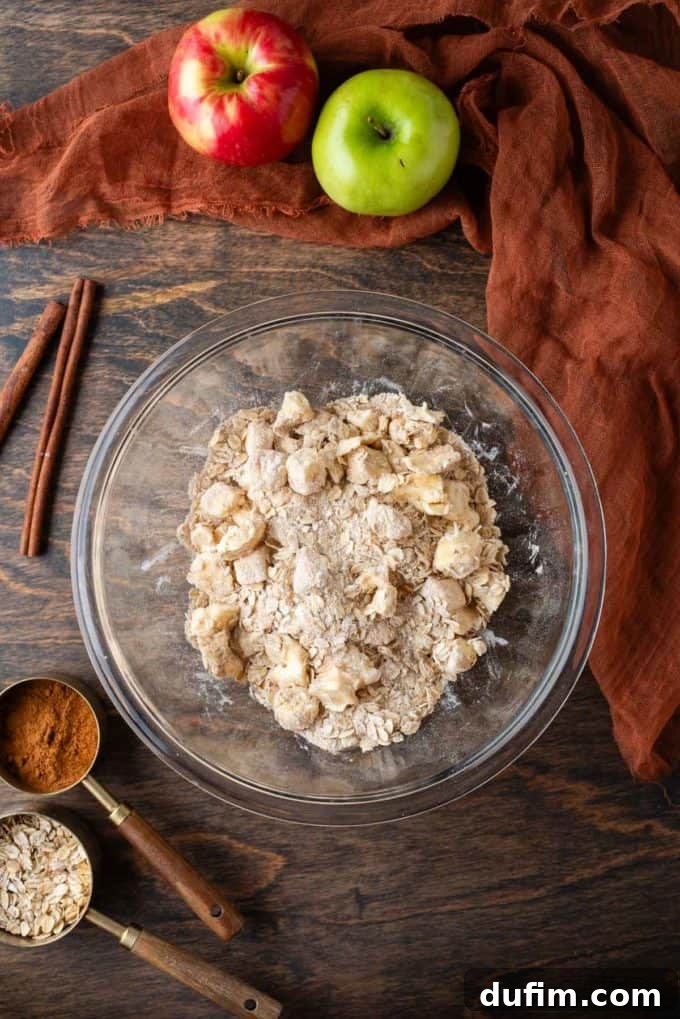
- Mix Dry Ingredients and Butter: In a separate mixing bowl, combine the old-fashioned rolled oats, all-purpose flour, brown sugar, ground cinnamon, and salt. Add the cold, cubed unsalted butter to this mixture. Using your fingertips or a pastry cutter, work the butter into the dry ingredients. Continue mixing until the texture resembles coarse sand with some pea-sized clumps of butter still visible – these small butter pockets are key to a rich, tender crumble. You can also gently squeeze the mixture with your hands to help form these clumps.
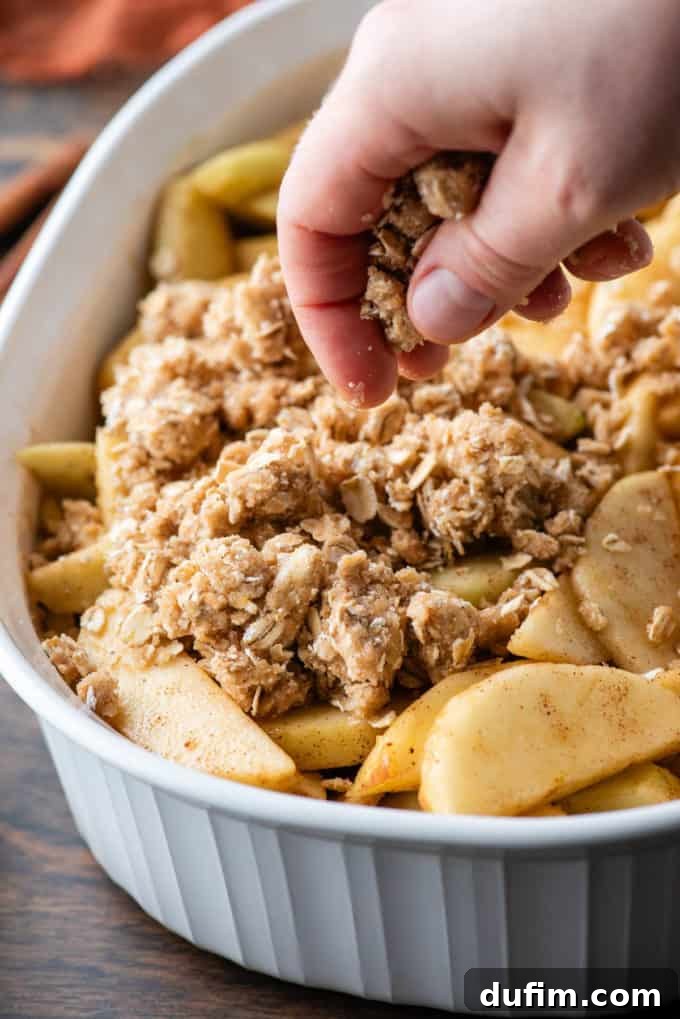
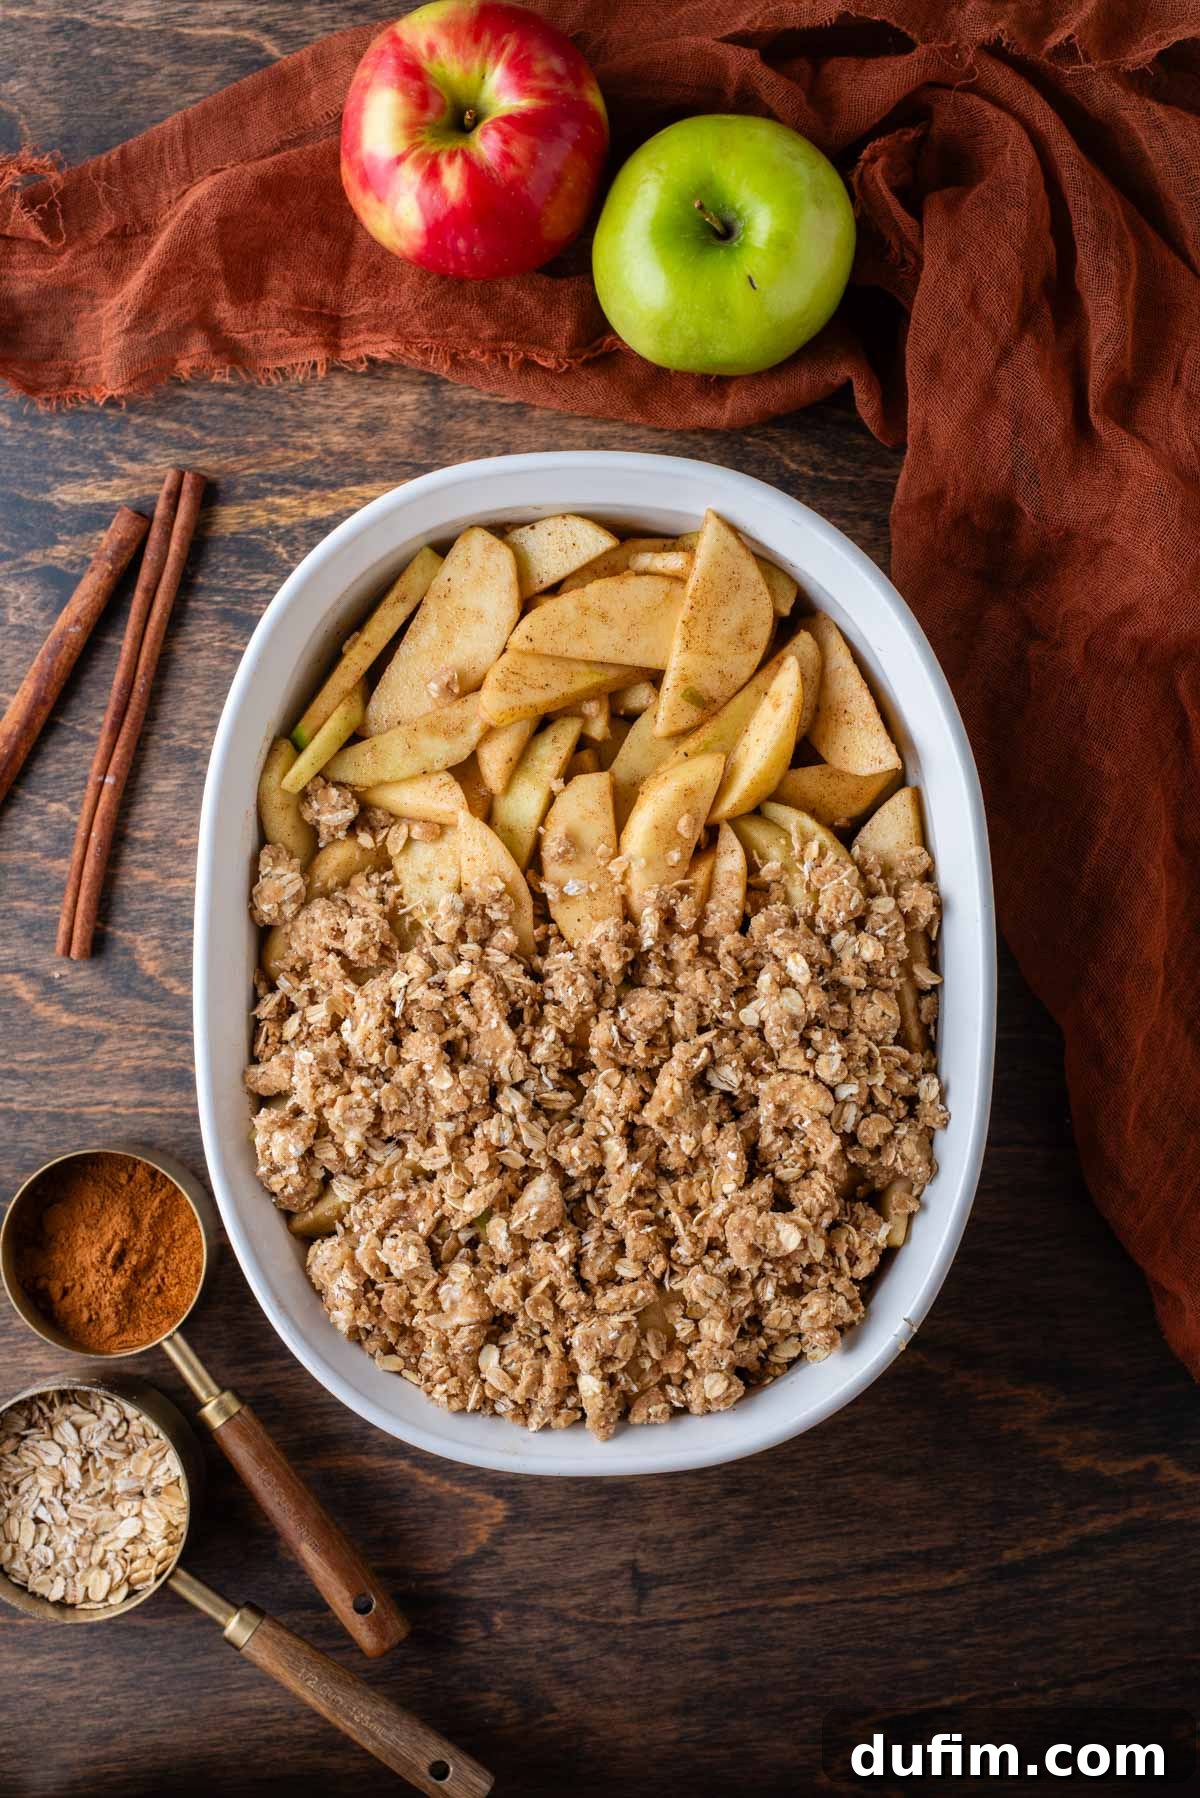
- Apply the Topping: Evenly distribute the prepared crumble topping over the apple filling in your baking dish. Use your fingers to break the topping into varied clumps, ensuring a beautiful, rustic appearance and even coverage.
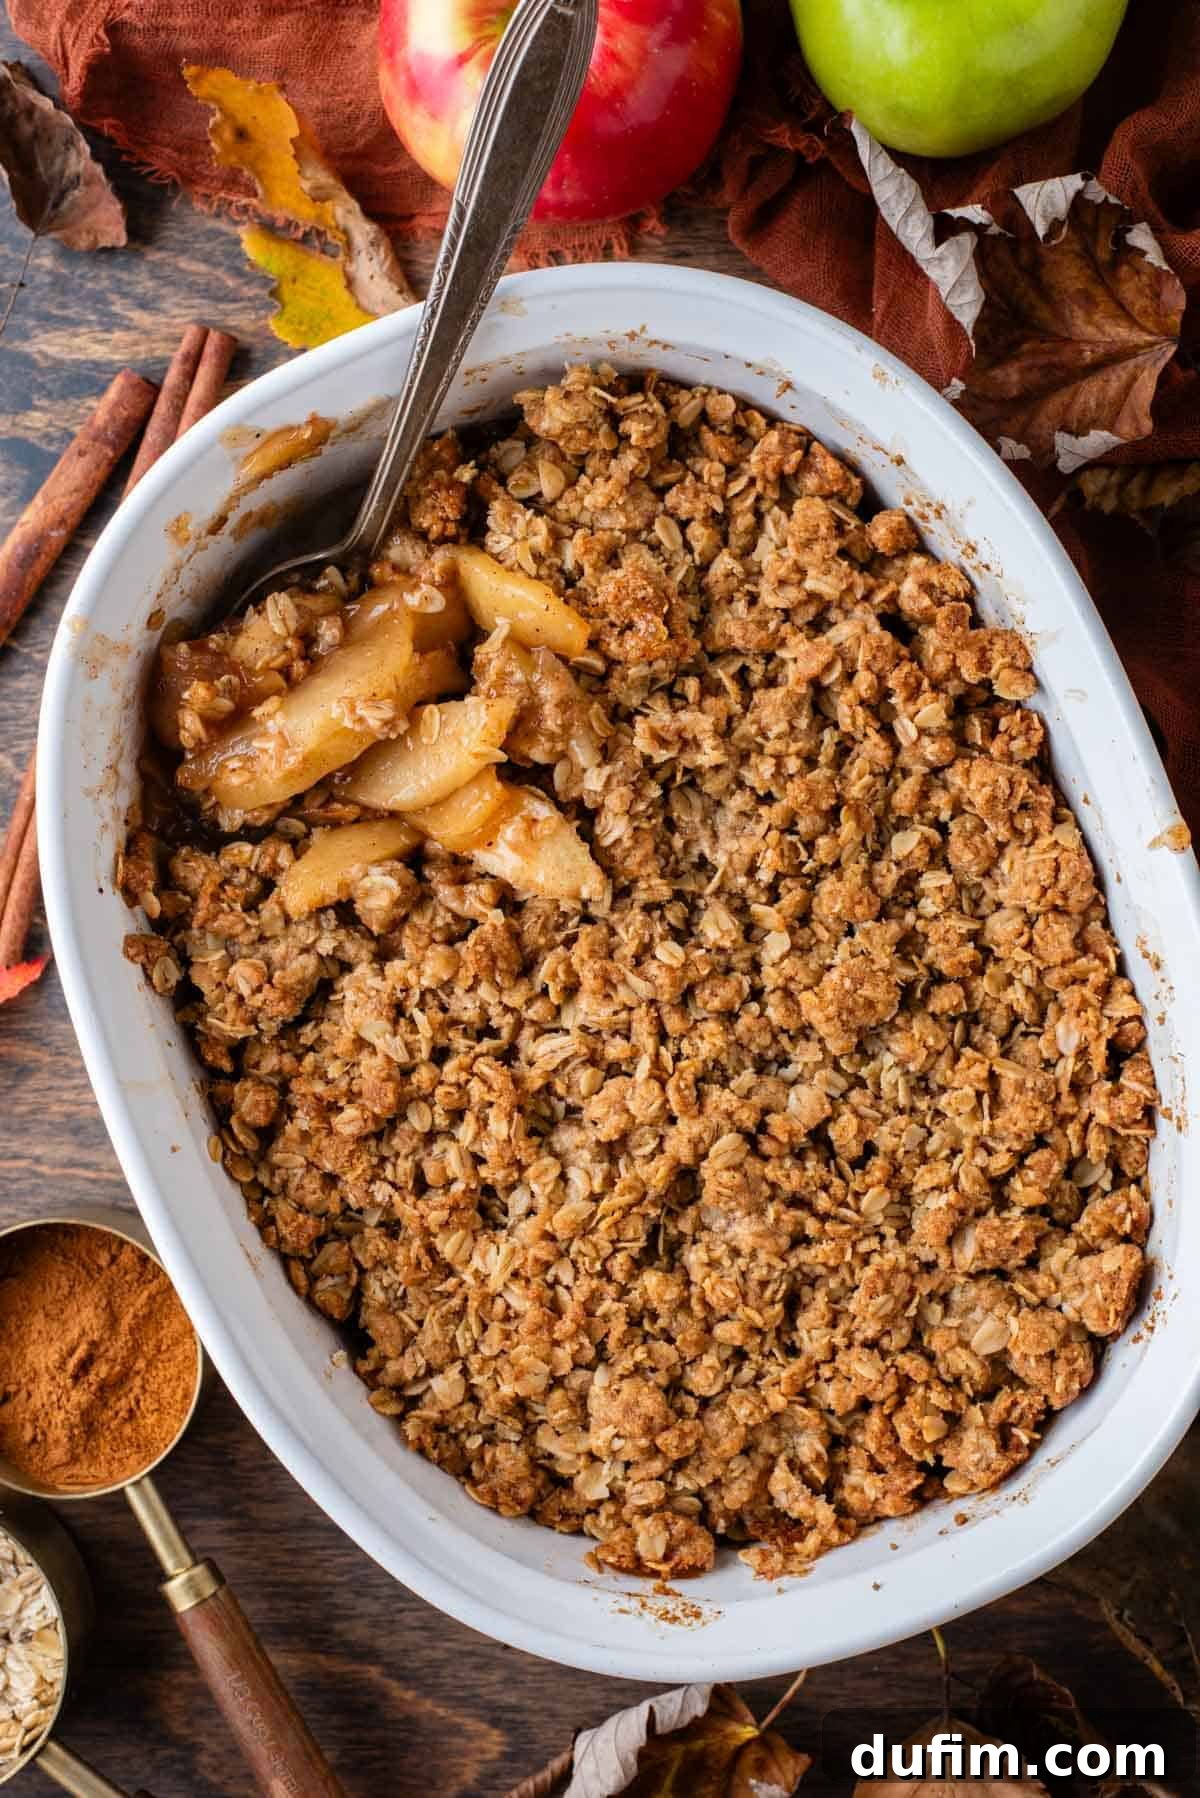
- Bake to Golden Perfection: Place the apple crisp in your preheated oven and bake for approximately 40-45 minutes. You’ll know it’s ready when the apple filling is bubbling gently around the edges and the oat topping has achieved a beautiful golden-brown hue and feels crisp to the touch. If it hasn’t reached these milestones, continue baking for an additional 10-20 minutes, as baking times can vary depending on your oven and the size/material of your baking pan. For instance, in an oval 7×11 inch pan, it might take closer to 60 minutes. Once baked, allow the crisp to cool for 10-15 minutes before serving. This crucial resting period allows the fruit juices to thicken, ensuring a perfectly set and delicious filling.
Pro Tip: How Do You Cut Apples for Apple Crisp?
The way you cut your apples can influence the texture of your filling. For this recipe, you have two excellent options:
- Diced: Peel and dice the apples into 1-inch cubes. This creates a filling with distinct apple pieces that retain some firmness.
- Sliced: Peel and slice the apples into 1/2-inch thick slices. This results in a softer, more yielding filling that’s wonderfully saucy.
Choose the method that best suits your preference for apple texture!
Mastering the Apple Crisp Topping: A Simple Guide
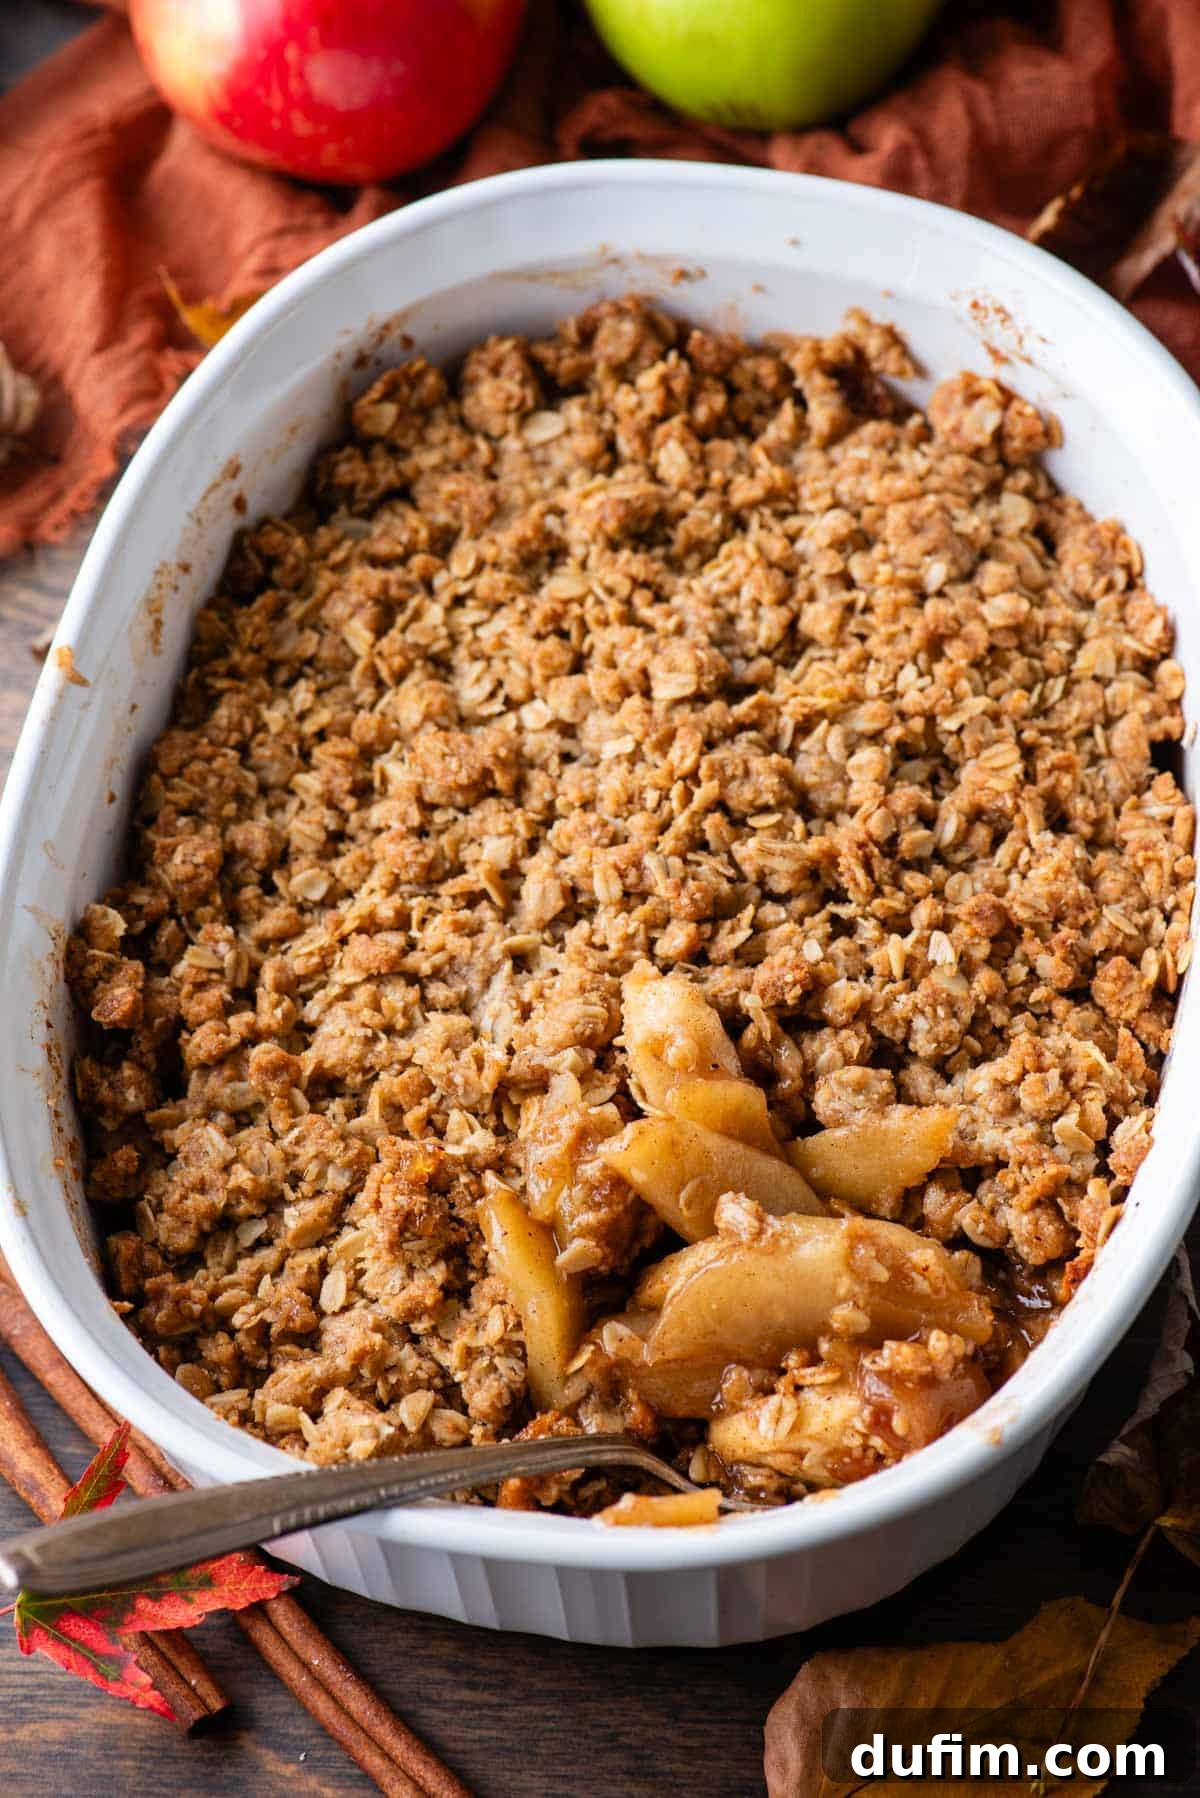
The magic of this apple crisp lies significantly in its topping – a delightful combination of textures and flavors. To create this superb crumble topping, you simply combine old-fashioned rolled oats, all-purpose flour, brown sugar, a touch of cinnamon, a pinch of salt, and cold, cubed unsalted butter. The key is to use your hands or a pastry cutter to meticulously cut the butter into the dry mixture until it resembles a coarse, sandy texture with some small, pea-sized butter clumps. These butter pockets will melt during baking, creating pockets of rich flavor and ensuring a wonderfully crumbly, golden-brown crust. Once mixed, this irresistible crumb mixture is then evenly distributed over the spiced apple filling and baked to crispy, golden perfection.
Serving Your Delicious Oatmeal Apple Crisp
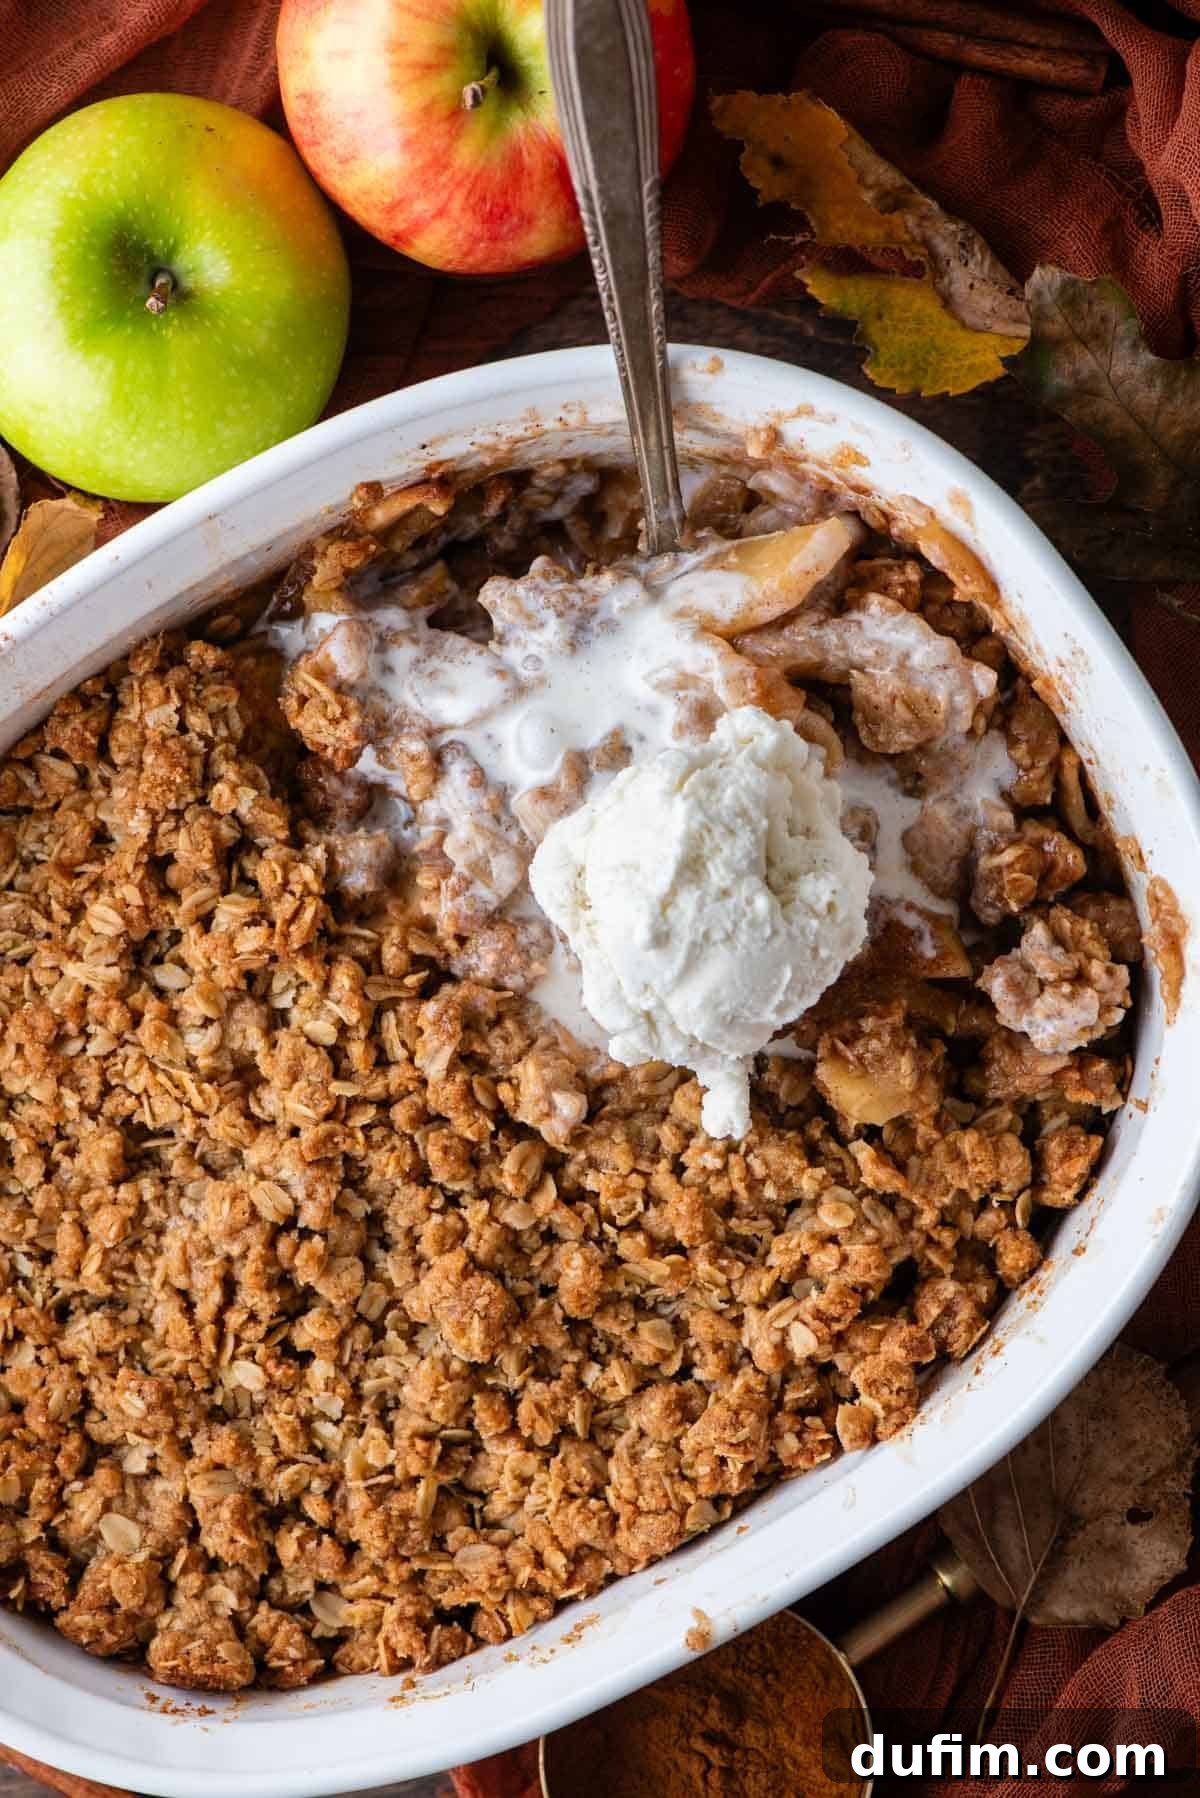
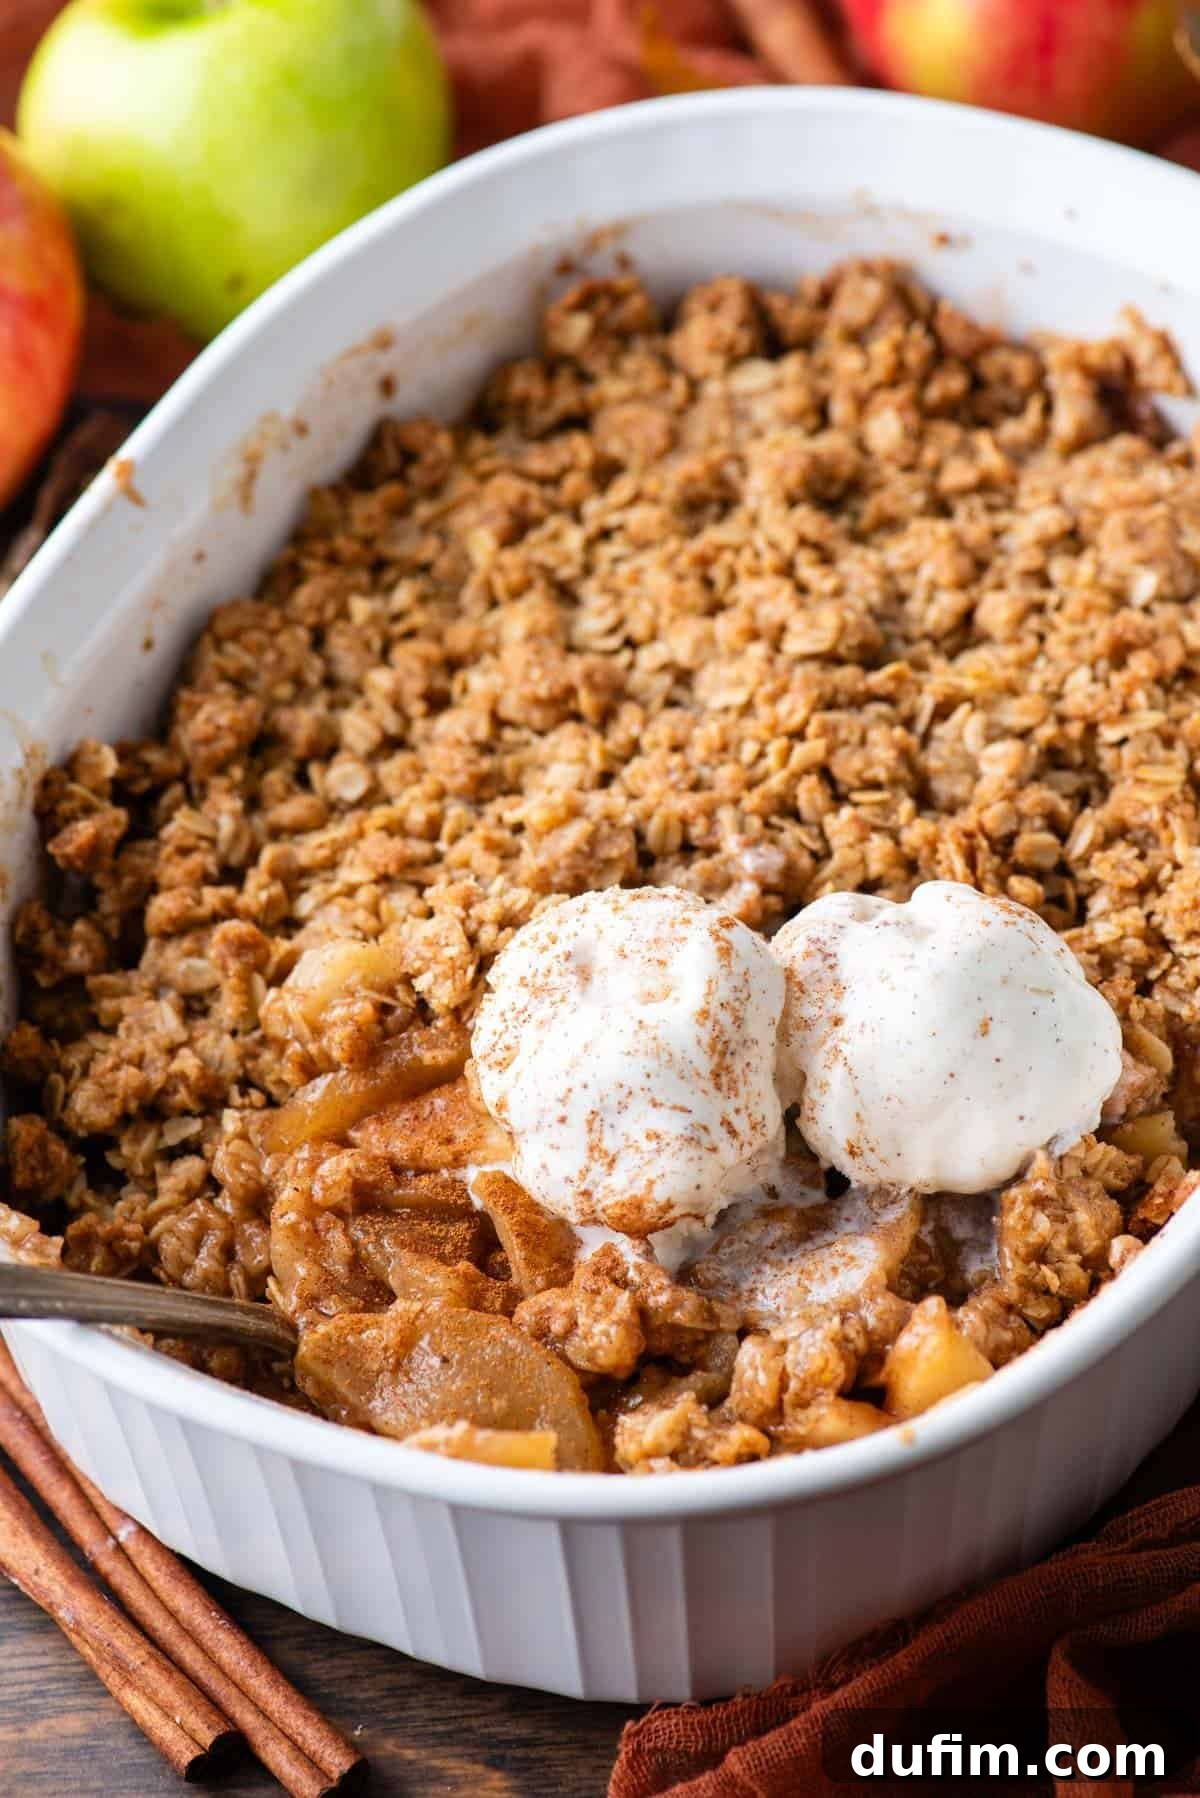
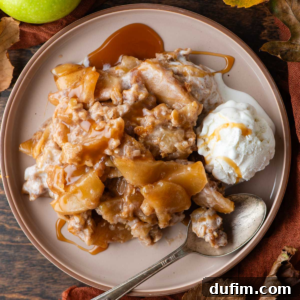
Serving a warm bowl of apple crisp is like offering a comforting, cozy hug in dessert form. While this apple recipe is absolutely delightful on its own, its versatility truly shines when paired with complementary toppings. Elevate your dessert experience by serving each portion with a generous scoop of creamy vanilla ice cream, allowing its cool sweetness to melt into the warm apples. Alternatively, a dollop of our easy homemade whipped cream adds a touch of airy elegance.
For an extra layer of indulgence, consider drizzling each individual serving with a luscious caramel sauce, or sprinkling finely chopped nuts like pecans or walnuts for added texture and a nutty flavor. This dessert is perfect for a casual family dinner or a festive holiday gathering, always bringing smiles and satisfaction.
Storing and Reheating Your Apple Crisp with Oats
Ensuring your delicious apple crisp stays fresh and enjoyable for days is simple. To store any leftovers, you have a couple of convenient options: either cover the baking dish tightly with plastic wrap or aluminum foil, or transfer the remaining crisp into an airtight container. Properly stored, it will keep beautifully in the refrigerator for up to 5 days.
For the best reheating experience, we highly recommend warming the crisp in a 350ºF (175ºC) oven until it is heated through and the topping regains some of its crispness. While a microwave will work in a pinch for a quick reheat, be aware that the topping may lose some of its desirable crunch. Reheating in the oven truly brings back that freshly baked quality.
Can I Freeze Apple Crisp?
Absolutely! This apple crisp recipe is wonderfully freezer-friendly, making it perfect for meal prep or enjoying a homemade treat later. To freeze, ensure the crisp is completely cooled. Then, wrap it meticulously in several layers of plastic wrap and a layer of aluminum foil, or transfer it to a freezer-safe, airtight container. It can be frozen for up to 3 months.
When you’re ready to enjoy, simply transfer the frozen crisp to the refrigerator and allow it to thaw overnight. Once thawed, reheat it in the oven according to the instructions above, ensuring it’s warmed through and the topping is crisp.
Choosing the Right Dish Size for Your Apple Crisp
The beauty of this apple crisp recipe lies in its adaptability to various baking dishes. You can successfully use any dish that holds approximately 2 to 2.5 quarts of volume. Here are several common options that will work perfectly:
- 8×8 inch square pan
- 8 inch round cake pan
- 9×9 inch square pan
- 9 inch round cake pan
- 7×11 inch rectangular pan (like the one used in the recipe photos)
- Standard oval baking dish of similar capacity
Keep in mind that while all these sizes work, they might slightly affect the bake time. A shallower pan may bake faster than a deeper one, so always monitor for the golden-brown topping and bubbling filling.
Frequently Asked Questions About Homemade Apple Crisp
Should I cover my apple crisp while baking?
No, for this recipe, you should not cover the apple crisp while it bakes. Leaving it uncovered allows the delicious oat topping to achieve that perfect golden-brown color and irresistible crisp texture, which is a hallmark of a great apple crisp.
What’s the difference between apple pie and apple crisp?
The primary distinction between apple pie and apple crisp lies in their crusts or toppings. A traditional apple pie features a full pastry crust that encases the apple filling, both on the bottom, sides, and as a top crust. In contrast, an apple crisp has a fruit filling on the bottom, but no bottom or side crust; instead, it is topped with a generous, loose, and crispy streusel-like crumble, typically containing oats.
What is the difference between apple crisp and apple brown Betty?
The key difference between an apple crisp and an apple brown Betty is the composition of their respective toppings. While both are baked fruit desserts with a crumbly top, an apple crisp characteristically includes oats in its topping, giving it a distinct chewy-crisp texture. An apple brown Betty, on the other hand, traditionally uses a topping made from buttered breadcrumbs or pieces of bread, mixed with sugar and spices, creating a softer, more bread-like texture.
Can I cut apples the night before for apple crisp?
While it’s generally best to cut apples just before assembling the crisp to prevent them from oxidizing and turning brown, you can prepare them ahead of time with a little trick. If you need to slice them the night before, simply toss the apple slices with a squeeze of fresh lemon juice. The acidity of the lemon juice acts as an antioxidant, helping to significantly prevent browning. Store them in an airtight container in the refrigerator.
Can you refrigerate apple crisp before baking?
Yes, you can prepare the apple crisp ahead of time and refrigerate it before baking. However, for the best results, we recommend preparing the apple filling and the crumble topping separately. Assemble the crisp (adding the topping) just before you plan to bake it. This ensures the topping doesn’t absorb too much moisture from the apples and become soggy. If you bake a cold apple crisp filling directly from the refrigerator, be aware that it might require a slightly longer baking time, so adjust accordingly until the filling is bubbling and the topping is golden.
Discover More Delicious Apple Recipes
If you’ve enjoyed this homemade apple crisp, you’re in for a treat! Apples are incredibly versatile, forming the base for countless delightful desserts. Explore some of our other favorite apple-inspired recipes that are perfect for any time of year:
- Decadent Caramel Apple Fudge
- Effortless Apple Dump Cake with Pie Filling
- Chewy Caramel Apple Cookies
- Moist Apple Crumb Muffins
Average Rating: 4.73 from 22 ratings
Tap stars to rate! (Note: Interactive rating functionality is removed for static HTML compliance.)
Apple Crisp Recipe (with Oats)
Pin Recipe
Rate This Recipe
Print Recipe
Get ready to wow friends, family, and yourself when you make the best apple crisp recipe with a warm apple filling and addictive crumble oat topping. Even better, you’ll make it in just 5 easy steps with just 10 minutes of prep when you follow my step-by-step guide below.
Equipment
- Glass Mixing Bowl
- Kitchen Scale (optional, for precise measurements)
- 8-inch or 9-inch Baking Pan (square or round, 2-2.5 quart capacity)
- Pastry Cutter (optional, fingers work too)
Ingredients
Apple Filling
- 7 cups (791g) peeled & sliced apples (6-7 large or 8-10 small apples; Granny Smith, Jonagold, Honeycrisp, Braeburn, or Pink Lady recommended)
- ½ cup (107g) brown sugar
- ¼ cup (28g) cornstarch
- 1 tsp cinnamon
- ½ tsp nutmeg
Topping
- 1 cup (89g) old-fashioned rolled oats
- ½ cup (60g) all-purpose flour
- ½ cup (107g) brown sugar
- ½ tsp cinnamon
- ½ tsp salt
- ½ cup (113g) unsalted butter, cold and cut into pieces
Instructions
Apple Filling
- Peel and chop or slice about 7 cups of apples. Cut the apples into 1-inch by 1/2-inch cubes or slice into 1/2-inch apple slices.
- Preheat the oven to 350ºF (175ºC). In your baking dish (use a 2 to 2.5-quart dish such as an 8×8 inch, 8-inch round, 9×9 inch, 9-inch round, or 7×11 inch pan), combine the apples, brown sugar, cornstarch, cinnamon, and nutmeg. Toss with a spoon or spatula to ensure all apples are evenly coated.
Topping
- In a mixing bowl, combine the old-fashioned rolled oats, flour, brown sugar, cinnamon, salt, and cubed cold butter. Use your fingers or a pastry cutter to cut the butter into the mixture. Mix until it resembles a “sandy” texture, allowing for some pea-sized clumps of butter. Gently squeeze the mixture with your hands to help form larger crumbs.
- Use your fingers to break the topping into varied clumps and evenly distribute it all over the prepared apple filling in the baking dish.
- Bake for 40-45 minutes, or until the apple filling is bubbling and the topping is golden brown and crisp. Baking time may vary depending on your pan size and oven; it may take up to 60 minutes in some dishes (e.g., a 7×11 inch oval pan). Allow the crisp to cool for 10-15 minutes before serving. This resting period allows the juices to thicken properly.
Video
For a visual guide on making this delicious apple crisp, please refer to the video tutorial usually found here. (Note: Video embedding script removed for static HTML compliance.)
Notes
What Size Dish to Use
You can use any dish that holds 2 to 2.5 quarts for this apple crisp. All of these common sizes will work effectively:
- 8×8 inch square pan
- 8 inch round cake pan
- 9×9 inch square pan
- 9 inch round cake pan
- 7×11 inch rectangular pan
Nutrition Disclosure: All nutritional values are approximate and provided to the reader as a courtesy. Changing ingredients and/or quantities will alter the estimated nutritional calculations. (Note: Interactive “Show/Hide Nutrition Info” button removed for static HTML compliance.)
Like this recipe? Rate and comment below!