
Get Ready to Celebrate with This Stunning Lime Green Funfetti Cake!
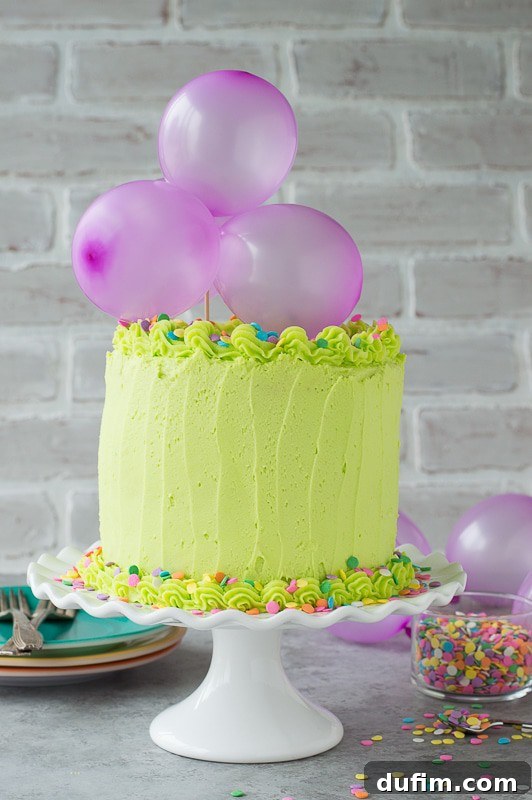
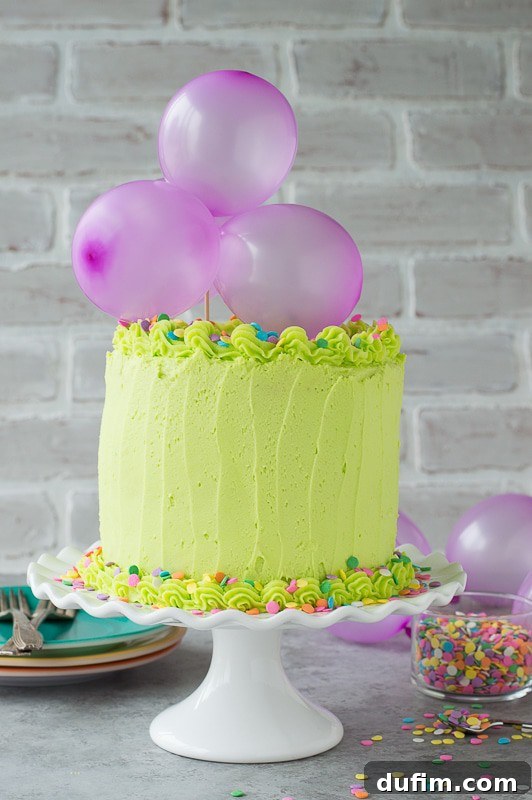
Prepare to be absolutely delighted by this show-stopping dessert: a homemade funfetti cake adorned with a vivacious lime green buttercream and topped with an irresistibly charming DIY balloon cake topper! This isn’t just a cake; it’s a burst of joy, color, and flavor designed to elevate any celebration. While my heart might occasionally lean towards creamy homemade buster bars for my own birthday indulgence, there’s truly nothing quite like a vibrant, sprinkle-filled cake to mark a special occasion.
I’m a firm believer that birthdays deserve more than just a single day of festivity – they warrant an entire month of joyful observance! So, whether you’re celebrating a summer birthday (happy birthday to all the wonderful July babies out there!) or simply looking for an excuse to bring some extra cheer into your life, this funfetti cake arrives perfectly timed to kick off the party. It’s an ode to spontaneity, vibrant hues, and the sheer delight of homemade treats that always bring a smile.
The Magic Behind the Mirth: Unveiling This Festive Creation
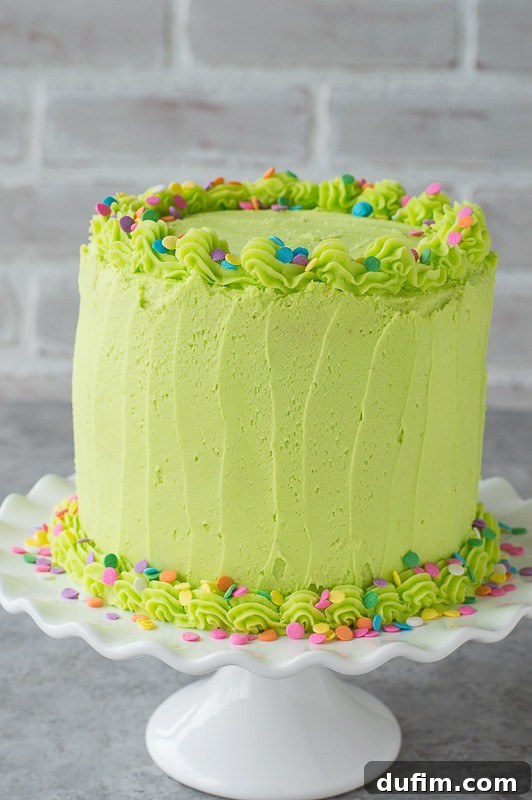
Every element of this cake, from its dazzling color palette to its whimsical topper, feels like it came together with a touch of magic. Truth be told, my creative process for photo shoots and cake designs often unfolds in real-time, right as I’m in the midst of assembling the final masterpiece. There’s a unique thrill in allowing inspiration to strike organically, letting the cake’s personality emerge layer by delicious layer. And for this particular funfetti dream, I found myself captivated by two magnificent features: the unexpected vibrancy of the lime green buttercream and the adorable pop of purple from the handmade balloon topper.
A Spontaneous Stroke of Genius: Crafting Your Own Balloon Cake Topper
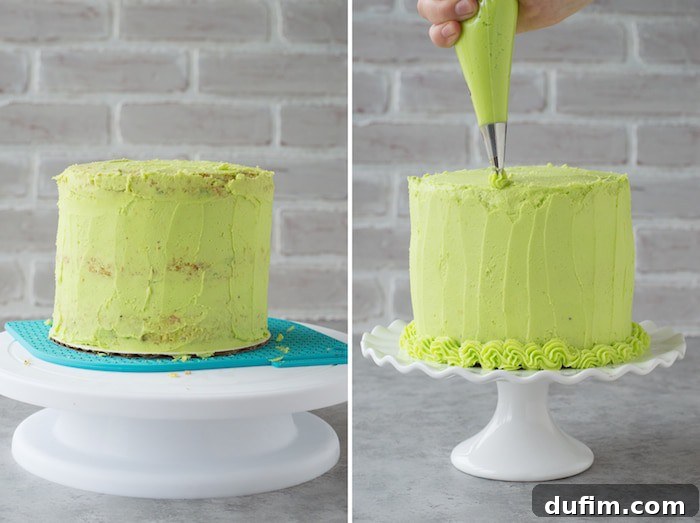
After meticulously piping that elegant shell border and showering the cake with a generous scattering of sprinkles, I knew it needed that one final, show-stopping touch: a cake topper. Who, after all, can resist the charm and personality a well-chosen topper adds to a celebratory cake? I certainly can’t – and trust me, there are many more cake recipes featuring delightful toppers coming your way!
The journey to this particular topper was an adventure in last-minute DIYing. A quick rummage through my craft supplies yielded an unexpected treasure: a bag of small purple water balloons. With a flash of inspiration, I rigged up a completely unique balloon cake topper using just four of these tiny balloons, a bit of clear tape, and a sturdy toothpick (or a slender wooden skewer would work just as well). The process was surprisingly simple yet incredibly effective and added so much character. Here’s how you can recreate this charming detail:
- Gather Your Supplies: You’ll need four small water balloons (or small regular balloons), clear tape, and a long toothpick or wooden skewer.
- Inflate (Slightly): Gently inflate each water balloon to a small, uniform size. You want them to be about the size of a large grape or cherry – not too big, or they’ll overwhelm the cake and be harder to manage.
- Form a Cluster: Arrange the four inflated balloons into a pleasing cluster. You might opt for a symmetrical arrangement or have two slightly higher than the other two for added visual interest and dynamic appeal.
- Secure with Tape: Use a small piece of clear tape to gently wrap around the bases of the clustered balloons. This will hold them securely together and maintain their arrangement.
- Attach to Anchor: Carefully tape the clustered balloons to the top of your toothpick or wooden skewer. Ensure the tape is firm enough to hold the balloons in place but discreet enough not to detract from the topper’s appearance. The toothpick serves as the essential anchor for inserting the topper into your cake.
- Insert and Admire: Gently press the toothpick into the center of your frosted cake. Voila! You’ve created an instant burst of charm and a delightful pop of color that will capture everyone’s attention.
This simple, handmade topper instantly transformed the cake into something even more special and personalized. For next time, I’m already envisioning covering the balloons in shimmering sprinkles, edible glitter, or dazzling sequins for an extra layer of sparkle. Because when it comes to celebrating, can a cake ever truly have too much pizzazz? I wholeheartedly believe it cannot, a sentiment beautifully echoed by the incredibly talented baker Katherine Sabbath. Just take a moment to be inspired by her breathtaking creations on Katherine’s Instagram – pure edible artistry and endless cake decorating inspiration!
The Essential Guide to Sprinkles: A Sweet Science for Perfect Cakes
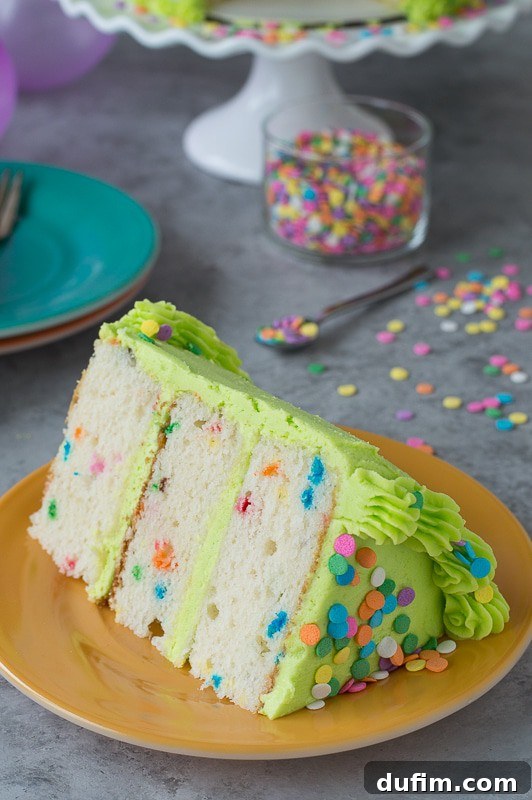
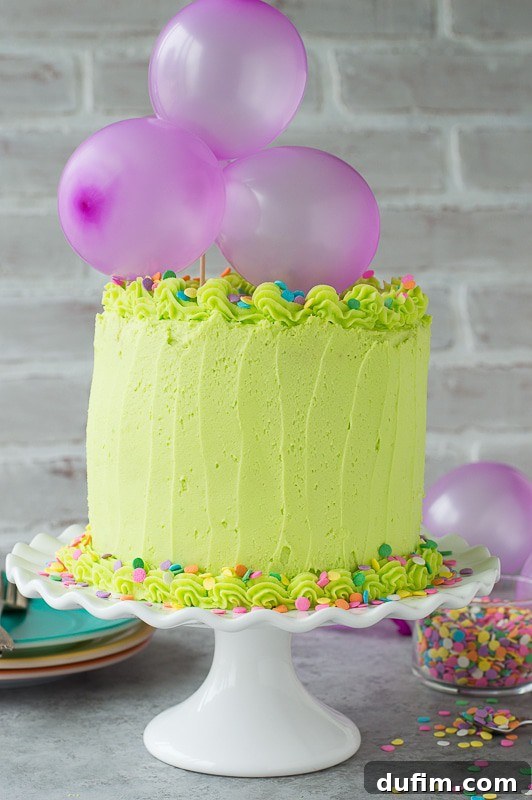
Ah, sprinkles! These tiny bursts of color are integral to any funfetti creation, transforming a simple cake into a canvas of festivity. But did you know there’s a nuanced science to choosing the right kind? Selecting the correct sprinkle type can make all the difference in achieving that perfect festive look without any unexpected surprises like color bleeding or melting. Let’s dive into our mini lesson on sprinkle etiquette and how to master their application:
- Jimmies (The Cake Batter Stars): For incorporating inside the cake batter, you absolutely must use jimmies sprinkles. These are the long, skinny, cylindrical ones you commonly see. Their robust coating allows them to hold their shape and vibrant color beautifully when baked into the cake. This ensures those signature joyful flecks are evenly distributed throughout your slices without bleeding or dissolving, giving you that classic funfetti appearance.
- Nonpareils (Handle with Care): The small, circular ball sprinkles, often called nonpareils, are undeniably charming and offer a delicate texture. However, they are notorious for bleeding their color when exposed to moisture and heat, making them less ideal for baking directly into batter. Save these delicate beauties for decorating the outside of an already cooled and frosted cake. Applied externally, they can truly shine, adding a pop of color and crunch without melting into a colorful puddle.
- Confetti Sprinkles (Exterior Glamour): For decorating the outside of this very cake, I opted for confetti sprinkles. These flat, disc-shaped sprinkles come in various sizes and shapes, adding a lovely textural contrast and a playful burst of color. They adhere perfectly to creamy buttercream and are fantastic for scattering, creating intricate patterns, or forming a vibrant border around the base or top of your cake.
- Beyond the Basics: The world of sprinkles is vast! Explore sanding sugars for sparkle, edible pearls for elegance, or shaped sprinkles (like stars or hearts) for themed cakes. Each type offers a unique way to enhance your dessert’s visual appeal.
Understanding these distinctions ensures your funfetti cake looks as fantastic as it tastes! No one wants a muddy-looking cake when they’re expecting a rainbow explosion. Apply sprinkles to frosting while it’s still slightly soft so they adhere well, but not so wet that they melt.
Crafting the Perfect Funfetti Cake: Essential Tips for Baking Success
Beyond the sprinkles and the charming topper, the foundation of this celebratory dessert is a perfectly moist and fluffy funfetti cake. Achieving this is simpler than you might think with a few key baking principles and techniques in mind:
The Cake Base: Light, Fluffy, and Full of Joy
A good funfetti cake starts with a superb vanilla base that’s tender, moist, and perfectly structured to hold those vibrant sprinkles. Here’s how to ensure your cake turns out flawlessly:
- Room Temperature Ingredients are Non-Negotiable: Always start with room temperature butter, eggs, and milk. This allows them to emulsify properly when mixed, creating a smooth, homogenous batter that traps air efficiently, resulting in a lighter, fluffier cake crumb. Cold ingredients don’t blend well and can lead to a lumpy batter.
- Accurate Measuring is Key: Baking is often referred to as a science, and for good reason! Use proper measuring cups and spoons, and for dry ingredients like flour, consider weighing them with a kitchen scale for ultimate precision. Over-flouring is a common pitfall that can lead to a dense, dry cake.
- Do Not Overmix: Once you add the dry ingredients to the wet, mix only until just combined and no streaks of flour remain. Overmixing develops the gluten in the flour, which can result in a tough, chewy, and dense cake texture – the opposite of what we want for a light funfetti!
- Quality Vanilla Extract: A good quality pure vanilla extract is paramount, as it forms the foundational flavor profile for most funfetti cakes. It perfectly complements the sweetness and allows the playful colors of the sprinkles to truly pop.
- Gentle Sprinkle Folding: When it’s time to add your jimmies, fold them in gently at the very end of the batter mixing process. This technique ensures they are evenly distributed throughout the batter without breaking up or negatively affecting the batter’s delicate texture.
- Prepare Your Pans Properly: Grease and flour your cake pans thoroughly, or line them with parchment paper, to ensure your cakes release easily without sticking.
The Zesty Lime Green Buttercream: A Burst of Freshness and Color
This buttercream isn’t just visually striking; it’s a delightful flavor journey. The bright, tangy notes of lime perfectly cut through the sweetness, making each bite incredibly refreshing and a perfect complement to the vanilla cake. Here’s how to create this vibrant frosting:
- Softened Butter is Crucial: Just like with the cake batter, softened, unsalted butter is absolutely crucial for a smooth, lump-free buttercream. Cream it thoroughly on medium-high speed until it’s light, fluffy, and almost white in color before adding any other ingredients. This incorporates air, making the frosting light.
- Sift Your Powdered Sugar: Sifting powdered sugar removes any lumps and ensures a silky-smooth frosting texture that’s easy to spread and pipe.
- Fresh Lime Zest and Juice: Use fresh lime zest for maximum aromatic impact – the oils in the zest provide intense lime flavor. A touch of fresh lime juice will achieve that authentic tangy flavor profile. Start with a small amount, then add more to taste, ensuring it doesn’t thin the frosting too much.
- Achieving Vibrant Color: Gel food coloring is your best friend for bold, true colors without thinning your frosting, which liquid food coloring can often do. Add it gradually, mixing well after each addition, until you reach your desired shade of electrifying lime green. Remember, a little goes a long way!
- Perfect Piping Consistency: The consistency of your buttercream is vital for smooth spreading and defined piping. If your buttercream is too stiff, add milk or cream a teaspoon at a time until it’s pliable. If it’s too soft (especially in warm kitchens), chill it in the refrigerator for 10-15 minutes, then re-whip until it reaches the perfect consistency.
More Than Just a Dessert: A Symbol of Joy and Celebration
In a world that sometimes feels overwhelmingly serious, this lime green funfetti cake is a vibrant reminder to embrace joy, celebrate milestones big and small, and inject a little extra color into our lives. It’s a testament to the fact that baking can be an incredibly personal and expressive art form. There’s a profound satisfaction in creating something beautiful and delicious with your own hands. Whether you’re marking a birthday, an anniversary, a graduation, or simply a sunny Tuesday afternoon that calls for something special, a homemade cake carries an unparalleled warmth and thoughtfulness that store-bought options, no matter how convenient, simply can’t match.
This cake is especially perfect for summer gatherings, backyard barbecues, or any occasion that calls for a fresh, zesty flavor profile and a look that screams “party!” The refreshing tang of lime combined with the playful funfetti creates a unique and unforgettable taste experience that will have everyone asking for the recipe. And the DIY balloon topper? It’s your secret weapon for adding that irresistible, personalized touch that will undoubtedly spark conversations and bring countless smiles.
So, gather your ingredients, put on your favorite celebratory music, and get ready to create a masterpiece that’s as fun to make as it is to eat. Don’t be afraid to get creative with your sprinkle choices, experiment with different colors for your buttercream, or even try a different kind of DIY topper to reflect your personal style. The true beauty of baking lies not just in the final product, but in the experimentation, the process, and most importantly, the joy of sharing your delicious creations with loved ones. This cake is an invitation to add a splash of color and a dash of zest to your next special moment.
We hope this comprehensive guide inspires you to whip up your very own Zesty Lime Green Funfetti Cake with a DIY Balloon Topper. It’s more than just a recipe; it’s an invitation to celebrate life’s sweet moments with flair and a whole lot of deliciousness. Happy baking!