
Delightful Easter Cupcakes: Your Guide to Bakery-Style Treats & Kid-Friendly Decorating
Welcome to your ultimate guide for creating truly magical Easter cupcakes! These festive treats begin with my deeply loved and meticulously perfected vanilla cupcake recipe. Crafted through countless tests for cookbooks and blog features, this recipe guarantees bakery-quality results right in your own kitchen – every single time. Say goodbye to dry, crumbly cupcakes; prepare for a soft, moist crumb and consistent flavor that forms the perfect canvas for any decorating theme you can imagine.
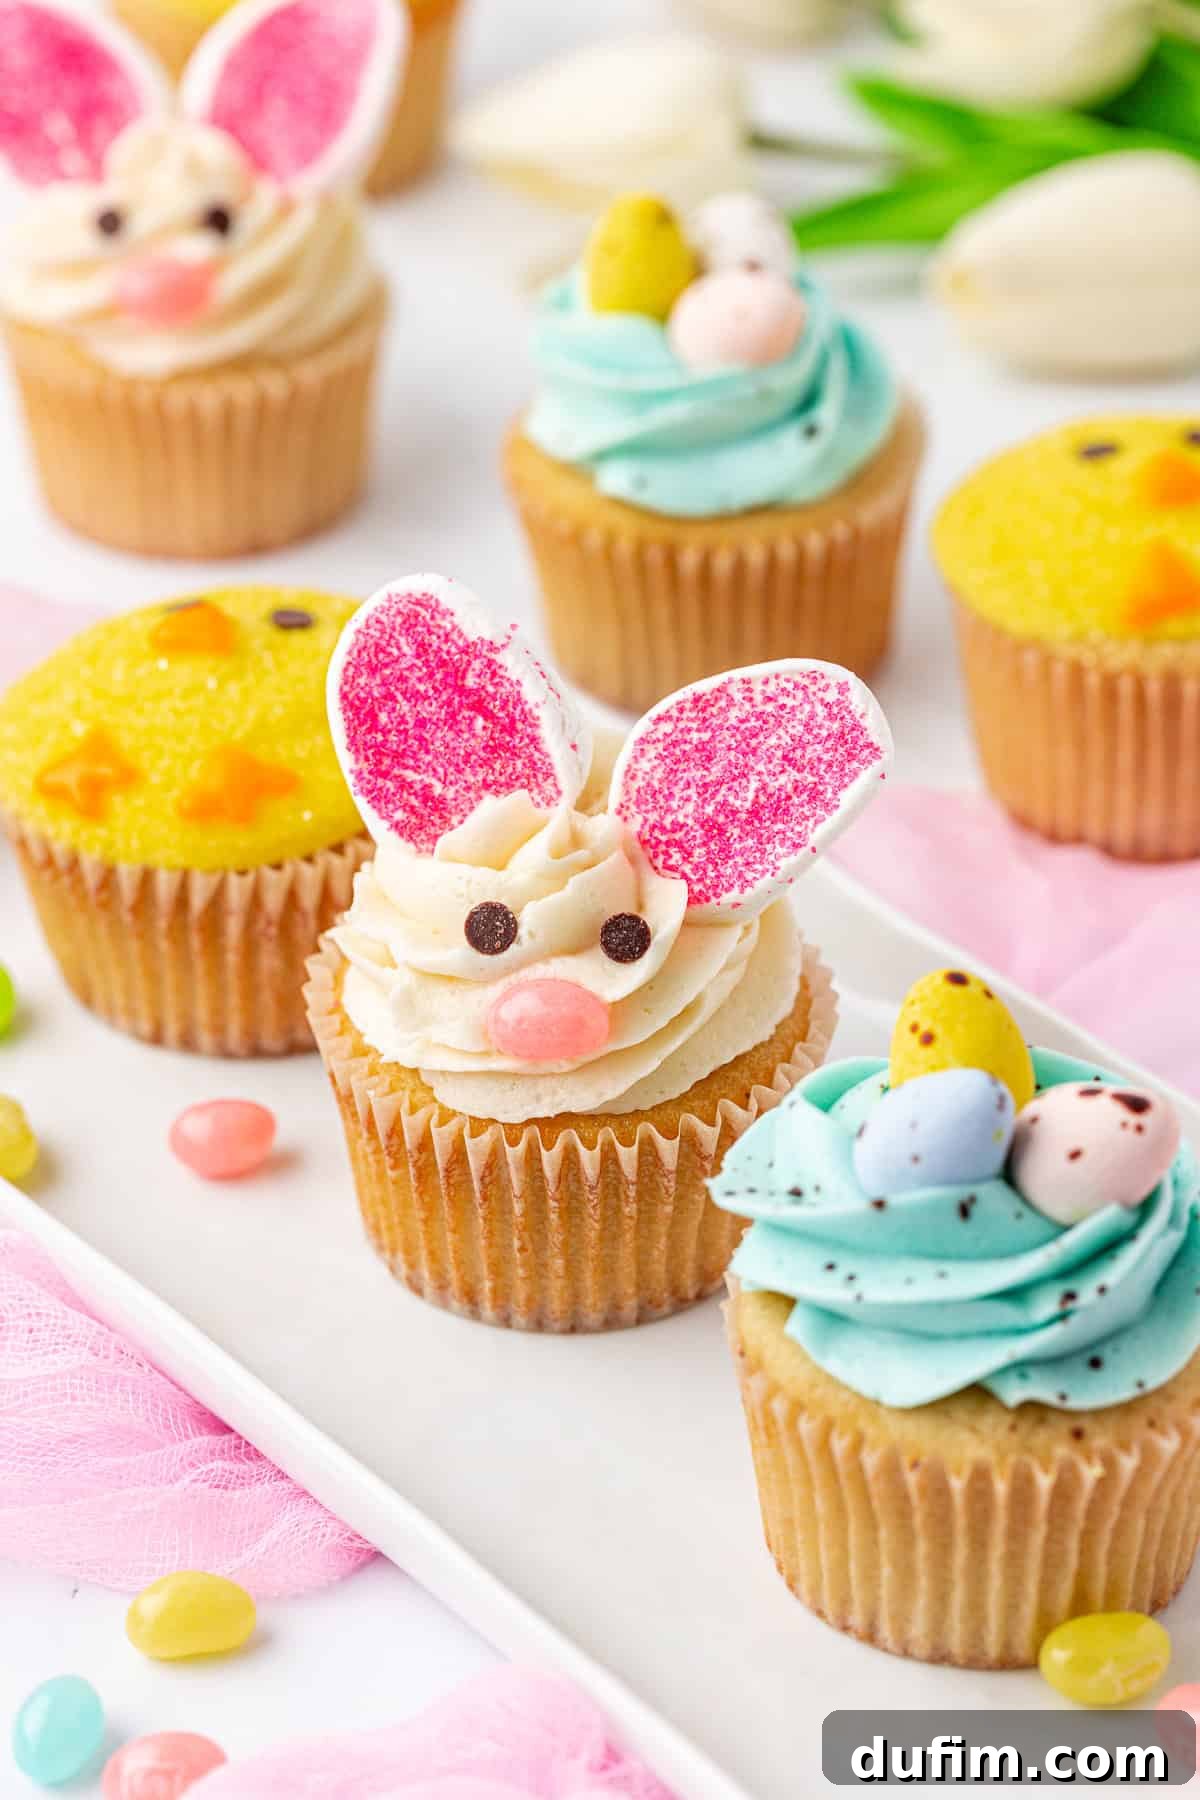
What truly elevates these Easter cupcakes beyond just “cute” is their foundation: a reliable vanilla cupcake base renowned among readers for its exceptional tenderness and flavor. My commitment to extensive testing means I understand exactly what it takes to achieve that perfect balance of softness and moisture, making these cupcakes an absolute joy to bake and even better to eat. They are designed to be forgiving for home bakers, ensuring you get picture-perfect results without the stress.
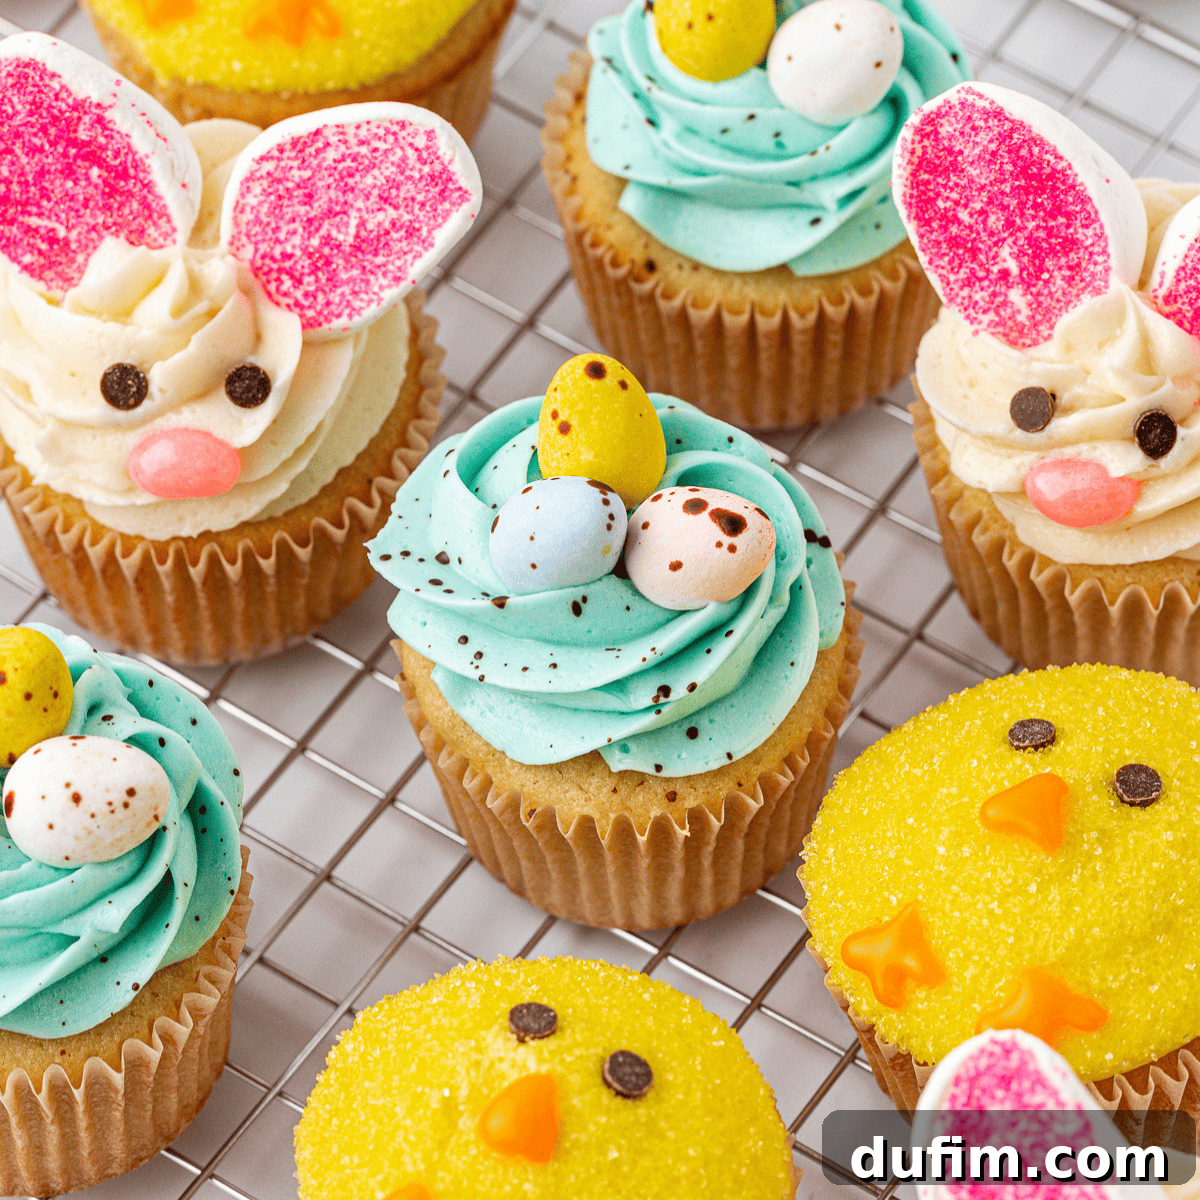
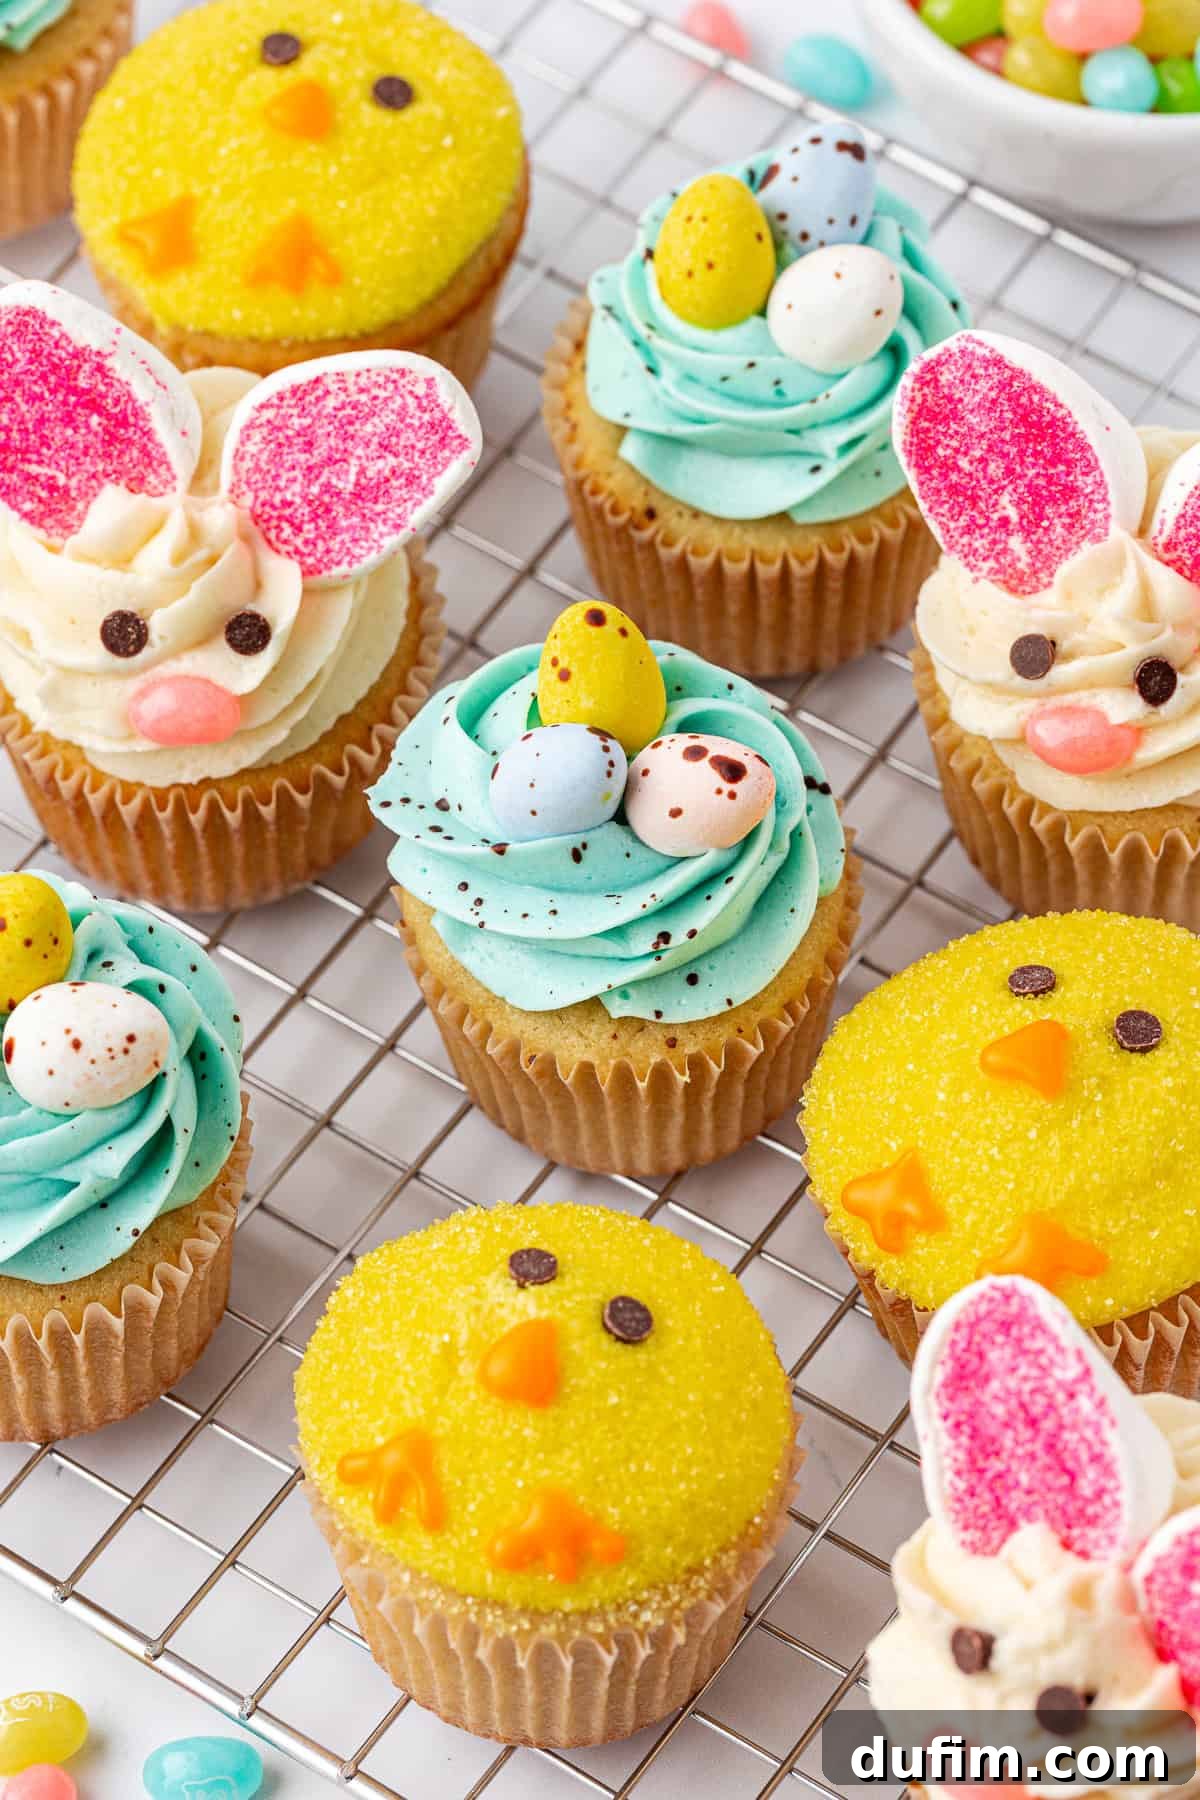
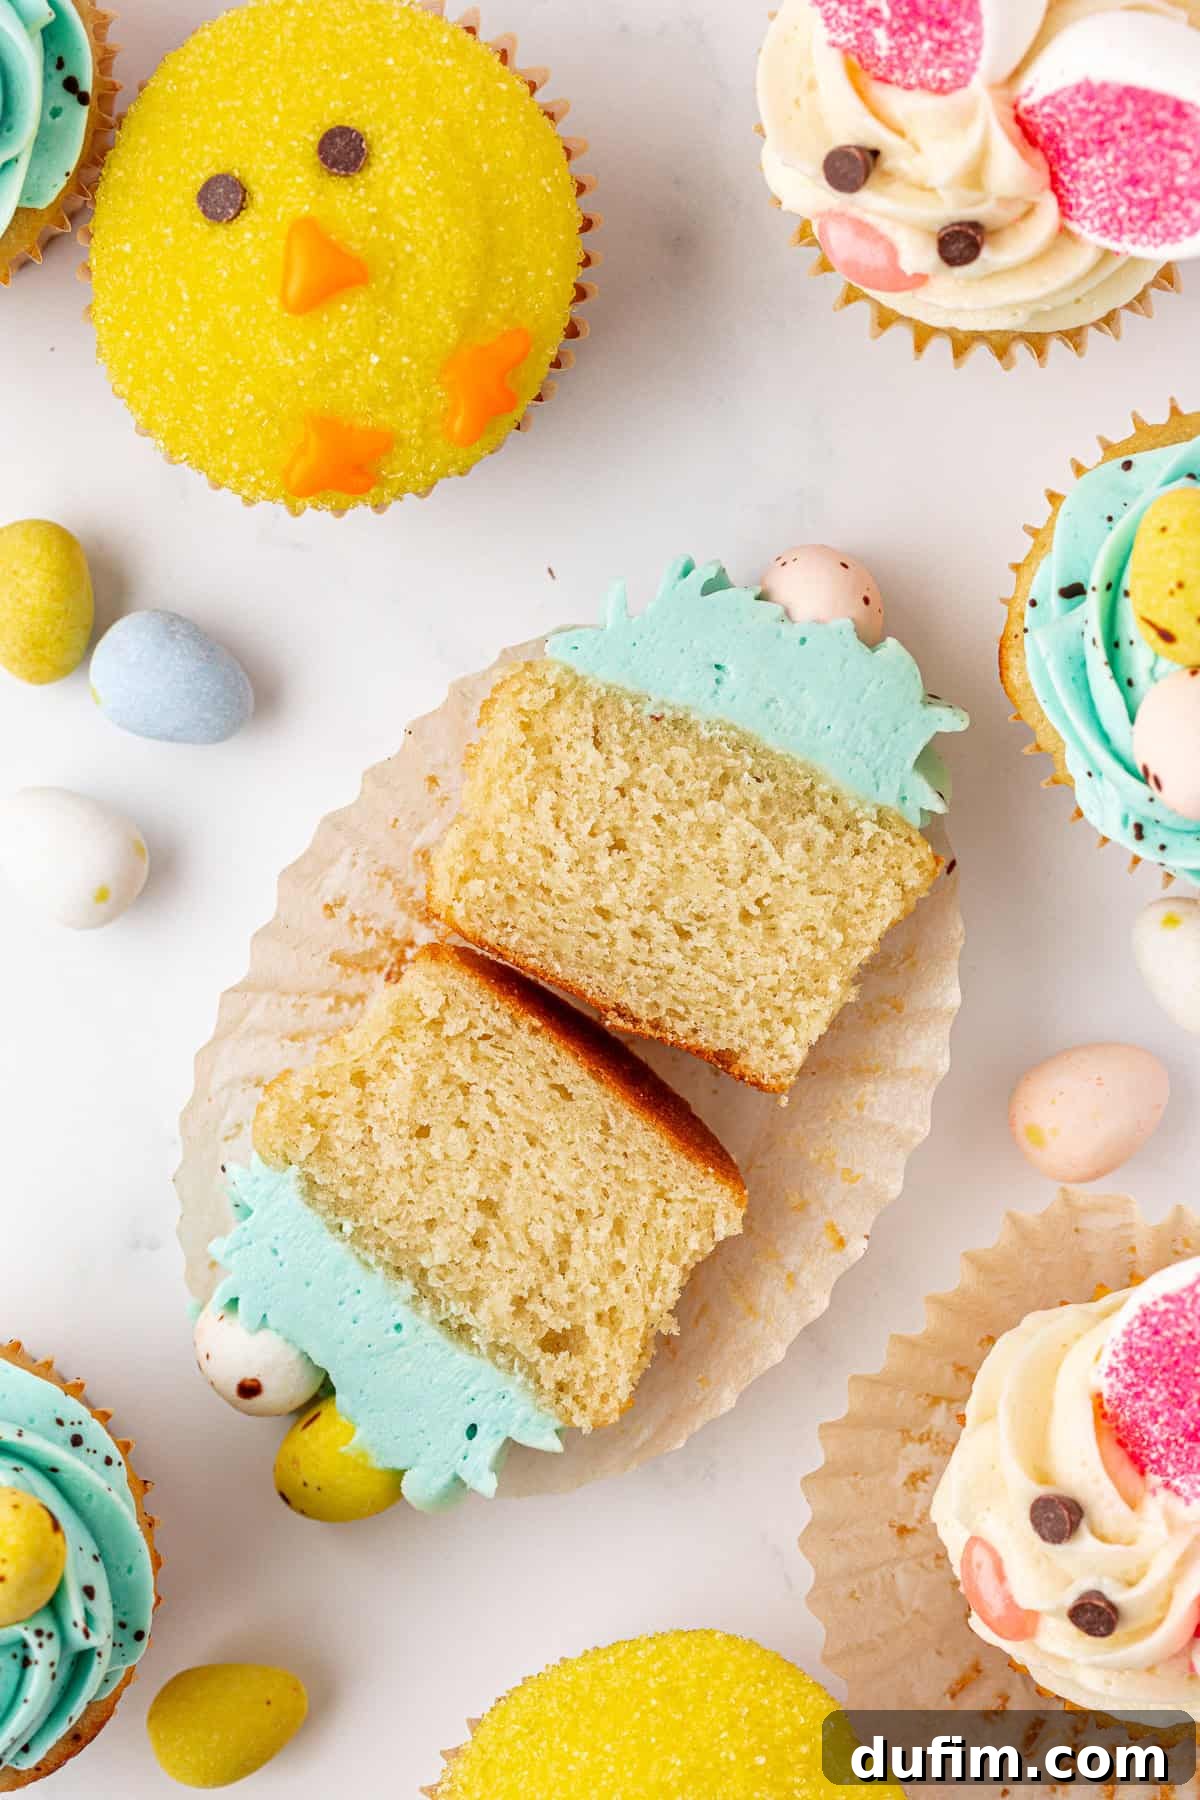
Beyond their delicious taste, these Easter cupcakes shine through their charming, kid-friendly designs. I’ve distilled complex decorating techniques into simple, manageable steps, making them accessible for even beginner bakers and their eager little assistants. Whether you envision fluffy yellow chicks adorned with sparkling sanding sugar, sweet bunny faces with soft marshmallow ears, or speckled robin’s egg cupcakes nestled with colorful candy eggs and a hint of cocoa “paint,” these are truly achievable decorating ideas you can execute with confidence at home. This isn’t about perfection; it’s about fostering creativity and making unforgettable holiday memories.
My philosophy extends beyond just providing a recipe; I believe in teaching and empowering you to succeed. Every decorative variation featured here has been meticulously developed and refined in my own kitchen. This means you can bypass the common trial-and-error often associated with elaborate baking projects. If you’ve ever felt intimidated by the flawless images on Pinterest, consider this your invitation to dive in. Yes, you absolutely can create these beautiful treats! Let’s embark on a journey to bake something festive, incredibly fun, and utterly delicious this Easter season.
Tips for Decorating Easter Cupcakes with Kids
Baking and decorating with children can transform a simple activity into one of the most cherished holiday traditions. Far from being a source of chaos, it can be a wonderfully smooth and enjoyable experience for everyone involved. Here are my tried-and-true tips to ensure your Easter cupcake decorating session is both fun and manageable:
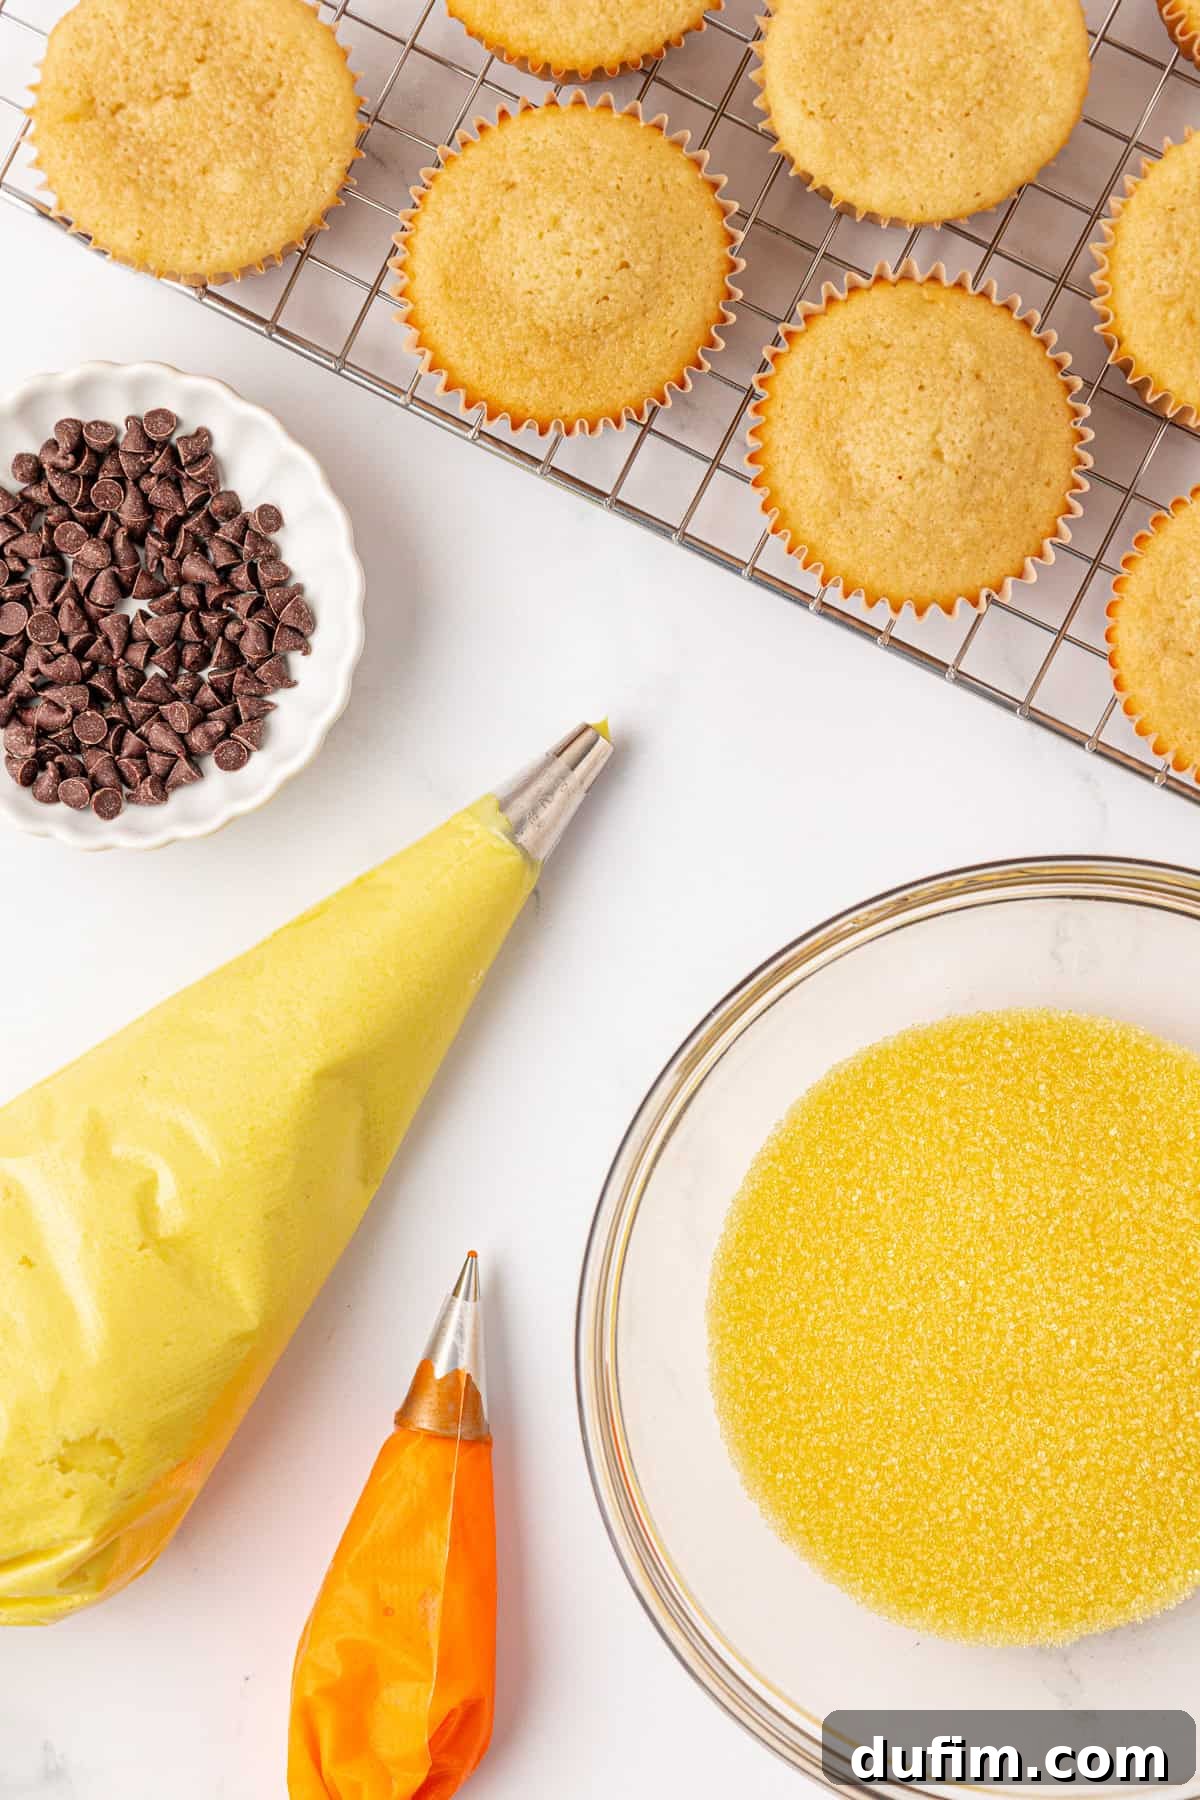
- Prep in Advance: The key to a stress-free decorating session is preparation. Before your little helpers even enter the kitchen, take the time to measure and tint all your frostings. Cut marshmallows for bunny ears, prepare any candy toppings, and arrange them neatly. Having everything ready to go keeps the momentum flowing and significantly reduces potential messes, allowing you to focus on the fun part with your kids.
- Give Age-Appropriate Tasks: Tailor tasks to each child’s age and skill level. Younger children will delight in simple jobs like sprinkling vibrant sanding sugar, carefully placing candy eggs, or pressing mini chocolate chips into place for eyes. Older children can take on more intricate roles, such as piping frosting swirls or using a paintbrush to create the charming speckles on robin’s egg cupcakes. This ensures everyone feels involved and successful.
- Set Up a Dedicated Decorating Station: Organize your toppings and tools efficiently. Using muffin tins or small, shallow bowls for various sprinkles, candies, and decorations helps keep everything contained. This clear, organized setup allows kids to easily see all their creative options without rummaging or making a larger mess. Consider laying down newspaper or a washable tablecloth for extra peace of mind.
- Embrace Imperfection and Creativity: Remember, the goal isn’t bakery-aisle perfection; it’s about the joy of creating together. Not every bunny will have perfectly symmetrical ears, and that’s absolutely part of the charm! Encourage your children to be creative, express themselves, and make each cupcake uniquely their own. The laughter, bonding, and memories forged during this time are infinitely more valuable than a flawless finish.
- Capture the Moment Before the Taste Test: Once these adorable cupcakes are decorated, they tend to disappear quickly! Before eager hands claim their masterpieces, make sure to snap a few quick photos. These pictures will serve as wonderful keepsakes of your family’s festive baking adventure and provide a lasting reminder of the fun you had.
How to Make Adorable Easter Cupcakes
These easy Easter cupcakes deliver on all fronts: incredible taste, charming presentation, and an enjoyable baking experience perfect for involving your kids. Follow these simple steps to bring some tasty Easter cheer into your home!
Cupcakes
- Prepare Oven and Pan: Begin by preheating your oven to 350ºF (180°C). Line a standard muffin pan with paper liners, ensuring each cup is ready for batter. Set the prepared pan aside.
- Combine Dry Ingredients: In a medium mixing bowl, thoroughly whisk together the all-purpose flour, baking powder, baking soda, and salt. Whisking ensures these leavening agents and flavor enhancers are evenly distributed throughout the flour. Set this bowl aside.
- Combine Wet Ingredients: Using either a stand mixer fitted with the paddle attachment or a hand mixer, beat the softened unsalted butter, granulated sugar, and vegetable oil together on medium speed for approximately 2 minutes. Continue beating until the mixture is light, pale, and fluffy. Next, incorporate the large eggs, sour cream, milk (whole milk is recommended for richness), and vanilla extract. Beat for an additional minute until everything is well combined and smooth.
- Combine Wet and Dry Ingredients: Reduce your mixer speed to low. Gradually add the reserved dry ingredients to the wet mixture, mixing just until everything is fully incorporated and no streaks of flour remain. Be careful not to overmix, as this can lead to tough cupcakes.
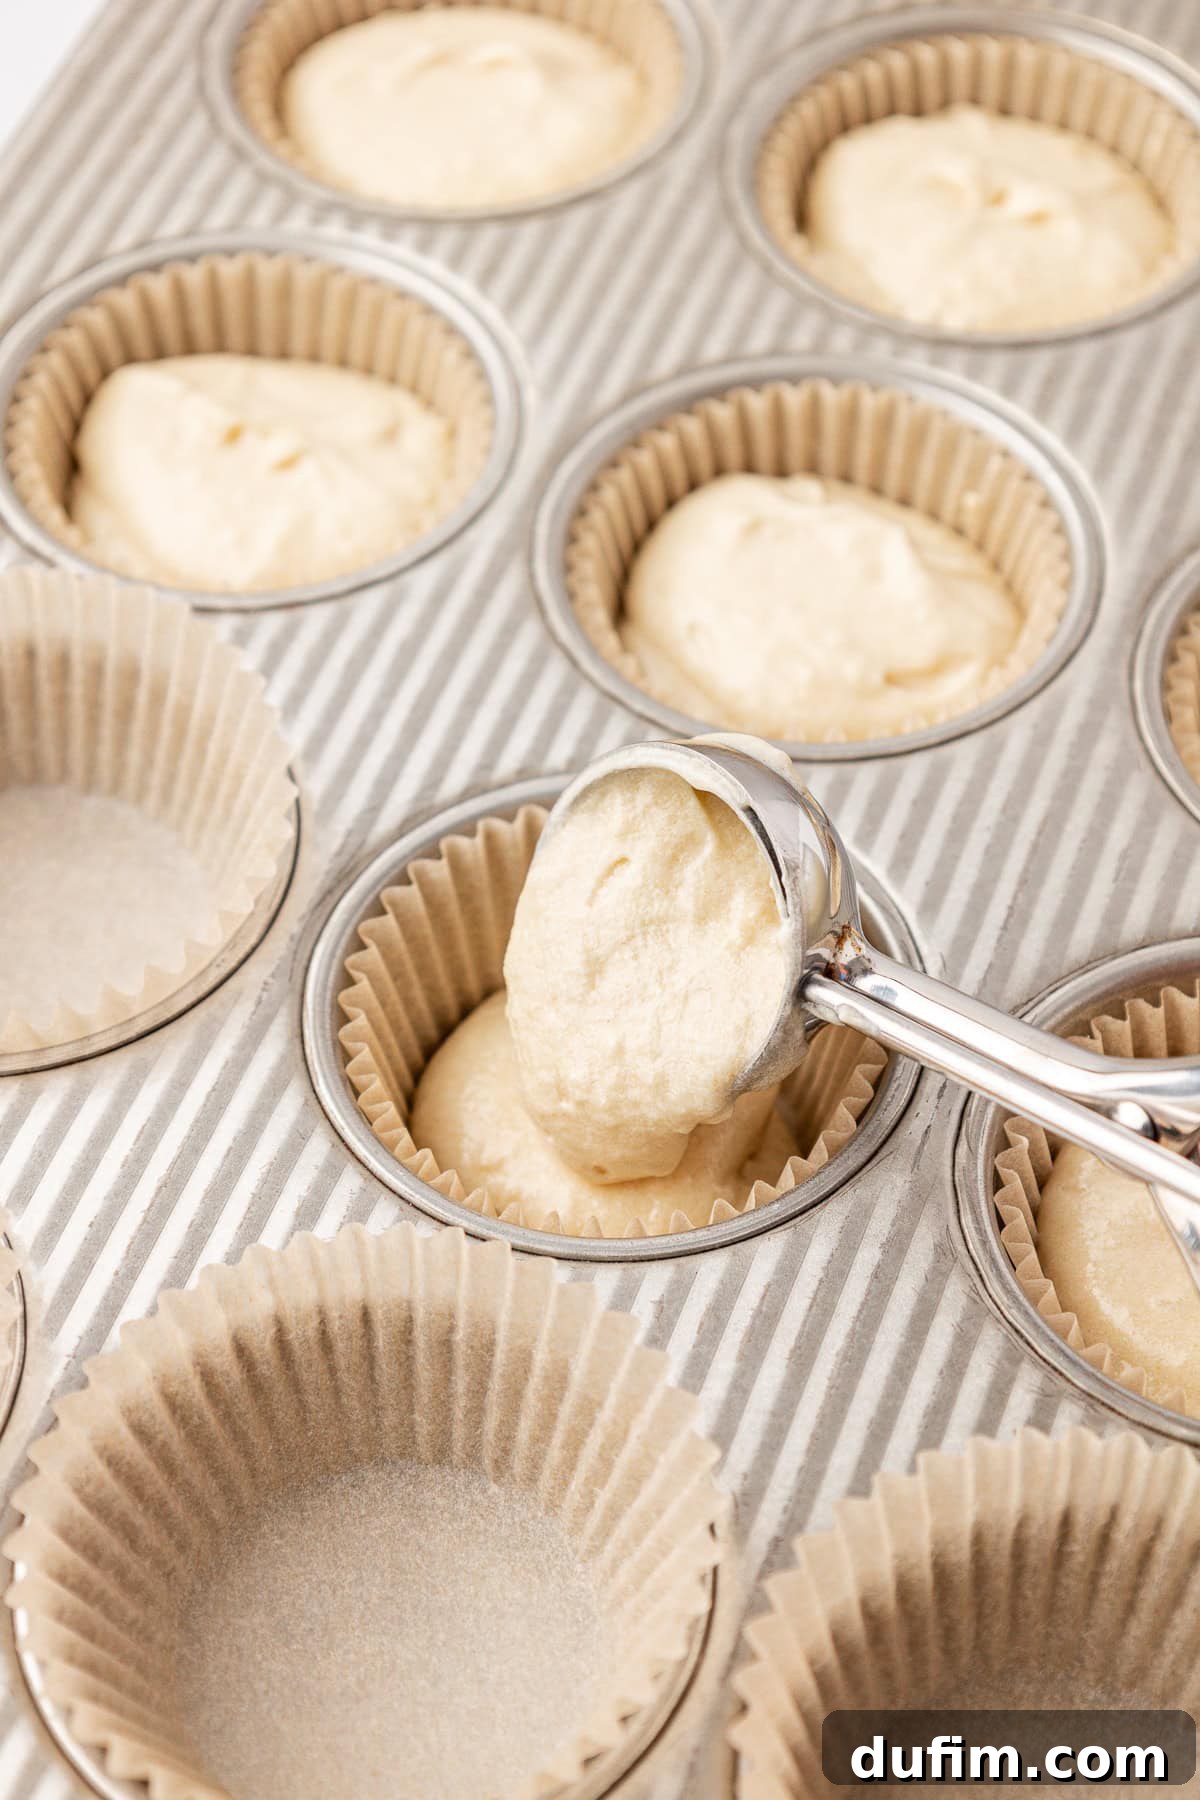
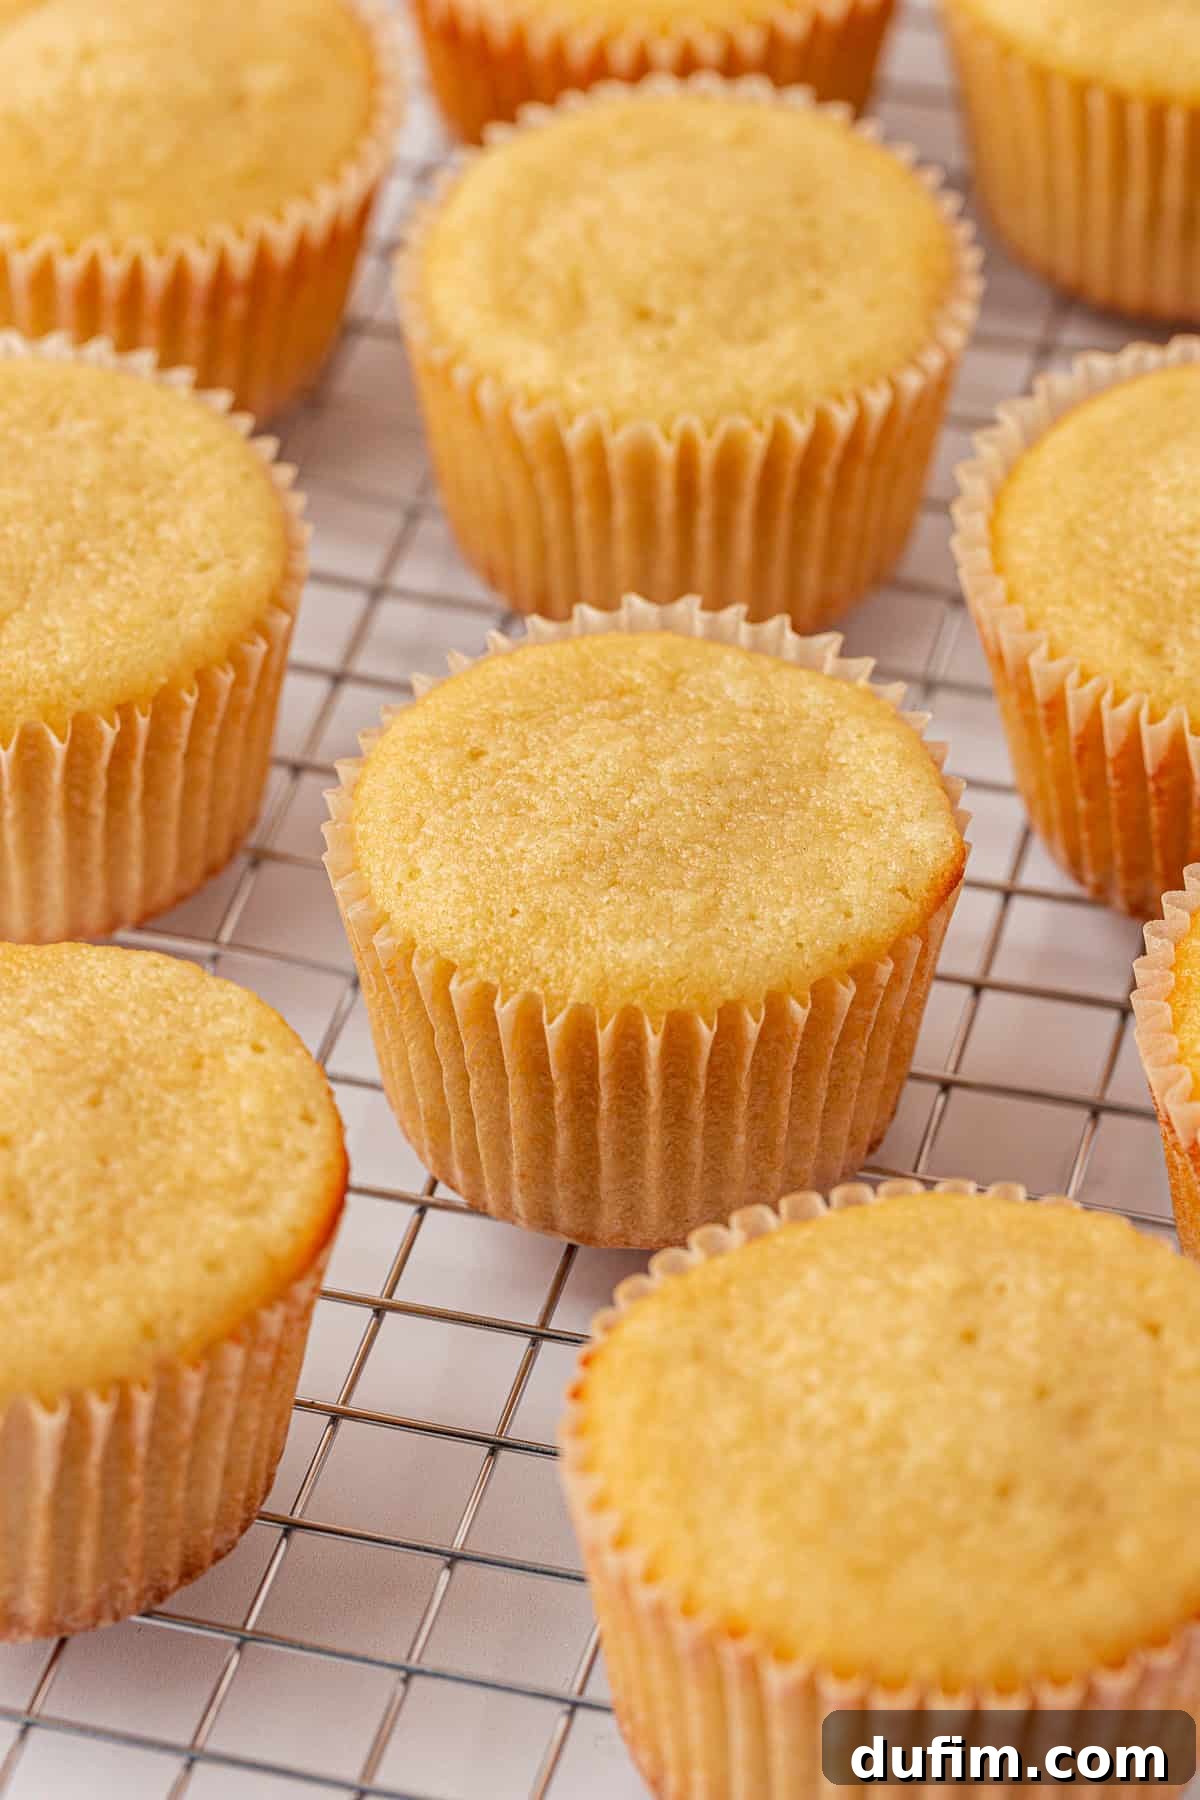
- Bake and Cool: Fill each prepared muffin liner halfway with the cupcake batter. This ensures they don’t overflow during baking and allows for a perfect dome. Bake for 17-19 minutes, or until a wooden toothpick inserted into the center of a cupcake comes out with only a few moist crumbs attached. Once baked, remove the cupcakes from the oven and let them cool completely on a wire rack before attempting to frost them. Cooling is crucial for frosting success!
Vanilla Frosting
- Prepare and Adjust Frosting: In a clean mixing bowl (using a stand mixer or hand mixer), beat the room-temperature unsalted butter, vanilla extract, and a pinch of salt on medium speed for about 2 minutes. The mixture should become noticeably light and fluffy. Gradually add the powdered sugar, alternating with 3 tablespoons of milk or heavy cream, mixing on low speed until the frosting is smooth and creamy. Taste and adjust for sweetness by adding more powdered sugar if desired. If the frosting appears too thick for piping or spreading, thin it with an additional 2-4 tablespoons of milk or cream, adding it one tablespoon at a time until you reach your desired consistency.
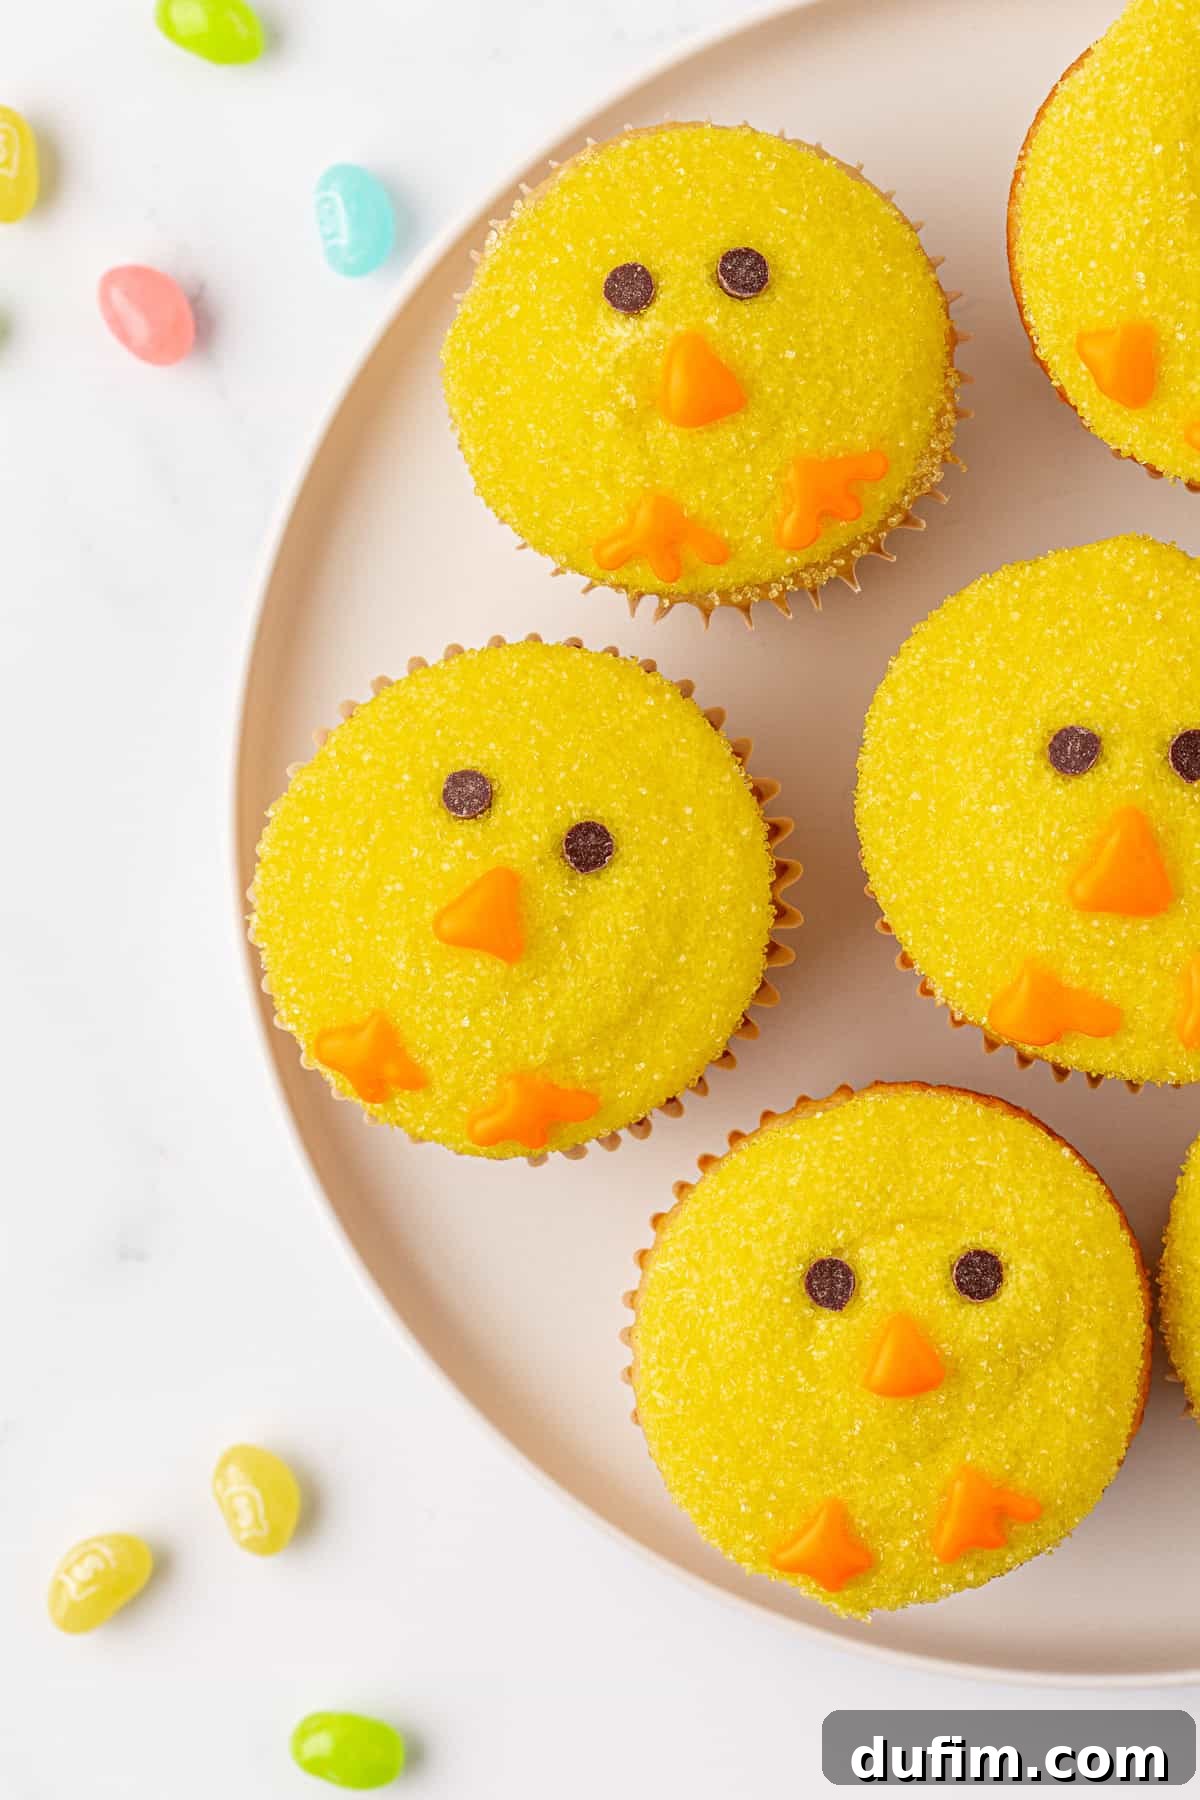
Chick Design
- Color Frosting: Divide your vanilla frosting. Use yellow gel food coloring to tint about 1 ½ cups of frosting a vibrant chick yellow. Take approximately 2 tablespoons of frosting and dye it orange for the beaks and feet. Mix both colors thoroughly until they are evenly tinted.
- Frost Cupcakes: Using an offset spatula or a butter knife, apply a generous amount of yellow frosting to the top of each cooled cupcake. Gently smooth the frosting into a rounded dome shape, mimicking the fluffy body of a baby chick.
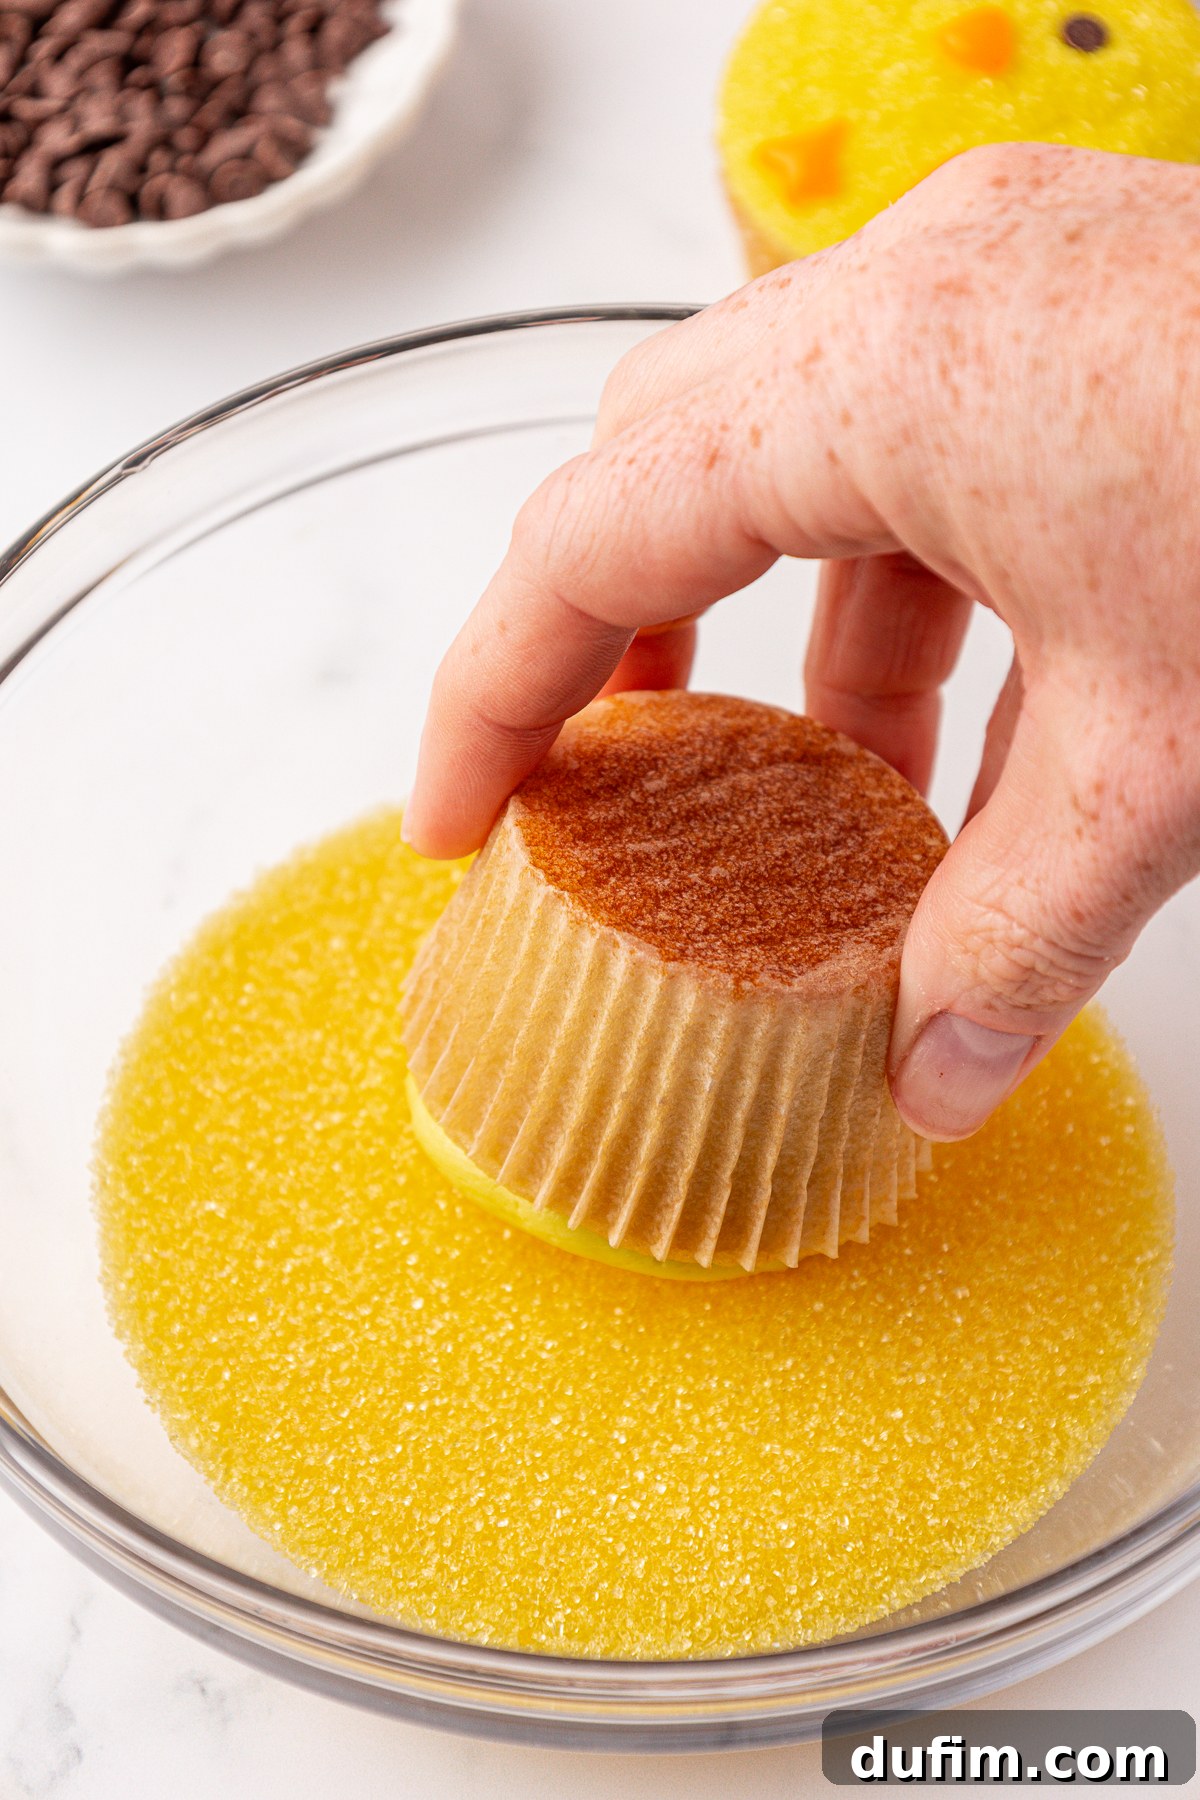
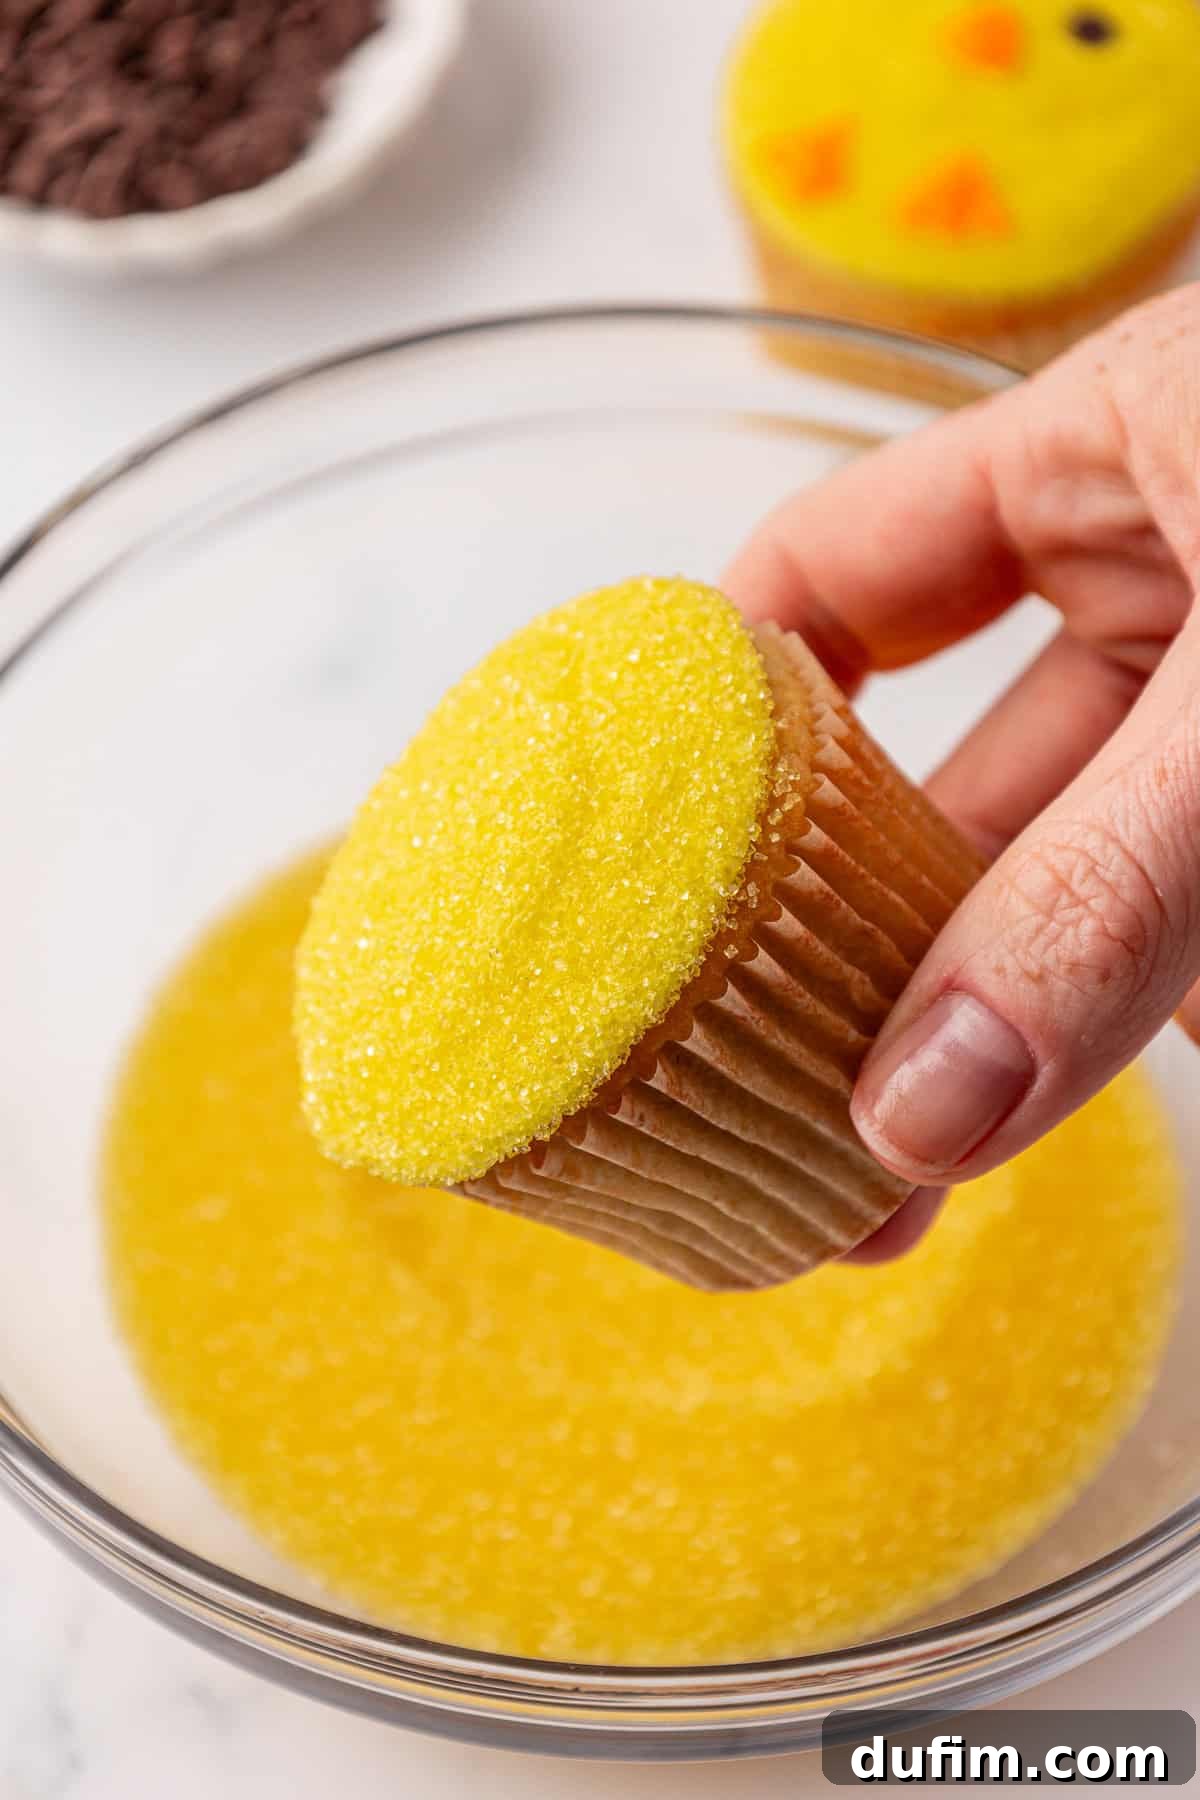
- Add Sanding Sugar: For that irresistible fluffy, sparkly chick texture, gently roll the frosted top of each cupcake into a bowl of yellow sanding sugar until it’s completely coated. Alternatively, you can generously sprinkle the sugar over the top.
- Add Eyes: Carefully place two mini chocolate chips, with the point side facing down, near the top center of each cupcake. These will form the adorable, bright eyes of your chicks.
- Add Beak and Feet: Transfer your orange frosting to a piping bag fitted with a small round tip, or simply use a zip-top bag with a tiny corner snipped off. Pipe a small triangle shape just below the chocolate chip eyes to create the chick’s beak. Using the same piping bag, pipe two small orange dots or short lines at the bottom of the cupcake to represent the feet.
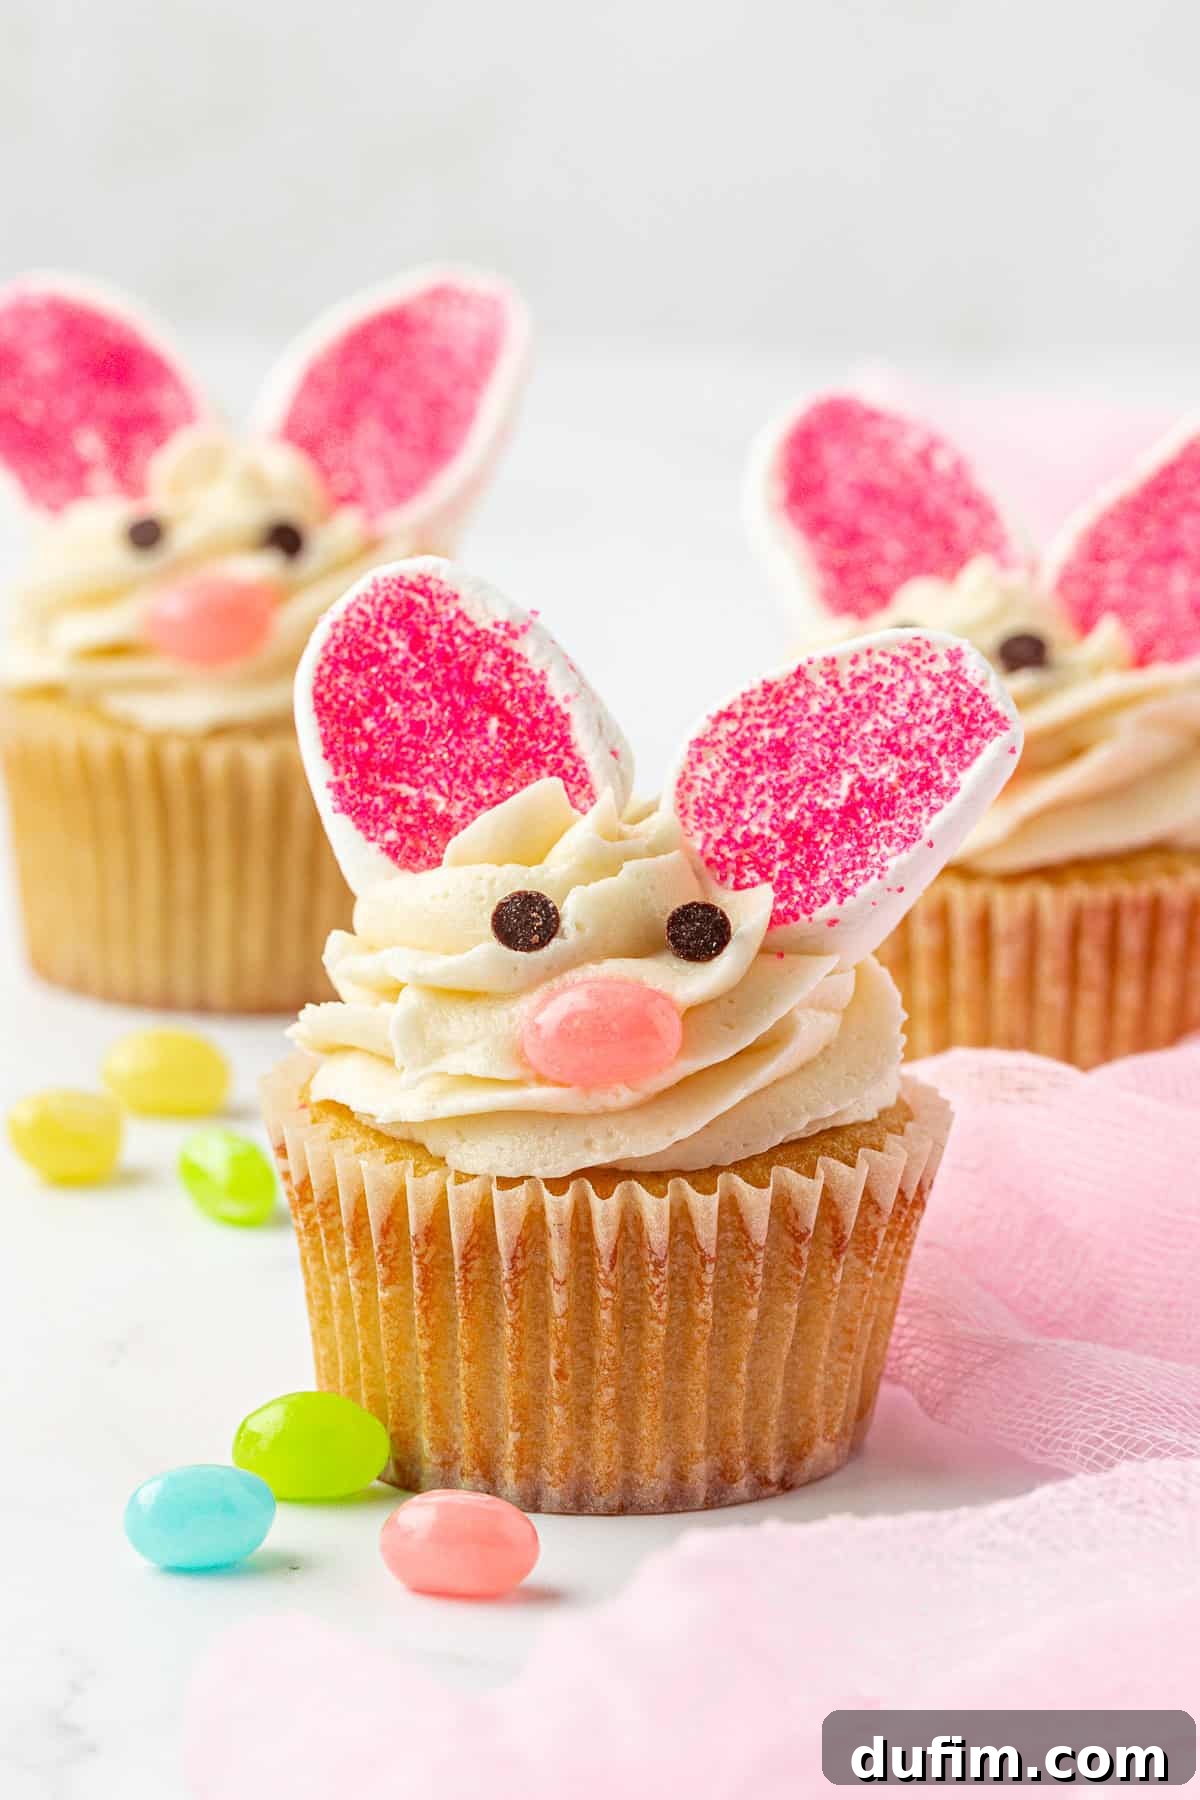
Bunny Design
- Frost Cupcakes: Using a piping bag fitted with your favorite large round or star tip, create a generous swirl of vanilla frosting on each cupcake. For a classic, tall swirl, start piping from the outer edge of the cupcake and work your way inward, building height as you go. Alternatively, you can use an offset spatula to create a smooth, domed surface.
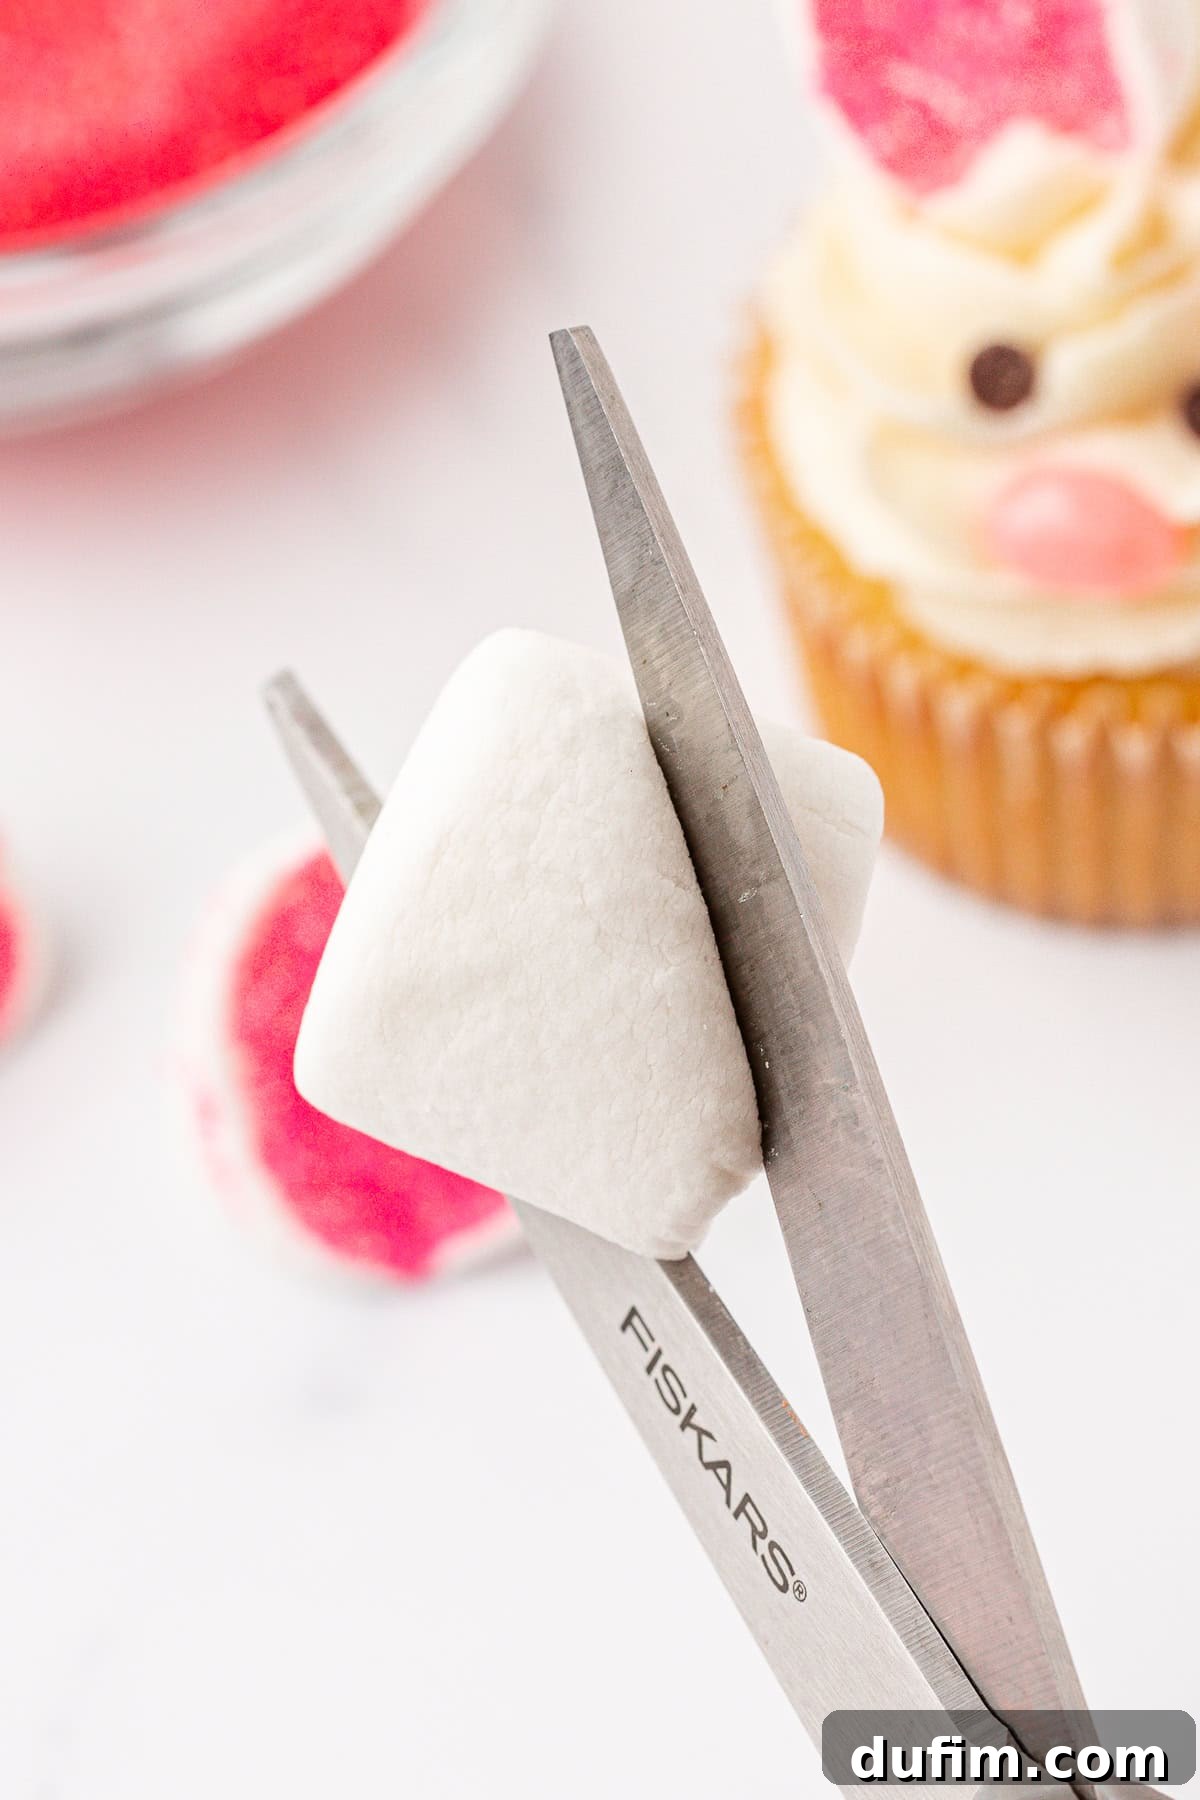
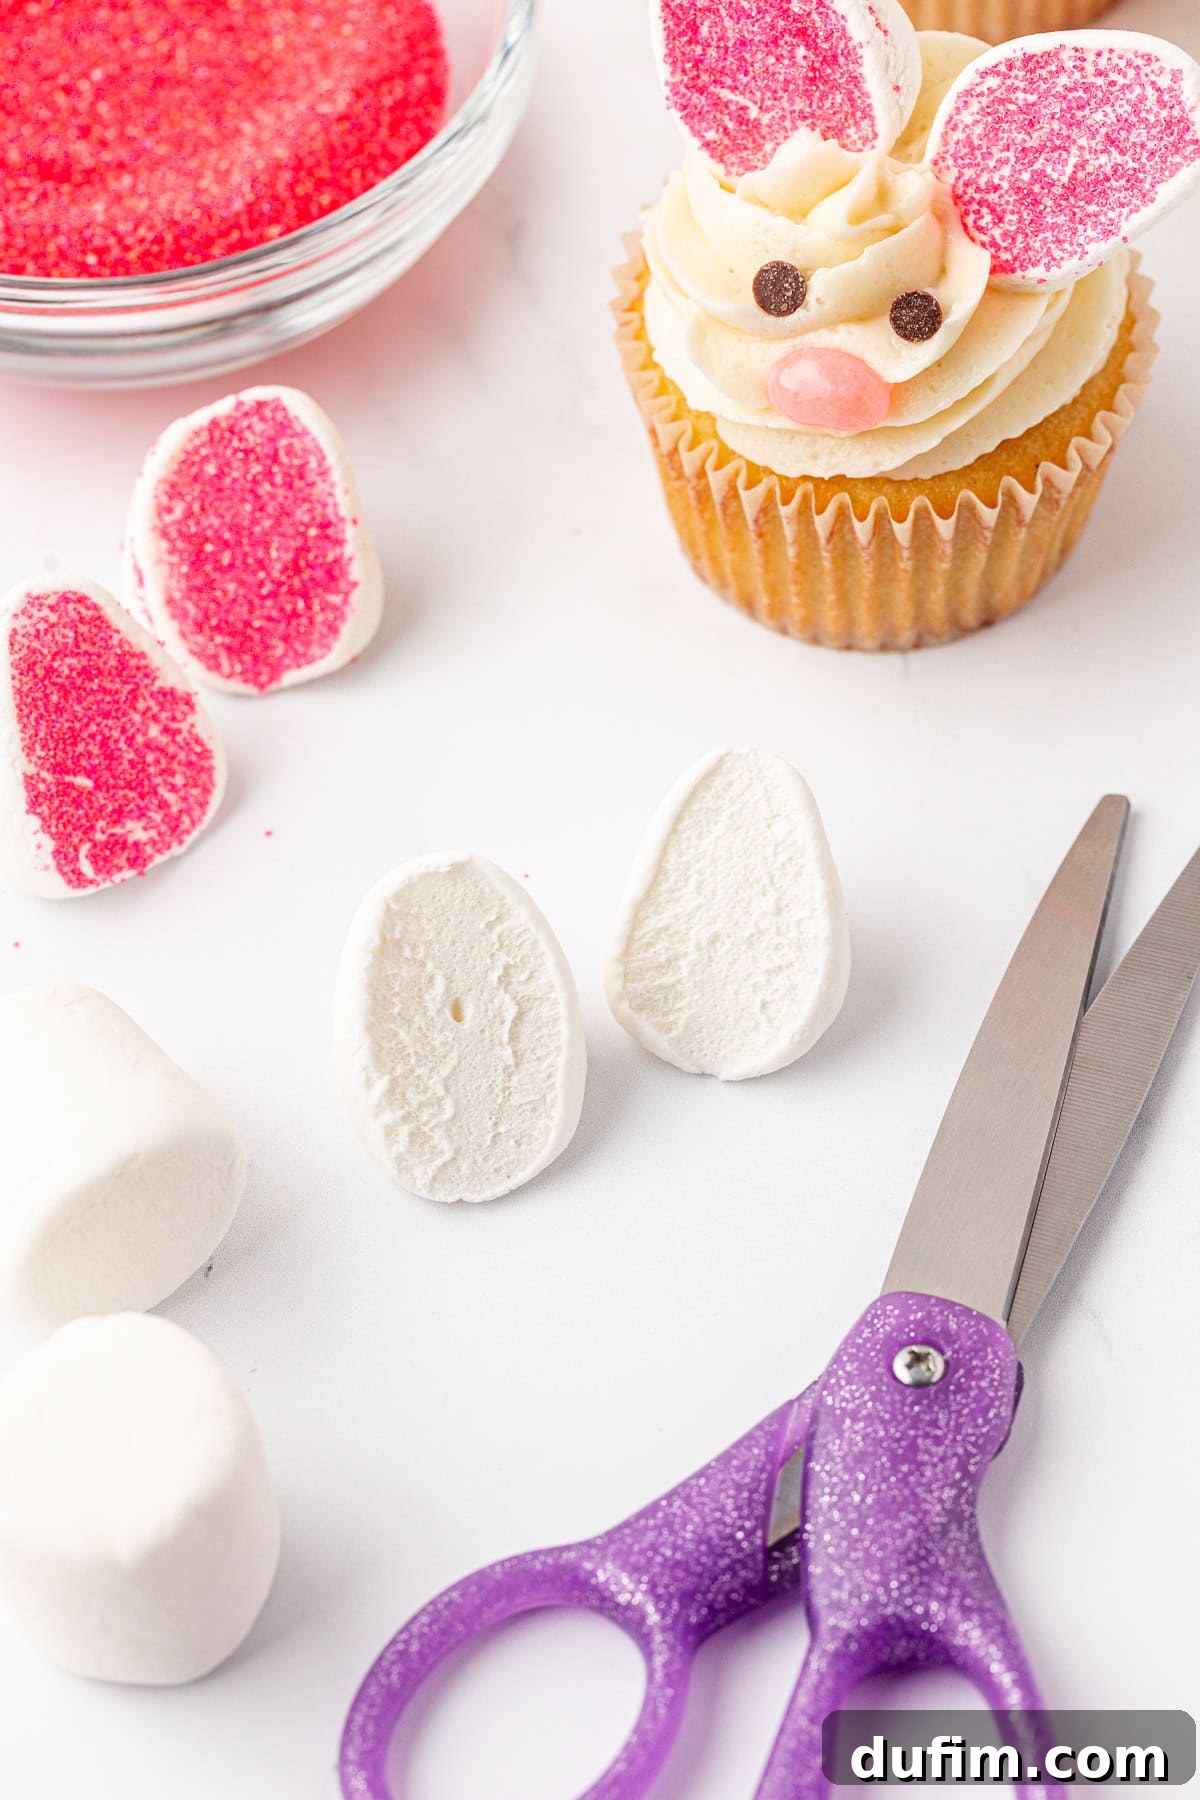
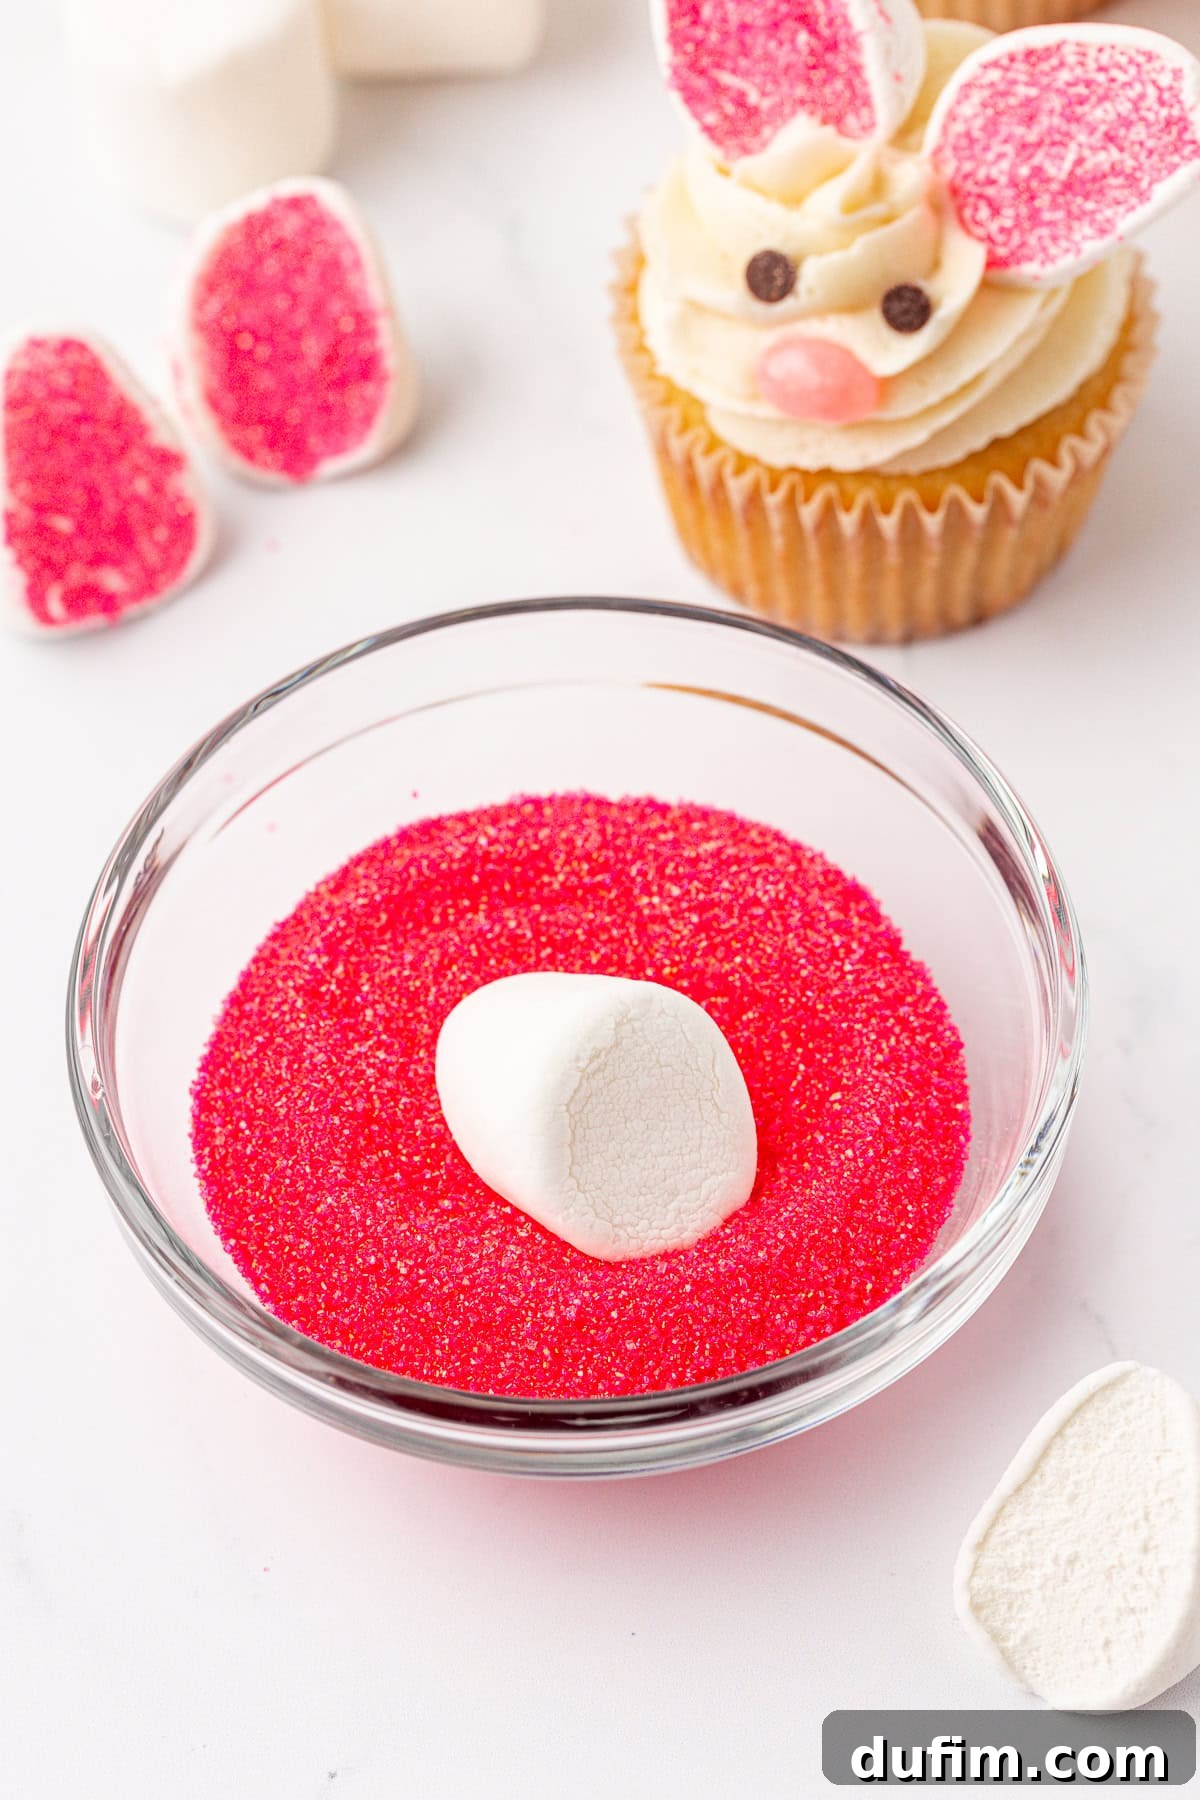
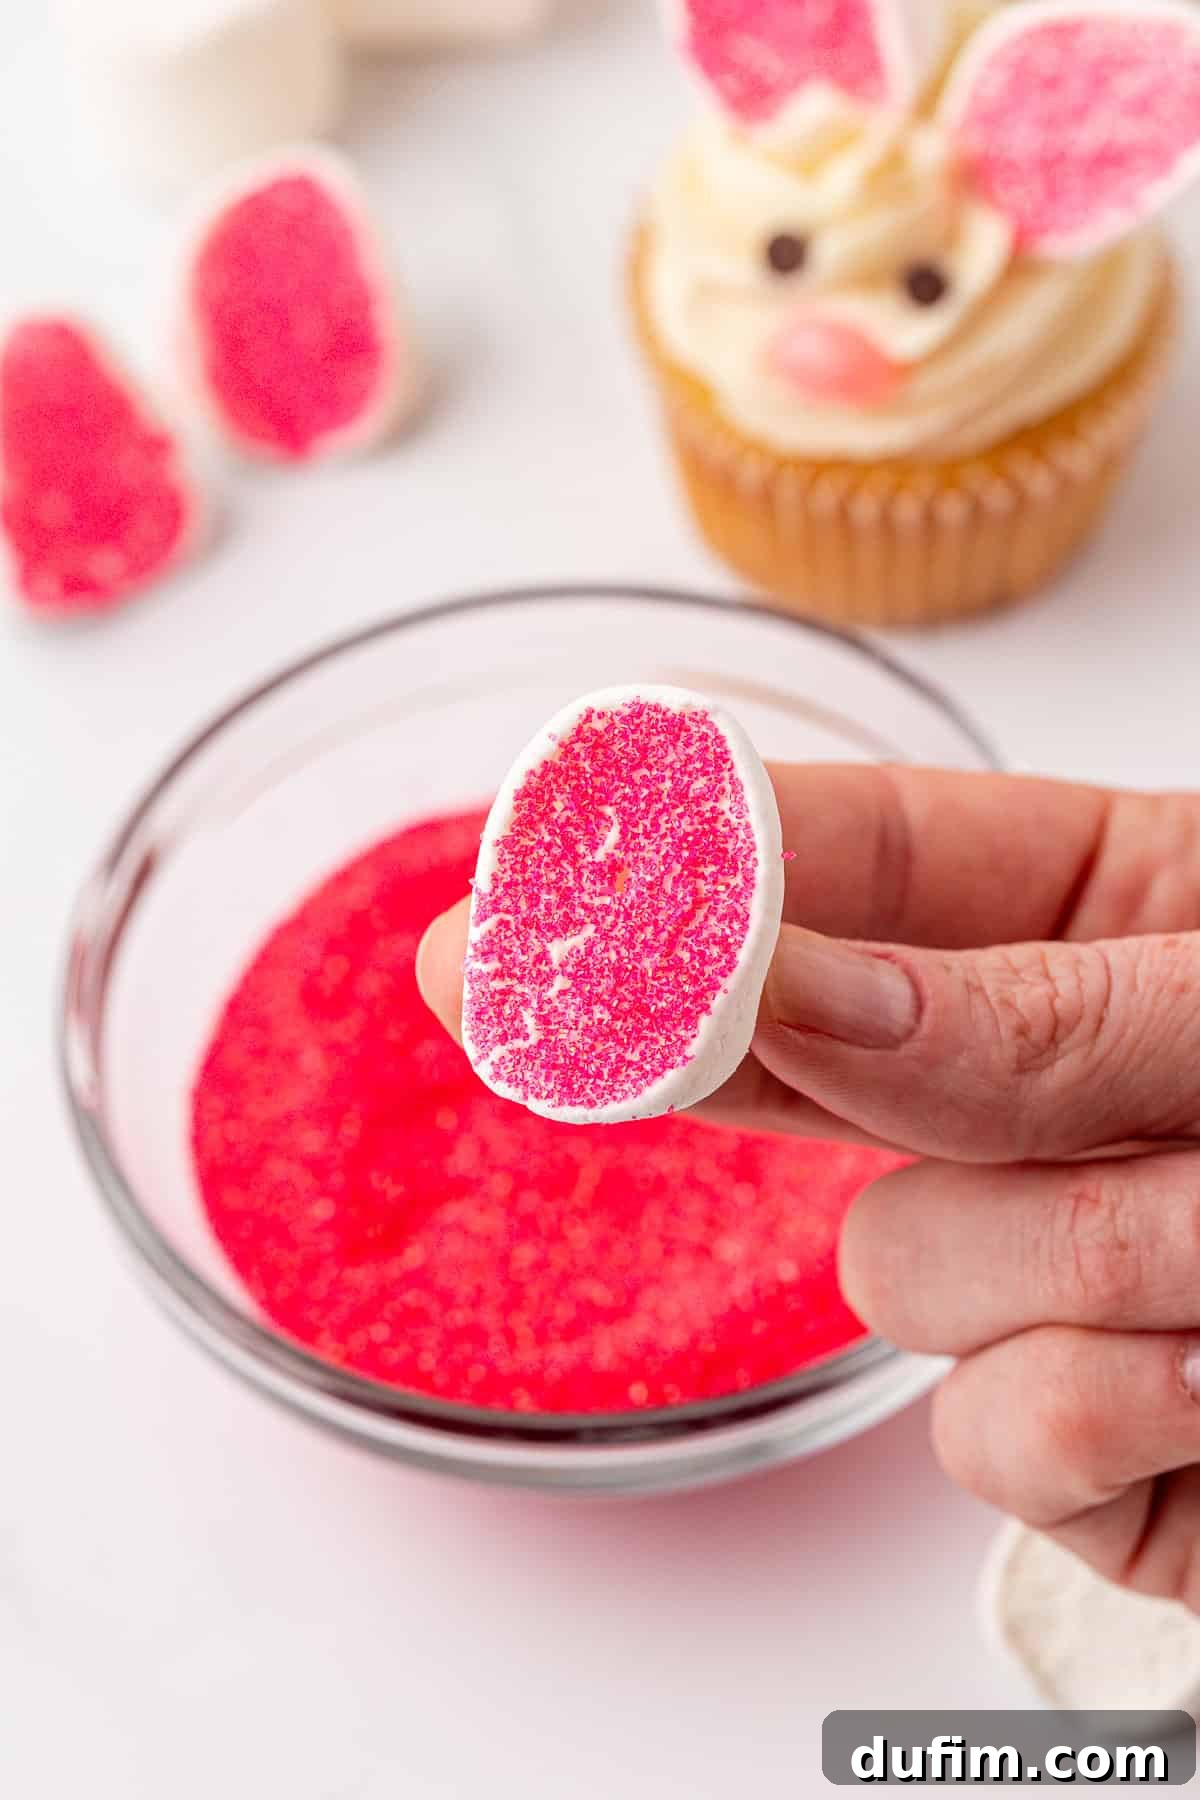
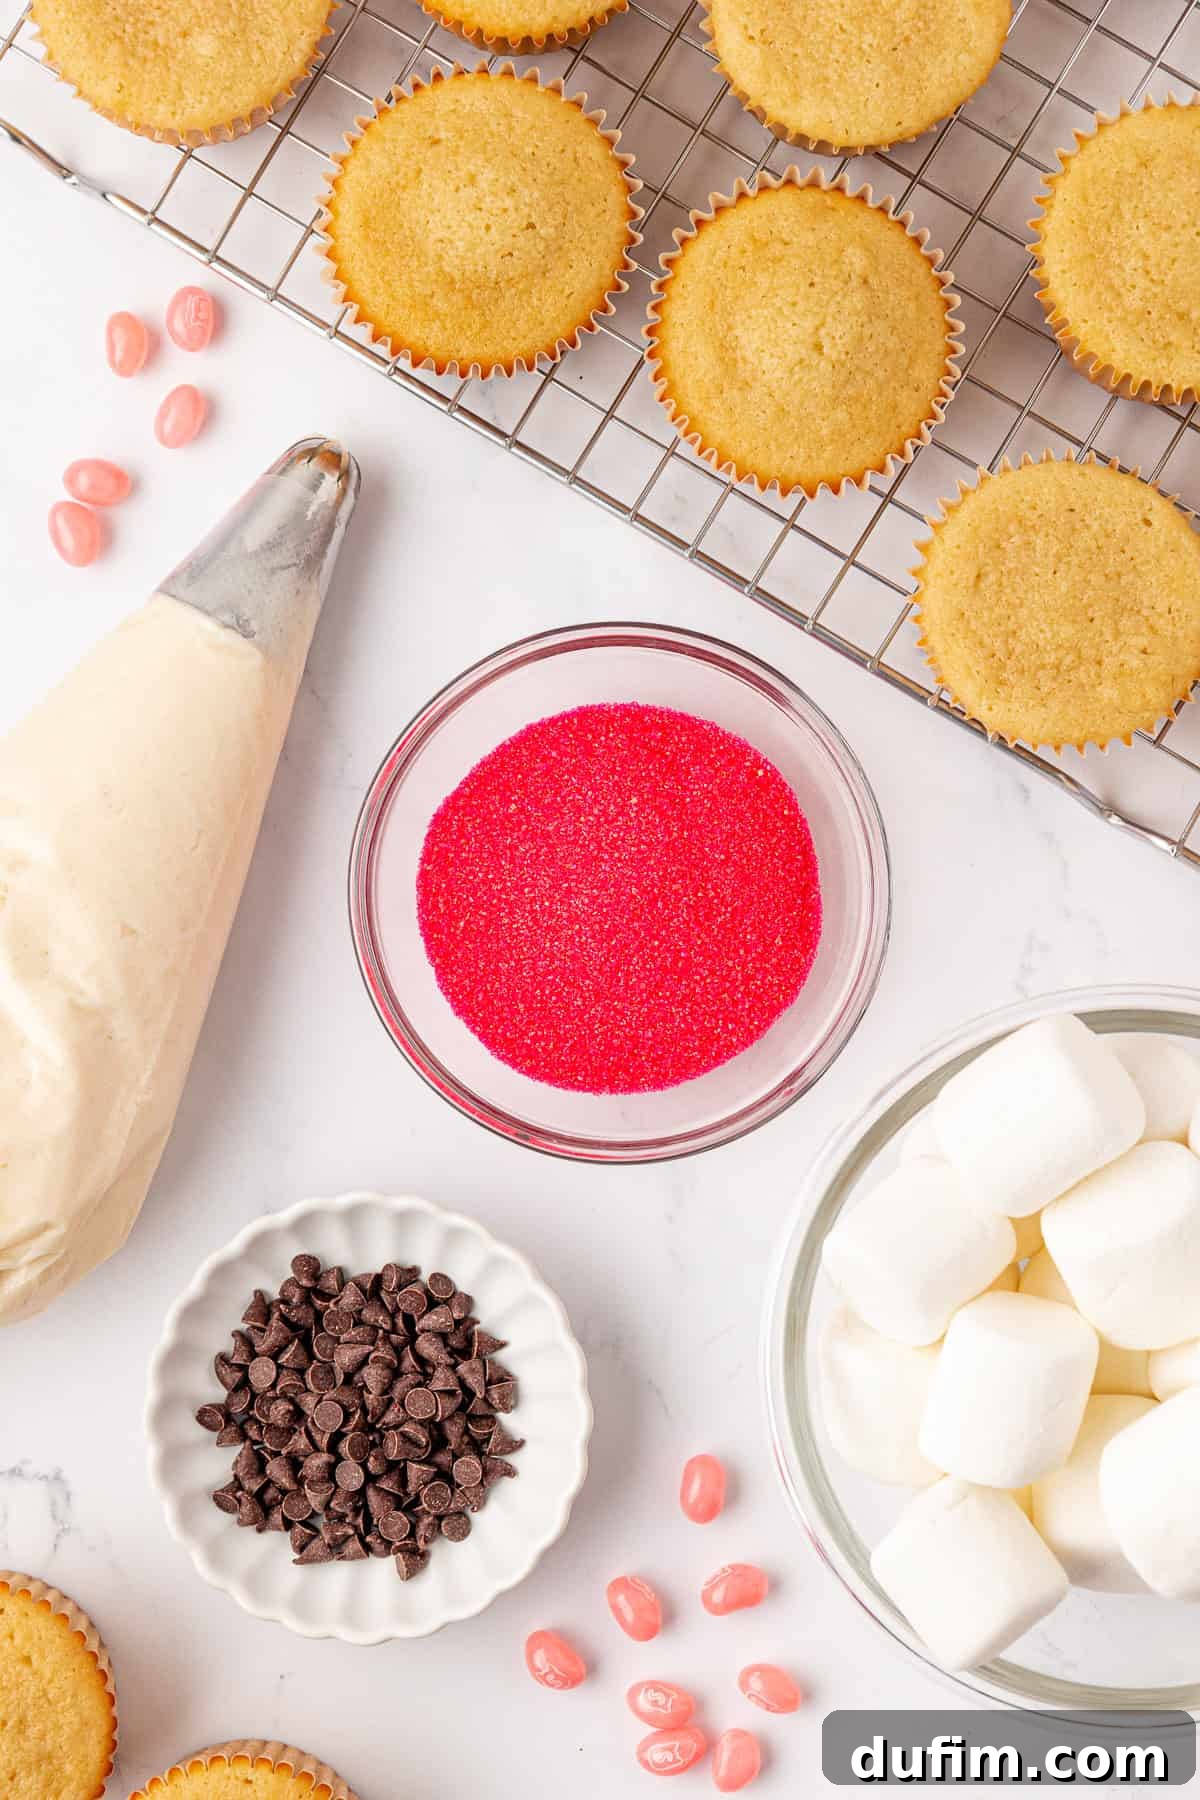
- Craft the Bunny Ears: This step is simple and adds so much character! Lightly dip your clean kitchen scissors in water before cutting the marshmallows to prevent sticking. Cut each large marshmallow in half diagonally, creating two distinct teardrop-shaped pieces. These will form the adorable bunny ears. Immediately dip the sticky cut side of each marshmallow piece into pink sanding sugar. This creates the charming “inner ear” effect. Gently press two prepared ears into the top of each frosted cupcake, positioning them towards the back.
- Add the Bunny Face: Complete your bunny with charming facial features. Place two mini chocolate chips, tip side down, slightly above the center of the frosting swirl for the eyes. Then, gently press a pink jelly bean just below the eyes to create the sweet bunny nose. You can also use a fine-tipped food marker or a tiny amount of melted chocolate to draw whiskers if desired.
Robin’s Egg Design
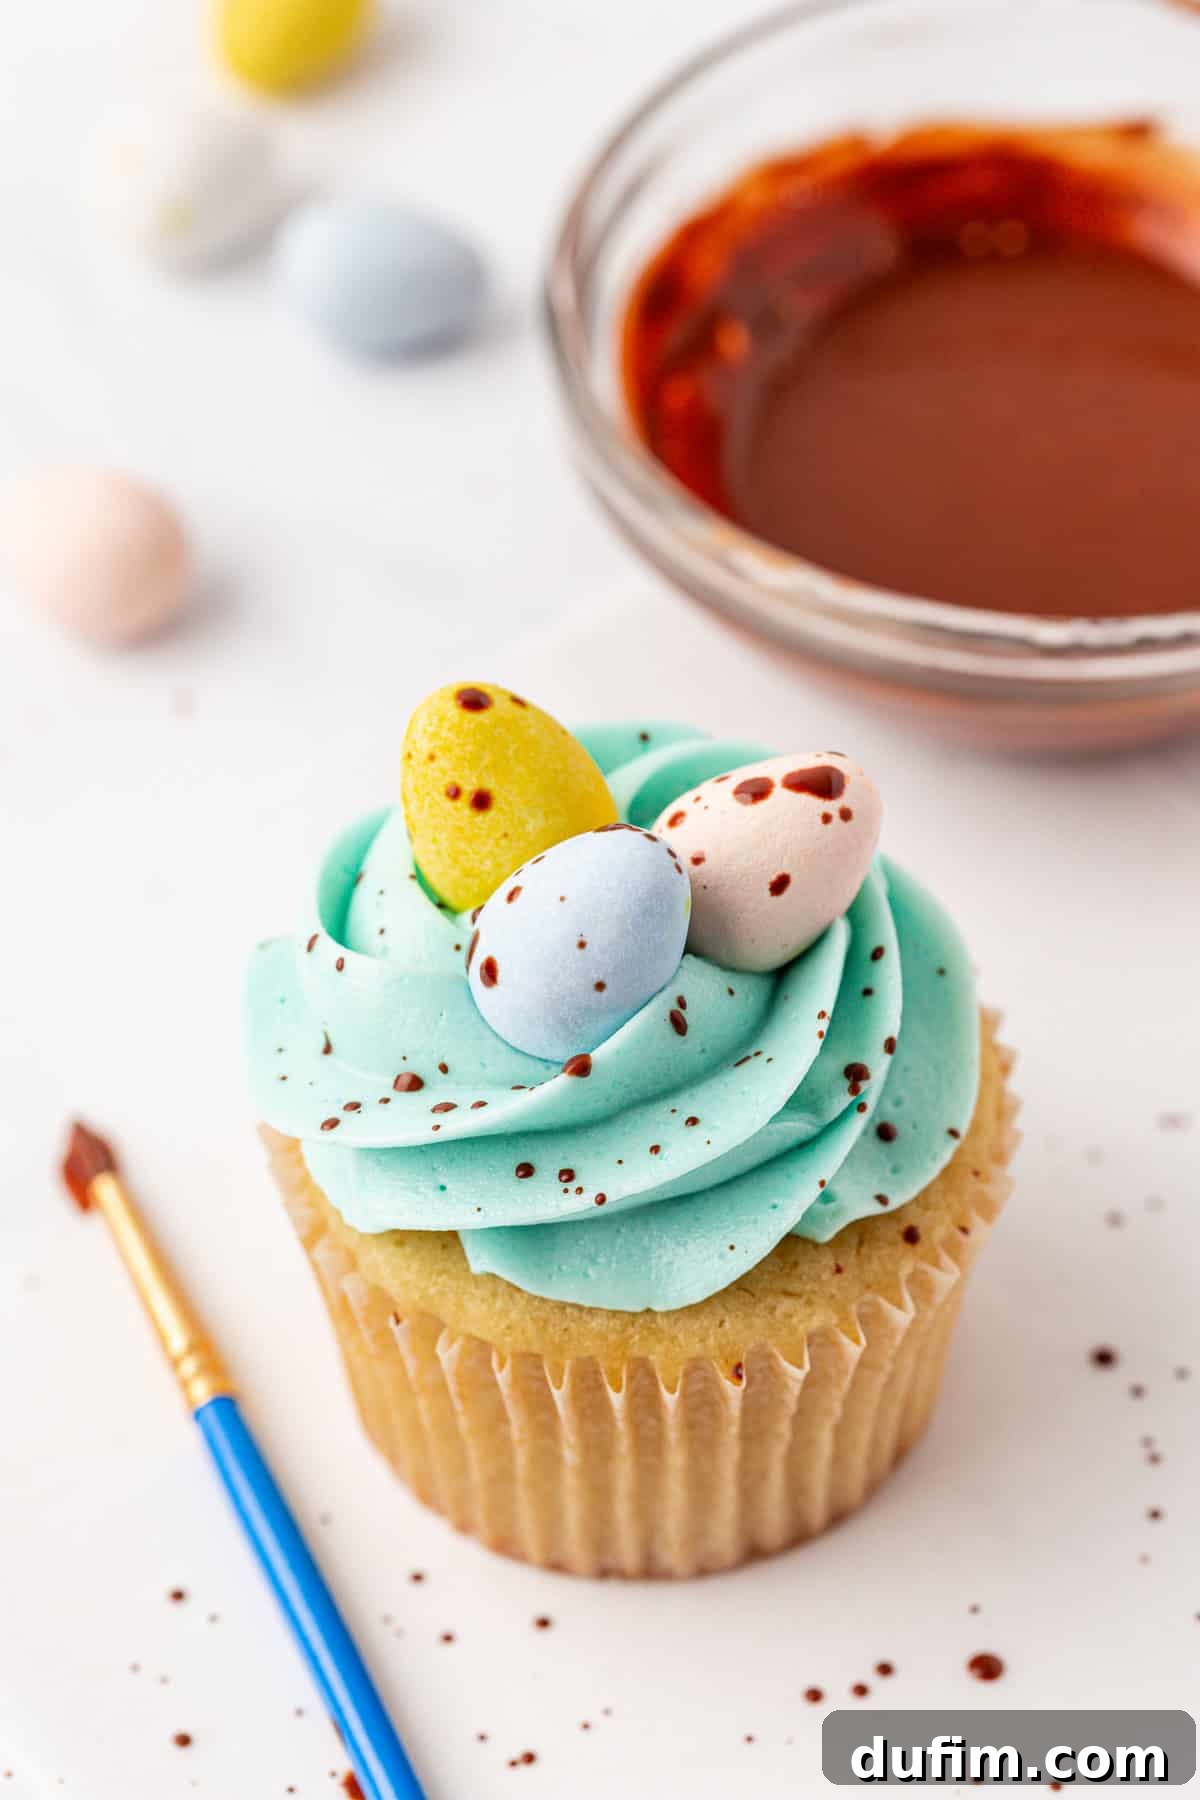
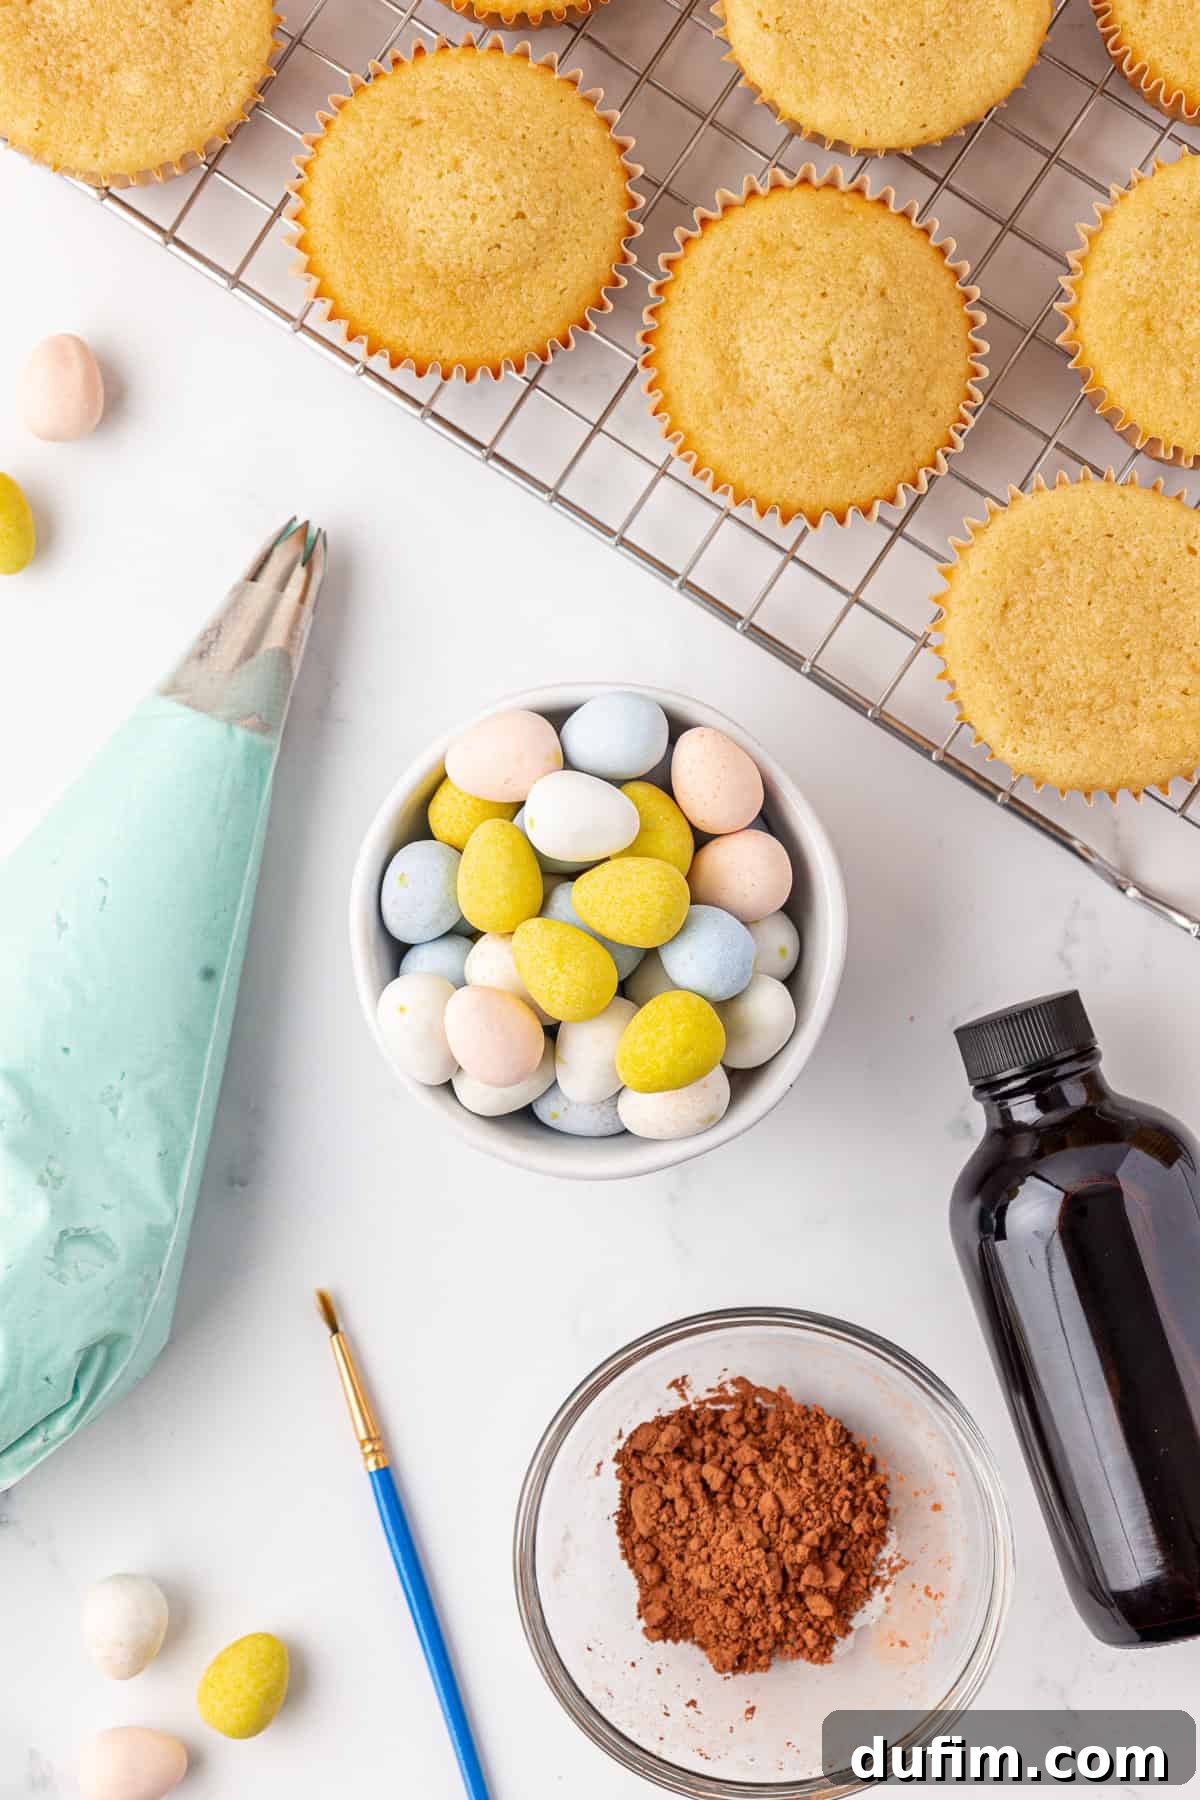
- Color Frosting: Take a portion of your vanilla buttercream and add a very small amount of blue gel food coloring. Mix it thoroughly until you achieve a soft, delicate robin’s egg blue hue. The color should be subtle and pastel-like.
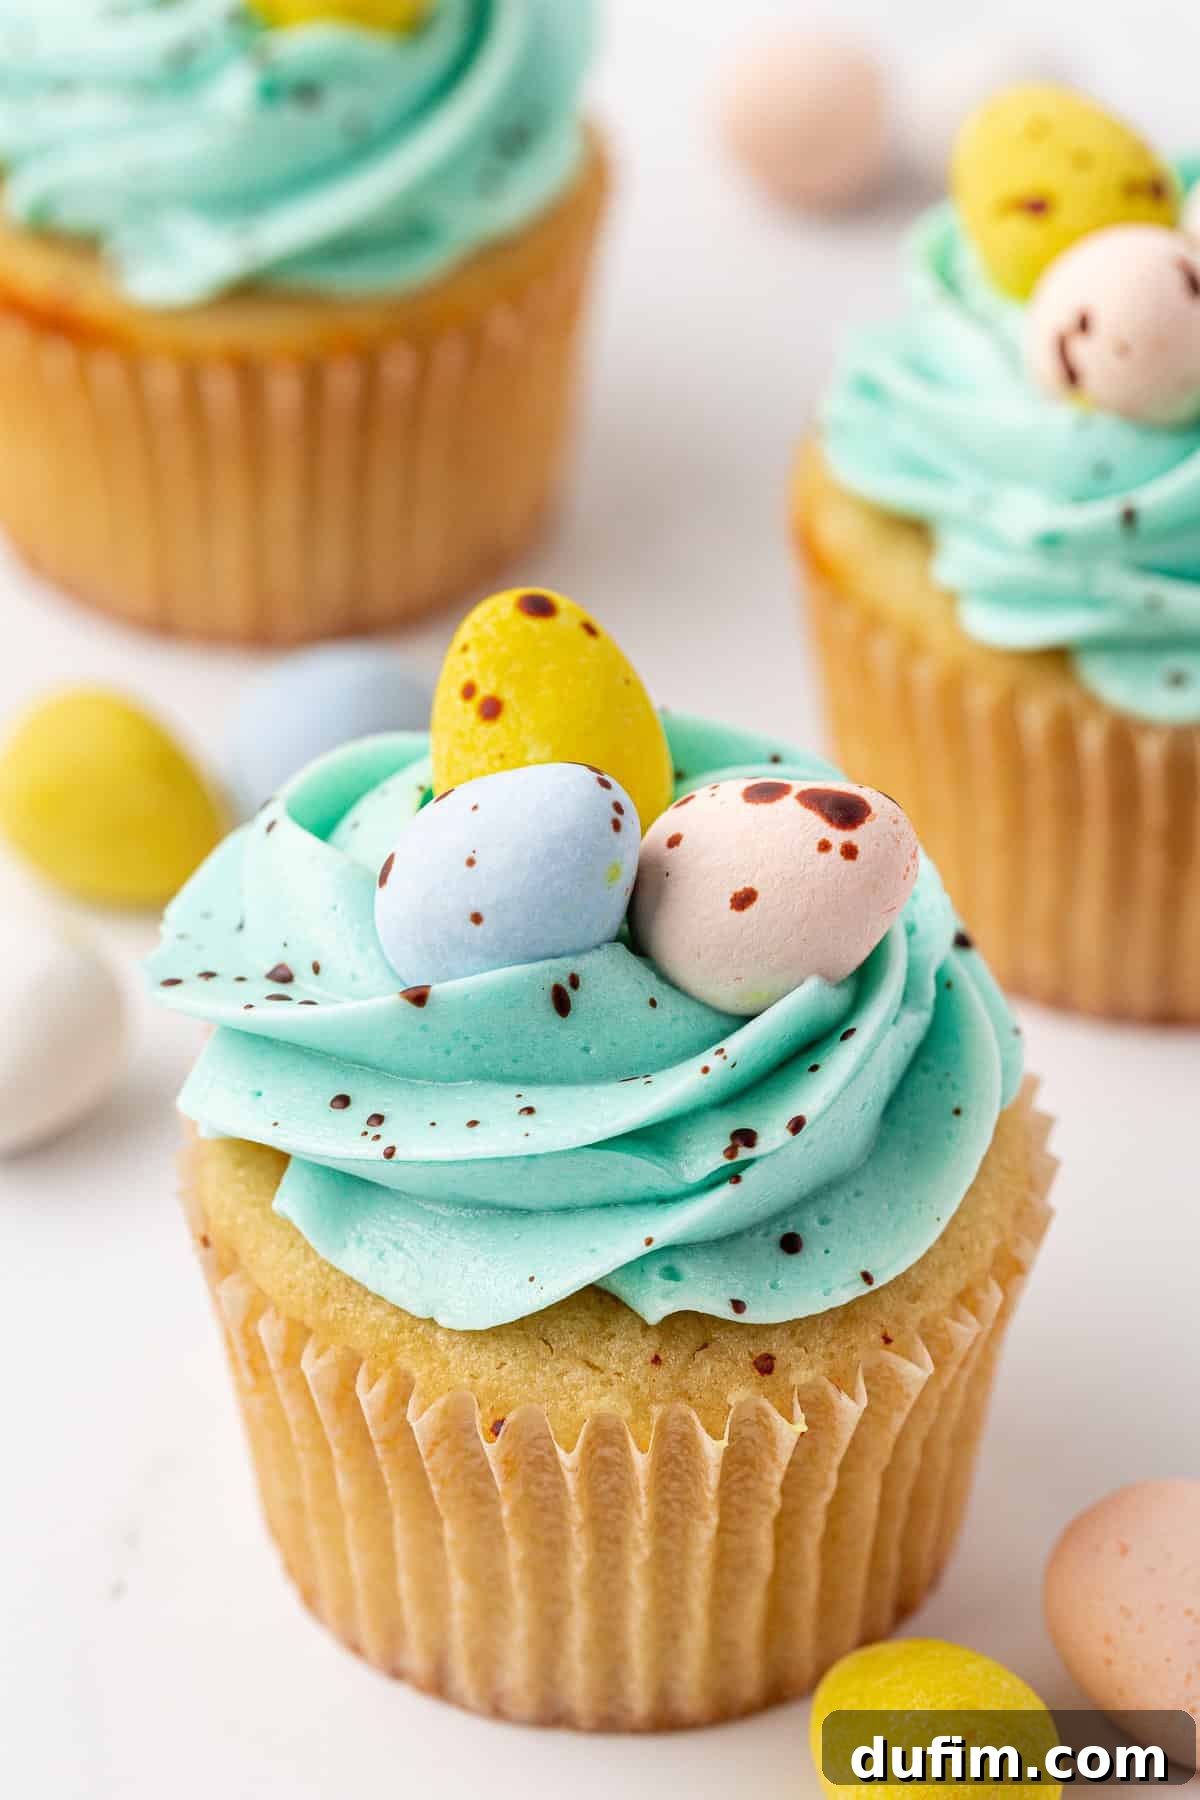
- Frost the Cupcakes: Using a piping bag or an offset spatula, apply a generous swirl or dome of the blue frosting to each cooled cupcake. For a clean, smooth base for your eggs, ensure the top surface is relatively even.
- Create the Nest: Gently press 2 to 3 Cadbury Mini Eggs into the top center of each frosted cupcake. Arrange them artfully to resemble a tiny bird’s nest filled with precious eggs. The pastel colors of the mini eggs complement the robin’s egg blue frosting beautifully.
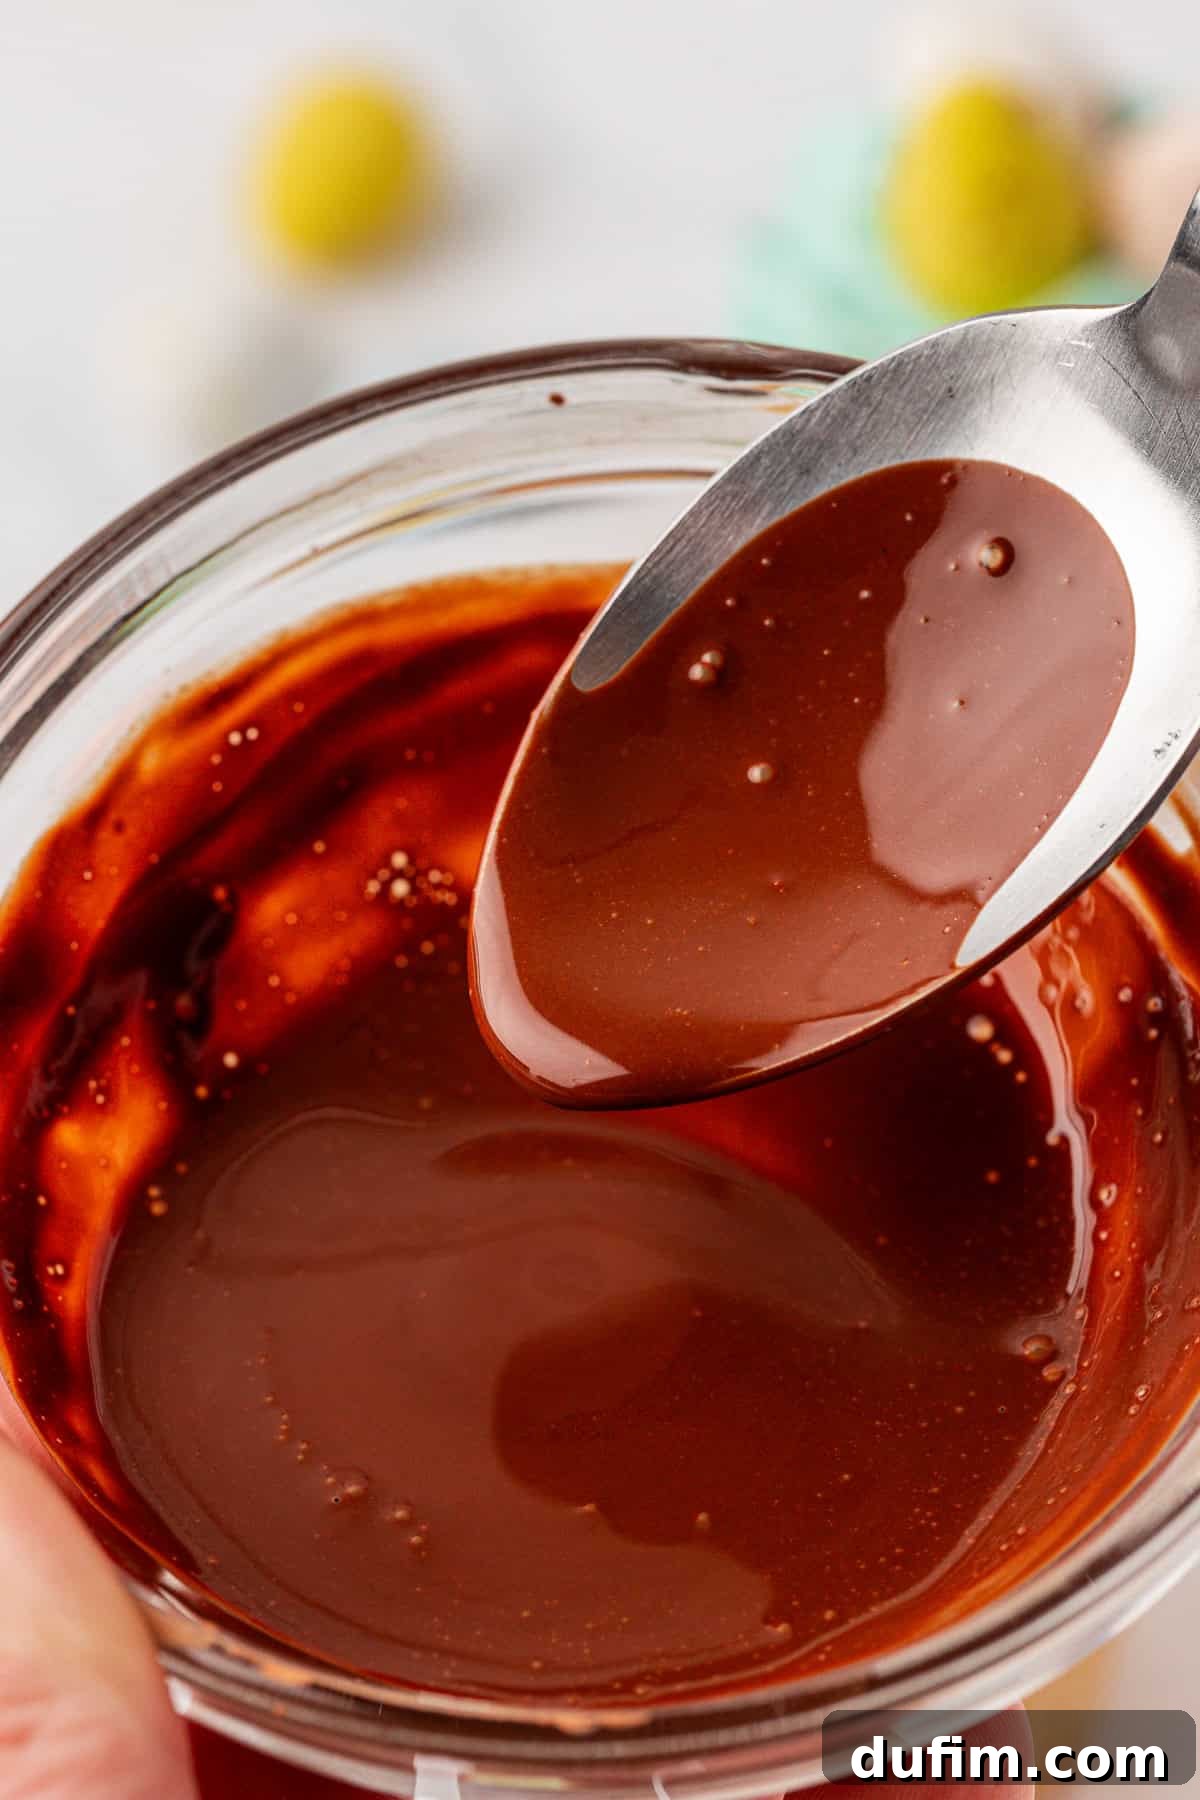
- Prepare the Cocoa Speckle Paint: In a very small bowl, combine 1 teaspoon of unsweetened cocoa powder with ½ teaspoon of vanilla extract. Stir these two ingredients together until you achieve a thin, watery consistency. This mixture will serve as your edible “speckle paint.”
- Speckle the Cupcakes: Dip a small, food-safe paintbrush (or a new, clean toothbrush specifically for baking) into your cocoa speckle paint. Hold the brush a few inches directly above a frosted cupcake. Then, gently flick the bristles with your finger to splatter tiny cocoa speckles across the blue frosting. This technique creates a remarkably realistic robin’s egg effect.
Pro Tip: To minimize mess, perform this speckling step over a large baking sheet lined with parchment paper, or simply work within the confines of your kitchen sink. This will contain any errant splatters and make cleanup a breeze.
Tips for Ensuring Moist Easter Cupcakes
Achieving perfectly moist and tender cupcakes at home is easier than you think, even for novice bakers. By following a few expert tips, you can guarantee a delightful texture every time:
- Master Flour Measurement: This is arguably the most critical step for moist cupcakes. Avoid scooping flour directly from the bag with your measuring cup, as this compacts the flour and results in using too much. Instead, use a spoon to lightly fluff the flour in its container, then gently spoon it into your measuring cup. Once filled, use the straight edge of a butter knife or a flat spatula to level off any excess flour perfectly. Over-measured flour is a primary culprit for dry, dense cupcakes.
- Do Not Overfill Muffin Liners: Resist the urge to fill your muffin liners to the brim! Only fill them approximately halfway full. This allows the cupcakes enough room to rise beautifully without overflowing their liners, which can lead to uneven baking and dry edges.
- Avoid Overmixing the Batter: Once you combine the wet and dry ingredients, mix only until the flour streaks have just disappeared. Overmixing develops the gluten in the flour, resulting in a tougher, drier cupcake. A few small lumps are perfectly acceptable.
- Don’t Overbake: Baking for even a few minutes too long can strip your cupcakes of their precious moisture. Start checking for doneness at the minimum recommended baking time. A toothpick inserted into the center should come out with a few moist crumbs, not wet batter, and certainly not completely clean and dry.
- Use Room Temperature Ingredients: Ensuring your butter, eggs, and sour cream are at room temperature helps them emulsify properly with the other ingredients. This creates a smoother, more uniform batter that traps air more effectively, leading to a lighter and more tender crumb.
How to Properly Measure Flour for Baking Success
For the most precise and consistent baking results, using a digital kitchen scale to weigh your flour in grams is highly recommended. It eliminates variables and ensures accuracy every time.
If you don’t have a kitchen scale, fear not! You can still measure flour accurately using this tried-and-true method:
- Aerate the Flour: Flour tends to settle and become compact as it sits. Before measuring, use a whisk or spoon to gently fluff or aerate the flour in its container. This is similar to fluffing but not the same as sifting, which should only be done if the recipe explicitly calls for it.
- Spoon into Measuring Cup: Once aerated, use a spoon to lightly sprinkle and scoop the flour into your dry measuring cup. Do not pack it down, shake the cup, or tap it against the counter, as these actions will compact the flour, leading to an inaccurate and excessive measurement.
- Level Off: Finally, use the flat back of a butter knife or any straight edge to carefully level off the excess flour from the top of the measuring cup. This ensures you have the precise amount needed for the recipe.
Gluten-Free Easter Cupcakes
For those requiring a gluten-free option, you can still enjoy these delicious Easter cupcakes! I’ve had fantastic success converting many of my cupcake recipes to gluten-free using King Arthur’s Gluten Free Measure for Measure Flour. This high-quality blend is designed as a direct one-to-one substitute for regular all-purpose flour, making the swap incredibly simple without compromising on taste or texture. Just replace the standard flour with an equal amount of the gluten-free alternative in the recipe.
Storage Suggestions for Your Easter Cupcakes
To keep your festive Easter cupcakes fresh and delicious, store any leftovers at room temperature. Place them in an airtight container to prevent them from drying out. When stored properly, these beautifully decorated treats will maintain their quality and flavor for 2-3 days. If your kitchen is particularly warm, or if your frosting contains ingredients that require refrigeration, you may opt to store them in the refrigerator, but allow them to come to room temperature before serving for the best texture.
More Delightful Easter Recipes
Looking for more ways to celebrate Easter with delicious homemade treats? Explore these other fantastic recipes:
- Easter Pretzels
- Easter Egg Truffles
- Bunny Bait
- Rice Krispies Easter Eggs
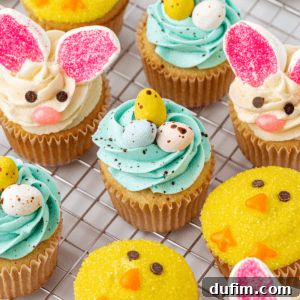
Easter Cupcakes
These pro-tested Easter cupcakes use my favorite vanilla cupcake base and are decorated like chicks, bunnies, and robin’s eggs—fun, festive, and kid-approved!
Ingredients
Cupcakes
- 2 ½ cups (300g) all-purpose flour
- 2 tsp baking powder
- ½ tsp baking soda
- 1 tsp salt
- ¾ cup (170g) unsalted butter, room temperature
- 1 ¾ cups (346g) granulated sugar
- ¼ cup (59ml) vegetable oil
- 4 large eggs, room temperature
- 1 cup (227g) sour cream
- ½ cup (118ml) milk (whole milk recommended)
- 1 Tbsp vanilla extract
Vanilla Frosting (makes enough to frost 24 cupcakes)
- 2½ cups (565g) unsalted butter, room temperature
- 2 Tbsp vanilla extract
- ⅛ tsp salt
- 6-10 cups (681-1135g) powdered sugar
- 3-6 Tbsp milk or heavy cream
Decorations
- Yellow gel food coloring
- Orange gel food coloring
- Yellow sanding sugar
- Mini chocolate chips
- Large marshmallows
- Pink sanding sugar
- Pink jelly beans
- Blue gel food coloring
- Cadbury Mini Eggs
- Unsweetened cocoa powder
- Vanilla extract (for speckle paint)
Instructions
Cupcakes
- Preheat the oven to 350ºF (180°C). Line a muffin pan with liners and set aside.
- In a small bowl, whisk together flour, baking powder, baking soda, and salt. Set aside.
- In a stand mixer or using a hand mixer, beat the butter, sugar, and oil on medium speed for 2 minutes until light and fluffy. Add eggs, sour cream, milk, and vanilla extract, then beat for 1 minute.
- On low speed, mix in the dry ingredients until fully combined.
- Fill the muffin liners halfway. Bake for 17-19 minutes, or until a toothpick inserted into the center comes out with a few moist crumbs. Let the cupcakes cool completely before frosting.
Vanilla Frosting
- Beat butter, vanilla extract, and salt on medium speed for 2 minutes until light and fluffy. Gradually add powdered sugar and 3 tablespoons of milk or cream, mixing on low until smooth. Adjust sweetness by adding more powdered sugar if desired. If too thick, thin with 2-4 additional tablespoons of milk or cream.
Chick Design
- Use gel food coloring to dye about 1 ½ cups frosting yellow and about 2 Tablespoons frosting orange. Mix until fully tinted.
- Using an offset spatula or butter knife, frost the top of each cupcake with a generous amount of yellow frosting, smoothing it into a dome shape.
- Gently roll or sprinkle the frosted top with yellow sanding sugar until it’s fully coated. This gives the chicks a fluffy, sparkly look.
- Place 2 mini chocolate chips, point side down, near the top center of each cupcake for the eyes.
- Use the orange frosting in a piping bag (or a zip-top bag with the tip snipped) to pipe a small triangle beak just below the eyes. Pipe two small orange feet at the bottom using the same piping bag.
Bunny Design
- Using a piping bag or spatula, frost each cupcake with a generous swirl of vanilla frosting. For a tall swirl, use a large round tip and pipe in a spiral from the outer edge inward.
- Make the Bunny Ears: Lightly dip your kitchen scissors in water before cutting to prevent the marshmallow from sticking. Cut each marshmallow in half on the diagonal to create two teardrop-shaped pieces—these will be the ears. Immediately dip the sticky cut side of each piece into pink sanding sugar to create the “inner ear” look. Gently press two ears into the top of each frosted cupcake.
- Add the Face: Place two mini chocolate chips, tip side down, for the bunny’s eyes. Press a pink jelly bean below the eyes for the nose.
Robin’s Egg Design
- Add a small amount of blue gel food coloring to your buttercream to create a soft, robin’s egg blue. Mix well until the color is evenly distributed.
- Frost the Cupcakes: Using a piping bag or spatula, frost each cupcake with a generous swirl or dome of blue frosting. Smooth the tops for a clean look.
- Gently press 2–3 Cadbury Mini Eggs into the top center of each frosted cupcake to resemble a little nest of eggs.
- Make the Cocoa Speckle Paint: In a small bowl, stir together: 1 tsp unsweetened cocoa powder and ½ tsp vanilla extract. The consistency should be watery.
- Speckle the Cupcakes: Dip a small food-safe paintbrush or new toothbrush into the cocoa paint. Hold it a few inches above the cupcakes and flick the brush bristles with your finger to splatter cocoa speckles across the frosting. Pro Tip: Do this over a baking sheet or parchment paper to contain any mess.
Video
Watch a video tutorial for these Easter cupcakes:
Nutrition Information
Calories: 506kcal |
Carbohydrates: 56g |
Protein: 3g |
Fat: 31g |
Saturated Fat: 18g |
Polyunsaturated Fat: 3g |
Monounsaturated Fat: 8g |
Trans Fat: 1g |
Cholesterol: 105mg |
Sodium: 189mg |
Potassium: 58mg |
Fiber: 0.4g |
Sugar: 45g |
Vitamin A: 909IU |
Vitamin C: 0.1mg |
Calcium: 51mg |
Iron: 1mg
Nutrition Disclosure
All nutritional values provided are approximate and are offered to the reader as a courtesy. Please note that changing ingredients and/or quantities will alter the estimated nutritional calculations.