

After dedicating six intense months to crafting and perfecting an array of delightful muffin recipes for my acclaimed Muffin Cookbook, I proudly earned the moniker “muffin expert.” Now, I’m thrilled to share my coveted knowledge with you. Prepare to master the art of baking truly extraordinary raspberry white chocolate muffins right in your own kitchen. This comprehensive guide will show you how to achieve those coveted tall, domed, bakery-style tops and an irresistibly moist crumb in just a few straightforward steps.

By far the best muffins I’ve ever had! Thanks for this recipe!
-Chey
Indulge in Homemade Bakery-Style Raspberry White Chocolate Muffins: A Perfect Treat for Any Time of Day!
Imagine biting into a soft, tender muffin, bursting with the sweet tang of juicy raspberries and the creamy richness of white chocolate. These easy-to-make Raspberry White Chocolate Muffins aren’t just a treat; they’re a revelation. Whether you’re seeking the ideal breakfast accompaniment to kickstart your morning, a satisfying afternoon snack, a delightful dessert, or (my personal favorite) a comforting late-night indulgence, these muffins fit every occasion.
Forget the common baking mishaps and frustrating flat muffin tops. My journey to becoming a “muffin expert” involved countless hours of testing, tweaking, and perfecting this very recipe. I’ve navigated the pitfalls so you don’t have to, ensuring that even if you’re a novice baker, you can effortlessly create impressive, bakery-quality muffins that will astound your friends and family. Thousands of home bakers are already elevating their muffin game using my proven techniques, and now it’s your turn to unlock these simple secrets to baking perfection!

Why You’ll Fall in Love with This Raspberry White Chocolate Muffin Recipe
This isn’t just another muffin recipe; it’s a gateway to baking bliss. Here’s why these raspberry white chocolate muffins will quickly become a cherished favorite in your recipe collection:
- Harmonious Flavor Blend: Experience the exquisite balance between the lush sweetness of premium white chocolate and the vibrant, slightly tart burst of fresh raspberries. This flavor combination is truly a match made in heaven, appealing to a wide range of palates.
- Effortless Preparation: Designed with the home baker in mind, this recipe is incredibly straightforward. You don’t need advanced baking skills or specialized equipment to achieve outstanding results. My clear, easy-to-follow steps ensure success every time.
- Perfect Make-Ahead Treat: These muffins are ideal for busy lifestyles. Whip up a batch on the weekend, and you’ll have delicious treats ready to grab and go throughout the week, making mornings brighter and snack times more enjoyable.
- Freezer-Friendly Convenience: Beyond just being a great make-ahead option, these muffins freeze beautifully. Stock your freezer with a batch, and you’ll always have a homemade delight on hand for unexpected guests, school lunches, or whenever a craving strikes.
- Impressive Bakery-Style Results: Say goodbye to flat, sad muffins. My unique tips and tricks will empower you to create muffins with those coveted tall, domed tops and a wonderfully golden-brown exterior, rivaling any professional bakery.
- Versatile Indulgence: These muffins transcend typical meal categories. They’re equally fitting as a satisfying breakfast, a delightful coffee break companion, a light dessert, or a comforting treat any time of day.
Essential Ingredients for Your Raspberry White Chocolate Muffins
The beauty of this white chocolate raspberry muffin recipe lies in its simplicity. You’ll find that most of the ingredients are pantry staples, readily available and easy to work with. Using high-quality ingredients, especially the fresh fruit and good white chocolate, will truly elevate your muffins from good to utterly unforgettable. Below is a comprehensive list, followed by more details on each to ensure your baking success. Remember to check the full recipe card at the end for precise measurements.
- All-Purpose Flour: The foundational dry ingredient, providing structure to our muffins. Proper measurement is key here for the perfect texture.
- Granulated Sugar: Sweetens the muffins and contributes to their golden-brown crust.
- Baking Powder: Our primary leavening agent, responsible for those desirable tall, domed muffin tops. Ensure it’s fresh for optimal rise!
- Salt: A crucial flavor enhancer, balancing the sweetness and bringing out the best in the other ingredients.
- Ground Nutmeg: Adds a subtle, warm spice that beautifully complements the raspberries and white chocolate, giving the muffins a hint of bakery-level depth.
- Large Eggs: Bind the ingredients together, add richness, and contribute to the muffin’s overall structure and moisture.
- Buttermilk: The secret ingredient for incredibly tender and moist muffins. Its acidity reacts with the baking powder, contributing to a fantastic rise and delicate crumb.
- Vegetable Oil: Provides ultimate moisture and a soft texture, often preferred over butter in muffins for a lighter, more consistently moist crumb.
- Vanilla Extract: Enhances all the flavors, adding a fragrant, sweet aroma that makes these muffins irresistible.
- Fresh Raspberries: The star of the show! Use fresh, firm raspberries for the best flavor and texture. If using frozen, do NOT thaw them before adding to the batter to prevent bleeding and soggy muffins.
- White Chocolate Chips: These creamy morsels melt into pockets of sweetness, creating a luxurious contrast with the tart raspberries. Choose a good quality brand for superior flavor.

How to Make Irresistible White Chocolate Raspberry Muffins: A Step-by-Step Guide
Get ready to bake a batch of muffins that boast perfect golden-brown tops and a flavor profile that will have your entire family asking for more. This raspberry white chocolate muffins recipe is designed for ease and guaranteed success, yielding impressive bakery-style results. Follow these detailed steps carefully, and you’ll be enjoying warm, homemade muffins in no time. The full recipe with precise measurements can be found in the recipe card below.
- Prepare the Dry Ingredients: In a large mixing bowl, combine your all-purpose flour, granulated sugar, baking powder, salt, and ground nutmeg. Whisk these dry ingredients thoroughly to ensure they are well-distributed and lump-free. Set this bowl aside for now. This initial step is crucial for an even rise and consistent flavor throughout your muffins.
- Combine the Wet Ingredients: In a separate, even larger mixing bowl, crack your large eggs. Add the buttermilk, vegetable oil, and vanilla extract. Using a spatula or whisk, stir these wet ingredients together until they are fully combined and smooth. This creates the essential liquid base for our moist muffin batter.
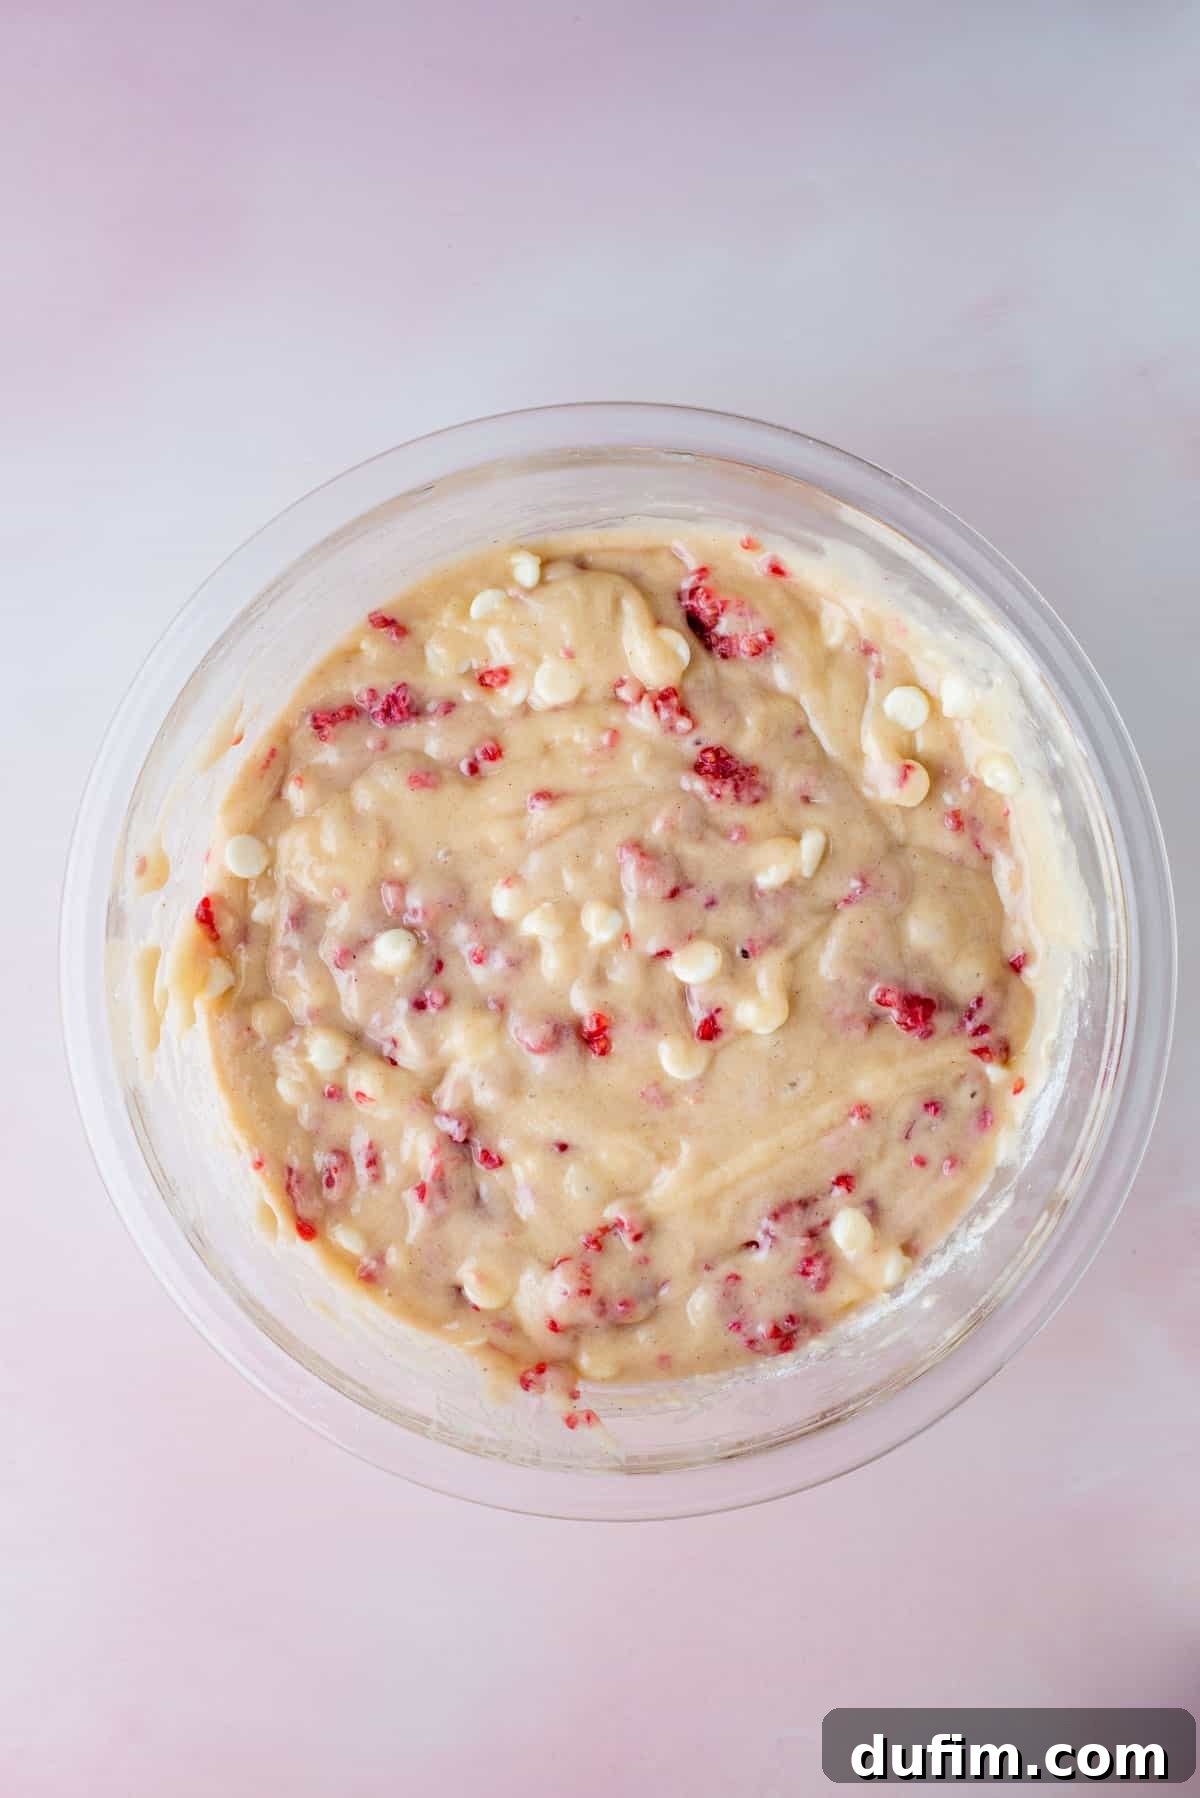
- Gently Mix Wet and Dry: Gradually add the reserved dry ingredients to the wet ingredient mixture. Mix just until everything is combined. It’s imperative not to over-mix here; a few lumps are perfectly acceptable and actually desirable for tender muffins. Over-mixing develops gluten, leading to tough muffins. The batter will be noticeably thick at this stage. Finally, with great care, gently fold in your fresh raspberries and white chocolate chips. Be delicate to avoid crushing the berries.
- The Essential Rest Period: Cover your bowl of thick, fruit-studded batter with a clean kitchen towel and allow it to rest at room temperature for a full 30 minutes. This resting period is a game-changer, especially with the juicy fresh fruit, as it allows the flour starches to fully hydrate and swell, resulting in a thicker batter and ultimately taller, more tender muffins. During this crucial rest, preheat your oven to a robust 425ºF (220ºC).
- Prepare for Baking – The Bakery-Style Way: To achieve those signature bakery-style muffin tops, prepare a 12-count muffin pan by lining only 6 muffin wells with paper liners. This means you will fill every other muffin well. Generously fill each lined well to the very top with batter, using about 6-8 heaping tablespoons per cup. If the tops appear lumpy, gently smooth them with a butter knife. For an extra touch of beauty and flavor, press a few additional fresh raspberries and white chocolate chips onto the surface of each muffin and sprinkle with a pinch of sanding sugar for a delightful crunch.

- Bake to Perfection: Place your prepared muffin pan on the center rack of your preheated 425ºF (220ºC) oven. Bake for precisely 7 minutes at this high temperature. This initial blast of heat provides an incredible “oven spring,” causing the muffins to rise rapidly and form beautiful domes. Without opening the oven door, reduce the temperature to 350ºF (175ºC) and continue baking for an additional 18-21 minutes, or until a wooden toothpick inserted into the center of a muffin comes out clean. Once baked, allow the muffins to cool in the pan for about 15 minutes before carefully transferring them to a wire rack to cool completely. If you have remaining batter, repeat the baking process, remembering to increase the oven temperature back to 425ºF (220ºC) before baking the next batch.
Unlocking the Secret to Bakery-Style Muffins: Achieve Those Magnificent Domed Tops
Bakery muffins are instantly recognizable by their beautifully domed, sky-high tops. This isn’t magic; it’s a result of a few clever baking techniques that work synergistically to “lift” your muffins to impressive heights. Once you understand these principles, you’ll never settle for flat-topped muffins again!
1. The Crucial Rest Period
One of the most overlooked yet vital steps is allowing your muffin batter to rest. After mixing, cover your bowl and let the batter sit for at least 15-30 minutes before scooping it into the muffin pan. Why is this so effective? During this resting period, the starch molecules present in the flour begin to absorb the liquid within the batter. As they absorb moisture, they swell, leading to a much thicker batter consistency. This increased viscosity helps the batter hold its shape better during baking, encouraging it to rise upwards rather than spreading outwards. Furthermore, the rest period allows gluten to relax, which contributes to a more tender crumb. While a 15-minute rest is beneficial, I recommend a 30-minute rest for this particular raspberry muffin batter, especially given the moisture from the fresh fruit, ensuring optimal hydration and structure.
2. Strategically Fill Every Other Muffin Cup
This technique is a genuine game-changer for achieving truly impressive, evenly domed muffin tops. Instead of filling all twelve cups in a standard muffin pan, line and fill only six cups, using every other well. For example, fill cups 1, 3, 5, 7, 9, and 11. This strategic spacing provides two key advantages. Firstly, it allows for better heat circulation around each individual muffin, ensuring more even baking and browning. Secondly, and perhaps more importantly, it gives the muffins ample space to spread and dome without bumping into their neighbors. This freedom of expansion is critical for developing those gorgeous, rounded tops that are the hallmark of a bakery-style muffin. Don’t worry, the empty cups won’t affect baking; you can simply add a little water to them to prevent scorching if you like, though it’s often not strictly necessary.
3. Fill Them Generously – All the Way to the Top!
This tip might go against conventional baking wisdom you’ve heard about filling muffin cups only two-thirds full, but it’s absolutely essential for achieving impressive height. For bakery-style muffins, you need to be bold: fill your muffin liners right up to the very top with batter. This abundant amount of batter provides a substantial base that, when combined with the other techniques, forces the muffin to grow upwards as it bakes. It gives the leavening agents more material to work with, pushing the muffin batter higher and higher, creating that desirable rise and generously sized, satisfying muffin.
4. Begin Baking at a High Temperature, Then Reduce
This dual-temperature baking method is a cornerstone of achieving sky-high muffin tops. Start by baking your muffins at a high temperature, typically 425ºF (220ºC), for the initial 5-7 minutes. This sudden blast of intense heat creates what bakers call “oven spring.” The high temperature causes the leavening agents (like baking powder) to activate rapidly, producing a quick burst of steam and carbon dioxide. This explosive expansion makes the batter rise very quickly before the outer surface has a chance to set. Once the muffin tops have beautifully domed and set, reduce the oven temperature to 350ºF (175ºC) for the remainder of the baking time. This lower temperature allows the muffins to cook through evenly without burning the exterior, resulting in a perfectly baked interior and a gorgeously domed, golden-brown crust.

How to Properly Measure Flour for Baking Success
Accurate flour measurement is paramount in baking, as too much or too little can drastically alter the texture of your muffins. The most precise method, and highly recommended for consistent results, is to use a kitchen scale, weighing your flour in grams.
If you don’t own a kitchen scale, follow this traditional “spoon and level” method for the next best accuracy:
- Aerate the Flour: Before you begin, gently aerate the flour in its container. Flour naturally compacts as it sits, becoming dense. Use a whisk or a spoon to lightly fluff it up. This is similar to aerating but not as fine as sifting (unless your recipe specifically calls for sifted flour, do not sift).
- Spoon into Measuring Cup: Using a spoon, gently sprinkle the aerated flour into your dry measuring cup. Do not scoop the flour directly with the measuring cup, as this action compacts it.
- Level Off: Once the cup is slightly overflowing, use the flat back of a butter knife or a straight edge to level off the excess flour, ensuring a precise measurement. Do not tap the cup against the counter at any point, as this will also compact the flour.
Expert Tips for the Best Raspberry White Chocolate Chip Muffins
Beyond the core instructions and bakery-style secrets, a few additional tips can truly elevate your homemade raspberry white chocolate chip muffins from great to absolutely extraordinary:
- Prioritize Fresh Berries: For the most vibrant flavor and appealing texture, fresh raspberries are always the best choice. Their natural sweetness and slight tartness shine through beautifully. If fresh aren’t available, frozen berries are a perfectly acceptable alternative. However, a crucial point: do NOT thaw frozen berries before adding them to the batter. Adding them frozen helps prevent them from bleeding their color into the batter and becoming mushy.
- Avoid Over-Mixing at All Costs: This is a golden rule in muffin making! Once you combine the wet and dry ingredients, mix only until they are just incorporated. A few streaks of flour are completely fine, even desirable. Over-mixing develops the gluten in the flour, leading to dense, tough, and rubbery muffins rather than the desired moist and tender crumb. The batter will be very thick, which is exactly what we want.
- Handle Raspberries and Chocolate with Care: When folding in your fresh raspberries and white chocolate chips, be incredibly gentle. Use a spatula and fold them in delicately. This ensures that the raspberries remain largely intact, providing delightful bursts of fruit in every bite, and prevents them from breaking apart and coloring the entire batter. Gentle handling also keeps the white chocolate chips evenly distributed.
- Opt for Firm Raspberries: Whenever possible, select fresh raspberries that are firm to the touch. Firmer berries will hold their shape better during the mixing and baking process, contributing to a superior texture in your finished muffins. Soft or overly ripe raspberries are more prone to falling apart.
- Ensure Room Temperature Ingredients: For optimal emulsification and a smoother batter, make sure your eggs and buttermilk are at room temperature. This allows them to blend more easily with the other ingredients, creating a more uniform batter and contributing to a better rise and texture.
- Don’t Skimp on Muffin Liners: Using good quality muffin liners can make a big difference, preventing sticking and making for easy cleanup. If you’re worried about sticking, lightly spray the liners with non-stick cooking spray before adding batter.
- Patience During Cooling: Resist the urge to pull your muffins out of the pan immediately after baking. Allowing them to cool in the pan for 10-15 minutes helps them firm up and prevents them from crumbling when you remove them. Transferring them to a wire rack after this initial cool-down ensures air circulation and prevents soggy bottoms.

Raspberry White Chocolate Muffins: Creative Substitutions and Flavorful Variations
While this classic raspberry white chocolate muffin recipe is perfect as is, it’s also wonderfully adaptable! Feel free to experiment with these substitutions and variations to tailor the muffins to your taste preferences or to utilize ingredients you already have on hand.
- Explore Different Berries: If raspberries are out of season, hard to find, or you simply want to try something new, feel free to substitute with other berries. Blueberries or blackberries work beautifully, offering a similar burst of fruity flavor. You could even try a mix of berries for a “mixed berry” muffin!
- Sweeten Tart Raspberries: Sometimes raspberries can be a bit tart, especially depending on the season. If you find your berries particularly sour, you can gently toss them with a tablespoon or two of granulated sugar and let them sit for about 5-10 minutes before folding them into the batter. This slight maceration will draw out some juice and sweeten them up.
- Change Up the Chocolate: White chocolate chips provide a creamy, sweet contrast to the raspberries, but don’t limit yourself! For a different flavor profile, consider using milk chocolate chips for a classic pairing, or dark chocolate chips for a more sophisticated, slightly bitter complement. You could even chop up a high-quality chocolate bar for unique textures and richer flavor.
- Add a Zesty Citrus Burst: For a bright, fresh, and aromatic twist, incorporate the zest of one lemon or orange into your muffin batter. Citrus zest beautifully enhances the flavor of raspberries and adds a lovely fragrant note that elevates the entire muffin. Add it with the wet ingredients for best distribution.
- Introduce Nuts for Crunch: If you enjoy a bit of crunch, fold in half a cup of chopped nuts like almonds, walnuts, or pecans along with the raspberries and white chocolate chips. Toasting the nuts lightly before adding them will deepen their flavor.
- Spice It Up: Beyond nutmeg, consider adding a pinch of cardamom or a touch of cinnamon to your dry ingredients for an extra layer of warmth and complexity. These spices pair wonderfully with both berries and chocolate.
Storing and Freezing Your Delicious Muffins
To ensure your raspberry white chocolate muffins remain fresh and delightful for as long as possible, proper storage is key. Here are my best tips for keeping them perfect, whether you plan to enjoy them tomorrow or next month.
Optimal Muffin Storage at Room Temperature
If you anticipate devouring your freshly baked muffins within 24 hours, the simplest storage method is often the best: leave them uncovered on your kitchen counter. Surprisingly, moist muffins can become soggy and lose their beautiful, crunchy, sugary tops when stored in an airtight container immediately after baking due to condensation. Leaving them exposed for a short period allows any residual moisture to dissipate, preserving their texture.
My Secret Trick for Longer Freshness (2-4 Days): The Paper Towel Method
For extended freshness, up to 2-4 days, I employ a simple yet effective trick using paper towels. Line the bottom of an airtight container with a layer of paper towels. Arrange your cooled muffins in a single layer on top of the paper towels, ensuring they don’t touch too much if possible. Then, place an additional layer of paper towels over the tops of the muffins before sealing the container. The paper towels act as a natural sponge, absorbing any excess moisture that the muffins release as they sit, thus preventing sogginess and helping to maintain their delicate texture and crisp tops. Check the paper towels daily, and if they become too damp (around day 2 or 3), replace them with fresh ones.
How To Freeze Muffins for Long-Term Enjoyment
Freezing is an excellent way to preserve the freshness of your raspberry white chocolate muffins for up to 3 months, making them perfect for meal prepping or unexpected cravings.
Freezing Method:
- Ensure the muffins are completely cooled to room temperature.
- Individually wrap each muffin tightly in plastic wrap. This step is crucial to prevent freezer burn and maintain moisture.
- Place the individually wrapped muffins into a large freezer-safe ziploc bag or an airtight freezer container. Remove as much air as possible before sealing.
- Label the bag or container with the date and place it in the freezer.
Thawing Your Frozen Muffins:
When you’re ready to enjoy a frozen muffin, you have a couple of easy options:
- Room Temperature Thawing: Simply remove the desired number of muffins from the freezer and leave them on your kitchen counter to thaw at room temperature. They should be fully defrosted and ready to eat in about 1 hour.
- Quick Microwave Thawing: For a faster option, unwrap a frozen muffin and place it on a microwave-safe plate. Microwave in 15-20 second intervals until it is defrosted and warmed through. Be careful not to overheat, as this can make the muffin tough.
Enjoying a warm, homemade muffin straight from the freezer is a wonderful convenience!
More Delightful Raspberry Recipes to Explore
If you’ve fallen in love with the sweet and tart charm of raspberries in these muffins, you’ll be thrilled to discover more ways to incorporate this vibrant fruit into your baking and cooking. Here are some other fantastic raspberry-infused recipes from my collection:
- Decadent Chocolate Raspberry Cake
- Refreshing Raspberry Lemonade
- Elegant White Chocolate Raspberry Dessert Mousse
- Classic Raspberry Jam Shortcake

Tap stars to rate!
Bakery-Style Raspberry Muffins Recipe with White Chocolate Chips
Print Recipe
Equipment
-
Bakery Style Muffins Cookbook
-
Muffin Pan
-
Glass Mixing Bowl
-
Spatula
-
Large Mixing Bowl
-
Kitchen Scale (Optional, for precise flour measurement)
Ingredients
- 3 cups (360g) all-purpose flour
- 1 ½ cups (297g) granulated sugar
- 3 tsp baking powder
- ½ tsp salt
- ¼ tsp ground nutmeg
- 2 large eggs
- ¾ cup (236ml) buttermilk
- ½ cup (118ml) vegetable oil
- 2 tsp vanilla extract
- 2 cups fresh raspberries, can also use frozen, do not thaw
- 1 ½ cups (255g) white chocolate chips
Instructions
-
In a large mixing bowl, thoroughly combine the flour, granulated sugar, baking powder, salt, and nutmeg. Whisk until well-distributed, then set aside.3 cups (360g) all-purpose flour, 1 ½ cups (297g) granulated sugar, 3 tsp baking powder, ½ tsp salt, ¼ tsp ground nutmeg
-
In a separate, large mixing bowl, combine the eggs, buttermilk, vegetable oil, and vanilla extract. Stir well with a spatula until fully incorporated.2 large eggs, ¾ cup (236ml) buttermilk, ½ cup (118ml) vegetable oil, 2 tsp vanilla extract
-
Gradually add the dry ingredients to the wet ingredients, mixing gently just until combined. Be careful not to over-mix; the batter will be very thick. Carefully fold in the fresh raspberries and white chocolate chips.2 cups fresh raspberries, 1 ½ cups (255g) white chocolate chips
-
Cover the bowl with a clean towel and let the batter rest for 30 minutes. During this time, preheat your oven to 425ºF (220ºC).
-
For bakery-style muffins, line a 12-count muffin pan with only 6 muffin liners, filling every other well. Fill each lined cup to the top with batter (approximately 6-8 heaping tablespoons). Smooth any lumpy tops with a butter knife. Press additional raspberries and white chocolate chips on top and sprinkle with sanding sugar.
-
Place one pan in the center of the preheated oven and bake for 7 minutes at 425ºF (220ºC). Then, reduce the oven temperature to 350ºF (175ºC) and continue baking for 18-21 minutes, or until a toothpick inserted into the center comes out clean. Allow muffins to cool in the pan for 15 minutes before removing. Repeat with any remaining batter, remembering to increase the oven temperature back to 425ºF (220ºC) first.
Video
Nutrition
Nutrition Disclosure
All nutritional values are approximate and provided to the reader as a courtesy. Changing ingredients and/or quantities will alter the estimated nutritional calculations.
Love this recipe? Share your thoughts below!