

Delightful Peeps Bunny Sugar Cookies: Your Ultimate Easter Treat Guide
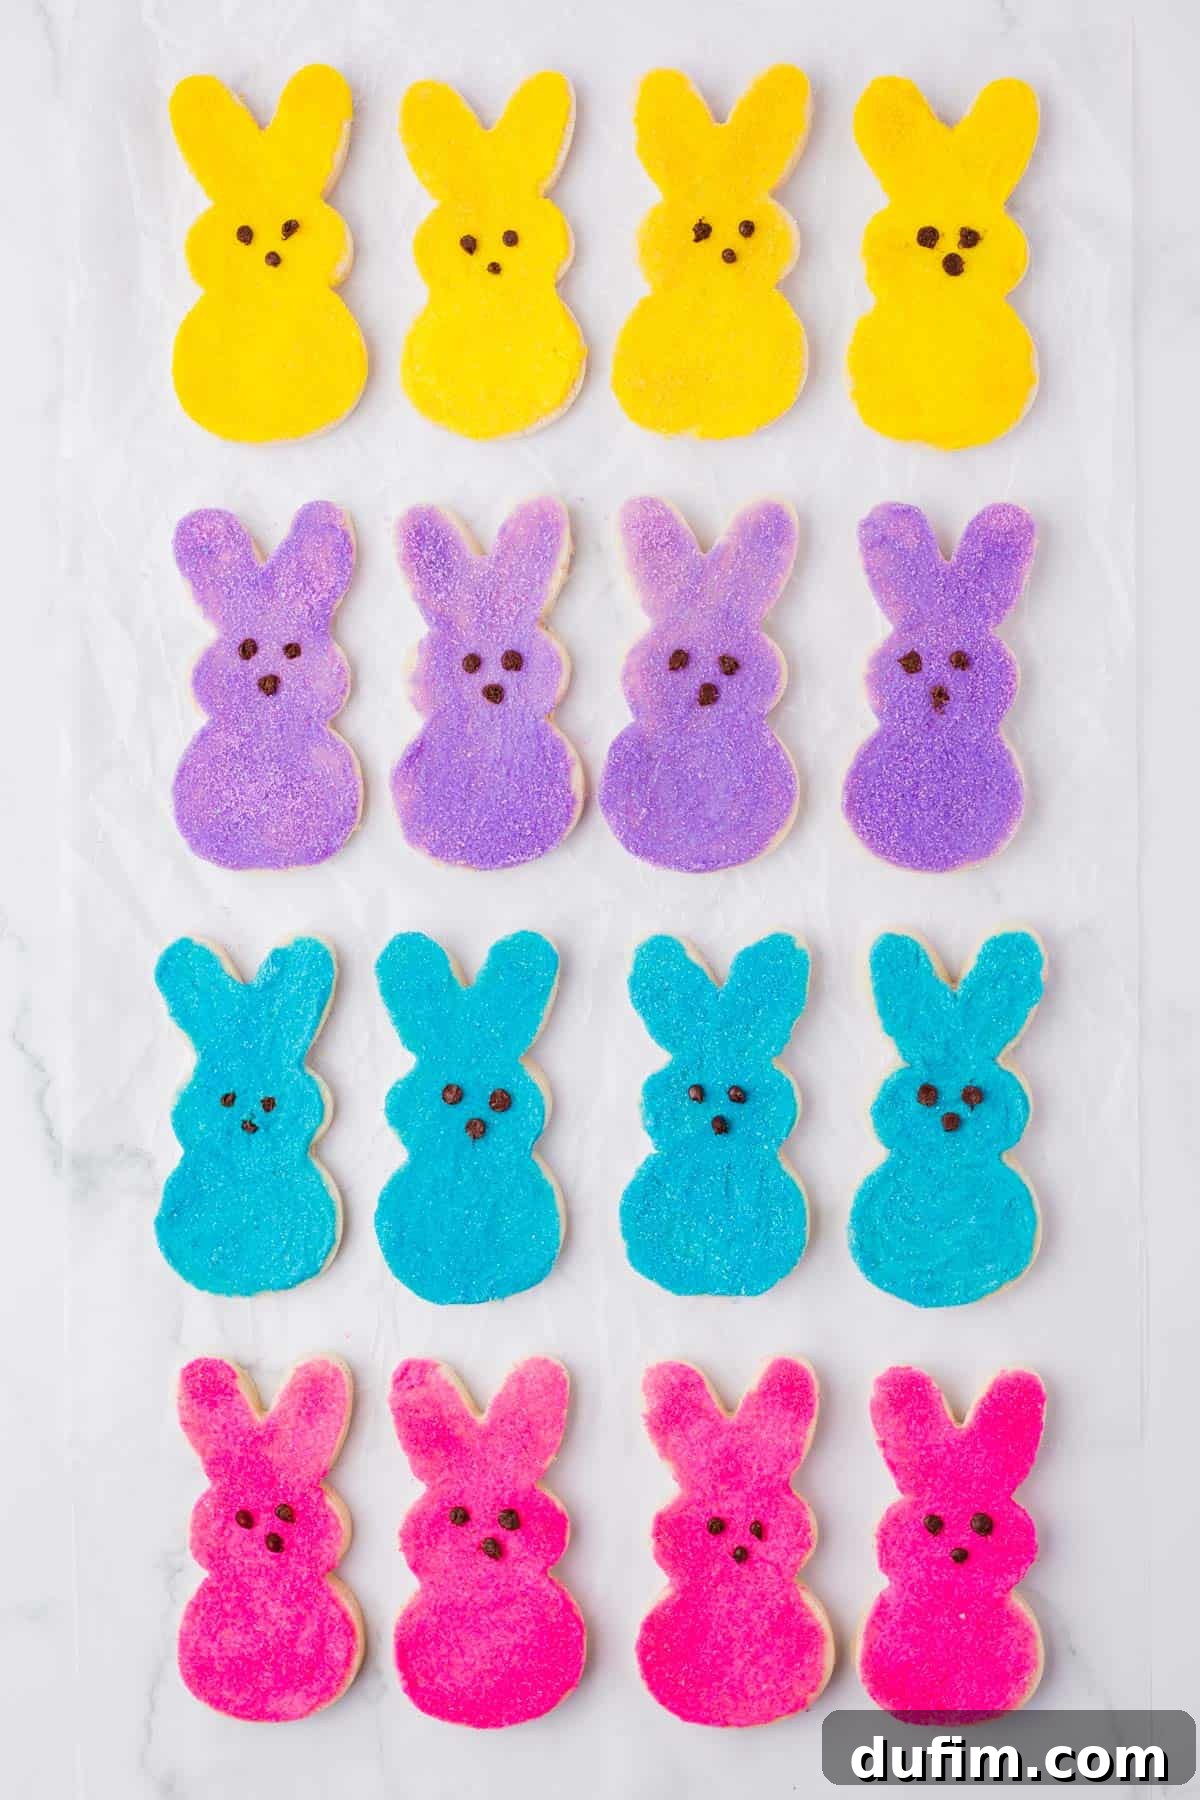
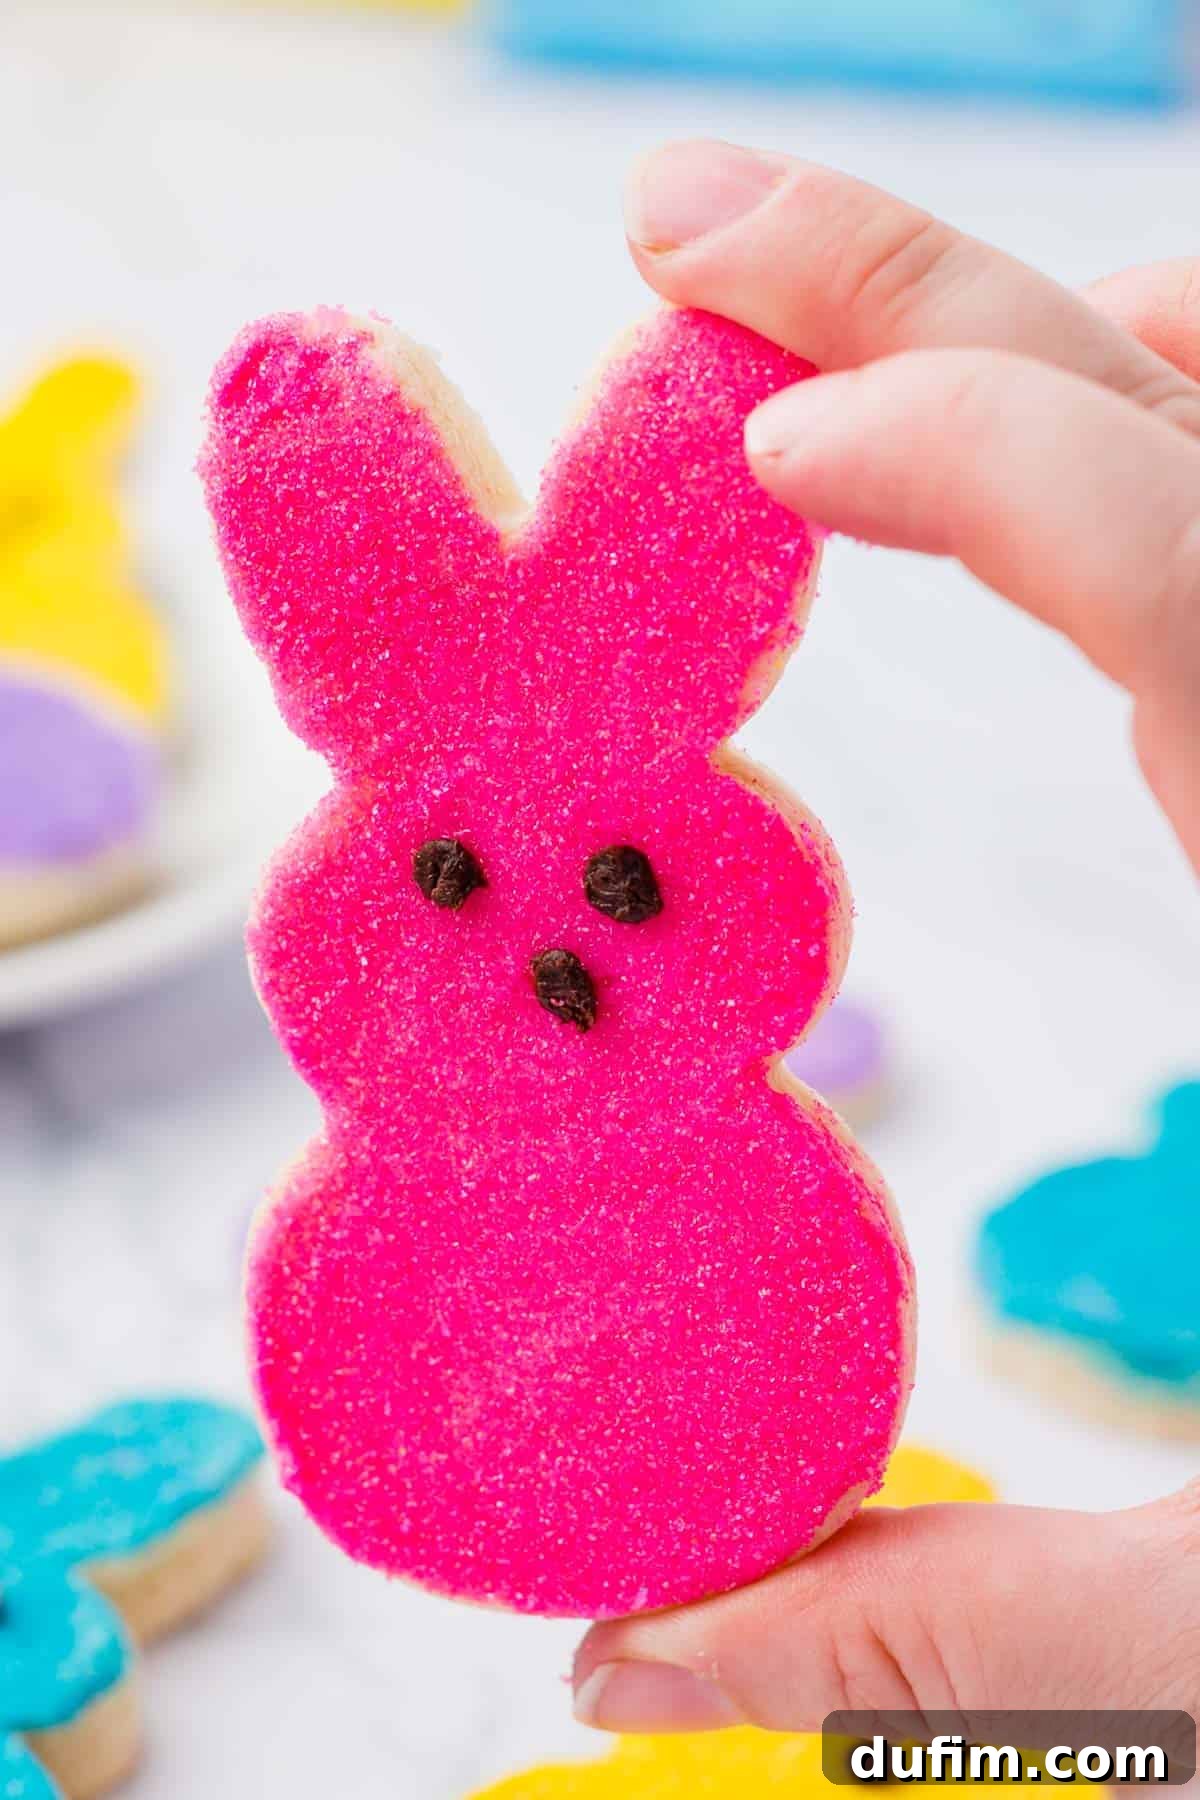
Step into the festive spirit of Easter with our irresistible Peeps Bunny Sugar Cookies! These delightful treats perfectly capture the iconic look of Peeps marshmallows but deliver an even more satisfying experience with a tender, flavorful sugar cookie base. Each cookie is beautifully adorned with smooth buttercream frosting, shimmering decorative sugar, and charming chocolate eyes and noses, making them an absolute must-have for your holiday celebrations.
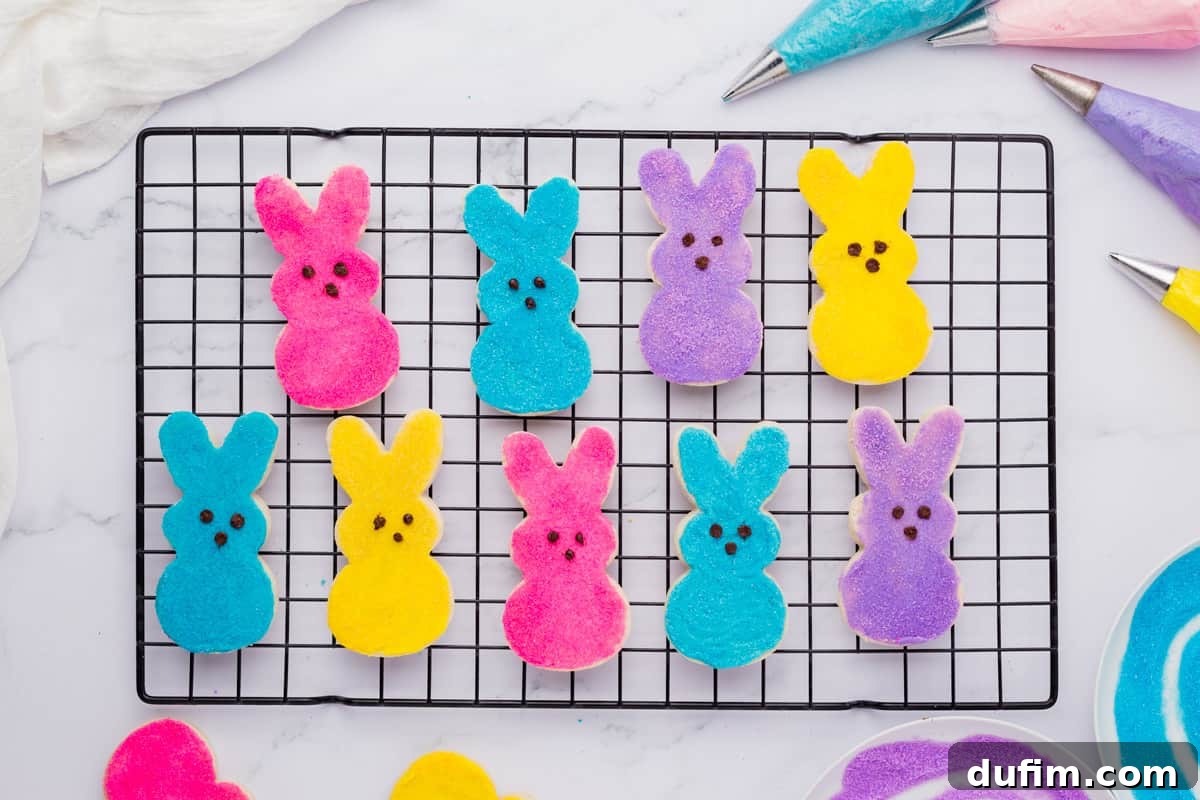
While Peeps marshmallows have a special place in many hearts (or spark a playful debate!), these **Peeps Bunny Sugar Cookies** offer a universally loved alternative. If you’re someone who appreciates the charming shape and vibrant colors of Peeps but prefers a different texture, then these homemade cookies are definitely for you! They embody the same fun, festive essence but in the delightful form of a classic sugar cookie. It’s a win-win for everyone at your Easter table.
To achieve that perfectly recognizable Peeps bunny silhouette, we recommend using a dedicated Peeps cookie cutter. However, don’t worry if you don’t have one; any other bunny-shaped cookie cutter will work beautifully, allowing you to create your own unique batch of adorable Easter treats.
Crafting a Complete Easter Dessert Spread
Easter is a time for abundance and joy, especially when it comes to desserts! If you’re planning a party or a family gathering and want to create a stunning array of themed treats, consider pairing these **Peeps Bunny Sugar Cookies** with some of these other fantastic Easter-inspired recipes:
- Easter-Themed Pretzels
- Peeps Bunny Pudding Cups
- Swimming Peeps Jello Cups
- Rice Krispies Easter Eggs
- Easter Egg Truffles
Why These Peeps Bunny Cookies Will Capture Your Heart
These aren’t just any cookies; they’re a celebration of Easter in every bite! Here’s why you’ll absolutely adore making and sharing these **Peeps Bunny Sugar Cookies**:
- Irresistibly Adorable Bunny Shape: The charming Peeps bunny design is instantly recognizable and brings a smile to everyone’s face, making them perfect for Easter baskets and dessert tables.
- Surprisingly Simple to Make: Our recipe for these **cut-out sugar cookies** is straightforward and forgiving, making it accessible for bakers of all skill levels, from beginners to seasoned pros.
- Convenient No-Chill Option: Short on time? Our innovative “no-chill” dough modification means you can skip the waiting period and get straight to baking these delightful **Easter treats**.
- Delicious Gluten-Free Alternative: We provide an easy gluten-free option, ensuring that everyone can enjoy these festive cookies without compromising on taste or texture.
- Fantastic for Family Fun: Get the kids involved in this **kid-friendly baking project**! From mixing and rolling to cutting and decorating, it’s a wonderful way to create lasting Easter memories together.

Gather Your Ingredients for Peeps Bunny Cookies
Making these **Peeps Bunny Sugar Cookies** is an enjoyable process, and the ingredients are readily available. The beauty of this recipe lies in its customization, allowing you to adjust flavors and colors to your liking. For precise measurements and detailed steps, be sure to check the full recipe card below.
For the Perfect Cut Out Sugar Cookies
- All-purpose flour: The foundation of our tender **sugar cookie recipe**. Ensure it’s measured correctly for best results (see our flour measuring tips below!).
- Baking powder: Gives the cookies a subtle lift, keeping them light and airy.
- Salt: A pinch enhances all the sweet flavors in the cookie.
- Unsalted butter: Softened to room temperature (unless using the no-chill method) for a smooth, creamy dough. Quality butter makes a noticeable difference.
- Granulated sugar: Provides the classic sweetness and helps achieve that delightful crisp edge.
- Egg: Acts as a binder, adding structure and richness to the dough.
- Vanilla extract: Essential for that universally loved classic sugar cookie flavor.
- Almond extract: A secret ingredient that adds a wonderful depth and complements the vanilla beautifully.
- Peeps Cookie Cutter: While ideal for the iconic Peeps shape, any **bunny-shaped cookie cutter** will create charming **Easter sugar cookies**.
For the Dreamy Buttercream Frosting
- Unsalted butter: Softened to create a fluffy and spreadable buttercream.
- Powdered sugar (confectioners’ sugar): The key to a smooth, non-gritty frosting.
- Vanilla extract: For a delicious, aromatic frosting.
- Almond extract: Adds another layer of flavor that perfectly pairs with the cookies.
- Milk: Or heavy cream, to adjust the frosting consistency to your desired piping thickness.
- Gel food coloring: Gel colors provide vibrant hues without thinning the frosting. We recommend cheerful yellow, pink, blue, and purple for a true Peeps look.
- Sanding sugar: The signature sparkle that mimics the coating on actual Peeps. Have fun with yellow, pink, blue, and purple.
- Chocolate chips: Melted chocolate is perfect for piping those tiny, expressive eyes and cute little noses, bringing your bunnies to life!
How to Make Peeps Sugar Cookies: A Step-by-Step Guide
Creating these **Peeps Sugar Cookies** is not just baking; it’s an opportunity for quality time and creative expression, especially when made as a family on Easter morning. Follow these simple steps to bring your adorable bunny cookies to life. Remember to consult the comprehensive recipe card below for all exact measurements and detailed instructions.
Mastering the Cut-Out Sugar Cookies
Prepare dry ingredients: In a spacious bowl, whisk together the all-purpose flour, baking powder, and salt until thoroughly combined. This ensures even distribution throughout the dough. Set this mixture aside for later.
Cream butter and sugar: In a separate mixing bowl, combine your softened, room-temperature unsalted butter with the granulated sugar. Beat them vigorously with an electric mixer for about 90 seconds until the mixture is light, fluffy, and pale in color. This creaming process incorporates air, contributing to a tender cookie.
Incorporate wet ingredients: Add the large egg, vanilla extract, and almond extract to the creamed butter and sugar. Continue beating for another minute until all ingredients are well-integrated and smooth.
Combine wet and dry mixtures: Gradually add the flour mixture into the wet ingredients in three separate additions, mixing only until the flour is just incorporated after each addition. Initially, the dough may appear crumbly and sandy. Continue mixing until the mixture thickens and begins to stick together. For the final touch, use your hands to gently knead the dough for just 20-30 seconds, bringing it into a cohesive ball. Be careful not to overmix, as this can lead to tough cookies.
Chill the dough: Divide your prepared dough into two equal, flat discs. Wrap each disc tightly in plastic wrap to prevent drying, and place them in the refrigerator to chill for at least 1 hour. Chilling is vital for preventing the cookies from spreading excessively during baking, helping them maintain their perfect Peeps bunny shape. The dough can be safely stored in the fridge for up to 2 days, making it excellent for advanced preparation.
Preheat your oven: Once the dough has sufficiently chilled, remove one disc from the refrigerator and preheat your oven to 350ºF (175ºC). Ensure your oven is fully preheated for even baking.
Roll out the dough: On a very lightly floured surface (and we mean minimal flour to avoid toughening the dough), use a rolling pin to roll one disc of dough to an even 1/4 inch thickness. For even easier handling and to minimize additional flour, consider rolling your dough directly on a silicone baking mat.
Cut out cookie shapes: Use your chosen cookie cutter (ideally the Peeps bunny shape!) to cut out your festive cookie shapes. Carefully remove the surrounding dough scraps. With the help of a thin spatula, gently transfer the cut-out shapes onto a baking sheet lined with a silicone baking mat or parchment paper, ensuring they are spaced evenly.
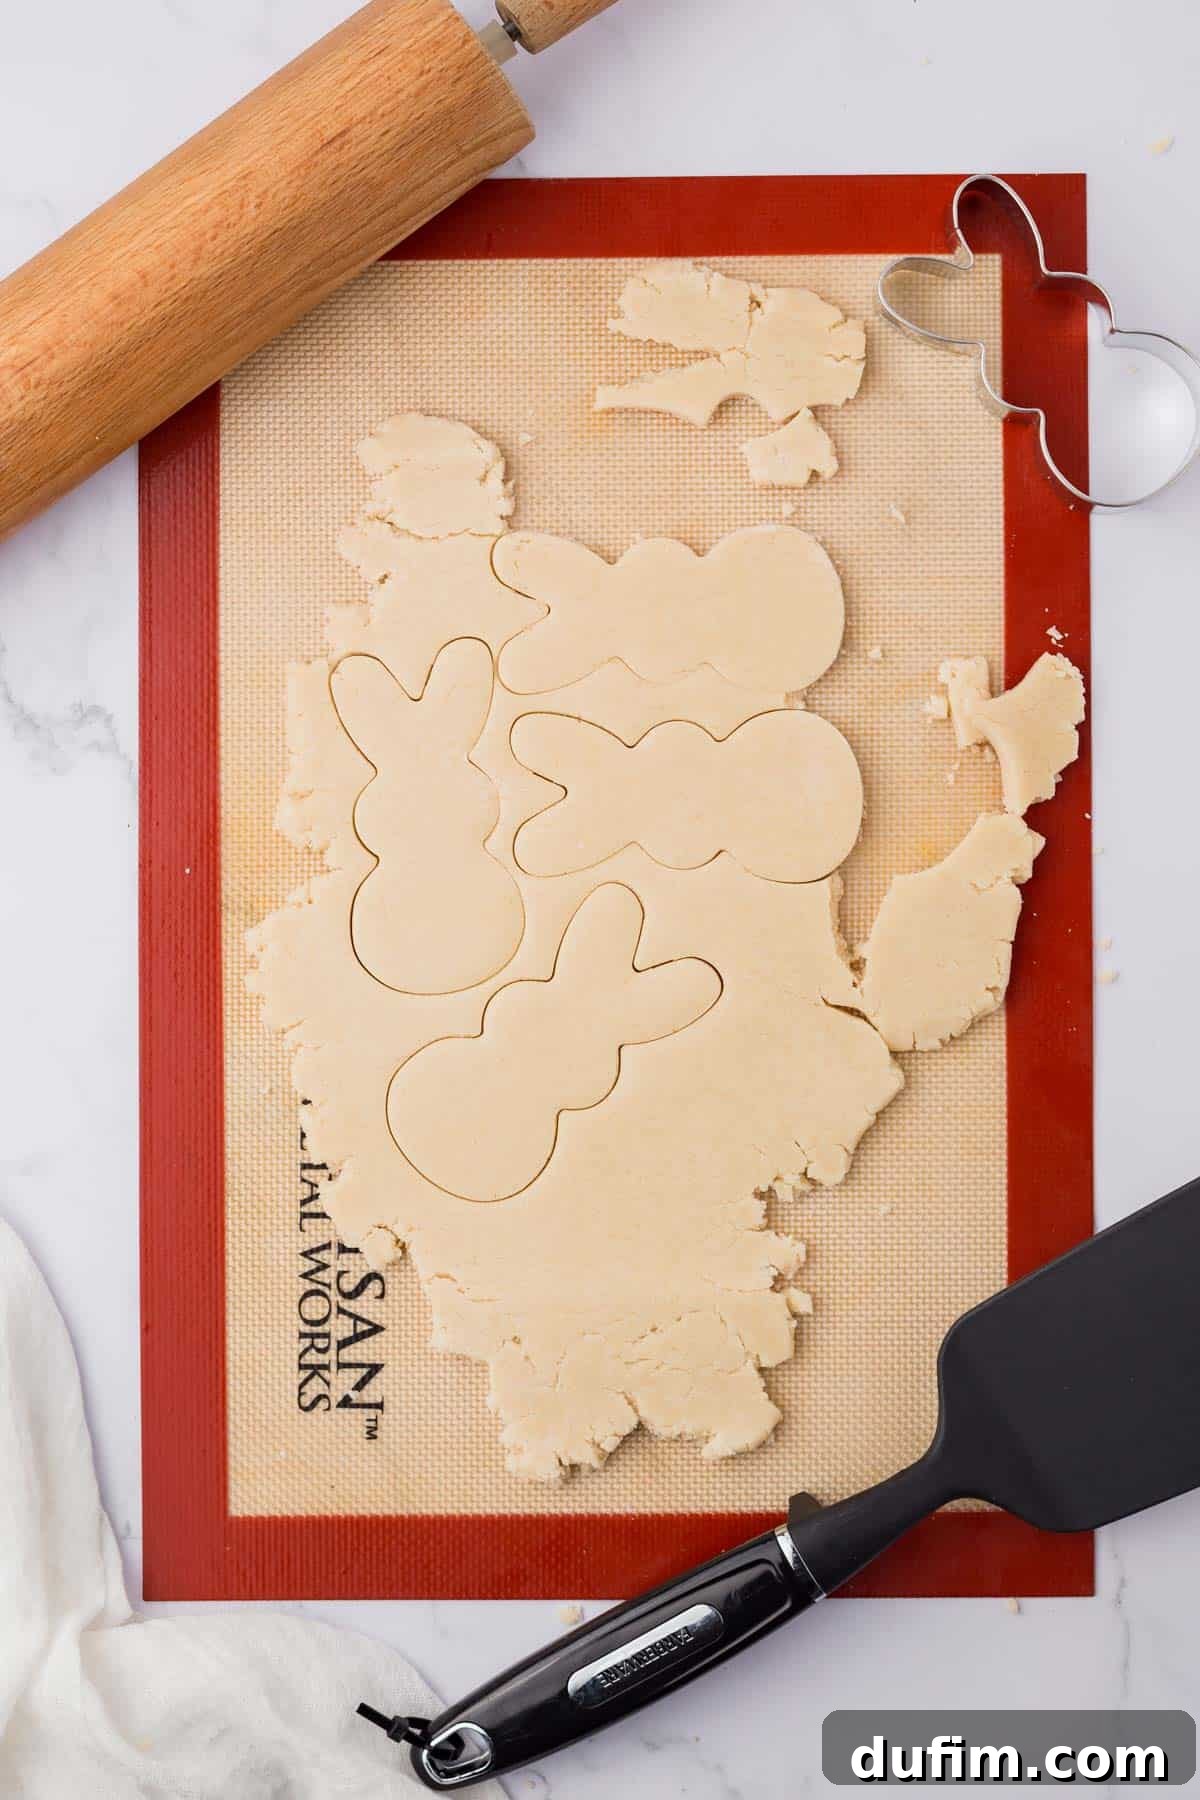
Bake to perfection: Bake the cookies for approximately 9-10 minutes. The edges should be lightly golden, but the centers will remain pale. If your oven tends to have hot spots, rotate the cookie sheet halfway through the baking time for uniform results.
Cooling process: Once baked, the cookies will continue to cook slightly from residual heat. Allow them to cool on the baking sheet for at least 10 minutes before carefully transferring them to a wire cooling rack to cool completely. This step is crucial for preventing breakage and ensuring they are firm enough for frosting.
Repeat and re-chill: Repeat the rolling, cutting, and baking process with the remaining dough. If your dough becomes too warm and soft during this time, wrap it and chill it in the refrigerator for about 15 minutes to firm it up again.
Complete cooling: Ensure all cookies are completely cooled to room temperature before attempting to frost them. Warm cookies will cause the buttercream to melt and slide off.
Decorating with Dreamy Buttercream Frosting
Whip the butter: Place your softened unsalted butter in a mixing bowl. Beat it with an electric mixer for about 90 seconds until it’s light, fluffy, and creamy. This is the foundation for a perfect buttercream.
Gradually add sugar and extracts: Slowly add the powdered sugar, typically about 2 cups at a time, beating well after each addition. Incorporate the vanilla and almond extracts as you go. Continue beating until the frosting is smooth and well combined.
Adjust consistency and taste: Taste the frosting and adjust for sweetness if desired. If the frosting seems too thick for piping, add milk or heavy cream, 1 tablespoon at a time, beating until you achieve a creamy, pipeable consistency. For this recipe, 4 cups of powdered sugar usually yields a perfect sweetness and texture.
Divide and color: Divide the prepared buttercream frosting into four separate small bowls. Using gel food coloring, dye each portion your desired vibrant color, such as yellow, pink, blue, and purple, mixing until the color is uniform and bright.
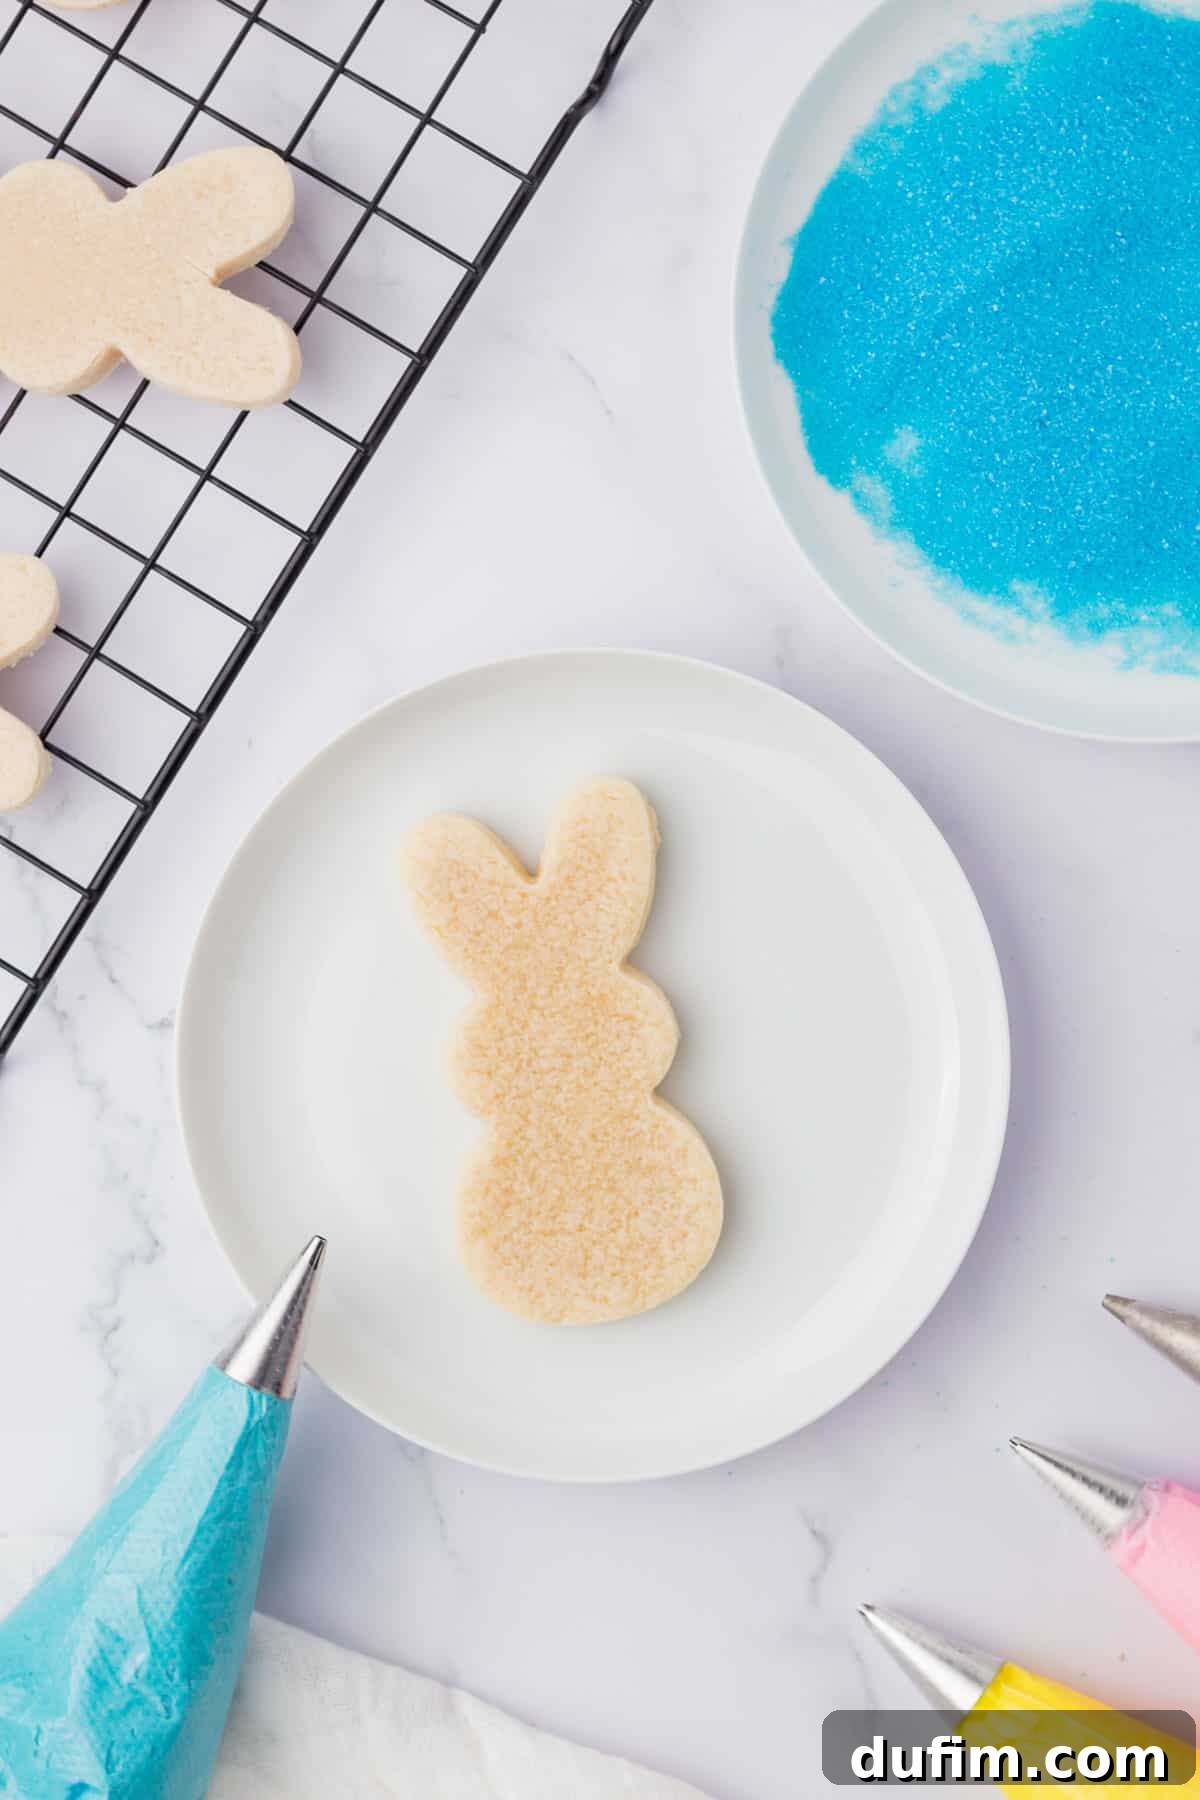
Pipe the frosting: Transfer each colored frosting into a separate piping bag fitted with a small round tip (like a Wilton 1A). Hold the tip close to the cookie surface and begin piping the frosting. Start by outlining the bunny ears with a V-shape, then continue to pipe and fill in the head and body of the cookie, ensuring an even layer.
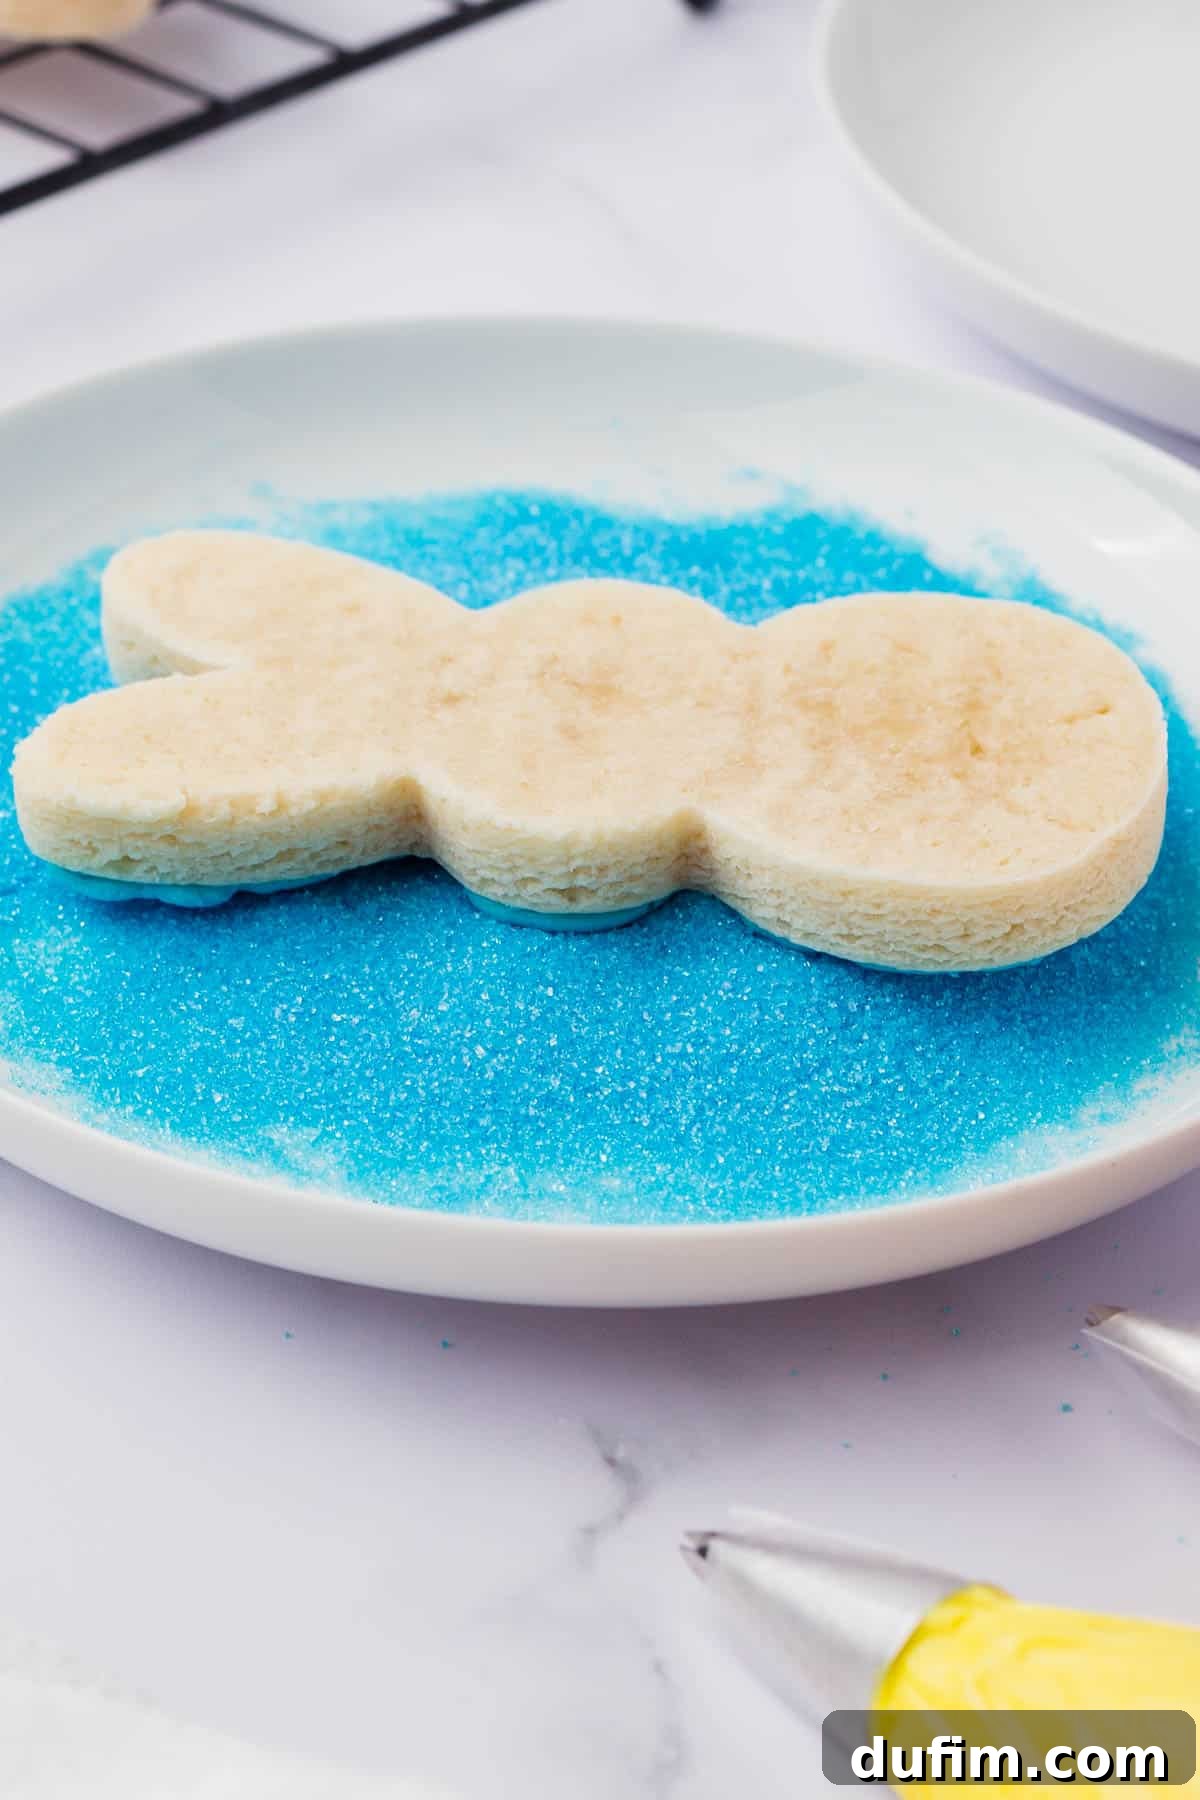
Add sparkling sanding sugar: Pour the sanding sugar of a corresponding color onto a flat plate. While the frosting is still wet, gently press each frosted cookie face-down into the sanding sugar, making sure the entire frosted surface is covered. Lift and gently shake off any excess. Repeat this step for all your delightful cookies.
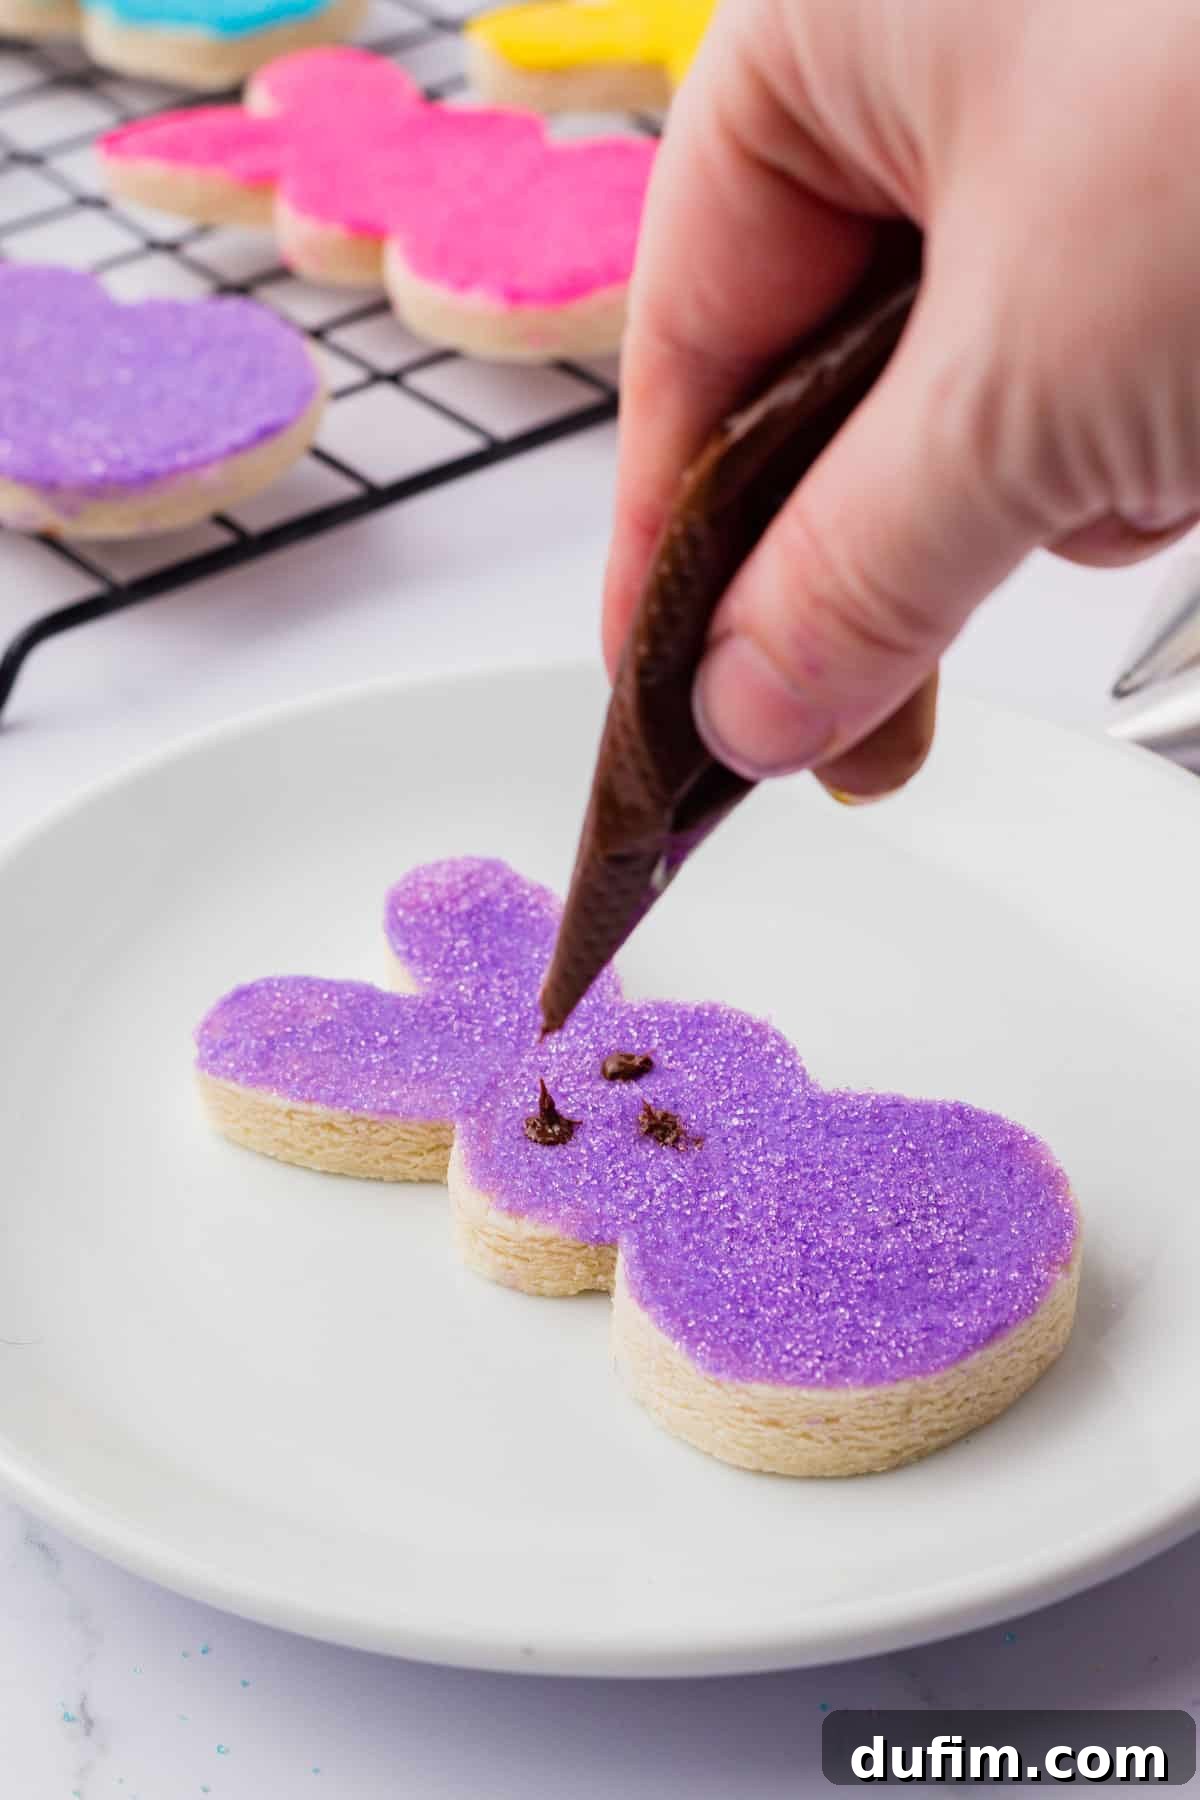
Create chocolate eyes and noses: Melt about 2 tablespoons of semi-sweet chocolate chips in the microwave until smooth. Transfer the melted chocolate into a very small piping bag (or a ziplock bag with a tiny corner snipped off). Cut a minuscule hole at the tip and carefully pipe two small dots for eyes and one tiny dot for the nose on each bunny cookie. For more control, you can also use a toothpick to dab on the melted chocolate.
Tips for Sugar Cookie Success
- Room Temperature Ingredients: Always ensure butter and eggs are at room temperature for both the cookies and frosting (unless using the no-chill method). This allows for easier mixing and a smoother, more uniform consistency.
- Don’t Overmix: Mix the dough and frosting only until ingredients are just combined. Overmixing can develop the gluten in the flour, resulting in tough cookies, or incorporate too much air into the frosting, making it difficult to pipe.
- Even Thickness: When rolling out the dough, aim for a consistent 1/4 inch thickness. This ensures that all cookies bake evenly and have the same texture.
- Use Parchment Paper or Silicone Mats: These not only prevent sticking but also help maintain the cookie’s shape during baking and make cleanup a breeze.
- Cool Completely: Patience is key! Ensure cookies are fully cooled before frosting to prevent your beautiful buttercream from melting.
Flavor and Decoration Variations
- Citrus Zest: Add lemon, orange, or lime zest to your cookie dough or frosting for a bright, fresh flavor.
- Spices: A pinch of cinnamon or nutmeg in the cookie dough can add warmth, especially if you’re making them for occasions beyond Easter.
- Extract Swaps: Experiment with different extracts in your frosting, like lemon, orange, or even coconut extract for a tropical twist.
- Other Shapes: Use different Easter-themed cookie cutters like eggs, chicks, or flowers for a varied assortment.
- Sprinkle Fun: Beyond sanding sugar, try different types of sprinkles, edible glitter, or even mini candies to decorate your bunnies.
Storage Solutions: How to Keep Your Peeps Bunny Cookies Fresh
How to Freeze Baked Easter Bunny Sugar Cookies
Freezing baked sugar cookies is a fantastic way to prepare ahead or enjoy your treats later. This method works best for undecorated cookies without frosting.
- First, ensure your cookies are completely cooled to room temperature.
- Stack the cooled cookies with a small piece of parchment paper between each one to prevent sticking. Stacks of 4-5 cookies work well.
- Wrap these cookie stacks tightly and thoroughly in plastic wrap, ensuring no air pockets remain.
- Place the wrapped bundles inside a heavy-duty ziplock freezer bag or an airtight freezer-safe container.
- To thaw, simply remove the cookies from the freezer bag or container (keeping them in their plastic wrap) and let them thaw on your kitchen counter until they reach room temperature.
How to Freeze Cut Out Sugar Cookie Dough
Freezing the dough is an excellent strategy for future baking sessions, allowing you to whip up fresh cookies with minimal effort. You have two convenient options for freezing this versatile sugar cookie dough:
1. Freezing Dough Discs
This method is perfect if you want to store a batch of dough for later use without pre-cutting shapes.
- After preparing the dough, divide it in half and flatten each half into a disc shape.
- Wrap each disc securely with plastic wrap, then place it inside a freezer bag or an airtight container to prevent freezer burn.
- To thaw, transfer the frozen dough disc to the refrigerator and let it thaw overnight. Once thawed, it can be rolled out and baked as usual.
2. Freezing Pre-Cut Shapes
This option is fantastic for ultimate convenience, allowing you to bake just a few cookies at a time whenever the craving strikes.
- After mixing, roll out the dough and use your Peeps bunny cookie cutter to cut out the desired shapes.
- Arrange the raw cookie shapes on a baking sheet lined with silicone or wax paper. Ensure they are not touching. Freeze for 1-2 hours, or until the shapes are solid.
- Once thoroughly frozen, carefully remove the bunny cookies from the pan. Stack them with parchment paper in between, wrap them together tightly in plastic wrap, and then store them inside a freezer bag or container.
- To bake from frozen, unwrap the desired number of cookie shapes, place them on a silicone-lined baking sheet on the counter, and allow them to thaw for 15-25 minutes. They should still be cold but no longer frozen solid before baking. Adjust baking time by a minute or two if needed.
Mastering Flour Measurement for Perfect Cookies
Accurate flour measurement is paramount for achieving the ideal texture in your **sugar cookie recipe**. Incorrect measurement is a common culprit for dry or crumbly cookies. For the best results, follow this tried-and-true method:
- Fluff the flour: Before scooping, use a fork or whisk to lightly fluff up the flour in its container or bag. This aerates it and prevents compaction.
- Spoon into cup: Gently spoon the fluffed flour into your dry measuring cup until it overflows slightly. Do not pack it down.
- Level with a knife: Use the straight edge of a butter knife or similar utensil to level off the excess flour, ensuring a precise measurement.
Alternatively, for unparalleled accuracy, measure your flour by weight using a food scale. If you simply scoop your measuring cup directly into a bag of flour, you risk compacting it significantly, which can add too much flour to your recipe and result in dry, stiff cookies. Precision in flour measurement guarantees a tender and delightful **Peeps Bunny Sugar Cookie** every time.
The No-Chill Sugar Cookie Dough Secret: A Time-Saving Option
Good news for those who are eager to bake and short on time! You absolutely can make these delightful **Peeps Bunny Sugar Cookies** without the traditional chilling period for the dough. This “no-chill” option is a fantastic hack for quick baking sessions, letting you enjoy fresh cookies sooner.
There’s one crucial adjustment you need to make to the recipe if you opt for the no-chill method: you must use cold butter instead of softened butter. When you start with cold butter and work quickly, the dough remains sufficiently cold during the mixing and rolling process to hold its shape beautifully during baking. The key is to minimize the dough’s exposure to warm temperatures.
Even with the no-chill method, we do recommend chilling the dough briefly (15-20 minutes) between batches, especially if your kitchen is warm or if you’re taking a break. This helps maintain the dough’s cool temperature, preventing the cookies from spreading too much in the oven and ensuring they keep their charming Peeps bunny form.

Gluten-Free Peeps Sugar Cookies: A Delicious Alternative
We’re thrilled to share that this **Peeps Bunny Sugar Cookie recipe** adapts beautifully to a gluten-free diet, ensuring everyone can enjoy these festive **Easter treats**. Achieving fantastic results with gluten-free flour is simpler than you might think!
For this recipe, we’ve had excellent success using a high-quality, all-purpose gluten-free flour blend, specifically King Arthur’s All-Purpose Gluten-Free Flour. The best part? There are no other changes or complex modifications needed for the recipe. Simply substitute the regular all-purpose flour with an equal amount (one-for-one replacement by volume or weight) of your preferred all-purpose gluten-free flour blend. Many modern GF blends are formulated to perform similarly to wheat flour, making the transition seamless.
When baking with gluten-free flour, it’s always a good idea to keep an eye on the dough’s consistency, as some blends can absorb liquid differently. However, with a reliable blend like King Arthur’s, you can expect delicious, perfectly shaped **gluten-free Easter sugar cookies** that are just as delightful as the original!
Frequently Asked Questions (FAQs)
- Can I make the cookie dough ahead of time?
- Yes, absolutely! The cookie dough can be made up to 2 days in advance and stored tightly wrapped in the refrigerator. This is perfect for splitting your baking process into multiple days.
- How long do Peeps Bunny Cookies stay fresh?
- Once decorated, these cookies can be stored in an airtight container at room temperature for up to 3-5 days. If refrigerated, they can last a bit longer, but the frosting might firm up.
- Can I use store-bought cookie dough?
- While this recipe is optimized for homemade dough, you can certainly use good quality store-bought sugar cookie dough for a quicker shortcut. Just be aware that the texture and flavor might differ slightly from our homemade version.
- What if my frosting is too runny or too thick?
- If your frosting is too runny, gradually add more powdered sugar, a tablespoon at a time, until it thickens. If it’s too thick, add milk or heavy cream, also a tablespoon at a time, until it reaches a pipeable consistency.
- How can I make the chocolate eyes and noses more easily?
- If you find piping tiny details challenging, you can use a toothpick dipped in melted chocolate to carefully dab on the eyes and nose. This often gives more control for small features.
Explore More Cookie Creations
If you loved making these **Peeps Bunny Sugar Cookies**, we’re sure you’ll enjoy exploring these other fantastic cookie recipes. Each one offers a unique flavor and baking adventure:
- Caramel Apple Cookies
- Rainbow Sugar Cookies
- Pineapple Cookies
- Lemon Sugar Cookies

Tap stars to rate!
Peeps Bunny Cookies
By: Beth
Prep Time: 15 minutes
Cook Time: 8 minutes
Chill Time: 2 hours
Servings: 24 cookies
Peeps Bunny Cookies are the perfect Easter treats, made with my cut out sugar cookie recipe that has a no chill option and a gluten free option, then topped with decorative sugar and chocolate eyes and noses.
Equipment
- Peeps Cookie Cutter
- Gel food coloring
- Blue sanding sugar
- Yellow sanding sugar
- Purple sanding sugar
- Pink sanding sugar
Ingredients
CUT OUT SUGAR COOKIES
- 2 ½ cups (300g) all purpose flour
- 1 tsp baking powder
- ¼ tsp salt
- ½ cup (113g) unsalted butter, softened, 1 stick
- 1 cup (198g) granulated sugar
- 1 large egg
- 1 tsp vanilla extract
- ½ tsp almond extract
BUTTERCREAM FROSTING
- 1 ½ cups (339g) unsalted butter, 3 sticks, softened
- 4 cups (454g) powdered sugar
- 1 tsp vanilla extract
- 1 tsp almond extract
- 1 Tbsp milk, or heavy cream works great too
- Gel food coloring, I used yellow, pink, blue and purple
- Sanding sugar, I used yellow, pink, blue and purple
- 2 Tbsp chocolate chips, melted
Instructions
CUT OUT SUGAR COOKIES
- In a large bowl, combine the flour, baking powder and salt. Mix with a spoon or fork. Set aside.
- In a mixing bowl, combine the room temperature butter and sugar, beat with an electric mixer for 90 seconds.
- Add in the egg, vanilla & almond extracts and beat for 1 minute.
- Add the flour in thirds, mixing just until the flour is incorporated. The dough will initially look crumbly, almost sandy. But continue to mix until the mixture is thick and sticks together. Use your hands to gently knead the dough together at the very end of the mixing process – knead for only 20-30 seconds.
- Divide the dough into 2 flat discs, cover each with plastic wrap and place in the fridge for at least 1 hour to chill. The dough can be left in the fridge to chill for up to 2 days.
- After chilling, remove one disc and preheat the oven to 350ºF.
- On a very lightly floured surface (and I mean minimal) use a rolling pin to roll the dough to 1/4 inch thick. Frequently I will roll my dough on a silicone baking mat to eliminate the need to use flour.
- Use cookie cutters to cut out your desired shapes. Remove the dough scraps and use a spatula to transfer the shapes to a baking sheet lined with a silicone baking mat. Bake for 9-10 minutes. If your oven has a hot spot, rotate the cookie sheet half way through.
- The cookies will be pale in color – but will continue baking slightly once removed from the oven. Allow the cookies to cool on the baking sheet for at least 10 minutes. Then move to a cooling rack. Repeat the process with the remaining dough. If your dough is out of the fridge for too long, wrap it and chill it in the fridge for 15 minutes.
- Allow the cookies to cool completely before frosting them.
BUTTERCREAM FROSTING
- Place the softened butter in a mixing bowl, beat using an electric mixer for 90 seconds.
- Gradually add the powdered sugar, I usually do 2 cups at a time, and add the vanilla and almond extracts, beat again.
- Taste the frosting to see if you want it sweeter. I liked the way mine turned out with 4 cups of powdered sugar. If the frosting is too thick add 1 tbsp of milk or heavy cream, beat until creamy.
- Divide the frosting into 4 bowls and dye each your desired color.
- Transfer each color into a piping bag fit with a round tip, similar to a Wilton 1A. Hold the tip close to the cookie and pipe the frosting on the cookies, starting with a V shape for the bunny ears. Continue onto the head and body.
- Transfer the sanding sugar to a plate. Press each cookie into the sprinkles, making sure all the frosting is covered. Repeat for all the cookies.
- Melt 2 tablespoons of semi-sweet chocolate chips in the microwave. Transfer the melted chocolate to a piping bag. Cut a very small hole in the bag and pipe 2 eyes and 1 nose on each bunny. You could also dab the melted chocolate on with a toothpick if you feel like that gives you more control.
Notes
This recipe turned out awesome using a high quality gluten free flour. I used King Arthur’s All Purpose Gluten Free Flour. There are no other changes you need to make, simply substitute the gluten free flour as a one for one replacement with regular flour to make gluten free cut out sugar cookies.
Nutrition
Calories: 304 kcal | Carbohydrates: 39g | Protein: 2g | Fat: 16g | Saturated Fat: 10g | Polyunsaturated Fat: 1g | Monounsaturated Fat: 4g | Trans Fat: 1g | Cholesterol: 48mg | Sodium: 48mg | Potassium: 27mg | Fiber: 0.4g | Sugar: 29g | Vitamin A: 484IU | Calcium: 19mg | Iron: 1mg
Nutrition Disclosure
All nutritional values are approximate and provided to the reader as a courtesy. Changing ingredients and/or quantities will alter the estimated nutritional calculations.