

Forget store-bought delights – these aren’t just any chocolate covered strawberries. I dedicated countless hours to meticulously testing eight distinct types of chocolate, scrutinizing every detail from melt time and smoothness to flavor, radiant shine, drying efficiency, and overall cost. The mission? To unearth the absolute perfect chocolate for dipping, ensuring you can craft an unforgettable dessert right in your own kitchen.
The result of this extensive research is a comprehensive guide that empowers you to create chocolate-dipped strawberries so exquisitely impressive, your guests will be convinced they’ve been custom-ordered from a high-end luxury dessert boutique. Whether your heart desires a rich, intense chocolate flavor, a quick-setting option for effortless preparation, a brilliantly bright white coating, or simply the most budget-friendly yet delicious choice, I’ve meticulously tested and documented them all. Dive in and let’s craft the BEST chocolate covered strawberries – eliminating all guesswork and ensuring spectacular success every single time.

Why Homemade Chocolate Dipped Strawberries Are Perfect for Every Occasion
The allure of chocolate covered strawberries isn’t reserved solely for grand gestures like Valentine’s Day or anniversaries. These simple yet elegant treats bring a touch of luxury and joy to any moment. Imagine the delightful contrast: a burst of juicy, fresh strawberry enveloped in a silky, rich chocolate shell, chilled to sublime perfection. It’s an irresistible combination that never fails to impress, making them ideal for everything from casual gatherings to sophisticated dinner parties, or simply as a well-deserved personal indulgence.
But achieving that “luxury dessert company” standard at home requires a little insider knowledge – which is precisely what this guide provides. My extensive kitchen trials involved rigorously testing eight different types of chocolate to bring you the definitive guide. The chocolates put to the test included popular choices such as Ghirardelli Milk Chocolate Flavored Melting Wafers, Ghirardelli Semi-Sweet Chocolate Chips, Ghirardelli White Chocolate Chips, Baker’s Semi-Sweet Chocolate Bar, Ghirardelli White Chocolate Bar, Ghirardelli Dark Chocolate Flavored Melting Wafers, alongside more economical options like Walmart brand Chocolate Almond Bark and White Chocolate Almond Bark.
For each variety, I meticulously documented every aspect: the speed and ease of melting, the smoothness and workability for dipping, the depth and balance of flavor, the final appearance and shine, the crucial drying time, and of course, the cost-effectiveness. My ultimate goal was to demystify the process and deliver a foolproof recipe that consistently yields truly impressive, gourmet-quality results right in your own home.
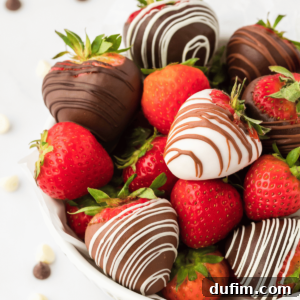
With just four essential ingredients and my meticulously refined, step-by-step methodology, you’ll be able to create an array of stunning chocolate-dipped strawberries in approximately 30 minutes. Follow along closely, absorb my expert-tested tips, and prepare to present chocolate covered strawberries so exquisite that your friends and family will undoubtedly believe you had them freshly delivered from an exclusive, high-end patisserie.
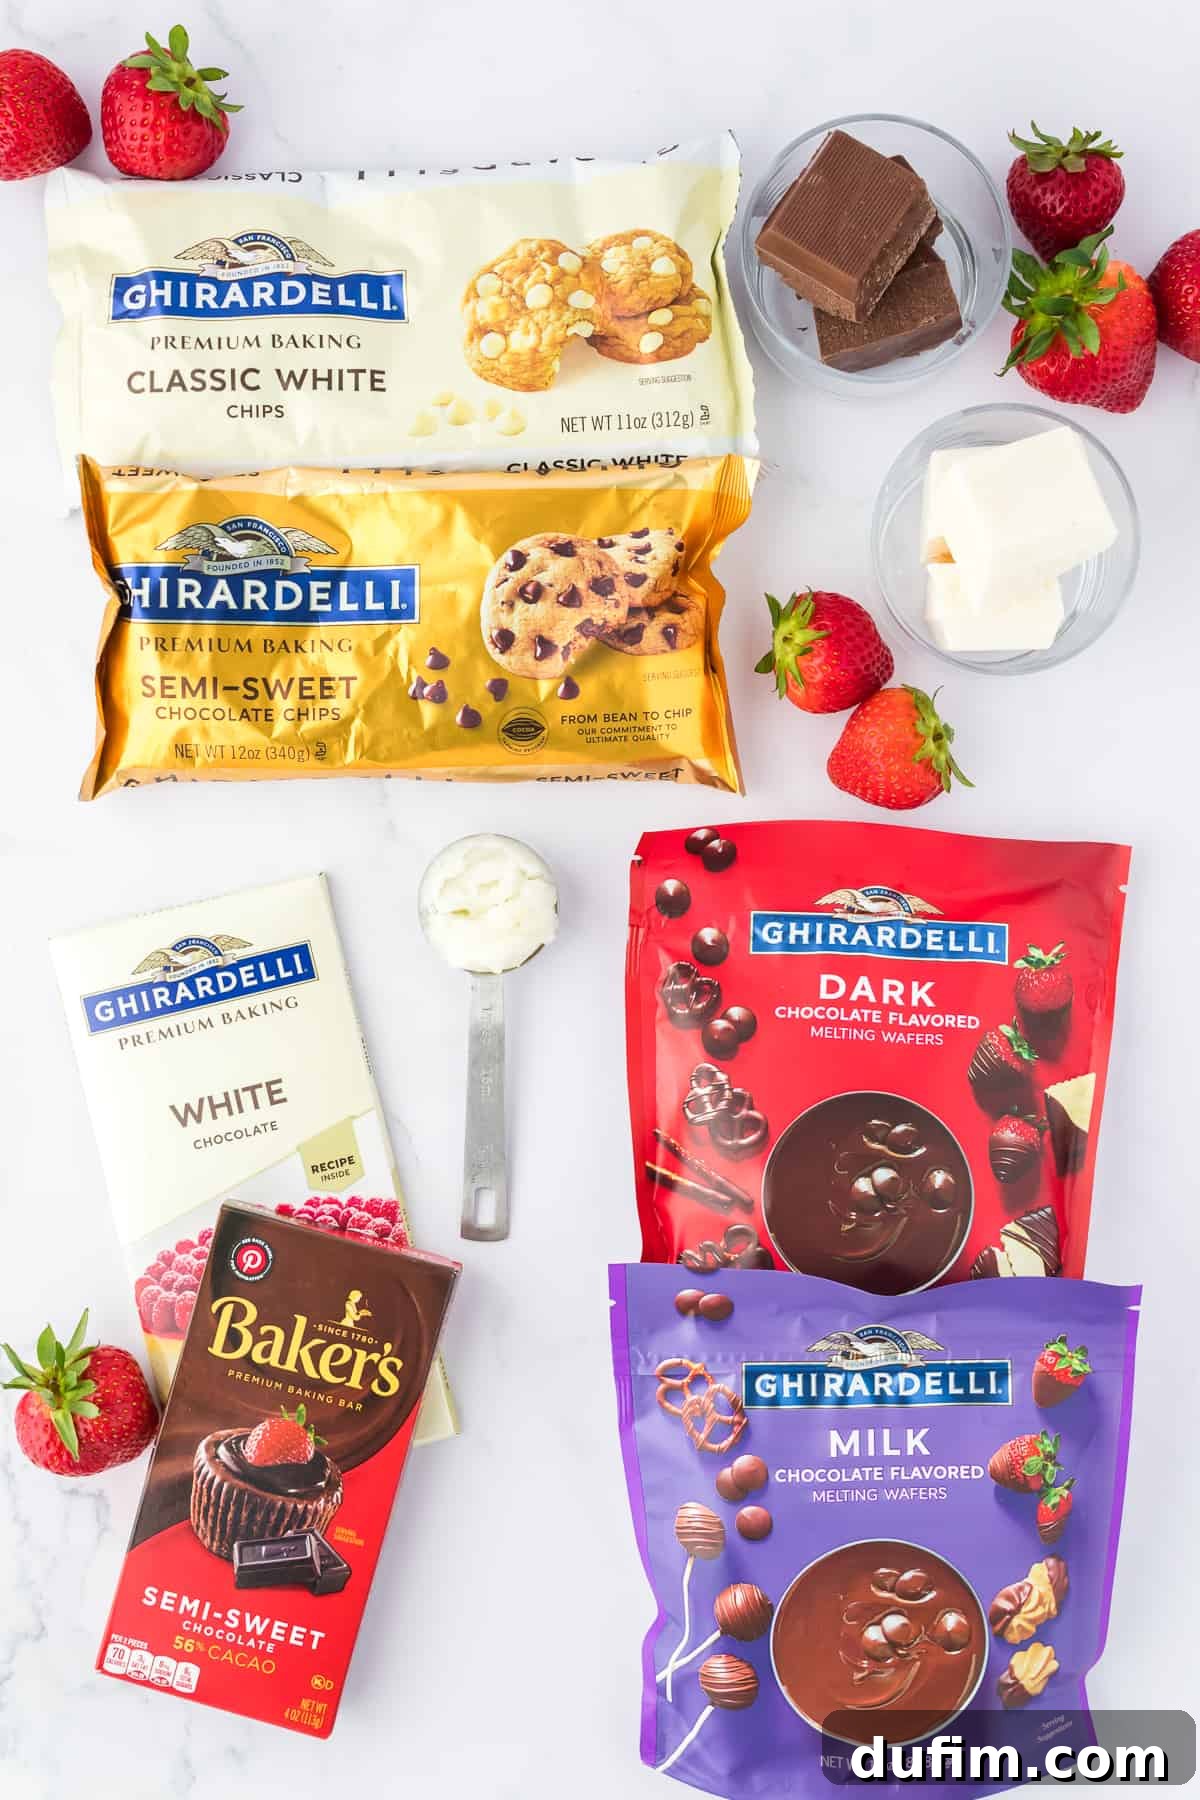
Essential Ingredients for Decadent Chocolate Covered Strawberries
Crafting these irresistibly easy chocolate covered strawberries requires only a handful of fundamental ingredients. While the full recipe with precise measurements and additional insights is detailed further below, here’s a quick overview of what you’ll need to gather:
- Fresh Strawberries: The star of our show! Choose firm, ripe berries with vibrant green stems for the best flavor and presentation.
- Semi-Sweet Chocolate: This can be in the form of a baking bar or chips. As you’ll discover in our in-depth chocolate comparison, the type you choose significantly impacts the final result.
- White Chocolate: Essential for elegant drizzles or a bright contrasting coating. Again, baking bars or chips are options, and our testing reveals the superior choice.
- Coconut Oil or another Neutral Oil: A small amount of oil is the secret ingredient for achieving that perfectly smooth, glossy chocolate coating and a delightful, softer bite.
Each ingredient plays a vital role in creating a flawless chocolate-dipped strawberry experience. Selecting high-quality components is the first step towards gourmet results.
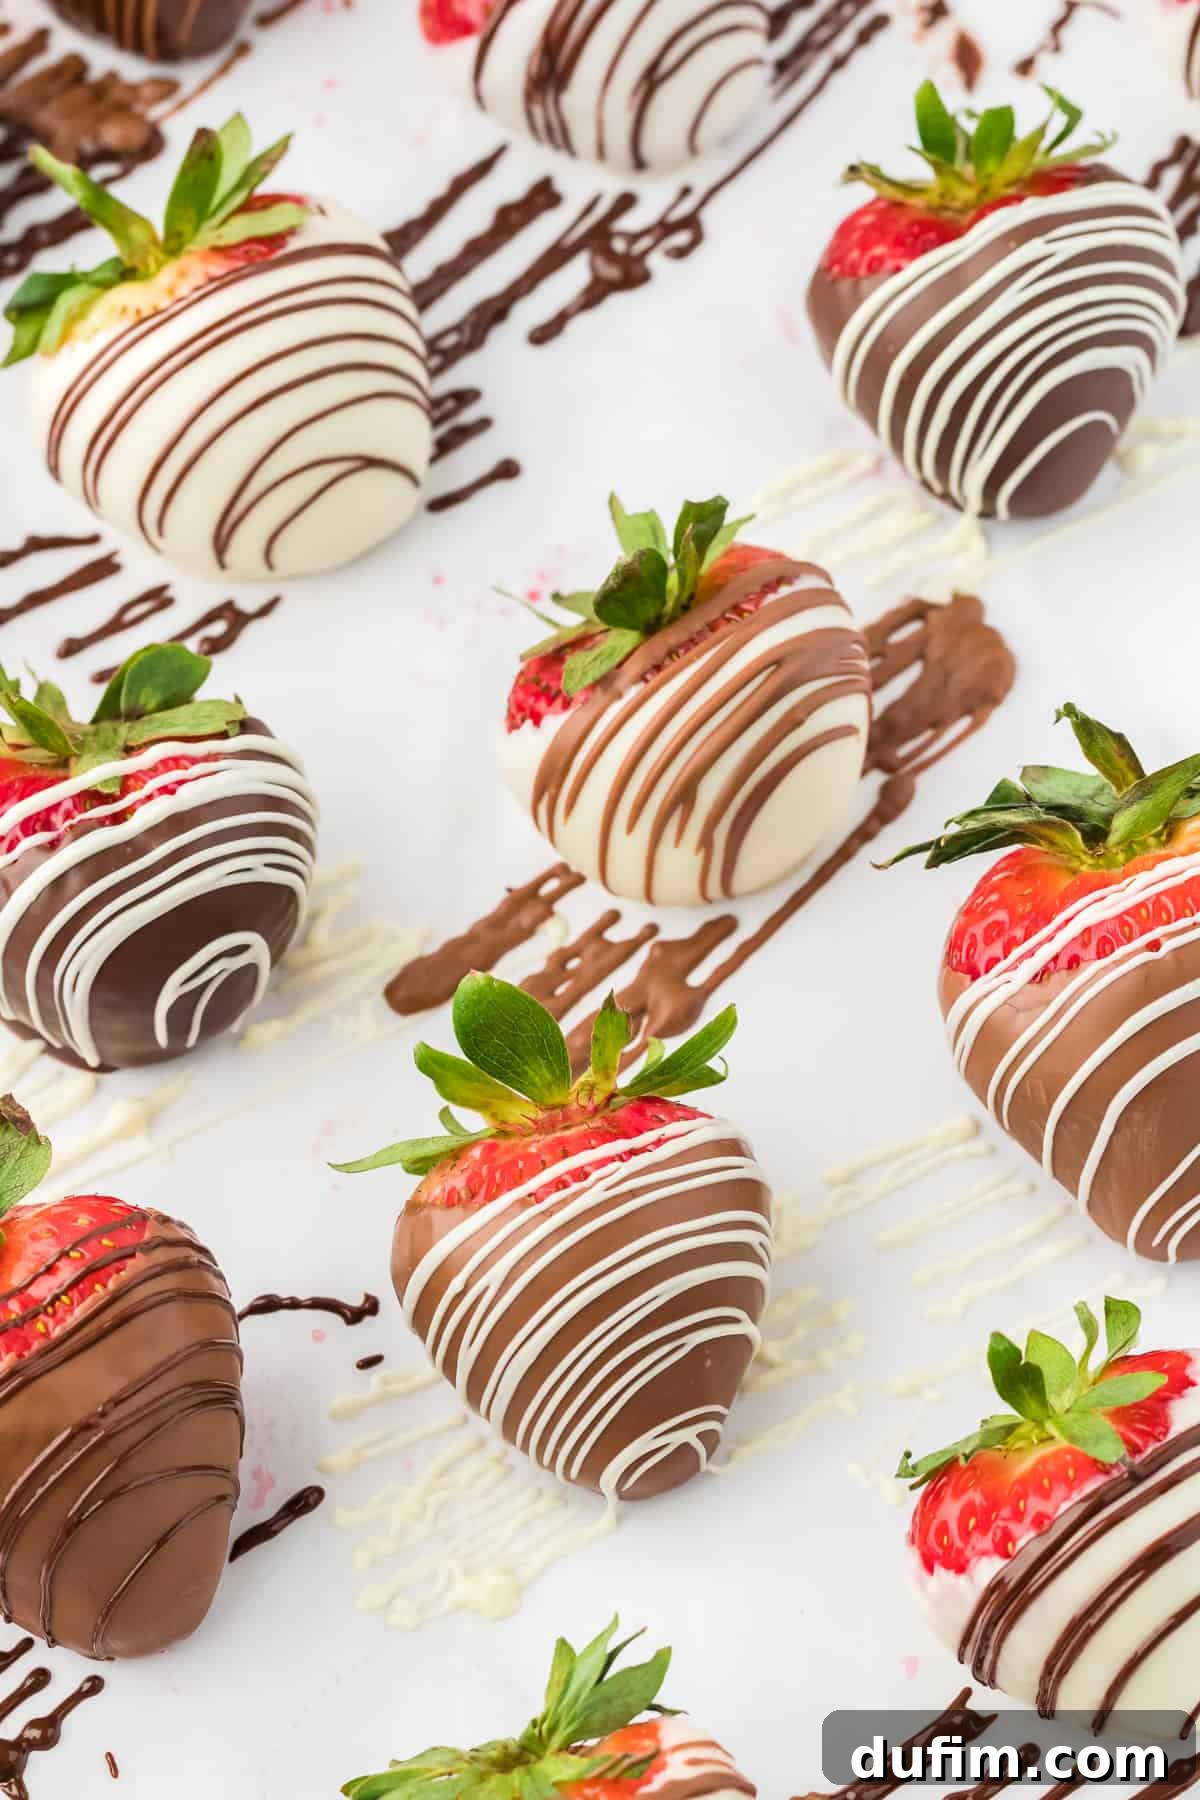
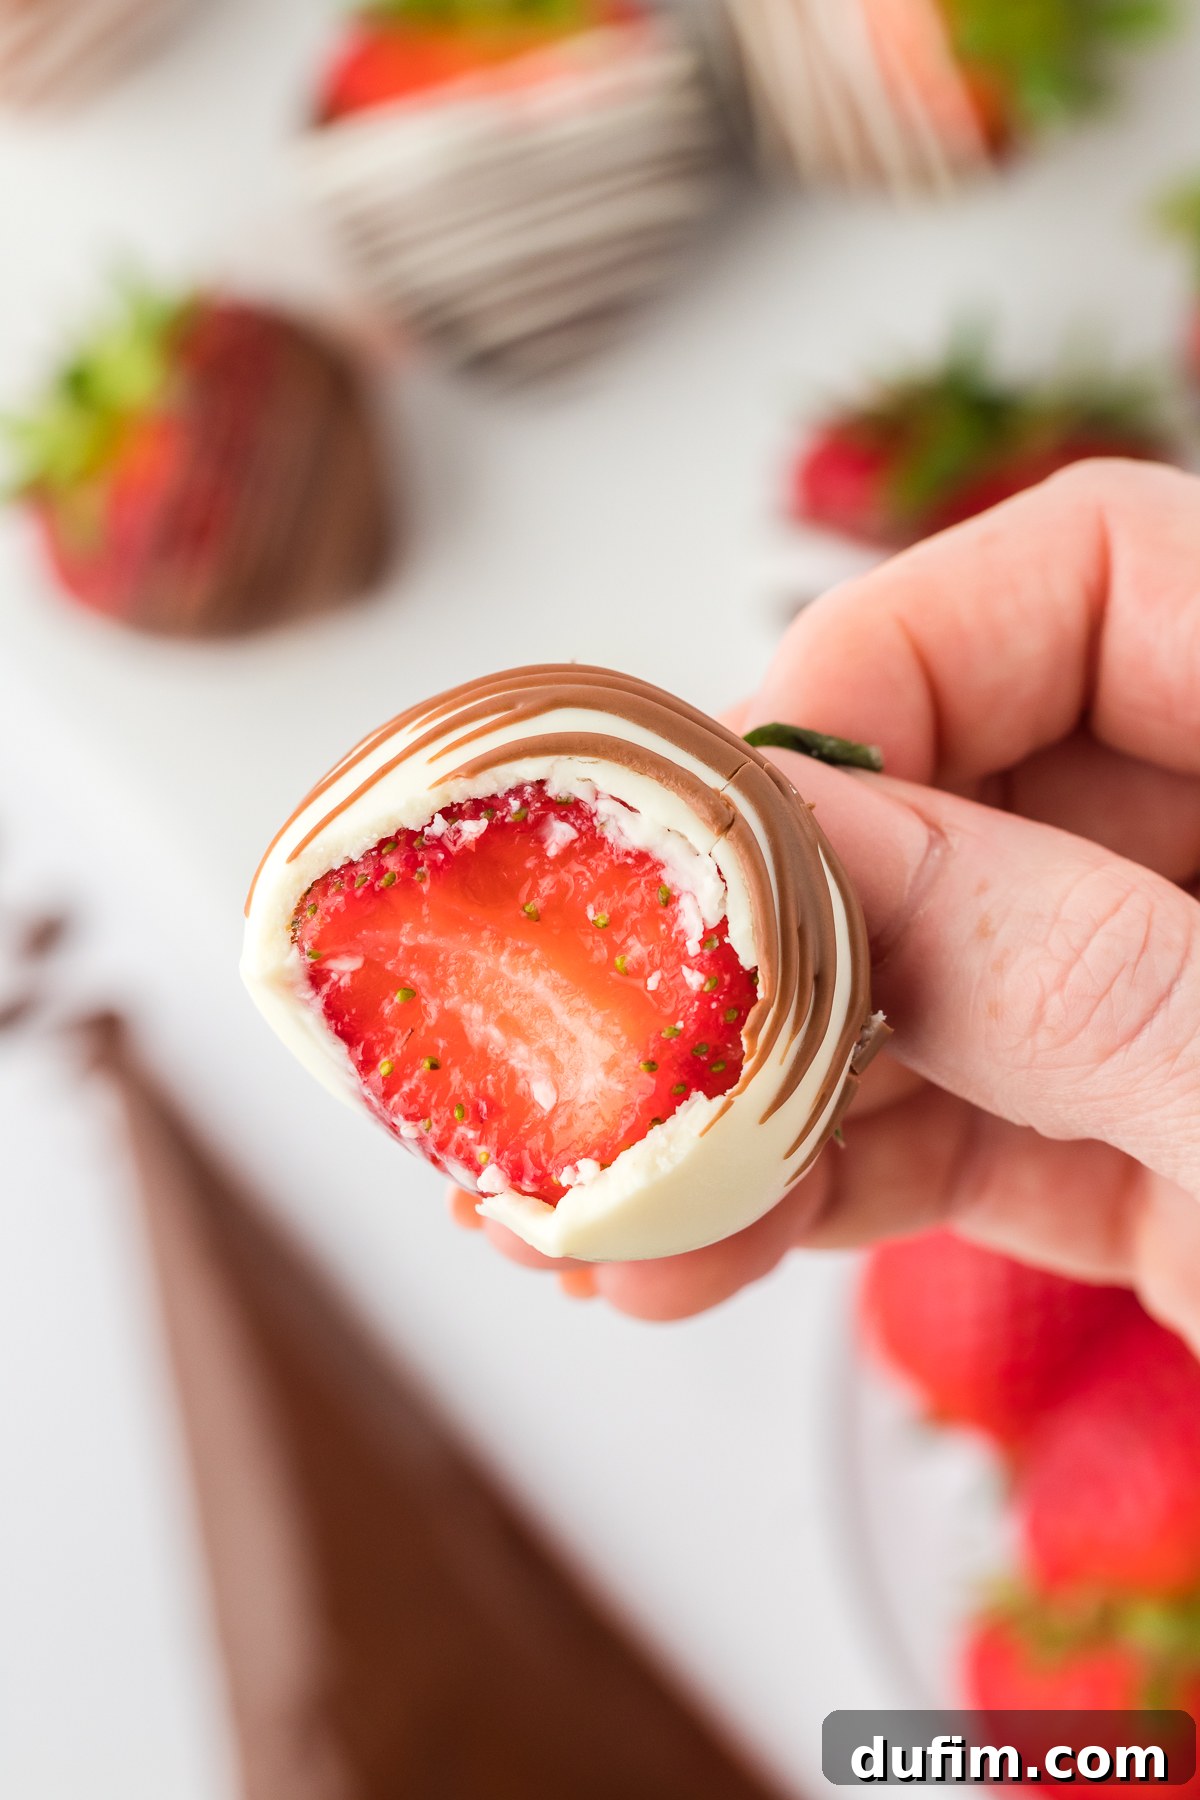
Unveiling the Best Chocolate for Chocolate Covered Strawberries: An In-Depth Analysis
The quest for the ultimate chocolate covered strawberry begins with selecting the perfect chocolate. To guide you through this crucial decision, I rigorously tested eight different types of chocolate, meticulously recording my observations for each. While any delicious chocolate will elevate a fresh strawberry, understanding the nuances of each variety can significantly enhance your homemade creations, transforming them from good to truly extraordinary.
During my extensive testing, I made detailed notes on several key performance indicators. These included the precise time required for the chocolate to melt to a smooth consistency, the richness and balance of its flavor profile, its visual appeal and sheen once set, the ease and workability of its dipping consistency, the critical drying time, and its comparative price per ounce. This comprehensive evaluation ensures that you have all the information needed to choose the chocolate that best suits your preferences and desired outcome.
Ghirardelli Milk Chocolate Flavored Melting Wafers Review
These wafers are a popular choice for their convenience. My tests revealed:
- Time to melt: Remarkably quick, usually within 60 seconds.
- Taste: Sweetness was more prominent than a deep chocolate flavor. Good for those who prefer a milder chocolate taste.
- Dipping Consistency: Exceptionally smooth and easy to work with, making dipping a breeze.
- Overall Appearance: Resulted in a pleasing matte finish with a light brown hue.
- Drying Time: Very fast, setting within minutes, which is ideal for quick preparations.
- Price: Approximately 0.49 cents per ounce.
- Additional Notes: The fastest drying option, offering a super easy dipping experience, perfect for beginners or when time is of the essence.
Ghirardelli Semi-Sweet Chocolate Chips Review
A household staple for baking, but how do they fare for dipping strawberries? Here’s what I found:
- Time to melt: Took slightly longer, around 90 seconds, requiring a bit more patience.
- Taste: Delivered a wonderfully deep, rich chocolate flavor, appealing to true chocolate lovers.
- Dipping Consistency: Noted for its thick consistency, which made dipping a bit more challenging and less smooth.
- Overall Appearance: Produced a lovely, shiny finish once dry.
- Drying Time: Significantly slower, taking a few hours to fully set, which can be a drawback for immediate serving.
- Price: A budget-friendly option at about 0.34 cents per ounce.
- Additional Notes: While excellent for baking, their thickness and slow drying time make them less ideal for fruit dipping compared to other options.
Ghirardelli White Chocolate Chips Review
For those seeking a classic white chocolate coating, these chips were evaluated for their performance:
- Time to melt: Melted quickly, typically within 60 seconds.
- Taste: Offered a balanced, rich flavor that wasn’t overly sweet, a common issue with some white chocolates.
- Dipping Consistency: Provided a medium thickness, still easy enough to dip without too much effort.
- Overall Appearance: Resulted in an off-white, creamy color.
- Drying Time: Impressively quick to dry.
- Price: Reasonably priced at around 0.38 cents per ounce.
- Additional Notes: Considered among the best white chocolate choices in terms of both enjoyable taste and efficient drying time.
Baker’s Semi-Sweet Chocolate Bar Review
A traditional baking chocolate bar, tested for its dipping capabilities:
- Time to melt: Required about 90 seconds to melt to a smooth consistency.
- Taste: Delivered a deep, robust chocolate flavor that was very satisfying.
- Dipping Consistency: Maintained a medium thickness, making it quite manageable for dipping.
- Overall Appearance: Achieved a beautiful, shiny finish.
- Drying Time: Similar to Ghirardelli Semi-Sweet Chips, it had a slow drying time, taking a few hours to fully set.
- Price: Pricier than chips at approximately 0.62 cents per ounce.
- Additional Notes: Had a good, consistent texture for dipping, but the long drying time needs to be factored in.
Ghirardelli White Chocolate Bar Review
Another bar format, this time in white chocolate:
- Time to melt: Melted quickly within 60 seconds.
- Taste: Featured a good, rich flavor that wasn’t excessively sweet.
- Dipping Consistency: Offered a medium thickness, making it easy to dip.
- Overall Appearance: Resulted in an off-white hue.
- Drying Time: Exhibited a slow drying time, taking several hours.
- Price: The most expensive option at approximately 0.72 cents per ounce.
- Additional Notes: Good taste and consistency, but its higher price point and slow drying time are considerable drawbacks.
Ghirardelli Dark Chocolate Flavored Melting Wafers Review
For those who appreciate a darker chocolate without the bitterness:
- Time to melt: Melted efficiently in about 60 seconds.
- Taste: Pleasantly surprising, not bitter like typical dark chocolate. Offered a much more pronounced chocolate flavor than the Ghirardelli Milk Chocolate Flavored Melting Wafers.
- Dipping Consistency: Melted easily and provided a very smooth dipping consistency.
- Overall Appearance: Produced a matte finish.
- Drying Time: Achieved a quick dry, making it a convenient choice.
- Price: Fairly priced at approximately 0.49 cents per ounce.
- Additional Notes: An excellent option for dark chocolate fans who want a quick set without excessive bitterness. It’s not intensely dark, making it broadly appealing.
Chocolate Almond Bark (Walmart brand) Review
An economical option, often used for coating. Here’s its performance:
- Time to melt: Very fast, melting within 60 seconds.
- Taste: Tended to be sweeter than chocolatey, typical of almond bark.
- Dipping Consistency: Melted easily and smoothly, making it very user-friendly.
- Overall Appearance: Set with a matte finish.
- Drying Time: Remarkably quick dry.
- Price: The most budget-friendly choice at approximately 0.15 cents per ounce.
- Additional Notes: Its smooth, quick-drying nature makes it fantastic for drizzles and decorative touches, though the flavor is less complex.
White Chocolate Almond Bark (Walmart brand) Review
The white chocolate counterpart to the almond bark:
- Time to melt: Melted very quickly, within 60 seconds.
- Taste: Similar to its chocolate counterpart, it was more sweet than distinctly chocolatey.
- Dipping Consistency: Very easy to melt and offered a smooth, effortless dipping experience.
- Overall Appearance: Delivered the purest white color among all tested options, standing out for its bright finish.
- Drying Time: Featured a quick dry time.
- Price: Also highly economical at approximately 0.15 cents per ounce.
- Additional Notes: Excellent for achieving a vibrant white color and perfect for creating beautiful drizzles due to its smooth consistency and fast setting.
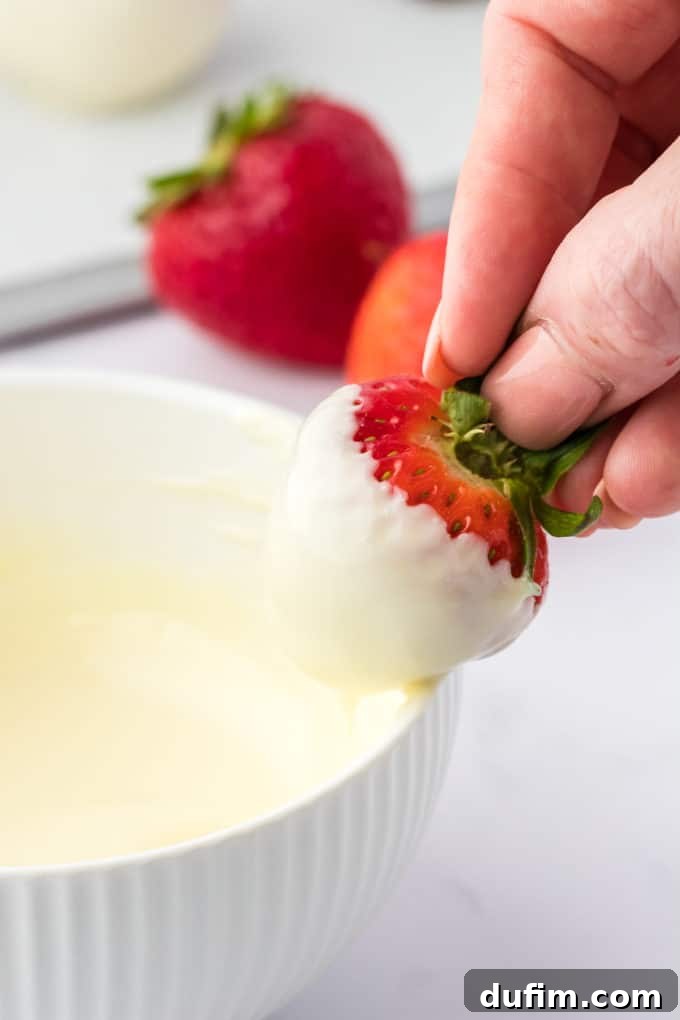
Which Chocolate Should You Choose for Your Chocolate Dipped Strawberries? Final Recommendations
After thorough testing, the best chocolate for your dipped strawberries ultimately boils down to your personal preferences and priorities. However, based on the detailed observations, here are tailored recommendations to help you achieve your desired outcome:
- If you prioritize a truly **rich, deep chocolate flavor** and are comfortable with a longer drying time, opt for **Ghirardelli Semi-Sweet Chocolate Bar** or **Baker’s Semi-Sweet Chocolate Bar**. These deliver an authentic, intense chocolate experience.
- For a **middle-of-the-road chocolate flavor with a significantly quicker dry time**, making preparation more efficient, I highly recommend **Ghirardelli Dark Chocolate Flavored Melting Wafers**. They offer a great balance without the bitterness often associated with dark chocolate.
- If **cost-effectiveness** is your primary concern without entirely sacrificing quality, then **Walmart Brand Chocolate Almond Bark** or **White Chocolate Almond Bark** are your best bet. They melt easily and dry quickly, making them very practical.
- To achieve the **purest, brightest white color** for a stunning visual impact, definitely go with **Walmart Brand White Chocolate Almond Bark**. It stands out for its pristine white finish.
- A note of caution regarding chocolate chips: I found them to be my **least favorite option for dipping**. The mixture often proved very thick, even after incorporating additional oil, making it challenging to achieve a smooth, elegant coating on the strawberries. They are better suited for baking applications.
Understanding these characteristics will ensure you select the perfect chocolate to match your taste and presentation goals, setting the stage for truly impressive homemade treats.
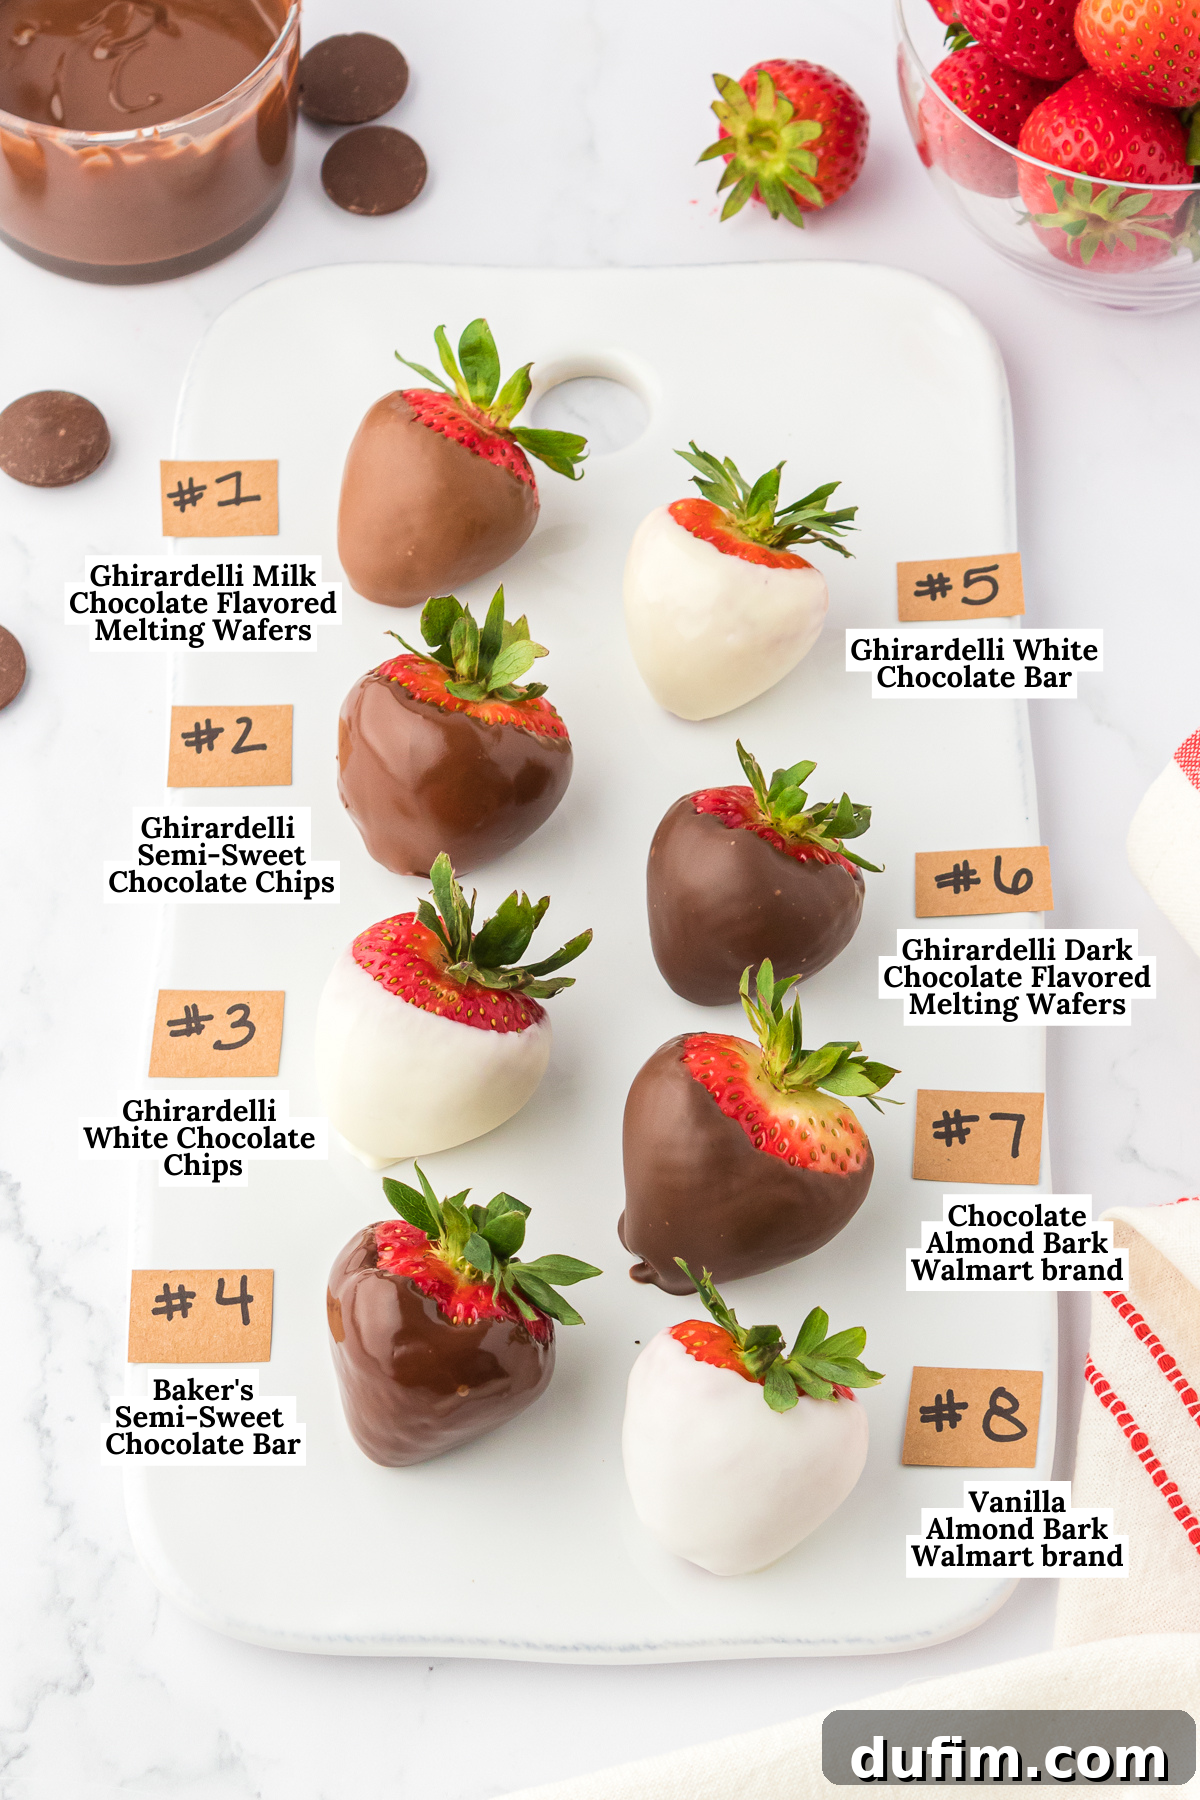
The image above, displaying the numbered strawberries on the white board, was captured approximately 30 minutes after all berries had been dipped. It vividly illustrates which chocolate types require more time to set, as evidenced by their continued glossy, unset appearance compared to those that dried quickly.
Mastering the Art: How to Make the Best Chocolate Covered Strawberries at Home
Creating show-stopping, perfectly coated chocolate strawberries at home is surprisingly simple when you follow this detailed, step-by-step guide. My professional tips and tricks will empower you to achieve gorgeous results that look as if they came from a professional confectionery. The full recipe with precise measurements and ingredient specifics is provided in the recipe card section below, but first, let’s walk through the process:
- Prepare the Strawberries: Begin by filling a clean bowl with warm water. Gently add the fresh strawberries and swish them around to thoroughly clean off any dirt or debris. It is absolutely crucial to drain the water completely and then meticulously dry each individual strawberry. I recommend laying them out on paper towels or a clean cloth and allowing them to air dry for at least 30 minutes, or even longer, until they are *completely* dry. Any residual moisture will prevent the chocolate from adhering properly, leading to a patchy or peeling coating.
- Melt the Chocolate: Transfer your chosen chocolate (chips or finely chopped bar) into a microwave-safe bowl. Heat the chocolate in short, controlled bursts of 20 seconds. After each interval, remove the bowl and stir the chocolate thoroughly with a spoon. This process typically takes about 3-4 intervals, depending on your microwave’s power and the chocolate quantity. The key is to stop microwaving once you still see a few small pieces of chocolate remaining. The residual heat from the melted chocolate will continue to melt these remaining pieces as you stir, preventing overheating and ensuring a smooth, lump-free consistency.
- Achieve Perfect Dipping Consistency: Once your chocolate is fully melted and smooth, stir in approximately ½ teaspoon of coconut oil (or another neutral-flavored oil like vegetable or canola oil) for each type of chocolate you are preparing. This small addition of oil is transformative: it thins the chocolate to the ideal consistency for effortless dipping, imparts a beautiful, glossy sheen to the finished strawberries, and ensures the chocolate coating has a delightful, softer snap when you bite into it, rather than a hard, brittle crack.
- Prepare Your Drying Surface: Line a baking sheet with either wax paper, parchment paper, or a silicone baking mat. This prepared surface will prevent the dipped strawberries from sticking as the chocolate sets, making for easy removal and a clean finish.
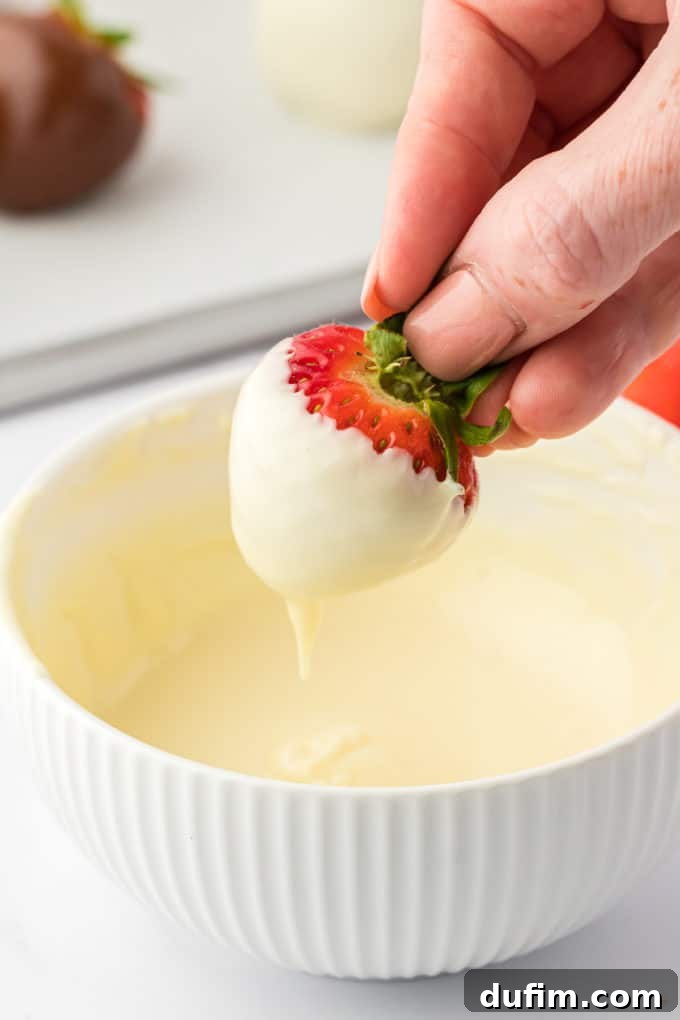
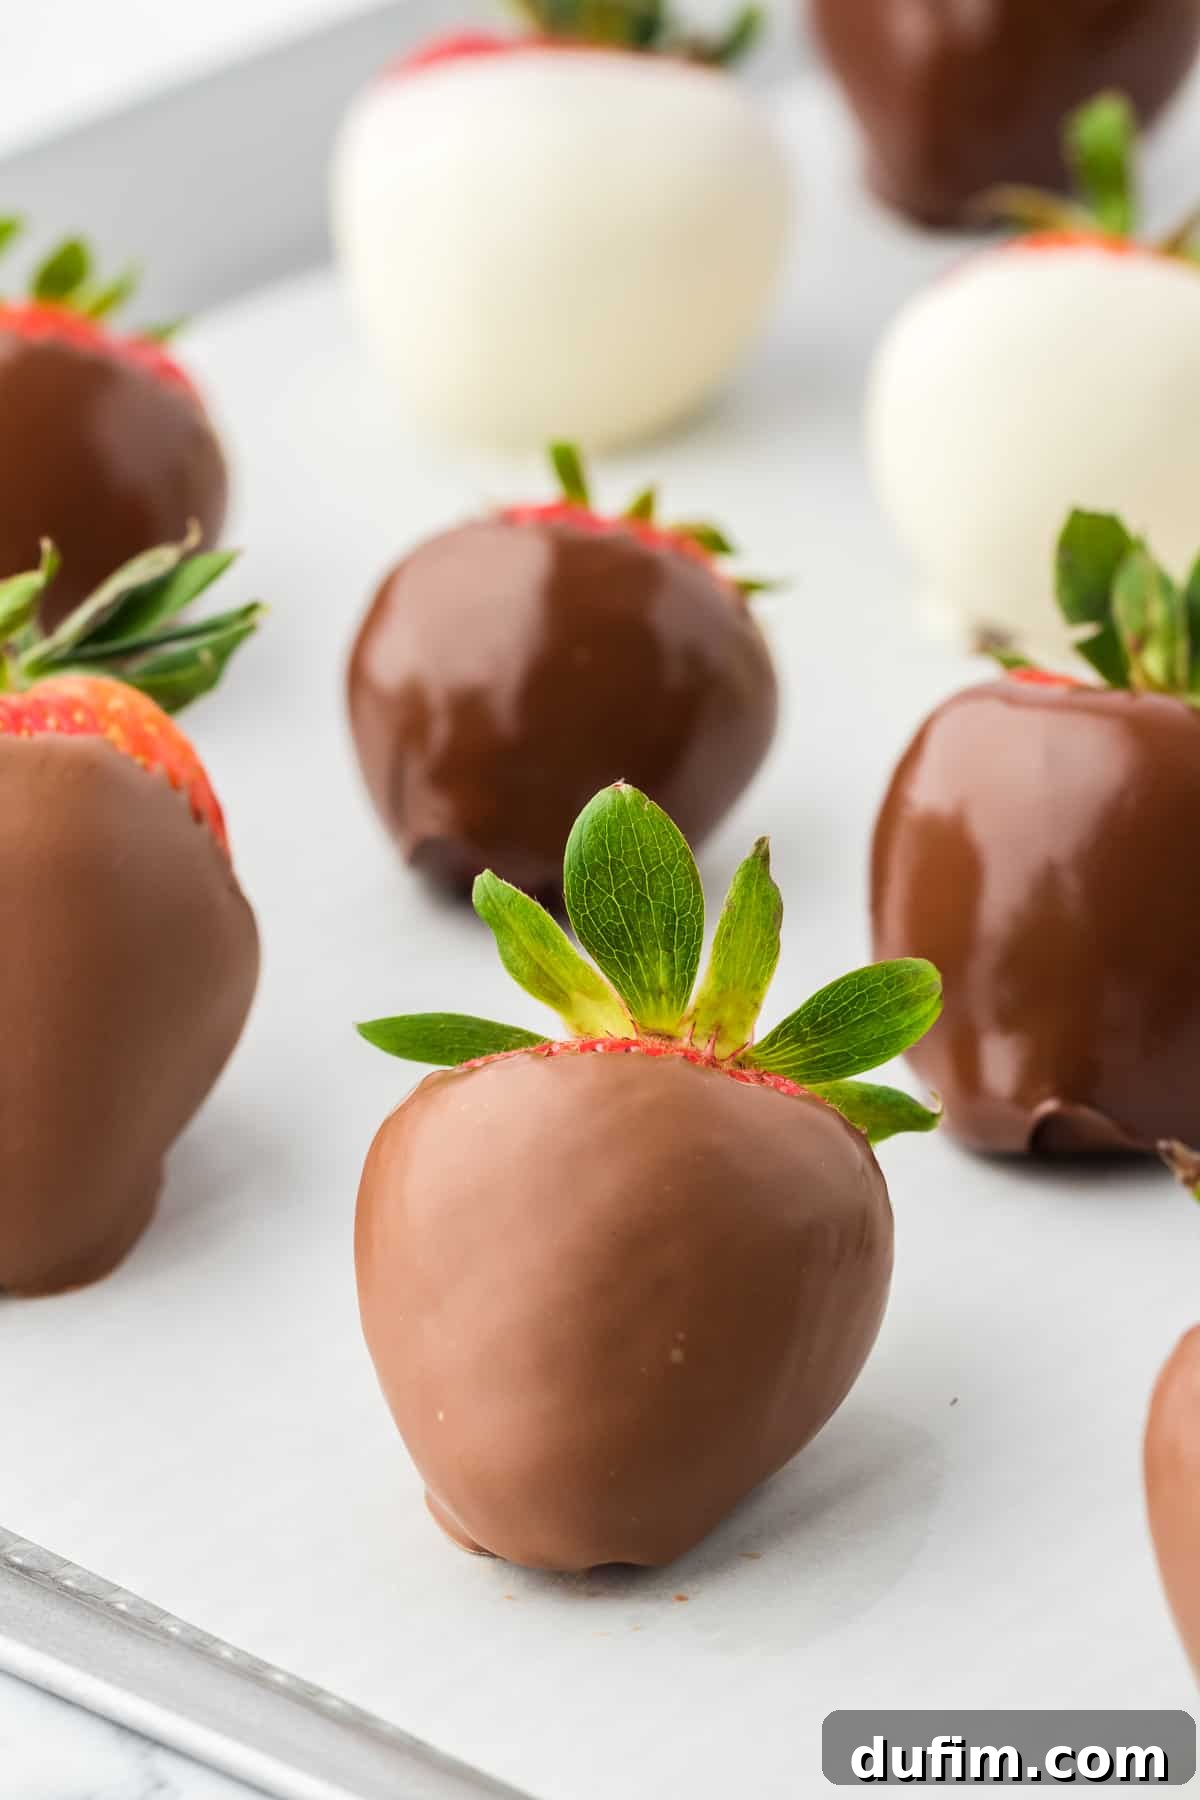
- Dip the Strawberries: Grasp a strawberry firmly by its green stem (or insert a toothpick into the top if stems are short). Submerge the strawberry into the melted chocolate, rotating it gently to ensure an even, full coating. Lift the strawberry out of the chocolate and delicately scrape any excess chocolate off the bottom of the berry against the rim of the bowl. This technique minimizes puddling and ensures a neat, professional-looking base. Place the dipped strawberry carefully onto your prepared lined tray.
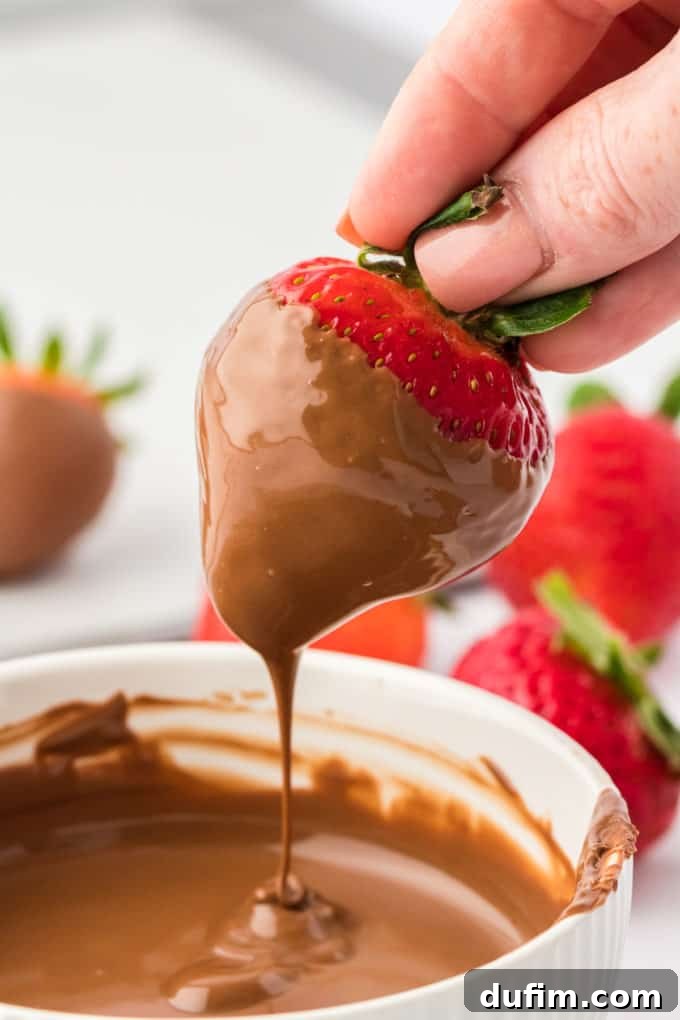
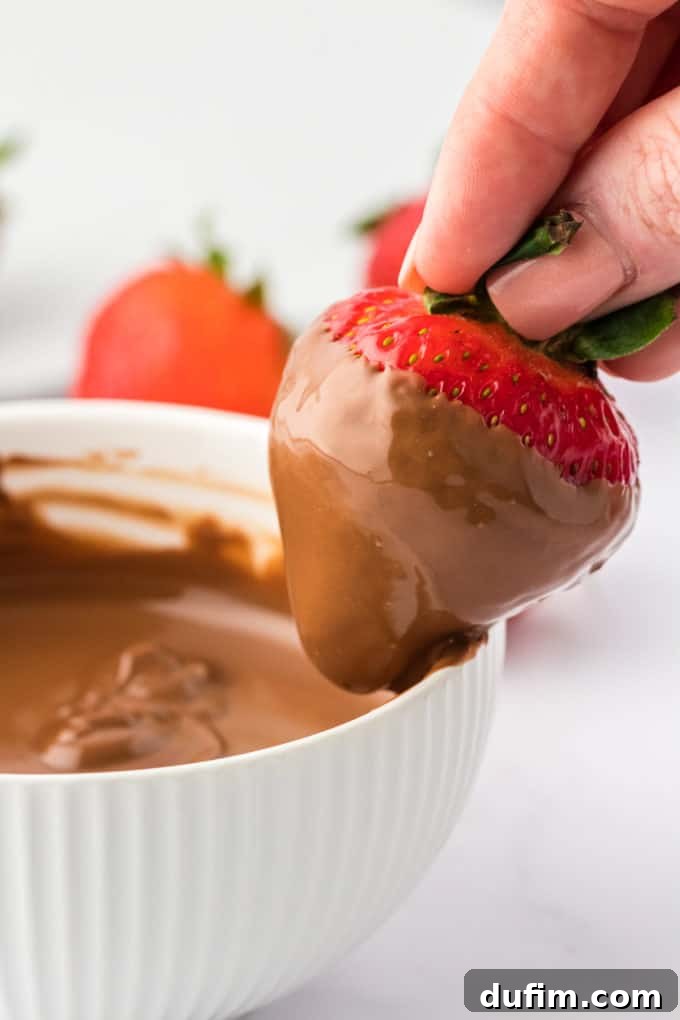
- Add Optional Drizzles or Toppings: For an extra touch of elegance and flavor, consider drizzling your dipped strawberries. Melt a small amount of contrasting chocolate (white chocolate over dark, or vice-versa). Transfer the melted chocolate into a piping bag or a small sandwich bag. Snip a tiny hole in one corner of the bag. Holding the bag above the strawberries, carefully drizzle the chocolate back and forth in thin, decorative lines. This is also the perfect moment to add any other desired toppings like sprinkles or crushed nuts, as the drizzled chocolate will help them adhere.
- Allow to Set: Once dipped and decorated, allow the strawberries to sit undisturbed at room temperature until the chocolate has completely hardened and set. This could take anywhere from a few minutes (for quick-drying chocolates) to a couple of hours. Once firm, gently remove them from the lined tray and arrange them beautifully on a serving plate.
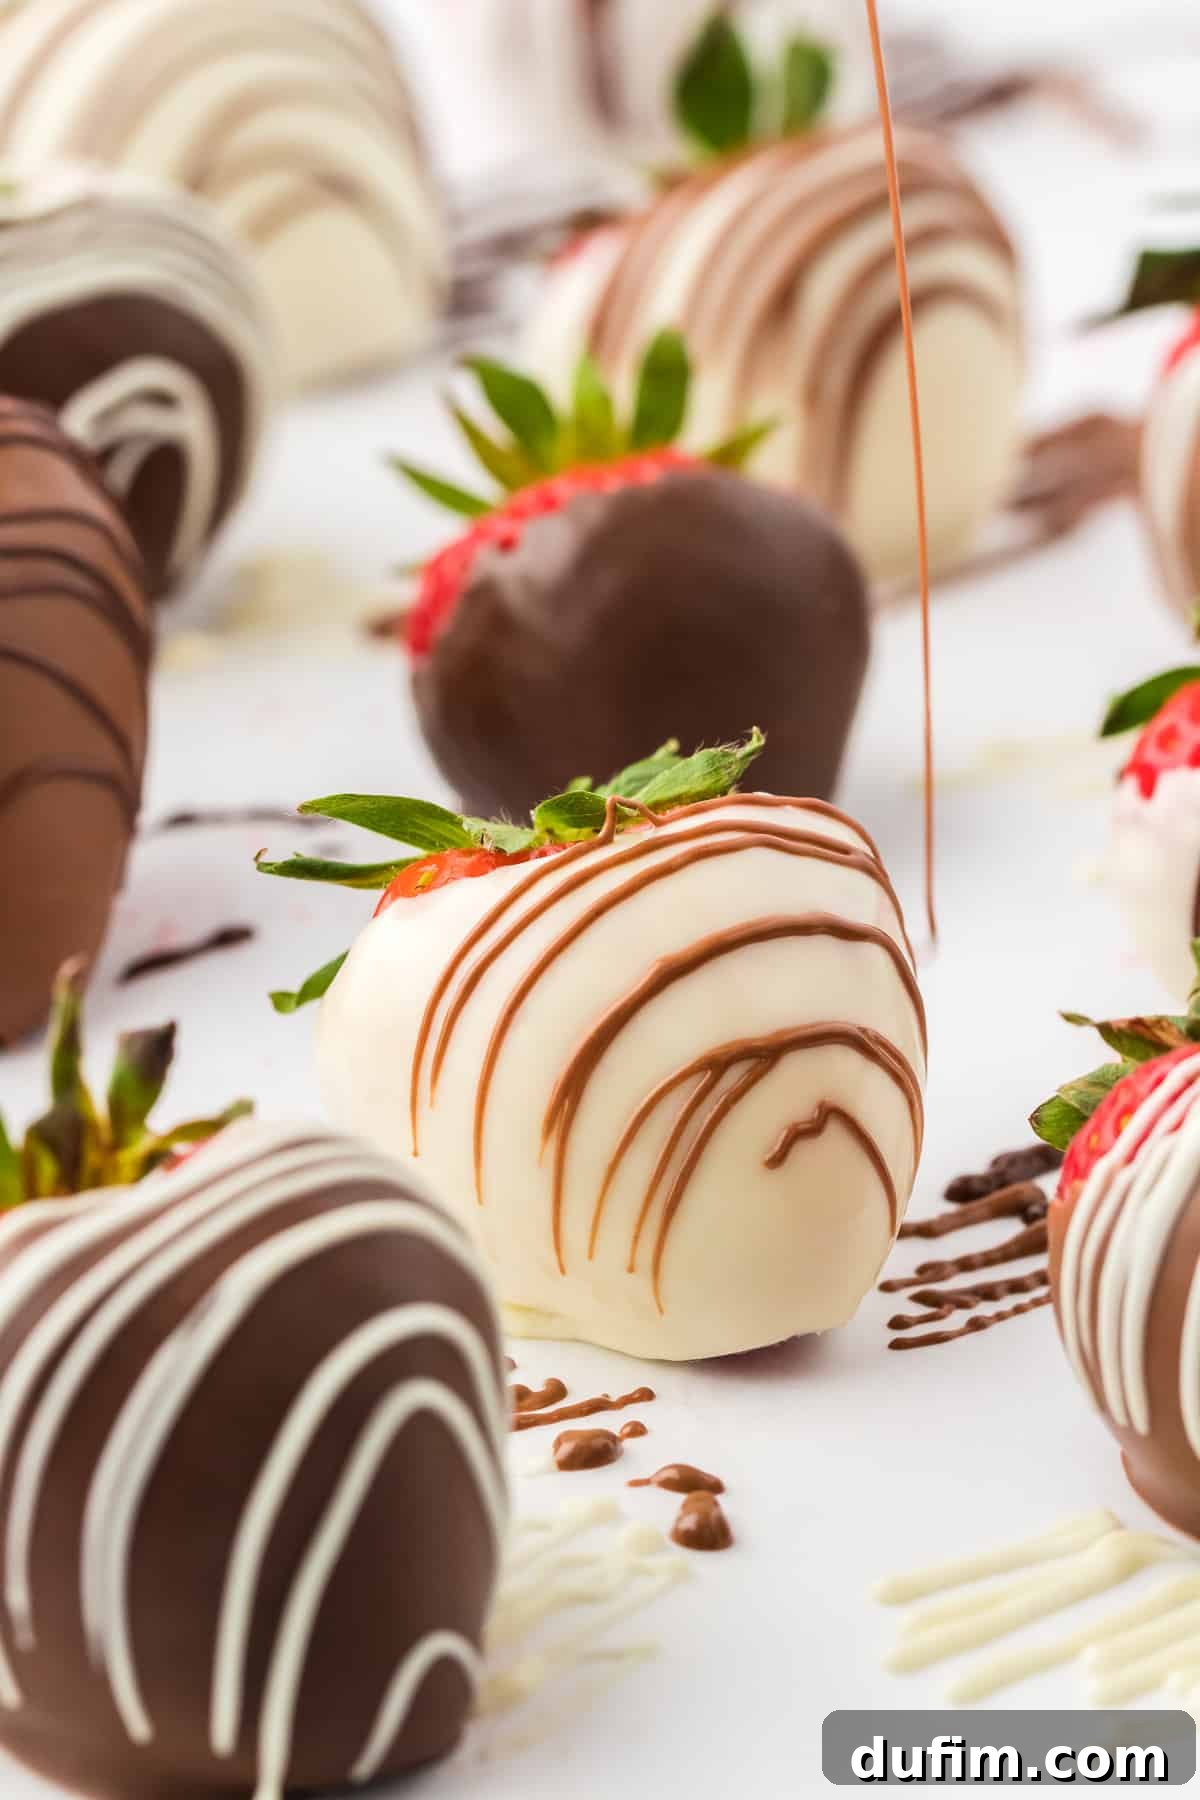
Creative Variations for Chocolate Dipped Strawberries
While classic chocolate covered strawberries are delightful on their own, adding various toppings can elevate their appearance and flavor profile. Experiment with these popular ideas to customize your treats:
- Colorful Sprinkles: A festive and fun addition, perfect for celebrations.
- Finely Crushed Nuts: Pistachios, almonds, walnuts, or pecans add a sophisticated crunch and nutty flavor.
- Crushed Peppermint: Ideal for holiday-themed strawberries, offering a refreshing minty kick.
- Crushed Candy: Get creative with your favorite finely crushed candies, such as Oreos, pretzels, or even toffee bits.
- Mini Chocolate Chips: A simple yet effective way to add more chocolatey texture.
- Coconut Flakes: Toasted or untoasted coconut flakes offer a tropical twist.
- Sea Salt Flakes: A delicate sprinkle of sea salt can beautifully enhance the chocolate’s flavor, especially with dark chocolate.
Apply these toppings immediately after dipping or drizzling, while the chocolate is still wet, to ensure they adhere properly.
Planning Ahead: Making Chocolate Covered Strawberries in Advance
For the absolute best taste and texture, chocolate covered strawberries are ideally enjoyed fresh, within 24 hours of their creation. The inherent moisture in strawberries, coupled with temperature fluctuations, can lead to condensation forming on the chocolate, potentially affecting its texture and appearance over time. This is why immediate consumption is often recommended.
However, if you must prepare them in advance, the optimal storage method is at room temperature. Keep them on your kitchen counter for approximately one day. Storing them at room temperature helps to minimize the formation of condensation, which is a common issue when chilled items are brought out into warmer environments. Maintaining a consistent room temperature helps preserve the chocolate’s smooth finish and prevents the strawberries from ‘sweating,’ ensuring they retain their perfect texture and visual appeal for longer.
Expert Tips for the Best Chocolate Dipped Strawberries, Every Time
You don’t need to order from a fancy delivery service like Edible Arrangements to enjoy exquisite chocolate covered strawberries. With these professional tips, you can create treats that are even better, whenever the craving strikes!
- Source Fresh, Ripe Strawberries: The foundation of any great chocolate-covered strawberry is the berry itself. Always select firm, plump, and deeply red strawberries with vibrant green leaves that extend all the way to the stem. These not only offer the best visual appeal but also deliver superior sweetness and juiciness, creating a delightful contrast with the chocolate.
- Ensure Strawberries are Dry and at Room Temperature: This is perhaps the most critical tip. After gently washing your strawberries, take the time to thoroughly dry each one individually. Any residual moisture on the berry’s surface will repel the melted chocolate, causing it to slide off or create a grainy texture. Furthermore, allow your strawberries to come to room temperature before dipping. Cold strawberries can cause the chocolate to seize or create premature condensation once dipped, hindering a smooth and even coating.
- Utilize High-Quality Chocolate: The quality of your chocolate directly translates to the quality of your finished product. Refer to our detailed chocolate comparison guide above to select the perfect type that melts smoothly, has an ideal dipping consistency, and delivers the flavor profile you desire. Investing in good quality chocolate will result in a superior shine, a better snap, and a richer taste that elevates your homemade treats to gourmet status.
- Don’t Overheat the Chocolate: When melting chocolate, patience is key. Overheated chocolate can become grainy, dull, or even burn, making it unusable for dipping. Always use low heat and stir frequently, especially if using a double boiler, or employ short bursts in the microwave, stirring in between, as outlined in our step-by-step instructions.
- Work in Small Batches: If you’re dipping a large quantity of strawberries, it’s often best to melt chocolate in smaller batches. This prevents the chocolate from cooling down and thickening too much while you’re working, maintaining optimal dipping consistency throughout the process.
- Consider a Double Boiler: While microwaving is convenient, a double boiler offers more controlled, gentle heat, reducing the risk of scorching. If you have the equipment, it’s an excellent method for maintaining a consistent, smooth chocolate temperature.
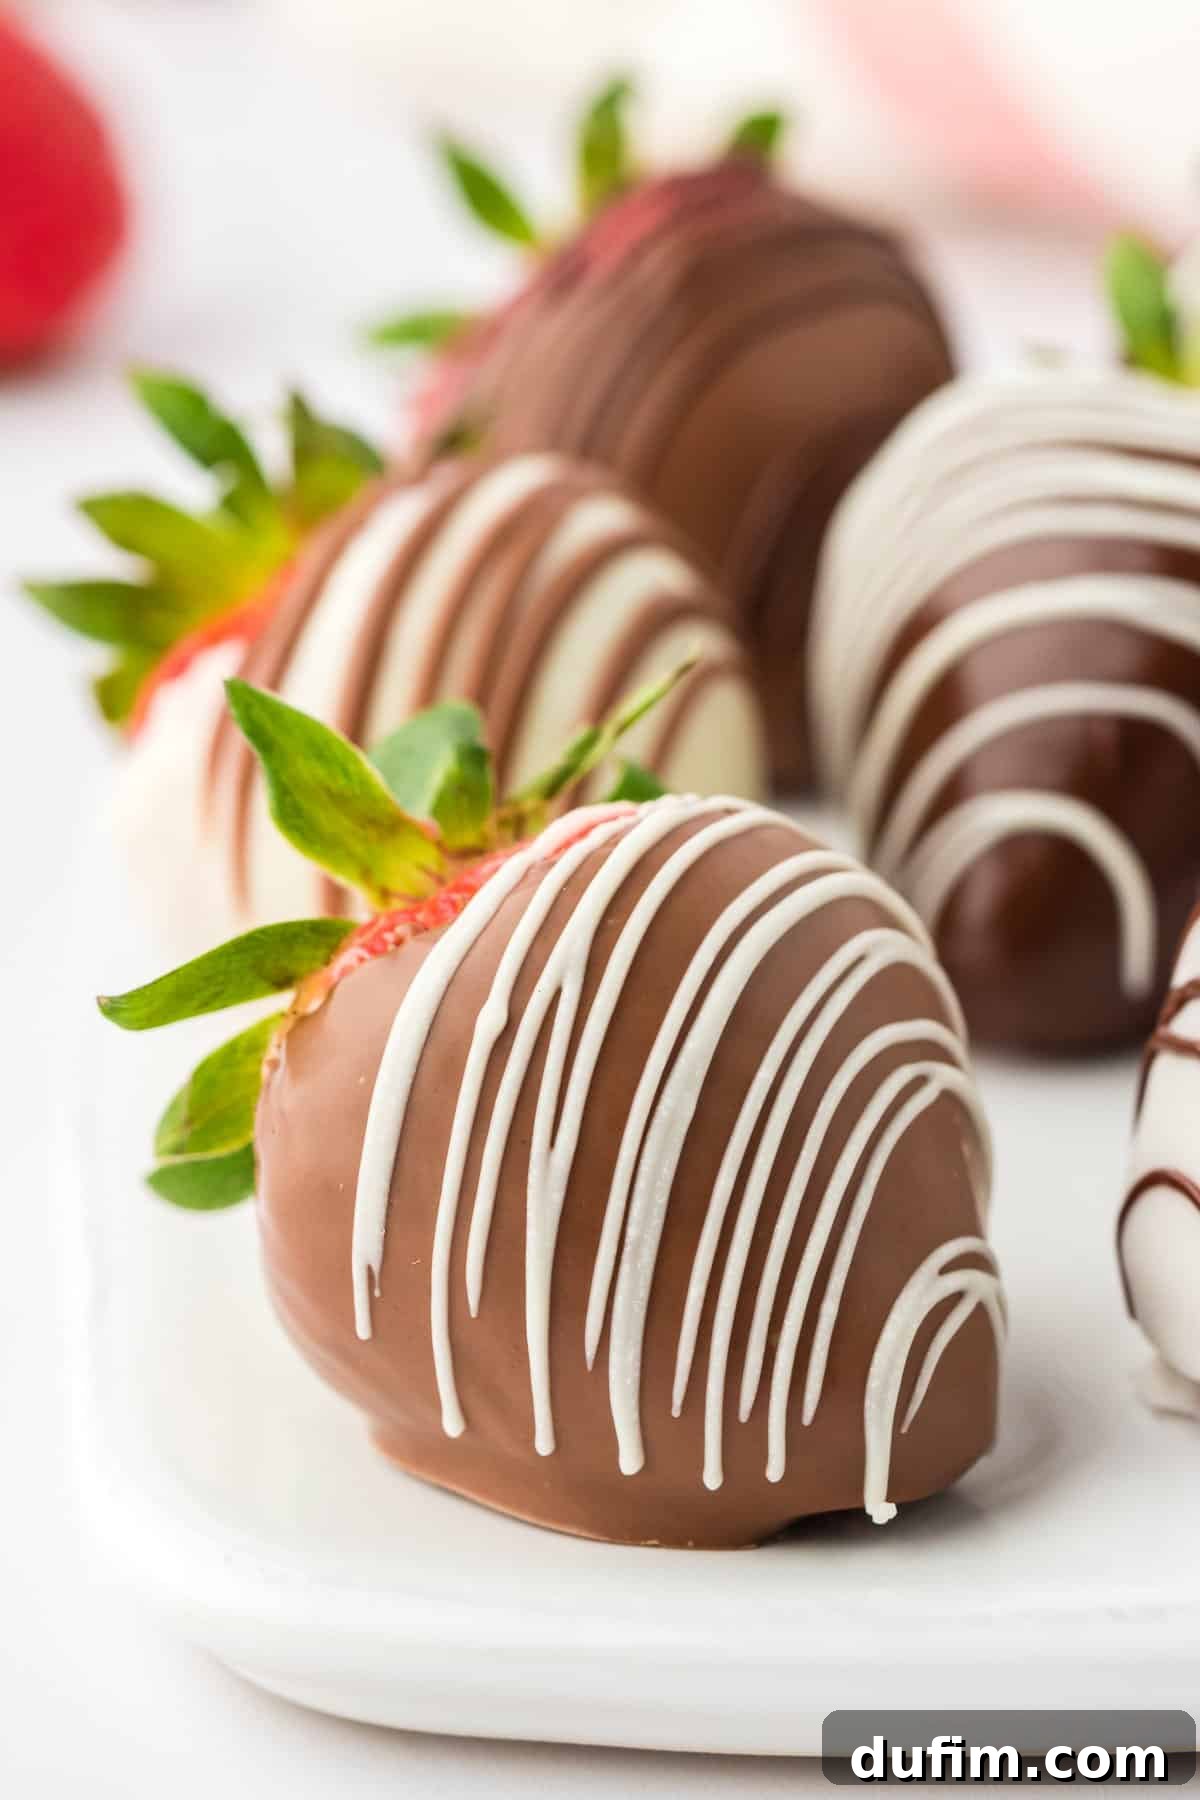
How to Achieve the Right Consistency for Chocolate Covered Strawberries
Achieving that perfectly smooth, fluid consistency in your melted chocolate is essential for an elegant coating. If your melted chocolate seems too thick for dipping, the secret lies in adding a small amount of neutral oil. Stir in coconut oil (or any other neutral oil like vegetable, canola, or grapeseed oil) *very gradually* and in small increments, about ¼ teaspoon at a time, stirring thoroughly after each addition. Continue this process until you reach your desired dipping consistency. Exercise caution and add sparingly, as incorporating too much oil can thin the chocolate excessively and prevent it from setting properly, leading to a runny, unappealing finish.
Creative Ways to Serve Perfect Chocolate Covered Strawberries
Chocolate covered strawberries are more than just a dessert; they are a statement of elegance and indulgence, making them perfectly suited for special occasions such as weddings, anniversary parties, or festive holiday gatherings. Their inherent beauty and delicious taste make them a universally loved treat. However, their versatility extends far beyond formal events; they are also a wonderful way to satisfy a sweet craving or simply provide a special, homemade treat for your family any day of the week.
Beyond simply plating them, here are some imaginative ideas to serve and showcase your exquisite chocolate-dipped strawberries:
- Elevate Other Desserts: Use them as sophisticated edible garnishes. Arrange them elegantly around the base or on top of a grand chocolate cake, a luscious cheesecake, or a creamy tiramisu. Their vibrant color and decadent coating add instant visual appeal and an extra layer of flavor.
- Adorn a Dessert Bar: For events with a dedicated dessert spread, individual chocolate-dipped strawberries make for stunning, edible decor. Arrange them artfully on tiered stands, platters, or interspersed among other sweet treats to create a visually rich and tempting display.
- Craft Chocolate Strawberry Pops: For a fun, handheld, and child-friendly option, gently insert a wooden skewer or lollipop stick into the top of each strawberry before dipping. These “strawberry pops” can be served upright in a decorative container or glass, creating a charming and easy-to-grab treat. They also double as fantastic edible decorations when stuck into other desserts like cupcakes or brownies.
- Pair with Wine or Champagne: For an adult indulgence, serve chocolate covered strawberries alongside a glass of sparkling wine, champagne, or a rich dessert wine. The complementary flavors create a truly luxurious experience.
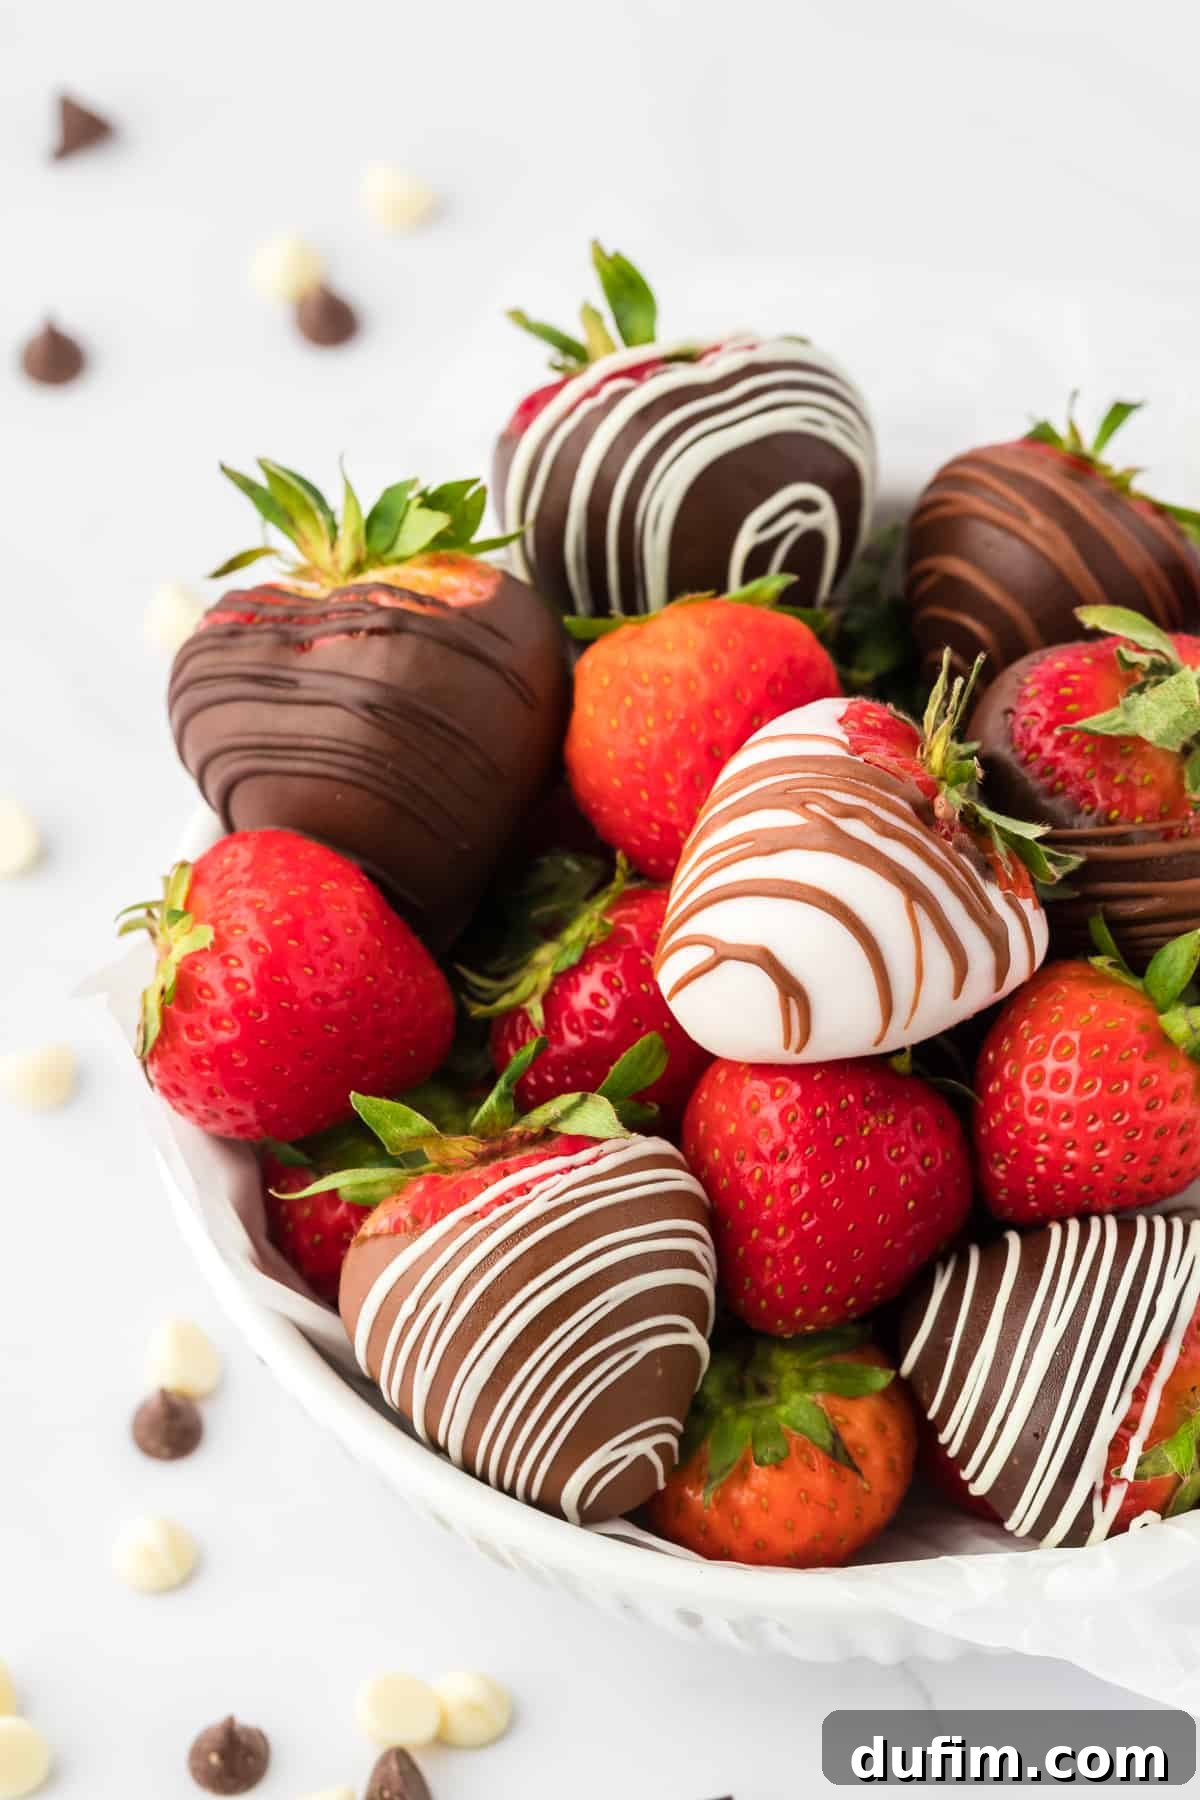
Optimizing Storage for Chocolate Covered Strawberries
Proper storage is key to maintaining the quality and freshness of your homemade chocolate covered strawberries. As highlighted previously, for peak enjoyment, they are best consumed within 24 hours when stored at room temperature.
If you anticipate needing to store your chocolate covered strawberries for longer than a day, refrigeration becomes necessary. However, be aware that the refrigerator’s humid environment can cause condensation, leading to the strawberries “sweating” and the chocolate potentially losing some of its crisp texture or developing a cloudy appearance. To mitigate this:
- Place a layer of paper towels at the bottom of an airtight container. Paper towels absorb excess moisture, helping to keep the strawberries drier.
- Arrange the chocolate covered strawberries in a single layer on top of the paper towels, ensuring they do not touch each other.
- If you need to store multiple layers, place a sheet of wax paper or parchment paper between each layer to prevent sticking and damage to the chocolate coating.
- Seal the container tightly before refrigerating.
When stored at room temperature, chocolate covered strawberries generally maintain their quality for approximately 24 hours. When refrigerated using the recommended method, their shelf life can extend to about 48 hours, though some minor changes in appearance or texture may occur.
For best results, consume chocolate covered strawberries within 24 hours at room temperature. If refrigerated, they can last up to 48 hours with careful storage to minimize condensation.
Frequently Asked Questions About Homemade Chocolate Covered Strawberries
The most common reason for melted chocolate failing to stick to strawberries is the presence of moisture on the berries’ surface. Water and chocolate do not mix, causing the chocolate to seize or refuse to adhere. Always ensure your strawberries are thoroughly washed and then meticulously dried before dipping. Furthermore, the temperature of your melted chocolate is crucial; if it’s too hot, it can cause the chocolate to thin excessively and slide off, while if it’s too cold or starting to set, it won’t coat smoothly.
After dipping a strawberry and allowing any excess chocolate to drip back into the bowl, gently place it onto a prepared surface. This surface should be a baking sheet lined with either parchment paper, wax paper, or a silicone baking mat. These materials prevent sticking. Simply leave the dipped strawberries undisturbed at room temperature until the chocolate has fully hardened and achieved its set texture. Avoid moving them too much during this crucial setting phase.
Both fresh berries and chocolate contain water, and they react to changes in temperature, particularly when moving from a cold environment (like a refrigerator) to a warmer room temperature. This temperature differential leads to condensation forming on the surface of the chocolate, causing them to appear “watery” or “sweaty.” To minimize this, it’s essential to allow your strawberries to come to room temperature *before* dipping them. Also, as stressed, ensure they are completely dry before coating. If you must refrigerate them, placing paper towels at the bottom of an airtight container can help absorb some of the moisture, as detailed in our storage section.
It is generally not recommended to freeze chocolate covered strawberries. Freezing can drastically alter the texture of the strawberries, making them mushy and watery upon thawing due to the expansion of water crystals. Additionally, the chocolate coating can suffer from thermal shock, leading to cracking, blooming (a white, powdery appearance), or excessive sweating as it thaws, significantly diminishing their appeal and quality.
(Note: Rating functionality in the original article is not active here.)
Best Chocolate Covered Strawberries Recipe
Discover how to make rich, glossy, and impressive chocolate covered strawberries at home, just like they came from a gourmet dessert shop. This recipe is informed by rigorous testing of 8 different chocolates to ensure perfection!
Equipment
- Baking Sheet
- Silicone Baking Mat
- Glass Mixing Bowl
Ingredients
- 1 pound strawberries (approx. 16 oz)
- 8 oz (170g) semi-sweet chocolate (baking bar or chips – see notes for best choice)
- 8 oz (170g) white chocolate (baking bar or chips – see notes for best choice)
- ½ tsp coconut oil or another neutral oil (for each type of chocolate you melt)
Instructions
- Fill a bowl with warm water, add the strawberries and gently swish them together to clean them. Drain the water and thoroughly dry each strawberry. Allow them to air dry for 30 minutes, ensuring they are completely dry, as chocolate will not stick to wet berries.
- To melt the chocolate, use a microwave-safe bowl and heat it in 20-second increments, stirring well after each interval. This usually takes 3-4 intervals. Stop microwaving when small pieces still remain, and stir until the residual heat fully melts the chocolate into a smooth consistency.
- Once fully melted, stir ½ teaspoon of coconut oil (or neutral oil) into each type of chocolate. This enhances dipping consistency, adds a glossy finish, and creates a softer texture when bitten.
- Line a baking sheet with wax paper, parchment paper, or a silicone baking mat to prevent sticking.
- Hold each strawberry by the stem and dip it into the melted chocolate. Gently scrape any excess chocolate off the bottom of the strawberry against the lip of the bowl. Place the dipped strawberry onto the prepared lined tray.
- Optional Drizzle: For decoration, melt a small amount of contrasting chocolate. Transfer it to a piping bag or a small sandwich bag, snip a tiny hole in one corner, and carefully drizzle over the dipped strawberries.
- Allow the strawberries to sit at room temperature until the chocolate fully sets and hardens. Once firm, carefully remove them from the tray and arrange them for serving.
Notes
Storing: For optimal freshness and texture, consume the strawberries on the day they are made. Store them at room temperature on the counter. Refrigeration is not generally recommended as it can cause condensation to form, affecting the chocolate’s texture.
What is the Best Chocolate for Chocolate Covered Strawberries?
For a detailed breakdown of the 8 chocolates I rigorously tested, please refer to the main blog post above. Here are the final conclusions for quick reference:
- Ultimately, the best chocolate choice depends on your personal preference.
- For a rich, deep chocolate flavor with a willingness to wait for drying, use Ghirardelli or Baker’s Semi-Sweet Chocolate Bar.
- For a balanced chocolate flavor with a quick dry time, Ghirardelli Dark Chocolate Flavored Melting Wafers are recommended.
- For the most cost-effective option, choose Chocolate Almond Bark or White Chocolate Almond Bark (Walmart Brand).
- For a pure white color, use Walmart Brand White Chocolate Almond Bark.
- Chocolate chips were found to be less ideal for dipping due to their thick consistency, even with added oil.
Nutrition Information (Approximate per serving)
Carbohydrates: 12g |
Protein: 1g |
Fat: 7g |
Saturated Fat: 4g |
Polyunsaturated Fat: 0.2g |
Monounsaturated Fat: 2g |
Trans Fat: 0.01g |
Cholesterol: 3mg |
Sodium: 10mg |
Potassium: 110mg |
Fiber: 1g |
Sugar: 10g |
Vitamin A: 10IU |
Vitamin C: 11mg |
Calcium: 28mg |
Iron: 1mg
Nutrition Disclosure
All nutritional values are approximate and provided to the reader as a courtesy. Changing ingredients and/or quantities will alter the estimated nutritional calculations.