
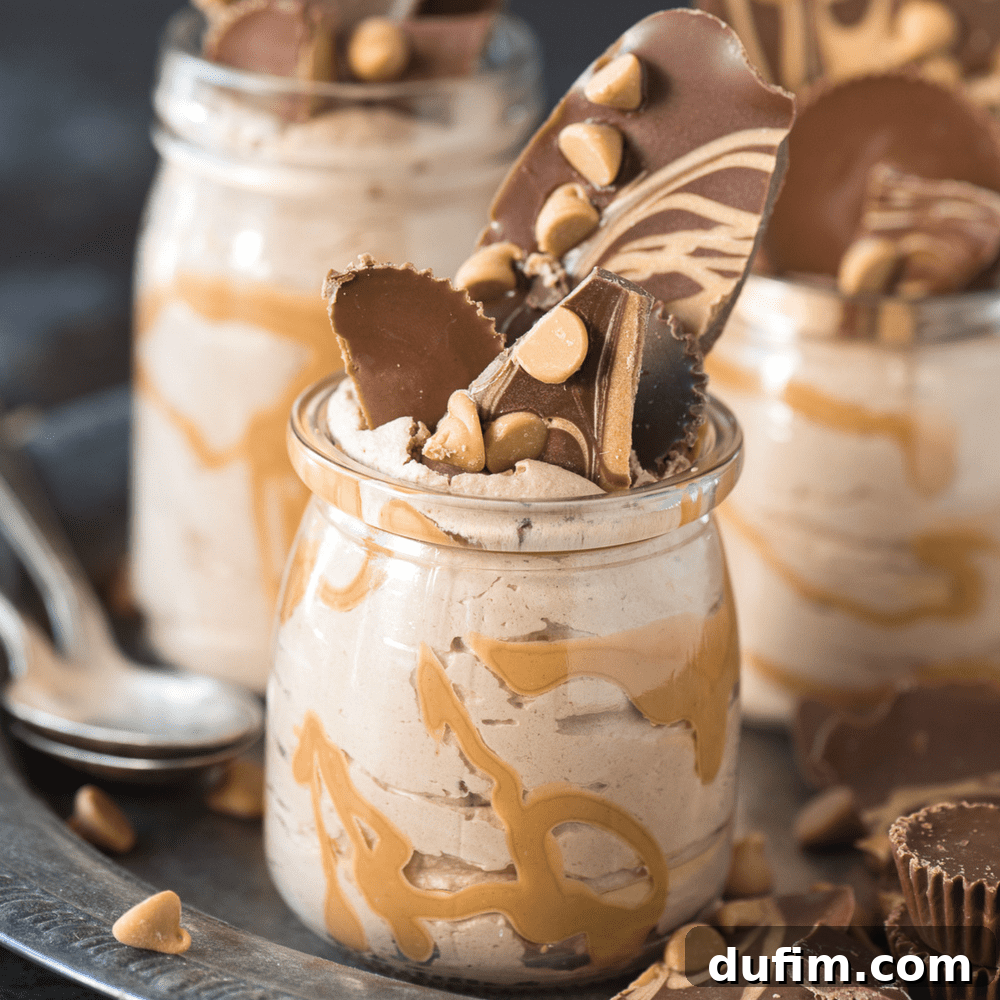
Decadent and Fluffy Chocolate Peanut Butter Mousse Jars: Your New Favorite No-Bake Dessert!
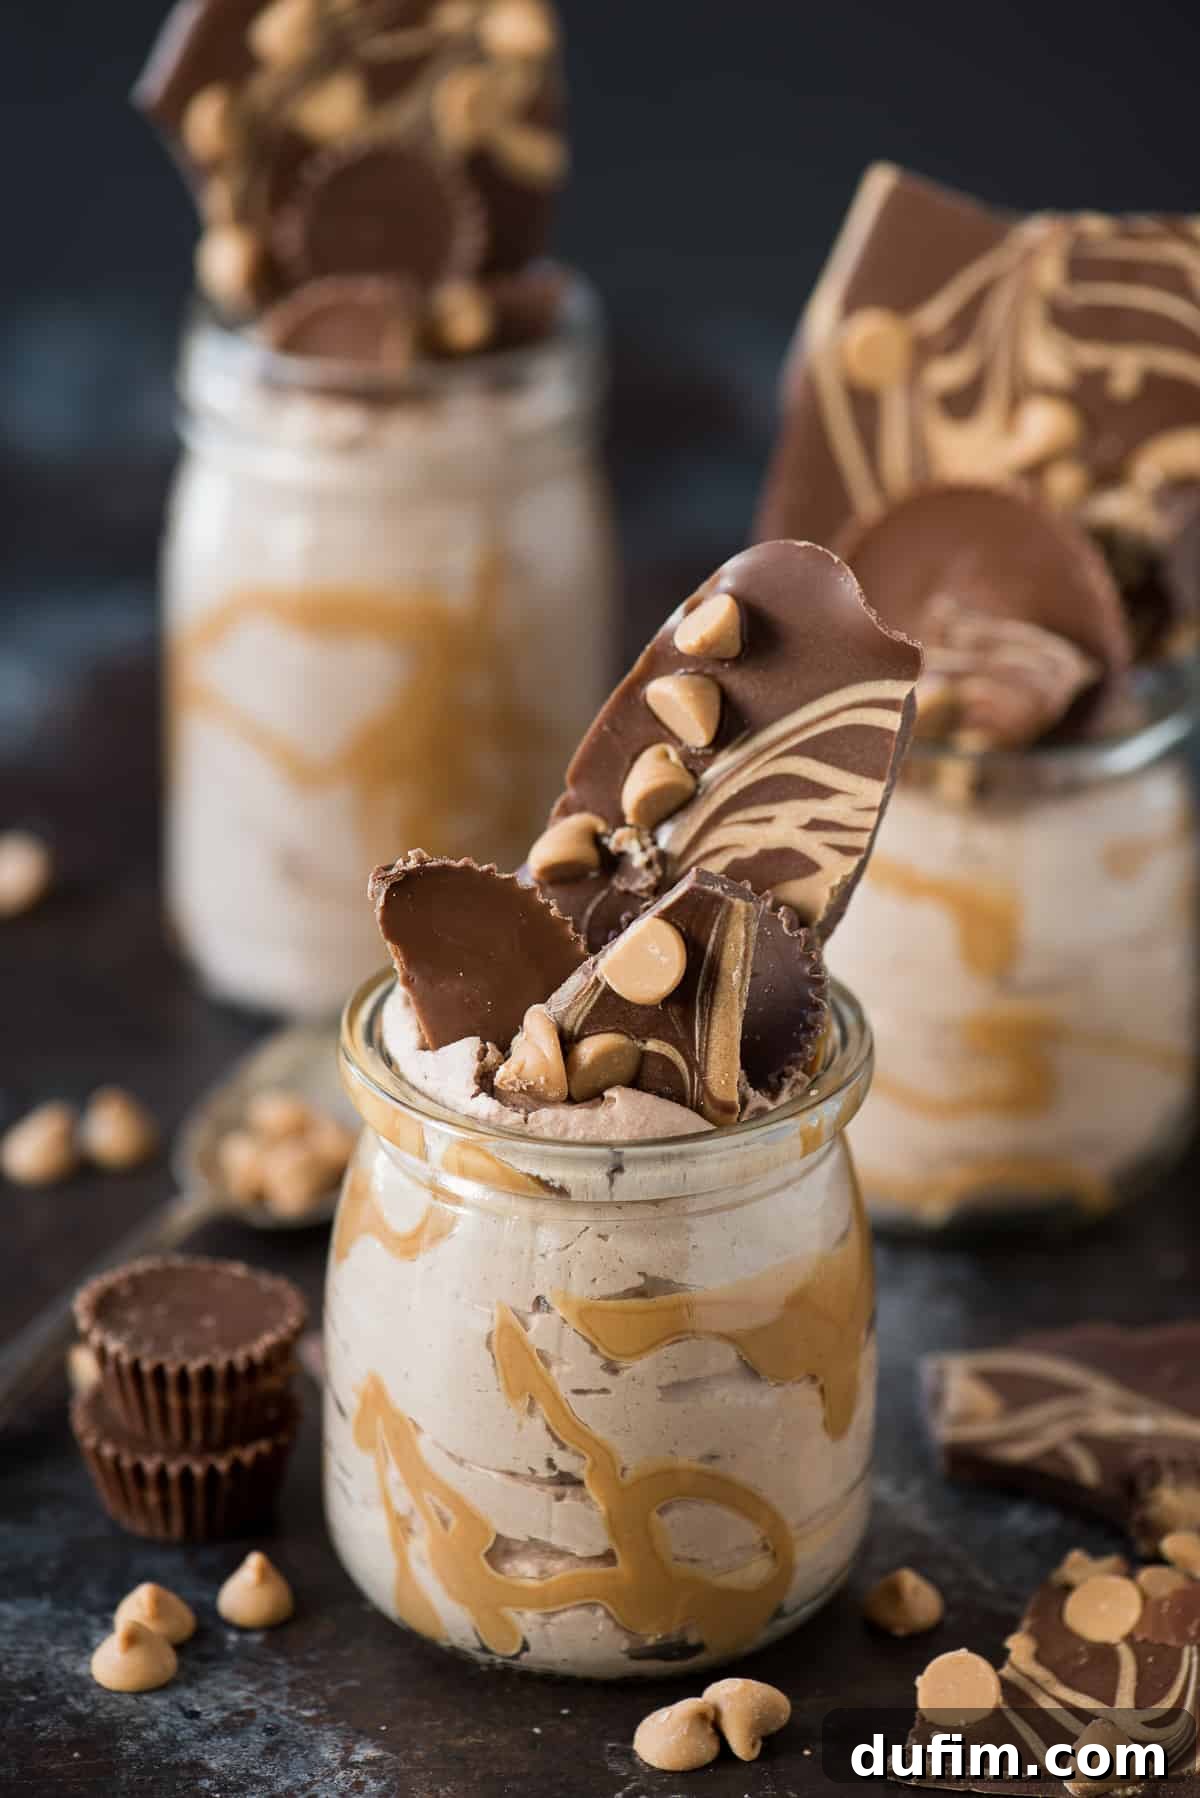
There are certain desserts that hold a special place in our hearts – and on our palates. For many, that elusive category includes creamy mousses and rich cheesecakes. Even when you feel completely satisfied, there’s always that tiny corner left for a spoonful of something truly extraordinary. If you share this sentiment, then prepare to meet your match: these incredible Chocolate Peanut Butter Mousse Jars. They are dangerously delicious, exquisitely simple to prepare, and promise to become a staple in your dessert repertoire.
Imagine the silken texture of chocolate mousse, perfectly balanced with the nutty richness of peanut butter, all swirled into individual jars for a personal treat. This recipe isn’t just a dessert; it’s an experience, combining two universally beloved flavors into a light yet indulgent confection that requires no baking whatsoever. Whether you’re a seasoned baker or a kitchen novice, these mousse jars offer a straightforward path to dessert bliss.
Mastering the Mousse: Essential Tips for Success
Creating a light and airy mousse might seem intimidating, but with a few professional tips, you’ll achieve perfect results every time. The key lies in understanding your ingredients and preparing your tools correctly. Let’s dive into some fundamental techniques that will elevate your mousse-making game.
The Cold Secret: Why Chill Your Bowl for Whipped Cream?
One of the most crucial steps for achieving perfectly stable and voluminous whipped cream – a cornerstone of any great mousse – is chilling your mixing bowl and beaters. I highly recommend placing a metal or glass mixing bowl, along with your beaters, in the freezer for at least 15-20 minutes before you begin whipping your cream. But why is this so important?
Cream whips best when it’s very cold. The fat molecules in cold cream are firmer and more stable, allowing them to entrap air more effectively. A chilled bowl and beaters help maintain this low temperature throughout the whipping process. If the cream gets too warm, the fat emulsifies less efficiently, resulting in a runny, less voluminous, or even separated whipped cream. By keeping everything thoroughly chilled, you ensure that your cream whips beautifully, tripling in volume and forming those desirable stiff peaks that give mousse its characteristic airy texture. This stability is vital, especially when incorporating other ingredients, as it prevents the mousse from deflating.
Additional Expert Tips for Flawless Mousse
- Heavy Cream is Key: Always use heavy cream or heavy whipping cream, which boasts a fat content of at least 36%. While often used interchangeably, heavy cream and heavy whipping cream are essentially the same product. However, “whipping cream” (without “heavy”) contains a lower fat percentage (30-35%), which can result in a less stable and less rich mousse. The higher fat content in heavy cream provides the necessary structure and luxurious mouthfeel for a truly decadent mousse.
- Perfect Portioning: This recipe typically yields about 2-3 cups of delicious mousse. For ideal individual servings and elegant presentation, I find that dividing the mousse among four 5.3 oz bowls or small jars works perfectly. This ensures each guest gets a generous, beautifully presented treat.
- Optimal Storage: Mousse is best enjoyed fresh, but it can be stored in the refrigerator for 2-3 days. To maintain its delightful freshness, airy texture, and prevent the top from drying out or absorbing refrigerator odors, be sure to cover each individual container tightly with plastic wrap. This barrier is essential for preserving the mousse’s delicate consistency.
- Gentle Mixing: When combining the whipped cream with the melted chocolate and gelatin mixture, fold gently. Overmixing can deflate the air incorporated into the cream, leading to a dense mousse rather than a light and fluffy one. Use a spatula and fold with care until just combined.
- Quality Ingredients Matter: Since this recipe has relatively few ingredients, the quality of each component shines through. Opt for high-quality chocolate chips and a good brand of heavy cream for the best flavor and texture.
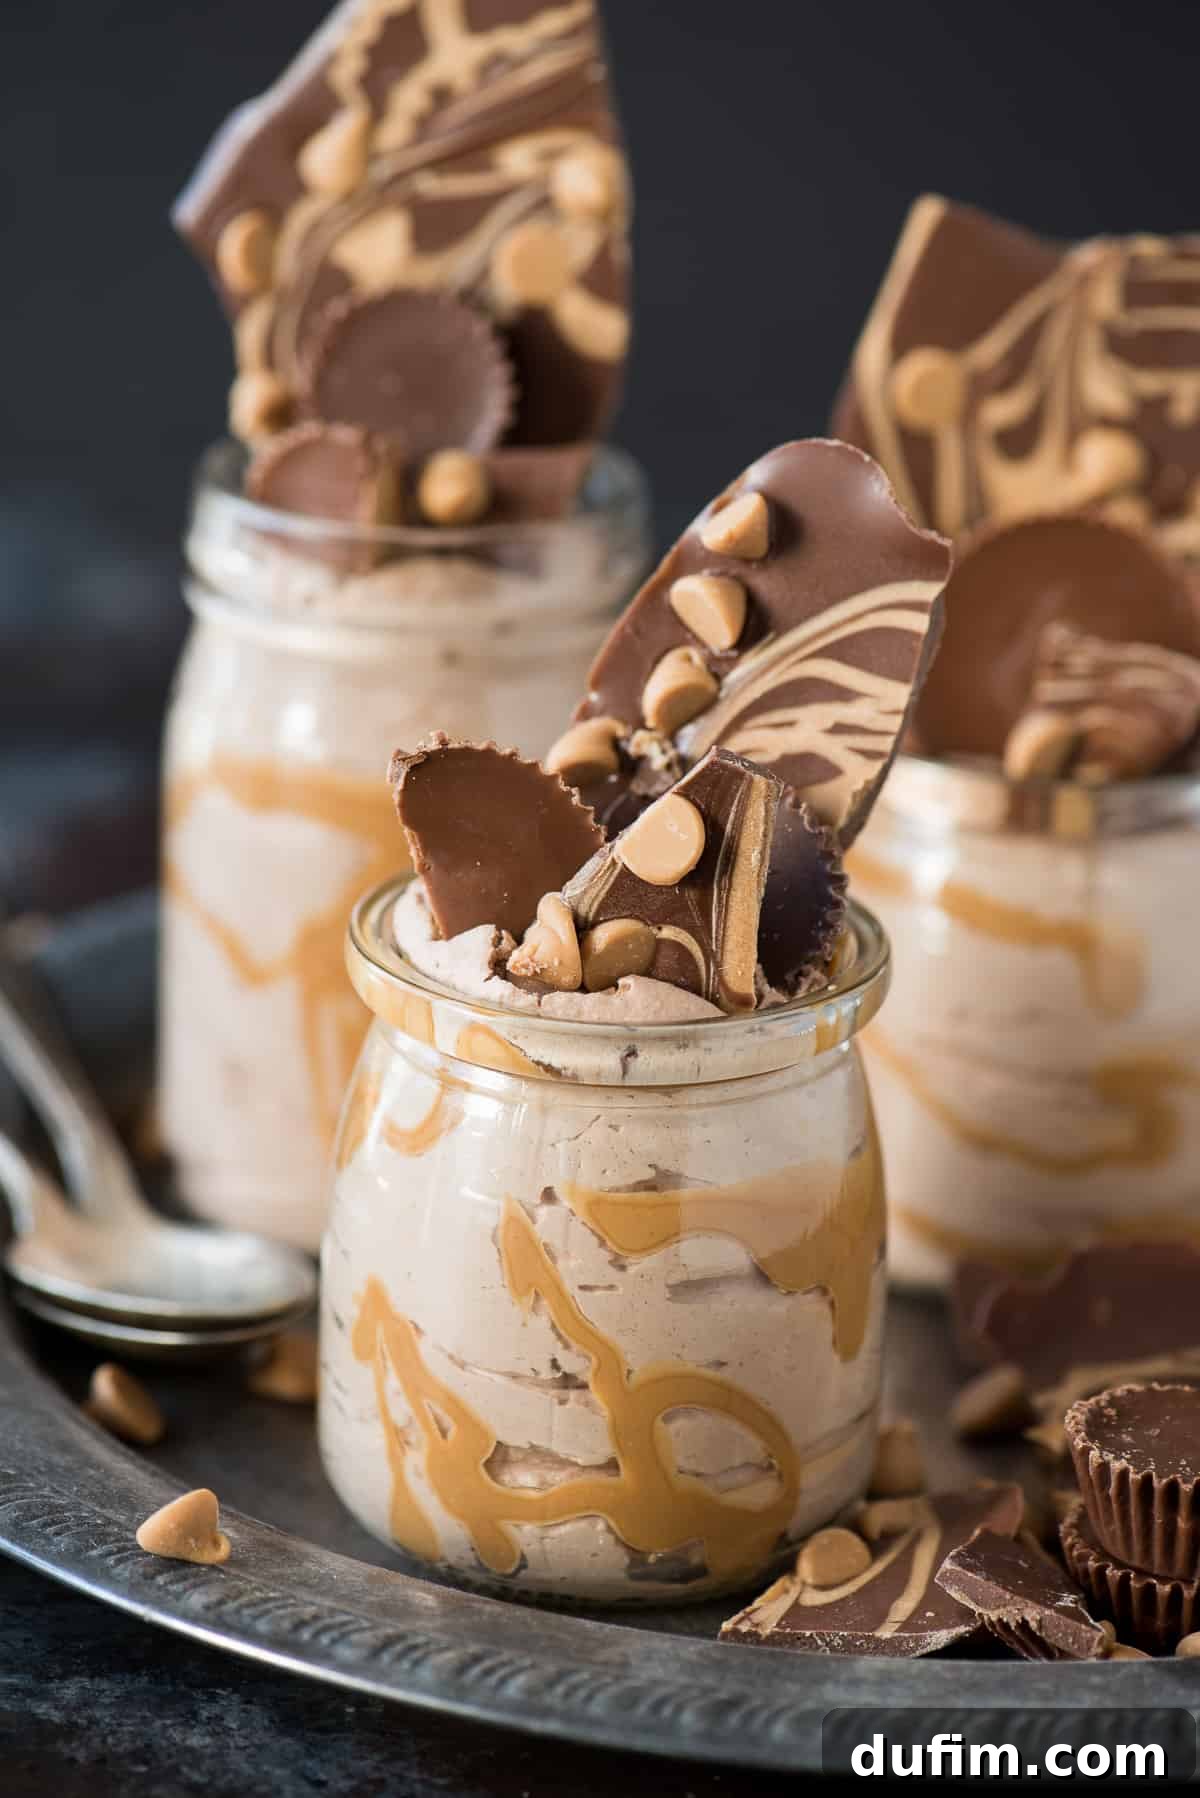
While entirely optional, the artistic touch of a peanut butter drizzle on the inside of the serving jars and a homemade chocolate peanut butter bark topping transforms these simple mousse jars into a visually stunning dessert, perfect for impressing guests or simply indulging yourself in something extra special.
For this recipe’s rich chocolate peanut butter flavor, I’ve incorporated International Delight’s Reese’s creamer. It’s truly a game-changer, and I was absolutely thrilled when they announced this delightful flavor would be available year-round – making these mousse jars a treat you can enjoy any time of the year!
Watch How It’s Made: Chocolate Peanut Butter Mousse Video
4.50 from 2 ratings. Tap stars to rate!
Chocolate Peanut Butter Mousse Jars
Beth
30 minutes
1 hour
1 hour 30 minutes
4
servings
Rate
Equipment
-
Glass Mixing Bowl
-
Favorite Spatula
-
KitchenAid 9-Speed Mixer
Ingredients
Mousse
- ½ cup (85g) semi-sweet chocolate chips, melt with a little bit of vegetable oil
- 2 Tbsp cold water
- 2 tsp unflavored gelatin
- 1 ½ cups (354ml) heavy whipping cream
- ½ cup (118ml) International Delight Reese’s creamer
OPTIONAL toppings:
- Peanut butter, melted
- Chocolate candy melts, or chocolate candiquik/almond bark
- A few Reese’s cups, chopped
- A few peanut butter chips
Instructions
-
Prepare Your Tools: Begin by placing a clean metal or glass mixing bowl and your mixer beaters into the freezer. Allow them to chill for at least 20 minutes. This crucial step ensures your heavy cream whips to its maximum volume and stability.
-
Melt the Chocolate: In a microwave-safe bowl, combine ½ cup (85g) of semi-sweet chocolate chips with a tiny splash of vegetable oil (just enough to help smooth out the melt). Microwave on 50% power in 30-second intervals, stirring after each, until the chocolate is fully melted and smooth. This typically takes 1-2 minutes. Set aside to cool slightly.
-
Decorate Jars (Optional): If you desire a fancy presentation, heat about 1 tablespoon of creamy peanut butter in a microwave-safe bowl until it’s pourable and runny. Carefully drizzle the melted peanut butter onto the inside walls of the jars you plan to use for your mousse. This creates beautiful streaks and adds an extra layer of flavor. Set the decorated jars aside.
-
Bloom the Gelatin: In a small, separate container, sprinkle 2 teaspoons of unflavored gelatin over 2 tablespoons of cold water. Allow this mixture to “bloom” for 1 minute – you’ll see it thicken into a gel-like consistency. Once bloomed, microwave it for 10-15 seconds until the gelatin completely dissolves and the mixture is clear. This ensures there are no grainy bits in your mousse. Set aside.
-
Whip the Cream: Retrieve your chilled bowl and beaters from the freezer. Pour 1 ½ cups (354ml) of heavy whipping cream and ½ cup (118ml) of International Delight Reese’s creamer into the cold bowl. Beat on high speed until soft peaks form. The cream should be airy and hold its shape, but still have a gentle curl at the tip. Be careful not to over-whip at this stage, as you’ll continue mixing.
-
Combine and Finish: With the mixer still on high, slowly pour the slightly cooled melted gelatin mixture and the cooled melted chocolate into the whipped cream. Continue beating on high until the mousse becomes incredibly airy, thick, and well combined. The mixture should hold stiff peaks and have a light, fluffy texture. Once ready, transfer the mousse into a piping bag (or use a spoon) and carefully pipe or scoop it into your prepared jars. Refrigerate the mousse for at least 1 hour, or ideally overnight, to allow it to set completely and achieve its full flavor and texture. Always cover the bowls or jars with plastic wrap during refrigeration to prevent the top from drying out.
-
Prepare Chocolate Peanut Butter Bark Topping (Optional): To create a beautiful and delicious topping, melt ½ cup of chocolate candy melts (or chocolate candiquik/almond bark). Once smooth, pour the melted chocolate onto a small baking sheet lined with parchment paper, spreading it thinly. Drizzle melted peanut butter over the chocolate and use a skewer or toothpick to swirl the two together for a marbled effect. Immediately sprinkle chopped Reese’s cups and peanut butter chips over the warm bark. Place the baking sheet in the fridge for 15-20 minutes, or until the bark is fully set and firm.
-
Serve and Enjoy: Before serving, remove the chocolate peanut butter bark from the fridge and break it into irregular pieces. Top each chilled mousse jar with a few pieces of the bark. These decadent chocolate peanut butter mousse jars are now ready to be savored!
Nutrition Information (per serving)
Calories: 484 kcal
Carbohydrates: 16g
Protein: 6g
Fat: 45g
Saturated Fat: 28g
Polyunsaturated Fat: 2g
Monounsaturated Fat: 13g
Trans Fat: 1g
Cholesterol: 135mg
Sodium: 53mg
Potassium: 234mg
Fiber: 2g
Sugar: 8g
Vitamin A: 1430IU
Vitamin C: 1mg
Calcium: 105mg
Iron: 1mg
Nutrition Disclosure
All nutritional values are approximate and provided to the reader as a courtesy. Changing ingredients and/or quantities will alter the estimated nutritional calculations.
The Art of Mousse: Why We Love It
Mousse, derived from the French word for “foam,” is celebrated for its incredibly light, airy texture that practically melts in your mouth. Unlike custards or puddings, mousse incorporates air through whipped cream or egg whites, giving it a unique, ethereal quality. This chocolate peanut butter mousse is particularly delightful because it strikes a perfect balance between richness and lightness, ensuring you can enjoy every spoonful without feeling overly heavy. It’s the ideal dessert for those who appreciate sophistication without an overly complicated preparation.
Flavor Fusion: The Irresistible Duo of Chocolate and Peanut Butter
The pairing of chocolate and peanut butter is a classic for a reason – their complementary flavors create a symphony on the palate. The deep, slightly bitter notes of chocolate perfectly contrast with the creamy, salty, and sweet profile of peanut butter. This mousse leverages this dynamic duo to its full potential, offering layers of flavor in every bite. Using a Reese’s flavored creamer further intensifies this beloved combination, making the chocolate peanut butter experience truly unparalleled. It’s a nostalgic flavor that appeals to almost everyone, making these mousse jars a guaranteed crowd-pleaser.
Customization and Variations for Your Mousse Jars
While this recipe is perfect as is, it also serves as an excellent canvas for creativity. Don’t hesitate to experiment with different additions to make these mousse jars uniquely yours:
- Cookie Crumble Base: For an added layer of texture, consider adding a thin layer of crushed oreos, graham crackers, or peanut butter cookies at the bottom of each jar before piping in the mousse.
- Different Chocolate: Instead of semi-sweet, try milk chocolate for a sweeter mousse or dark chocolate for a more intense cocoa flavor.
- Nutty Add-ins: Fold in finely chopped roasted peanuts or miniature peanut butter cups directly into the mousse for extra crunch and flavor.
- Coffee Kick: A teaspoon of instant espresso powder added to the melted chocolate can deepen the chocolate flavor beautifully without making it taste like coffee.
- Boozy Mousse: For an adult twist, add a tablespoon of peanut butter whiskey or a coffee liqueur to the mousse mixture.
- Fresh Fruit Garnish: While rich, these mousses can be brightened with a few fresh raspberries or sliced strawberries on top before serving.
Troubleshooting Common Mousse Mistakes
Even with simple recipes, sometimes things don’t go exactly as planned. Here are some common issues you might encounter when making mousse and how to prevent them:
- Runny Mousse: This is usually due to under-whipped cream, warm cream, or overmixing after adding other ingredients (which deflates the air). Ensure your bowl and cream are very cold, and whip until stiff peaks form before adding the chocolate and gelatin. Fold gently.
- Grainy Mousse: If your mousse has a grainy texture, it’s likely that the gelatin didn’t fully dissolve. Make sure to heat the bloomed gelatin until it’s completely clear and liquid before incorporating it.
- Chocolate Hardening Too Quickly: If your melted chocolate cools too much, it can seize up when added to the cold whipped cream, creating chocolate flecks instead of a smooth blend. Ensure your chocolate is still slightly warm and fluid when adding, but not hot enough to melt the whipped cream.
- Mousse Not Setting: This is almost always a gelatin issue. Double-check that you’re using unflavored gelatin and that it’s properly bloomed and dissolved. Not enough gelatin or inactive gelatin will prevent setting.
Serving and Presentation Ideas
The beauty of these mousse jars lies not only in their taste but also in their charming presentation. Beyond the optional peanut butter drizzle and chocolate bark, here are more ways to serve them:
- Elegant Glasses: Use small stemmed dessert glasses for a more formal presentation.
- Layered Look: Create alternating layers of chocolate mousse, peanut butter mousse (if making two separate batches), and a cookie crumble for visual appeal.
- Whipped Cream Dollop: A simple dollop of freshly whipped cream on top, perhaps with a sprinkle of cocoa powder or mini chocolate chips, is always a winning garnish.
- Dessert Board: Serve the jars as part of a larger dessert board with fresh berries, small cookies, and other bite-sized treats.
- Gifting: These jars make wonderful homemade gifts! Tie a ribbon around them and add a small tag for a thoughtful present.
Conclusion: Your Journey to Mousse Perfection
These decadent chocolate peanut butter mousse jars are more than just a dessert; they’re a testament to how simple ingredients, combined with a few key techniques, can create something truly magical. The fluffy texture, the rich blend of chocolate and peanut butter, and the ease of preparation make this recipe an absolute must-try. Whether you’re celebrating a special occasion, hosting a gathering, or simply craving a sweet escape, these mousse jars are guaranteed to delight. So, gather your ingredients, chill your bowl, and prepare to embark on a delicious journey to mousse perfection. Happy creating, and even happier indulging!
Like this recipe? Rate and comment below!
We’d love to hear your thoughts and see your creations!