
The Ultimate Guide to Making the Best Homemade Graham Cracker Pie Crust
For years, I’ve cherished the joy of baking, and through countless pies and cheesecakes, I’ve refined my graham cracker pie crust recipe to absolute perfection. It’s a fundamental skill for any home baker, offering a versatile foundation for an array of delightful desserts. This guide will walk you through just how incredibly simple it is to create this impeccable pie crust right in your own kitchen, perfect for your favorite no-bake pies and creamy homemade cheesecakes. Forget the store-bought versions; once you experience the superior taste and texture of a freshly made graham cracker crust, there will be no turning back.
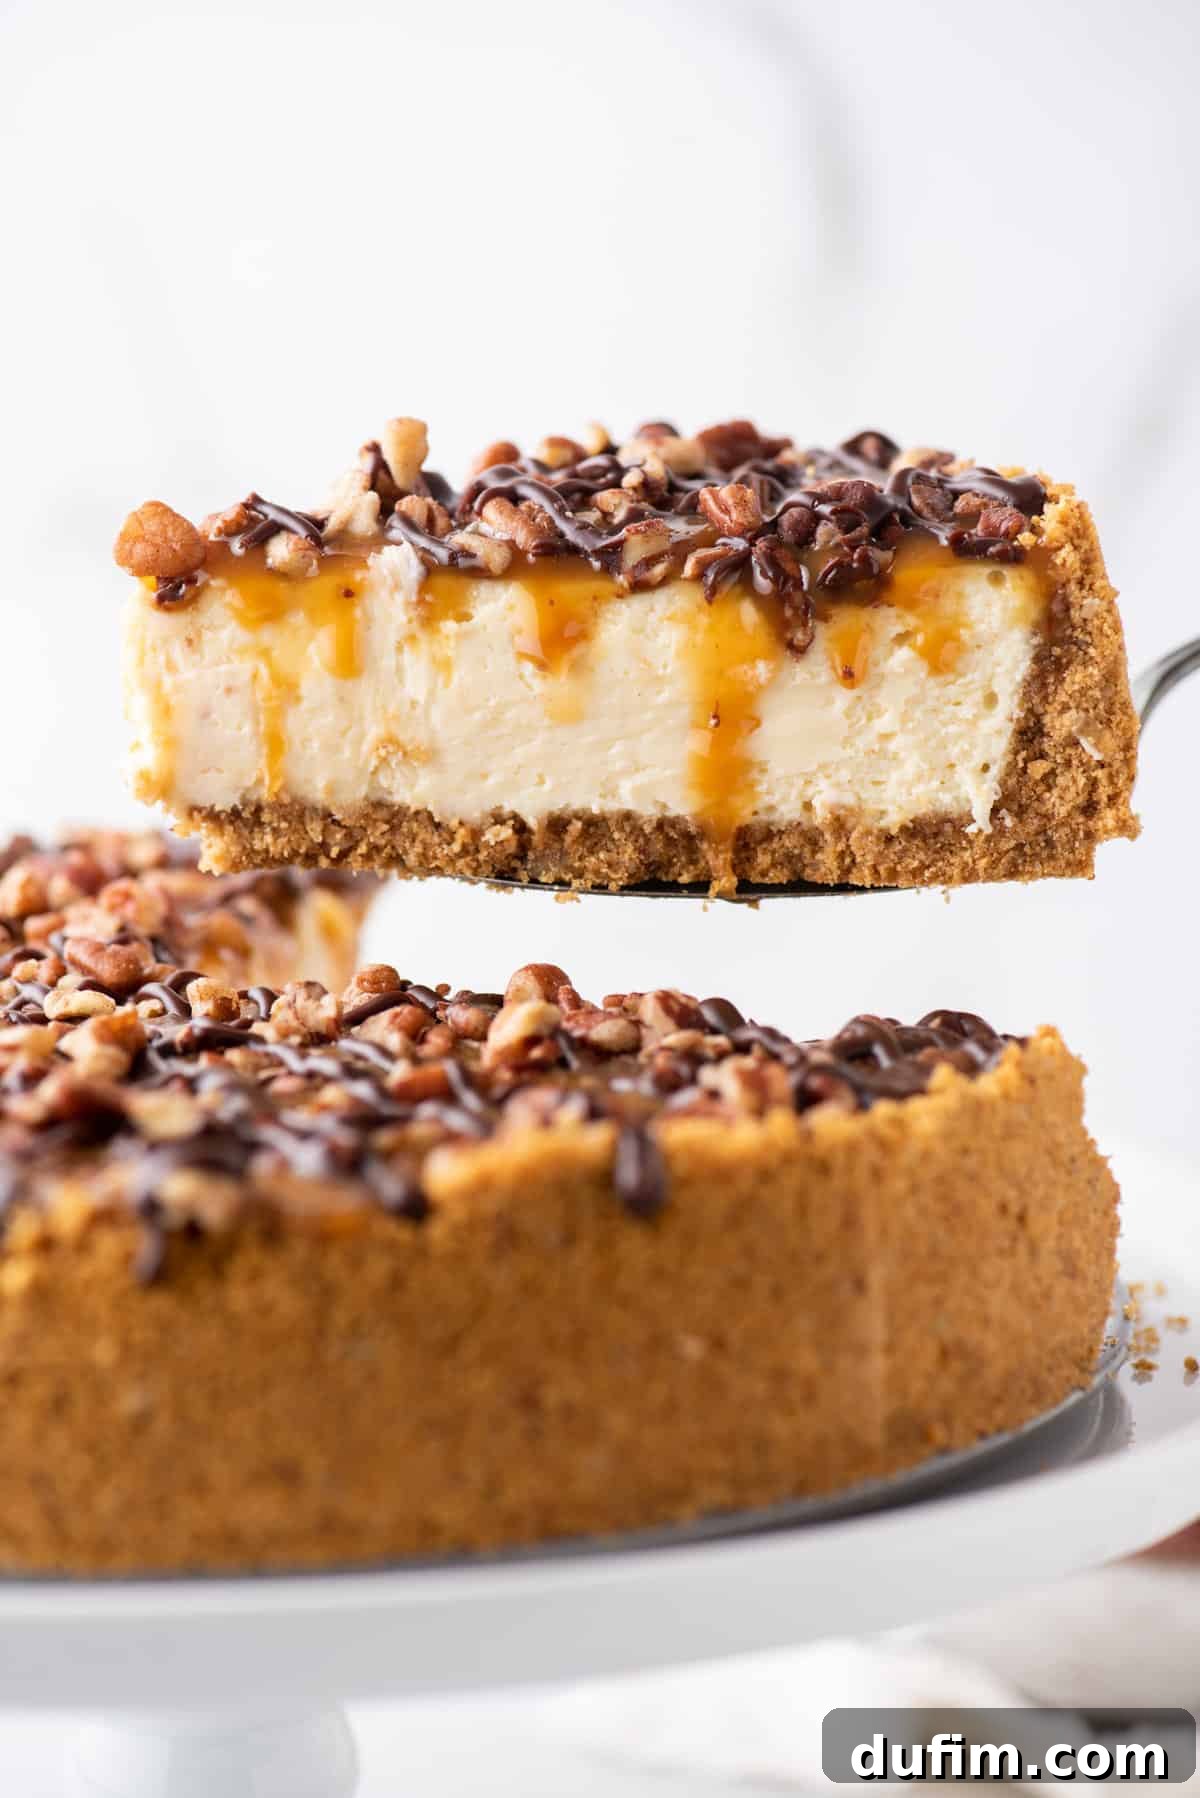
I’ve made this crust so many times that the process has become second nature. It’s a testament to its simplicity and reliability. This article is packed with all my tried-and-true tips, tricks, and insights to ensure your graham cracker crust turns out flawlessly every single time, whether you’re crafting a light and airy no-bake dessert or a rich, decadent cheesecake. Get ready to elevate your dessert game with a crust that’s not only easy but also packed with homemade flavor and quality.
You’ll be amazed at how this simple, three-ingredient recipe outperforms any pre-made crust you’ve ever bought. While store-bought crusts often contain a surprising list of ten or more ingredients—many of which are unnecessary additives—our homemade version focuses purely on essential components, delivering a clean, authentic taste that complements your fillings perfectly. Prepare to impress your family and friends with a crust that tastes genuinely homemade because it is!
Why Homemade Graham Cracker Crust Reigns Supreme
A homemade graham cracker crust isn’t just a component of a dessert; it’s the delicious, foundational embrace that brings your no-bake pies and cheesecakes to life. Stepping away from the pre-packaged crusts found in aluminum pans opens up a world of benefits, offering control, freshness, and unparalleled flavor.
When you craft this crust at home, you have the freedom to choose your favorite pie plate, adding a personal touch to your presentation. More importantly, you gain complete control over the ingredients. You’ll know precisely what goes into your dessert – just three wholesome items – contrasting sharply with store-bought options that often list a dozen or more, including preservatives and artificial flavors. This transparency not only ensures a healthier option but also guarantees a fresher, more vibrant taste that factory-made crusts simply cannot replicate. The subtle sweetness and buttery richness of a homemade crust provide the perfect balance to any filling, making it an indispensable part of your baking repertoire.
Essential Ingredients for Your Easy Graham Cracker Crust
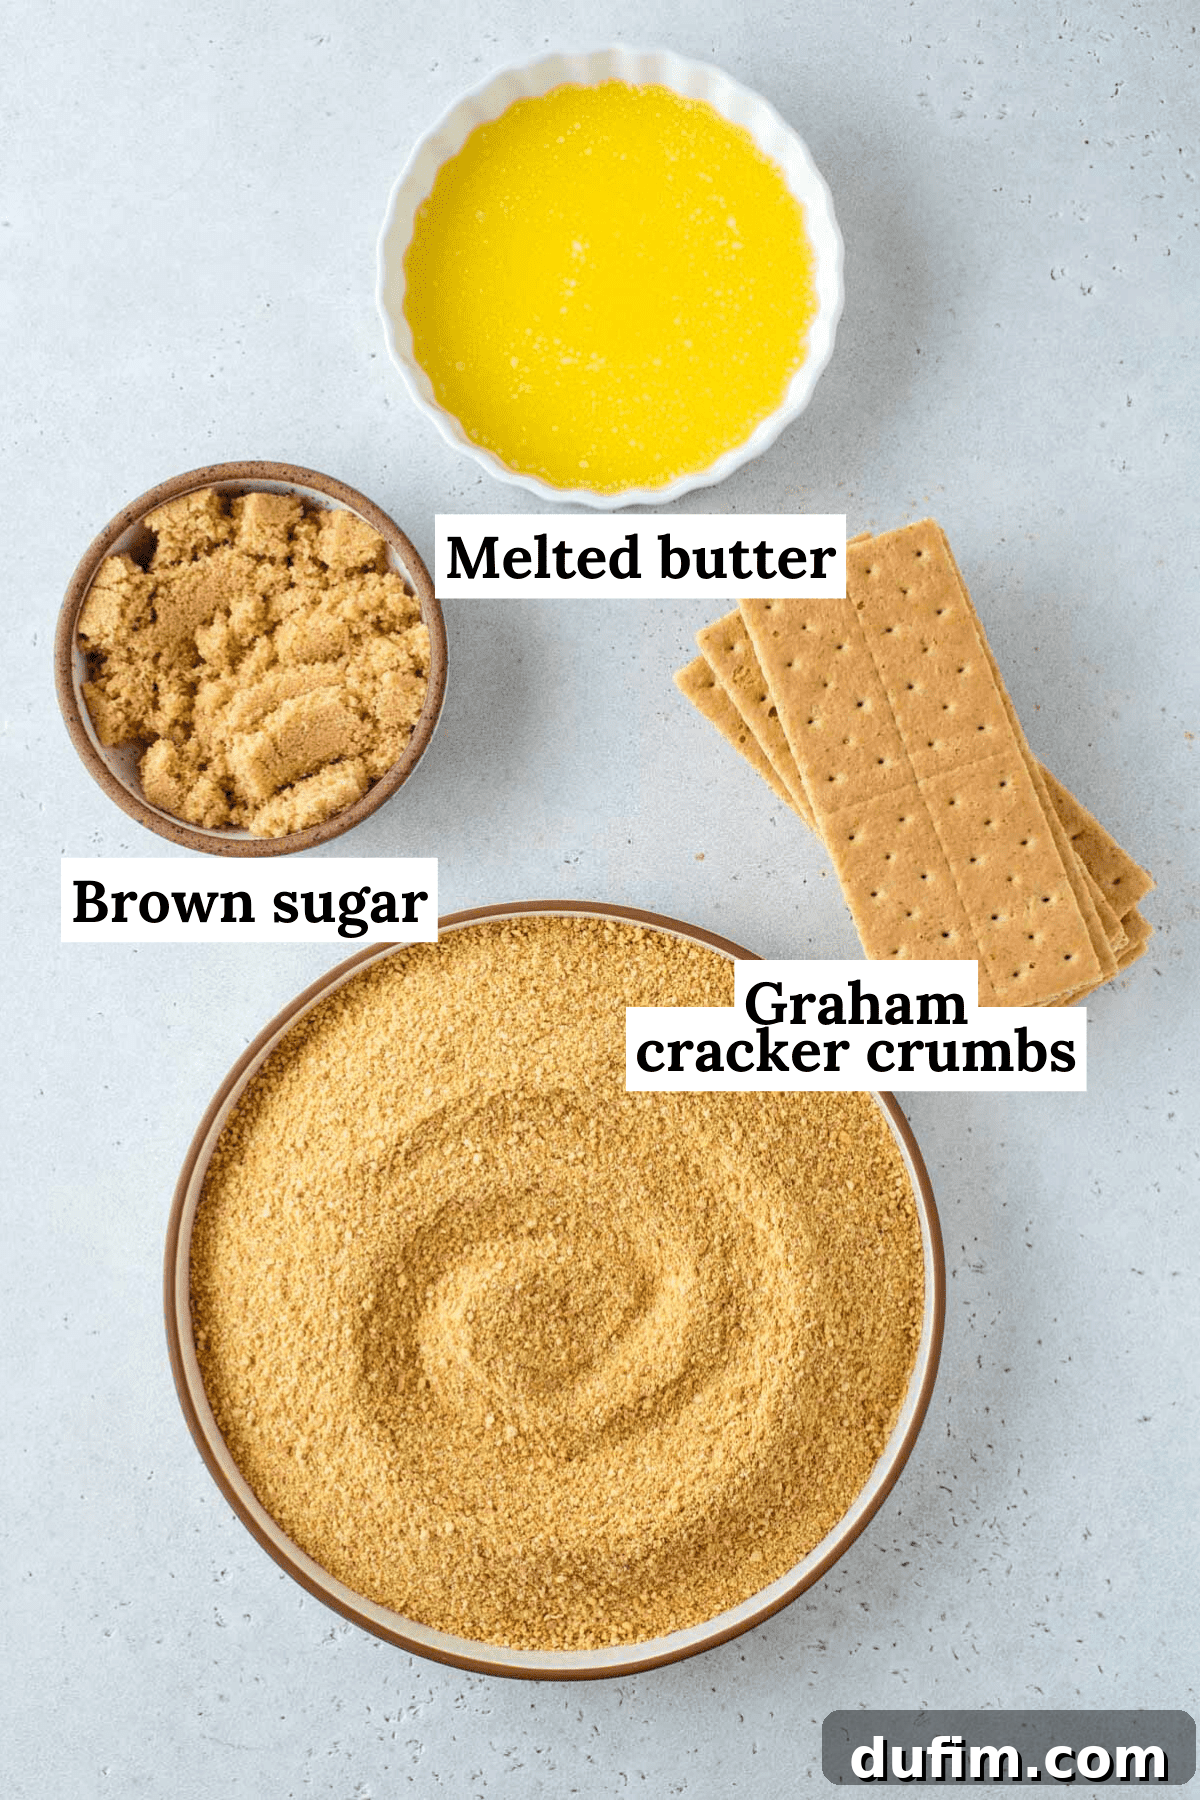
The beauty of this recipe lies in its simplicity. With just three core ingredients, you can create a crust that is both robust and tender, providing the ideal base for any dessert. Let’s break down what you’ll need and why each component is crucial:
- Graham Cracker Crumbs: These form the bulk of your crust, offering a distinctive mild sweetness and crunchy texture.
- Brown Sugar: Adds a touch of caramel-like sweetness and helps to bind the crumbs together, contributing to a firmer crust.
- Unsalted Melted Butter: The magical binding agent that holds everything together, creating a rich flavor and a perfectly set crust. Using unsalted butter gives you control over the overall saltiness of your dessert.
Understanding Graham Cracker Crumbs
You have a couple of options for graham cracker crumbs. Many grocery stores stock pre-crushed graham cracker crumbs in the baking aisle, usually near the pre-made pie crusts. This is a convenient shortcut that saves you time.
However, if you prefer to make your own from whole graham crackers, it’s incredibly easy and often yields a fresher flavor. You’ll need approximately 9 full sheets of graham crackers to yield about 1 ½ cups of crumbs. To achieve fine crumbs, you can either place the crackers in a food processor and pulse until finely ground, or put them in a sturdy Ziploc bag and crush them with a rolling pin. The finer the crumbs, the more uniformly they will bind and the smoother your crust will be.
Step-by-Step Guide: How to Make a Graham Cracker Crust
Creating this delicious crust is a straightforward process that takes mere minutes. Follow these steps for a perfect result every time:
-
Combine Dry Ingredients
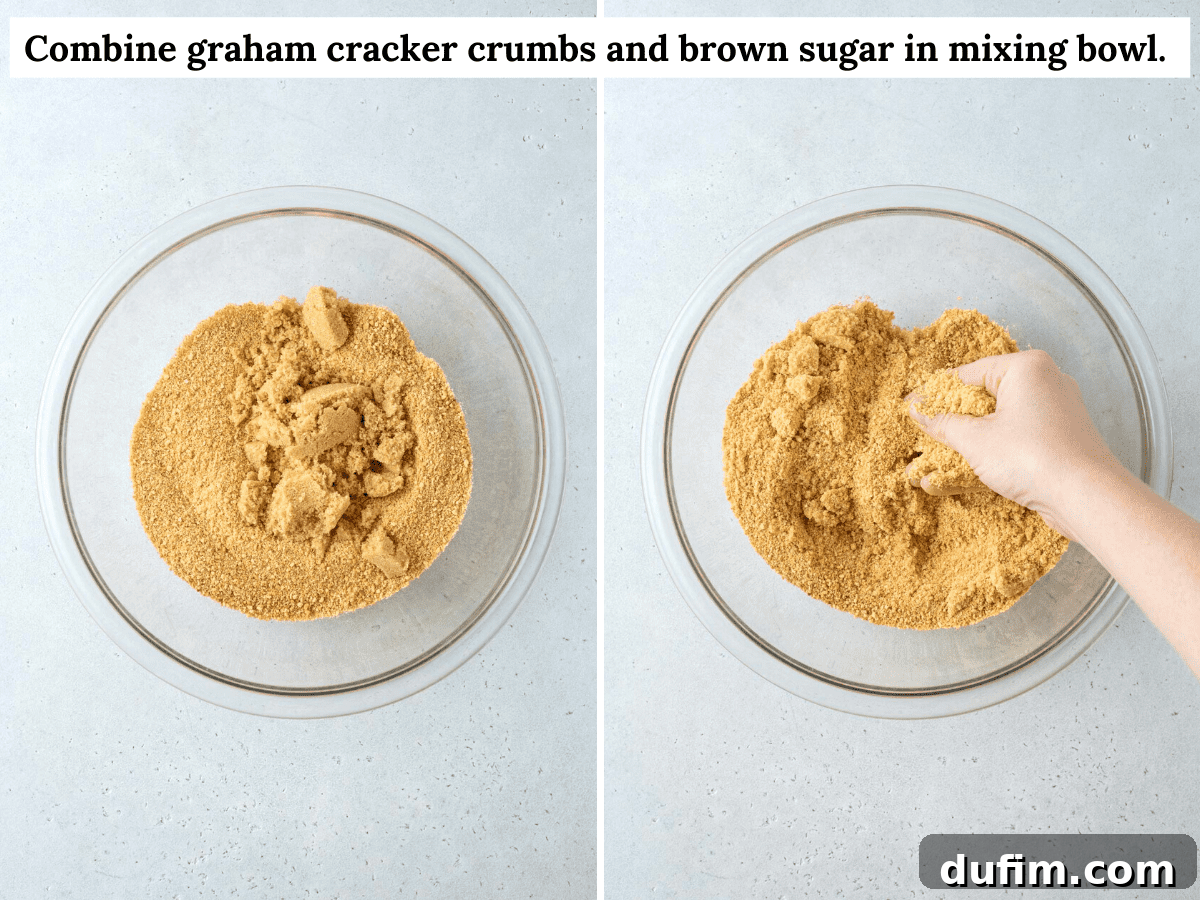
In a large mixing bowl, measure out your graham cracker crumbs and brown sugar. Use your fingers or a spatula to thoroughly combine them, ensuring the brown sugar is evenly distributed throughout the crumbs. This initial mixing is crucial for uniform sweetness and binding.

-
Incorporate Melted Butter
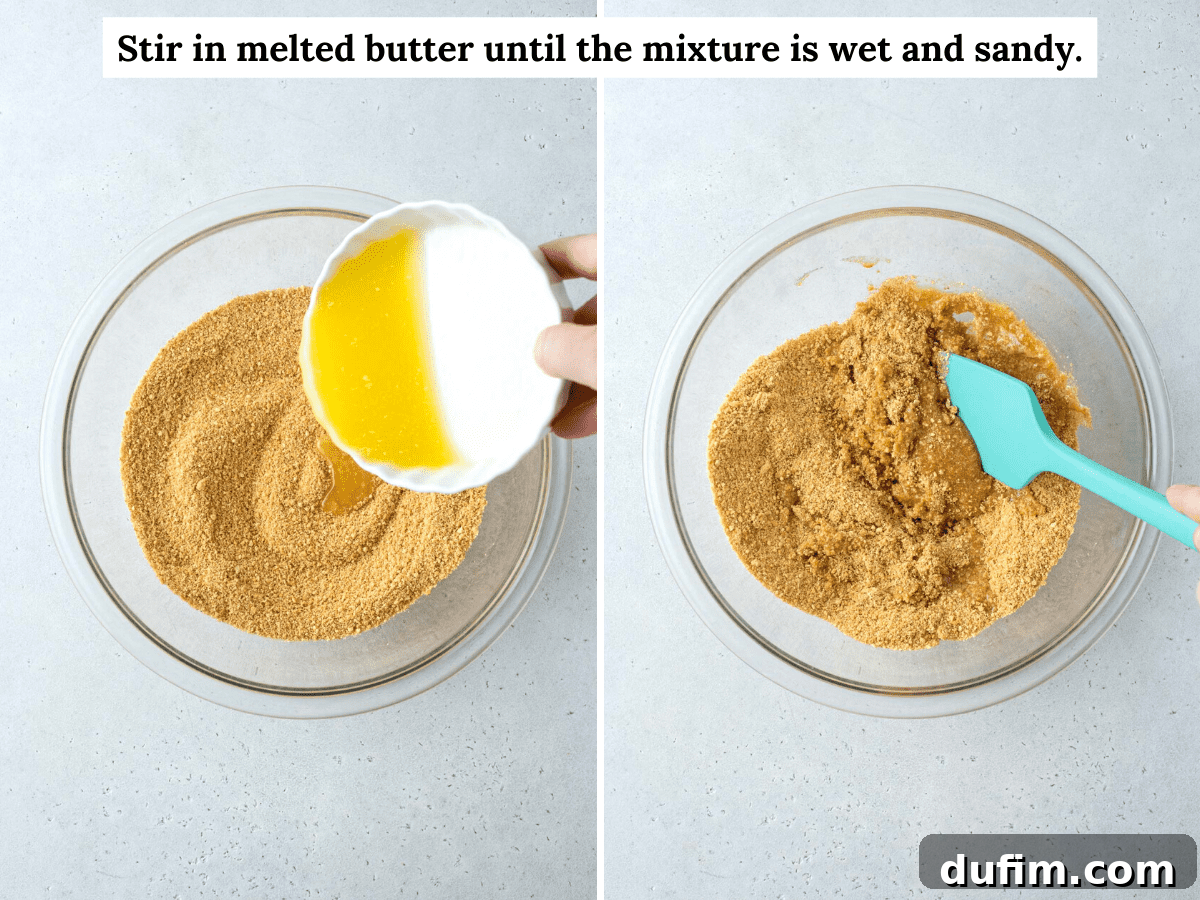
Pour the melted unsalted butter into the dry mixture. Stir everything together until it is fully combined. The mixture should transform into a wet, sandy consistency, where every crumb is coated with butter. This is a key indicator that your crust will hold together beautifully.
-
Press into Your Pan
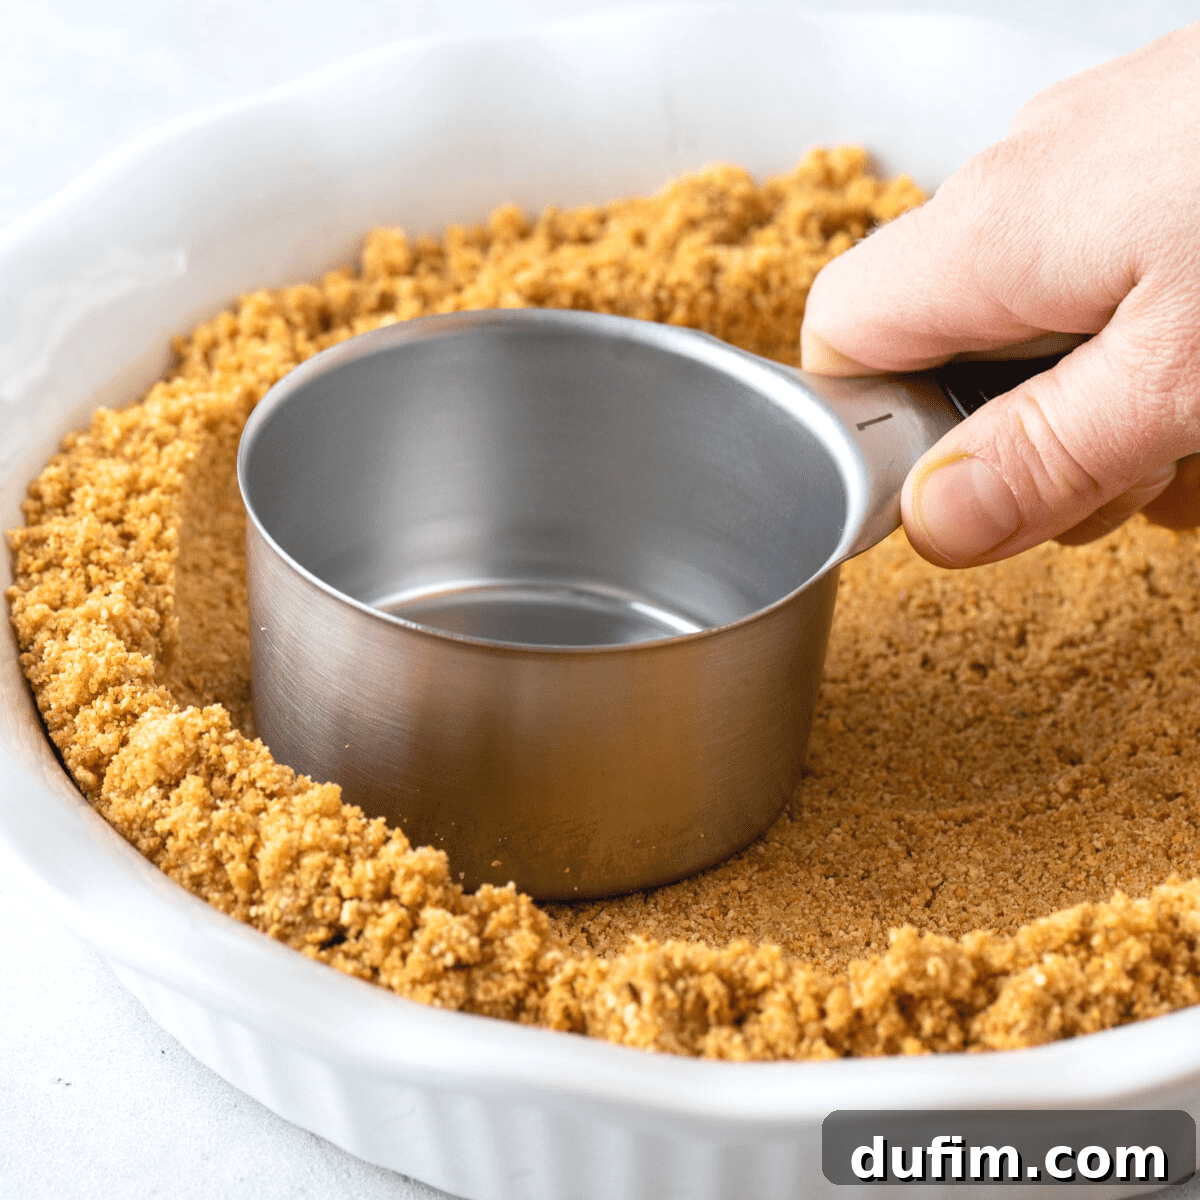
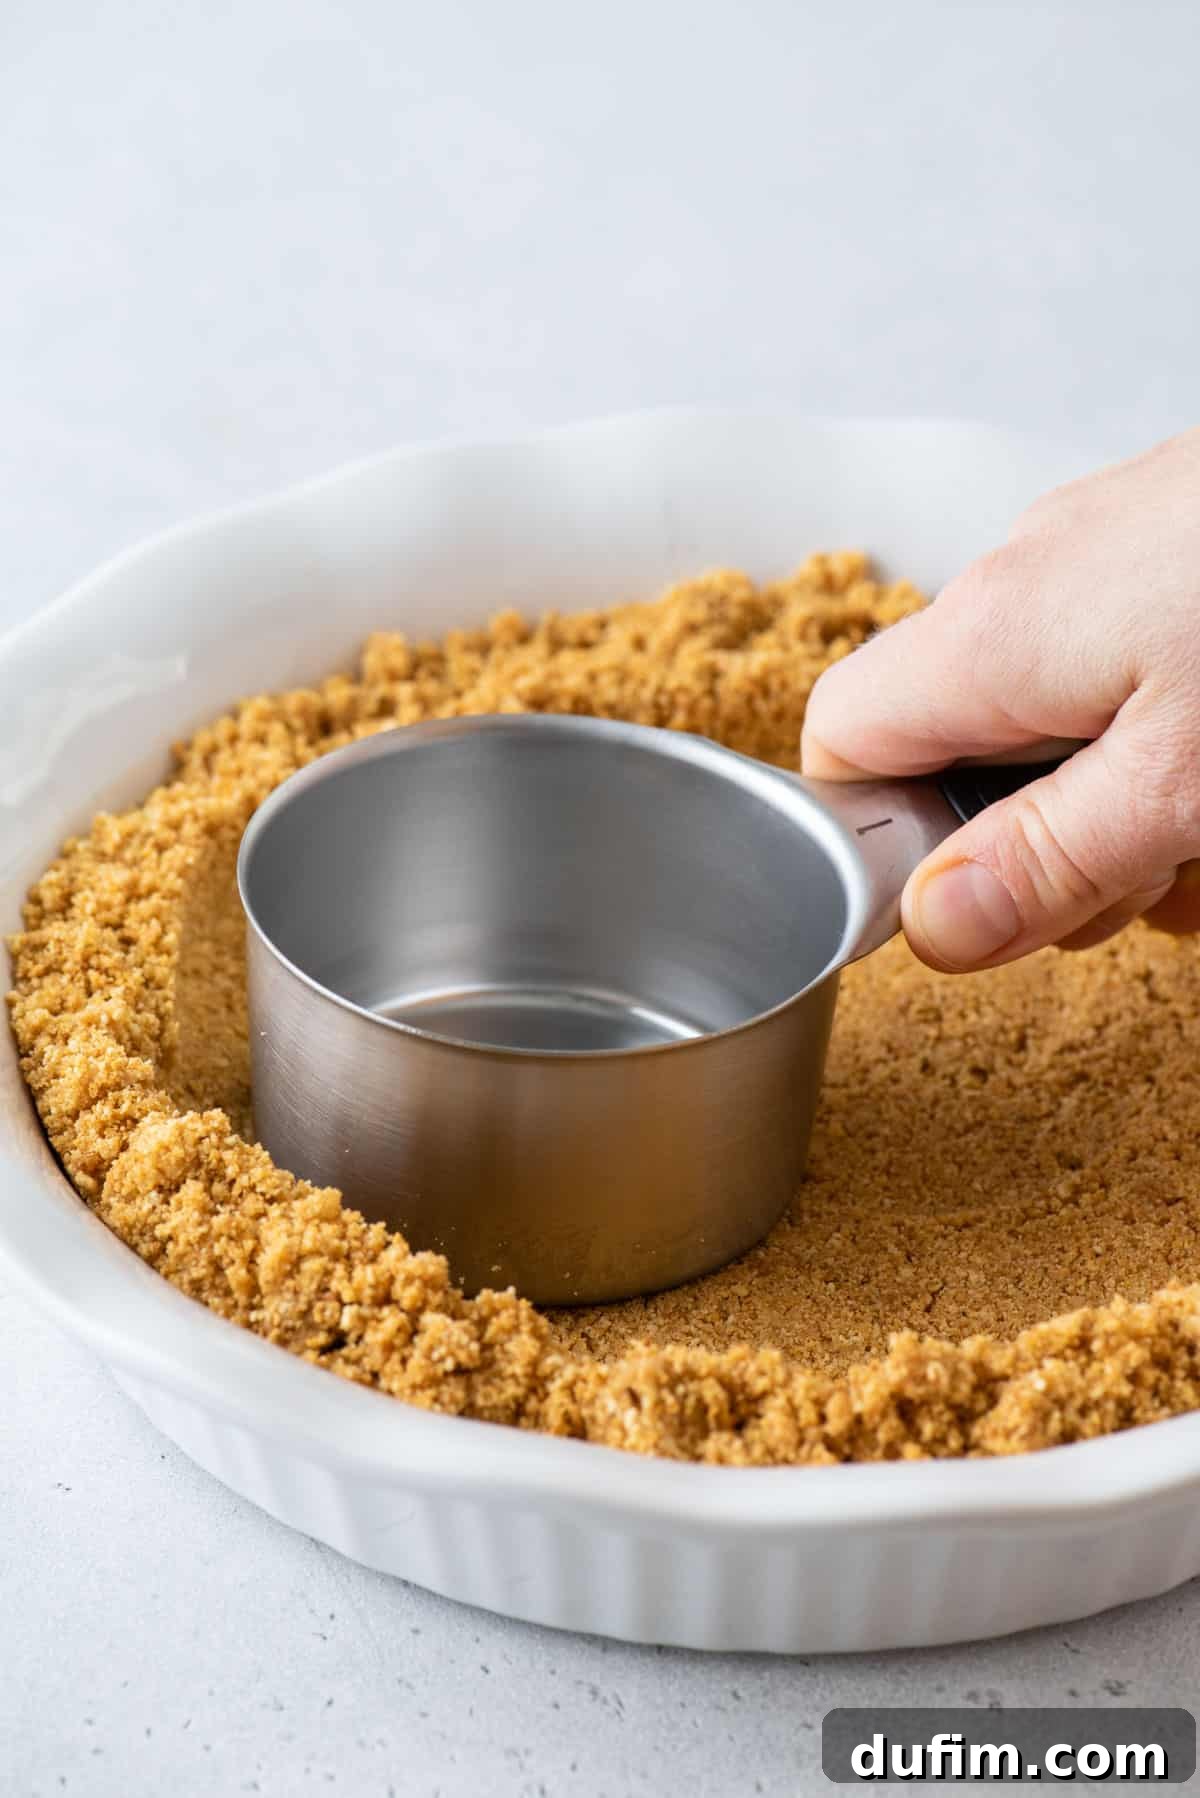
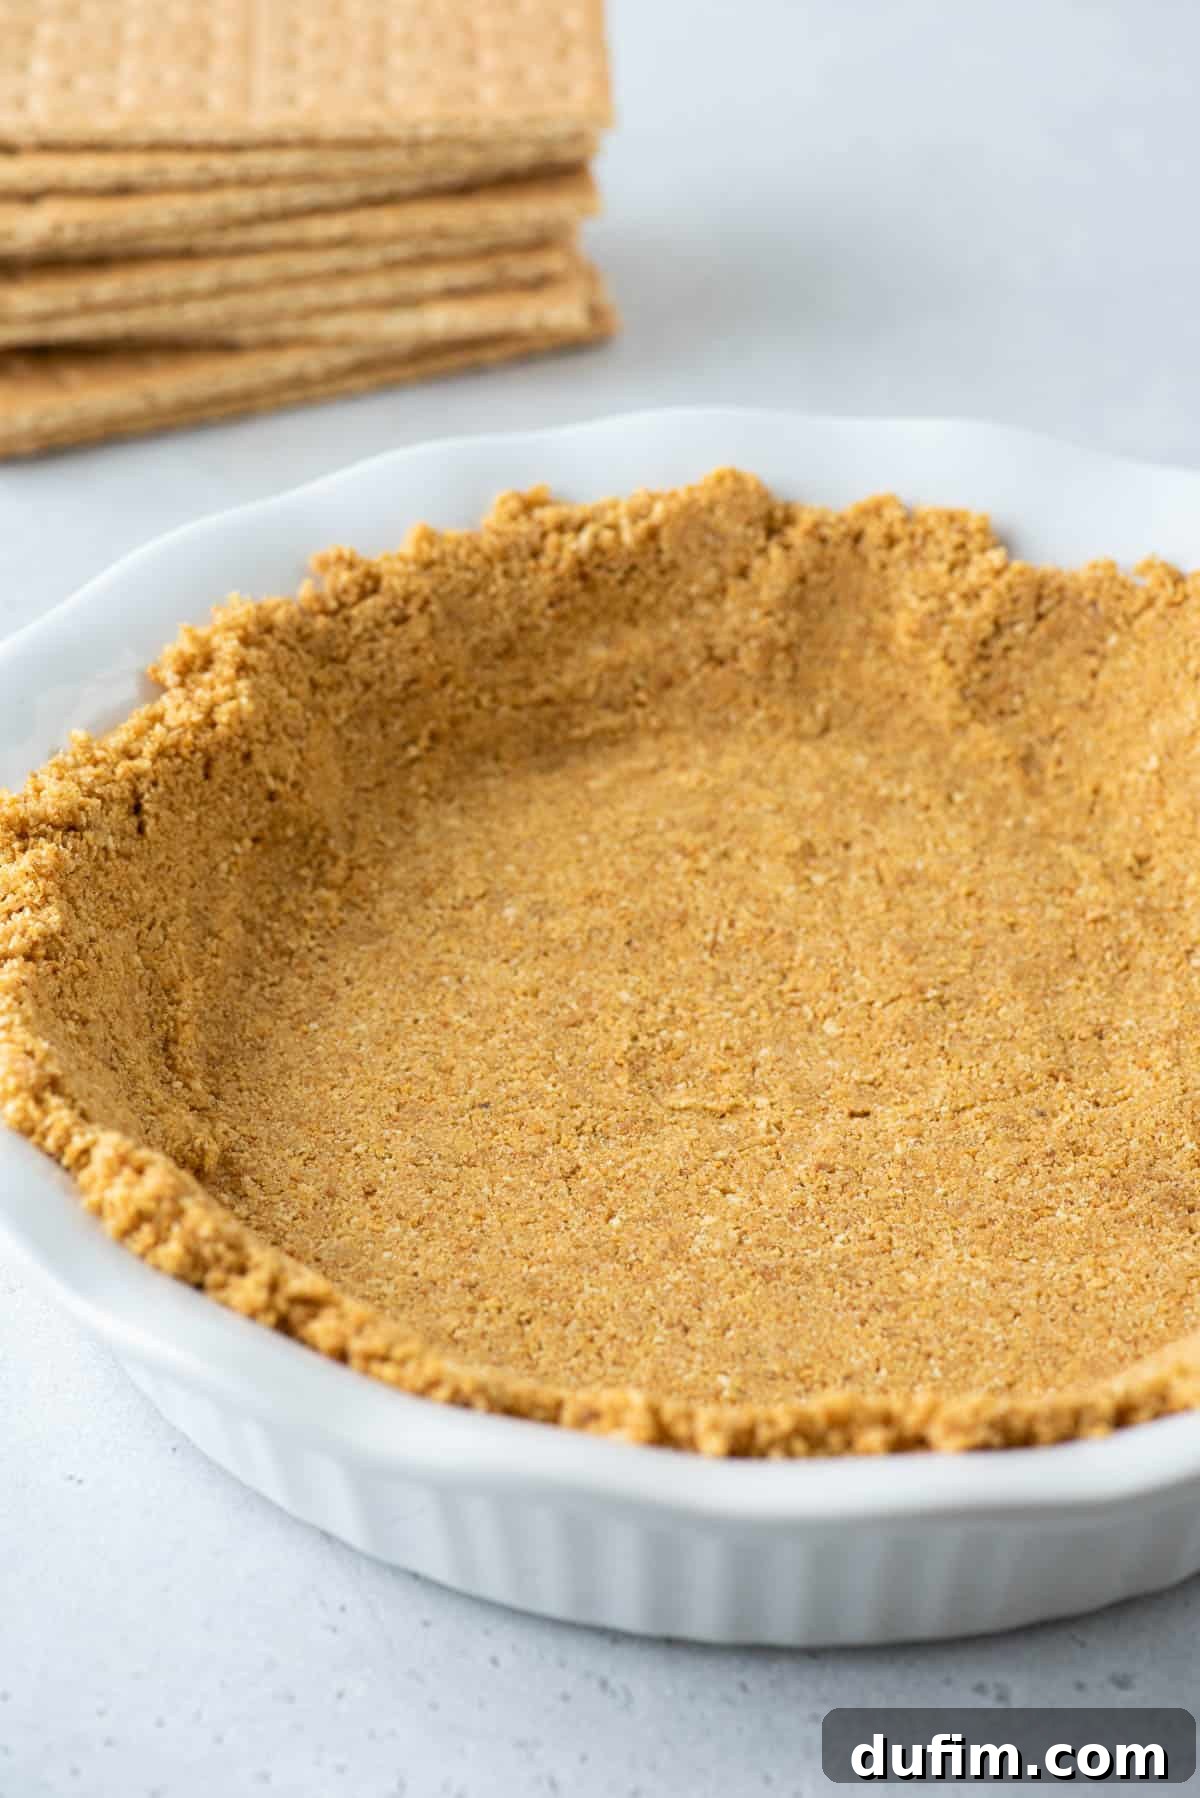
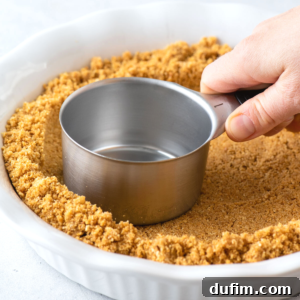
Transfer the buttered graham cracker mixture into a 9- or 10-inch pie pan or springform pan. Distribute the mixture evenly across the bottom and up the sides of the pan. The secret to a firm crust that won’t fall apart is pressing it down really well. Use the bottom of a flat-surfaced measuring cup or a drinking glass to firmly pack the crust into place, paying extra attention to the edges and corners.
-
Chill or Pre-Bake
The next step depends on your dessert. If you are making a no-bake pie or a no-bake cheesecake, simply place the crust in the refrigerator to chill for at least 30 minutes. This allows the butter to solidify, setting the crust firmly before you add your filling.
If your recipe calls for a baked cheesecake, you will typically pre-bake the crust first. Follow your specific cheesecake recipe’s instructions for pre-baking times and temperatures, usually around 10 minutes at 350°F (175°C), before adding the filling and baking further.
Delightful Variations to Your Graham Cracker Pie Crust
While the classic graham cracker crust is a timeless favorite, don’t hesitate to experiment with variations to perfectly match your dessert:
Chocolate Graham Cracker Pie Crust
For a rich, cocoa-infused twist, simply substitute regular graham crackers with chocolate graham crackers. The amount remains the same: 1 ½ cups of crumbs, which is roughly 9 chocolate graham cracker sheets. This variation is particularly wonderful for chocolate-based cheesecakes, mint pies, or any dessert where a deeper, chocolatey flavor would enhance the experience.
Other Flavorful Crust Ideas
The principle of this recipe—crumbs, sugar, butter—can be applied to a variety of other cookies and crackers. Consider using:
- Vanilla Wafers: For a milder, vanilla-infused base, perfect for banana puddings or fruit tarts.
- Ginger Snaps: If you’re making a pumpkin pie or a spiced apple dessert, a ginger snap crust adds a delightful zing.
- Shortbread Cookies: Crushed shortbread makes for an elegant, buttery crust that pairs beautifully with berry tarts.
- Oreo Cookies: For a decadent chocolate cookie crust, simply use crushed Oreos (including the cream filling for extra richness) and reduce the sugar, as Oreos are already quite sweet. We have a dedicated recipe for Oreo pie crust if you’re interested!
Expert Tips for a Flawless Graham Cracker Pie Crust
Achieving a perfect graham cracker crust is simple, but a few key tips can make all the difference, ensuring it’s firm, flavorful, and never soggy:
- Consistency is Key for Crumbs: If you’re using whole graham crackers, ensure they are finely crushed. A food processor is ideal for achieving a uniform, sand-like texture. If crumbs are too coarse, your crust might be crumbly and less cohesive.
- Don’t Skimp on the Butter: Butter is the essential binding agent. Using the exact amount specified in the recipe is critical for the crust to hold together. Too little butter, and your crust will fall apart; too much, and it could become greasy.
- Pack it Down Firmly: This is arguably the most important step for a sturdy crust. Use the bottom of a measuring cup, a flat-bottomed glass, or even your knuckles to press the mixture firmly and evenly into the pie dish. Pay close attention to the sides and edges to create a solid foundation.
- Chill Thoroughly: For no-bake desserts, chilling the crust for at least 30 minutes in the refrigerator allows the butter to re-solidify, creating a wonderfully firm crust that slices cleanly.
- Pre-Bake When Needed: For baked cheesecakes, pre-baking the crust briefly (around 10 minutes at 350°F/175°C) can help set it and prevent it from becoming soggy once the filling is added. Always allow it to cool completely before adding filling.
Homemade Graham Cracker Crust Recipe FAQs
Do I bake Graham Cracker Crust?
The necessity of baking your graham cracker crust depends entirely on the type of dessert you’re preparing. For no-bake pies or no-bake cheesecakes, such as a chocolate pudding pie or a no-bake pumpkin cheesecake, you do not need to bake the crust. Once the crust mixture is firmly packed into your pie pan, simply place it in the refrigerator to chill. This allows the butter to firm up and bind the crumbs, creating a solid base that’s ready for your chilled filling. This is the method often used in easy no-bake cheesecake recipes.
Conversely, if you are making a traditional baked cheesecake, like a turtle cheesecake, espresso cheesecake, or a rich chocolate cheesecake, you will typically pre-bake the crust. This usually involves baking it for about 8-10 minutes at 350°F (175°C) before adding the cheesecake filling. Pre-baking helps the crust achieve a slightly crisper texture and can also act as a barrier to prevent sogginess from the creamy filling.
How do you keep a graham cracker crust from falling apart?
A crumbly crust is a common frustration, but it’s easily avoidable by following these key practices:
- Proper Mixing: Ensure the graham cracker crumbs, brown sugar, and melted butter are thoroughly combined. Every single crumb needs to be coated with butter, as butter is the primary binding agent. If some crumbs are dry, the crust will lack cohesion.
- Press Firmly: This step cannot be emphasized enough. Use a flat-bottomed measuring cup, a drinking glass, or even your hands to press the mixture *very* firmly and evenly into the pie dish or springform pan. The goal is to compact the crumbs as tightly as possible, especially along the bottom and up the sides.
- Chill Before Filling: Refrigerate the pressed crust for at least 30 minutes (or even longer, up to an hour) before adding any filling. The cold helps the butter solidify, essentially “gluing” the crumbs together and making the crust much more stable and less likely to crumble when cut.
- Bake if Recommended: For recipes that call for a baked crust, a short stint in the oven (around 10 minutes at 350°F / 175°C) can help further set the butter and create a sturdier structure. Always let it cool completely after baking.
How do you make a graham cracker crust not soggy?
Nobody wants a soggy pie crust! Here’s how to ensure your graham cracker crust stays perfectly crisp:
- Pre-Bake (if applicable): For recipes with wet fillings (especially baked cheesecakes or custards), pre-baking the crust is highly recommended. Bake it at 350°F (175°C) for about 8-10 minutes until it’s lightly golden and firm. This creates a slightly drier barrier that is less prone to absorbing moisture from the filling.
- Brush with Egg White (Optional but Effective): After pre-baking, you can brush the warm crust with a thin layer of lightly beaten egg white, then return it to the oven for another 2-3 minutes. The egg white bakes into an invisible, moisture-resistant shield, significantly reducing the chance of sogginess. Let it cool completely.
- Cool Completely: Always allow the crust to cool entirely before adding your filling. A warm crust will condense moisture, making it more susceptible to becoming soggy when a cold filling is added.
- Add Filling Just Before Serving: If your dessert allows, adding the filling as close to serving time as possible minimizes the crust’s contact time with moisture-rich ingredients. This is especially true for fresh fruit fillings.
- Choose Firm Fillings: Opt for fillings that are less likely to release a lot of liquid. Cream cheese-based fillings, puddings, or stable custards are generally better for maintaining crust integrity than very juicy fruit fillings.
Can I make this crust ahead of time?
Absolutely! This graham cracker crust is an excellent make-ahead component. Once pressed into the pan, you can cover it tightly with plastic wrap and refrigerate it for up to 2-3 days before you plan to use it. You can also freeze the unbaked, pressed crust for up to a month. Thaw it in the refrigerator before adding your filling.
How do I store leftover crust?
If you have any leftover plain, unbaked crust mixture (before pressing into a pan), you can store it in an airtight container in the refrigerator for up to a week, or in the freezer for up to a month. When ready to use, simply thaw to room temperature if frozen, then press into a pan as directed.
The Easy Homemade Graham Cracker Crust Recipe
Experience the unparalleled simplicity and flavor of a homemade graham cracker crust. This foolproof recipe yields a sturdy, sweet base perfect for an array of desserts.
Equipment
- Large Glass Mixing Bowl
- Spatula
- 9 or 10-inch Pie Pan or Springform Pan
- Measuring Cup (for pressing)
- Food Processor (optional, for crushing crackers)
Ingredients
- 1 ½ cups (170g) graham cracker crumbs (approximately 9 whole graham crackers)
- ¼ cup (54g) brown sugar, packed
- 6 Tbsp (86g) unsalted butter, melted (¾ stick)
Instructions
- In a large bowl, combine the graham cracker crumbs and brown sugar. Use your fingers or a spatula to mix the brown sugar thoroughly into the crumbs until well combined.
- Pour the melted unsalted butter into the crumb mixture. Stir until the butter is fully incorporated and the mixture resembles wet sand.
- Transfer the mixture into a 9 or 10-inch pie pan or springform pan. Use the bottom of a measuring cup or a flat-bottomed glass to firmly and evenly press the crust down across the bottom and up the sides of the pan.
- For no-bake pies or cheesecakes: Place the crust in the refrigerator to chill for at least 30 minutes, or until ready to fill.
- For baked cheesecakes: Pre-bake the crust according to your cheesecake recipe’s instructions, typically for 8-10 minutes at 350°F (175°C), then let it cool completely before adding the filling.
Notes
The estimated calorie count provided is for one whole crust. Individual serving nutrition will vary based on how many slices you cut.
You can easily substitute chocolate graham crackers for a chocolate version of this crust, using the same measurements.
If you’re interested in an Oreo pie crust, we have a dedicated recipe for that too!
Nutrition Information
All nutritional values are approximate and provided to the reader as a courtesy. Changing ingredients and/or quantities will alter the estimated nutritional calculations.
- Calories: 1346 kcal
- Carbohydrates: 150g
- Protein: 10g
- Fat: 81g
- Saturated Fat: 45g
- Polyunsaturated Fat: 3g
- Monounsaturated Fat: 22g
- Trans Fat: 3g
- Cholesterol: 181mg
- Sodium: 855mg
- Potassium: 316mg
- Fiber: 4g
- Sugar: 82g
- Vitamin A: 2099 IU
- Calcium: 165mg
- Iron: 6mg
We hope this comprehensive guide inspires you to create the perfect homemade graham cracker pie crust for all your dessert endeavors. Don’t forget to share your creations and let us know your favorite fillings! Happy baking!