
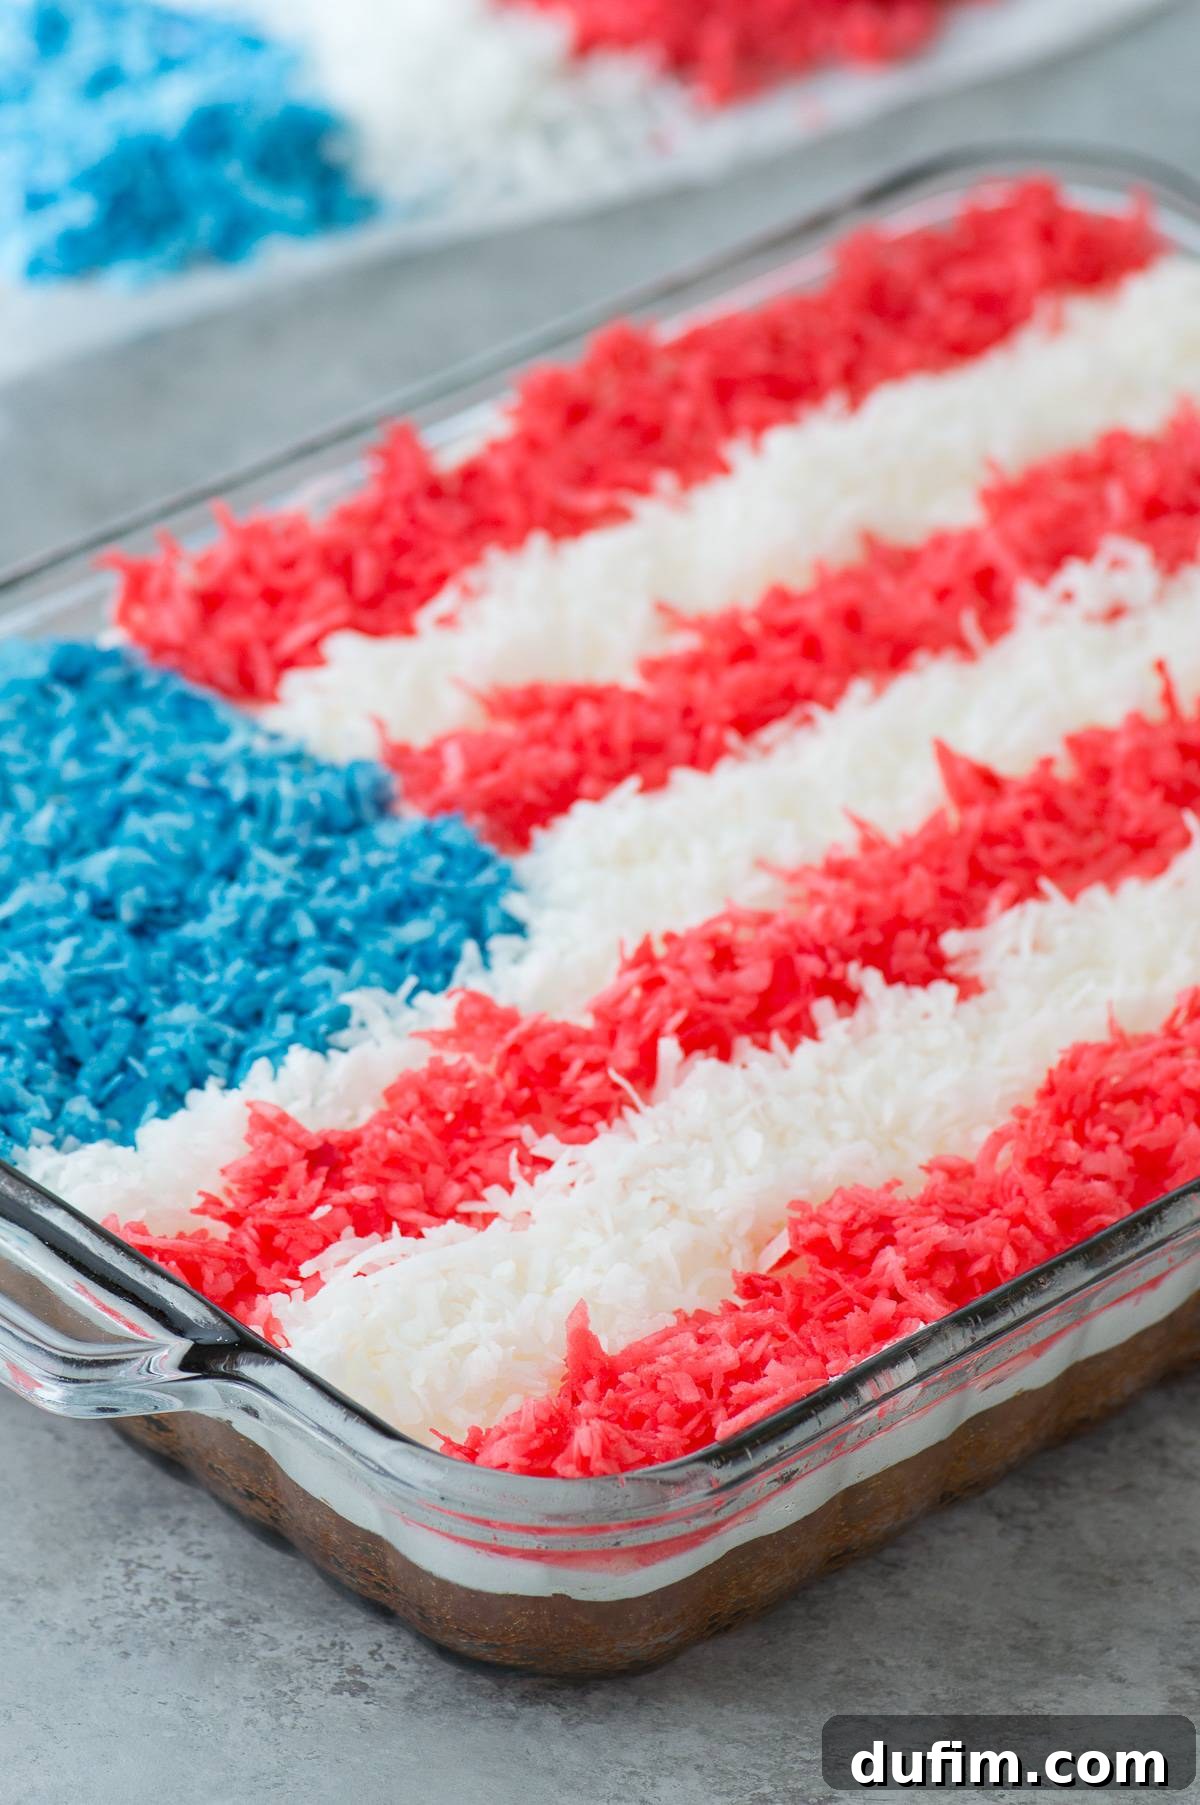
Bake a Spectacular American Flag Cake for Your 4th of July Celebration
Get ready to impress your guests this Independence Day with a truly show-stopping dessert: a homemade American Flag Cake! This festive treat is not only incredibly easy to assemble but also offers a delightful burst of patriotic colors and flavors. Our recipe guides you through creating a moist, flavorful cake base, topping it with a light, airy whipped cream, and then decorating it with vibrant red, white, and blue shredded coconut to perfectly mimic the Stars and Stripes. It’s the ideal centerpiece for any 4th of July barbecue, Memorial Day picnic, or any occasion calling for a touch of American pride.
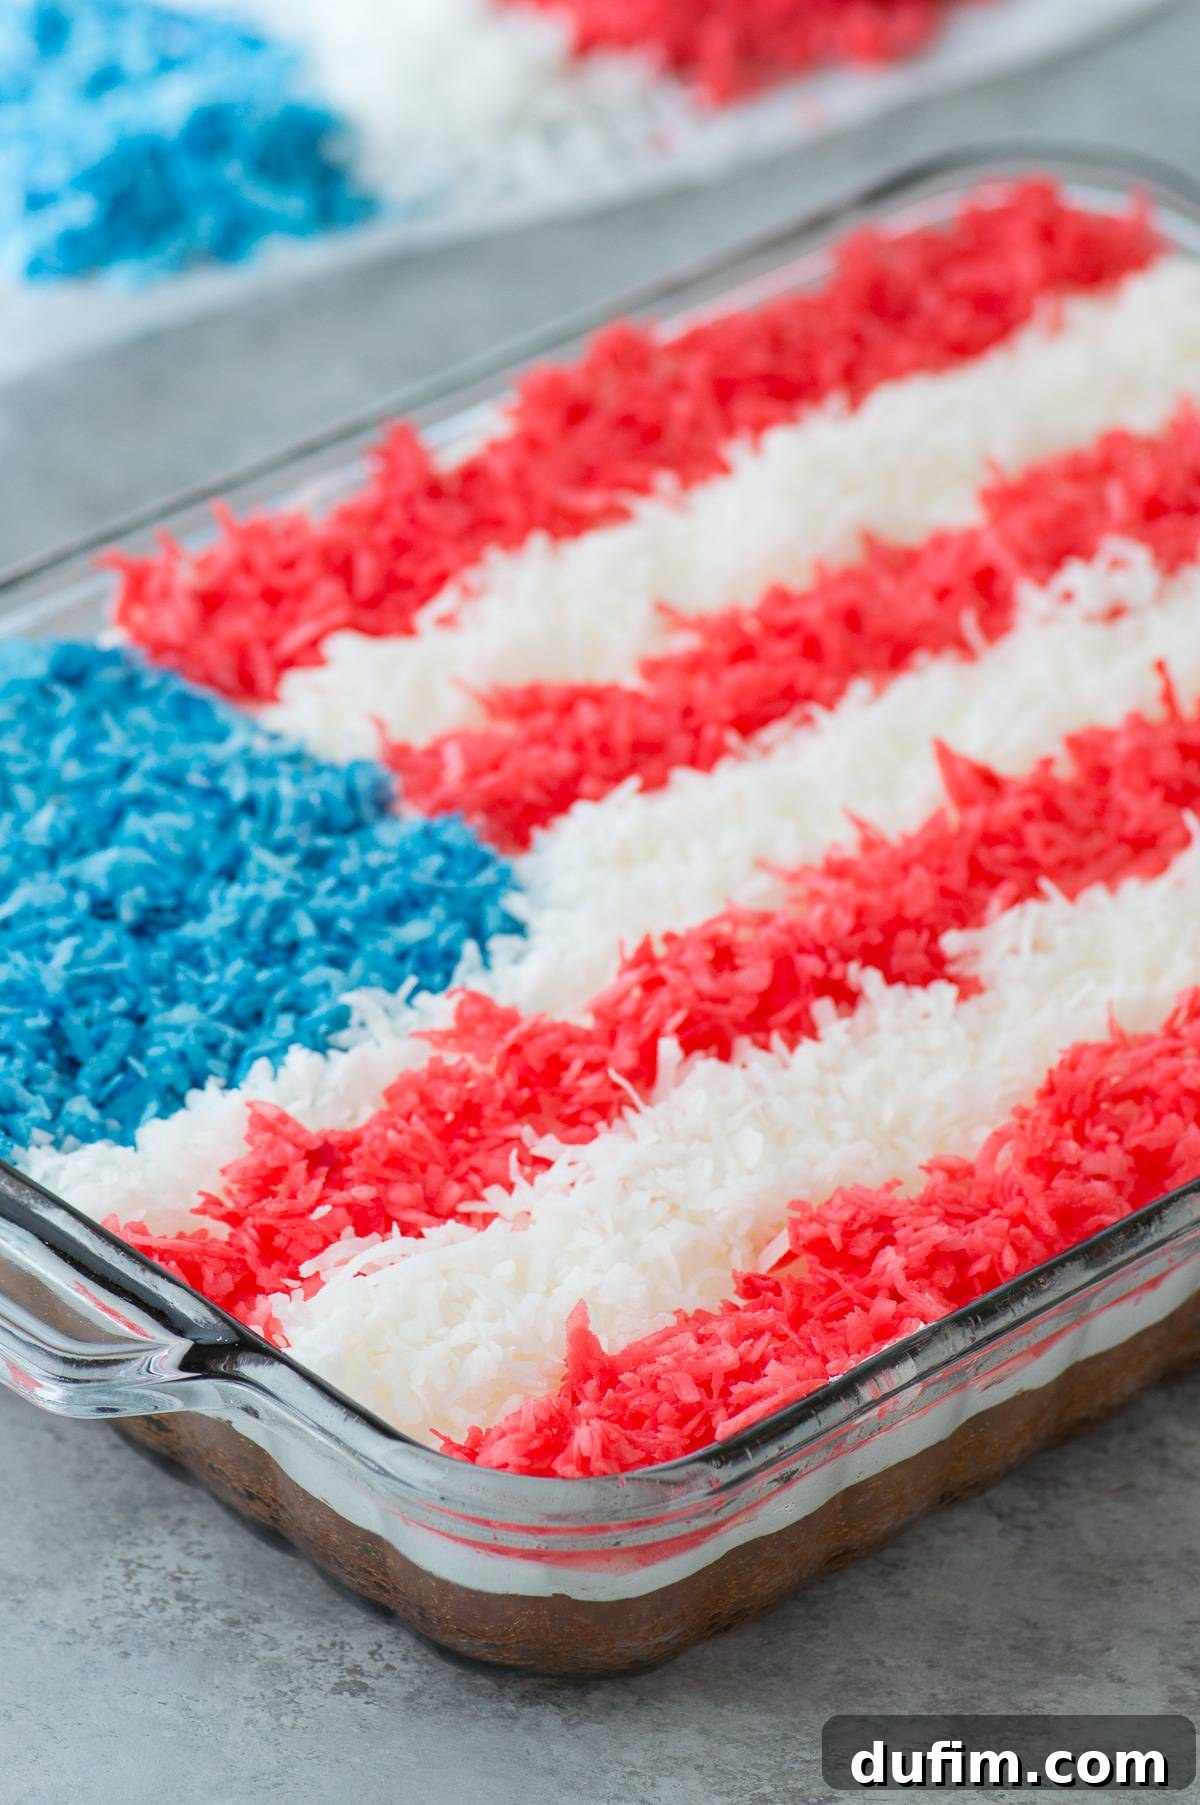
The beauty of this American Flag Cake lies in its simplicity and versatility. While we love a rich coconut sheet cake to complement the coconut topping, you can easily adapt this recipe to suit your favorite cake flavor. The core elements remain consistent: a sturdy 9×13 inch cake, luscious whipped topping, and beautifully colored shredded coconut to form the iconic flag design. Let’s dive into how to create this patriotic masterpiece!
Choose Your Perfect Cake Base: Beyond Coconut!
For this recipe, we’ve opted for a delightful coconut sheet cake baked in a classic 9×13 inch pan. The subtle, sweet flavor of coconut in the cake pairs wonderfully with the textural richness of the shredded coconut topping, creating a harmonious and truly tropical-inspired patriotic dessert. However, the world of cake flavors is vast, and you have endless options to customize your American Flag Cake. The key is to choose a cake that holds its structure well and provides a delicious foundation for the vibrant decoration.
Looking for other delicious cake flavors? Consider these fantastic alternatives that will also make a wonderful base for your patriotic flag cake:
- Bright Key Lime Cake: Its zesty and refreshing flavor offers a fantastic contrast to the sweet topping, perfect for summer gatherings.
- Sweet Orange Cake: A sunny, citrusy cake that brings a delightful aroma and a tender crumb.
- Tangy Lemon Cake: The bright notes of lemon will add a refreshing twist, especially appealing on a warm day.
- Tropical Pineapple Cake: For another taste of the tropics, a pineapple cake would be a fantastic, moist choice.
- Fruity Strawberry Cake: Incorporating fresh strawberry flavor into the cake itself can enhance the red theme beautifully.
- Classic Chocolate Cake: A beloved classic, chocolate cake provides a rich, comforting base that everyone will enjoy.
- Versatile Vanilla Cake: A simple yet elegant choice, vanilla cake allows the coconut and whipped topping flavors to truly shine.
No matter which flavor you choose, ensure your cake is completely cooled before frosting and decorating to prevent melting and sliding of your beautiful flag design. This versatility ensures there’s a flavor to suit everyone’s preferences at your patriotic celebration!
The Perfect Topping: Cool Whip or Homemade Whipped Cream
When it comes to the frosting for our American Flag Cake, simplicity and lightness are key. The rich flavors of the cake and the sweetness of the coconut topping are perfectly balanced by a delicate and airy frosting. For ultimate ease and stability, we recommend using a store-bought whipped topping like Cool Whip. Its consistent texture and ability to hold shape make it a fantastic choice for decorating, especially in warmer weather.
However, if you prefer a homemade touch, homemade whipped cream is an excellent alternative. To elevate its flavor, try adding a splash of vanilla extract or a hint of vanilla paste. While homemade whipped cream is undeniably delicious, it tends to be less stable than Cool Whip, especially if the cake will be sitting out for an extended period. If opting for homemade, ensure your cake is thoroughly chilled before spreading the whipped cream, and consider serving it shortly after assembly or keeping it refrigerated until serving time for best results. Both options provide a beautiful white canvas for your red and blue coconut!
Essential Ingredients for Your American Flag Cake
Creating this stunning patriotic dessert requires a few key ingredients. We’ll divide them into two categories: those for our delicious coconut cake base and those for the vibrant, festive topping. Understanding the role of each ingredient ensures baking success and a truly delicious outcome.
For the Moist Coconut Cake:
- All-Purpose Flour: The fundamental building block, providing structure to our cake. Properly measured flour is crucial for a tender crumb.
- Baking Powder: Our leavening agent, responsible for creating that wonderful rise and light, airy texture. Ensure yours is fresh for optimal lift!
- Salt: A small but mighty ingredient that balances the sweetness, enhances all the other flavors, and brings out the depth of the coconut.
- Unsalted Butter (Room Temperature): Contributes richness, tenderness, and moisture to the cake. Using unsalted butter gives you control over the overall salt content. Room temperature butter creams better with sugar, creating a light texture.
- Granulated Sugar: Provides sweetness, moisture, and aids in browning, giving the cake a lovely golden hue.
- Large Eggs (Room Temperature): Act as a binder, adding structure, richness, and helping to emulsify the batter for a smooth texture. Room temperature eggs combine more easily with other ingredients.
- Coconut Extract: Infuses the cake with that distinct, delightful coconut flavor, making it a perfect match for the topping.
- Cream of Coconut: This is a key ingredient for intense coconut flavor and incredible moisture, resulting in a wonderfully tender cake. It’s thicker and sweeter than coconut milk.
For the Patriotic Topping:
- Cool Whip (or Homemade Whipped Cream): The fluffy, white base for your flag design. It provides a cool, light contrast to the cake.
- Shredded Coconut: The star of our flag design! We’ll divide and dye this into red and blue. Sweetened shredded coconut generally works best for flavor and texture.
- Red and Blue Food Coloring: Essential for transforming plain coconut into the vibrant colors of the American flag. Liquid or gel food coloring can be used, with liquid often easier for even coating of shredded coconut.
How to Dye Shredded Coconut for Vibrant Colors
Achieving those striking red and blue colors for your American Flag Cake is surprisingly simple! While both liquid and gel food colorings can be used, many bakers find that the more liquid type of food coloring provides a more even and effortless coating for shredded coconut, as it distributes more easily without clumping. Here’s a quick guide to getting perfectly colored coconut:
- Divide the Coconut: Separate your shredded coconut into two portions. You’ll typically need more red coconut for the stripes than blue for the stars section. For this recipe, about 1/2 cup for blue and 1 1/2 cups for red works well.
- Bag It Up: Place one portion of coconut (e.g., the amount for blue) into a sturdy, sealable plastic bag (like a Ziploc bag).
- Add Coloring: Add a few drops of your desired food coloring to the bag. Start with a small amount and add more gradually to achieve your preferred shade. Remember, a little goes a long way, especially with concentrated gel colors!
- Shake and Distribute: Seal the bag, ensuring there’s some air inside to allow the coconut to move freely. Vigorously shake and massage the bag, tumbling the coconut until the color is evenly distributed throughout. This usually takes about 30-60 seconds. If needed, add more food coloring a drop at a time and repeat shaking.
- Repeat for Second Color: Transfer the dyed coconut to a plate or baking sheet to dry slightly while you repeat the process with the second color (e.g., red) in a clean bag.
- Drying Tip: For best results, spread the dyed coconut in a thin layer on a baking sheet lined with parchment paper for a few minutes to air dry. This helps prevent the colors from bleeding when placed on the whipped topping.
This method ensures beautiful, evenly colored coconut that will make your flag design pop!
Step-by-Step Guide: Assembling Your American Flag Cake
Once your delicious coconut cake is baked and completely cooled, and your vibrant red and blue shredded coconut is ready, it’s time for the most exciting part: assembling your patriotic masterpiece! This process is straightforward and fun, allowing your creativity to shine.
- Prepare the Canvas: Ensure your 9×13 inch cake is completely cooled to room temperature. This is crucial to prevent the whipped topping from melting and sliding.
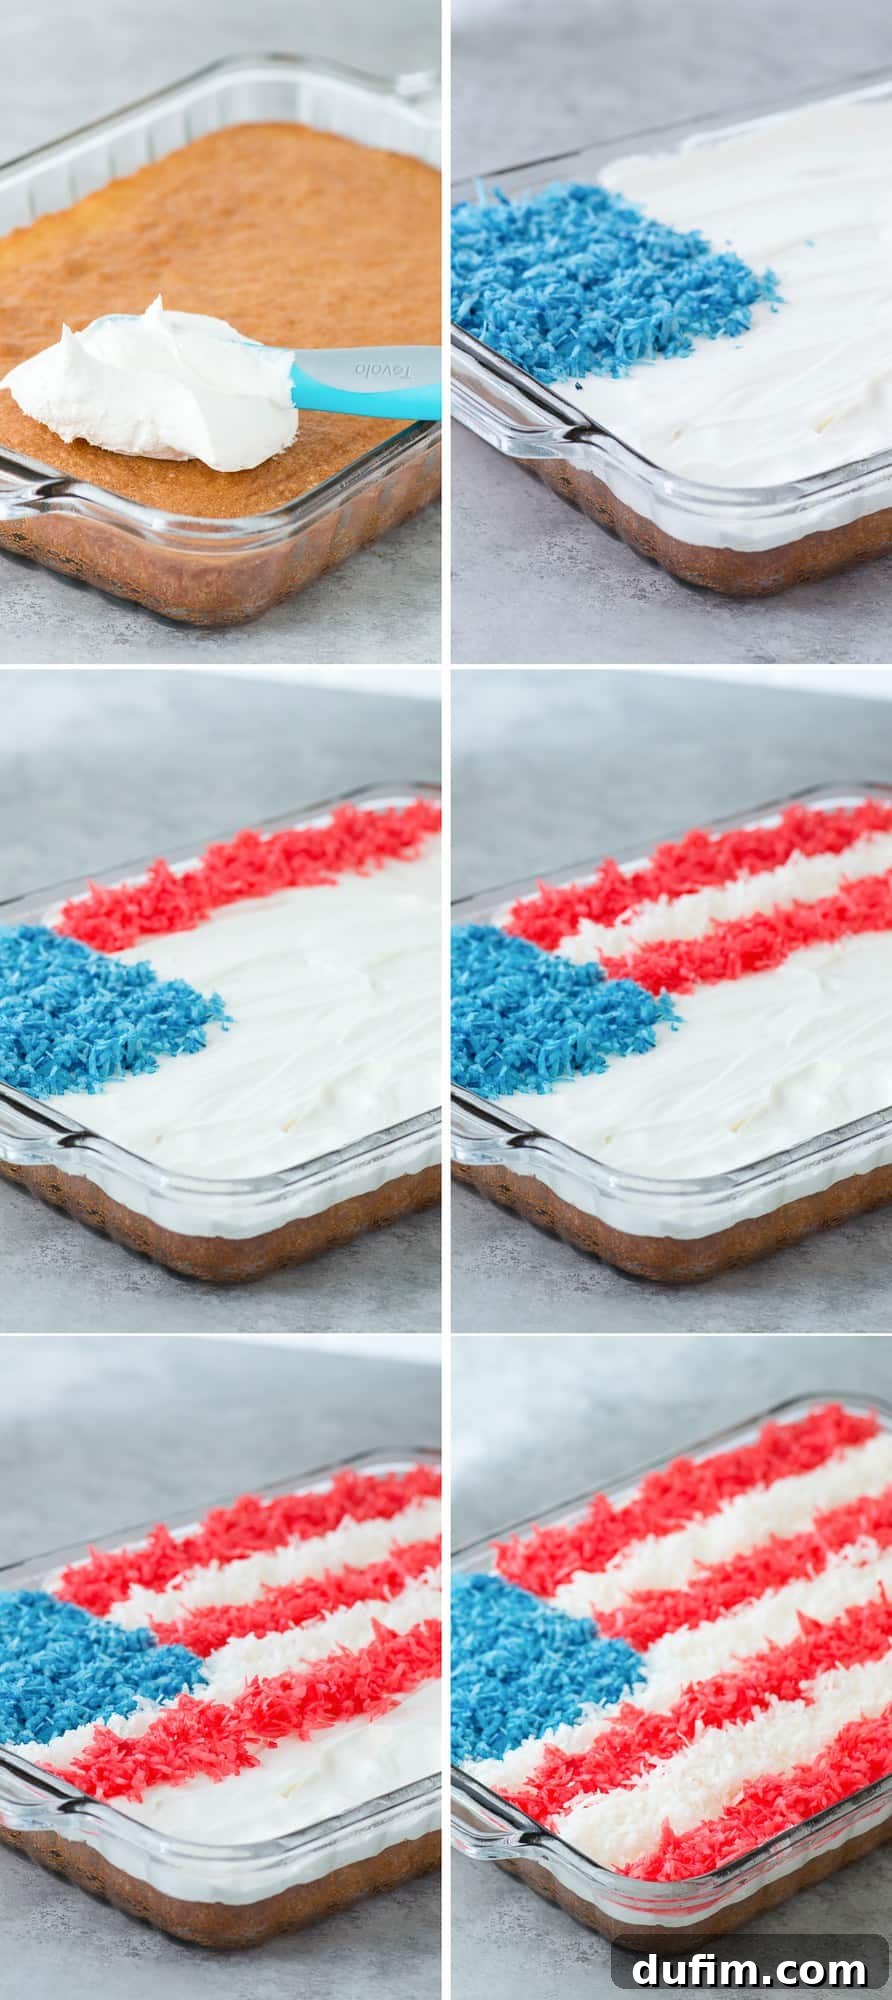
- Apply the Frosting Base: Using a spatula or an offset icing knife, evenly spread the Cool Whip (or homemade whipped cream) over the entire top surface of the cooled cake. Aim for a smooth, consistent layer that covers the cake entirely, creating a pristine white canvas for your flag.
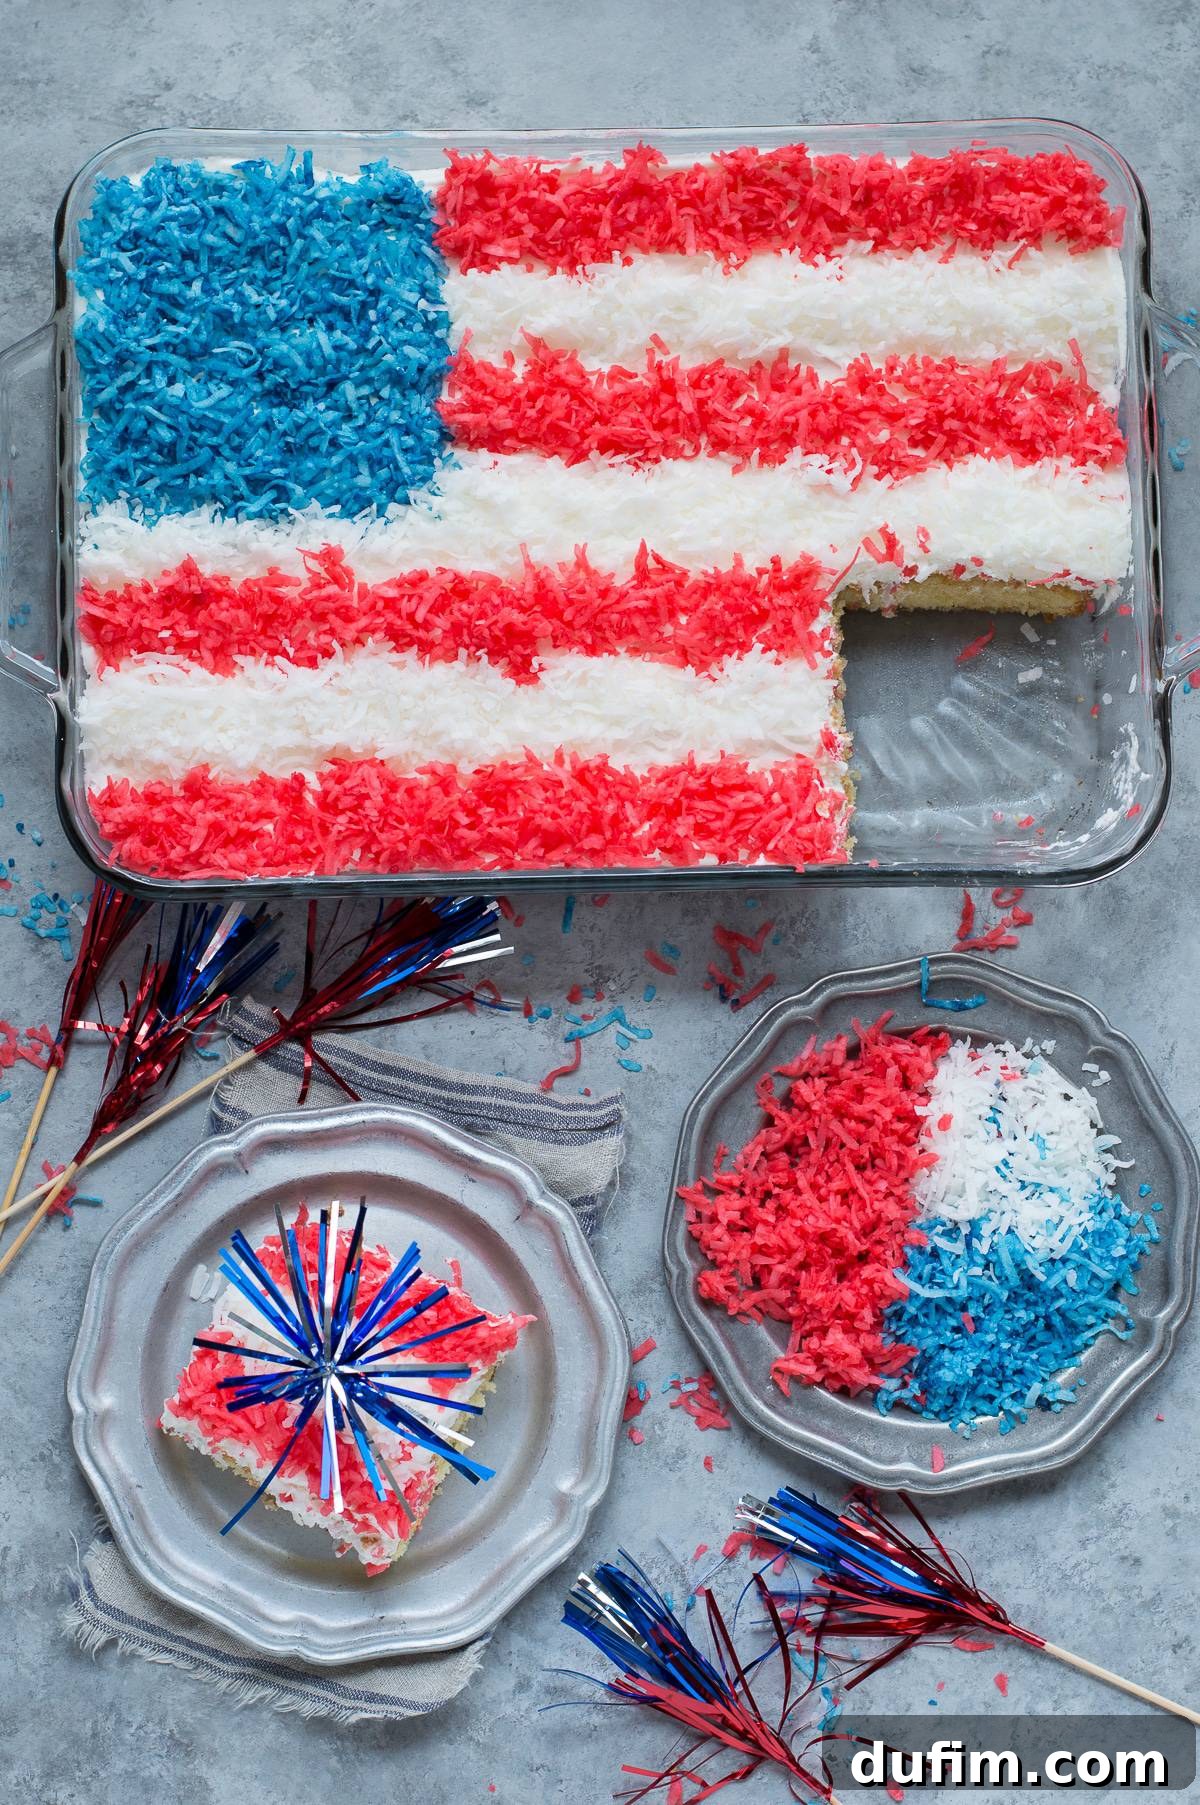
- Create the Blue Field (Union): Take your blue-colored shredded coconut. In the upper left-hand corner of the cake, gently sprinkle and arrange the blue coconut to form a large square or rectangle. This represents the union field of stars on the American flag. You can eyeball the proportions, adding more coconut and gently shaping it with your fingers or the back of a spoon until it looks proportional to the rest of the cake, typically covering about a quarter of the cake’s surface area.
- Begin the Red Stripes: Next, it’s time for the stripes. Starting immediately below the blue field, create your first stripe using the red-colored shredded coconut. Gently sprinkle it in a straight line, extending the full width of the cake (from the edge of the blue field to the right edge of the cake). Use a light touch to keep your lines clean.
- Add the White Stripes: After your first red stripe, leave an equal-sized gap for the natural white of the whipped topping to show through, forming your first white stripe.
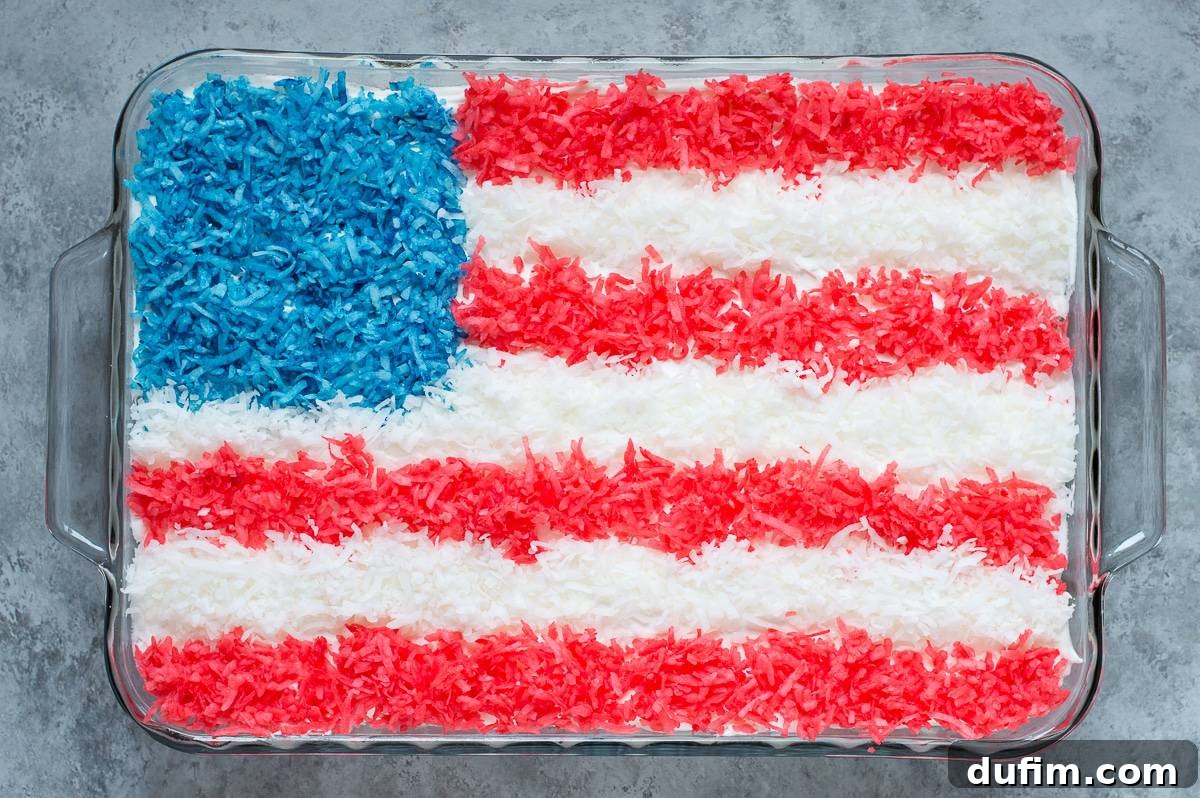
- Alternate Red and White Stripes: Continue alternating between red-colored coconut stripes and the visible white whipped topping stripes. The standard American flag has 13 stripes, but on a cake, you’ll typically aim for 7 stripes (4 red, 3 white) to fill the remaining space below and beside the blue field. You should start and end with red stripes for the most authentic look in this arrangement. So, the sequence will be: Red – White – Red – White – Red – White – Red.
- Final Touches: Step back and admire your creation! Make any minor adjustments to the stripes or blue field to ensure they look neat and proportional. If desired, you can use a clean, dry paintbrush to gently sweep away any stray coconut flakes for sharper lines.
Your magnificent American Flag Cake is now complete! It’s ready to be the star of your celebration.
Planning Your Baking Day: Total Time Required
Baking and decorating this American Flag Cake is a rewarding process that requires a few distinct steps. While none of the individual steps are overly complicated, proper planning ensures a stress-free experience, especially the crucial cooling time. Here’s a breakdown of the estimated time commitment:
- Prep the Batter: Approximately 10-15 minutes. This includes gathering ingredients, measuring, and mixing the wet and dry components.
- Dye the Coconut: A quick task, about 5 minutes. This involves separating the coconut and shaking it with food coloring in bags.
- Bake the Cake: 30-35 minutes. Baking time can vary slightly depending on your oven, so always test for doneness.
- Cool the Cake: At least 1 hour, but often longer. This is the most critical step. The cake must be completely cool to the touch before frosting. Rushing this step will result in a melted, messy topping. For best results, you can even bake the cake the day before and let it cool overnight.
- Frost and Assemble the Cake: Approximately 10-15 minutes. Spreading the Cool Whip and arranging the colored coconut is a relatively quick and enjoyable process.
Total Estimated Time: Approximately 2 hours (with 1 hour of passive cooling). This makes it a perfect project to spread out over an afternoon or even prepare the cake base a day in advance!
Precision in Baking: How to Properly Measure Flour
Accurate ingredient measurement is a cornerstone of successful baking, and flour is particularly sensitive. Improperly measured flour can lead to a dry, dense, or crumbly cake, completely altering the intended texture. To ensure your American Flag Cake turns out perfectly moist and tender, follow the “spoon and level” method for measuring flour:
- Fluff the Flour: Before you begin, use a spoon or whisk to lightly fluff the flour in its container. Flour often settles and compacts, especially in the bag or canister.
- Spoon into the Measuring Cup: Gently spoon the flour into your dry measuring cup. Do not scoop the measuring cup directly into the flour bag, as this compacts the flour and can add up to 25% more flour than intended.
- Level Off: Once the flour is mounded above the rim of the measuring cup, use the flat side of a butter knife or a straight edge to level off the excess flour. Simply slide the knife across the top of the cup, allowing the excess to fall back into the bag.
- Do NOT Pack: Resist the urge to tap the measuring cup or pack the flour down. The goal is a light, aerated measurement.
By using this method, you ensure consistency in your baking results, leading to perfectly textured cakes every time. Remember, baking is a science, and precision makes all the difference!
Creating a Gluten-Free American Flag Cake
For those with gluten sensitivities or dietary preferences, you’ll be delighted to know that this American Flag Cake recipe adapts beautifully to be gluten-free! You can still enjoy a wonderfully moist and flavorful patriotic dessert without compromising on taste or texture. The key is selecting the right gluten-free flour blend.
We’ve had great success using high-quality, all-purpose gluten-free flour blends. Brands like King Arthur Gluten Free Measure for Measure Flour are formulated to be a direct 1:1 substitute for traditional all-purpose wheat flour in most recipes, making the conversion incredibly simple. These blends often contain a mix of different gluten-free flours (like rice flour, tapioca starch, potato starch) and sometimes a binder like xanthan gum, which mimics the elasticity of gluten.
To make your cake gluten-free:
- Choose a Reputable Blend: Opt for a “measure for measure” or “1:1” gluten-free all-purpose flour blend. These are specifically designed for easy substitution in recipes like this one.
- Direct Substitution: Simply substitute the regular all-purpose flour with an equal amount (by volume or weight) of your chosen gluten-free flour blend. No other adjustments to the liquid or leavening agents are typically needed when using a good 1:1 blend.
- Follow Instructions: Proceed with the rest of the recipe directions exactly as stated. The mixing methods, baking time, and assembly process remain the same.
You’ll find that the resulting gluten-free cake is just as tender, moist, and delicious, allowing everyone to enjoy this festive treat.
Serving and Storing Your Patriotic Masterpiece
Once your American Flag Cake is fully assembled and looking spectacular, it’s ready to be the star of your celebration! For optimal freshness and flavor, this cake is best served the same day it’s assembled. The cool, fluffy whipped topping and vibrant coconut are at their peak when freshly arranged.
Serving Suggestions:
- Serve chilled straight from the refrigerator for a refreshing dessert, especially on a warm day.
- Garnish the serving platter with fresh berries (strawberries, blueberries) for an extra pop of color and freshness.
- Pair with a scoop of vanilla ice cream or a side of extra whipped cream for an even more indulgent experience.
Storage Tips:
- Refrigeration: Because of the whipped topping, any leftover flag cake must be stored in the refrigerator.
- Airtight Container: Place the cake in an airtight container or cover it tightly with plastic wrap to prevent it from drying out and absorbing odors from the fridge.
- Shelf Life: Stored properly, the cake will remain delicious for 2-3 days. Note that the coconut colors might slightly bleed or soften over time, but the flavor will still be fantastic.
- Freezing: While the unfrosted cake base can be frozen for up to a month, we do not recommend freezing the assembled flag cake, as the whipped topping and dyed coconut texture can degrade upon thawing.
Enjoy every delightful bite of your festive American Flag Cake!
More Festive 4th of July Desserts
If you’re looking to expand your patriotic dessert spread, we’ve got more delicious and visually appealing ideas that complement the American Flag Cake perfectly. These treats are sure to bring even more red, white, and blue cheer to your Independence Day celebrations:
- 4th of July Fruit & Jello Cups: Layers of colorful jello and fresh fruit create a refreshing and easy-to-serve dessert.
- American Flag Donuts: A fun and quick alternative, these decorated donuts are perfect for a festive breakfast or a casual party snack.
- 4th of July Ice Cream Pie: A cool and creamy dessert that’s simple to make ahead, ideal for hot summer days.
- Fruit Pizza: A beautifully colorful and healthier option, topped with an array of fresh seasonal berries and a sweet cream cheese frosting.
These desserts, alongside your magnificent American Flag Cake, will ensure your 4th of July spread is both delicious and unforgettable!
Rate this recipe!
American Flag Coconut Cake
Beth
20 minutes
35 minutes
1 hour (for cooling)
1 hour 55 minutes
20 servings
Equipment
-
Glass Mixing Bowl
-
Electric Mixer (handheld or stand mixer)
-
9×13 inch glass baking pan
-
Rubber Spatula
-
Large Ziploc Bags
Ingredients
Coconut Cake
- 1 ½ cups (180g) all-purpose flour
- 2 ¼ tsp baking powder
- ¼ tsp salt
- 1 cup (226g) unsalted butter, 2 sticks, room temperature
- 1 cup (198g) granulated sugar
- 4 large eggs, room temperature
- ¾ tsp coconut extract flavor
- ⅓ cup (95g) cream of coconut*
Topping
- 8 oz (226g) cool whip, thawed
- Shredded coconut, about 3 & 1/2 cups total (2 cups white, 1 1/2 cups red, 1/2 cup blue)
- Red food coloring
- Blue food coloring
Instructions
- Prepare for Baking: Preheat your oven to 350º F (175°C). Lightly grease and flour (or spray with non-stick cooking spray) a 9×13 inch baking pan.
- Combine Dry Ingredients: In a medium mixing bowl, whisk together the all-purpose flour, baking powder, and salt until well combined. Set aside.
- Cream Wet Ingredients: In a large mixing bowl, using an electric mixer, cream together the softened unsalted butter and granulated sugar until light and fluffy (about 2-3 minutes).
- Add Eggs and Extract: Beat in the large eggs one at a time, mixing well after each addition. Stir in the coconut extract until just combined.
- Incorporate Cream of Coconut: Gently fold in the cream of coconut by hand using a spatula. Mix until fully incorporated but do not overmix.
- Combine Dry and Wet: Gradually add the dry flour mixture to the wet ingredients in two additions. Begin by adding about half of the flour mixture, gently shaking it over the wet ingredients. Fold the mixture by hand with a spatula until no streaks of flour remain. Repeat with the second half of the flour mixture, folding gently and scraping the sides and bottom of the bowl to ensure everything is incorporated. Be careful not to overmix, which can lead to a tough cake.
- Bake the Cake: Pour the prepared batter evenly into your 9×13 inch pan. Bake for 30-35 minutes, or until a wooden toothpick inserted into the center of the cake comes out clean.
- Cool Completely: Allow the cake to cool in the pan on a wire rack for at least 1 hour, or until it reaches room temperature. Cooling completely is essential before frosting.
- Dye Blue Coconut: Place about ½ cup of shredded coconut into a Ziploc bag. Add a few drops of blue food coloring. Seal the bag and shake vigorously until the coconut is evenly dyed. Set aside.
- Dye Red Coconut: Place about 1 ½ cups of shredded coconut into a separate Ziploc bag. Add red food coloring, starting with a few drops and adding more as needed to achieve your desired shade. Seal the bag and shake until the coconut is evenly dyed. Set aside.
- Frost the Cake: Once the cake is completely cool, use a spatula to evenly spread the thawed Cool Whip (or homemade whipped cream) over the entire top surface of the cake. This forms the white background for your flag.
- Add the Blue Field: Carefully sprinkle the blue-colored coconut into the upper left-hand corner of the cake, forming a square or rectangle. You can eyeball the size to make it proportional to your cake, typically covering about ¼ of the cake’s surface.
- Create Red and White Stripes: Next, create the stripes. Start immediately to the right of the blue field and directly below it. Begin by gently scattering a stripe of red-colored coconut. Follow this with a visible stripe of the white whipped topping, then another red stripe, then white, and so on. The sequence should be Red – White – Red – White – Red – White – Red to create a visually balanced flag pattern.
- Serve or Refrigerate: Serve your American Flag Cake immediately, or refrigerate it until ready to serve. For best appearance and taste, it is recommended to serve this cake on the same day it’s assembled.
Notes
Nutrition
| Carbohydrates: 31g
| Protein: 3g
| Fat: 17g
| Saturated Fat: 12g
| Polyunsaturated Fat: 1g
| Monounsaturated Fat: 3g
| Trans Fat: 1g
| Cholesterol: 63mg
| Sodium: 144mg
| Potassium: 92mg
| Fiber: 1g
| Sugar: 22g
| Vitamin A: 356IU
| Vitamin C: 1mg
| Calcium: 51mg
| Iron: 1mg
Nutrition Disclosure
All nutritional values are approximate and provided to the reader as a courtesy. Changing ingredients and/or quantities will alter the estimated nutritional calculations.
Like this recipe? We’d love to hear from you!
Share your thoughts and rating below.