
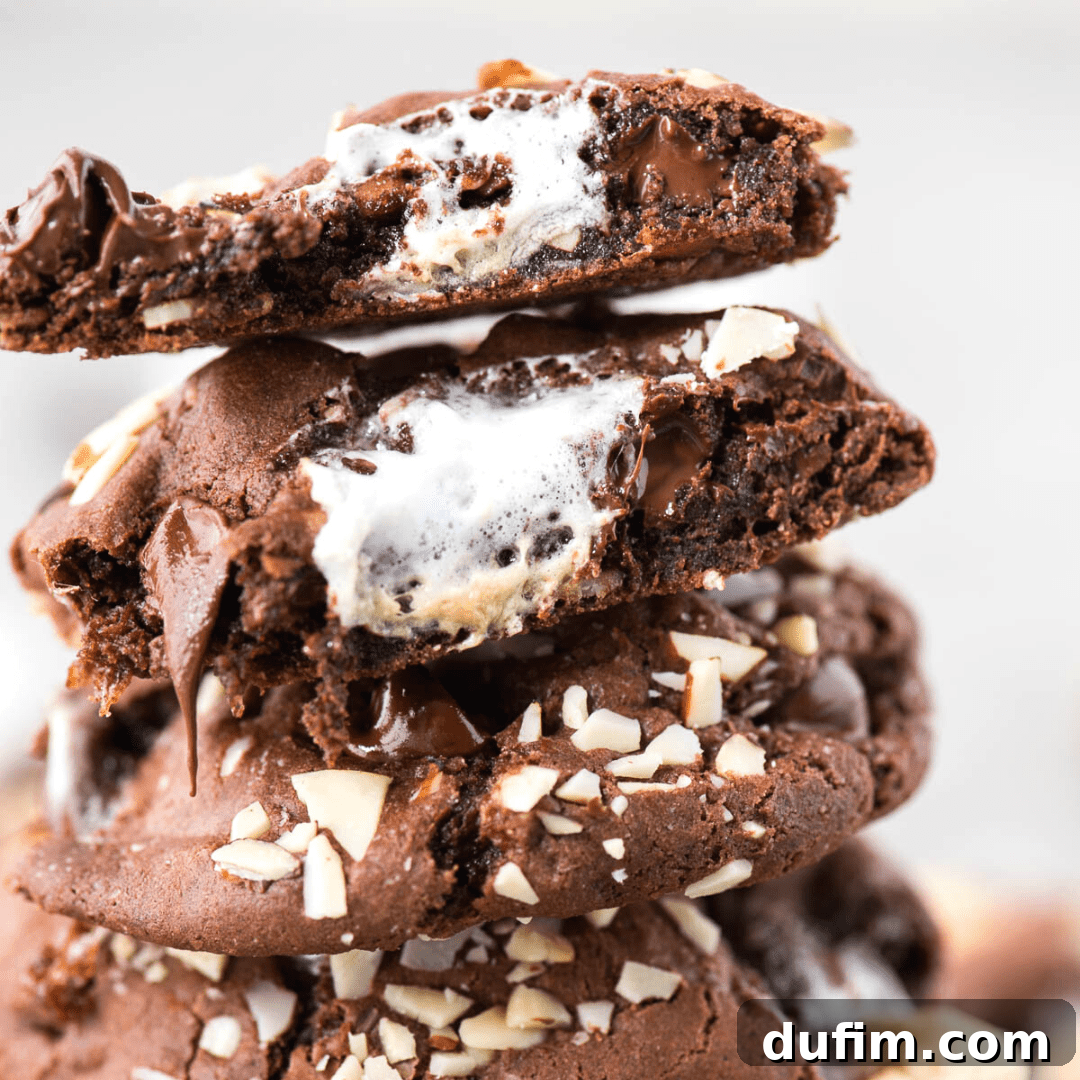
Irresistibly Soft & Chewy Rocky Road Cookies: Your New Favorite Dessert!
Imagine biting into a cookie that perfectly captures the magic of your favorite rocky road ice cream – a delightful blend of rich chocolate, satisfying crunch, and irresistible chewiness. These homemade Rocky Road Cookies are precisely that! Crafted with a decadent chocolate base, generously packed with toasted almonds, melty chocolate chips, and gooey marshmallows, they are a treat for all senses. Best of all? This incredible recipe requires no chilling time, meaning you can have a batch of these glorious cookies ready from start to finish in just about 30 minutes. Get ready to experience cookie perfection!
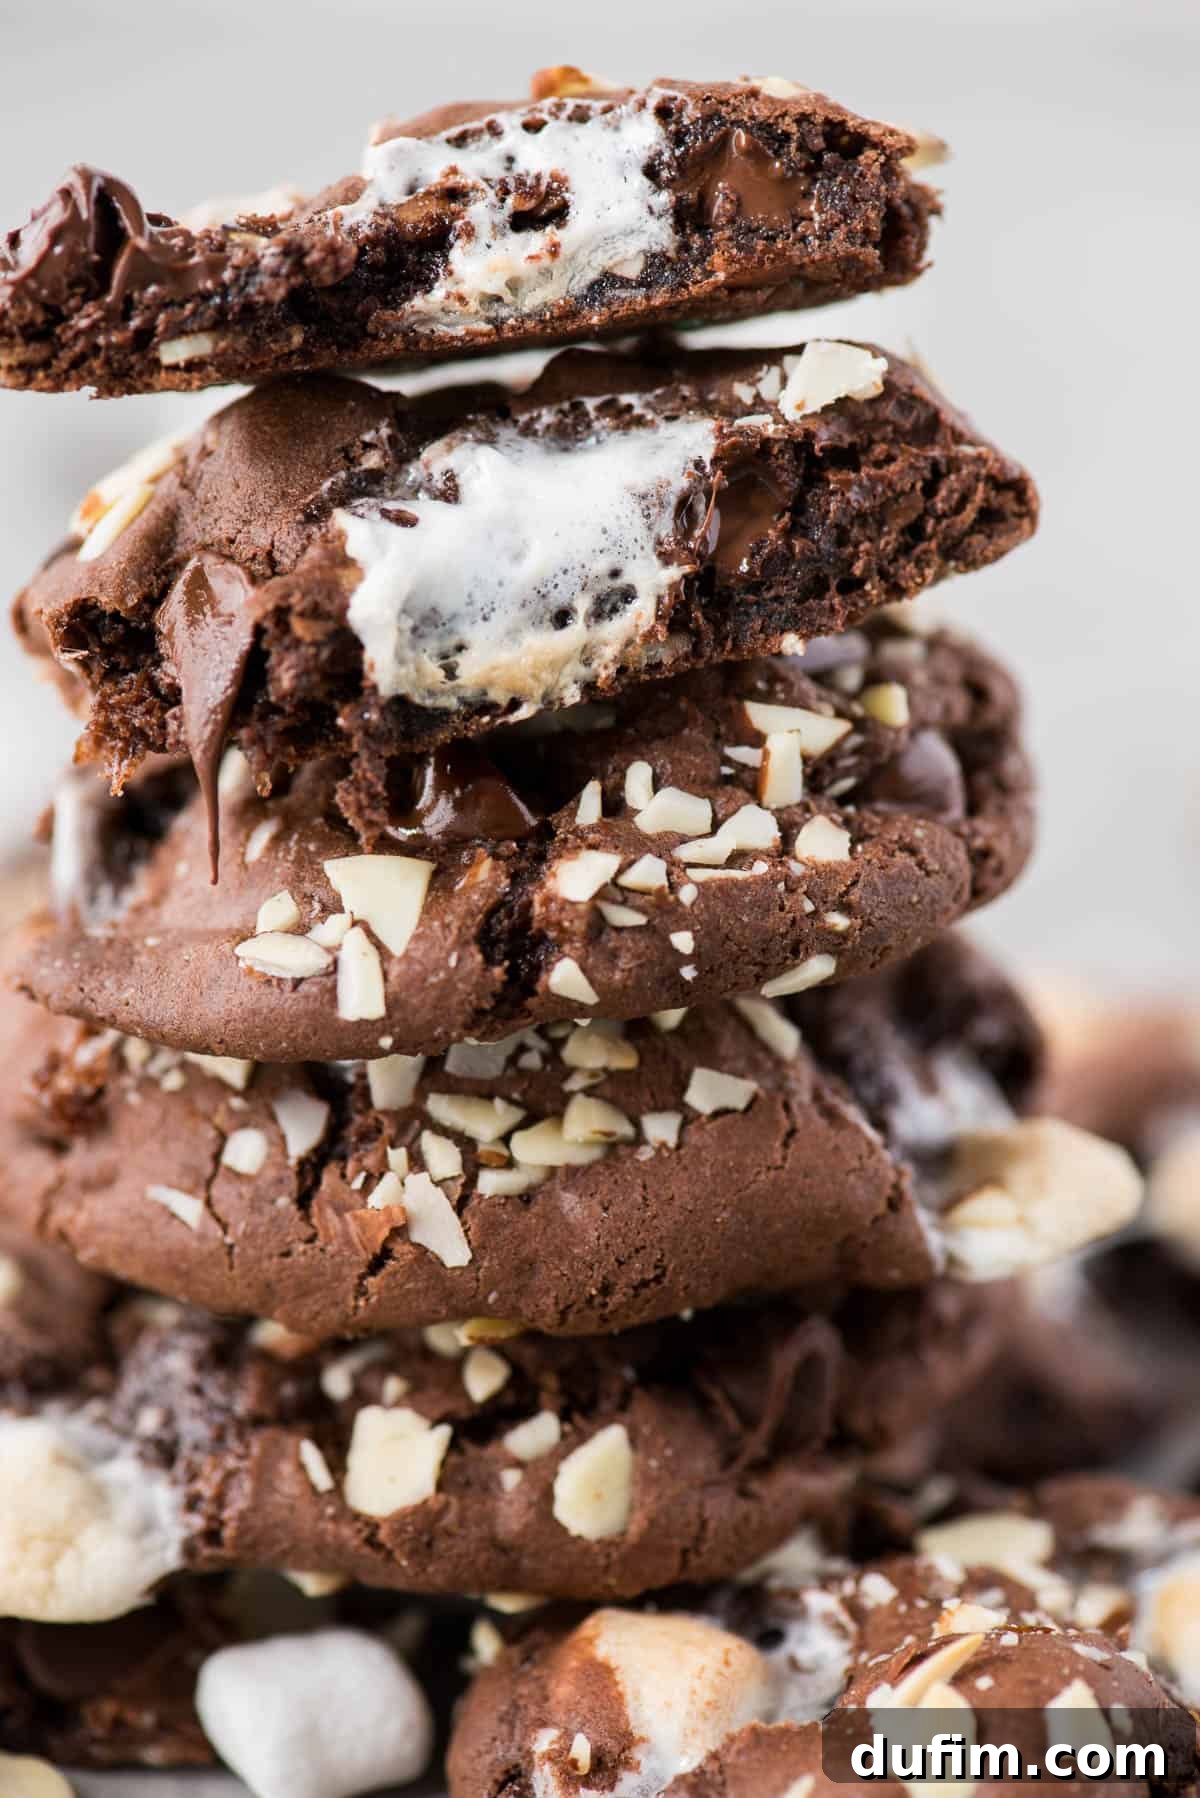
These were a hit! My husband even recommended them as ice cream sandwiches with vanilla bean ice cream. Yum!
-Adriana
What’s the Secret to Perfect Rocky Road Cookies?
The allure of Rocky Road Cookies lies in their faithful recreation of the classic ice cream flavor. Our recipe builds upon a rich, fudgy chocolate cookie base – think deep cocoa notes and a wonderfully tender texture. Into this delightful canvas, we fold in a trio of textural and flavorful superstars: crunchy almonds, pockets of melting chocolate chips, and, of course, the signature soft, gooey marshmallows. The contrast between the chewy cookie, crisp nuts, and airy marshmallows is what makes every bite an adventure. And if you’re anything like us, you’ll want extra marshmallows in every single cookie!
Making these cookies is an experience in itself. The aroma of baking chocolate and toasting nuts fills your kitchen, building anticipation for the moment they emerge from the oven, warm and inviting. Each ingredient plays a crucial role, from the quality of your cocoa powder, which dictates the depth of chocolate flavor, to the type of nuts, which adds a unique crunch and earthy undertone. We’ll guide you through each step to ensure your Rocky Road Cookies are nothing short of spectacular, mimicking the beloved ice cream in a portable, bite-sized form.
Choosing the Best Nuts for Your Rocky Road Cookies
Nuts are an essential component of rocky road, providing that satisfying crunch and earthy balance to the sweet chocolate and marshmallows. While traditional rocky road often features almonds, your cookies are a canvas for personal preference!
Our top recommendations for these chocolate rocky road cookies include:
- Almonds: Whether you choose chopped or sliced, almonds offer a subtle, buttery flavor and a delicate crunch that complements the chocolate beautifully. Toasting them lightly before adding them to the dough can enhance their flavor significantly.
- Peanuts: For a more classic, salty-sweet profile reminiscent of a candy bar, chopped or whole peanuts are an excellent choice. Their robust flavor stands up well to the rich chocolate.
- Walnuts: These provide a slightly bitter, earthy note and a softer crunch compared to almonds, adding another layer of complexity to your rocky road cookies. Chop them finely for even distribution.
But don’t feel limited! If you’re a fan of pecans, cashews, or even macadamia nuts, feel free to experiment. Just ensure they are chopped to an appropriate size for biting into a cookie. For an extra boost of flavor, consider toasting your chosen nuts lightly in a dry pan or oven before incorporating them into the dough. This simple step brings out their natural oils and deepens their taste, making your cookies even more irresistible.
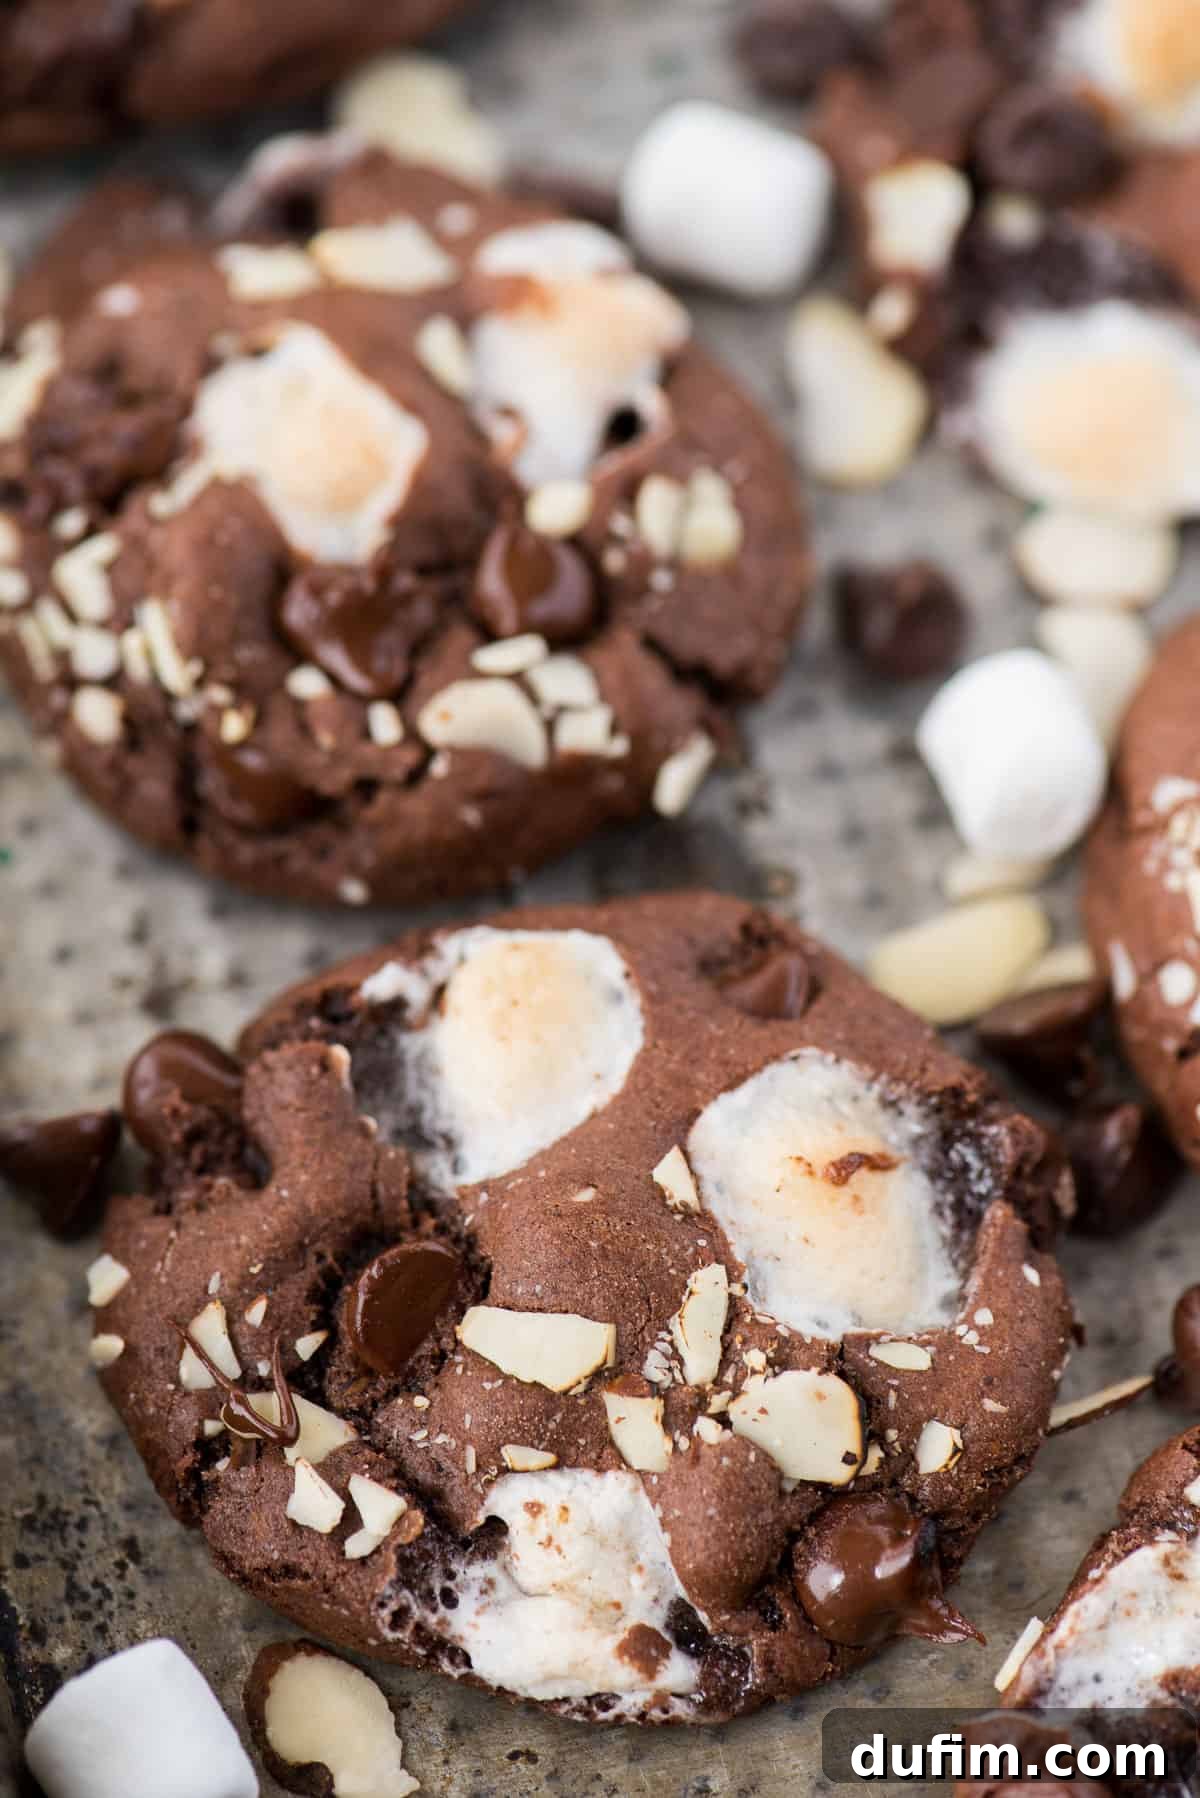
Mallow Bits vs. Mini Marshmallows: Which is Best for Your Cookies?
When it comes to the marshmallow component of your rocky road cookies, you have a couple of fantastic options, each offering a slightly different experience. The classic choice is, of course, mini marshmallows, but “mallow bits” also present an intriguing alternative.
Mini Marshmallows: These are the gold standard for that signature gooey, stretchy texture that melts beautifully into the cookie while baking. They create delightful pockets of sweetness that are incredibly satisfying. For the best results, we recommend pressing 3-4 mini marshmallows into the top of each cookie dough ball right before baking. This ensures they get perfectly toasted and gooey without completely disappearing into the dough. You can even add a few extra marshmallows to the cookies as soon as they come out of the oven, allowing the residual heat to gently soften them for an extra fresh burst of meltiness.
Mallow Bits (Dehydrated Marshmallows): Yes, you absolutely can use mallow bits! These are essentially tiny, crunchy marshmallows, often found in hot cocoa mixes or cereals like Lucky Charms. If you opt for mallow bits, we suggest mixing about 1 cup into the cookie dough directly. The key difference is that they won’t provide the same soft, gooey melt as fresh mini marshmallows. Instead, they’ll offer a fun, slightly crunchy texture and a concentrated burst of marshmallow flavor. While the texture won’t be identical, they are undeniably delicious and can be a fantastic way to add a unique twist to your rocky road cookie recipe, especially if you prefer less goo and more crunch.
Ultimately, the choice between mini marshmallows and mallow bits depends on your desired texture. Both will deliver fantastic flavor, but mini marshmallows are your go-to for gooeyness, while mallow bits offer a delightful, firmer chew.
Baking Delicious Gluten-Free Rocky Road Cookies
Good news for our gluten-sensitive and Celiac friends! This Rocky Road Cookie recipe is remarkably adaptable to gluten-free diets without sacrificing an ounce of flavor or texture. I’ve personally tested this recipe multiple times with both regular all-purpose flour and various gluten-free blends, consistently achieving awesome results. You don’t have to miss out on these delightful treats!
The key to successful gluten-free baking with this recipe lies in using the right flour blend. I highly recommend King Arthur’s Gluten Free Measure for Measure Flour. This particular blend is formulated to be a direct 1:1 substitute for traditional all-purpose flour in most recipes, making it incredibly convenient. You simply swap it out in the same quantity, and you’re good to go! Its balanced blend of gluten-free flours and starches helps mimic the structure and texture that gluten provides, resulting in soft, chewy cookies that everyone will love.
When baking with gluten-free flour, a few general tips can help ensure perfection:
- Measure Accurately: Gluten-free flours can be trickier than wheat flour. Use the “spoon and sweep” method (spoon flour into your measuring cup, then level it off with a straight edge) rather than scooping directly from the bag to avoid compacting the flour and using too much.
- Don’t Overmix: While gluten development isn’t an issue, overmixing can still lead to tough cookies by incorporating too much air or overworking starches. Mix just until combined.
- Rest the Dough (Optional but Recommended): Allowing gluten-free dough to rest for 15-30 minutes can help the flours absorb moisture more fully, leading to a better texture. While this recipe is designed to be no-chill, a short rest won’t hurt if you have the time.
- Watch for Doneness: Gluten-free cookies can sometimes brown a bit faster or appear done before they are. Look for slightly set edges and a still-soft center.
With these tips and the right flour, your gluten-free rocky road cookies will be every bit as delicious and satisfying as their traditional counterparts, making them a fantastic option for inclusive gatherings.

The Art of Making Visually Stunning Cookies
We all know taste is paramount, but let’s be honest: cookies that look as incredible as they taste are simply next level! Achieving that “bakery-quality” appearance for your Rocky Road Cookies is surprisingly easy and requires just one extra step in your baking process. This simple trick elevates your cookies from delicious to absolutely drool-worthy.
Here’s the golden rule for making your cookies look awesome:
Always add extra toppings to the outside of your cookie dough balls before baking.
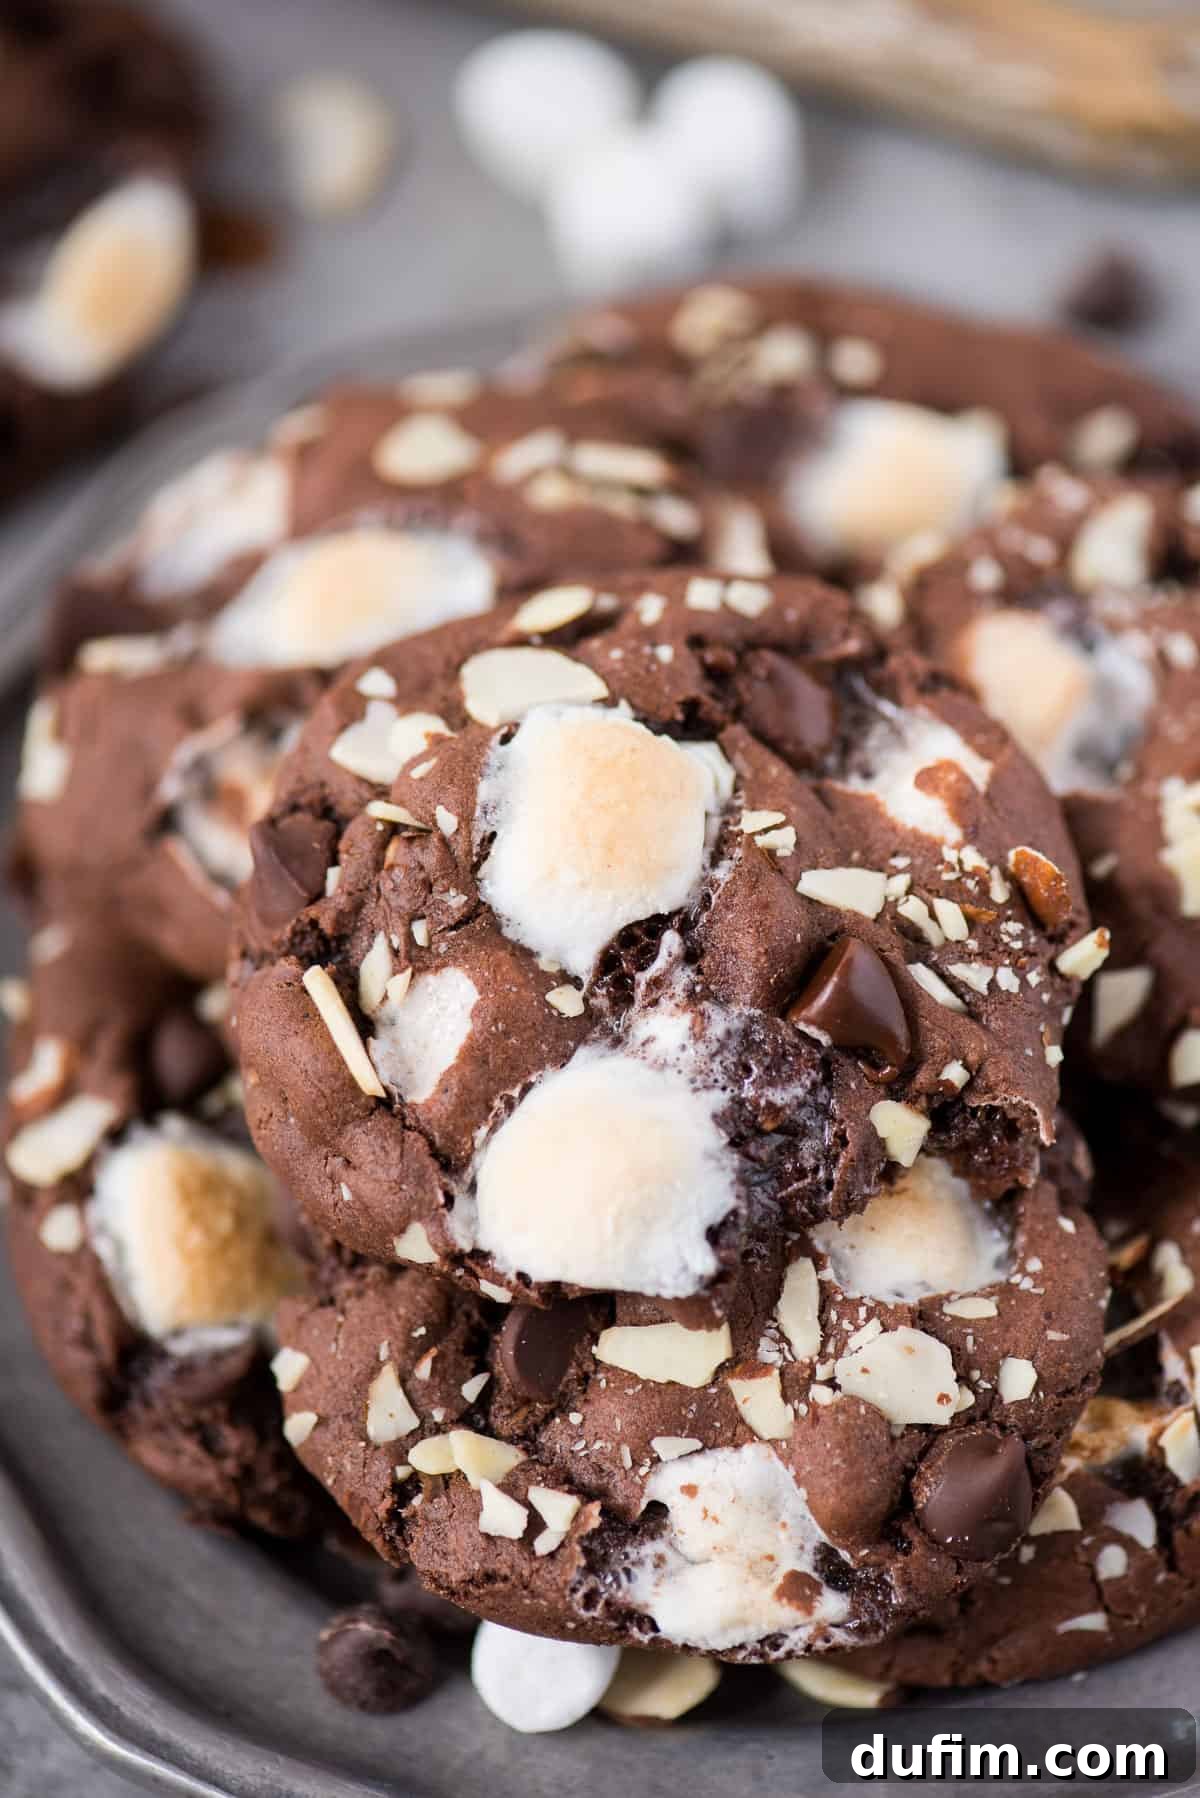
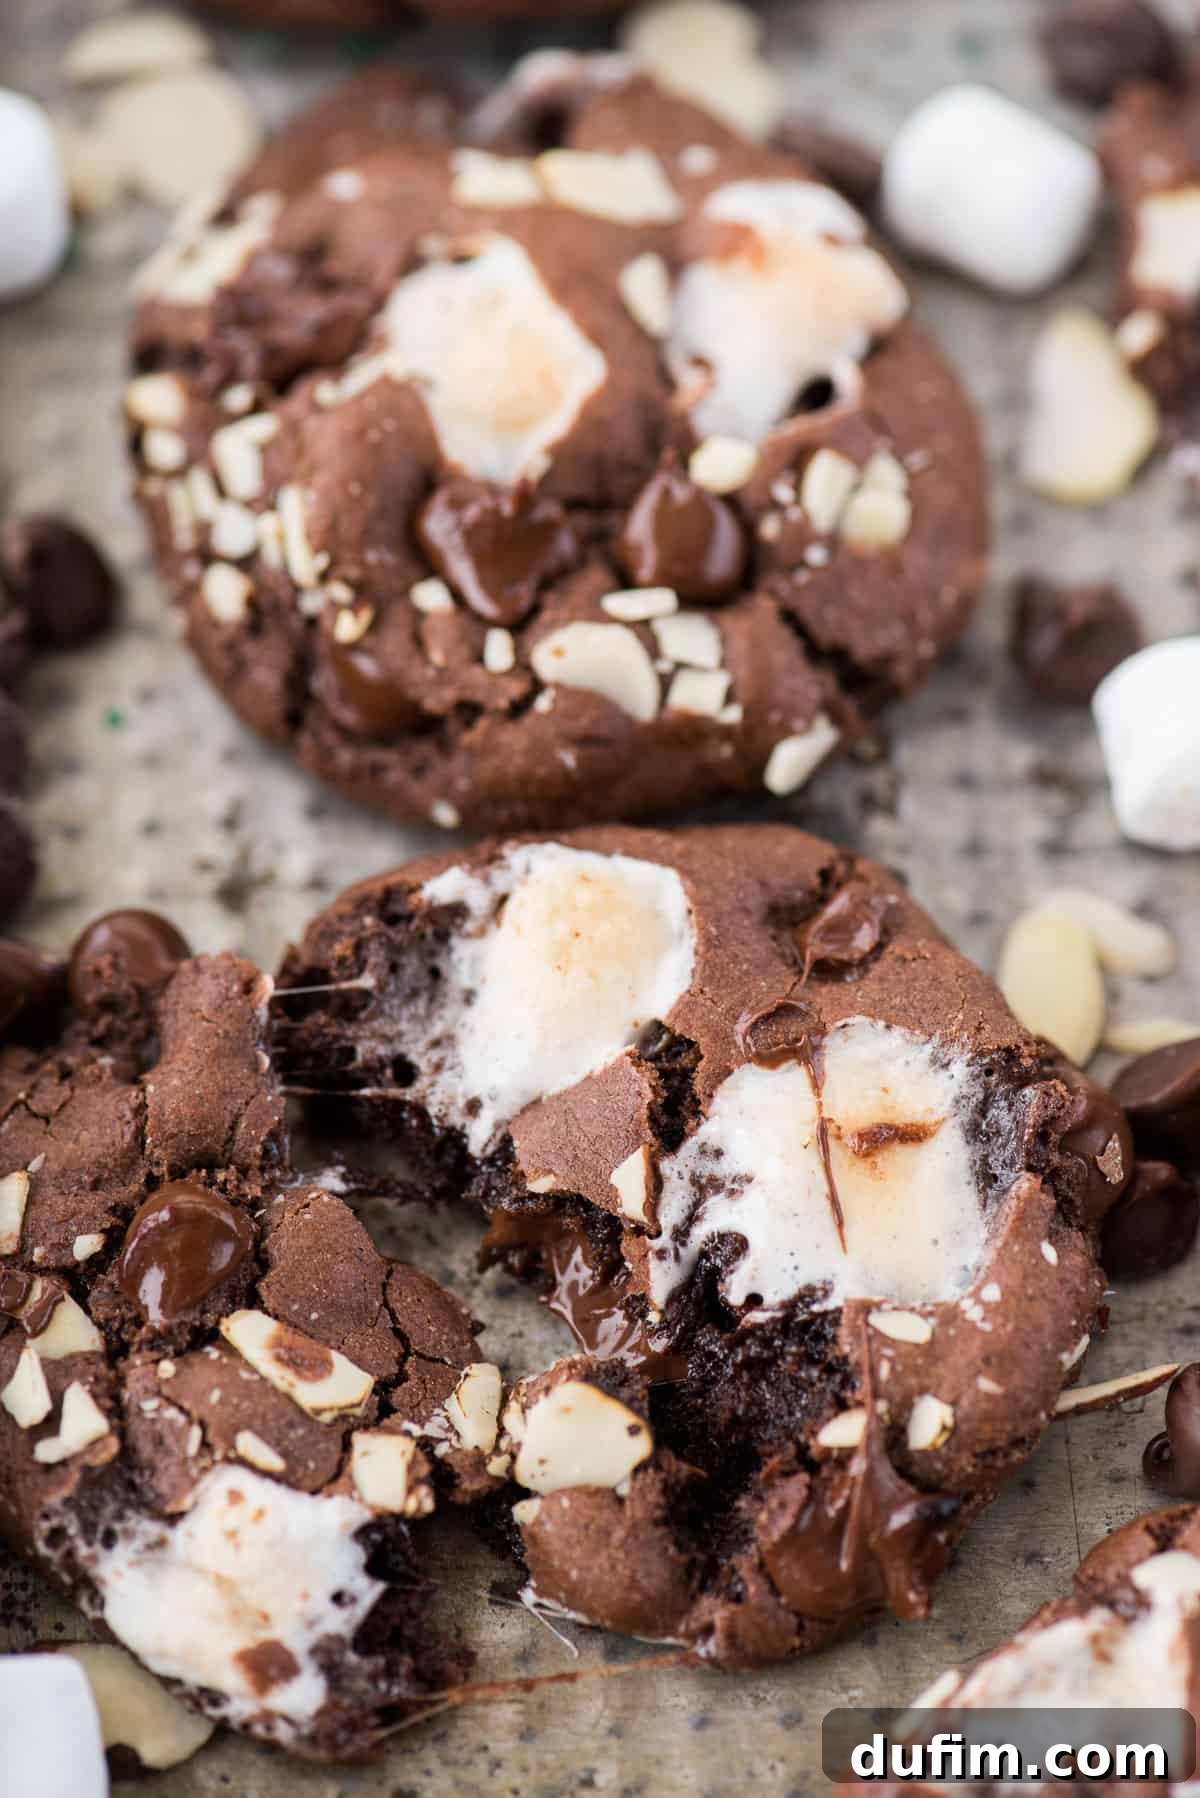
When you scoop your cookie dough, it usually has some mix-ins already distributed throughout. However, during the baking process, these ingredients tend to sink or become less prominent on the surface. By pressing additional pieces of almonds, chocolate chips, and marshmallows directly onto the surface of each dough ball, you ensure that these delicious elements are prominently displayed once the cookies are baked. This creates a rich, textured, and incredibly appealing visual.
Don’t be shy about loading them up! The more toppings you gently press onto the outside, the more enticing your final cookies will look. You can even reserve a few mini marshmallows to press onto the cookies immediately after they come out of the oven, for that freshly melted, perfectly gooey look. This technique not only makes your cookies look professional but also gives a clear indication of the delicious surprises awaiting inside each bite. It’s a small step that makes a huge difference in presentation, perfect for impressing guests or simply treating yourself to a beautiful homemade dessert.
The Ultimate Guide to Cookie Sheets for Baking Perfection
The right baking equipment can make all the difference in achieving perfectly baked cookies. When it comes to cookie sheets, quality and material play a significant role in how your Rocky Road Cookies turn out. Invest in good quality sheets, and you’ll notice a remarkable improvement in consistency and evenness of baking.
Here’s what to look for and why:
- Material: I highly recommend using shiny, heavy-gauge aluminum cookie sheets. These conduct heat evenly, preventing hot spots that can lead to unevenly baked or burnt cookies. The shiny surface also helps reflect heat, contributing to perfectly golden bottoms without over-browning.
- Sides: Opt for cookie sheets that have very low or no sides. This allows for better air circulation around the cookies, promoting even baking. Sheets with high sides can trap heat and create a less consistent baking environment.
- Avoid Dark Sheets: While dark-colored cookie sheets might look sleek, they absorb more heat than lighter ones. This often results in cookies with overly dark or burnt bottoms while the tops might still be underbaked. Stick to light-colored, shiny sheets for optimal results.
Pro Tip for Even Baking: To ensure every cookie bakes to perfection, always place only one cookie sheet in the oven at a time. This allows for proper air circulation around all sides of the sheet, ensuring consistent heat distribution and uniform baking across the entire batch.
Furthermore, regardless of your cookie sheet choice, I strongly suggest lining it with a silicone baking mat or parchment paper. A silicone baking mat is reusable, provides a non-stick surface that ensures easy release of cookies, and helps distribute heat evenly for consistent browning. Parchment paper works similarly well for non-stick properties and easy cleanup. Both options prevent your precious rocky road cookies from sticking and help achieve that coveted soft, chewy texture.
Total Time Required for Rocky Road Cookies
One of the best features of this Rocky Road Cookie recipe is its efficiency. You won’t be spending hours in the kitchen to enjoy these delightful treats. This recipe is designed for maximum flavor with minimal effort and time commitment, making it perfect for last-minute cravings or spontaneous baking sessions. Here’s a quick breakdown of the time needed:
- 10 minutes: To prepare and mix the cookie dough. This includes gathering ingredients and combining them to form the perfect base.
- 10-13 minutes: To bake the cookies. The baking time is short, allowing for quick turnarounds between batches.
- 15 minutes: To cool the cookies. While difficult to resist, a short cooling period ensures they set properly and are safe to handle.
From start to finish, you’re looking at approximately 35-38 minutes. This quick turnaround makes these chocolate rocky road cookies an ideal choice when you need a delicious homemade dessert without the lengthy process, especially since there’s no dough chilling required!
Serving Suggestions for Rocky Road Cookies
These Rocky Road Cookies are incredibly versatile when it comes to serving. Their delightful combination of chocolate, almonds, and marshmallows makes them a hit in any form. Here are a few ways to enjoy them:
- Warm from the Oven: There’s nothing quite like a warm cookie with melted chocolate and gooey marshmallows. Enjoy them straight off the cookie sheet after a short cooling period for the ultimate fresh-baked experience.
- Completely Cooled: Once fully cooled, these cookies develop a firmer, chewier texture, making them perfect for packing in lunchboxes or enjoying on the go.
- Microwaved: If you’ve stored your cookies in an airtight container and want to recapture that fresh-from-the-oven warmth, simply pop one in the microwave for 5-10 seconds. This will gently re-melt the chocolate and marshmallows, bringing back that delightful gooeyness.
- Rocky Road Ice Cream Sandwiches: As Adriana suggested, these cookies make an incredible base for ice cream sandwiches! Pair them with a scoop of vanilla bean ice cream, coffee ice cream, or even more rocky road ice cream for an epic dessert.
- With a Glass of Milk: A classic pairing that never disappoints. The rich chocolate and sweet marshmallows are perfectly complemented by a cold glass of milk.
- Alongside Coffee or Tea: For a more sophisticated treat, enjoy your cookie with a warm cup of coffee or your favorite tea.
No matter how you choose to serve them, these Rocky Road Cookies are sure to bring smiles and satisfy any sweet tooth!
Essential Tips for Baking Perfect Cookies Every Time
Even the simplest cookie recipes benefit from a few expert tips to ensure consistent, delicious results. Master these fundamental baking techniques, and your Rocky Road Cookies (and all future cookie endeavors!) will always turn out perfectly soft, chewy, and flavorful.
- Proper Flour Measurement: All-purpose flour is best measured using the “spoon and sweep” method. Gently spoon the flour into your dry measuring cup until it overflows, then level it off with a straight edge (like the back of a knife). Avoid scooping directly from the bag, as this can compact the flour and lead to using too much, resulting in dry, dense cookies.
- Room Temperature Butter: Ensure your unsalted butter is properly softened to room temperature. This is crucial for creaming the butter and sugar together effectively. Softened butter incorporates air more easily, creating a light and fluffy base that contributes to the cookies’ soft texture. If your butter is too cold, it won’t cream properly; if it’s too warm or melted, it can lead to greasy, flat cookies.
- Use a Cookie Scoop for Uniformity: A cookie scoop is a baker’s best friend! It ensures that each cookie dough ball is the same size, which means they will all bake evenly and be done at the same time. This also contributes to a professional-looking, consistent batch of cookies.
- Top for Presentation: As mentioned earlier, for cookies that look as good as they taste, reserve some chocolate chips, almond pieces, and mini marshmallows. Gently press these onto the outside of the scooped dough balls before baking. This ensures these delicious ingredients are visible on the surface, creating an appetizing, loaded cookie presentation that mirrors the photos.
- Don’t Overbake: Rocky Road Cookies are best when slightly underbaked, allowing them to remain soft and chewy. The edges should be set, but the centers should still look slightly soft and puffy. They will continue to cook slightly as they cool on the baking sheet.
- Cool on the Baking Sheet: Allow the cookies to cool on the hot baking sheet for 5-10 minutes after removing them from the oven. This helps them set and prevents them from falling apart when transferred to a cooling rack.
By following these tips, you’ll be well on your way to baking a batch of Rocky Road Cookies that are consistently perfect – every single time.
Yum yum yum!!!! My go to recipe from here on out!!!
-Cynthia
More Cookie Recipes to Love
If you’ve fallen in love with these Rocky Road Cookies, you’re in for a treat! Our collection features a variety of other irresistible cookie recipes, perfect for any occasion or craving. Explore these delightful options to expand your baking repertoire:
- Classic Chewy Chocolate Chip Cookies
- Irresistible Reese’s Pieces Peanut Butter Cookies
- Festive Maraschino Cherry Chocolate Chip Cookies
- Fun & Flavorful Classic Monster Cookies
- Bright & Zesty Lemon Sugar Cookies
Rating: 4.59 from 70 ratings
Rocky Road Cookies
By: Beth
Prep Time: 10 minutes | Cook Time: 10-13 minutes | Total Time: 20-23 minutes | Servings: 15-18 cookies
Soft and chewy rocky road cookies will hit the spot and remind you of your favorite rocky road ice cream. These chocolate cookies are packed with almonds, chocolate chips and marshmallows! You don’t have to chill the dough, this rocky road cookie recipe is ready in 30 minutes!
Equipment
- Glass Mixing Bowl
- KitchenAid 9-Speed Mixer (or hand mixer)
- Silicone Baking Mat
- Baking Sheet (light-colored, heavy-gauge)
- Cookie Dough Scoop
Ingredients
- 1 ½ cups (180g) all-purpose flour
- ¼ cup (21g) natural unsweetened cocoa powder
- ½ tsp baking soda
- ½ tsp salt
- ½ cup (113g) unsalted butter, softened (1 stick)
- ½ cup (99g) granulated sugar
- ½ cup (107g) brown sugar (packed)
- 1 large egg
- 1 tsp vanilla extract
- ½ cup (43g) sliced almonds, broken into smaller pieces
- ½ cup (85g) semi-sweet chocolate chips
To top the cookies:
- 1 cup mini marshmallows
- Extra sliced almonds and chocolate chips (for topping)
Instructions
- Preheat the oven to 350ºF (175ºC). In a mixing bowl, combine the all-purpose flour, cocoa powder, baking soda, and salt. Set aside.
- In a separate large mixing bowl, using a mixer on low speed, cream together the softened unsalted butter, granulated sugar, and brown sugar until light and fluffy (about 2-3 minutes).
- Add the large egg and vanilla extract to the creamed mixture, mixing again on low speed until just combined.
- Gradually add the dry ingredients to the wet ingredients, mixing on low speed or by hand until just combined. Be careful not to overmix. Fold in ½ cup chocolate chips and ½ cup sliced almonds.
- Use a cookie scoop to drop dough balls onto a silicone mat-lined baking sheet. For a beautiful presentation, gently press 3-4 mini marshmallows into the top of each cookie dough ball, along with additional almond pieces and chocolate chips.
- Place the cookies approximately 3 inches apart on the baking sheet. Bake for 10-13 minutes, or until the edges are set and the centers still look slightly soft. Bake only one cookie sheet at a time for even cooking.
- Allow the cookies to cool on the baking sheet for 10 minutes before carefully transferring them to a wire rack to cool completely.
Notes
This recipe consistently delivers excellent results when made with gluten-free flour! We particularly love King Arthur Gluten Free Measure for Measure Flour for a reliable 1:1 substitute.
Nutrition
Calories: 253 kcal | Carbohydrates: 32g | Protein: 4g | Fat: 13g | Saturated Fat: 6g | Polyunsaturated Fat: 1g | Monounsaturated Fat: 5g | Trans Fat: 1g | Cholesterol: 29mg | Sodium: 126mg | Potassium: 142mg | Fiber: 2g | Sugar: 18g | Vitamin A: 209IU | Calcium: 38mg | Iron: 2mg
Nutrition Disclosure
All nutritional values are approximate and provided to the reader as a courtesy. Changing ingredients and/or quantities will alter the estimated nutritional calculations.
Loved this recipe? Share your thoughts and tell us how your Rocky Road Cookies turned out in the comments below! Your feedback helps us create even more delicious content for you.