
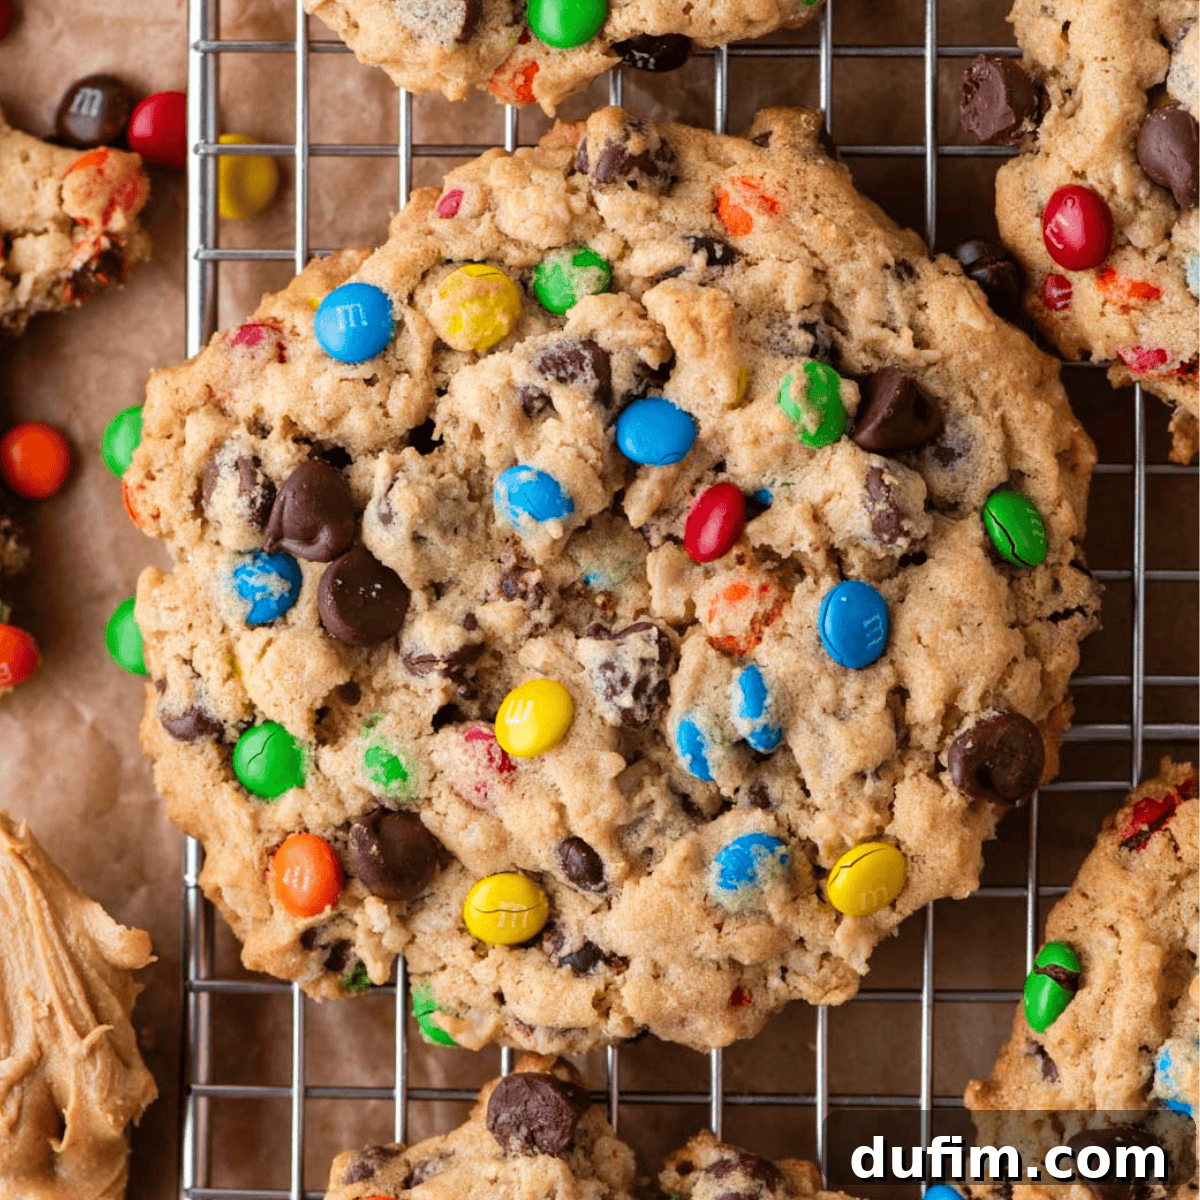
The Ultimate Chewy Monster Cookies: A Bakery-Style Recipe You Deserve
For years, monster cookies have held a special place in the hearts of cookie lovers, a delightful medley of peanut butter, oats, chocolate, and vibrant candy-coated goodness. While the classic recipe is undeniably charming and always a crowd-pleaser, I always felt there was room for improvement, a path to true cookie perfection. My culinary journey began with a simple question: how could I elevate this beloved treat into something truly extraordinary? After countless hours in the kitchen, experimenting with every conceivable ingredient ratio and technique, I’m thrilled to share my upgraded version: the **ultimate chewy monster cookies** that promise a truly bakery-style experience in every single bite. This isn’t just another recipe; it’s a meticulously perfected journey to achieve the ideal texture – luxuriously soft, wonderfully thick, and profoundly chewy – all while overflowing with vibrant mini M&M’s and rich chocolate chips. Get ready to bake the monster cookies you’ve always dreamed of, a homemade treat so satisfying, you’ll wonder how you ever settled for less.
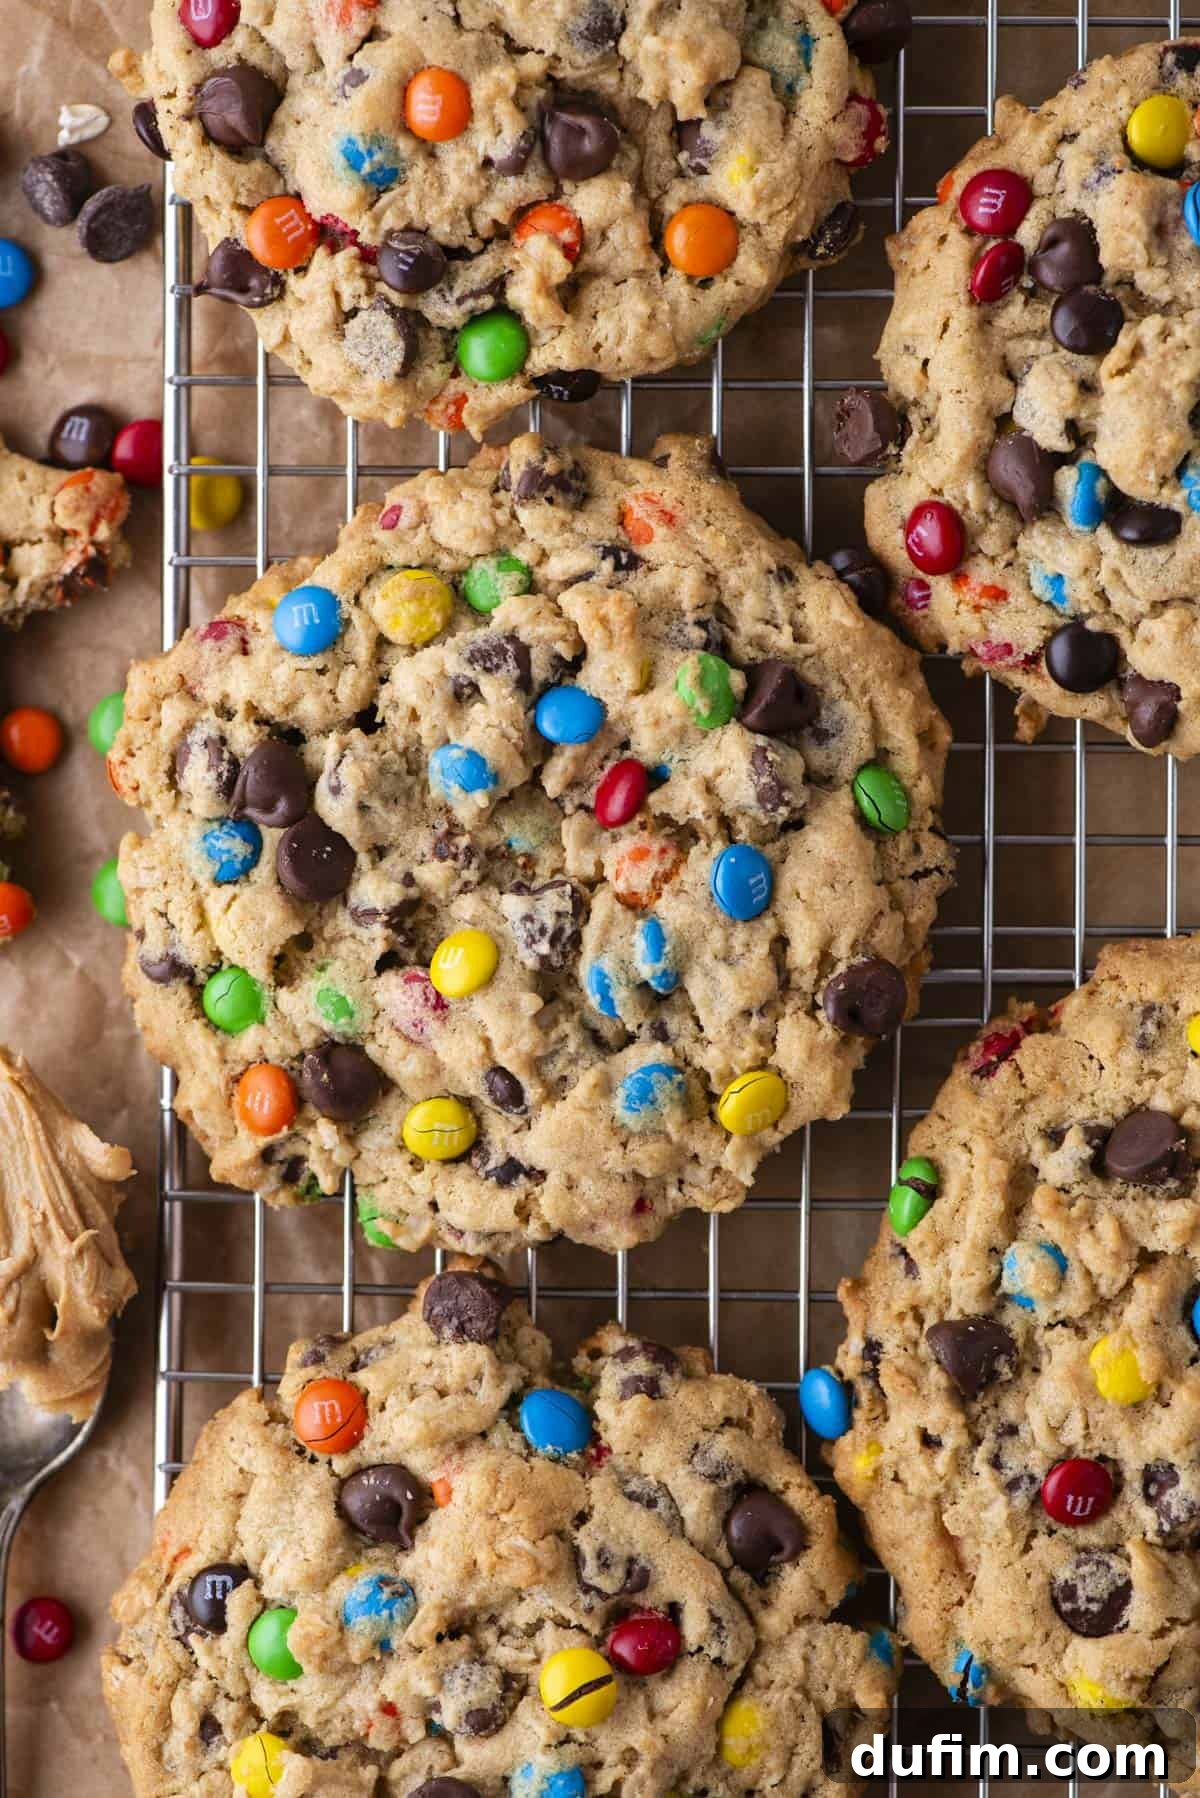
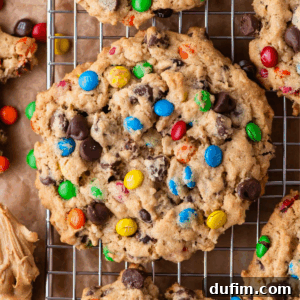
What truly sets these monster cookies apart and elevates them to ultimate status is the sheer abundance of their iconic mix-ins. I didn’t shy away from generosity; in fact, I significantly increased the quantities of both luscious chocolate chips and cheerful M&M’s to ensure that every single morsel is bursting with flavor and texture. You won’t find any sparse, disappointing bites here – just a delightful explosion of goodness! My preference for mini M&M’s isn’t just a whim; it’s a deliberate choice that makes a profound difference in the final cookie. These smaller candies disperse more evenly throughout the thick, peanut butter-infused dough, creating a beautiful speckling of color and flavor rather than clumpy pockets. This thoughtful detail ensures a consistent, delightful texture and an inviting pop of vibrant color in every single homemade monster cookie, making them as visually appealing as they are delicious.
The Secret to Irresistibly Chewy Monster Cookies
Forget everything you thought you knew about monster cookies because this isn’t just a slight tweak; it’s a complete revolution designed to deliver the most intensely chewy, gloriously chocolate-packed, and utterly satisfying cookies imaginable. My quest began years ago, driven by the belief that even a beloved classic could reach new heights of deliciousness. The original versions, while good, often lacked that certain *je ne sais quoi* – that deep, enduring chewiness and robust structure that defines a truly exceptional cookie. Thus, I transformed my kitchen into a dedicated test lab, embarking on a mission to unlock the full potential of these iconic treats, focusing on creating a texture that would stand out.
The first, and arguably most significant, revelation in my extensive experimentation was the strategic switch from quick oats to **old-fashioned rolled oats**. This seemingly minor alteration is, in fact, the linchpin of their incredible texture. Quick oats, by their nature, are cut smaller and tend to break down and blend into the dough during the baking process, often leading to a cookie that is softer, sometimes even crumbly, and lacks a distinct chew. Rolled oats, however, maintain their structural integrity beautifully when baked. They contribute a substantial, hearty chew that stands up magnificently to the generous amount of mix-ins, creating a textural foundation that is both satisfying and delightfully robust, giving each cookie a wholesome, rustic charm.
Another crucial, yet often overlooked, ingredient in achieving this bakery-style perfection is a judicious touch of **cornstarch**. This clever addition works wonders in ensuring the cookies boast a luxuriously soft and tender center, while simultaneously providing just the right amount of structure to prevent them from spreading excessively thin. It’s a secret weapon I’ve successfully employed in numerous other cookie recipes, consistently delivering that coveted balance between a crisp, golden-brown edge and a yielding, melt-in-your-mouth interior. The cornstarch helps to create a delicate crumb that enhances the overall chewiness, making these cookies truly exceptional. Together, these two ingredients – the robust rolled oats and the structure-giving cornstarch – form the backbone of a monster cookie that is not just good, but truly unforgettable in its texture and taste.
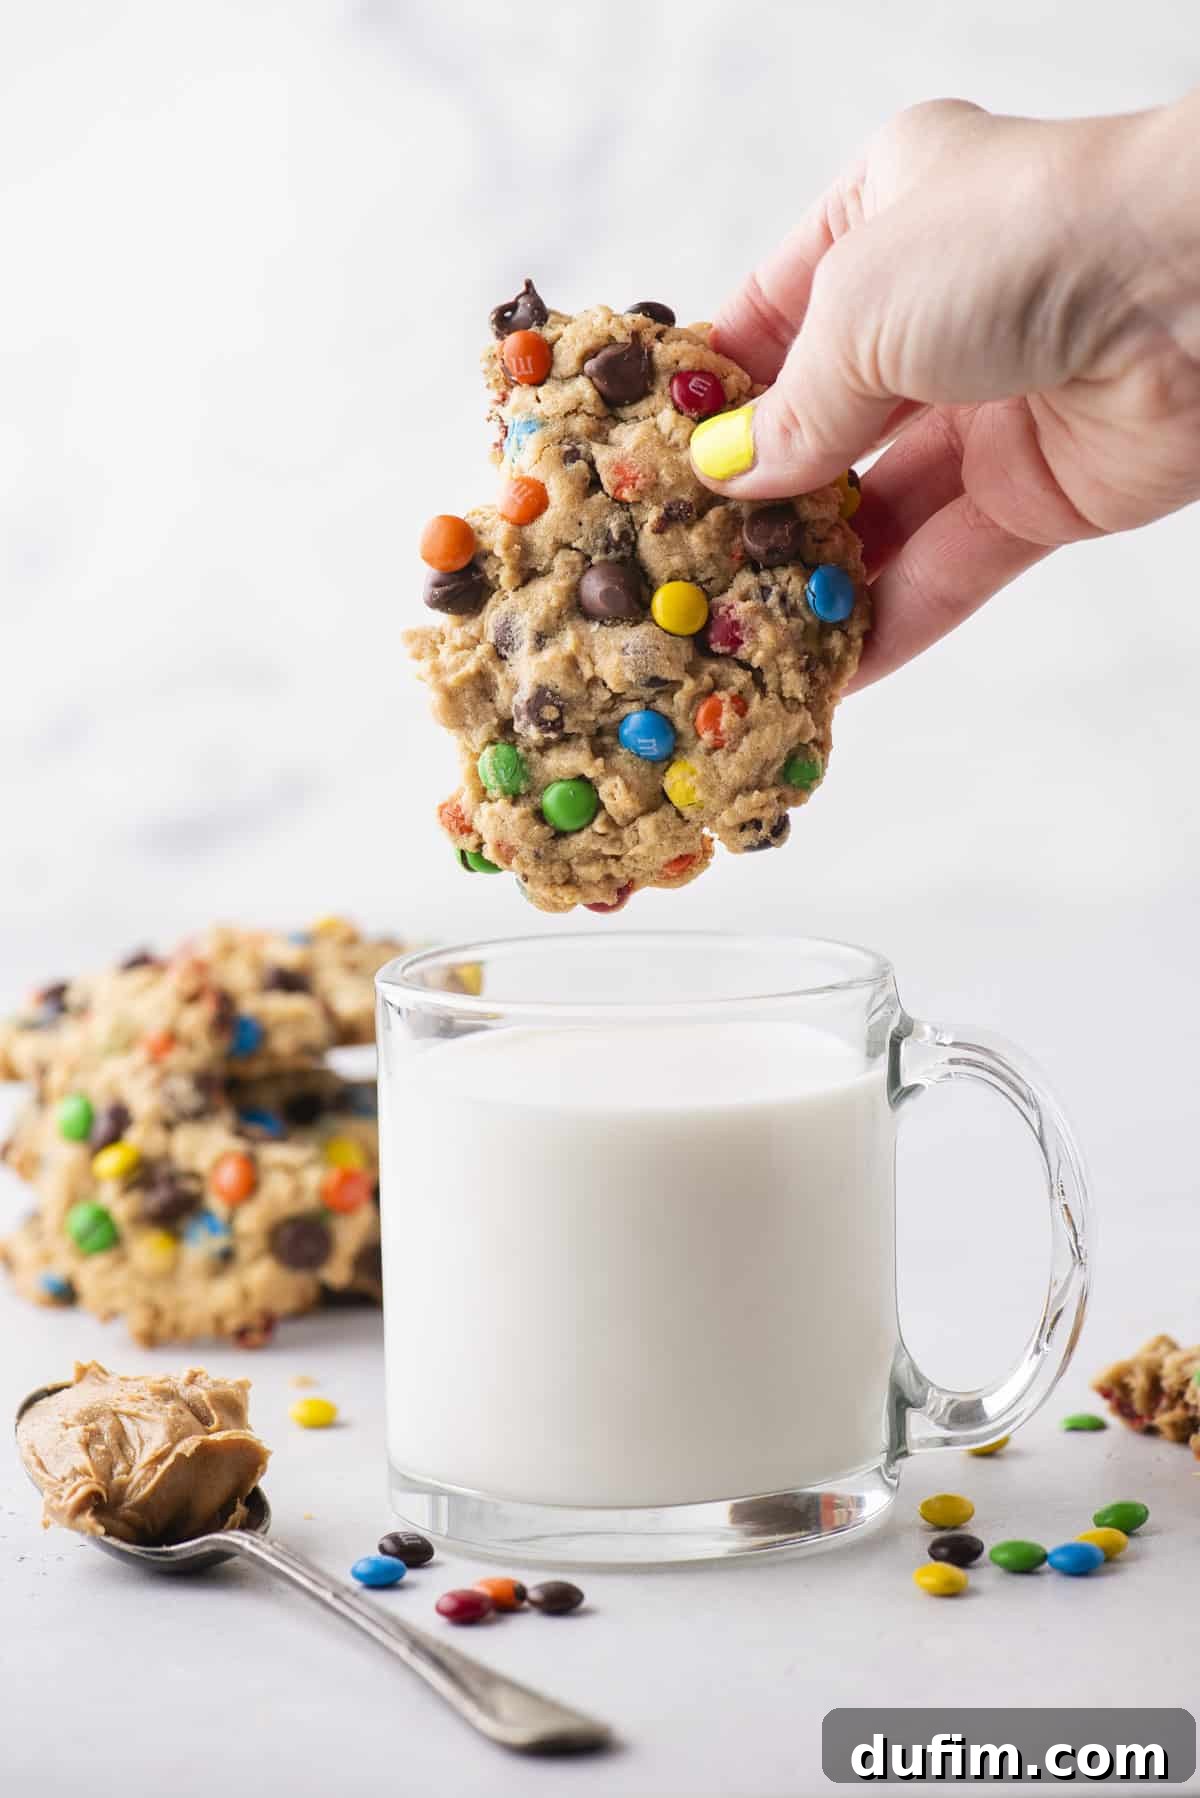
Crafting the Perfect Bakery-Style Monster Cookie: My Refinement Process
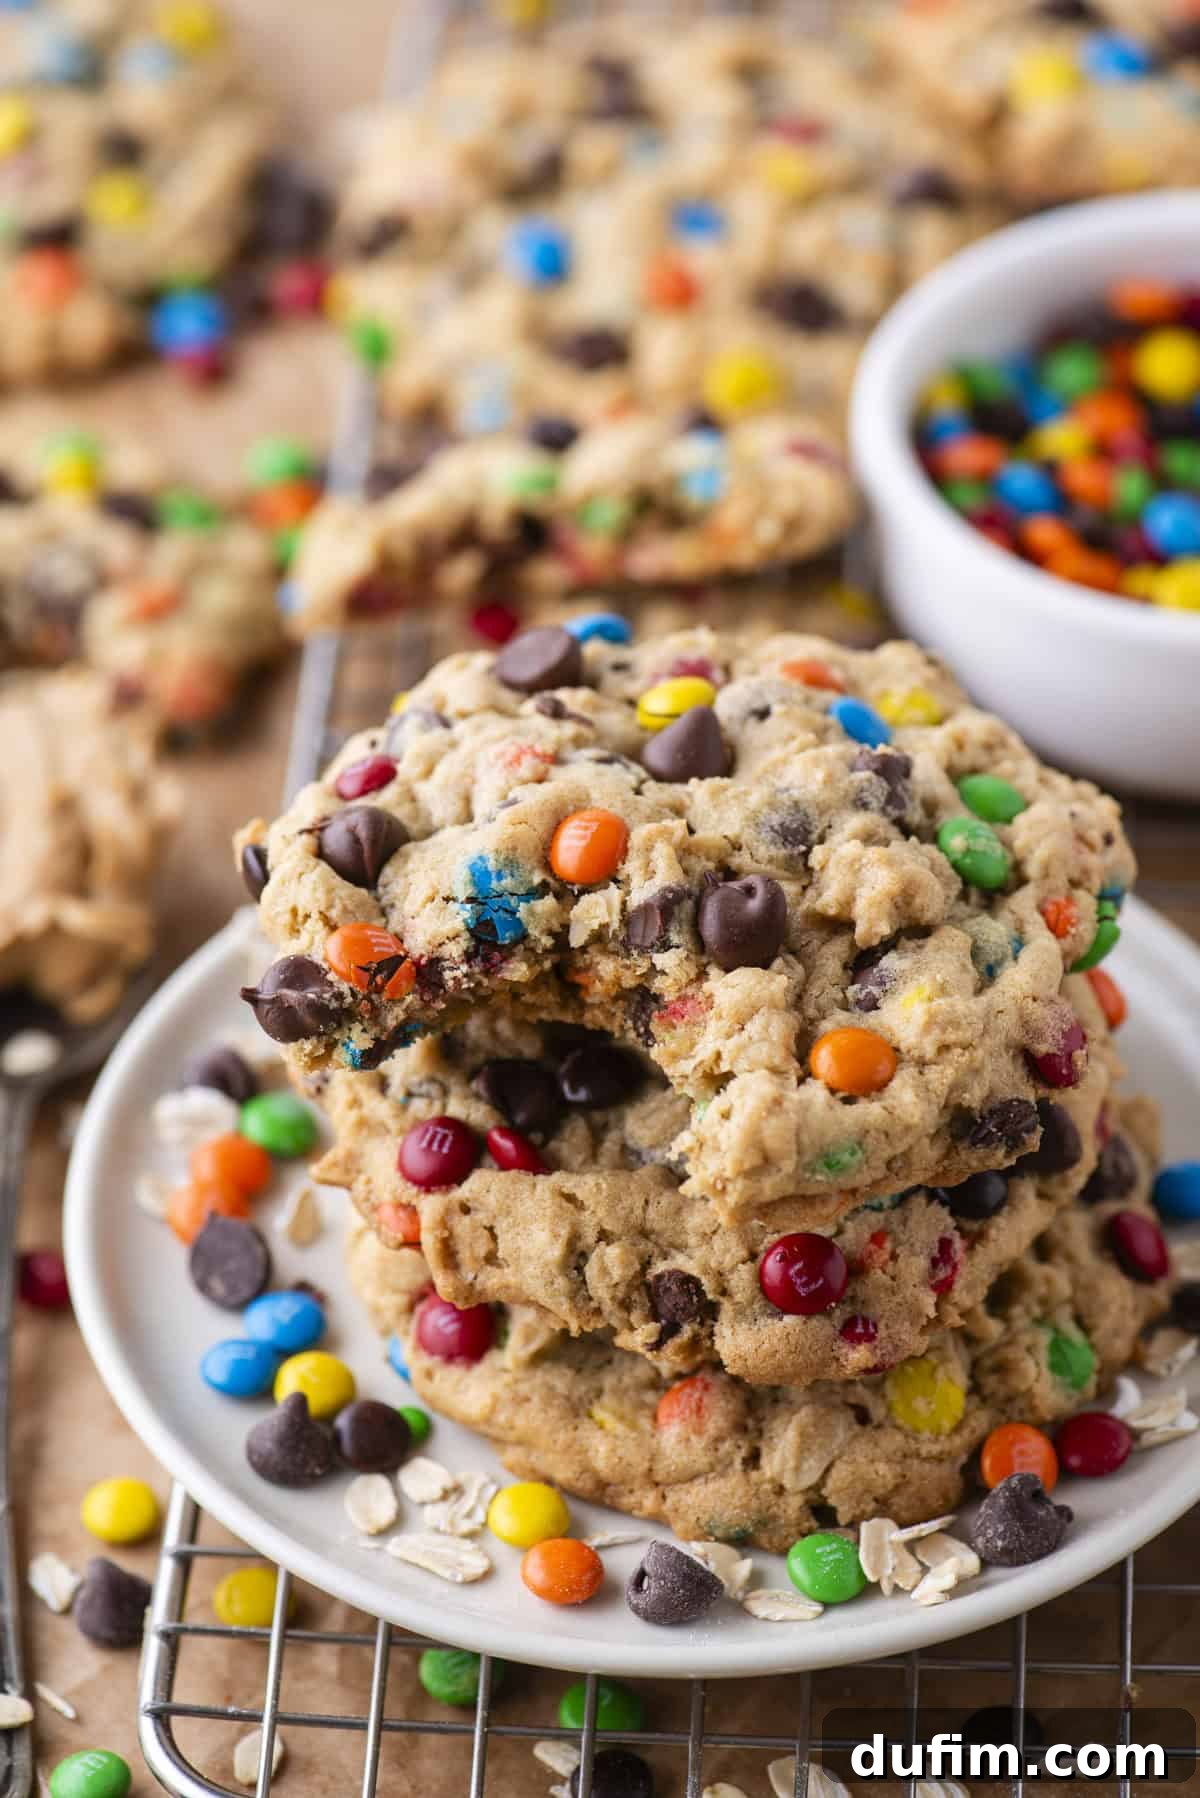
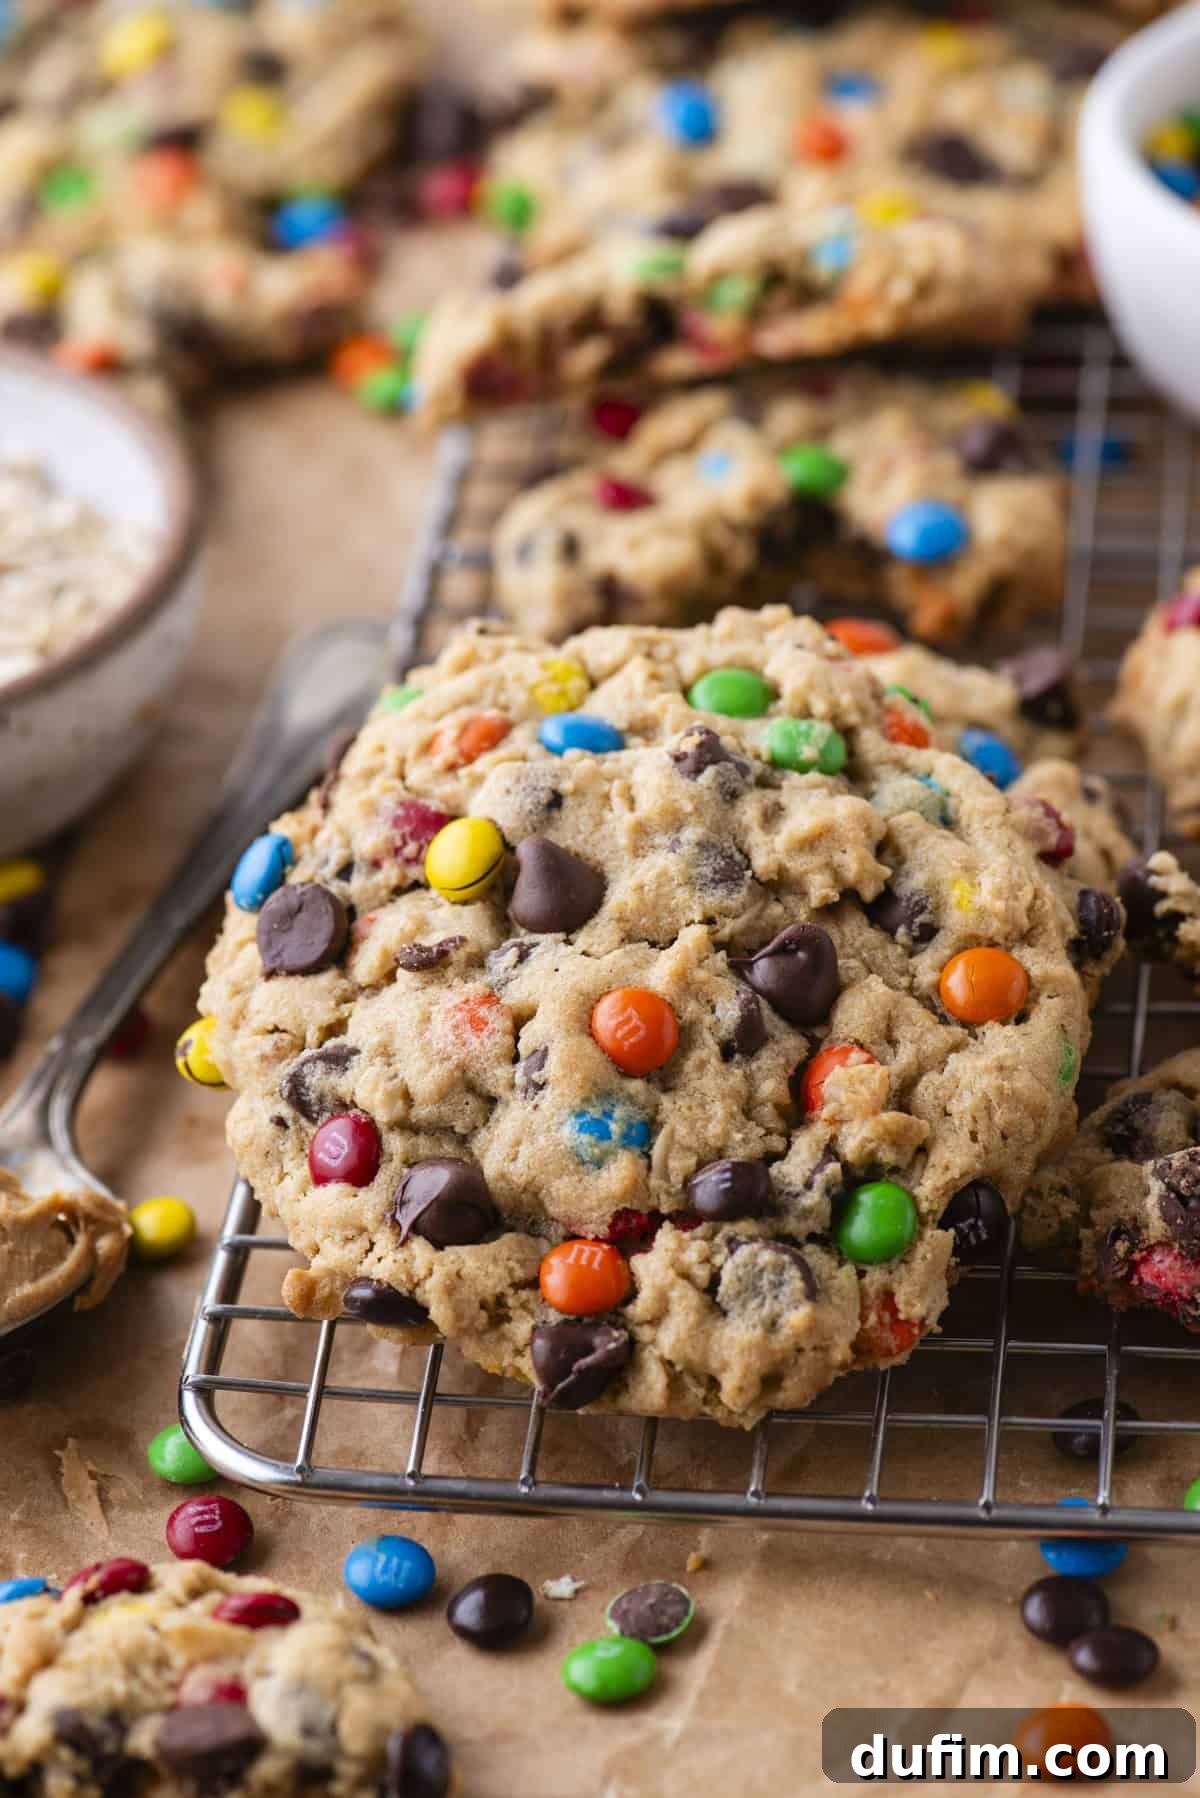
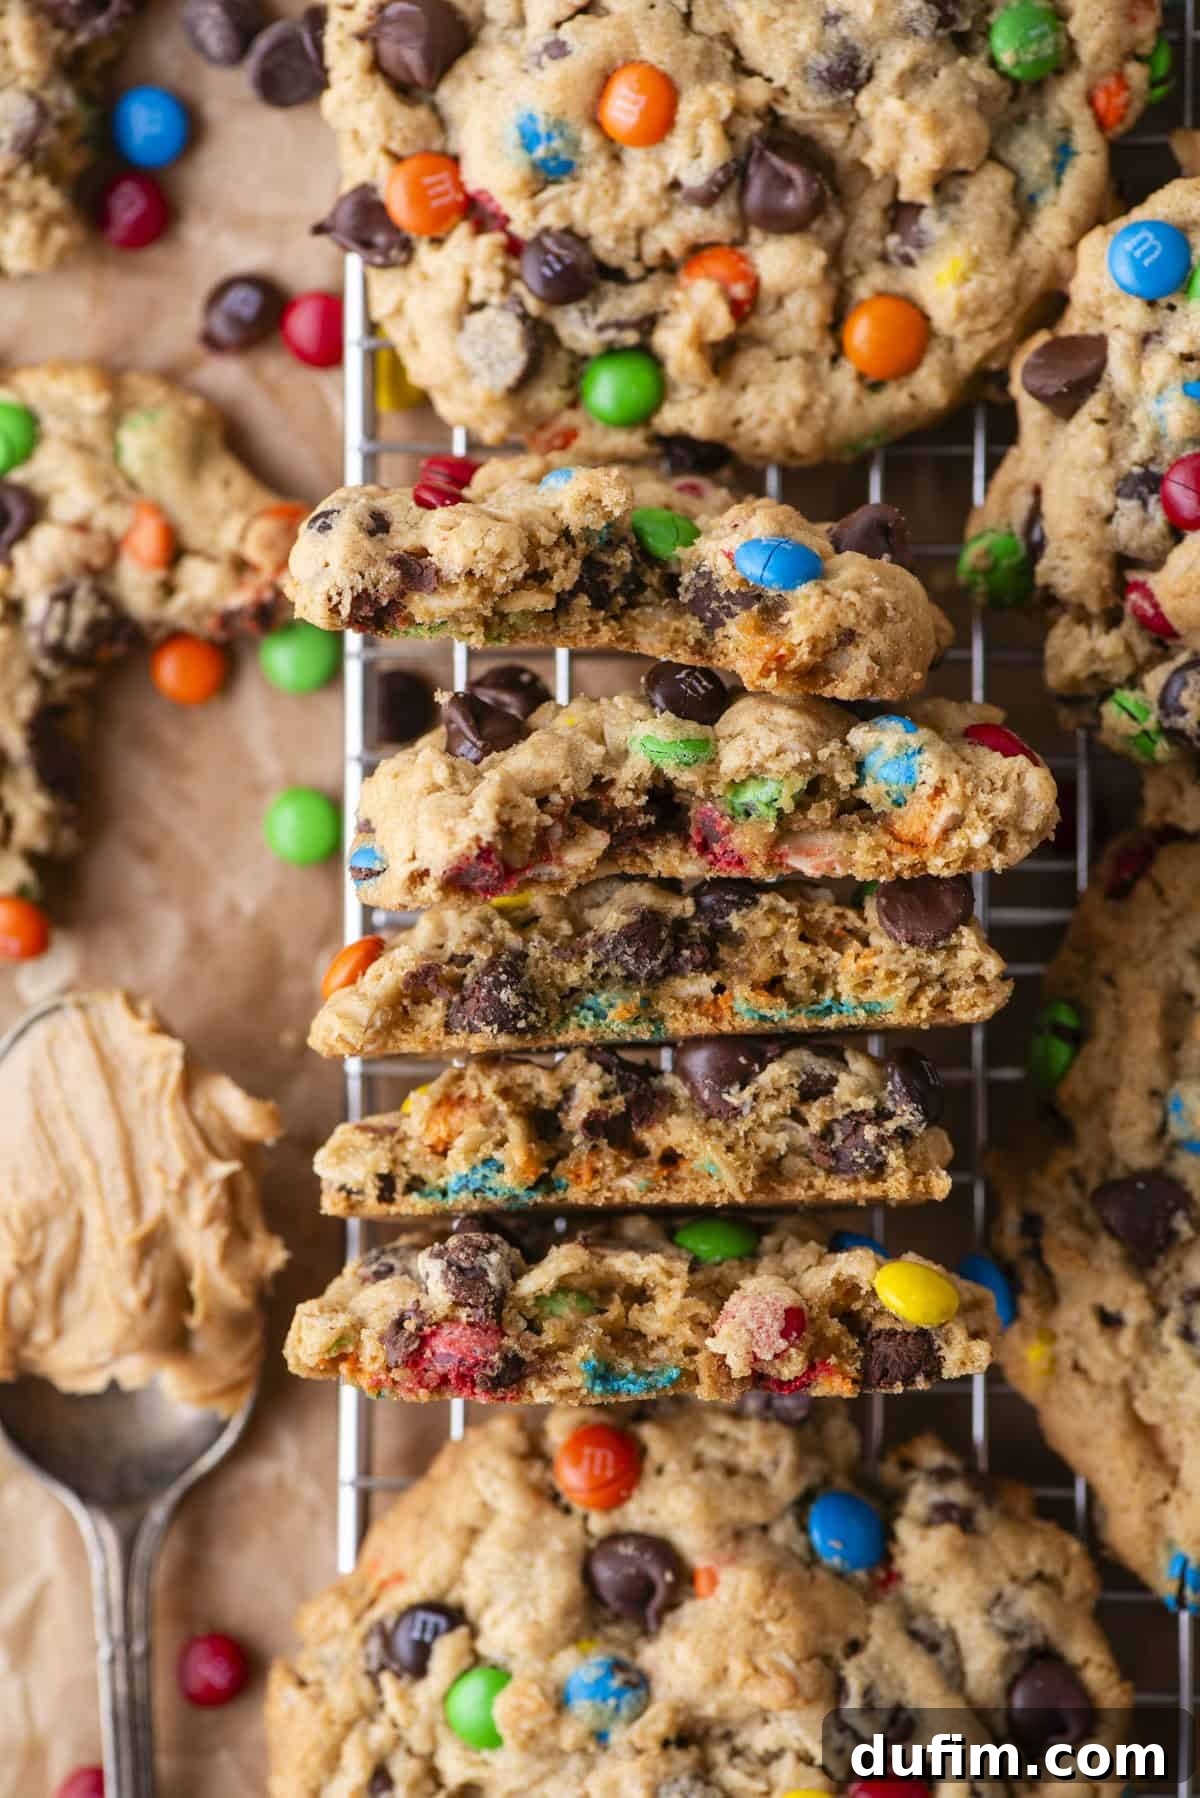
My dedication to perfecting these monster cookies extended beyond just the careful selection of ingredients; it also involved meticulous testing of various practical aspects, including the ideal size for each cookie. I rigorously experimented with different dough ball measurements, ranging from a standard 1 ounce (approximately 2 tablespoons) – which yields an average-sized cookie – to a more generous 2 ounces (4 tablespoons) for truly substantial treats. While both sizes yielded delicious results, there was an undeniable charm and visual appeal to the **extra-large cookies**. These larger creations boast an impressive bakery-style presence, instantly captivating with their substantial form and generous profile. More importantly, they offer the perfect ratio of delightfully crisp, golden-brown edges to a luxuriously soft and intensely chewy center – a textural symphony that is simply irresistible and characteristic of high-quality baked goods.
The journey to this ultimate monster cookie recipe was a genuine labor of love, involving numerous batches, precise adjustments, and continuous fine-tuning. Every minute detail was considered and adjusted to perfection: the precise balance of wet and dry ingredients for optimal texture, the ideal spread during baking to prevent them from becoming either too thin or too dense, and of course, the perfect ratio of all those delectable mix-ins to ensure every single bite is an adventure. The culmination of this rigorous testing and passionate development is a truly exceptional cookie: remarkably thick, satisfyingly chewy, and absolutely brimming with rich chocolate chips and colorful M&M’s. What’s more, this recipe is meticulously crafted to be straightforward and accessible, allowing home bakers of all skill levels to easily recreate that coveted bakery-quality taste and professional appearance right in their own kitchens, impressing everyone who tastes them.
How to Make Homemade Monster Cookies: Your Step-by-Step Guide
Creating these sensational chewy monster cookies at home is a wonderfully rewarding experience, and it’s far simpler than you might imagine. In just a few easy and clear steps, you’ll be on your way to baking fresh, warm cookies that are guaranteed to be an absolute hit with family and friends. Follow this guide closely for consistently perfect results, transforming simple pantry ingredients into extraordinary, bakery-quality treats right in your own kitchen.
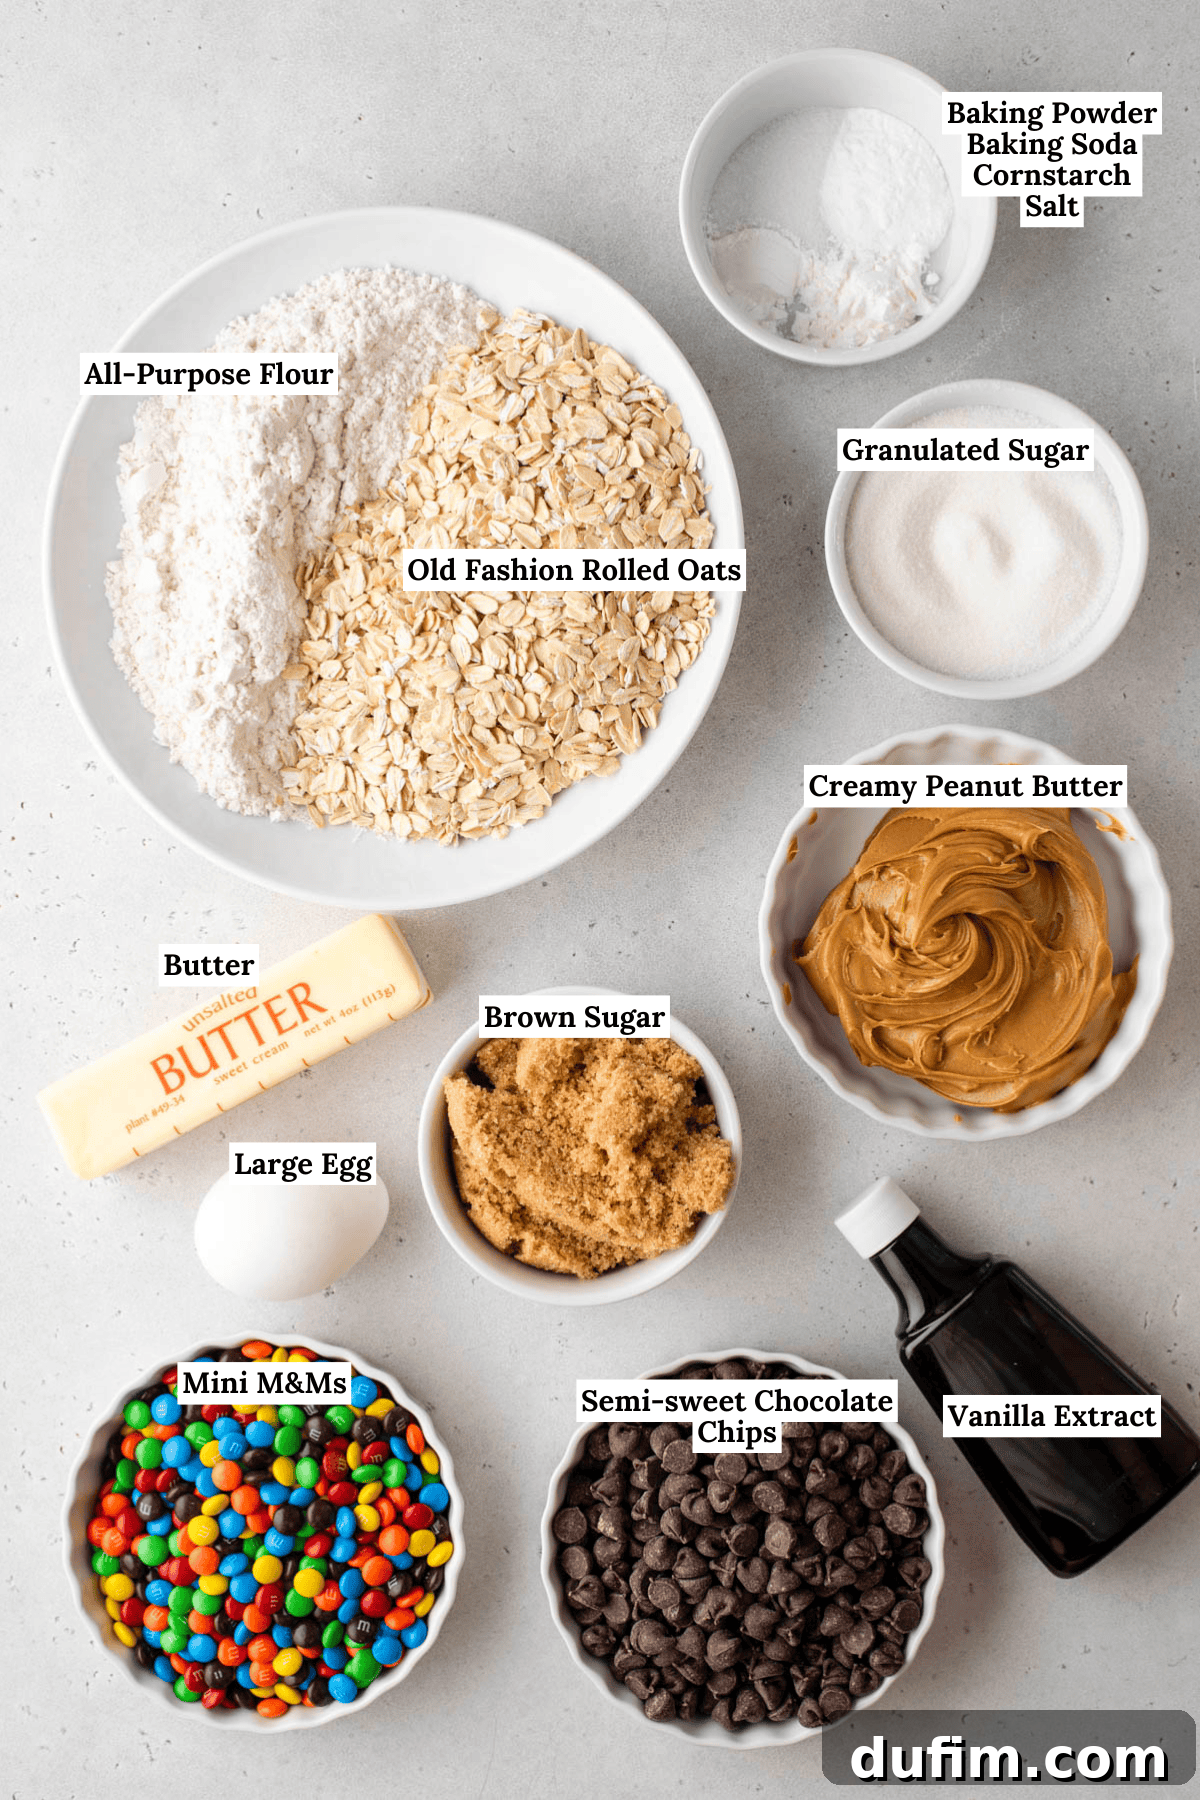
- Prepare Your Oven and Dry Ingredients: Begin by preheating your oven to a precise 350º F (175ºC). While the oven heats, take a small bowl and meticulously combine all your dry ingredients: the all-purpose flour, baking soda, baking powder, cornstarch, salt, and most importantly, the old-fashioned rolled oats. Whisk them together thoroughly to ensure even distribution of leavening agents and spices, then set this mixture aside. This pre-mixing step is vital for consistent texture and flavor in your final cookies, preventing pockets of unmixed ingredients.
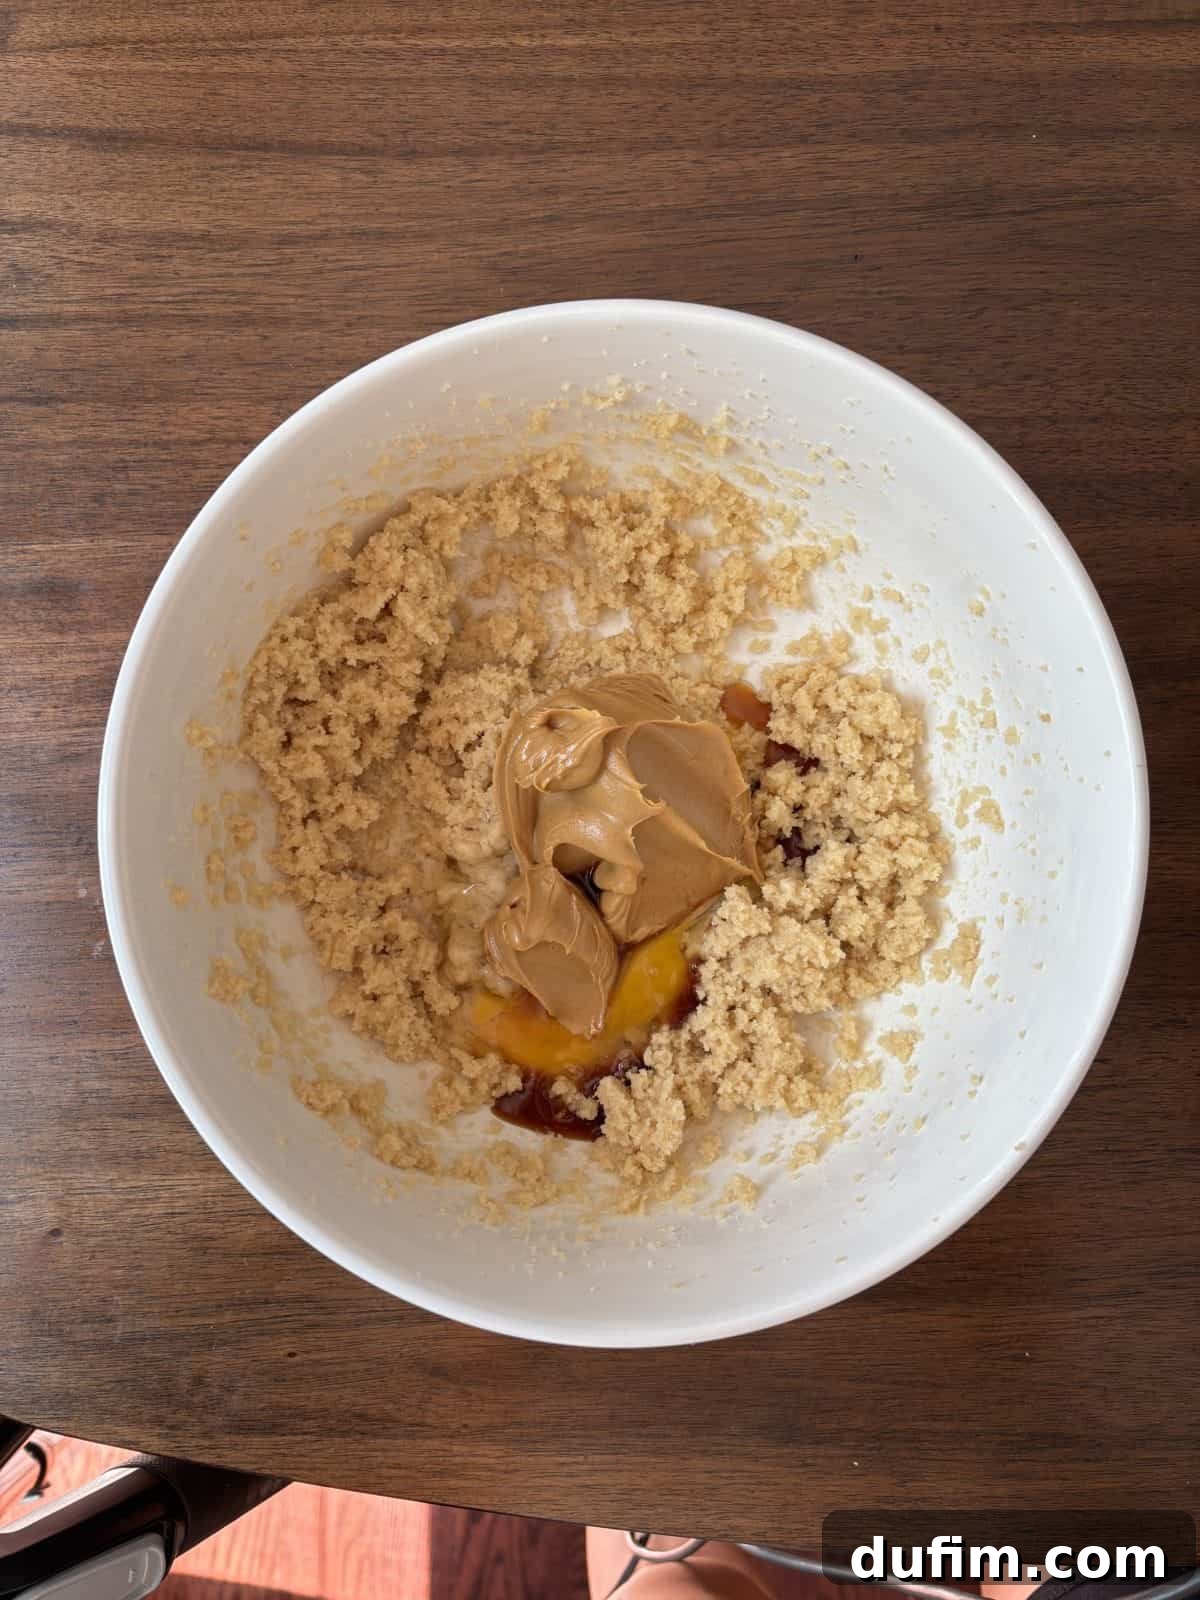
- Blend the Wet Ingredients to Perfection: In a generously sized mixing bowl, combine the softened unsalted butter, light brown sugar, and granulated sugar. Using an electric mixer, cream these together on medium speed for 1-2 minutes until the mixture is light, fluffy, and well-combined. This aeration step is key for a tender crumb and contributes significantly to the cookie’s final texture. Next, incorporate the creamy peanut butter, pure vanilla extract, and the large egg. Beat again until everything is smoothly integrated and no streaks of butter or peanut butter remain. Scrape down the sides of the bowl as needed to ensure all ingredients are thoroughly mixed.
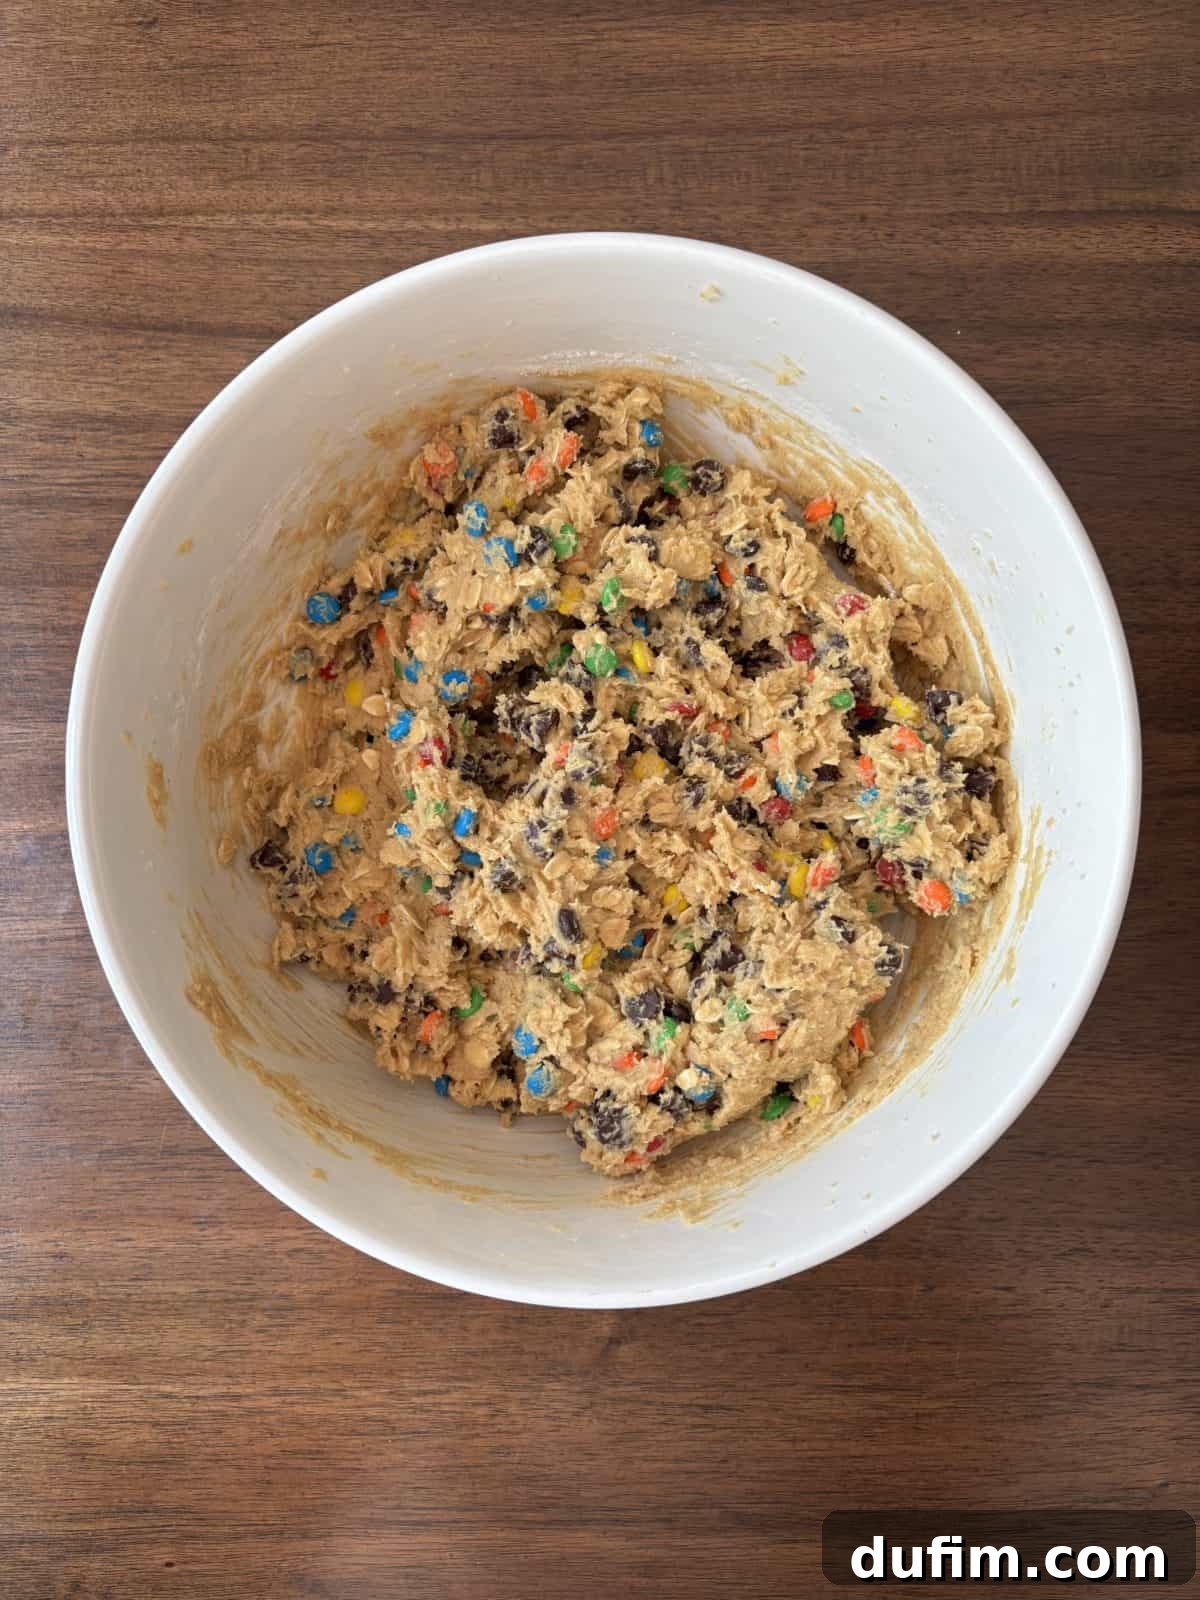
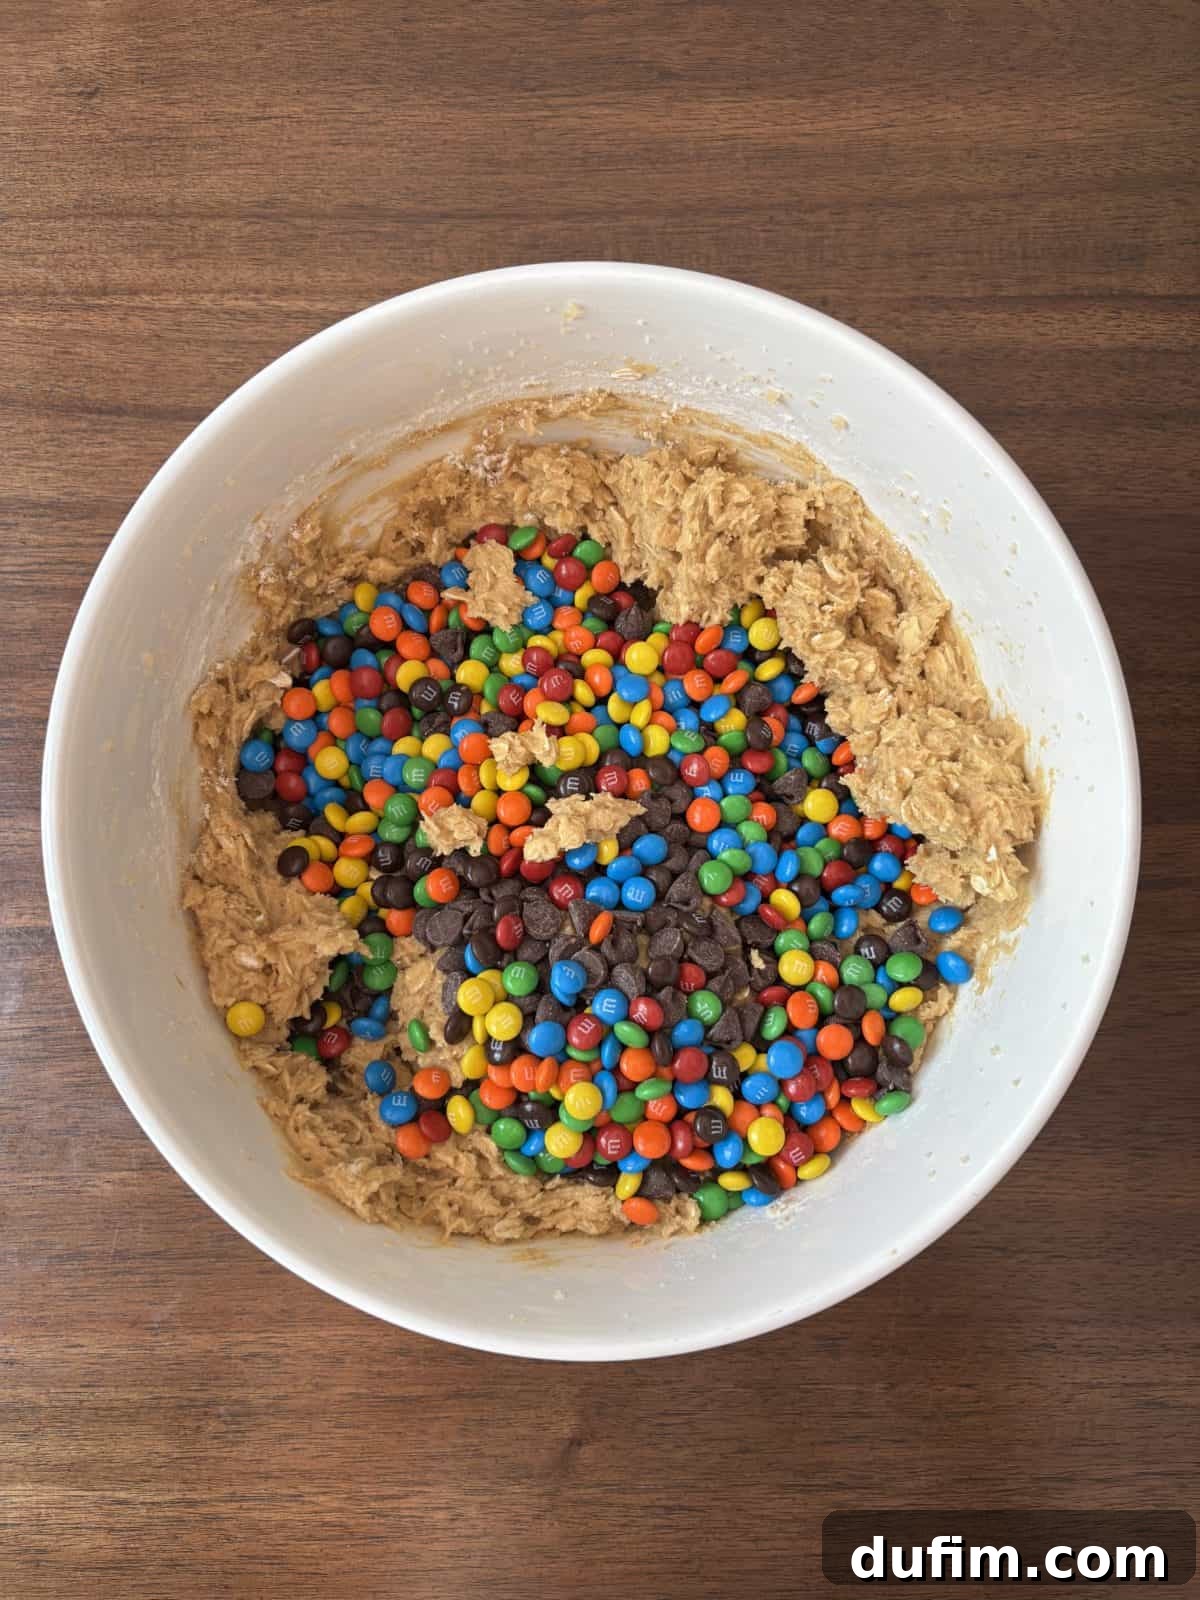
- Combine All Ingredients to Form Dough: With the wet ingredients beautifully blended, it’s time to introduce the dry mixture. Gradually add the dry ingredients to the wet, mixing on low speed with your electric mixer, or gently by hand using a sturdy spatula, just until everything is combined. Be careful not to overmix, as this can overdevelop the gluten in the flour, leading to tough cookies. Once the flour mixture is mostly incorporated, fold in the star of the show: the mini M&M’s and the rich chocolate chips. Mix by hand to ensure they are evenly distributed throughout the thick, luscious dough, guaranteeing a burst of flavor in every bite.
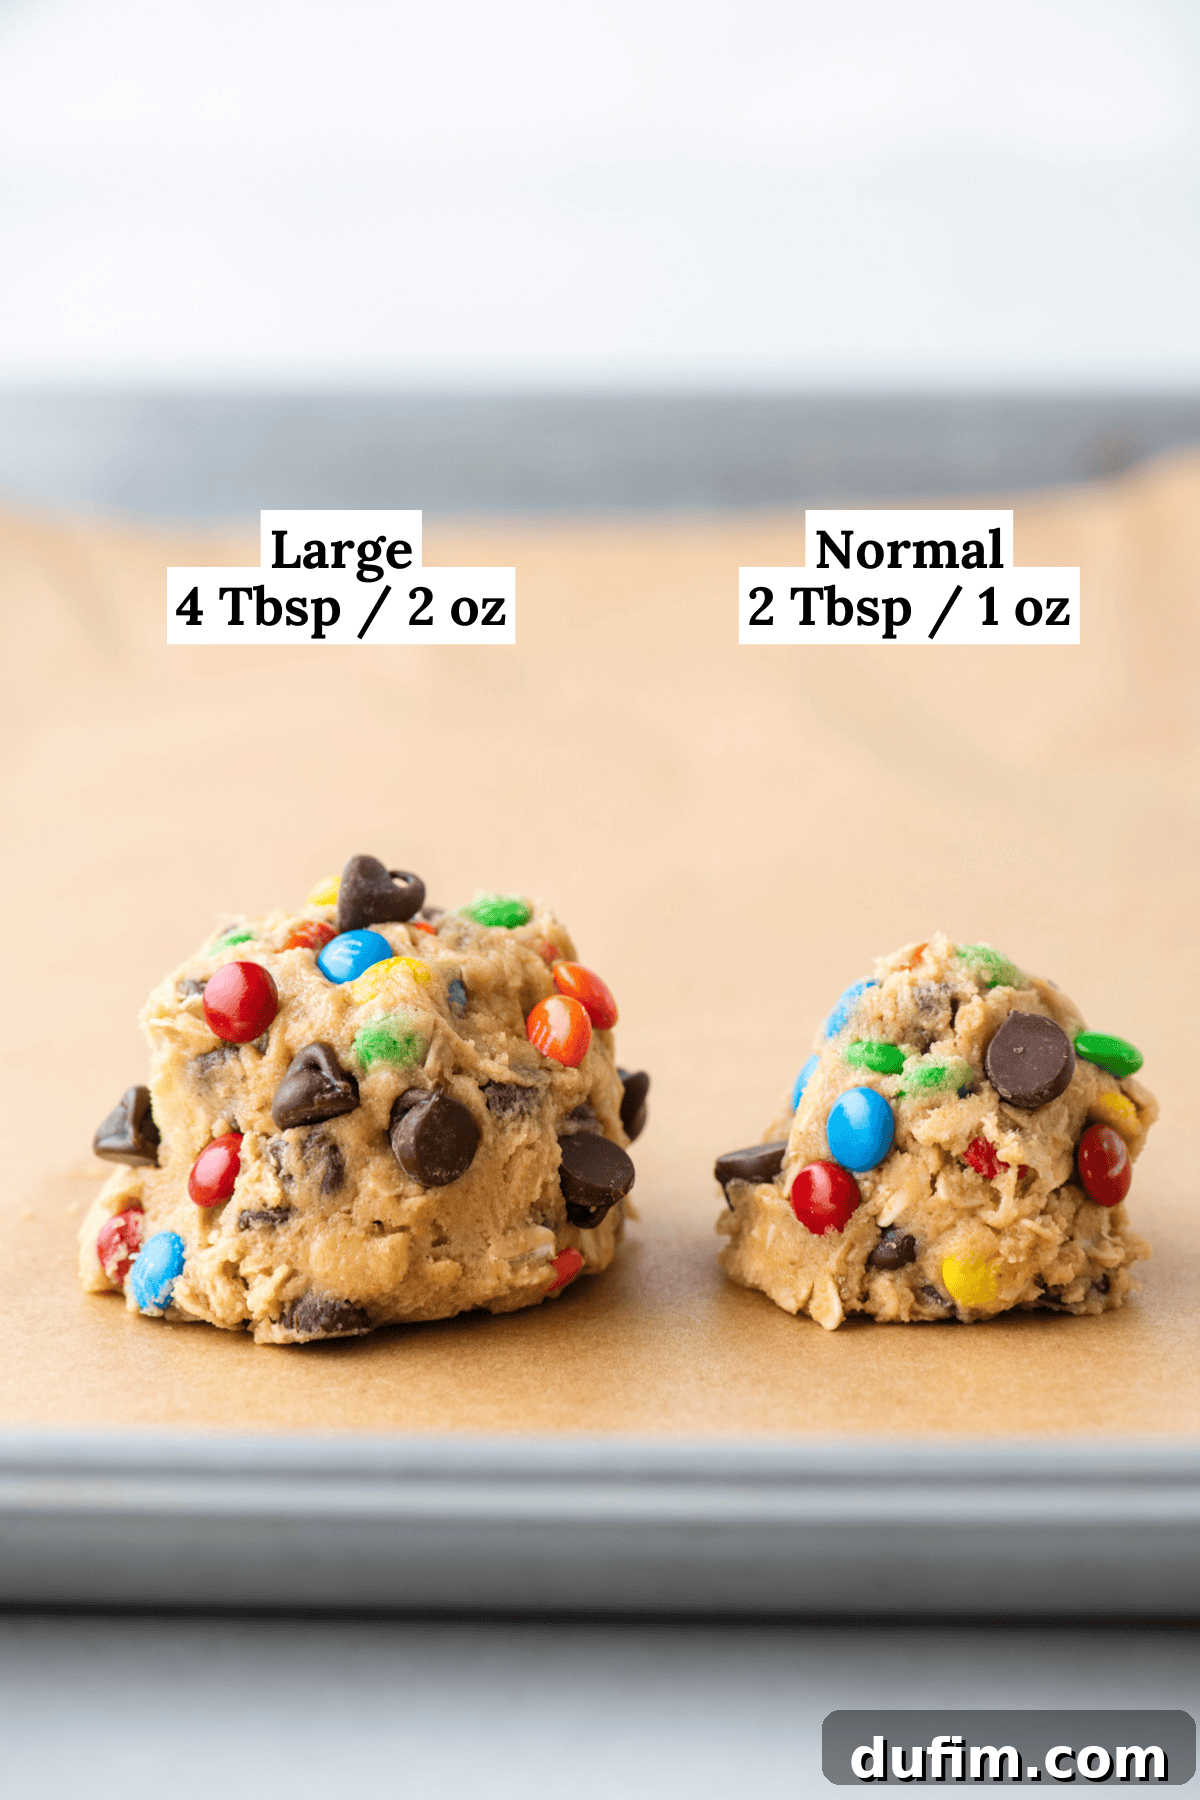
- Form and Prepare Cookie Dough Balls: Using a reliable cookie scoop, portion out your dough balls and arrange them onto a baking sheet generously lined with a silicone mat or parchment paper. Leave adequate space between each dough ball to allow for spreading during baking. For an extra “wow factor” and that signature bakery-style presentation, gently press additional M&M’s and chocolate chips onto the outside surface of each dough ball. This ensures a beautiful visual appeal. Remember, I recommend a 2 tablespoon (1 ounce) scoop for average-sized cookies, and a more substantial 4 tablespoon (2 ounce) scoop for those truly extra-large, show-stopping treats.
- Bake to Golden Perfection and Cool: Place your prepared baking sheets in the preheated oven. Bake the average 2 tablespoon (1 ounce) dough balls for approximately 10-13 minutes. For the impressive 4 tablespoon (2 ounce) dough balls, extend the baking time to 13-15 minutes. Regardless of size, cookies are done when their edges are just beginning to turn a delicate golden brown, while their centers still appear slightly soft or even slightly undercooked. This is crucial for maintaining that desirable chewy interior. Once removed from the oven, allow the monster cookies to cool completely on the baking sheet. They will continue to set and firm up during this cooling period, yielding the perfect, satisfyingly chewy texture. Resist the urge to move them too soon, as they are fragile when hot.
Pro Tips for the Best Chewy Monster Cookies, Every Time
Achieving perfectly chewy, bakery-quality monster cookies is entirely within your reach! By consistently following these professional baking tips, you’ll effortlessly create irresistible treats that taste like they came straight from a gourmet patisserie, delighting everyone who takes a bite.
- Mastering Flour Measurement is Key: The foundation of any great cookie lies in accurately measured flour. To avoid dense, dry, or inconsistent cookies, never scoop flour directly from the bag with your measuring cup, as this compacts it. Instead, first lightly whisk your all-purpose flour in its container or bag to aerate it and break up any clumps. Then, use a spoon to gently sprinkle the flour into your measuring cup until it overflows. Crucially, resist the urge to tap or shake the cup against the counter, as this will compact the flour, resulting in too much dry ingredient. Finally, use the straight edge of a butter knife or similar flat utensil to level off the excess flour, ensuring a precise and consistent measurement every single time.
- The Magic of Room Temperature Butter: This seemingly small detail makes a significant impact on your cookie’s final texture and overall success. Butter that is at true room temperature (soft enough to indent with a finger but still cool to the touch, not melted or greasy) creams effortlessly with the sugars, creating a light, airy, and emulsified mixture. This process incorporates tiny air pockets into the dough, which contribute directly to the soft, tender, and wonderfully chewy texture we’re aiming for in our monster cookies. Cold butter won’t cream properly, leading to a dense cookie, and melted butter will result in flat, greasy cookies that lack chewiness.
- Choose the Right Peanut Butter: Not all peanut butter is created equal when it comes to baking, especially for cookies where texture and structure are paramount. For these monster cookies, I strongly recommend using a processed or conventional creamy peanut butter, such as popular brands like Jif or Skippy. These types of peanut butter contain stabilizers (like hydrogenated oils) that help maintain the cookie’s structure, prevent excessive spreading, and contribute to its signature chewiness. Natural peanut butter, with its tendency to separate and its more fluid, oily consistency, is generally too watery and oily for this recipe and can negatively impact the dough’s texture, leading to thinner, greasier cookies that don’t hold their shape as well.
- Elevate Your Presentation Like a Pro: For that ultimate “wow factor” and a truly professional, bakery-style appearance, don’t overlook this simple yet effective trick. Before placing your scooped cookie dough balls onto the baking sheet and into the oven, gently press a few extra mini M&M’s and chocolate chips onto the outside surface of each dough ball. As the cookies bake and naturally spread, these additional mix-ins will be beautifully showcased on top, creating an incredibly appealing visual that signals the abundance of delicious goodness within. This makes your homemade monster cookies look even more irresistible.
- Avoid Overbaking for Ultimate Chewiness: This is perhaps the most critical tip for achieving a perfectly chewy cookie. Monster cookies should be removed from the oven when their edges are just barely beginning to turn a delicate golden brown, and their centers still look slightly soft, or even a little undercooked. Remember, cookies continue to bake for a few minutes after they are taken out of the hot oven, a phenomenon known as “carryover cooking.” Overbaking, even by a minute or two, will result in a dry, crumbly cookie, sacrificing that delightful, soft chewiness we’re striving for. Trust the process – slightly underbaked is often the secret to a perfectly chewy cookie!
- Consider Chilling Your Dough (Optional, but Recommended): While this recipe is designed to be made without requiring chilling, if you have the luxury of time, a brief chill (around 30-60 minutes) in the refrigerator can further enhance the cookie’s flavor and texture. Chilling helps to firm up the butter in the dough, which in turn reduces the amount of spread during baking and results in thicker, chewier cookies. It also allows the various flavors to meld beautifully, creating a more complex and satisfying taste profile.
Get Creative: Variations and Substitutions for Your Monster Cookies
While I absolutely adore the classic rendition of these ultimate chewy monster cookies, one of their most delightful attributes is their incredible versatility. They are super easy to customize, allowing you to tailor them precisely to your unique preferences, dietary needs, or simply what ingredients you happen to have on hand. Feel free to unleash your inner baker and experiment with different additions to create your own signature monster cookie masterpiece that will surely impress!
- Making Gluten-Free Monster Cookies: For those with dietary restrictions or preferences, transforming these into delicious gluten-free monster cookies is entirely achievable without sacrificing flavor or texture. The key is to ensure you use both certified gluten-free all-purpose flour and certified gluten-free old-fashioned rolled oats. I have personally tested this recipe multiple times with great success using King Arthur’s Gluten-Free Measure for Measure Flour. This particular flour blend works exceptionally well, producing cookies that are just as chewy, moist, and satisfying as their gluten-containing counterparts, maintaining that authentic monster cookie experience.
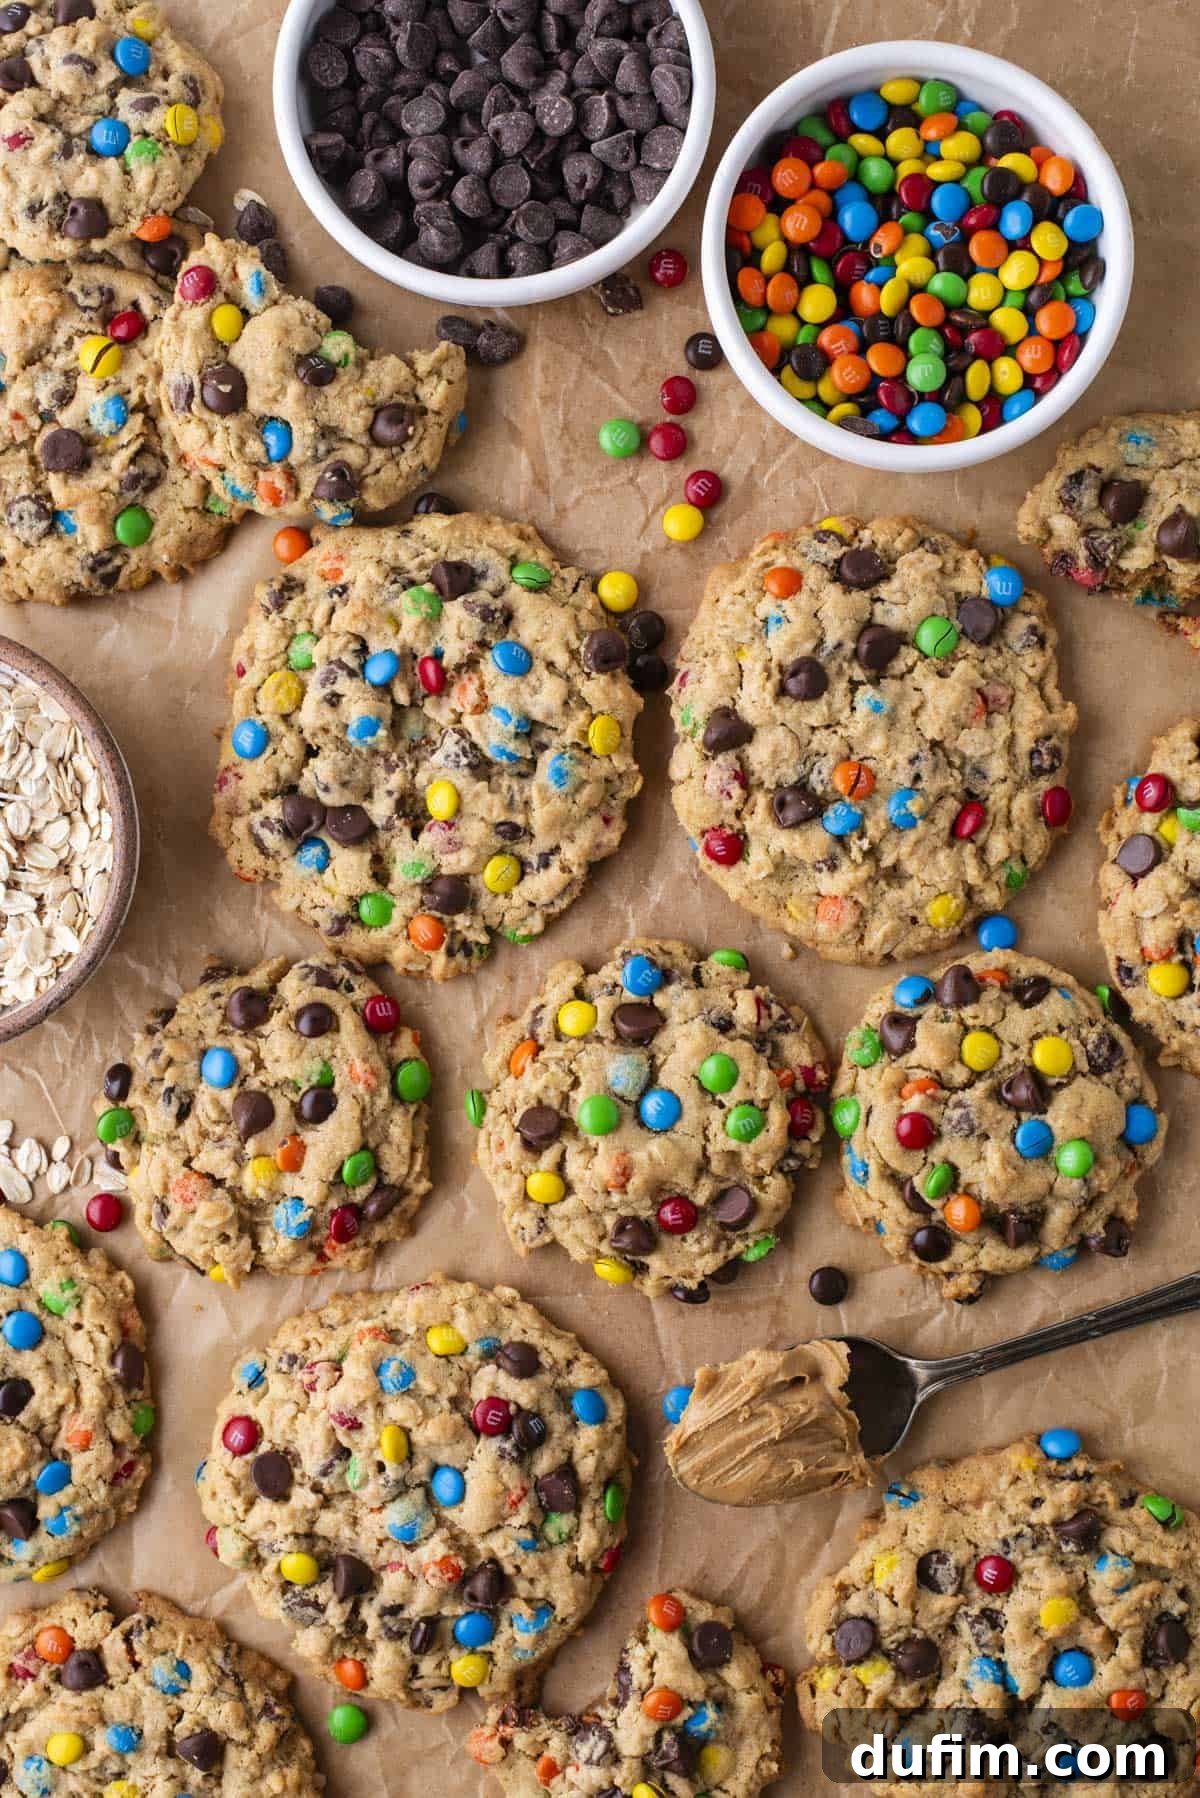
- Endless Mix-In Possibilities: Our core recipe proudly calls for a generous 1 cup of colorful mini M&M candies and 1 cup of rich chocolate chips. However, the true beauty and fun of monster cookies lie in their “anything goes” spirit! You can easily swap these out, or even add more, with almost any other mix-in your heart desires, allowing for endless creativity and flavor combinations. Consider these exciting ideas to personalize your next batch:
- M&M Varieties: Expand beyond mini M&M’s with regular size M&M’s, vibrant Reese’s Pieces, nutty Peanut M&M’s, decadent Dark Chocolate M&M’s, or satisfying Crispy M&M’s for added crunch.
- Nutty Additions: Introduce a delightful crunch and earthy flavor with chopped pecans, shelled pistachios, macadamia nuts, or classic walnuts.
- Other Chips & Chunks: Elevate the flavor profile with creamy peanut butter chips, sweet butterscotch chips, delicate white chocolate chips, more robust milk chocolate chunks, rich dark chocolate chunks, crunchy toffee bits, or even chopped Reese’s Peanut Butter Cup pieces for an extra peanut butter punch.
- Fruity & Other Textures: For a different dimension, try shredded coconut, tangy dried cranberries, finely chopped dried apricots, plump raisins, indulgent chocolate-covered raisins, fluffy mini marshmallows, or even chopped pretzel pieces for a delightful salty-sweet crunch.
- Seasonal Flair: Don’t forget to use holiday-themed M&M’s for festive monster cookies that perfectly match any celebration!
Experiment with different combinations and quantities to discover your absolute favorite blend. The ultimate goal is to have a little bit of everything in every single bite, making each cookie a unique and delightful discovery!
Storing and Freezing Monster Cookies for Lasting Freshness
Ensuring your freshly baked monster cookies stay delightfully soft and chewy is just as important as baking them perfectly. Whether you’re planning to enjoy them over a few days or save them for a special occasion, here are the best methods for storing and freezing, so you can savor these irresistible treats for days, or even months, to come.
How to Store Baked Monster Cookies
To maintain their optimal freshness and signature chewiness, store any leftover baked monster cookies in an airtight container at room temperature. They will remain wonderfully delicious and retain their soft texture for 5-7 days. A fantastic, time-honored trick to keep them extra soft and moist is to **add a slice of fresh bread** to the container with the cookies. The bread will gradually release its moisture, which the cookies will absorb, effectively preventing them from drying out and ensuring they stay perfectly tender and satisfying, even on day five!
Freezing Baked Monster Cookies
These chewy monster cookies also freeze exceptionally well, making them perfect for future cravings, last-minute treats, or meal prepping for unexpected guests. Once the cookies have cooled completely to room temperature, transfer them to a freezer-safe bag or an airtight freezer-friendly container. Layer them carefully, perhaps with small sheets of parchment paper between layers, to prevent them from sticking together or forming ice crystals. They will retain their superb quality for up to 3 months in the freezer. When you’re ready to indulge, simply remove the desired number of cookies and thaw them in the refrigerator overnight, or at room temperature for a quicker treat. For a warm, freshly baked experience that mimics just-out-of-the-oven goodness, you can even pop them in a microwave for 10-15 seconds after thawing.
Freezing Monster Cookie Dough for Ultimate Convenience
For the ultimate in baking convenience and spontaneous treat-making, you can also prepare and freeze this monster cookie dough in advance. This means you’ll always have a stash of delicious, ready-to-bake cookies at your fingertips any time a craving strikes, or when unexpected company arrives, minimizing prep time significantly. Here’s how to perfectly freeze your monster cookie dough for optimal results:
- Scoop and Flash Freeze: Begin by dropping uniform cookie dough balls (using your preferred scoop size) onto a baking sheet generously lined with a silicone mat or parchment paper. You can place the dough balls relatively close together on the sheet at this stage since they won’t be baking yet. Place the entire baking sheet, uncovered, into the freezer until the cookie dough balls are completely frozen solid. This typically takes about 1 hour. This crucial “flash freezing” step prevents them from sticking together once they are transferred into a bag or container.
- Package and Label: Once the dough balls are thoroughly frozen solid, remove the baking sheet from the freezer. Carefully transfer the rock-hard cookie dough balls into a heavy-duty ziplock freezer bag or an airtight freezer-safe container. To prevent them from sticking or clumping during long-term storage, you can separate layers with small sheets of parchment paper. Most importantly, don’t forget to label the bag or container clearly with the date it was frozen and precise baking directions (oven temperature and adjusted baking time).
- Store: The frozen cookie dough can be stored in your freezer for up to 3 months, ready to be baked at a moment’s notice whenever a craving strikes. This makes it an excellent option for meal prep or emergency treats.
- To Bake from Frozen: When you’re ready for fresh-baked monster cookies, simply remove the desired number of dough balls from the freezer. There’s no need to thaw them first! Preheat your oven to 350ºF (175ºC). Place the frozen dough balls on a prepared baking sheet, ensuring adequate spacing. Bake for approximately 14-17 minutes. Keep in mind that frozen cookies may require an additional 1-2 minutes of baking time compared to fresh, un-chilled dough to reach that perfect golden edge and chewy center. Enjoy the convenience of freshly baked cookies anytime!
Explore More Irresistible Cookie Recipes
If you’ve fallen in love with these ultimate chewy monster cookies, you’ll be thrilled to discover more delightful cookie recipes waiting to be baked. From classic chocolate chip to wholesome oatmeal varieties, there’s a perfect cookie for every palate and every occasion. Dive in and find your next favorite sweet treat to master in your kitchen:
- Irresistible Peanut Butter Chocolate Chip Cookies
- Perfectly Chewy Chocolate Chip Cookies
- Hearty Peanut Butter Oatmeal Cookies
- Delightfully Chewy Oatmeal Chocolate Chip Cookies
Average Rating: 4.58 from 14 ratings
Monster Cookies
Beth
10 minutes
15 minutes
10 minutes
35 minutes
24
cookies
Print Recipe
Equipment
-
KitchenAid 9-Speed Mixer
-
My favorite spatula!
-
Cookie Dough Scoop
-
Silicone Baking Mat
Ingredients
-
1
cup (120g)
all purpose flour -
1
tsp
baking soda -
½
tsp
baking powder -
½
tsp
cornstarch -
½
tsp
salt -
1 ¼
cup (115-124g)
old fashion rolled oats -
½
cup (113g)
unsalted butter, room temperature -
½
cup (107g)
brown sugar -
½
cup (99g)
granulated sugar -
½
cup (135g)
creamy peanut butter -
1
large
egg -
1
tsp
vanilla extract -
1
cup (210g)
mini m&ms -
1
cup (170g)
chocolate chips
Instructions
-
Preheat the oven to 350º F (175ºC). In a small bowl, combine the flour, baking soda, baking powder, cornstarch, salt, and old-fashioned rolled oats. Whisk well to ensure even distribution of ingredients and set aside.
-
In a large mixing bowl, cream together the softened butter, brown sugar, and granulated sugar with an electric mixer for 1-2 minutes until light and fluffy. Add in the creamy peanut butter, vanilla extract, and large egg, then beat again until fully combined and smooth. Scrape down the sides of the bowl as needed.
-
Gradually add the dry ingredients to the wet ingredients, mixing on low speed or by hand just until combined. Be careful not to overmix, which can lead to tough cookies. Fold in the mini M&M’s and chocolate chips by hand until evenly distributed throughout the thick dough.
-
Use a cookie scoop to form dough balls (use a 2 Tbsp/1 oz scoop for average sized cookies, or a 4 Tbsp/2 oz scoop for extra large cookies) and place them on a silicone mat-lined baking sheet, leaving space between each. For enhanced presentation, gently press additional M&M’s and chocolate chips onto the outside of the dough balls.
-
Bake 1 oz dough balls for 10-13 minutes, or 2 oz dough balls for 13-15 minutes, until the edges are lightly golden and the centers still appear slightly soft or undercooked. They will continue to cook and set as they cool. Allow the cookies to cool completely on the baking sheet to achieve the perfect chewy texture.
Video
(Video content removed to comply with JavaScript removal requirements. Please refer to the written instructions for guidance.)
Notes
How to Make Gluten-Free Monster Cookies
Be sure to use certified gluten-free all-purpose flour and certified gluten-free old-fashioned rolled oats. I have made these cookies multiple times with King Arthur’s Gluten-Free Measure for Measure Flour with great success, yielding equally delicious and chewy results.
Nutrition
Calories:
287
kcal
|
Carbohydrates:
40
g
|
Protein:
5
g
|
Fat:
13
g
|
Saturated Fat:
6
g
|
Polyunsaturated Fat:
1
g
|
Monounsaturated Fat:
3
g
|
Trans Fat:
0.2
g
|
Cholesterol:
20
mg
|
Sodium:
137
mg
|
Potassium:
122
mg
|
Fiber:
2
g
|
Sugar:
22
g
|
Vitamin A:
157
IU
|
Vitamin C:
0.1
mg
|
Calcium:
40
mg
|
Iron:
1
mg
Nutrition Disclosure
All nutritional values are approximate and provided to the reader as a courtesy. Changing ingredients and/or quantities will alter the estimated nutritional calculations.
Love this recipe? Share your thoughts below!