
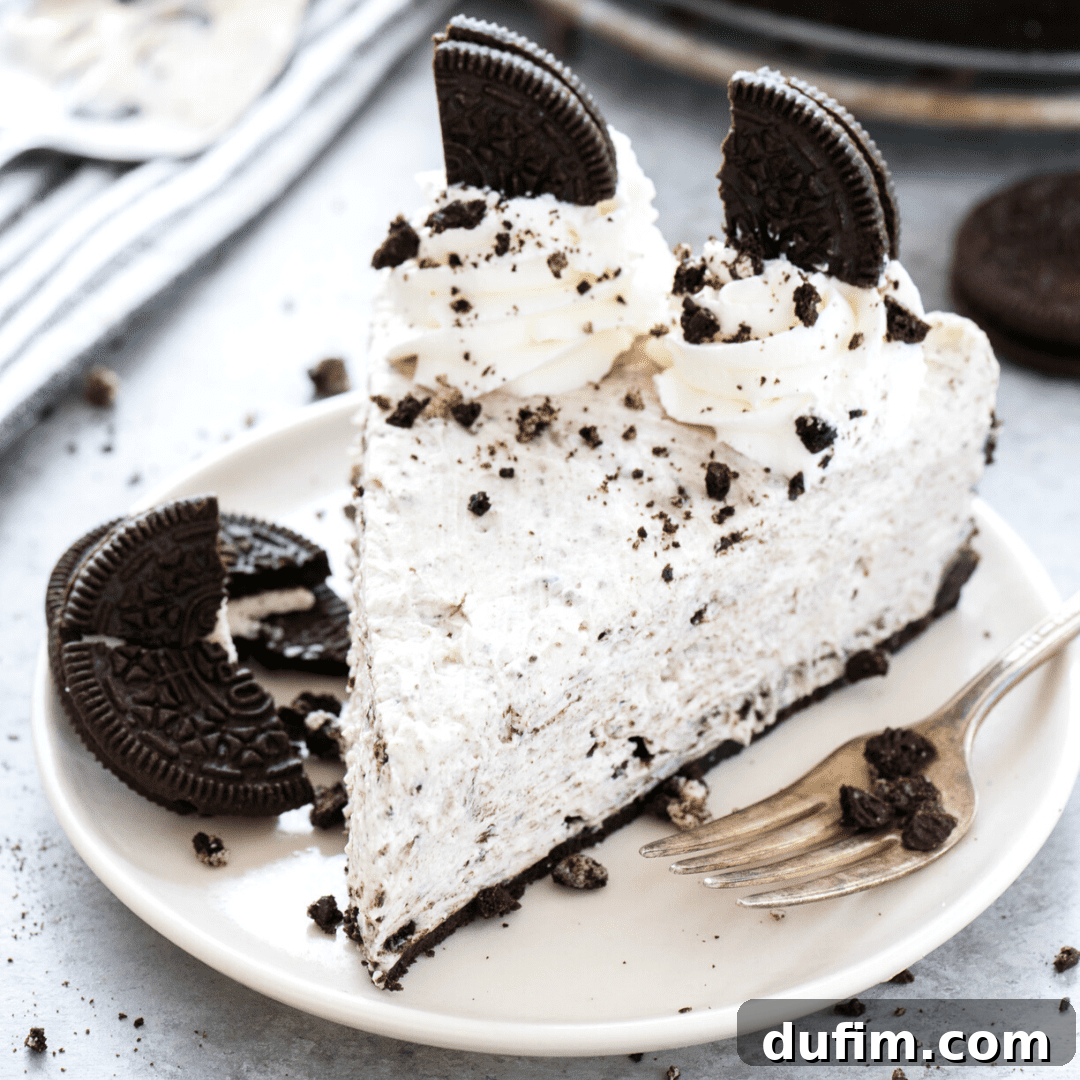
My no-bake Oreo cheesecake recipe is more than just a dessert; it’s a celebrated staple that has consistently delighted family and friends over the years. Through countless iterations, I’ve honed every detail: from perfecting the butter-to-Oreo crumb ratio for a remarkably sturdy and flavorful crust, to mastering the precise technique for blending the filling ingredients. This dedication ensures a cheesecake that is exquisitely fluffy, profoundly creamy, and unbelievably smooth – a textural dream that is, without exaggeration, truly addictive. This isn’t just a recipe; it’s a meticulously crafted guide to creating an effortlessly elegant, show-stopping dessert that requires no oven, making it perfect for any occasion.
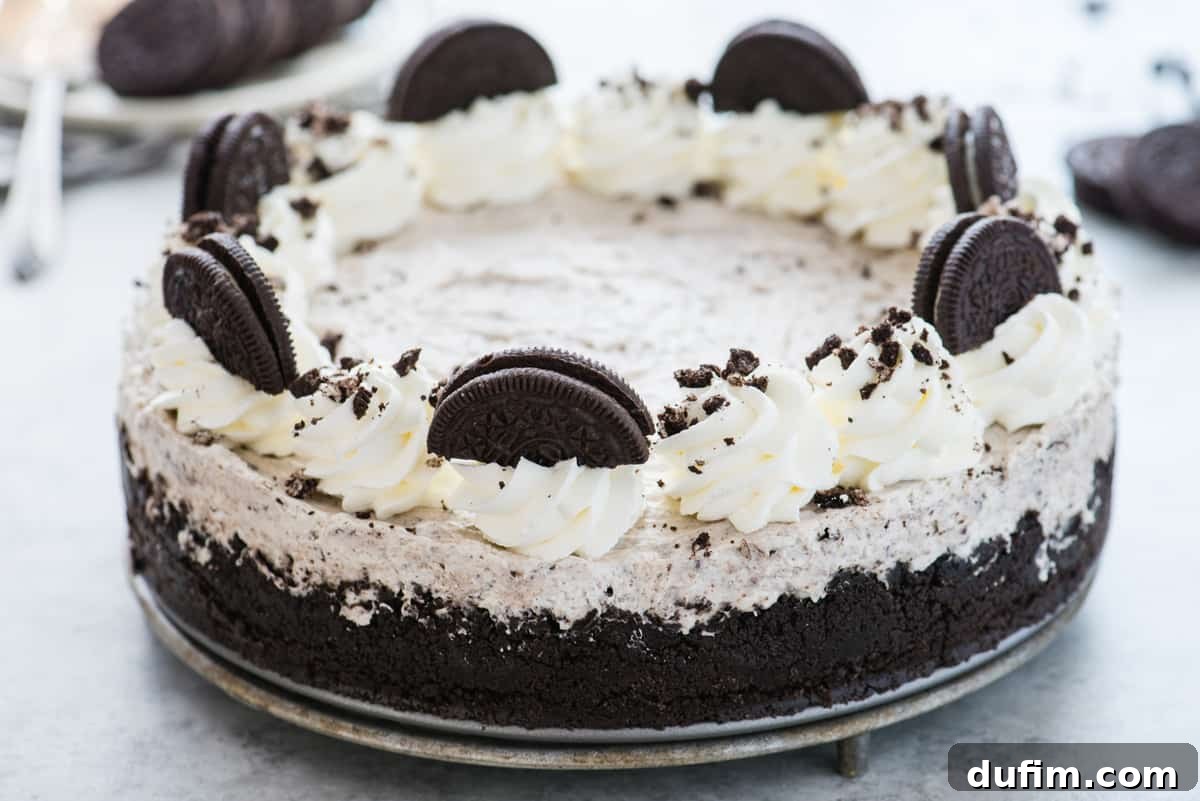
Gave this recipe a try this weekend, and it was a hit! Easy and SUPER DELICIOUS!!
-Mary
In today’s busy world, having a reliable, go-to no-bake dessert recipe is a true game-changer. Whether you’re planning for a festive holiday gathering, preparing a special treat for your loved ones, or simply craving something sweet and satisfying without the hassle of baking, this no-bake Oreo cheesecake fits the bill perfectly. Its simplicity belies its incredible flavor and luxurious texture, making it an indispensable part of your dessert collection. Forget about turning on the oven or complex techniques; this recipe is designed for maximum enjoyment with minimal effort, ensuring spectacular results every time.
Why This No-Bake Oreo Cheesecake is a Must-Try
This dessert consistently earns accolades and becomes an instant favorite for anyone who tries it. Here’s a closer look at what makes this no-bake Oreo cheesecake truly special and why you’ll want to make it again and again:
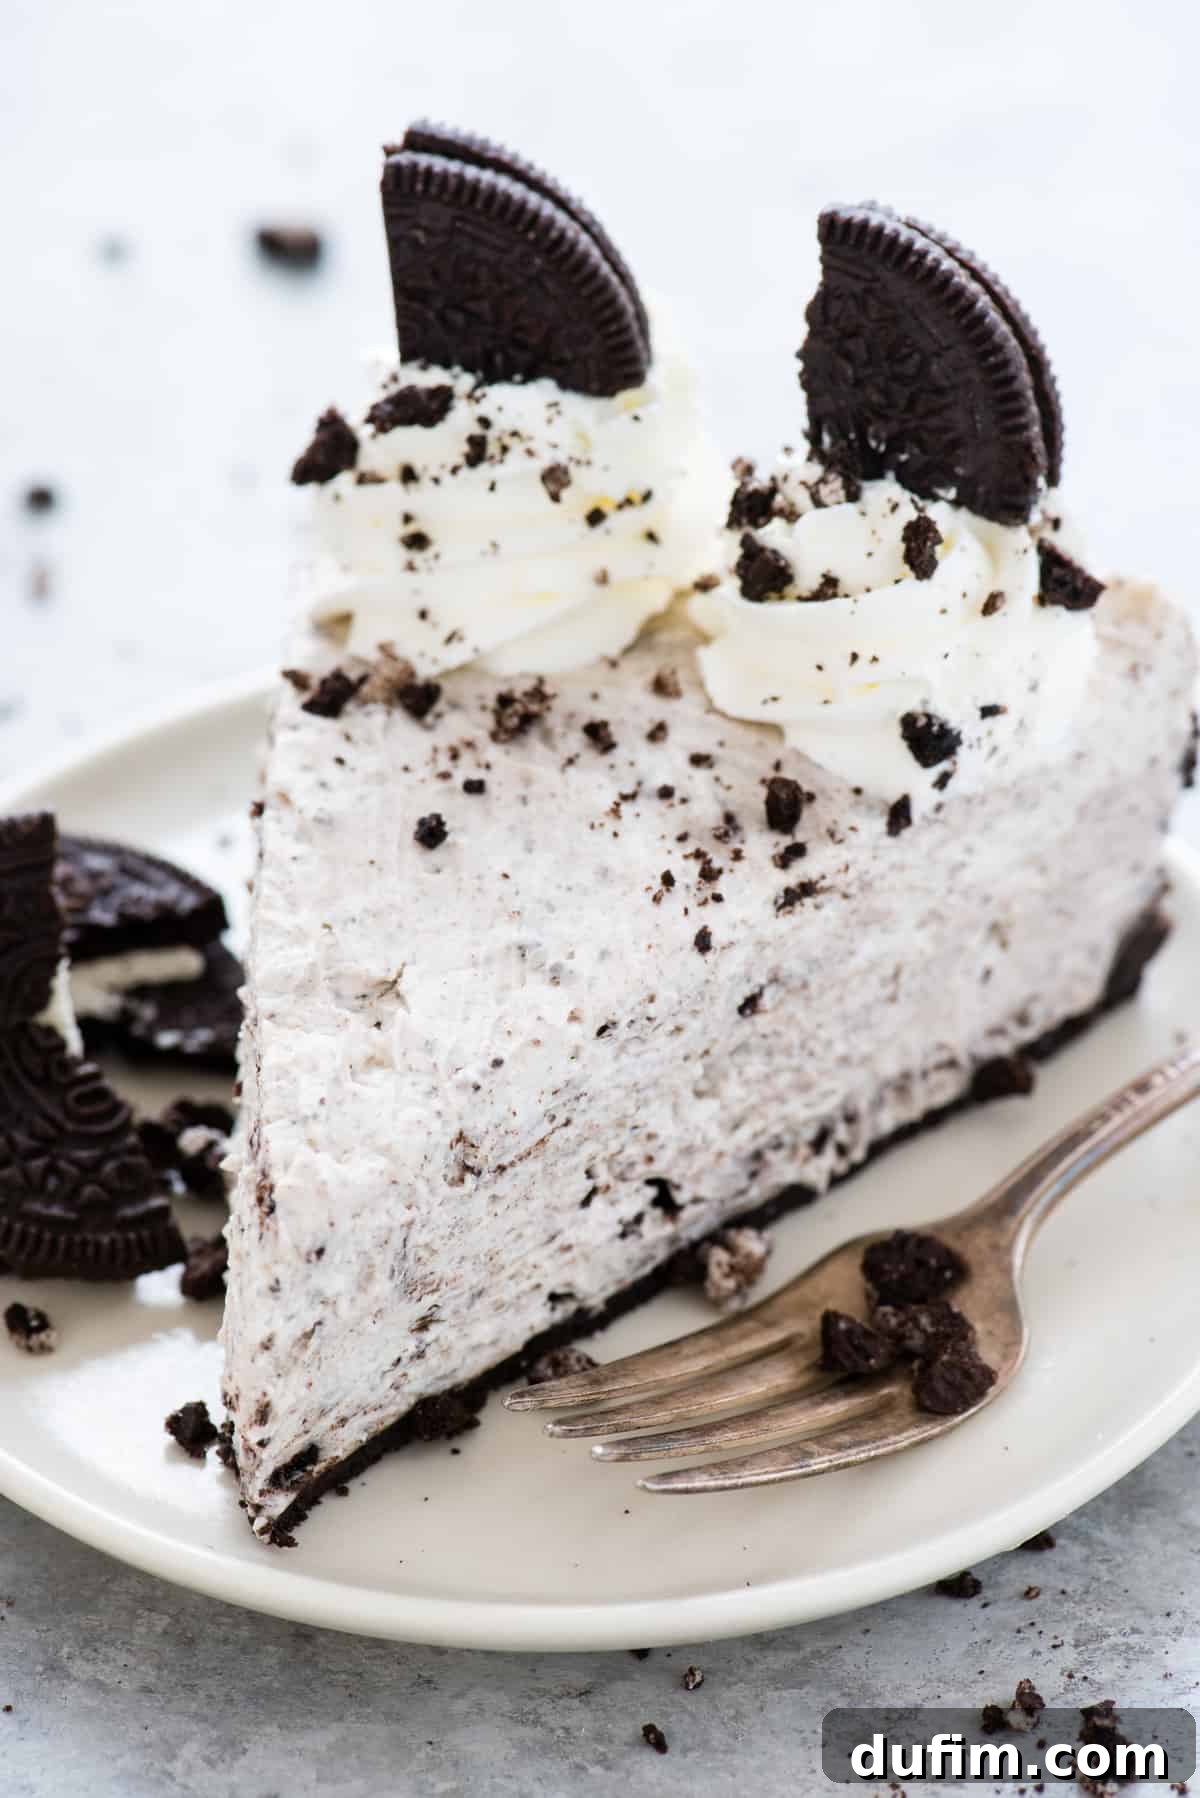
- **Unforgettable Texture:** Prepare to be amazed by a cheesecake that defines perfection in every spoonful. It’s consistently fluffy, sumptuously creamy, and flawlessly smooth. This ideal blend ensures a melt-in-your-mouth experience that is both light and incredibly satisfying, without any dense or rubbery consistency often found in baked cheesecakes.
- **Rich Flavor, Delightfully Light Feel:** This recipe masterfully balances richness with lightness. Despite its decadent flavor profile, packed with the deep taste of Oreos and cream cheese, it maintains an airy quality. This means you can indulge in a generous slice without feeling overly heavy, making it an ideal dessert to round off any meal.
- **An Oreo Lover’s Paradise:** If you adore Oreos, this cheesecake is your ultimate dream. It boasts a perfectly crafted, crunchy Oreo crust that forms a delicious base. But the Oreo magic doesn’t stop there; generous pieces of crushed Oreos are lovingly folded directly into the velvety cheesecake filling, ensuring a delightful burst of cookie flavor and texture in every single bite.
- **Effortless No-Bake Convenience:** The biggest draw? No baking required whatsoever! This dessert is 100% no-bake, making it a fantastic choice for hot summer days when you want to keep your kitchen cool, or for busy schedules when you need a impressive dessert without the oven. It simplifies dessert making without compromising on gourmet quality.
- **Quick & Straightforward Preparation:** Despite its sophisticated appearance and taste, this cheesecake comes together remarkably quickly. The active preparation time is minimal, allowing you to whip up this exquisite dessert in under 30 minutes. The majority of the time is hands-off chilling, giving you more freedom to focus on other tasks or simply relax.
- **Versatile for Any Celebration:** From casual family dinners and spontaneous get-togethers to elaborate holiday feasts and special birthday celebrations, this cheesecake is universally loved. Its enticing appearance and irresistible taste make it a guaranteed crowd-pleaser, suitable for any occasion where a delicious dessert is desired.
Should time be of the essence, you can streamline the process even further by opting for a high-quality store-bought crust. This clever shortcut maintains the dessert’s exceptional flavor and impressive presentation, allowing you to enjoy this delightful treat with even greater ease.
Key Ingredients for Your Decadent Oreo Cheesecake
Creating this dream-like no-bake cheesecake relies on a focused selection of ingredients, each playing a crucial role in the final texture and flavor. Prioritizing quality, especially with dairy products, will truly elevate your dessert. Here’s what you’ll need and why each component is essential:
- **Oreos:** The cornerstone of this recipe! You’ll need plenty of these iconic chocolate sandwich cookies. They form the crunchy, dark chocolatey base of the crust and are also crushed and folded into the filling, infusing every bite with that unmistakable Oreo flavor and a delightful textural contrast.
- **Unsalted Butter:** This is the binding agent for your crust. Melted unsalted butter mixes with the crushed Oreos to create a firm, buttery foundation that holds its shape beautifully once chilled. Using unsalted butter gives you control over the overall saltiness of the dessert.
- **Full-Fat Cream Cheese:** Absolutely vital for the characteristic richness and tang of cheesecake. Ensure you use full-fat cream cheese, as lower-fat versions can result in a less firm and less creamy filling. It must be at room temperature to ensure it beats smoothly and incorporates seamlessly into the other ingredients without any lumps.
- **Heavy Whipping Cream:** This is what gives the cheesecake its incredible lightness and sets it without baking. When whipped to stiff peaks, it provides the necessary volume and stability. It’s crucial that the cream is very cold before whipping to achieve the best results.
- **Powdered Sugar (Confectioners’ Sugar):** Unlike granulated sugar, powdered sugar dissolves instantly, guaranteeing a silky-smooth, grit-free cheesecake filling. It also provides the perfect level of sweetness to balance the tang of the cream cheese and the bitterness of the chocolate.
- **Pure Vanilla Extract:** A touch of high-quality vanilla extract is a non-negotiable flavor enhancer. It deepens the overall taste profile, complementing the chocolate and cream cheese beautifully, and adding a warm, aromatic note that elevates the entire dessert.
Understanding the Time Commitment: Prep and Chill
One of the appealing aspects of a no-bake cheesecake is the relatively short active preparation time. However, it’s important to factor in the non-negotiable chilling period, which is crucial for achieving the perfect texture and stability.
- **Oreo Crust Preparation:** This initial step is quite speedy, requiring approximately 5 minutes of hands-on time to crush the Oreos and press them into your chosen pan.
- **Cheesecake Filling Creation:** Whipping and combining the filling ingredients typically takes around 15 minutes. This can often be done concurrently while your prepared crust is chilling, optimizing your workflow.
- **Essential Chilling Period:** This is the most critical waiting period. The cheesecake absolutely *must* chill in the refrigerator for a minimum of 8 hours. This extended time allows the filling to properly set and firm up. For the most optimal results, including easier and cleaner slicing, I cannot recommend highly enough that you allow it to chill overnight. Patience truly pays off here!
Mastering the Art of No-Bake Oreo Cheesecake: Achieving Ultimate Fluffiness
The secret to a truly fluffy, creamy, and undeniably smooth no-bake cheesecake doesn’t solely lie in the ingredients themselves, but rather in the precision and technique of *how* you combine them. Each step is designed to build the perfect texture. Follow these four crucial steps carefully, and you’ll achieve cheesecake perfection every time.
STEP 1 – Create the Silky-Smooth Cream Cheese Base
- The foundation of your filling begins with the cream cheese. It is paramount that your full-fat cream cheese is at true room temperature – not cold, not warm, but perfectly softened. In a large mixing bowl, combine the softened cream cheese with the specified amount of powdered sugar. Using an electric mixer, beat these two ingredients together for a full 1 to 2 minutes. This isn’t just about combining; it’s about aerating the cream cheese until it is visibly light, incredibly creamy, and utterly smooth, with absolutely no lumps. This meticulous beating ensures a uniform, luscious base for your cheesecake.
STEP 2 – Achieve Perfectly Stiff Whipped Cream
- For the lightest, most stable whipped cream that provides the structural integrity for your no-bake cheesecake, preparation is key. Retrieve your thoroughly chilled metal or glass mixing bowl and electric mixer beaters from the freezer. Pour the very cold heavy whipping cream into this cold bowl, add the remaining portion of powdered sugar, and a splash of vanilla extract. Beat with your electric mixer on high speed until robust stiff peaks form. Stiff peaks mean the whipped cream is thick, holds its shape firmly when the beaters are lifted, and shows no signs of wilting or droopiness. This step is critical; under-whipped cream will result in a runny cheesecake.
STEP 3 – The Art of Gentle Folding and Combining
- Now for the delicate fusion that brings the filling together. Carefully add your prepared creamy cream cheese mixture to the bowl containing the stiffly whipped cream. This is also the perfect moment to incorporate the finely crushed Oreos, ensuring a delightful texture throughout the filling. Using your electric mixer on the *lowest* speed, mix for a brief 30 to 60 seconds. The goal is to mix *just* until the two mixtures are fully combined and no distinct streaks of either cream cheese or whipped cream are visible. Alternatively, you can achieve this by gently folding with a spatula. The key here is to avoid overmixing at all costs, as excessive agitation can deflate the precious air from the whipped cream, compromising the fluffy texture of your finished cheesecake. The final mixture should appear thick, airy, and hold its shape remarkably well.
STEP 4 – The Essential and Patient Chilling Period
- Once your perfectly combined filling is ready, spoon it carefully into your chilled Oreo crust, then use an offset spatula to gently smooth the top into an even layer. Now, the most crucial step begins: the chilling. Your no-bake cheesecake filling needs to firm up in the refrigerator for a minimum of 8 hours. However, for a truly impeccable, perfectly set cheesecake that slices with effortless precision, I wholeheartedly recommend chilling it overnight. This extended period allows the flavors to deepen and, more importantly, gives the structural components of the filling ample time to fully set and thicken, resulting in those coveted clean, crisp slices every time. Resist the urge to cut it short!
Troubleshooting: My No-Bake Cheesecake Isn’t Firm – What Happened?
It can be frustrating when your no-bake cheesecake doesn’t achieve the firm, sliceable consistency you envisioned. This is a common concern, but usually, the issue lies in a few key areas that are easily remedied. Understanding these points will help you achieve perfect results every time:
- **The Heavy Cream Wasn’t Whipped Enough:** This is, by far, the most frequent reason for a runny no-bake cheesecake. The heavy whipping cream is the primary structural component that helps the cheesecake set. It is absolutely crucial that the heavy cream is whipped until it forms *stiff peaks*. This means the whipped cream should be thick, voluminous, and hold its shape firmly when you lift the beaters from the bowl – there should be no softness or droopiness. If your cream is still soft or only forms soft peaks, it won’t be able to provide the necessary support for the cheesecake to firm up. Always ensure your cream is very cold and your mixing bowl/beaters are chilled for optimal whipping.
- **Insufficient Chilling Time:** While the “no-bake” aspect implies speed, patience during the chilling phase is non-negotiable. No-bake cheesecakes rely entirely on cold temperatures to solidify. If you’ve only allowed your cheesecake to chill for 6 hours instead of the recommended minimum of 8 hours (or, ideally, overnight), it simply hasn’t had enough time to fully set. From personal experience, the difference between a 6-hour chill and an overnight chill is significant in terms of firmness and the ability to cut clean slices. The longer it chills, the firmer and more stable it will become.
- **Cream Cheese Not at Room Temperature (or Too Warm):** While room temperature cream cheese is essential for smooth beating, if it’s too cold, it won’t combine properly, leading to lumps. If it’s too warm or even melted (e.g., from microwaving it to soften), it can contribute to a softer overall filling that struggles to set. Aim for truly softened, but still cool, room temperature.
- **Overmixing the Combined Filling:** Once you’ve beaten your cream cheese and whipped your cream separately, the final step of combining them needs to be done gently. Overmixing at this stage can deflate the air from the whipped cream, reducing its ability to provide structure and resulting in a softer cheesecake. Mix just until barely combined.
- **Incorrect Ingredient Ratios:** Always double-check your measurements. Using too little cream cheese or heavy cream, or too much liquid (like vanilla extract, though less common), can throw off the delicate balance required for the cheesecake to set properly.
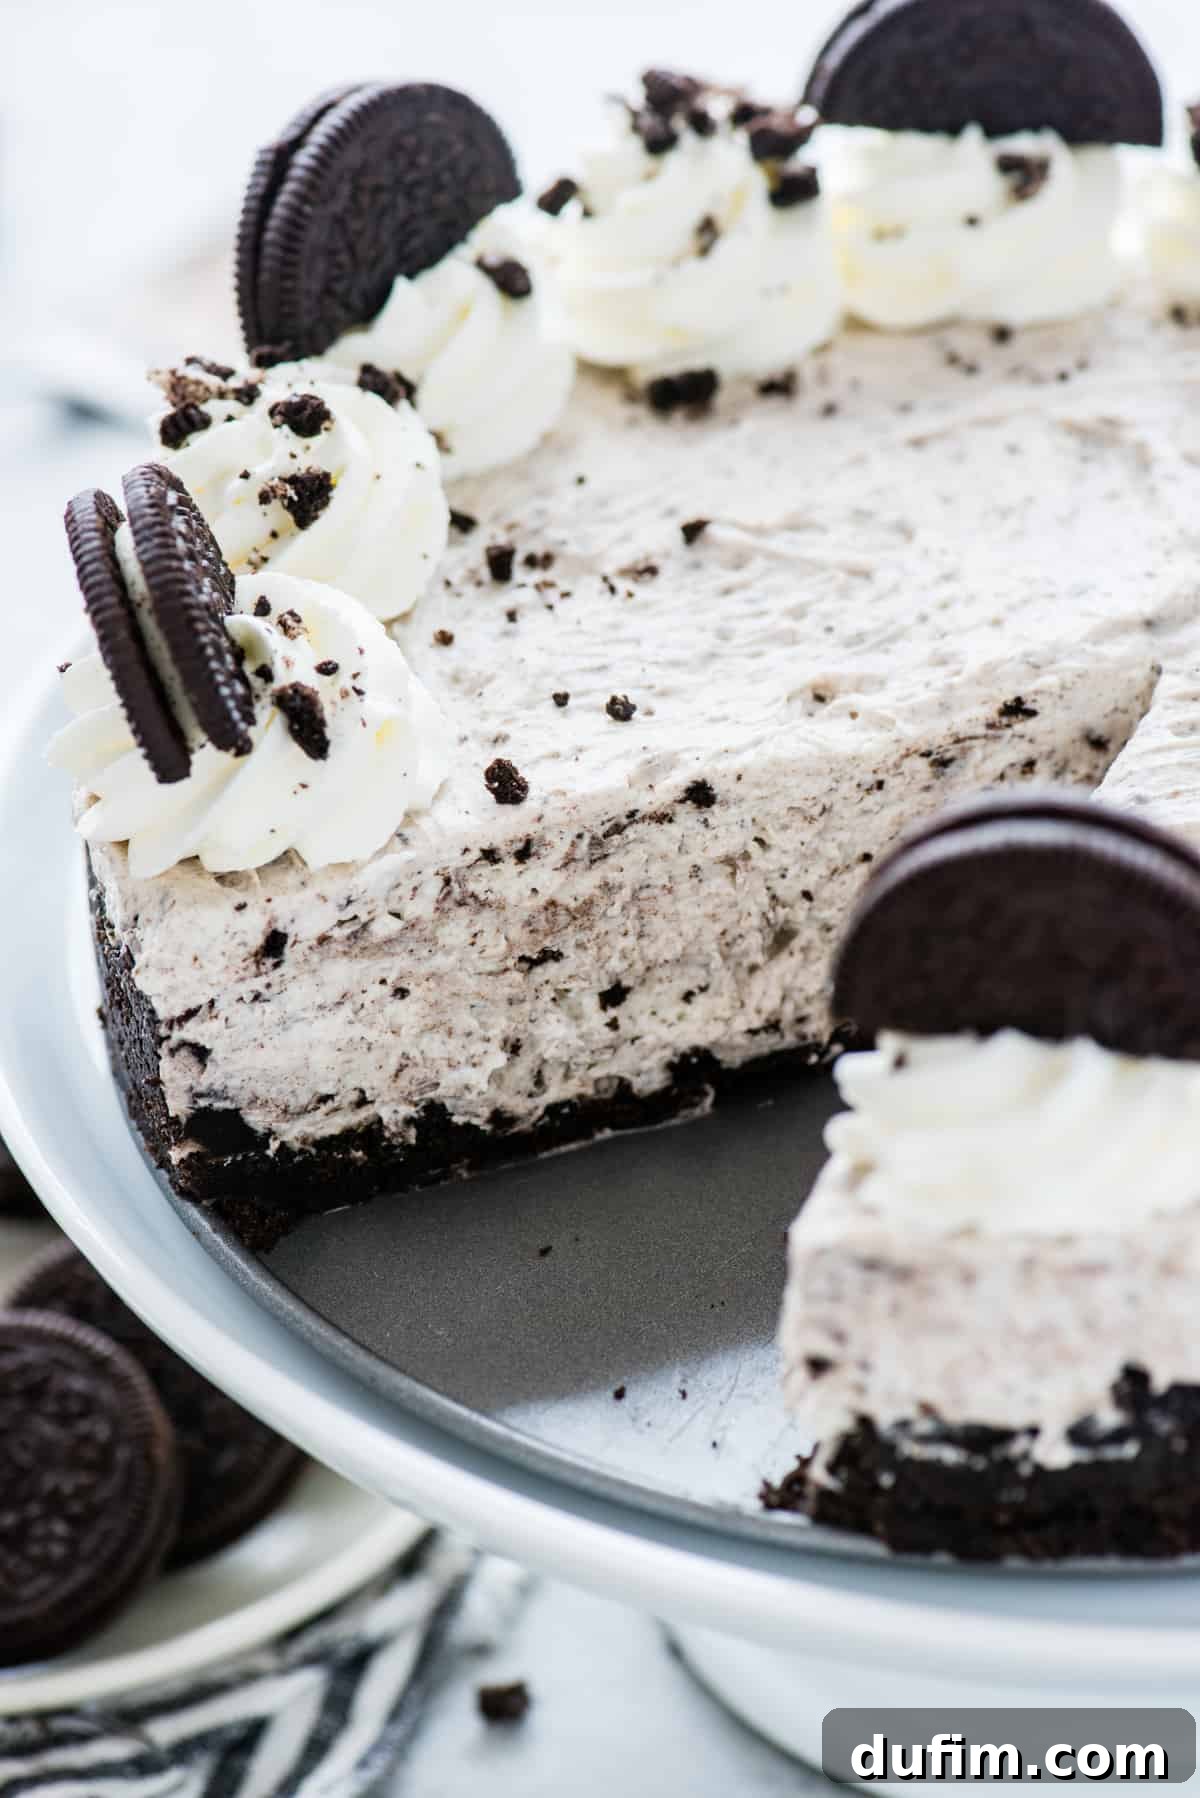
Optimal Storage Solutions for Your Oreo Cheesecake (No-Bake)
Ensuring your delightful no-bake Oreo cheesecake stays fresh and delicious for as long as possible is simple with proper storage. Here’s how to keep it in peak condition:
- **Refrigeration is Key:** This cheesecake must always be stored in the refrigerator. The cold temperature is essential not only for keeping it fresh but also for maintaining its firm, set texture.
- **Keep it Covered:** To prevent the cheesecake from absorbing unwanted odors from other foods in the fridge and to protect its delicate surface from drying out, it’s crucial to keep it well covered. A dedicated cake keeper is an excellent investment, providing a secure and airtight environment. Alternatively, you can use plastic wrap, ensuring it’s sealed tightly around the edges of the pan or dish, and if possible, avoid letting the plastic wrap touch the top of the cheesecake to preserve any decorative elements.
- **Enjoy Freshness for Days:** When stored correctly in the refrigerator, your no-bake Oreo cheesecake will retain its optimal flavor and texture for up to 5 days. While it might still be safe to consume beyond this point, its quality will gradually start to diminish.
- **Serving Temperature:** For the most enjoyable experience, serve the cheesecake chilled directly from the refrigerator. This ensures the best texture and a refreshing coolness that perfectly complements its rich flavor.
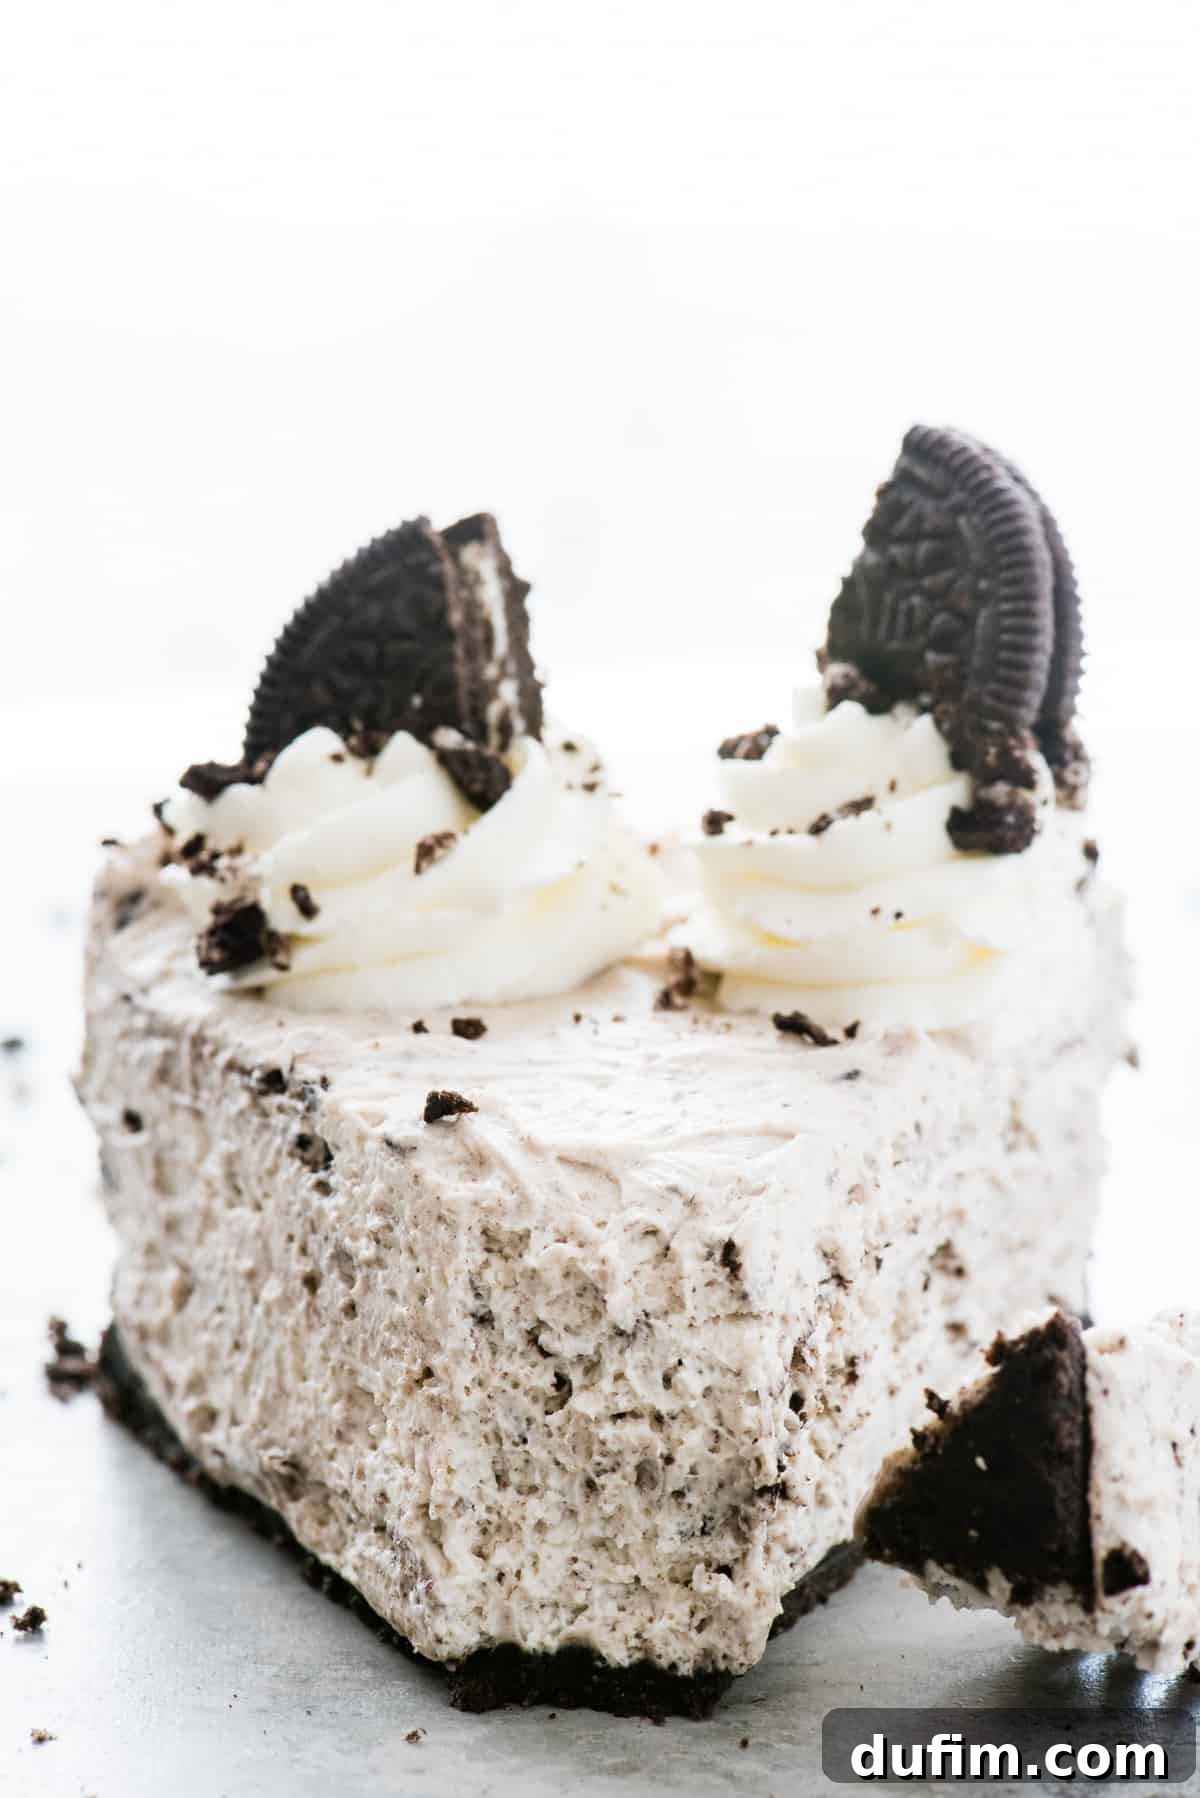
Can You Freeze No-Bake Oreo Cheesecake with an Oreo Crust?
Freezing can be a convenient method for long-term storage, but it comes with specific considerations for no-bake cheesecakes, particularly regarding texture. Here’s what you need to know:
- **Avoid Freezing for Quick Setting:** It’s important to clarify that freezing should *not* be used as a shortcut to speed up the initial setting process of your cheesecake. Rapid freezing can significantly alter the delicate, creamy texture of the filling, potentially making it icy or granular once thawed. Stick to refrigerator chilling for setting.
- **Freezing for Extended Storage:** You can absolutely freeze an entire no-bake cheesecake for future enjoyment! This is a great option if you’ve made it in advance or have leftovers. To do so, first ensure the cheesecake is fully set and chilled in the refrigerator. Then, wrap it very meticulously. Start with several layers of plastic wrap, making sure to cover every surface tightly to prevent air exposure. Follow this with a layer of heavy-duty aluminum foil. This double-layer protection is crucial for preventing freezer burn, which can dry out and alter the flavor and texture of your cheesecake. Properly wrapped, it can be stored in the freezer for up to 1-2 months.
- **Thawing Instructions for Best Results:** When you’re ready to indulge, remove the cheesecake from the freezer and immediately remove all layers of plastic wrap and foil. Place the unwrapped cheesecake (or loosely covered in a cake keeper) directly into the refrigerator to thaw slowly overnight. This gradual thawing process helps to minimize any textural changes. Avoid thawing at room temperature, as this can lead to excessive condensation on the surface, which can result in a soggy crust and a less appealing texture.
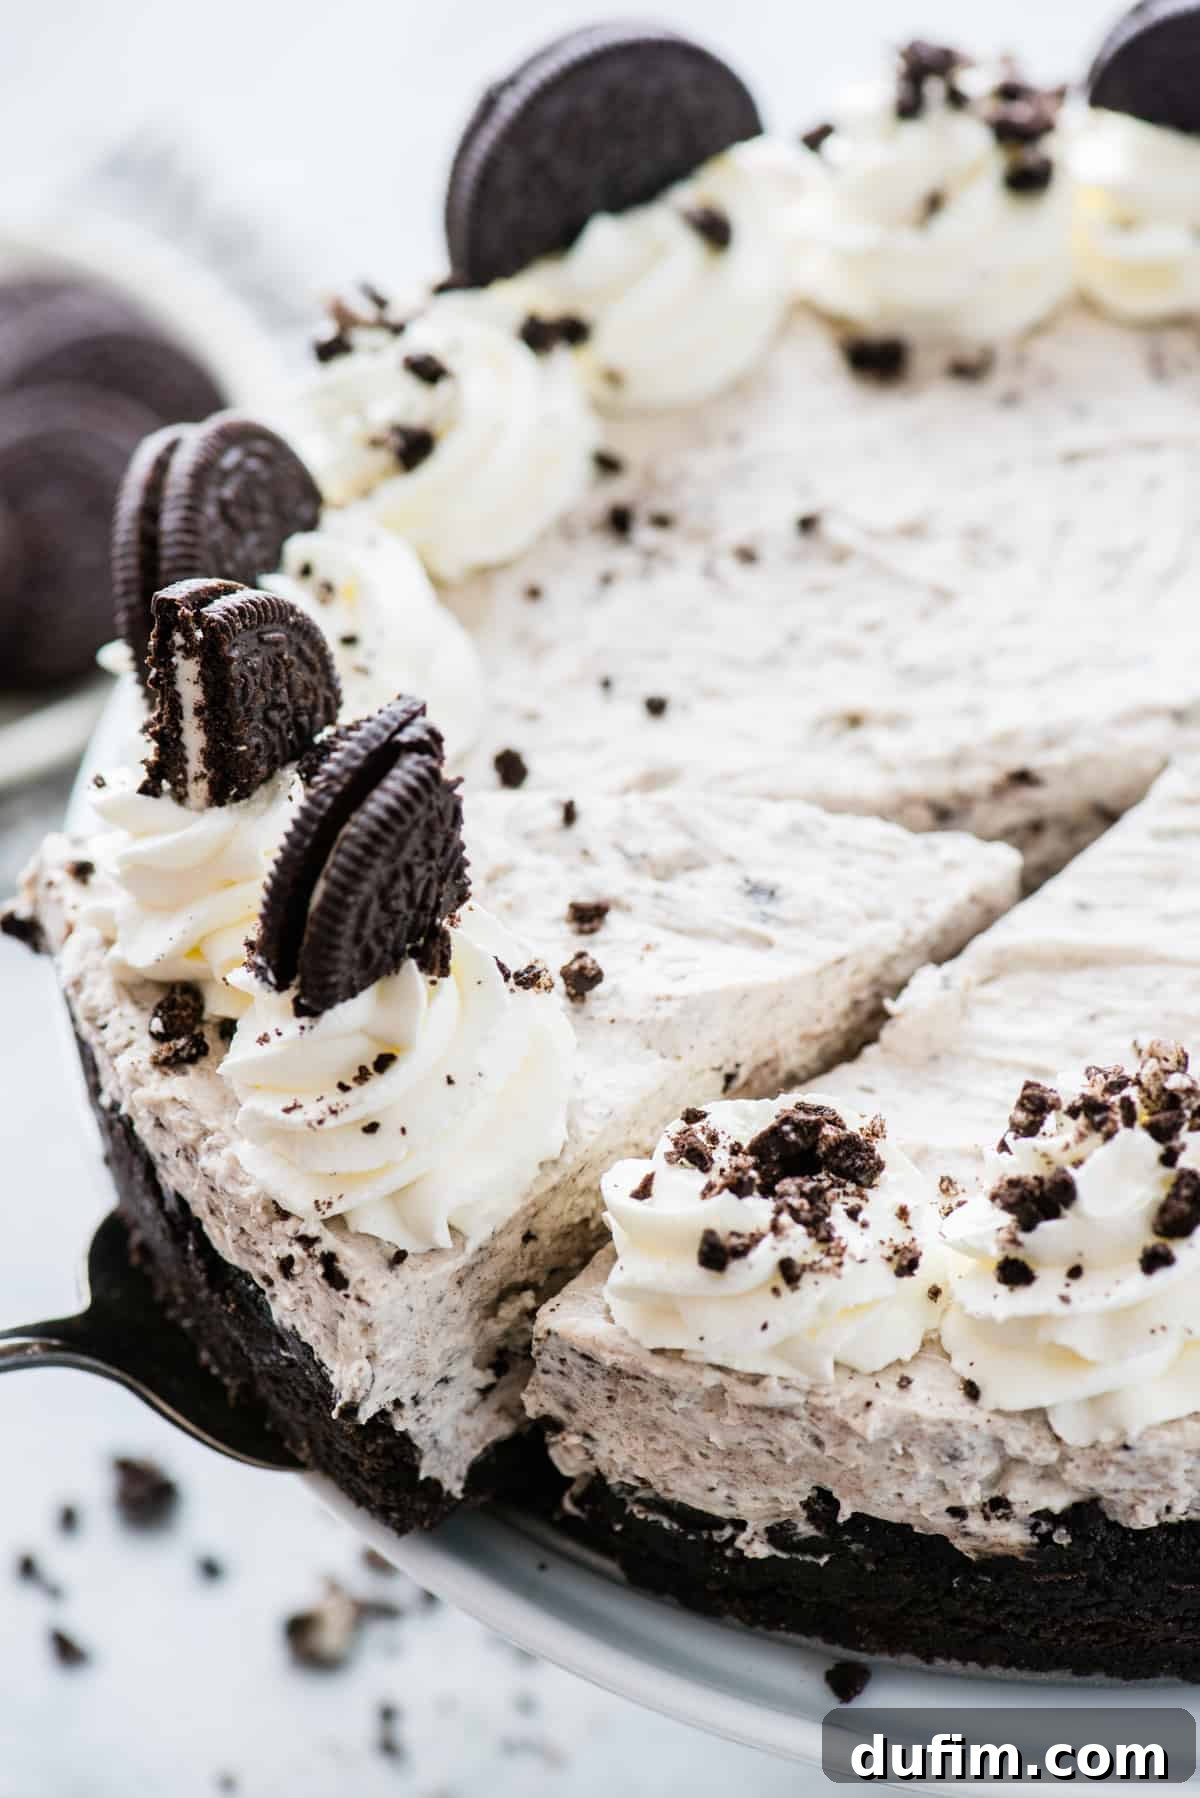
Pro Tip: How to Cut Perfectly Clean Cheesecake Slices
A beautifully made cheesecake deserves to be presented with equally beautiful slices. Achieving those sharp, restaurant-quality cuts that showcase the creamy filling and crisp crust can elevate your dessert presentation significantly. It requires a little extra effort, but the stunning results are undeniably worth it. Here’s the secret to perfectly clean cheesecake slices:
- **The Hot Knife Technique:** Before making your first cut, prepare a tall glass or pitcher of very hot water. Dip a long, thin-bladed, sharp knife into the hot water for about 10-15 seconds.
- **Thoroughly Wipe Dry:** Immediately after heating, wipe the knife blade completely clean and dry with a clean paper towel or kitchen cloth. Any moisture left on the blade can cause sticking.
- **Make a Single, Decisive Cut:** With the warm, clean knife, make one smooth, clean slice all the way through the cheesecake.
- **Repeat for Every Slice:** This is the crucial step for perfection. For *every single subsequent slice*, you must repeat the entire process: dip the knife in hot water, wipe it clean and dry, then make your cut. Yes, it can seem a bit tedious and adds a few moments to the serving process, but the reward is a platter of flawlessly neat, elegant slices that will impress every guest and perfectly highlight the creamy layers of your no-bake Oreo cheesecake. This method prevents the cheesecake from sticking to the knife and dragging crumbs or filling, ensuring each slice is pristine.
Delightful Variations and Serving Suggestions
While this classic no-bake Oreo cheesecake is a masterpiece on its own, its versatility allows for exciting customizations and serving enhancements. Feel free to experiment and make this dessert uniquely yours:
- **Luxurious Chocolate Drizzle:** Elevate the chocolate factor by melting high-quality chocolate chips or a gourmet chocolate bar with a touch of heavy cream to create a rich ganache. Drizzle this generously over the top of the chilled cheesecake just before serving for an extra layer of decadence.
- **Fresh Berry Topping:** For a bright and contrasting flavor, adorn your cheesecake with a medley of fresh berries. A simple berry compote (made by simmering fresh or frozen berries with a little sugar until slightly thickened) adds a vibrant burst of fruitiness and beautiful color.
- **Indulgent Caramel Swirl:** Introduce a hint of buttery sweetness with a generous swirl of caramel sauce. Whether homemade or store-bought, a good caramel sauce pairs wonderfully with the Oreo and cream cheese flavors.
- **Mint Oreo Sensation:** For a refreshing twist, consider using Mint Oreos for both the crust and the crushed cookies in the filling. You could even add a tiny drop of food-grade mint extract to the cheesecake filling for an intensified minty kick.
- **Peanut Butter Dream:** Peanut butter enthusiasts rejoice! Swirl some melted, creamy peanut butter directly into the cheesecake filling before chilling. The combination of peanut butter and Oreo is a classic, rich, and utterly satisfying pairing.
- **Enhanced Oreo Crunch:** Beyond the Oreos incorporated into the filling, chop a few extra cookies more coarsely and scatter them abundantly over the cheesecake’s top just before serving. This adds an extra layer of visual appeal and delightful crunch.
- **Coffee Companionship:** Serve individual slices alongside a piping hot cup of freshly brewed coffee, a rich espresso, or even a creamy latte for a sophisticated after-dinner experience.
- **A La Mode Indulgence:** For the ultimate treat, pair a slice of your no-bake Oreo cheesecake with a scoop of premium vanilla bean ice cream or, for an extra layer of cookie fun, cookies and cream ice cream.
Oreo Cheesecake Recipe No-Bake FAQs
Absolutely, yes! Utilizing a store-bought crust is a brilliant and perfectly acceptable shortcut, especially when you’re pressed for time or simply prefer the convenience. Any pre-made 8 or 9-inch crust will work wonderfully. This includes store-bought Oreo crusts, which seamlessly fit the theme, or even a classic graham cracker crust if you’re looking for a slightly different flavor profile. Just ensure the size matches your springform or pie pan. This simple swap significantly reduces your active prep time without compromising the deliciousness or the structural integrity of your no-bake cheesecake, making it an ideal hack for busy bakers.
Yes, you can substitute Cool Whip for the heavy whipping cream in this no-bake cheesecake recipe. This is a popular alternative for those looking for an even quicker preparation or a slightly different texture. However, it’s important to note the potential differences. When made with Cool Whip, the cheesecake will typically have a lighter, airier consistency and may not be as firm or sturdy as one made with freshly whipped heavy cream. Cool Whip contains stabilizers and a different fat content, which affects the final set. To substitute, use two standard 8-ounce containers of thawed Cool Whip in place of the heavy whipping cream. Remember to fold it gently into the cream cheese mixture to maintain its light, whipped texture.
The quantity of Oreos in a package can vary based on size. A standard 14.3-ounce package of regular Oreos typically contains around 36 cookies. For this particular recipe, especially if you plan on creating a homemade crust and also incorporating crushed Oreos into the filling and as a garnish, we highly recommend opting for a larger package. The “family size” 19.1-ounce package generally contains approximately 48 cookies, ensuring you’ll have more than enough for all components of your decadent no-bake cheesecake.
There are several common reasons why a no-bake cheesecake might not set properly, leading to a softer or runny consistency. Understanding these can help you achieve perfect results:
- **Incorrect Ingredient Ratios:** Precise measurements are crucial. Deviations from the recipe, especially with the amounts of cream cheese or heavy whipping cream, can significantly impact the cheesecake’s ability to set. Always double-check your quantities.
- **Improper Whipping Technique for Heavy Cream:** This is often the primary culprit. The heavy whipping cream *must* be beaten to stiff peaks. If it’s under-whipped and still soft or resembles a thick liquid, it won’t provide the necessary structure for the cheesecake to firm up. Ensure your cream is very cold and your equipment is chilled.
- **Insufficient Chilling Time:** No-bake cheesecakes rely entirely on cold temperatures to solidify. If the cheesecake hasn’t been refrigerated for the full recommended minimum of 8 hours (or ideally overnight), it simply won’t have had enough time for the ingredients to bind and firm up properly. Patience in this step is truly essential.
- **Cream Cheese Temperature:** While cream cheese needs to be softened to room temperature for smooth beating, if it becomes too warm or melted, it can lead to a softer final texture that struggles to set.
- **Overmixing the Combined Filling:** After gently folding the cream cheese mixture into the whipped cream, avoid overmixing. Excessive agitation can deflate the air from the whipped cream, reducing its setting power. Mix only until just combined.
A soggy no-bake cheesecake crust is a common issue that typically stems from moisture management. Here are the main reasons and how to prevent them:
- **Excessive Melted Butter:** While butter binds the crumbs, too much can saturate the crust, making it greasy and prone to sogginess once it solidifies and absorbs moisture. Stick to the precise amount specified in the recipe.
- **Inadequate Compaction:** The crust needs to be pressed very firmly and evenly into the pan. A loosely packed crust creates gaps where moisture from the filling can seep in, leading to a soggy texture. Use the back of a spoon or a flat-bottomed glass to compact it tightly.
- **Warm Filling on a Cold Crust:** Although it’s a no-bake recipe, if your cheesecake filling is overly warm when added to the chilled crust, it can partially melt the butter in the crust, resulting in a less firm and potentially soggy base. Ensure your filling is cool.
- **Condensation During Thawing or Storage:** If a frozen cheesecake is thawed improperly (e.g., at room temperature), condensation can form on its surface and seep into the crust. Similarly, if the cheesecake isn’t covered adequately in the refrigerator, moisture can accumulate. Always thaw frozen cheesecakes slowly in the refrigerator and keep chilled cheesecakes well-covered.
- **Baking the Crust (if mistakenly done):** No-bake crusts are formulated with a higher fat content to firm up in the refrigerator. Baking such a crust would cause the butter to melt excessively and seep out, leaving the crumbs to absorb moisture from the filling and become soggy.
By ensuring proper butter ratios, firm compaction, and correct chilling/thawing practices, you can confidently achieve a perfectly crisp and stable Oreo crust.
Explore More No-Bake Desserts
If you’ve been won over by the sheer simplicity and incredible flavor of this no-bake Oreo cheesecake, you’re in for a treat! There’s a whole world of fantastic desserts that require absolutely no oven time. Expand your repertoire with these additional no-bake favorites:
- Decadent Chocolate Pudding Pie: A rich and creamy classic, perfect for chocolate enthusiasts seeking a smooth, indulgent treat with minimal effort.
- Easy S’mores Bars: Bring the nostalgic flavors of a campfire s’more indoors with these gooey, chocolatey, and marshmallow-topped bars – no fire pit needed!
- Velvety Oreo Mousse: Experience Oreo goodness in a lighter, airier form. This mousse is wonderfully delicate yet packed with intense cookie flavor, a perfect alternative to cheesecake.
- Creamy Peanut Butter Pie: A dream come true for peanut butter lovers, this pie features a luxuriously smooth and rich peanut butter filling nestled in a complementary crust.
This recipe consistently receives high praise!
No-Bake Oreo Cheesecake
Beth
30 minutes
8 hours
8 hours
30 minutes
12
servings
Pin
Rate
Equipment
-
Electric Stand Mixer or Hand Mixer
-
8 or 9-inch Springform Pan
-
Large Mixing Bowls (Metal or Glass)
-
Food Processor or Blender (for crushing Oreos)
-
Offset Spatula (for smoothing)
Ingredients
For the Oreo Crust
-
24 Oreos, finely crushed (about 1 ¾ cups of crumbs) -
6 Tbsp (86g) unsalted butter, melted
For the No-Bake Cheesecake Filling
-
16 oz (452g) full-fat cream cheese, softened to room temperature -
2 cups (473ml) heavy whipping cream, very cold (1 pint) -
1 ½ cups (169g) powdered sugar, divided (1 cup for cream cheese, ½ cup for whipped cream) -
2 tsp pure vanilla extract -
8 finely crushed Oreos, about ¾ heaping cup, for folding into the filling
For the Whipped Topping (Optional)
-
2 cups (473ml) heavy whipping cream, very cold (1 pint) -
½ cup (56g) powdered sugar -
1 tsp pure vanilla extract -
Extra Oreos, for garnish
Instructions
Preparation Notes (Before You Begin)
-
To ensure your whipped cream reaches perfect stiff peaks, place a metal or glass mixing bowl (the one you’ll use for whipping cream) and your electric mixer beaters in the freezer for at least 15 minutes before starting. This cold environment greatly assists in whipping the cream to its ideal consistency.
Crafting the Perfect Oreo Crust
-
Using a blender or food processor, finely crush the Oreos until they resemble fine crumbs. Ensure there are no large chunks remaining for a smooth crust.
-
In a medium mixing bowl, combine the finely crushed Oreos with the melted unsalted butter. Stir thoroughly with a spoon or spatula until the crumbs are evenly moistened and a thick, sandy mixture forms.24 Oreos, 6 Tbsp (86g) unsalted butter
-
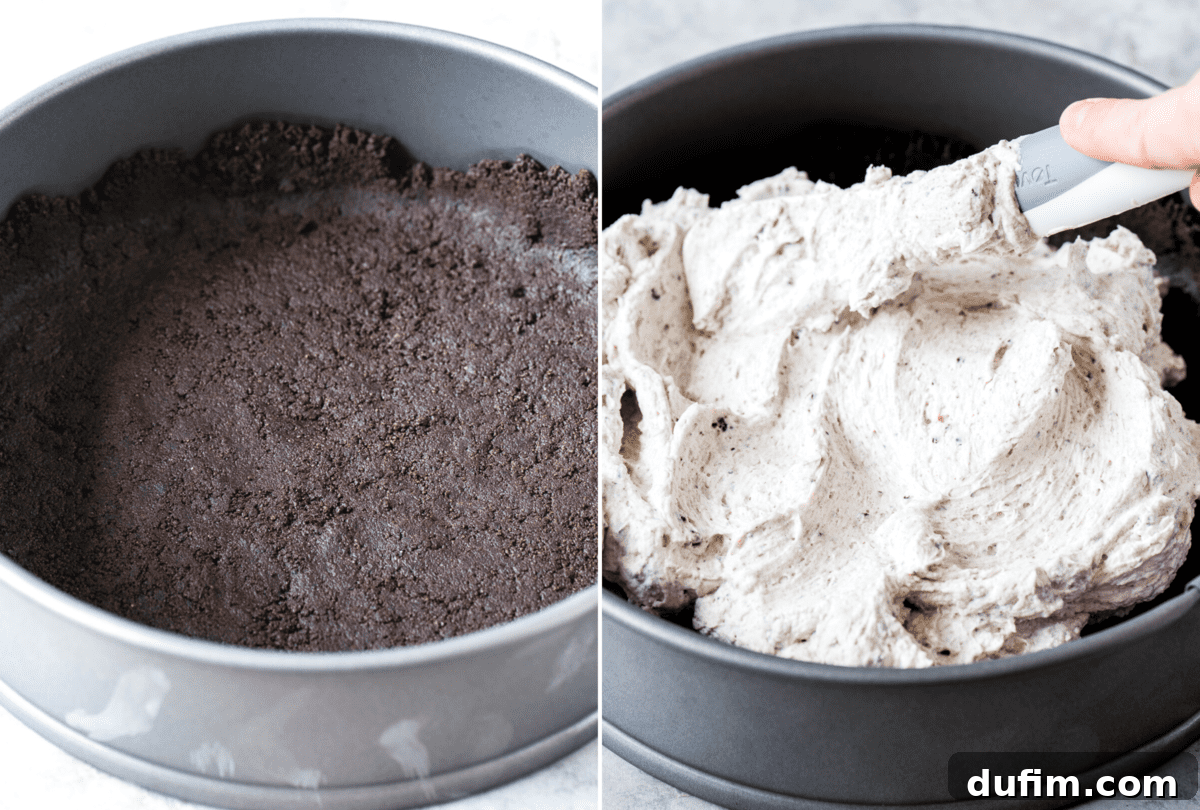
Transfer the Oreo crust mixture into an un-greased 8 or 9-inch springform pan (or a pie pan if preferred). Use your fingers to evenly distribute the mixture across the bottom and slightly up the sides of the pan. Then, use the bottom of a flat cup or a 1/2 measuring cup to firmly press and compact the crust. This crucial step creates a sturdy base that won’t crumble when sliced.
-
Place the prepared crust in the freezer for at least 15 minutes to firm up while you prepare the filling. If you plan to make the crust hours or days in advance, cover it tightly with foil or plastic wrap and store it in the refrigerator.
Preparing the Irresistible No-Bake Cheesecake Filling
-
In a large mixing bowl, beat the room temperature full-fat cream cheese with 1 cup of powdered sugar using an electric mixer. Continue beating for 1-2 minutes until the mixture is completely smooth, creamy, and free of any lumps. Set this aside.16 oz (452g) full-fat cream cheese, 1 cup powdered sugar (from 1½ cups total)
-
Retrieve your chilled metal mixing bowl and beaters from the freezer. Pour in the very cold heavy whipping cream, the remaining ½ cup powdered sugar, and the vanilla extract. Beat with an electric mixer on high speed for about 4-5 minutes, or until the whipping cream forms stiff peaks. It should be thick, voluminous, and hold its shape firmly.2 cups (473ml) heavy whipping cream, ½ cup powdered sugar (from 1½ cups total), 2 tsp vanilla extract
-
Gently add the prepared cream cheese mixture and the 8 finely crushed Oreos (for the filling) into the bowl with the stiffly whipped cream. Using your electric mixer on the lowest speed, mix for just 30-60 seconds, or until the ingredients are just combined and no streaks of cream cheese or whipped cream are visible. Alternatively, you can achieve this by gently folding with a spatula. Be careful not to overmix, as this can deflate the filling.8 finely crushed Oreos
-
Scoop the luxurious cheesecake filling into your chilled Oreo crust. Gently spread and smooth the top with an offset spatula to create an even surface. Cover the springform pan tightly with plastic wrap or aluminum foil.
-
Transfer the cheesecake to the refrigerator to chill and set for at least 8 hours. For the best possible texture and ease of slicing, I strongly recommend chilling it overnight. Before serving, carefully remove the outer ring of the springform pan. Use a sharp, hot knife (wiped clean after each cut) to achieve perfectly crisp and clean slices.
Optional Whipped Topping & Garnish
-
For the whipped topping, ensure another metal or glass mixing bowl is chilled in the freezer for 15 minutes.
-
Remove the bowl from the freezer. Add the heavy whipping cream, powdered sugar, and vanilla extract. Beat with an electric mixer until stiff peaks form, usually about 4-5 minutes. You can pipe beautiful whipped cream dollops around the edge of your cheesecake and sprinkle with extra crushed Oreos or mini Oreo halves for a stunning presentation.2 cups (473ml) heavy whipping cream, ½ cup (56g) powdered sugar, 1 tsp vanilla extract, Extra Oreos for garnish
Recipe Notes & Pro Tips
For more detailed answers and troubleshooting tips, please refer to the comprehensive sections above discussing:
- How To Thicken No-Bake Cheesecake
- My No-Bake Cheesecake Isn’t Firm – What Happened?
- How Long Does No-Bake Cheesecake Keep in the Fridge
- Can I Substitute Cool Whip in No-Bake Cheesecake
- Can I Use a Store-Bought Crust
- Can You Freeze a No-Bake Cheesecake
Nutrition Information (per serving)
Nutrition Disclosure
All nutritional values are approximate and provided to the reader as a courtesy. Changing ingredients and/or quantities will alter the estimated nutritional calculations.
Love this recipe? Share your experience and rate it below!