
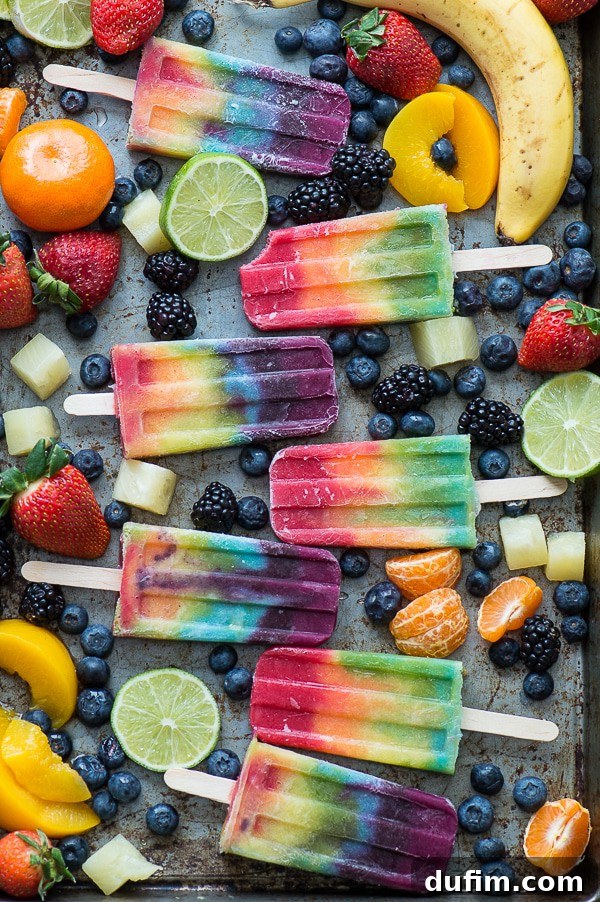
Brighten your day with outstanding 7-layer rainbow popsicles! Craft your own homemade, vibrant frozen treats bursting with fresh fruit flavors.
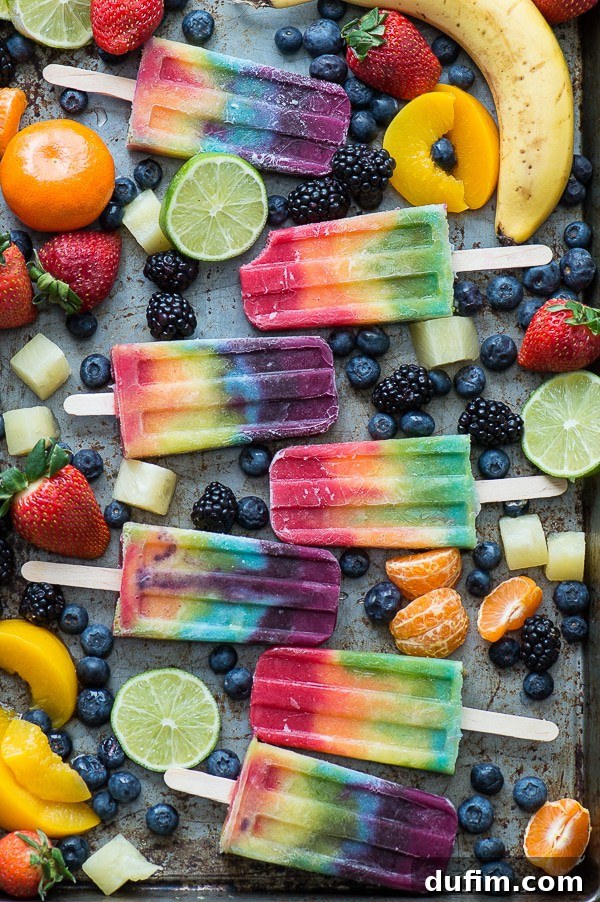
Awesome colors and fruity too! Very summer refreshing!
-Tin
Homemade Rainbow Popsicles: Your Ultimate Guide to Colorful Frozen Delights
Get ready for a double dose of delightful summer treats! Last week, we unveiled our refreshing recipe for rainbow smoothies. Today, we’re taking that incredible concept a step further by transforming those vibrant blends into spectacular homemade rainbow popsicles. It’s one versatile base recipe, offering two fantastic ways to enjoy the goodness!
Think of it like making muffins and bread from the same foundational batter. You can create delicious banana bread muffins or a classic banana bread loaf, all from a similar starting point. The same principle applies here: the foundation for our gorgeous rainbow smoothies doubles perfectly for these eye-catching rainbow popsicles. This means you’re not just learning one recipe, but opening up a world of colorful, fruity possibilities!
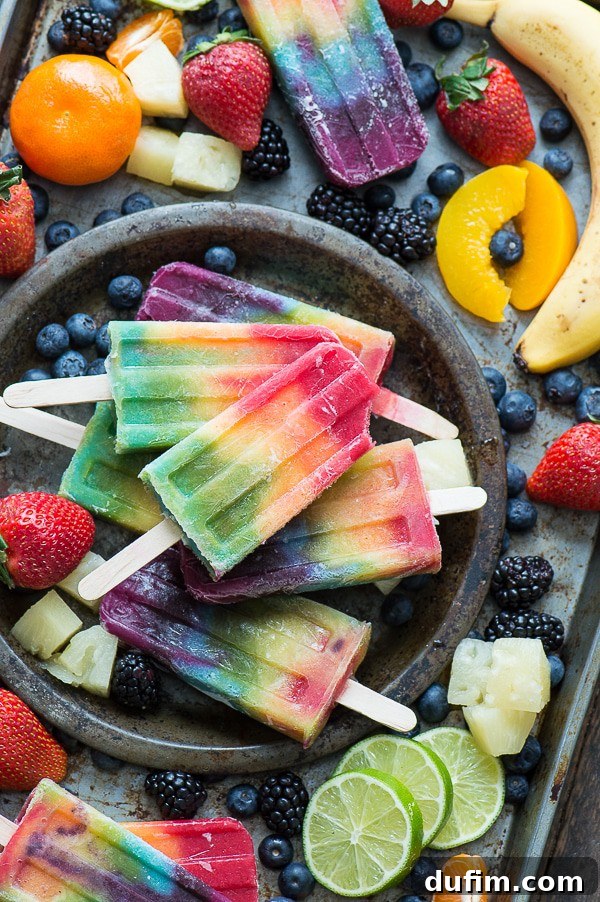
In our dedicated rainbow smoothie recipe, we delved deep into the art of crafting these layered beverages, discussing essential ingredients, blending techniques, and how to achieve those picture-perfect layers. Today, our focus shifts to transforming that delightful smoothie base into irresistible frozen pops, perfect for cooling down on a warm day.
This guide will equip you with all the knowledge and tips you need to effortlessly transition from a refreshing drink to a frozen delight, ensuring your homemade rainbow popsicles are as stunning as they are delicious. Let’s dive into making these vibrant, wholesome treats that everyone will adore!
Choosing the Best Popsicle Molds for Your Creations
To embark on your homemade popsicle journey, having the right equipment is key. A good popsicle mold and a supply of popsicle sticks are your foundational tools. The market offers a fantastic variety of molds, each bringing its own unique charm and functionality. To get you excited for popsicle season, we’ve rounded up some of our favorite and most engaging molds that will make your rainbow popsicles even more special.
When selecting a mold, consider the material – silicone offers easy release, while stainless steel is durable and often eco-friendly. Shape and size also play a role, from classic designs to whimsical shapes that add an extra touch of fun to your frozen treats. A quality mold can significantly enhance your popsicle-making experience, making it easier to achieve perfectly formed and beautiful results every time.
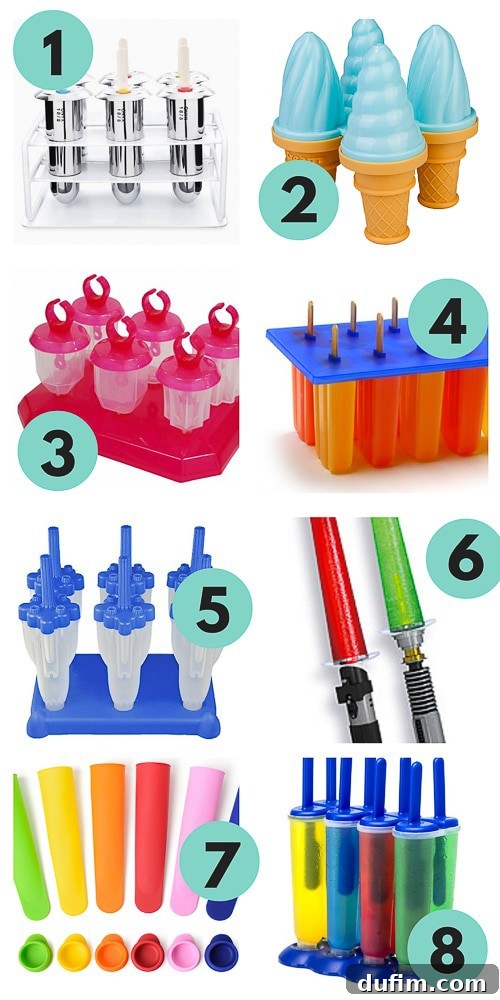
Popular Popsicle Mold Styles to Consider:
- Stainless Steel Popsicle Mold – These durable molds offer a sleek, modern look and are easy to clean. Their design often gives popsicles a sophisticated shape, almost like futuristic spaceships!
- Ice Cream Cone Mold – How utterly fun and creative! Imagine your rainbow popsicles shaped like classic ice cream cones, delighting both kids and adults alike.
- Ring Pop Mold – Take a delightful trip back to the 1990s with these nostalgic molds. Perfect for themed parties or just a playful twist on a frozen treat.
- Standard Popsicle Mold – A reliable classic that works perfectly for any popsicle recipe. This is a go-to choice for its simplicity and effectiveness, a favorite in many kitchens!
- Rocket Popsicle Mold – These molds are incredibly popular for their iconic shape. I can definitely see myself grabbing a set when we have little ones to impress!
- Star Wars Lightsaber Popsicle Mold – For the sci-fi fans, this is a brilliant idea! Imagine wielding a fruity, frozen lightsaber on a hot day.
- Squeezable Mold – These flexible silicone molds come with a convenient cap, allowing you to enjoy your popsicle on the go and save any leftovers for later without drips.
- Double Popsicle Mold – Why have one when you can have two? These molds create two popsicles in one, perfect for sharing with a friend or simply enjoying an extra treat yourself!
With so many exciting options, you might find yourself wanting them all! Each mold brings a unique element to your homemade rainbow popsicles, making the process of creation as enjoyable as the tasting.
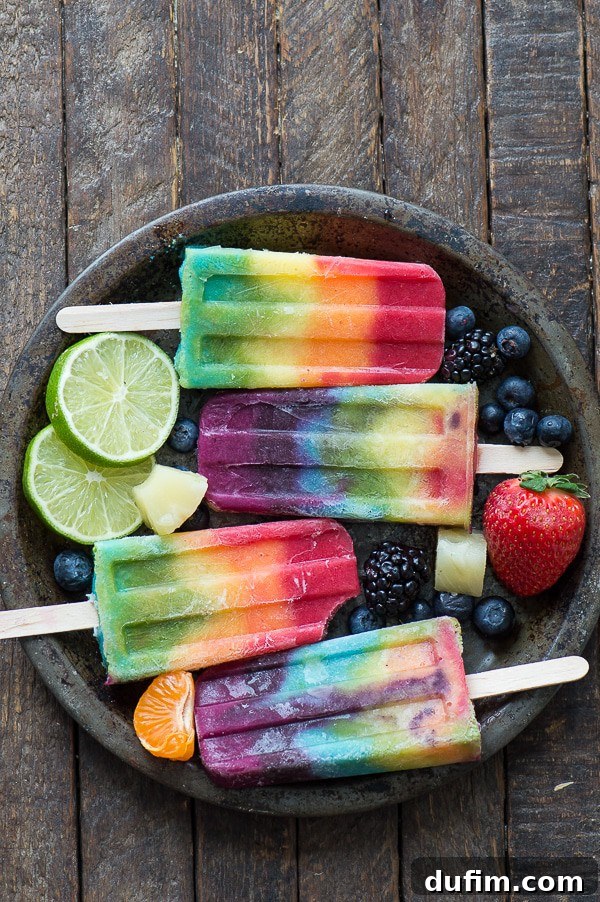
Essential Base Smoothie Ingredients for Vibrant Layers
The magic behind our spectacular rainbow popsicles lies in their simple yet effective base ingredients. Each colorful layer is crafted from a similar foundation, ensuring a consistent texture and delightful flavor throughout. Understanding the role of each component will help you customize your popsicles to perfection.
The most common and crucial base ingredients in each layer typically include:
- Frozen Banana: This is the secret to a creamy, naturally sweet, and thick smoothie base. Frozen bananas add body and a subtle sweetness that complements all the fruit flavors without overpowering them. They are also rich in potassium and fiber.
- Greek Yogurt: Adding Greek yogurt contributes a wonderful tanginess, a smooth texture, and a boost of protein. You can opt for vanilla for a hint of sweetness or plain for a more neutral base, allowing the fruit flavors to shine. It also helps to create a slightly thicker consistency, which is beneficial for distinct layers.
- Liquid for Blending: To achieve the perfect blend, you’ll need a liquid. Options like milk (dairy or non-dairy such as almond milk, oat milk), or even water, work well. Start with a small amount and gradually add more as needed to reach your desired smoothie consistency – thick enough to layer but still smooth enough to blend.
- Frozen Fruit: This is where the rainbow comes to life! Each layer calls for specific frozen fruits to achieve its vibrant hue and unique flavor profile. Using frozen fruit (instead of fresh) is essential as it eliminates the need for ice, resulting in a richer flavor and creamier texture for your popsicles. We’ll explore the specific fruits for each color in the recipe section.
These ingredients form the backbone of each luscious layer, promising a healthy and delicious treat that’s as good for you as it looks!
Expert Tips for Crafting Perfect Rainbow Popsicles
Creating beautifully layered rainbow popsicles is easier than you might think, especially with a few handy tips. The key to distinct, vibrant layers that don’t bleed into each other lies in patience and technique.
Achieving Distinct Layers: Layering the individual smoothie mixtures into your popsicle molds requires a careful touch. Instead of pouring directly from a glass, use a spoon or a tablespoon to scoop each smoothie mixture into the mold. This method helps to control the placement of each layer and significantly reduces the chance of colors mixing prematurely. While a slight blending at the edges is natural and even adds to the charm, spooning provides much better results for crisp, defined lines.
Partial Freezing Between Layers (Optional but Recommended): For the most defined layers, especially if your smoothie mixtures are on the thinner side, consider partially freezing each layer for about 15-20 minutes before adding the next. This creates a solid base that prevents the subsequent layer from sinking or bleeding too much. While this adds to the total preparation time, the stunning visual outcome is often worth the extra effort.
Freezing Time: Once all the layers are carefully added and your popsicle sticks are in place, the popsicles need ample time to set. For best results, freeze your popsicles overnight. This ensures they are completely solid and hold their shape, making them easy to remove from the mold and delightful to eat. A fully frozen popsicle will also melt slower, allowing more time to enjoy its vibrant layers and refreshing taste.
By following these simple tips, you’ll be well on your way to creating gorgeous, delicious rainbow popsicles that will impress everyone!
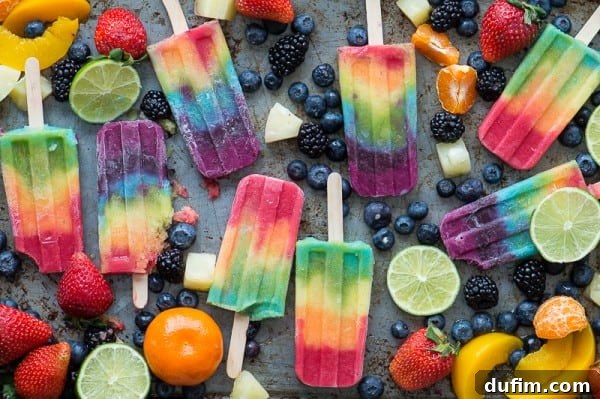
Effortless Removal: How to Release Popsicles from Their Molds
Once your rainbow popsicles are perfectly frozen, the final step is to gently release them from their molds without breaking the layers or leaving half the treat behind. This process is surprisingly simple and requires just a little warm water.
Here’s the foolproof method to get your beautiful popsicles out with ease:
- Prepare a Warm Water Bath: Fill your kitchen sink or a large container with room temperature or slightly warm water. Avoid using hot water, as it can melt your popsicles too quickly.
- Submerge the Mold: Carefully place the entire popsicle mold into the water, ensuring that the water level does not go above the top edge of the mold. You want to warm the outside of the mold, not get water into your popsicles.
- Allow to Sit Briefly: Let the mold sit in the water for about 10-20 seconds. This brief contact with the warmer water will slightly loosen the frozen pops from the mold’s interior walls.
- Gentle Wiggle and Release: After a few seconds, gently take the mold out of the water and try to wiggle one popsicle free. Hold the stick firmly and twist slightly. If it feels tough or resistant, place the mold back in the water for a few more seconds and try again. Patience is key – don’t force it, as this can snap the stick or break the popsicle.
- Enjoy or Store: Once all your gorgeous rainbow popsicles are successfully removed from the mold, they are ready to be enjoyed immediately! If you’ve made a large batch (which this recipe is designed to do), wrap any extra popsicles individually in plastic wrap. This prevents freezer burn and keeps them fresh for later. Place the wrapped popsicles back into the freezer, where they can be stored for several weeks.
This method ensures a smooth release every time, preserving the beautiful layers and delightful shape of your homemade rainbow popsicles.
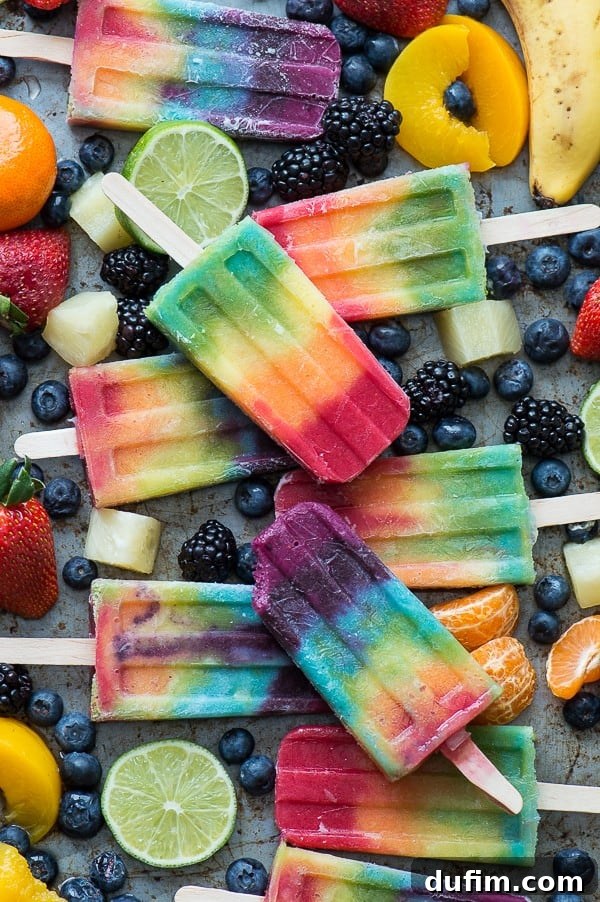
Here’s the delightful bonus: unless you’re making a massive batch of 30+ popsicles at once, you’ll most likely have leftover smoothie mixture! This means you can indulge in a refreshing rainbow smoothie while you patiently wait for your beautiful rainbow popsicles to freeze solid. It’s a win-win situation!
These rainbow popsicles are fantastic for any occasion. If you’re hosting a rainbow-themed party or planning a fun preschool lesson, be sure to add this recipe to your must-make list. Consider pairing them with other colorful treats like this delightful homemade rainbow bread for a truly spectacular spread!
More Refreshing and Colorful Inspirations:
- For an even simpler approach to fruity frozen treats, explore these fresh fruit popsicles, focusing on minimal ingredients and maximum flavor.
- If you happen to have leftover beets from making the magenta layer, don’t let them go to waste! Whip up a nutritious batch of ABC Juice (Apple, Beetroot, Carrot) for another healthy and colorful boost.
Looking for more sensational summer recipes?
Dive into these sunny delights perfect for any warm-weather gathering:
- Watermelon Cupcakes – These visually striking and delicious cupcakes are absolutely perfect for a summer birthday or any festive occasion.
- Lemon Sugar Cookies – I affectionately call these “the summer” cookie for a reason! Their bright, zesty flavor is the epitome of warm-weather refreshment.
- Strawberry Whipped Cream – Elevate any dessert with this light and fruity topping. It’s divine on cakes and cupcakes, delightful with fruit crisp, or simply perfect alongside your favorite cookies.
Enjoyed this recipe? Share your thoughts below!
7-Layer Rainbow Popsicles
Beth
30 minutes
8 hours
8 hours
30 minutes
30 popsicles
Print Recipe
Equipment
-
High-Speed Blender (e.g., Blendtec)
-
Popsicle Molds
-
Popsicle Sticks
Ingredients
RED LAYER
- 1 frozen banana
- ½ cup (113g) Greek yogurt, vanilla or plain
- ½ cup frozen raspberries
- ½ cup frozen strawberries
- Water or liquid for blending (as needed)
ORANGE LAYER
- 1 frozen banana
- ½ cup (113g) Greek yogurt, vanilla or plain
- ½ cup frozen peaches
- 1 small orange, peeled
- ¼ cup frozen mango
- Water or liquid for blending (as needed)
YELLOW LAYER
- 2 frozen bananas
- ½ cup (113g) Greek yogurt, vanilla or plain
- 1 cup frozen pineapple
- Water or liquid for blending (as needed)
GREEN LAYER
- 2 frozen bananas
- ½ cup (113g) Greek yogurt, vanilla or plain
- 1 handful, or more fresh spinach
- 1 cup frozen pineapple
- Water or liquid for blending (as needed)
BLUE LAYER
- 2 frozen bananas
- ½ cup (113g) Greek yogurt, vanilla or plain
- 1 cup frozen pineapple
- Small amount of blue food coloring (optional, see notes for natural alternatives)
- Water or liquid for blending (as needed)
PURPLE LAYER
- 1 frozen banana
- ½ cup (113g) Greek yogurt, vanilla or plain
- 1 cup frozen mixed berries (e.g., blueberries, blackberries)
- Water or liquid for blending (as needed)
MAGENTA LAYER
- 1 frozen banana
- ½ cup (113g) Greek yogurt, vanilla or plain
- ½ cup sliced canned beets, drained
- 1 cup frozen strawberries or raspberries
- Water or liquid for blending (as needed)
Instructions
PREPARING EACH SMOOTHIE LAYER
-
Place all the ingredients for one specific color layer into your high-speed blender. Blend until the mixture is completely smooth and creamy. If the smoothie is too thick to blend, add liquid (water, milk, or almond milk) a tablespoon at a time until you reach a pourable yet thick consistency.
-
Once blended, transfer this colored smoothie mixture to a separate bowl or container. Rinse your blender thoroughly before preparing the ingredients for the next color layer to prevent colors from mixing prematurely. Repeat this process for all seven layers.
ASSEMBLING THE RAINBOW POPSICLES
-
Carefully begin layering each color smoothie into your popsicle molds. Start with the first color (traditionally red), then follow with orange, yellow, green, blue, purple, and finally magenta.
-
For best results and distinct layers, use a spoon or tablespoon to scoop each smoothie mixture into the mold rather than pouring from a glass. This method helps prevent the layers from blending too much. For super crisp lines, you can freeze each layer for 15-20 minutes before adding the next, but this is optional.
-
Once all the molds are filled with the beautiful layers, insert your popsicle sticks. Place the filled molds into the freezer and allow the popsicles to freeze completely, ideally overnight (at least 8 hours).
-
To release the popsicles from their molds, fill your kitchen sink or a large bowl with room temperature water. Submerge the popsicle mold in the water, ensuring the water does not go above the top edge of the mold.
-
Allow the mold to sit in the water for a few seconds (10-20 seconds usually suffices).
-
Gently begin to wiggle a popsicle free from its mold. If it resists, place the mold back in the water for a few more seconds until it can be easily removed. Avoid forcing it.
-
Once all the popsicles are successfully removed from the mold, enjoy them immediately. For storage, wrap any leftover popsicles individually in plastic wrap and return them to the freezer to prevent freezer burn.
Video Guide
Watch this video to see how easily these beautiful rainbow popsicles come together!
Notes
Regarding the blue layer: If you are averse to using a small amount of artificial blue food coloring to achieve that distinct hue, it is perfectly fine to skip this layer entirely or substitute it with another color. For those who prefer an all-natural approach, there are excellent alternatives! You can find a tutorial for how to make natural blue food coloring here, or you can purchase natural blue food coloring online here or here.
Nutrition Information (per popsicle)
Calories: 69kcal | Carbohydrates: 15g | Protein: 3g | Fat: 1g | Saturated Fat: 1g | Polyunsaturated Fat: 1g | Monounsaturated Fat: 1g | Trans Fat: 1g | Cholesterol: 1mg | Sodium: 12mg | Potassium: 235mg | Fiber: 2g | Sugar: 9g | Vitamin A: 168IU | Vitamin C: 18mg | Calcium: 35mg | Iron: 1mg
Nutrition Disclosure
All nutritional values provided are approximate and offered to the reader as a courtesy. Please note that changing ingredients and/or quantities will alter the estimated nutritional calculations.
Love this recipe? Share your rating and comments below!