
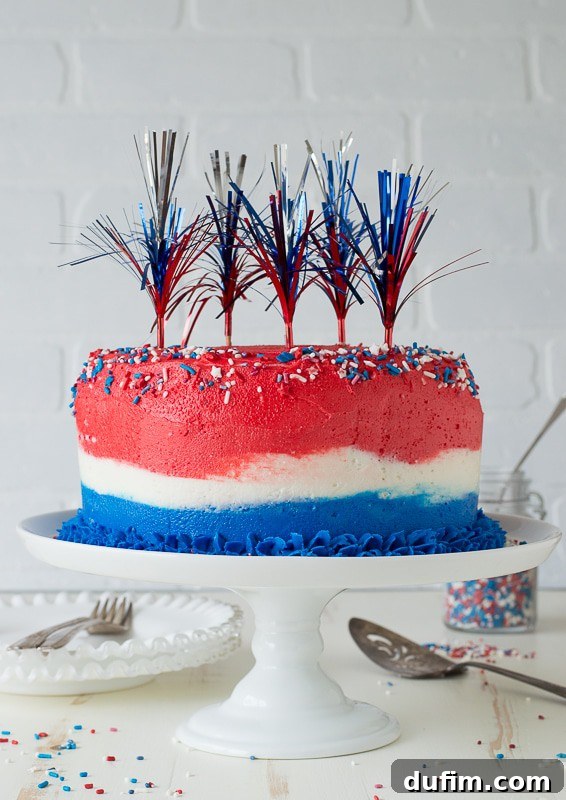
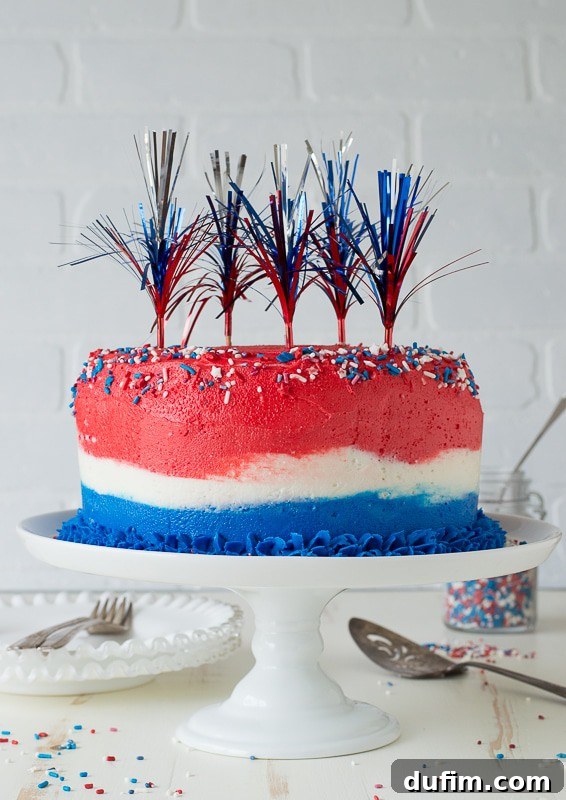
Stunning 4th of July Ombre Cake: Your Guide to a Patriotic Masterpiece
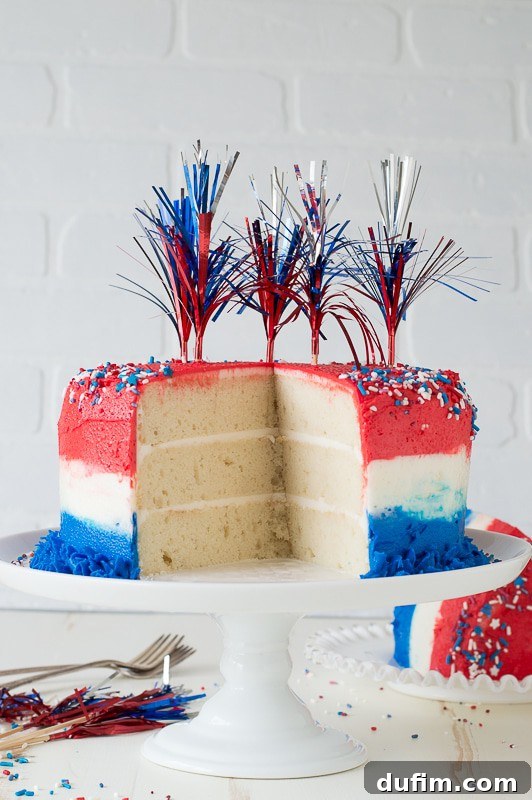
Get ready to ignite your taste buds and impress your guests with this spectacular 4th of July Ombre Cake! Far beyond just a festive dessert, this recipe introduces you to the secrets of a truly classic white cake – one that is remarkably light, incredibly fluffy, and boasts a beautifully pristine white color. It’s an essential recipe for any baker’s repertoire, made simple with just one special ingredient you might need to pick up: sour cream. Trust us, it’s worth the trip to the grocery store, as it contributes significantly to the cake’s tender crumb and moist texture.
Baking Bliss and Humidity Woes: Mastering Your Environment
Baking can sometimes present unexpected challenges, and one of the most common adversaries for beautiful cakes and smooth buttercream is humidity. During my own adventure with this particular cake, I was reminded that cake, buttercream, and high humidity are definitely not a harmonious trio! My usual routine involves chilling cake layers in the freezer before assembly, then returning the cake to the freezer after applying a crumb coat. This typically works wonders, setting the cake firm and making it easy to frost.
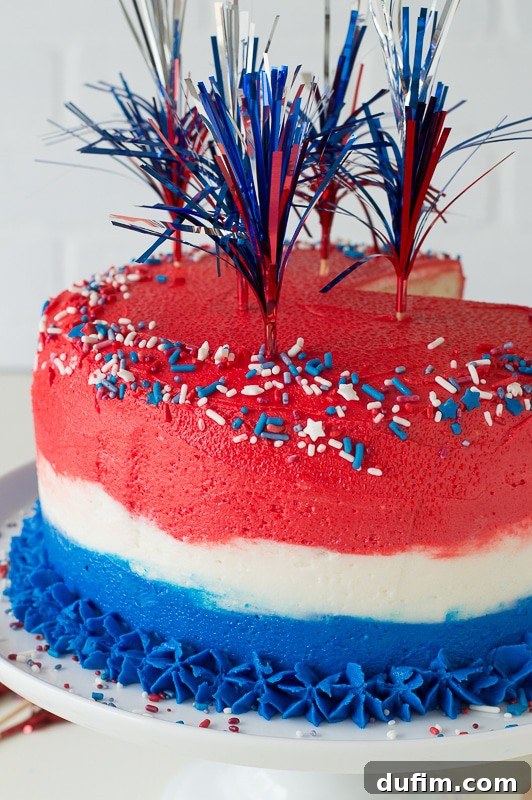
However, on this occasion, the moment I pulled the cake out of the freezer, *BAM!* The humidity struck with full force. You might even be able to spot the condensation forming on the cake in the images. It was a warm day, around 78 degrees Fahrenheit inside my home, even with the air conditioning running. Perhaps I should have cranked the AC down lower? My thrifty nature usually prevents such extravagances!
Essential Tips for Humid Baking Conditions
If you find yourself baking on a particularly humid day, take heed: I strongly advise against placing your cake layers in the freezer. Freezing and then exposing the cold cake to a warm, humid environment will almost certainly lead to condensation, which can cause your frosting to slide, weep, or become unmanageable. Instead, try these humidity-fighting strategies:
- Refrigerator Chill: Opt for chilling your cake layers in the refrigerator instead of the freezer. This will still firm them up for easier handling without creating such a drastic temperature difference, minimizing condensation.
- Work Quickly: Once you remove the cake from the fridge, work as swiftly as possible to apply your frosting. The less time it spends at room temperature, the better.
- Dehumidifier Power: If you have a dehumidifier, now is its time to shine! Run it in your kitchen for several hours before and during your baking and decorating process.
- Air Conditioning: While I may be a bit cheap, lowering your air conditioning to a cooler temperature can significantly reduce the ambient humidity, making a world of difference for your cake.
- Stable Buttercream: Consider using a buttercream recipe that is more stable in warmer temperatures, such as a shortening-based buttercream (like the one in this recipe) or a Swiss or Italian meringue buttercream, which tend to hold up better than American buttercreams.
Mastering the Ombre Effect: A Visual Guide to Stunning Frosting
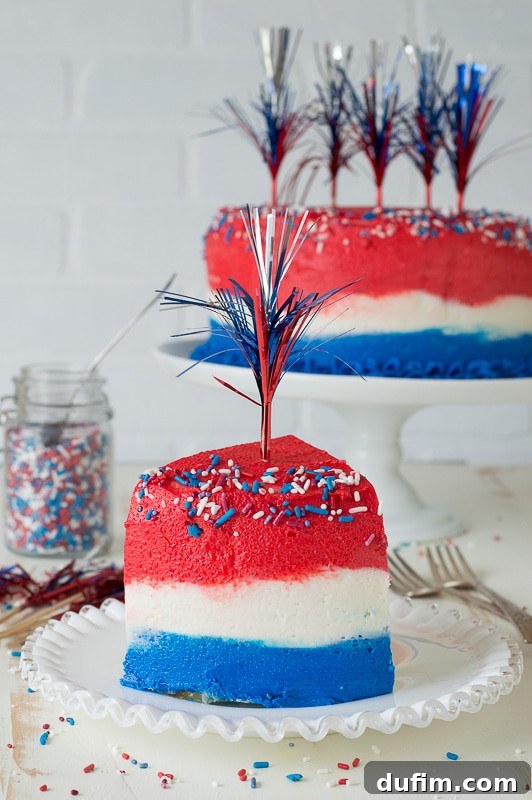
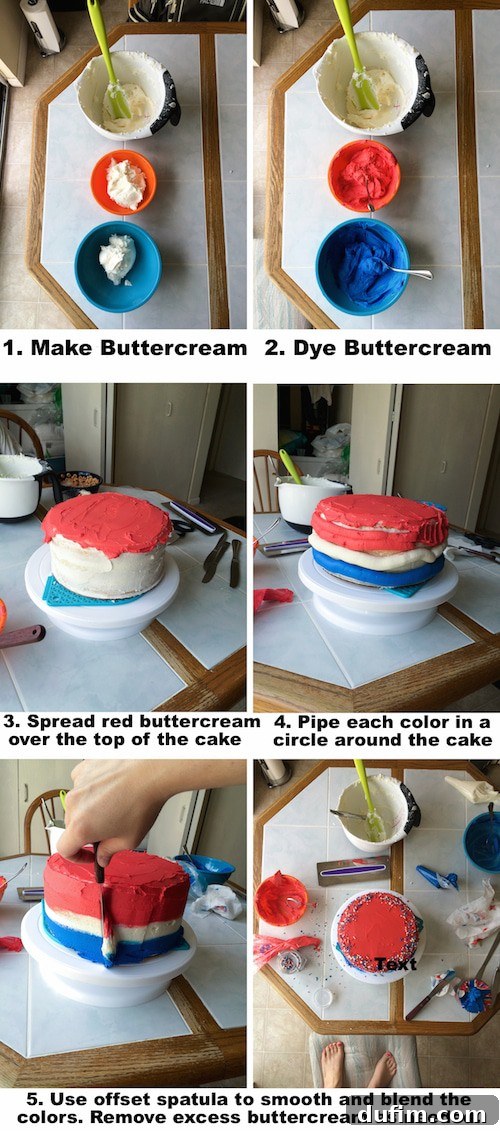
Creating a beautiful ombre effect on a cake might seem intimidating, but it’s surprisingly simple and incredibly rewarding. I’ve developed a straightforward technique that you can adapt to any cake, using any color palette you desire. The magic of the ombre transition truly comes to life once the buttercream is applied to the cake, and the best part? It comes together much quicker than you might think!
The beauty of the ombre effect lies in its versatility. You have complete control over whether you want your color transitions to be more distinct and separated, or beautifully blended into a seamless gradient. The key tool for this artistic expression is simply your offset spatula. With a little practice, you’ll be gliding colors into perfection.
Step-by-Step Ombre Frosting Technique:
- Prepare Your Frosting: Divide your buttercream into separate bowls for each color you plan to use (in this case, red, white, and blue). Ensure your colors are vibrant and well-mixed.
- Load Piping Bags: Fit each piping bag with a round tip (or simply cut a 1/2 to 1-inch hole at the end) and fill with one color of frosting. This allows for precise application around the cake.
- Strategic Application: Pipe concentric rings of each color around the cake, starting from the bottom with your darkest or desired base color (blue), followed by the middle color (white), and finishing with the top color (red). Aim for even lines around the entire circumference.
- The Blending Magic: Take your offset spatula and, starting at the bottom of the cake, gently drag the spatula horizontally around the cake, slightly overlapping each color. For a more blended look, apply gentle pressure and make smoother, continuous motions. For a more separated, striped effect, use lighter, more deliberate strokes.
- Clean and Repeat: As you smooth, excess buttercream will accumulate on your spatula. Wipe it clean frequently to avoid mixing colors unintentionally and to maintain crisp lines. Continue smoothing and blending until you achieve your desired gradient. Don’t be afraid to add a little more frosting in areas if you need to adjust the blend.
Festive Decorations: Adding Sparkle to Your Patriotic Cake
Once your ombre masterpiece is frosted, it’s time to add those festive touches that truly make it a celebration cake. I love to jazz up this 4th of July cake with a generous scattering of 4th of July sprinkles and charming 4th of July food picks. These small details instantly elevate the cake, making it look professionally decorated and undeniably patriotic.
Finding the perfect accessories can sometimes be a quest! I spent quite some time searching for some fantastic 4th of July tinsel sparklers, and I was absolutely thrilled when I finally discovered these particular ones. They are truly great, and since they came in a pack of 100, I’m well-stocked for many Independence Day celebrations to come!
Creative Decoration Ideas for Your 4th of July Cake:
- Sprinkle Extravaganza: Don’t limit yourself to just the top! Consider a “sprinkle drip” down the sides or apply sprinkles around the base for an extra pop of color and texture.
- Fruit Accents: Fresh berries like blueberries and raspberries can add a natural touch of red and blue, along with a burst of fresh flavor. Arrange them in patterns or scatter them artfully.
- Edible Glitter: A dusting of edible silver or gold glitter can make your cake sparkle, reminiscent of fireworks.
- Fondant Stars: Cut out small fondant stars in red, white, and blue to place around the cake or as a border.
- Flag Toppers: Mini American flags or other patriotic themed toppers can be easily inserted into the top of the cake for a grand statement.
- Chocolate Drizzle: A white chocolate drizzle over the red top layer can add an elegant touch while maintaining the color scheme.
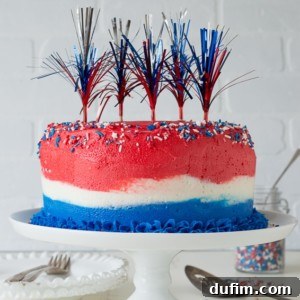
4th of July Ombre Cake
Equipment
-
8 inch cake pan (or 3 for a quicker bake of multiple layers)
-
Glass Mixing Bowl
-
Offset Spatula (essential for smooth frosting)
-
KitchenAid 9-Speed Mixer (or stand mixer with paddle attachment)
-
Piping Bags
-
Cake Turntable (highly recommended for easy frosting)
-
Parchment Paper
Ingredients
Cake (repeat this recipe for each layer – typically 3 layers for this cake)
- 6 Tbsp (86g) butter, softened
- ⅔ cup (132g) sugar
- 3 egg whites (from large eggs)
- ½ cup (114g) sour cream (full-fat for best results)
- 1 tsp vanilla extract (pure vanilla for best flavor)
- 1 cup + 2 Tbsp (135g) all-purpose flour
- 1 ½ tsp baking powder
- ¼ tsp salt
Buttercream Frosting
- 1 cup (226g) unsalted butter, 2 sticks, softened to room temperature
- 1 cup (236ml) vegetable shortening (high-quality for best texture)
- 1 tsp vanilla extract
- 7-10 cups (791-1130g) of powdered sugar, sifted (adjust to desired consistency)
- Red and blue gel food coloring (gel colors provide richer hues)
- 4th of July sprinkles, optional
Instructions
To bake the cake layers (repeat for each layer needed)
-
Preheat your oven to 350 degrees F (175 degrees C). Prepare an 8-inch round cake pan or springform pan by greasing the bottom and sides thoroughly with butter. Line the bottom with a round piece of parchment paper. To achieve perfectly level cake layers, consider using a bake-even strip. You can purchase these or easily make your own: cut a strip from an old towel or thick fabric to fit around your pan, get it really wet (squeezing out excess water but leaving it damp), and secure it tightly around the pan with a safety pin.
-
In a large mixing bowl, combine the softened butter and granulated sugar. Beat them together using an electric mixer on medium-high speed until the mixture is light, pale, and fluffy, which usually takes about 2-3 minutes. Next, add the egg whites one at a time, beating well after each addition until fully incorporated.6 Tbsp (86g) butter, ⅔ cup (132g) sugar, 3 egg whites
-
Stir in the sour cream and vanilla extract. Mix on low speed until the mixture is smooth and evenly combined. Be careful not to overmix at this stage.½ cup (114g) sour cream, 1 tsp vanilla extract
-
In a separate, smaller bowl, whisk together the all-purpose flour, baking powder, and salt until well combined. Gradually add this dry mixture to the wet ingredients. It’s crucial not to dump it all in at once. Instead, add the flour in two batches, gently shaking spoonfuls over the wet mixture as if sifting. Fold the dry ingredients into the wet mixture using a spatula until just combined and no streaks of flour remain. Avoid overmixing, as this can lead to a tough cake. Scrape down the sides and bottom of the bowl to ensure everything is incorporated. Pour the batter into your prepared cake pan and spread it evenly with a spatula.1 cup + 2 Tbsp (135g) all-purpose flour, 1 ½ tsp baking powder, ¼ tsp salt
-
Bake for 22-26 minutes, or until a wooden toothpick inserted into the center of the cake comes out clean. If you are using a bake-even strip, this may slightly increase the baking time. If the cake still appears wobbly in the center, allow it to bake for a few more minutes.
-
Once baked, remove the cake from the oven and let it cool in the pan on a wire cooling rack for 10 minutes. After 10 minutes, carefully invert the cake onto the cooling rack, remove the pan, and peel off the parchment paper. Allow the cake layer to cool completely to room temperature before handling further. Once cool, if your cake has a domed top, use a serrated knife or a cake leveler to level the top for easier stacking. Wrap the cooled cake layer tightly in plastic wrap to prevent it from drying out, and place it in the refrigerator. Cake layers can be prepared up to one week in advance and stored this way.
-
Approximately 30 minutes to 1 hour before you plan to assemble and frost the cake, place the wrapped cake layers in the freezer. This brief chill will firm them up, making them much easier to handle, level, and frost without crumbling. Remember the humidity tips mentioned earlier if your environment is particularly moist.
To make the buttercream frosting
-
In a large mixing bowl, combine the softened butter and vegetable shortening. Beat them together using an electric mixer on medium-high speed for about 3-5 minutes, until the mixture is very light and fluffy. Add the vanilla extract and mix until just combined. Begin to add the sifted powdered sugar, about 2-3 cups at a time, mixing on low speed until each addition is incorporated before adding more. This prevents a cloud of sugar. Continue adding powdered sugar until the frosting reaches your desired consistency and sweetness. It should be thick enough to hold its shape but still spreadable. Once all the sugar is incorporated, beat the frosting on high speed for another 2-3 minutes to make it extra light, fluffy, and smooth.1 cup (226g) butter, 1 cup (236ml) vegetable shortening, 1 tsp vanilla extract, 7-10 cups (791-1130g) of powdered sugar
To frost and decorate the cake
-
Divide the prepared buttercream frosting into three separate bowls. Designate one bowl for red, one for white, and one for blue. For the ombre effect, you’ll want more frosting for the red and white layers (which will be the most prominent colors on the outside), and a slightly smaller amount for the blue. Carefully add red gel food coloring to one bowl until you achieve a vibrant red. Leave the second bowl white. Add blue gel food coloring to the third bowl for a rich blue. Mix each color thoroughly.Red and blue gel food coloring
-
Assemble your cake on a turntable for ease of frosting. Place a small dollop of white frosting on an 8-inch round cardboard cake circle or directly on your serving platter to secure the first cake layer. Center your first cake layer on top. Apply an even layer of white buttercream over this layer using an offset spatula, spreading it smoothly to the edges. Repeat this process for each subsequent cake layer, stacking them neatly. Once all layers are stacked, apply a thin “crumb coat” of white buttercream around the sides and top of the entire cake. This traps any loose crumbs, creating a clean canvas for your final frosting.
-
Place the crumb-coated cake in the freezer for about 20 minutes to allow the frosting to set firm. This step is crucial for stability and ease of decorating. While the cake chills, prepare your piping bags. Cut off the ends of three piping bags, creating a 1/2 to 1-inch opening in each. Fill one bag with red buttercream, one with white, and one with blue.
-
Once the crumb coat is firm, begin applying the colored frostings. Start by spreading some of the red buttercream evenly over the top of the cake, extending it slightly down the sides. Next, pipe concentric rings of each color around the sides of the cake. Begin with the blue frosting at the very bottom, followed by the white frosting in the middle, and finally the red frosting at the top, just below the red top layer. Aim for relatively even bands of color.
-
Using your offset spatula, gently smooth and blend the colors. Start from the bottom (blue) and move upwards (towards red), applying light, even pressure. As you smooth, you will see the colors seamlessly blend into an ombre effect. Regularly wipe any excess buttercream off your spatula to keep the colors clean and the blend smooth. Continue to work your way around the cake until you achieve the desired gradient and a smooth finish. You can go over areas multiple times to refine the blend.
-
Once the ombre effect is perfect, generously add 4th of July sprinkles around the top edge and surface of the cake for a festive finish.4th of July sprinkles
-
For an extra touch, you can pipe a decorative blue border around the bottom edge of the cake using a star tip or a simple round tip on one of your blue piping bags.
-
Your stunning 4th of July Ombre Cake is now ready to serve and enjoy! Slice with a sharp, warm knife for clean cuts.
Notes
Nutrition
Carbohydrates: 67g |
Protein: 2g |
Fat: 30g |
Saturated Fat: 14g |
Polyunsaturated Fat: 4g |
Monounsaturated Fat: 10g |
Trans Fat: 2g |
Cholesterol: 45mg |
Sodium: 231mg |
Potassium: 34mg |
Fiber: 1g |
Sugar: 60g |
Vitamin A: 529IU |
Vitamin C: 1mg |
Calcium: 37mg |
Iron: 1mg
Nutrition Disclosure
All nutritional values are approximate and provided to the reader as a courtesy. Changing ingredients and/or quantities will alter the estimated nutritional calculations. For precise dietary information, it is recommended to calculate nutritional values based on the specific brands and quantities of ingredients you use.
Enjoyed baking this festive cake? Share your experience and patriotic creations in the comments below!