
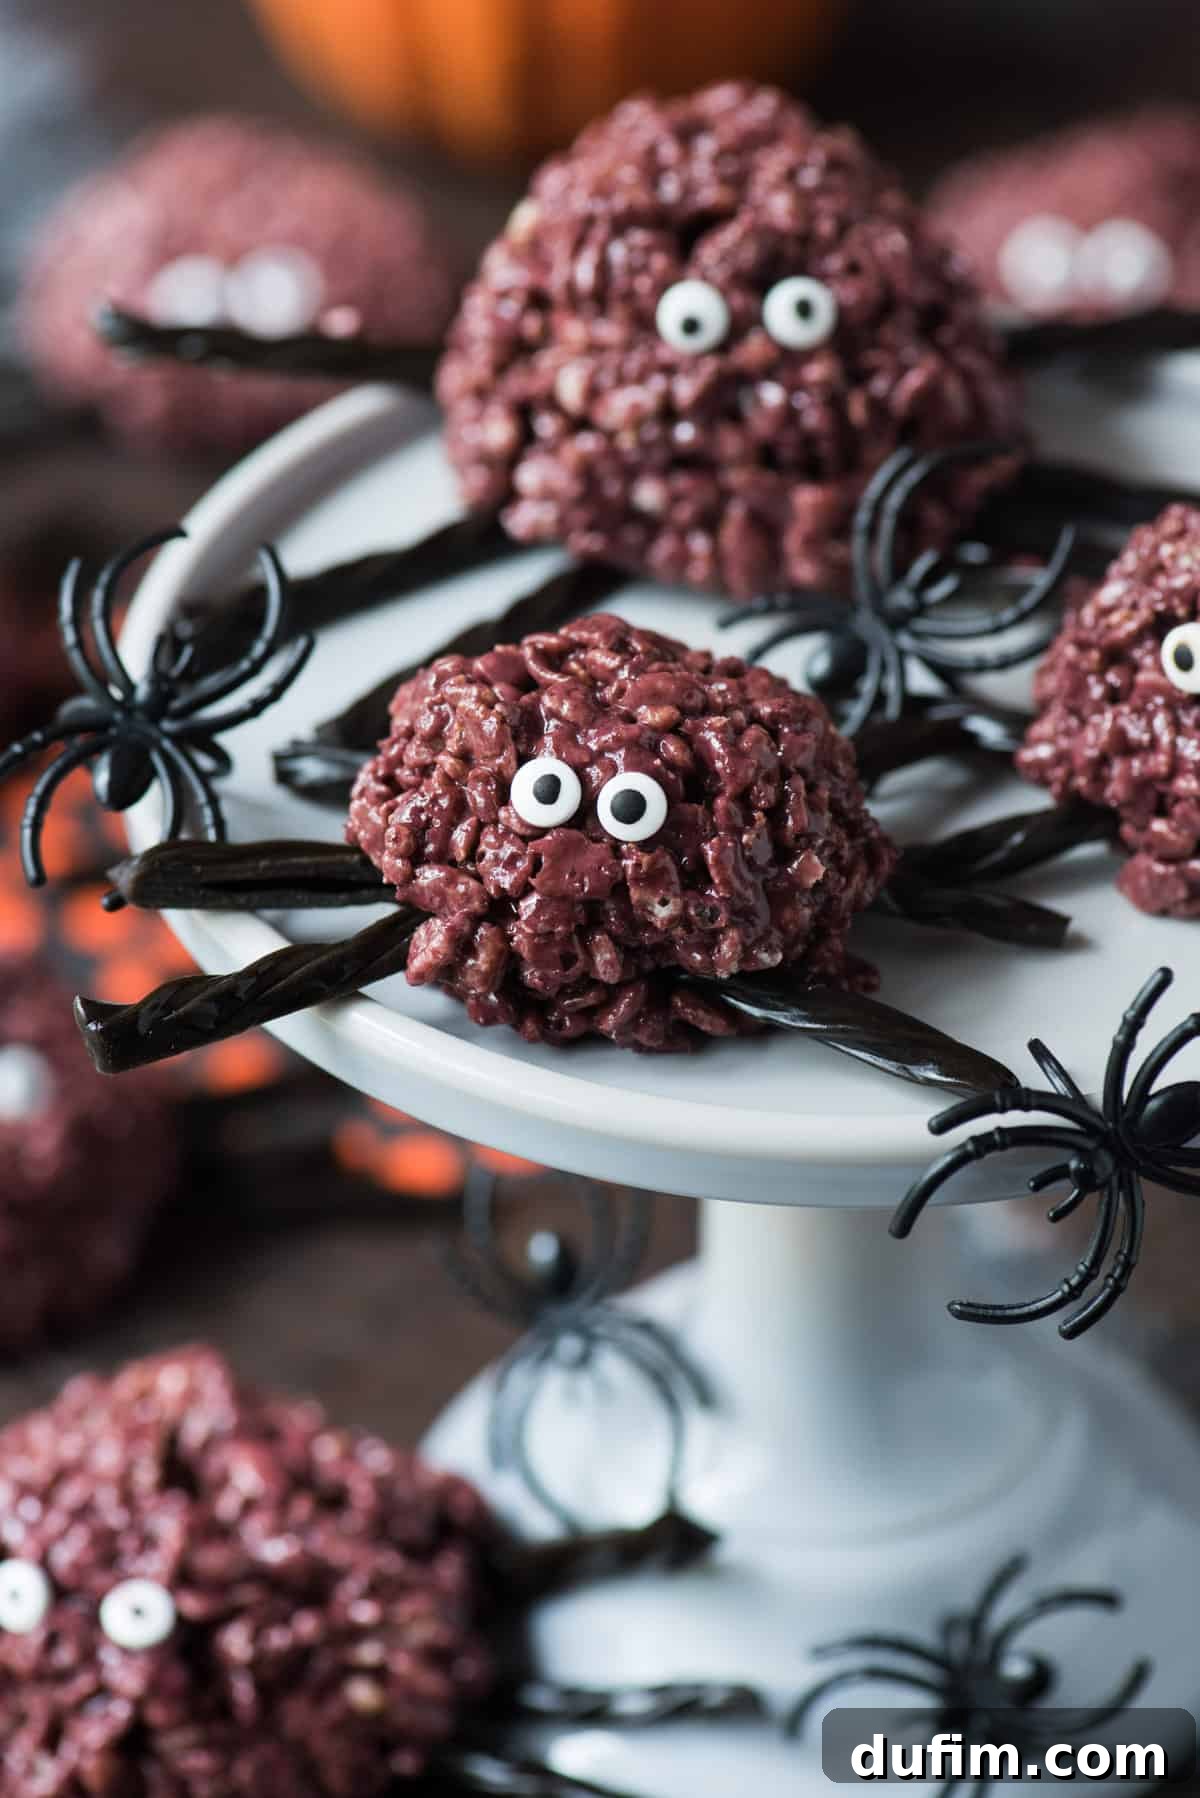
Get ready to spin a web of deliciousness this Halloween with our easy-to-make, incredibly fun, and adorably spooky Spider Rice Krispie Treats! These festive no-bake delights transform your favorite classic cereal treat into captivating creepy-crawlies, perfect for adding a touch of whimsy to any Halloween celebration. Kids will absolutely love helping create these vibrant, edible spiders, making them a fantastic family activity for the spooky season.
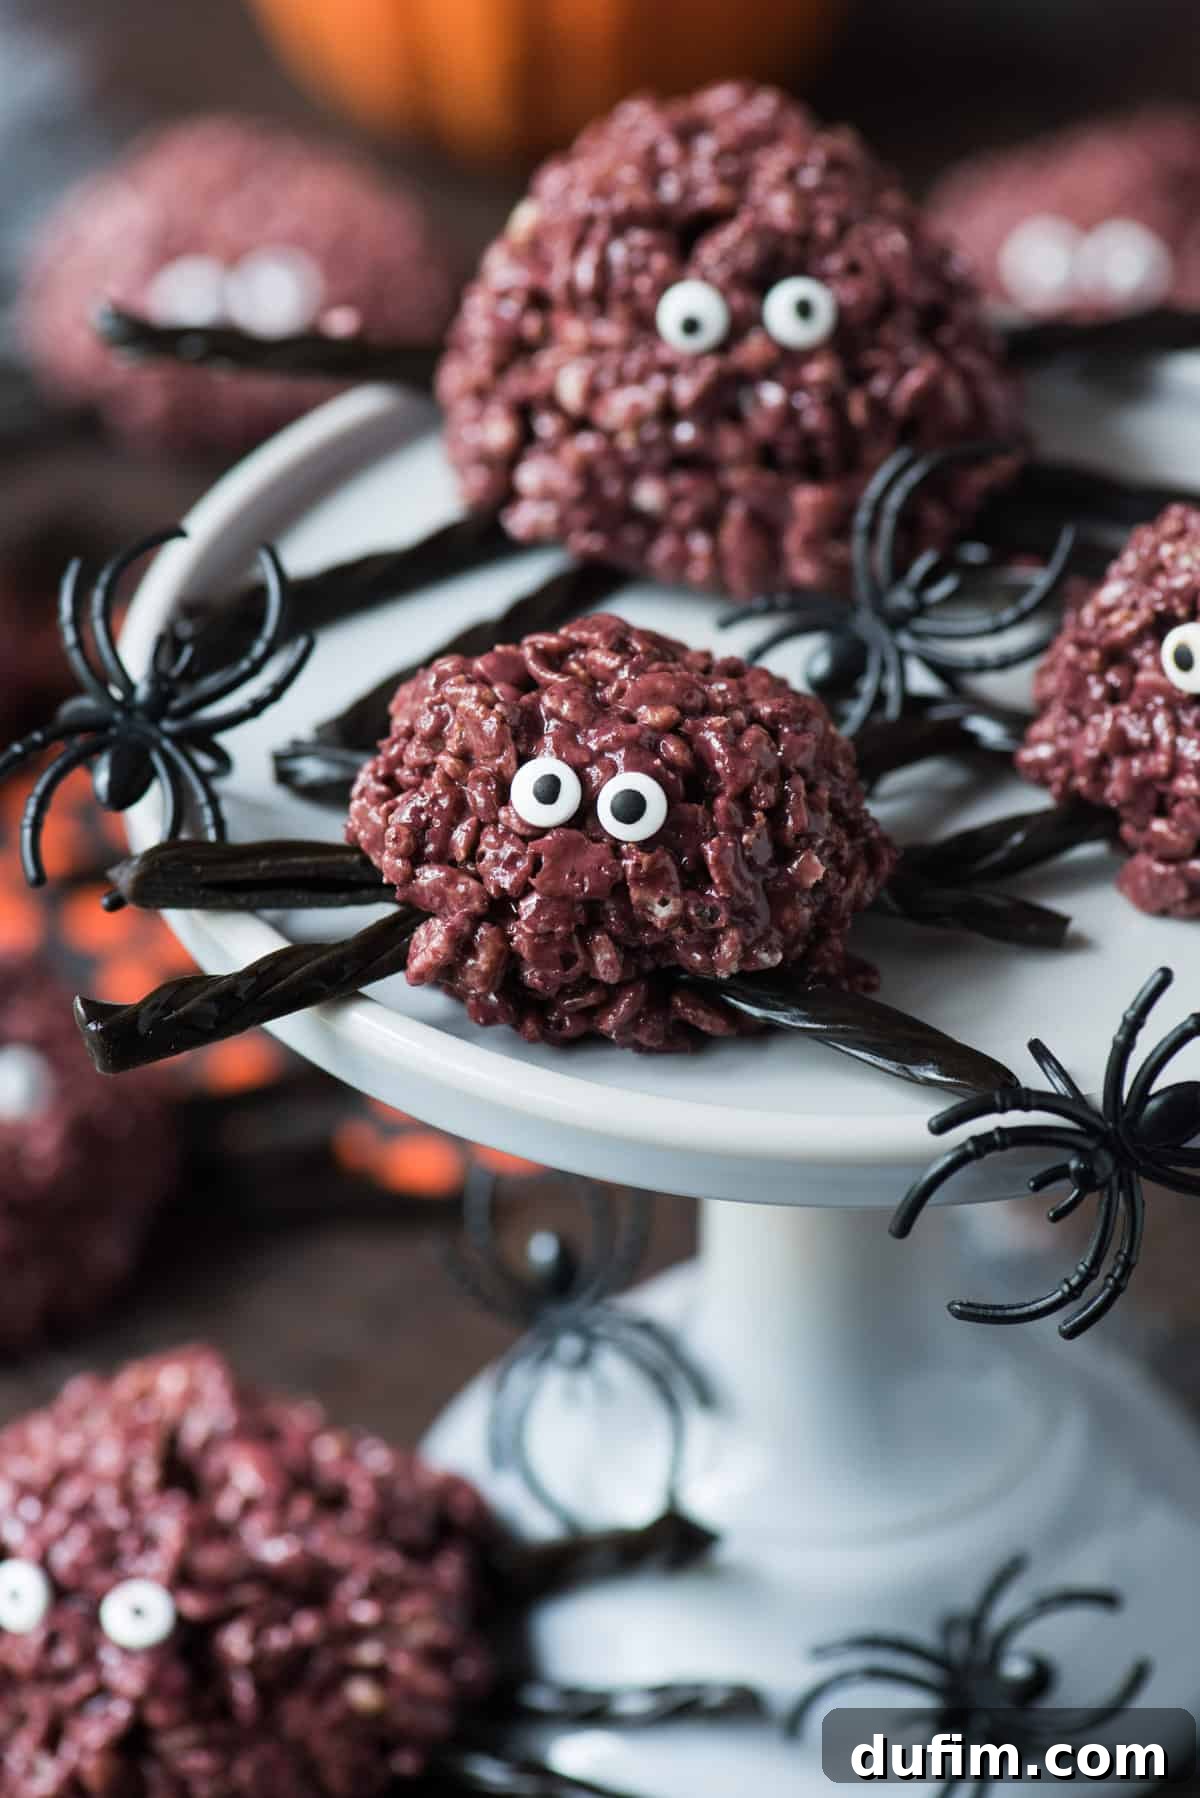
“We absolutely adore Rice Krispie treats, and my little ones were so excited to make these for Halloween! The recipe was wonderfully straightforward and perfectly suited for small hands to help out. A definite hit!”
-Chloe
Halloween has always held a special place in my heart – it’s undeniably my favorite holiday! I cherish vivid childhood memories of proudly donning my costume for elementary school, eagerly participating in the annual school parade to show off our creative outfits. Following the grand display, we’d gather for our lively class parties, where decorating pumpkin sugar cookies was always a highlight. Perhaps it was during those early, frosting-filled moments that the seeds of a future food blogger were sown! The sheer joy of crafting edible delights, especially those tied to festive occasions, has been a lifelong passion. This year, we’re bringing that same spirit of fun and creativity to your kitchen with these charmingly creepy Halloween treats.
Watch a quick video tutorial on how to make these delightful Spider Rice Krispie Treats!
These Spider Rice Krispie Treats are not just delicious; they are incredibly easy and make for a perfect family bonding activity during the Halloween season. Imagine the laughter and excitement as you and your children transform simple ingredients into a troop of colorful, googly-eyed spiders. It’s a no-bake wonder that promises minimal fuss and maximum fun, ensuring everyone, from the littlest hands to the most seasoned bakers, can partake in the Halloween spirit.
Gather Your Spooky Spider Rice Krispie Treat Supplies
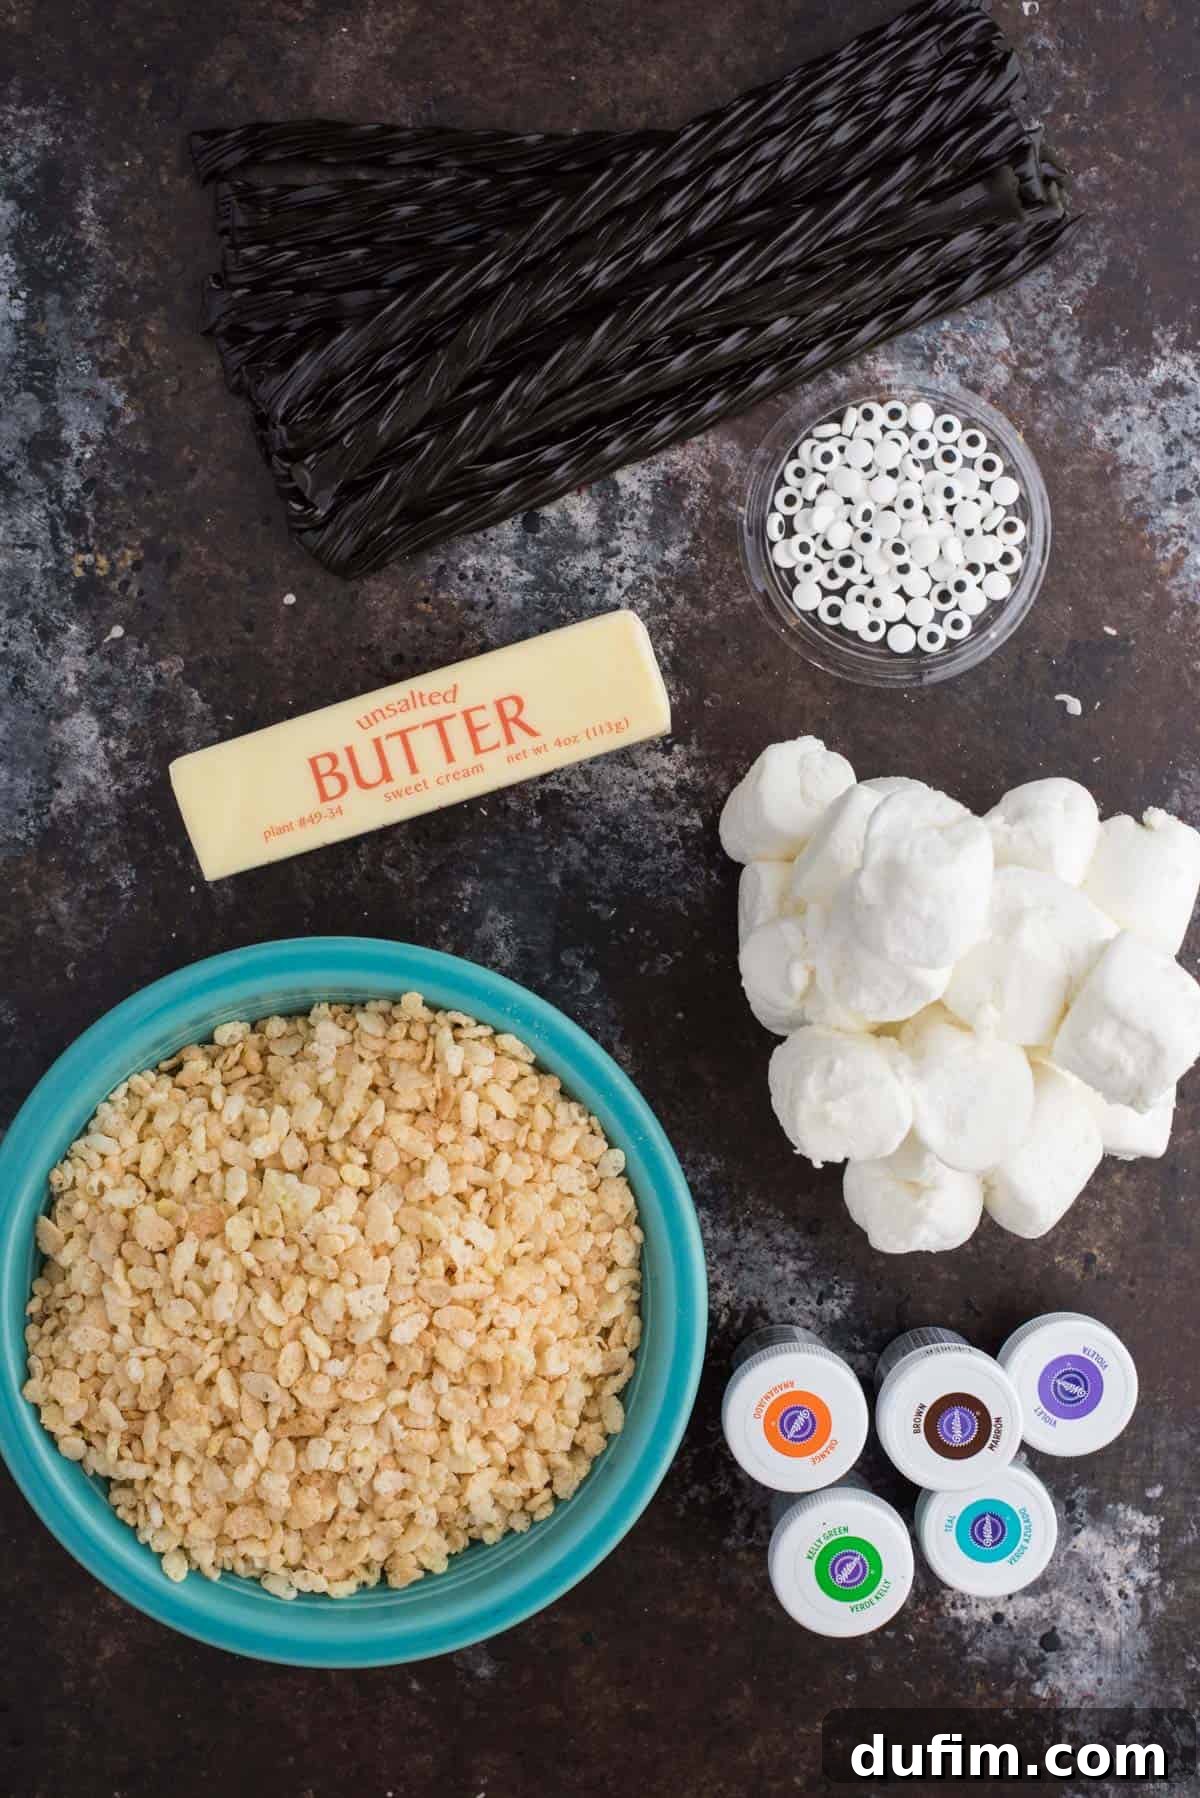
One of the best aspects of making these Halloween Spider Rice Krispie Treats is that most of the ingredients are kitchen staples, readily available at any local grocery store. You’ll need the foundational triumvirate of Rice Krispie cereal, butter, and marshmallows to create the gooey base. For the transformative touches that turn these treats into actual spiders, a few specialty items will be required.
The crucial black licorice, which forms the spider’s legs, can typically be found in the candy aisle of most supermarkets. Keep an eye out for string licorice or similar varieties that can be easily cut into thin strips.
For those captivating candy eyeballs and the vibrant gel food coloring that gives your spiders their unique hue, larger retailers like Walmart and Target often stock a dedicated Halloween baking section in the weeks leading up to the holiday. These stores are excellent starting points. However, if you find these items elusive, don’t despair! Craft stores such as Michaels or other specialty baking supply shops are reliable sources. They often feature extensive aisles of Wilton products and other baking essentials, ensuring you’ll find exactly what you need to bring your edible arachnids to life. Consider grabbing extra candy eyeballs; they’re versatile for many other Halloween creations!
Choosing the Perfect Spooky Shade: What Color Should Your Spiders Be?
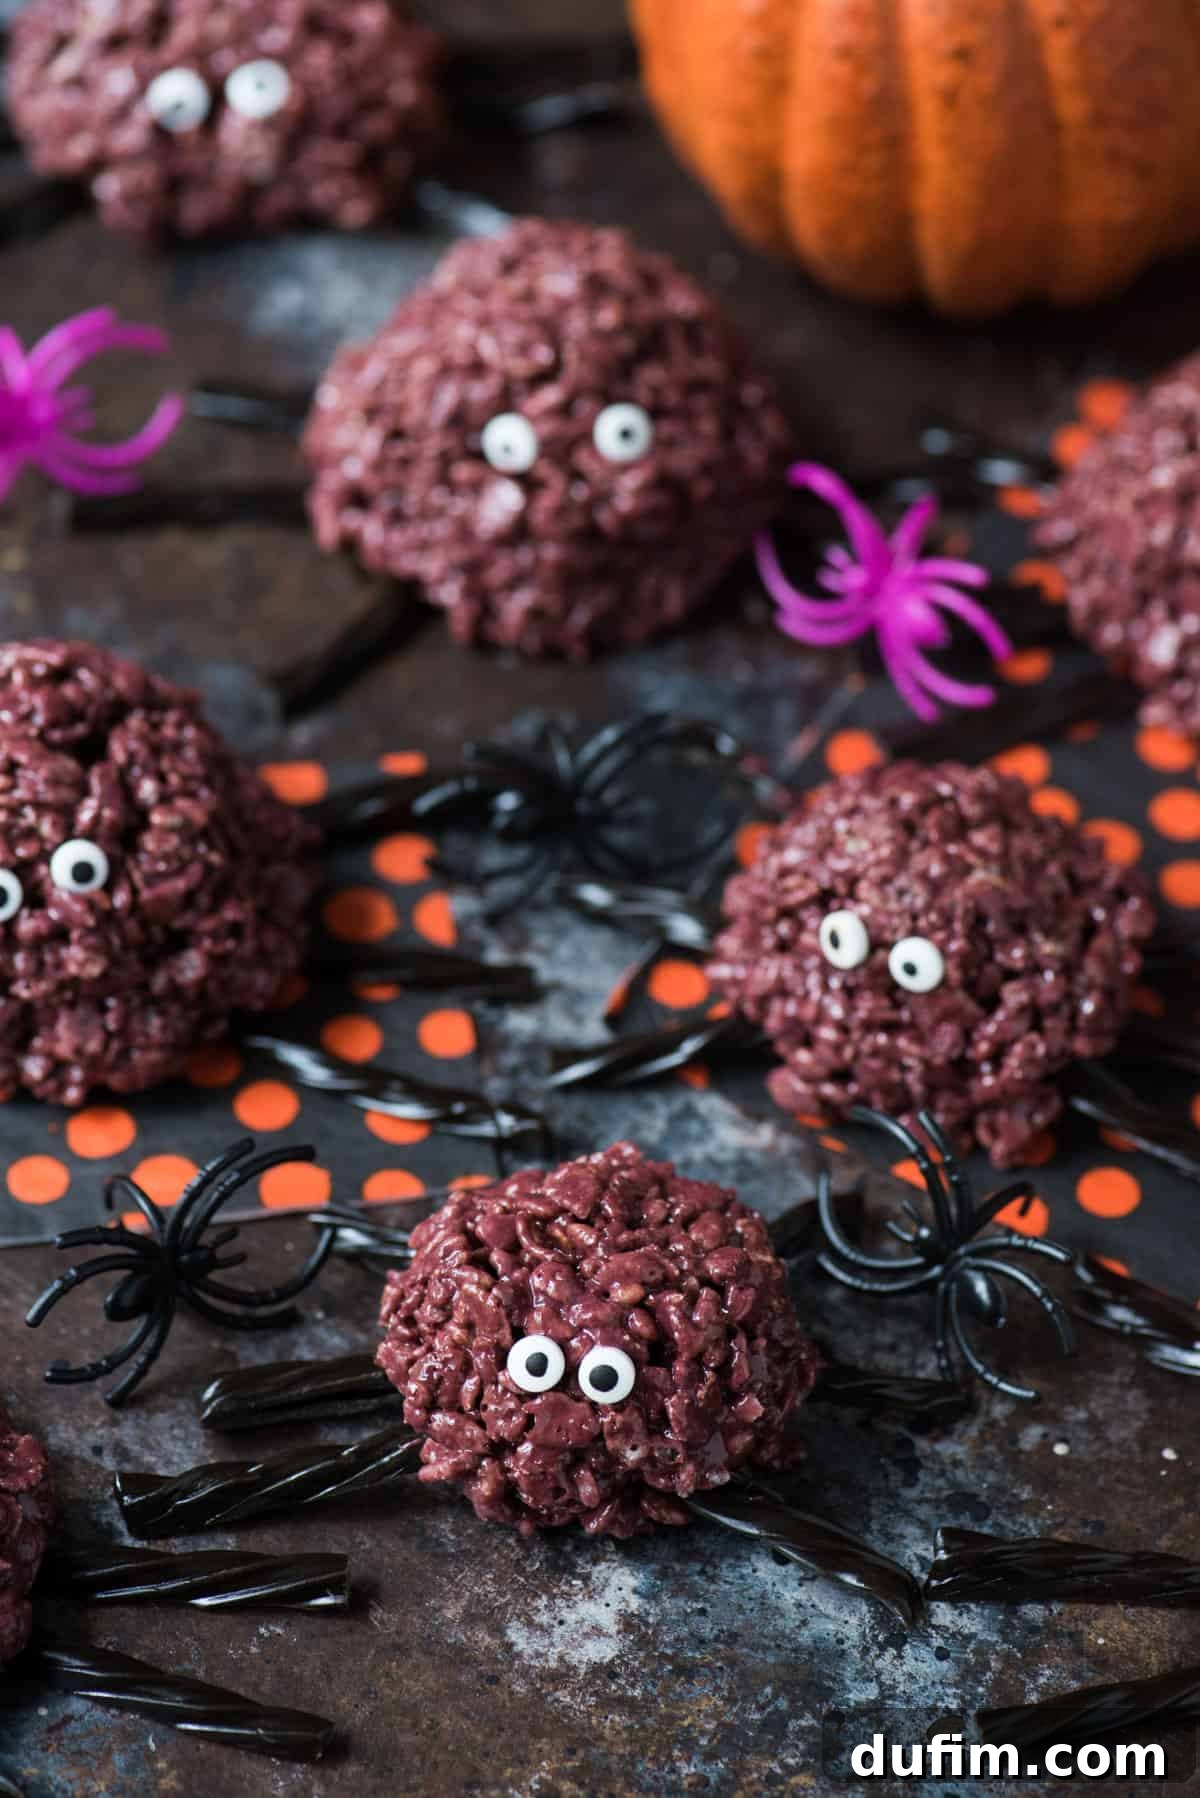
When it comes to the color of your spider Rice Krispie treats, the creative possibilities are endless, and it’s entirely up to your imagination! While the classic idea of black spiders might be appealing, achieving a true, jet-black hue with a whole batch of melted white marshmallows can be quite challenging. Even with a generous amount of black gel food coloring, you might find, as I did, that the resulting color leans more towards a deep maroon or a rich, dark purple. This isn’t a bad thing at all – these darker, jewel-toned spiders actually have a wonderfully eerie and sophisticated look!
Don’t limit yourself to just black or purple. Halloween is the perfect time to experiment with a spectrum of spooky shades. Consider vibrant, eerie green for a monster-like touch, or a deep, mysterious dark blue to evoke a midnight chill. A bold, spooky red can make your spiders look truly menacing and stand out on any treat platter. The beauty of this recipe lies in its adaptability; every spider, regardless of its color, inherently possesses that classic Halloween creepiness. So, have fun with the food coloring and let your creativity shine! Whether you aim for traditional spooky tones or something wonderfully whimsical, your colorful arachnid creations are sure to be a hit.
Step-by-Step Guide: Crafting Your Spooky Spider Rice Krispie Treats
Creating these adorable spider treats is a straightforward and enjoyable process. Follow these detailed steps to ensure your Halloween snacks turn out perfectly spooky and delicious!
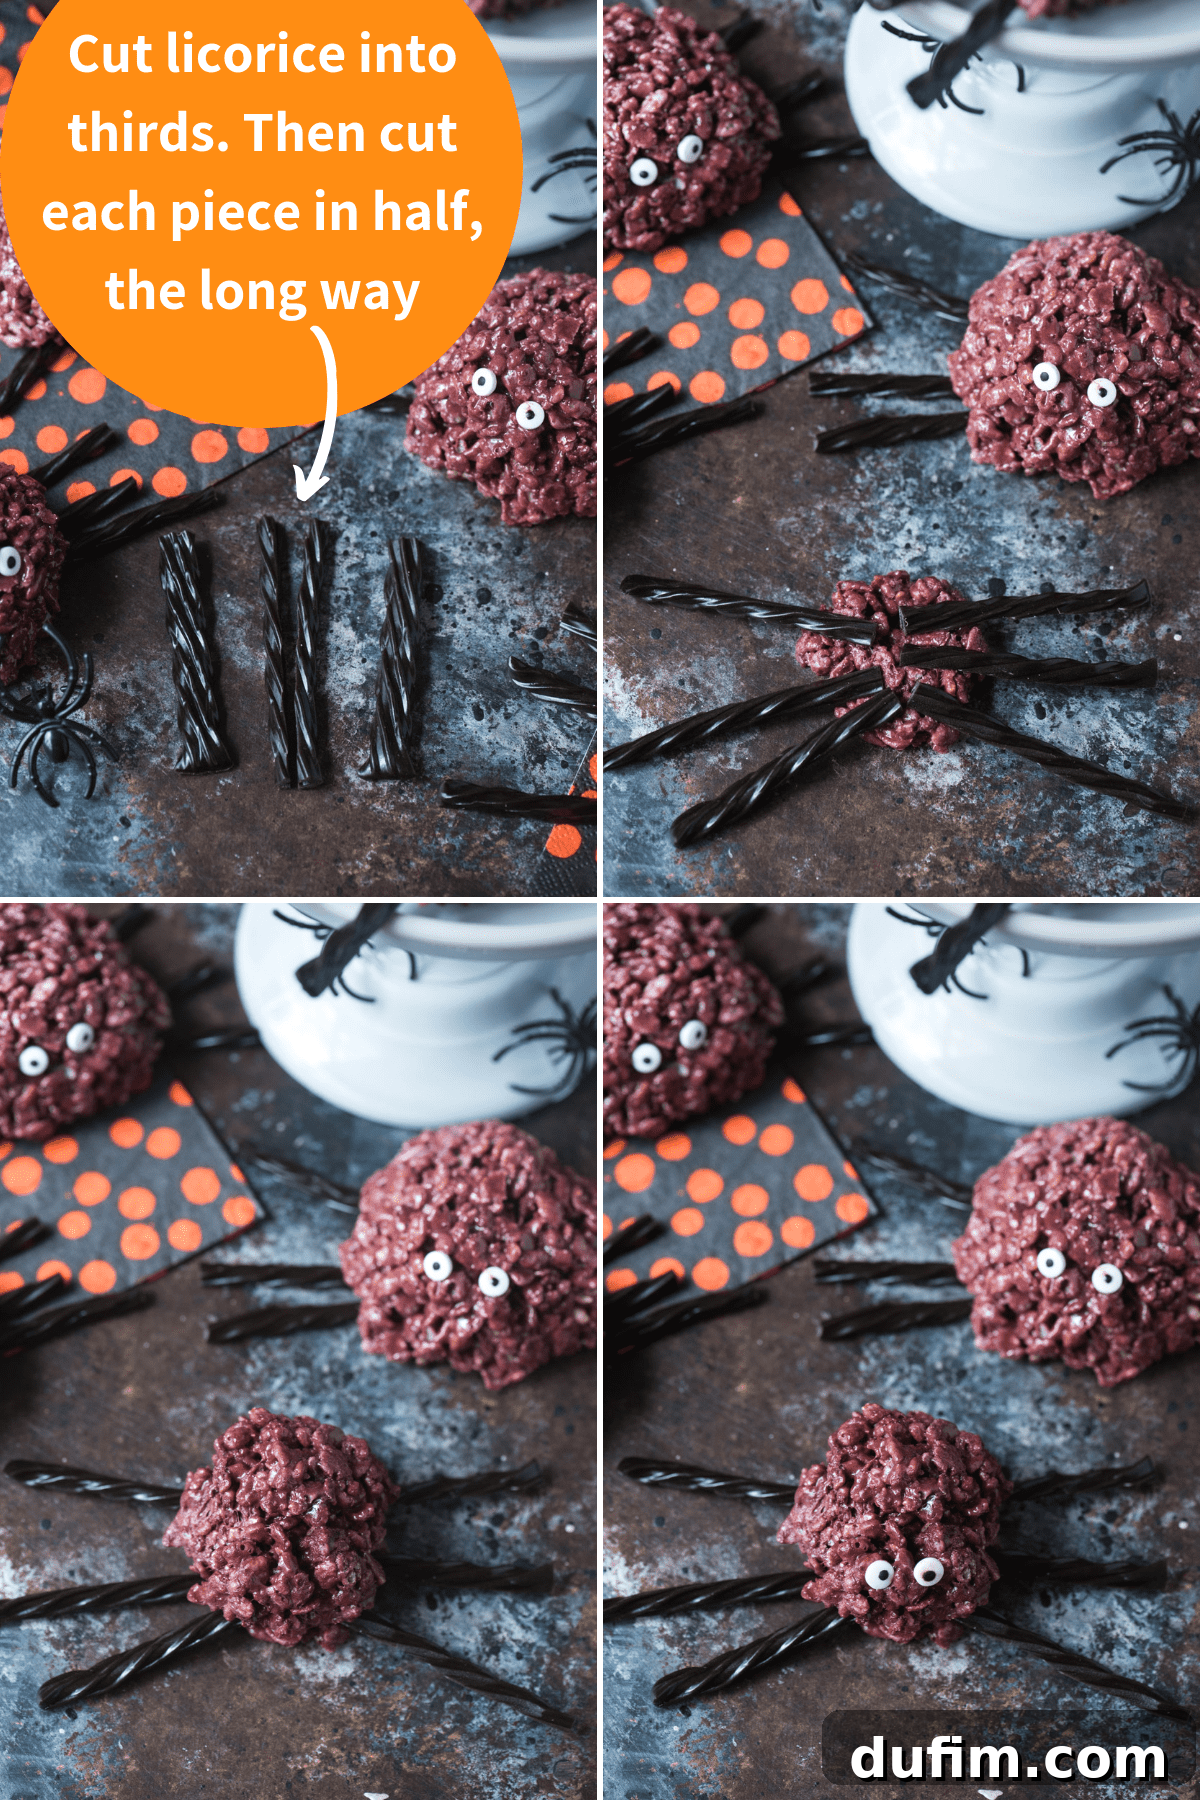
- Prepare the Licorice Legs: Begin by taking each strand of black licorice and cutting it into three equal pieces. Then, take each of those thirds and carefully slice them in half lengthwise, often referred to as “hot dog style” in culinary terms. This will give you thin, flexible strips suitable for spider legs. While my spiders typically feature six legs for a more manageable look, feel free to add eight for anatomical accuracy, or even more for a truly monstrous effect! Refer to the detailed image within this post for a visual guide on cutting the licorice.
- Craft Your Rice Krispie Base: Prepare your favorite Rice Krispie treat recipe as usual, melting the butter and marshmallows together. Once the marshmallows are fully melted and smoothly combined with the butter, it’s time to introduce your chosen food coloring. Stir the gel food coloring thoroughly into the marshmallow mixture until the color is evenly distributed and vibrant. Immediately remove the pot from the heat.
- Shape the Spider Base: Lay out a silicone baking mat or wax paper on your counter to prevent sticking. Scoop out approximately one tablespoon of the warm Rice Krispie mixture. Gently flatten this portion into a small, circular disk. Take three of your prepared licorice leg pieces and press their ends firmly into one side of the disk. Repeat this with another three licorice pieces on the opposite side, ensuring all six legs are securely embedded.
- Form the Spider Bodies: Now, use a large cookie scoop or your hands (lightly greased with cooking spray to prevent sticking) to form a round ball for the spider’s body. This ball should be slightly larger than the flattened disk. Carefully place and gently press this ball on top of the disk where the licorice legs are attached, effectively creating the spider’s main body and securing the legs in place. Ensure the legs are spread out and visible.
- Add the Googly Eyes: The final and most fun touch! While the Rice Krispie mixture is still slightly warm and pliable, gently press two candy eyeballs onto the front of each spider body. Their natural stickiness should hold the eyeballs in place, instantly bringing your spooky creations to life. Allow the treats to cool completely on the baking mat before serving to ensure they set properly.
Keeping Your Spooky Spiders Fresh: Storage Tips
Rice Krispie treats are always at their absolute best when enjoyed on the very day they are made. Their soft, chewy texture is most delightful right after they’ve had a chance to set. However, if you’re planning ahead for a Halloween party or simply have leftovers, you can certainly store these spider treats for a few days without losing too much of their charm.
To maintain their freshness and prevent them from becoming hard or stale, store your completed Spider Rice Krispie Treats in an airtight container at room temperature. They will remain wonderfully edible for up to three days. For an extra layer of freshness and to protect them from air exposure, individually wrap each spider treat in plastic wrap before placing them into the airtight container. This additional step creates a barrier that helps lock in moisture, keeping your spooky snacks soft and chewy for as long as possible. Always avoid refrigeration, as the cold temperature can cause Rice Krispie treats to harden significantly and lose their desirable texture.
Creative Alternatives for Spider Legs: Beyond Black Licorice
While black licorice provides an authentic, classic look for spider legs, we understand that not everyone is a fan of its distinctive flavor. If you’re looking for alternatives that offer different tastes or textures, or simply want to cater to varying preferences, there are several fantastic options that can work just as well for your edible arachnids!
Here are some excellent suggestions for spider legs:
- Pretzel Sticks: These offer a delightful salty-sweet contrast and a satisfying crunch. Their rigidity makes them easy to insert and ensures the legs hold their shape well. You can even dip them in melted chocolate or colored candy melts for an extra decorative touch before adding them to your spiders.
- Long Tootsie Rolls: If you’re looking for a chewier, chocolatey option, long Tootsie Rolls are perfect. You can easily cut them into thin strips, similar to the licorice, and they offer a softer texture that kids typically love. The dark brown color is also very spider-like!
- Gummy Worms: For a truly whimsical and even creepier effect, consider using gummy worms! Imagine a spider with wiggly, multi-colored gummy legs – it’s a wonderfully spooky and playful variation that adds another layer of fun to the treats. You’ll need to cut them lengthwise to create thinner legs, but their bright colors and chewy texture will be a hit.
- Chocolate Sticks or Pocky: These chocolate-coated biscuit sticks offer a crisp texture and a delicious chocolate flavor. Their uniform shape makes them ideal for uniform spider legs.
- Thin Chocolate Pretzels: Similar to pretzel sticks but already coated in chocolate, these provide a nice flavor and visual appeal without extra effort.
Each of these alternatives offers a unique twist, allowing you to customize your spider treats to your taste preferences or dietary needs. Don’t be afraid to experiment and find your favorite “leg” option!
Essential Tips for Perfect Spider Rice Krispie Treats
Achieving the perfect batch of Spider Rice Krispie Treats is simple with a few helpful pointers. Follow these tips to ensure your spooky snacks are a success every time:
- Always Use Fresh Marshmallows: This is a golden rule for all Rice Krispie treats. Old or stale marshmallows, especially those from an opened bag that’s been sitting in your pantry for a while, will not melt down properly. They can result in a grainy, hard, and unappealing treat. Always opt for a fresh, unopened bag of mini marshmallows for the best gooey consistency.
- Melt with Care: Low and Slow is the Way to Go: When melting your butter and marshmallows, always do so over low heat on the stovetop. While it might take a little extra time for the mixture to fully melt and become smooth, patience is key. Melting marshmallows over high heat can cause them to overheat, leading to a brittle, hard, and overly chewy texture in your finished treats. Low heat ensures a smooth, pliable, and perfectly gooey base.
- Prevent Sticking: Your Hands Will Thank You: The Rice Krispie mixture is notoriously sticky! To prevent it from adhering to your hands while shaping, generously spray your hands with non-stick cooking spray before you begin forming the spiders. Alternatively, you can keep a small bowl of water nearby to dip your hands in periodically. Another clever trick is to let the mixture cool on the counter for about 5 minutes after mixing; it will still be warm enough to work with but significantly less sticky.
- Re-soften if Needed: If you find the Rice Krispie mixture becoming too firm or difficult to work with as you shape your spiders, especially towards the end of the batch, simply pop the bowl into the microwave for 10-20 seconds. This short burst of heat will re-soften the marshmallows, making the mixture pliable and easy to mold again.
- Do Not Freeze Your Spiders: While many treats can be frozen for longer storage, I do not recommend freezing these edible spider Rice Krispie treats. The licorice or alternative legs can become brittle, break off, or simply not hold up well during the freezing and thawing process. Furthermore, individually wrapping these oddly shaped treats for long-term freezer storage can be quite cumbersome and lead to breakage. Enjoy them fresh within a few days!
- Experiment with Leg Placement: While a standard 6 or 8 legs are typical, don’t be afraid to get creative with how you place them. You can make some spiders appear to be “crawling” or arrange their legs in more dynamic positions to add character.
With these tips in mind, you’re well on your way to creating a spectacular batch of Spider Rice Krispie Treats that will be the highlight of your Halloween festivities!
More Spooktacular Halloween Treats to Try!
If you’ve enjoyed making these delightful spider treats, you’ll love exploring more of our festive Halloween recipes. We have a collection of spooky and sweet ideas perfect for parties, trick-or-treaters, or just a fun family baking day. Expand your Halloween dessert repertoire with these other creative and delicious options:
- Ghost Popcorn Balls: Light, airy, and eerily adorable, these ghost-shaped popcorn balls are a classic Halloween favorite.
- Tombstone Oreo Balls: Rich, chocolatey, and delightfully morbid, these no-bake Oreo balls decorated as tombstones are a graveyard smash.
- Mini Pumpkin Pie Rice Krispie Treats: A seasonal twist on the classic, these bite-sized treats capture the cozy flavors of fall and Halloween.
- Bubbling Witch’s Cauldron Brownies: Deep, dark brownies topped with a “bubbling” green frosting make for a magical and delicious dessert.

Average Rating: 5 out of 5 stars from 2 ratings
Tap stars to rate! (Note: Interactive rating functionality not available in this static HTML version.)
Spider Rice Krispie Treats
Rate This Recipe
Print Recipe
Equipment
-
Silicone Baking Mat
-
Baking Sheet
-
Large Spatula
Ingredients
- 1 box rice krispie cereal, 12 oz box (approximately 10 cups)
- ½ cup (113g) unsalted butter, 1 stick
- 16 oz mini marshmallows
- food coloring, black gel food coloring used here, resulting in a maroon purple
- black licorice, for spider legs
- candy eye balls
Instructions
-
Cut each piece of black licorice into thirds. Then cut each third in half, hot dog style, to create thin strips. For visual guidance, refer to the picture provided in the main post. My spiders typically have 6 legs, but feel free to add more if you desire an 8-legged arachnid!black licorice
-
Prepare your workspace by placing two silicone baking mats on a clean counter. If you don’t have silicone mats, parchment paper or wax paper will work just as well to prevent sticking.
-
In a large pot, melt the butter over low heat on your stove. Ensure the heat is not too high to prevent burning.1/2 cup (113g) unsalted butter
-
Once the butter is fully melted, add in the mini marshmallows. Stir frequently and gently until the marshmallows are completely melted and the mixture is smooth and gooey.16 oz mini marshmallows
-
Remove the pot from the heat. Add your desired food coloring to the melted marshmallow mixture and stir thoroughly until the color is uniformly combined. For reference, I used black gel food coloring, which resulted in a beautiful purple/maroon color for my spiders.food coloring
-
Gradually add the Rice Krispie cereal into the colored marshmallow mixture. Stir gently with a large spatula until the cereal is evenly coated with the marshmallow. Be careful not to crush the cereal.1 box rice krispie cereal
-
The next steps involve shaping the spiders, which can be a little messy as the mixture is quite sticky. TIP: Before you start shaping, generously spray your hands with non-stick cooking spray, or keep a small bowl of water handy to dip your hands in. You can also allow the Rice Krispie mixture to cool on the counter for about 5 minutes; it will become less sticky and easier to handle.
-
Take approximately 1 tablespoon of the mixture and flatten it into a small disk shape. Press the ends of 6 licorice pieces (3 on each side) into the edges of the disk, arranging them as legs. Then, use a large cookie scoop or your greased hands to form a round ball for the spider’s body. Gently press this ball on top of the disk, securing the legs. Finally, carefully press two candy eye balls onto the front of each spider body. NOTE: If your Rice Krispie mixture becomes too firm to work with as you shape, place it back into the microwave for 10-20 seconds to re-soften the marshmallows.candy eye balls
Video Tutorial
A visual guide to help you master these Spider Rice Krispie Treats. (Embedded video player functionality not available in this static HTML. Please refer to the source blog for the video.)
Chef’s Notes
Nutrition Information
Carbohydrates: 18g |
Protein: 1g |
Fat: 5g |
Saturated Fat: 3g |
Polyunsaturated Fat: 1g |
Monounsaturated Fat: 1g |
Trans Fat: 1g |
Cholesterol: 12mg |
Sodium: 19mg |
Potassium: 3mg |
Fiber: 1g |
Sugar: 13g |
Vitamin A: 145IU |
Vitamin C: 1mg |
Calcium: 2mg |
Iron: 1mg
Nutrition Disclosure
All nutritional values are approximate and provided to the reader as a courtesy. Changing ingredients and/or quantities will alter the estimated nutritional calculations.
Enjoyed this recipe? Please share your thoughts and rate it below!
Your feedback helps us create more delicious content for you.