
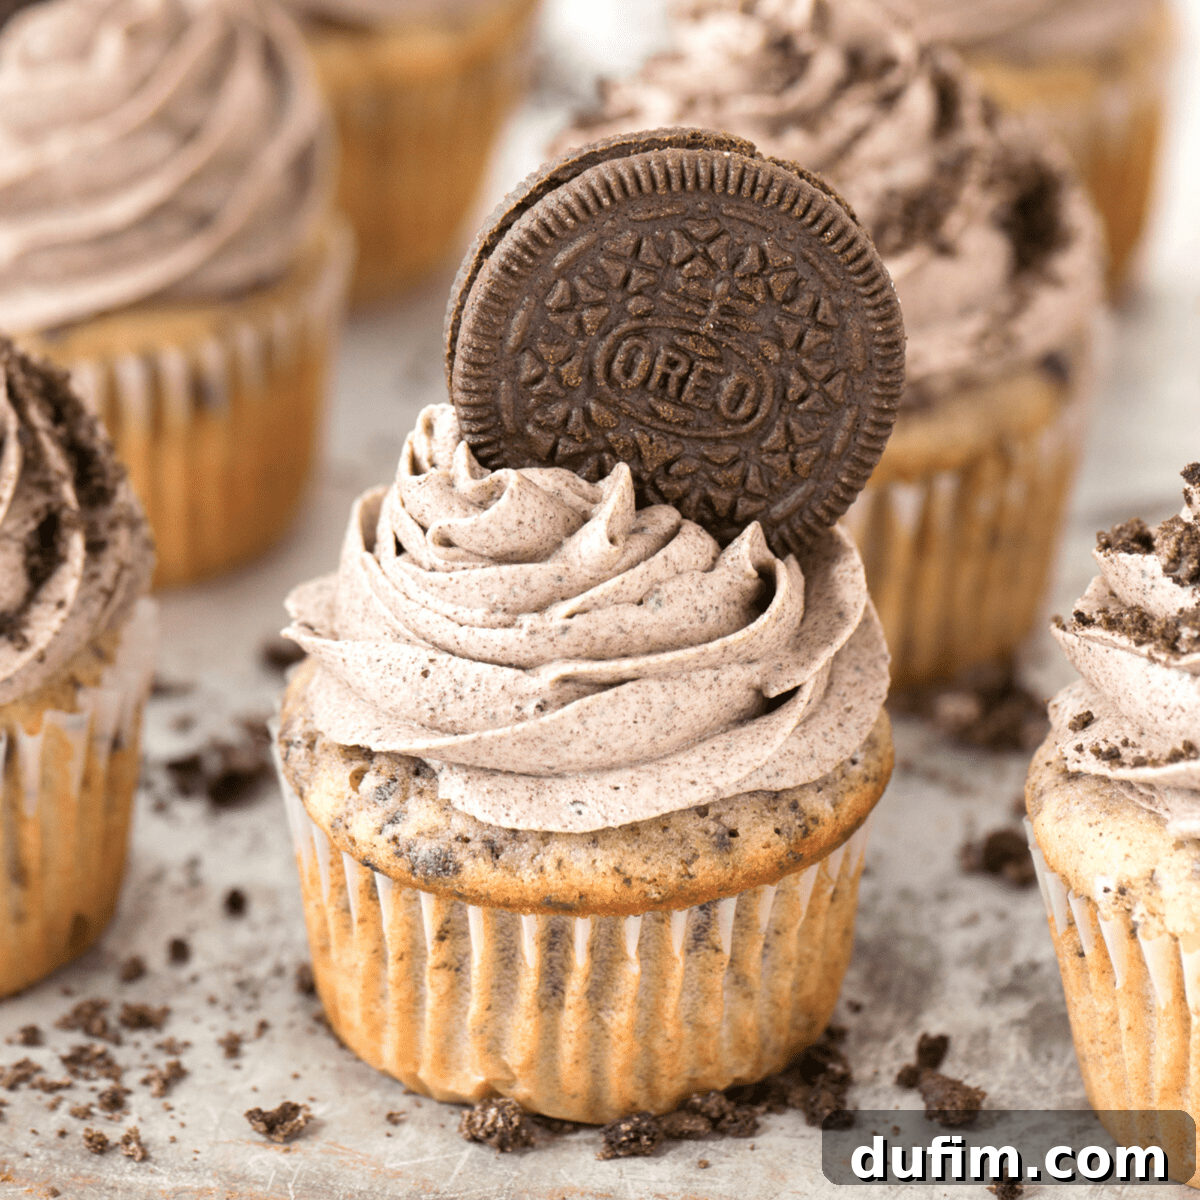
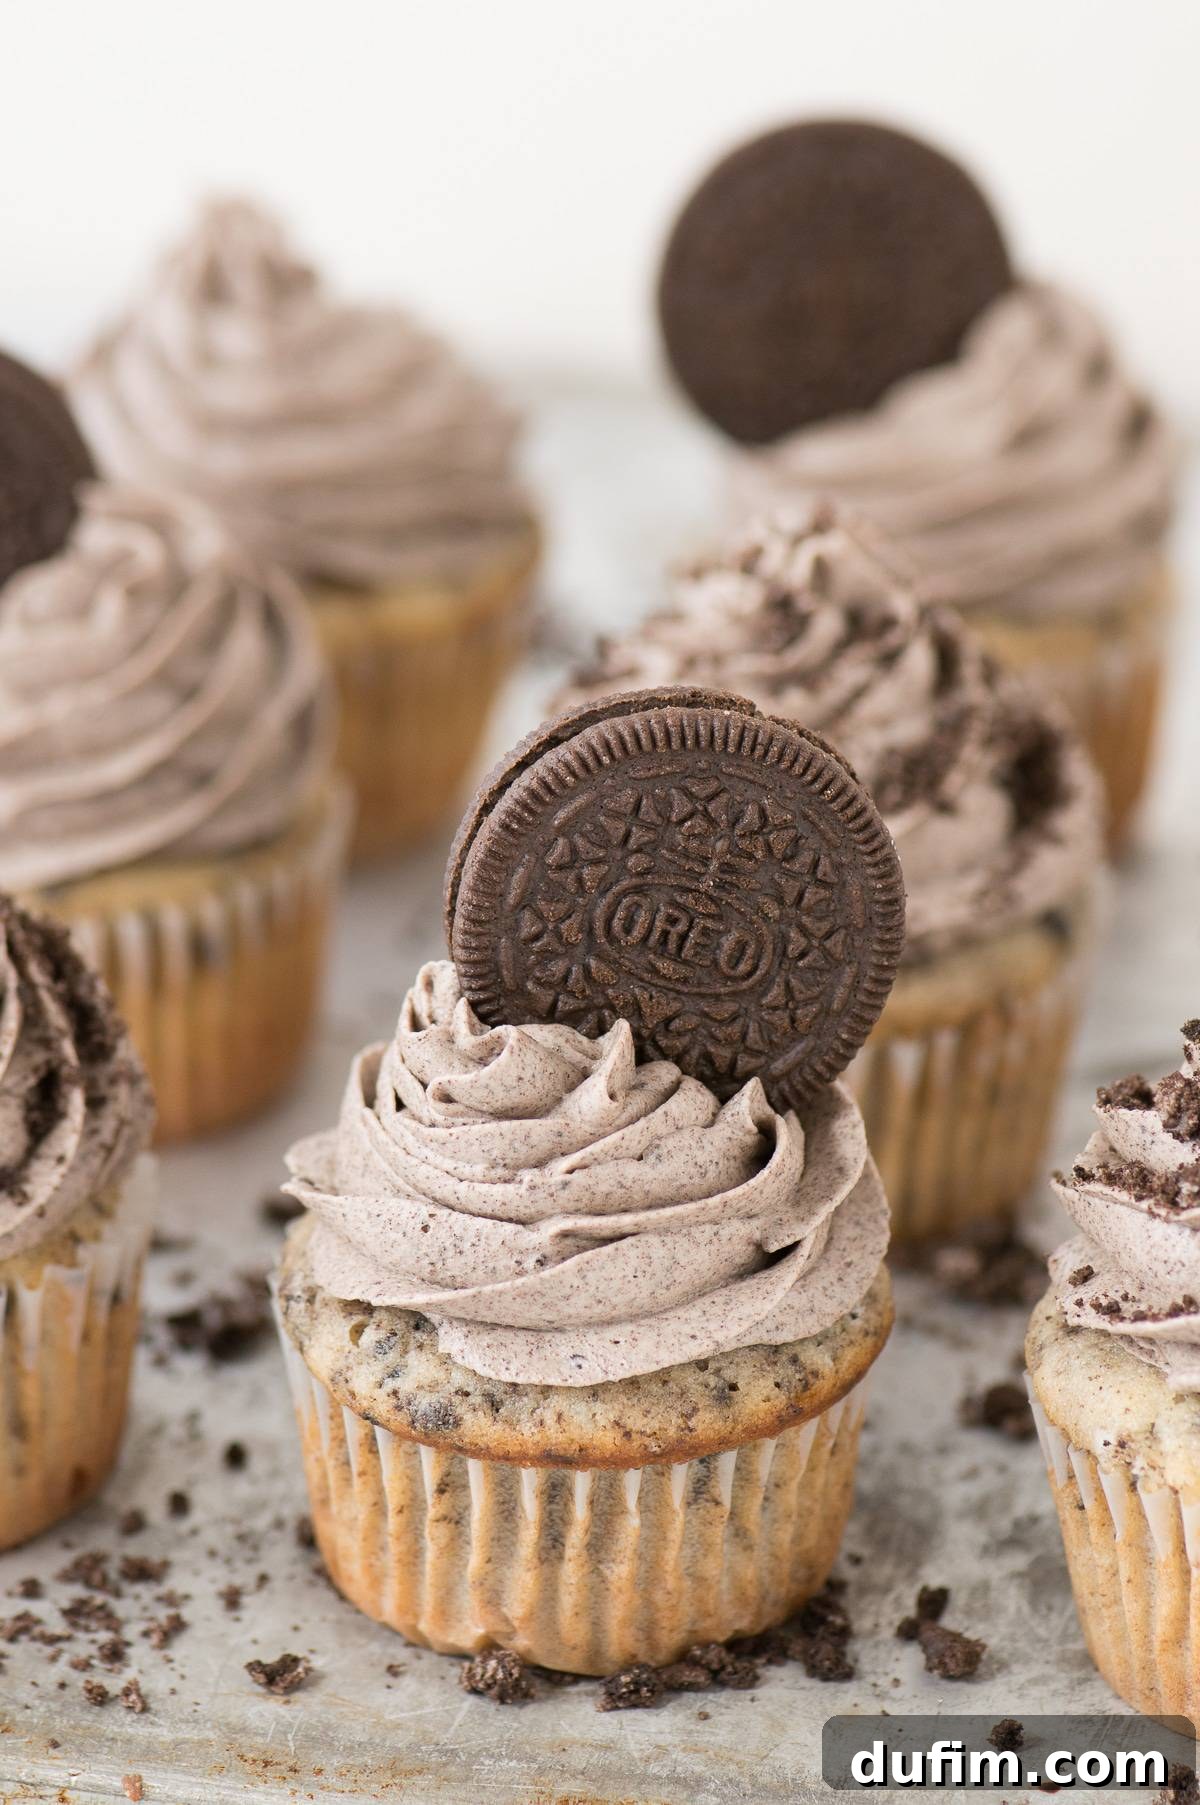
Welcome to the ultimate guide for creating the most decadent and delightful Oreo Cupcakes you’ll ever taste! These aren’t just any cupcakes; they combine a wonderfully moist, flavorful cake base with a rich, creamy Oreo frosting that is truly irresistible. This beloved recipe is meticulously adapted from our highly acclaimed classic white cupcake recipe, ensuring an unparalleled light and fluffy texture. We achieve this through a thoughtful blend of egg whites, sour cream, and milk, all contributing to maximum moisture and tenderness. But the indulgence doesn’t stop there – our signature frosting takes these treats to the next level, crafted with finely blended “Oreo flour” for a remarkably smooth and intensely flavorful finish that’s absolutely perfect for any celebration, from casual gatherings to grand parties.
“So happy I came across this recipe. It’s such a crowd pleaser!! I’ve made it 4 or 5 times because people keep requesting it. I also use sour cream in my other cupcakes now thanks to this recipe. Makes it so moist!”
– Deanna
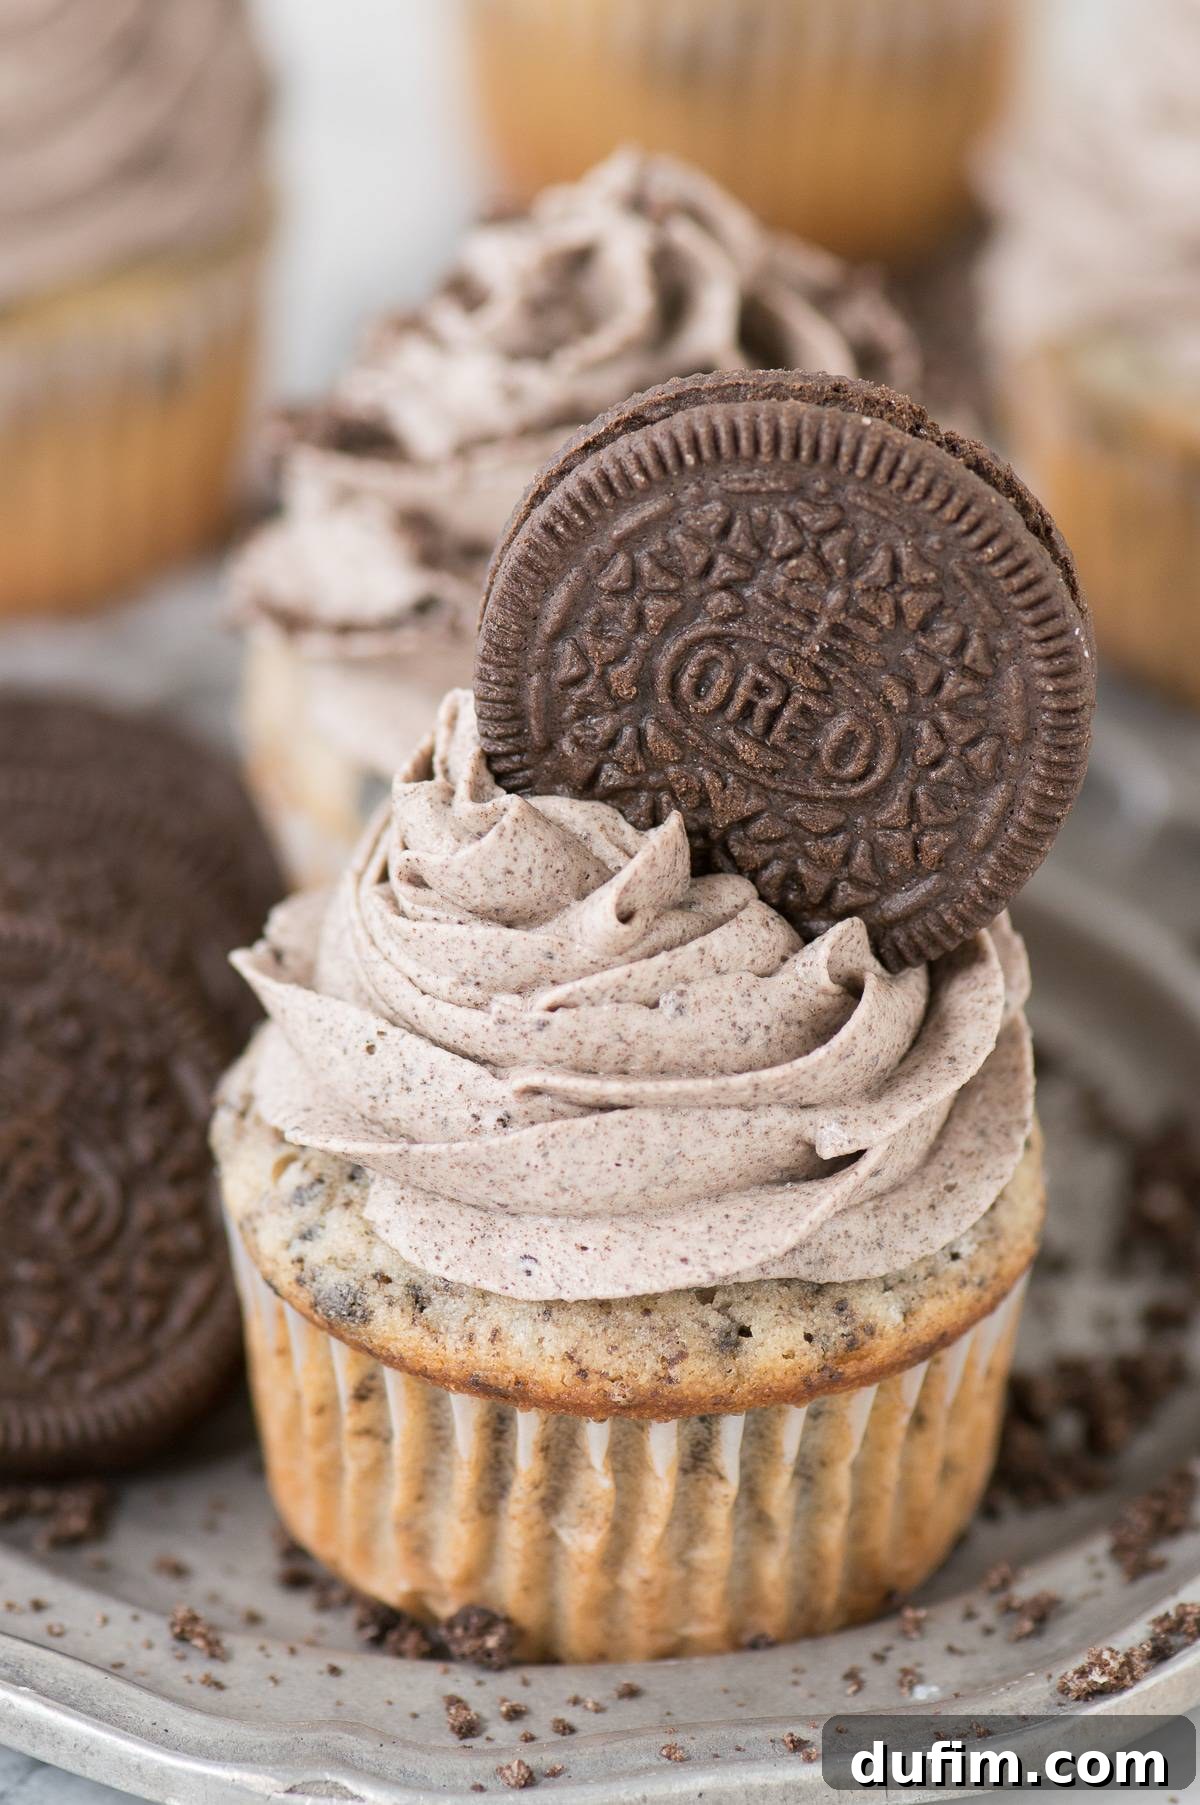
Indulge in the Best Homemade Oreo Cupcakes with Irresistible Cookies and Cream Frosting
Following the immense popularity of our classic white cupcake recipe, we’re thrilled to bring you a truly sensational sequel: these incredible Cookies and Cream Cupcakes! We’ve rediscovered our passion for cupcakes, and it’s recipes like this one that continually reignite that spark. The foundation of any exceptional cupcake lies in a moist, flavorful cake base, and we’ve poured all our expertise into perfecting just that for this Oreo cupcake creation.
This recipe is designed to become your ultimate go-to for parties, potlucks, or simply satisfying that sweet craving. Prepare to impress everyone with these vanilla Oreo cupcakes that are not only easy to make but consistently deliver astounding results. We’ll share all our expert tips to ensure your cupcakes are perfectly moist, fluffy, and bursting with delightful cookies and cream flavor.
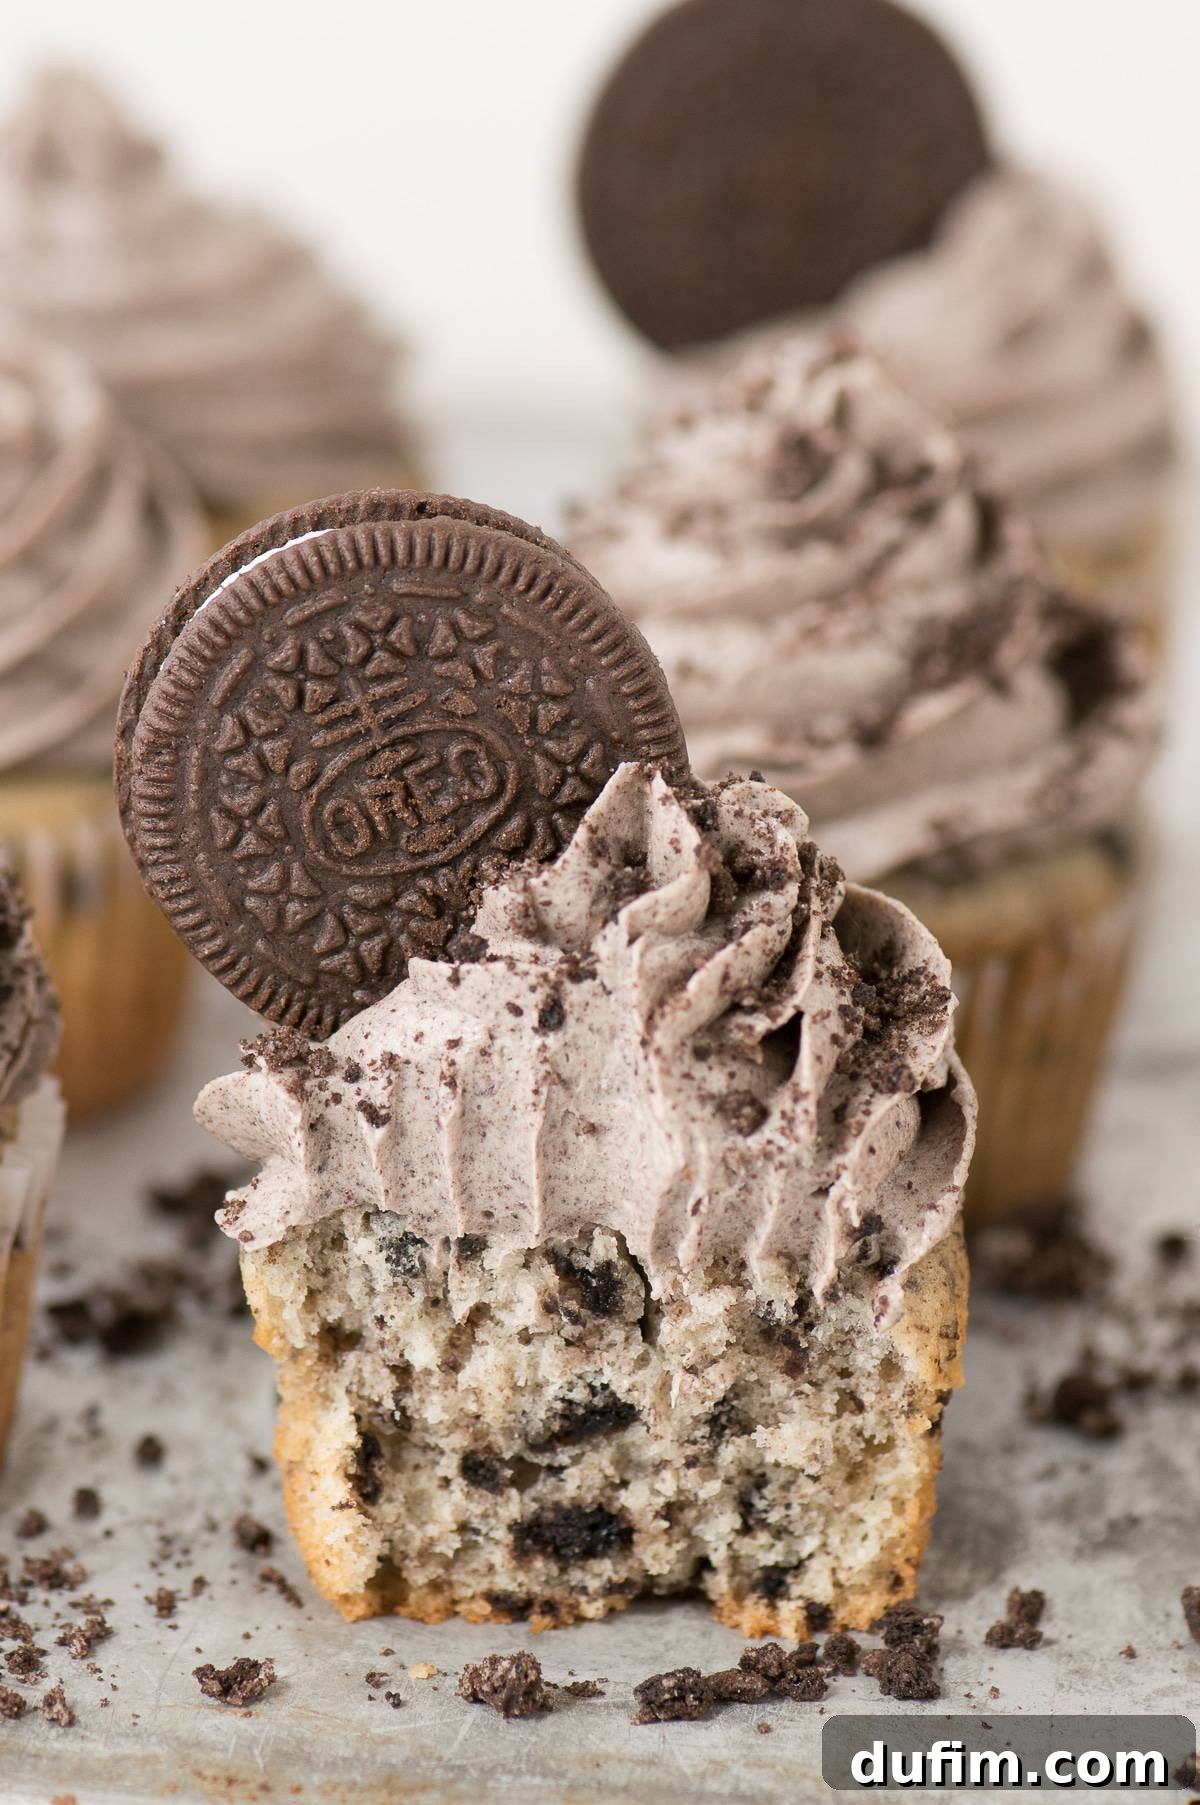
The Secret to Unbelievably Moist Oreo Cupcakes
Achieving a supremely moist and tender cupcake is the cornerstone of this recipe. Our formula relies on a generous incorporation of “wet” and fat-rich ingredients that work in harmony to prevent dryness and ensure a luxurious texture. We specifically opt for egg whites instead of whole eggs. This choice not only contributes to the cake’s beautifully light and bright appearance but also provides structure without adding the extra fat from yolks, which could sometimes make the cake denser. The real heroes for moisture and richness, however, are sour cream and milk. Sour cream introduces a delightful tang and a high fat content, making the cake exceptionally tender and moist. Milk further enhances this moisture while contributing to the overall creaminess and flavor of the batter. Together, these ingredients create a cupcake crumb that is truly melt-in-your-mouth soft and never dry.
Essential Ingredients for Perfect Cookies and Cream Cupcakes
Crafting these delectable cupcakes requires a balance of high-quality ingredients, each playing a crucial role in the final texture and flavor. Here’s a detailed look at what you’ll need for the cake batter:
- Unsalted Butter: The foundation of flavor and tenderness. Using unsalted butter allows you to control the salt content precisely. At room temperature, it creams beautifully with sugar, helping to incorporate air for a lighter cake.
- Granulated Sugar: Not just for sweetness, sugar also contributes to the cupcake’s moisture by attracting and retaining water, and aids in browning for a lovely golden crust.
- Egg Whites: As mentioned, these provide essential structure, leavening, and contribute to the bright, light color of the vanilla cake base, ensuring a fluffy crumb.
- Sour Cream: A powerhouse for moisture and a subtle tang that complements the sweetness. Its acidity also reacts with baking powder, enhancing the rise and tenderness.
- Milk: Adds additional liquid and moisture to the batter, creating a smoother consistency and contributing to the overall soft texture. Skim milk works well here, but whole milk will add even more richness.
- Vanilla Extract: A non-negotiable flavor enhancer that brings warmth and depth to the vanilla base, harmonizing beautifully with the Oreo cookies.
- All-Purpose Flour: The primary structural component of the cake. Proper measurement is key to avoid a dense or dry cupcake.
- Baking Powder: Our leavening agent. It reacts with the acidic sour cream to create carbon dioxide bubbles, which expand during baking, making the cupcakes rise and become fluffy.
- Salt: Just a pinch is needed to balance the sweetness of the sugar and Oreos, enhancing all the other flavors in the cake.
- Crushed Oreos: The star of the show! These iconic chocolate sandwich cookies are folded into the batter, infusing every bite with that classic cookies and cream taste and delightful texture.
What You’ll Need for Irresistible Oreo Frosting
The frosting is where the “cookies and cream” truly shines! This creamy, dreamy topping is easy to make and perfectly complements the cupcake:
- Unsalted Butter: Provides the rich, creamy base and structure for the buttercream frosting. Ensure it’s at room temperature for optimal creaming.
- Vanilla Extract: Enhances the overall sweet flavor profile and pairs perfectly with the Oreo cookies.
- Powdered Sugar (Confectioners’ Sugar): Adds sweetness, structure, and a smooth, silky texture to the frosting. It dissolves easily, preventing graininess.
- Finely Blended Oreos (“Oreo Flour”): This is the secret to a smooth, intensely flavored Oreo frosting. By blending Oreos into a fine “flour,” you ensure maximum cookies and cream flavor without gritty chunks or clogging your piping tips.
Step-by-Step Guide: How to Make Oreo Cupcakes
Follow these simple steps to bake a batch of homemade Oreo cupcakes that are sure to impress:
- Prepare Your Oven and Muffin Pan: Begin by preheating your oven to 400ºF (200ºC). Line a standard 12-cup muffin pan with paper liners. This initial high heat is a crucial step for achieving that beautiful domed top on your cupcakes.
- Cream Wet Ingredients: In a large mixing bowl, combine the room temperature unsalted butter and granulated sugar. Beat them together using an electric mixer on medium speed for 1-2 minutes until the mixture is light, fluffy, and pale in color. This process incorporates air, essential for a tender cupcake.
- Incorporate Liquids: Gently fold in the egg whites using a spatula. Then, add the sour cream, milk, and vanilla extract. Beat lightly with the electric mixer until just combined. Be careful not to overmix at this stage; we’re just aiming for incorporation.
- Combine Dry Ingredients: In a separate medium mixing bowl, whisk together the all-purpose flour, baking powder, and salt. Whisking ensures these dry ingredients are evenly distributed.
- Gradually Add Dry to Wet: With your electric mixer on low speed (or by hand with a spatula), gradually add the flour mixture to the wet ingredients, a few spoonfuls at a time. Mix only until *just* incorporated after each addition. Overmixing the batter can develop the gluten in the flour too much, leading to tough, dense cupcakes.
- Fold in Oreos: Finally, gently fold in the crushed Oreos. Use a spatula to mix until they are just evenly distributed throughout the batter.
- Fill and Bake: Divide the batter evenly among the prepared muffin liners, filling each about 1/2 to 3/4 full.
- Baking Method: Bake the cupcakes at 400ºF (200ºC) for the first 5 minutes. This burst of high heat helps the cupcakes rise rapidly, creating that lovely domed top. Without opening the oven door, reduce the temperature to 350ºF (175ºC) and continue baking for another 8-9 minutes, or until a toothpick inserted into the center of a cupcake comes out with a few moist crumbs attached.
- Cool Completely: Once baked, remove the cupcakes from the oven and let them cool in the muffin pan for a few minutes before transferring them to a wire rack to cool completely. It’s crucial that the cupcakes are entirely cool before frosting to prevent the frosting from melting.
Expert Frosting Tips for Smooth Cookies and Cream Perfection
The key to a flawless Cookies and Cream frosting, especially if you plan on piping it with decorative tips, lies in the preparation of your Oreos. For professional-looking swirls and smooth application, it is absolutely essential to blend the Oreos extremely finely. We’re talking “Oreo flour” consistency here. If you don’t blend the Oreos well enough, even small chunks can get stuck in the narrow opening of your piping tip, leading to frustration, uneven frosting, and a less-than-perfect presentation. A food processor or high-speed blender is your best friend for achieving this fine texture. Don’t rush this step – a perfectly smooth Oreo flour will make all the difference in your piping experience!
How to Store and Freeze Your Delicious Cookies and Cream Cupcakes
Proper storage is essential to keep your homemade Oreo cupcakes fresh and delicious. Here’s how to do it:
Room Temperature Storage: If unfrosted, store the cooled cupcakes in an airtight container at room temperature for up to 2-3 days. If frosted, they can also be stored in an airtight container at room temperature for up to 3 days. The frosting acts as a protective layer, helping to keep the cake moist.
Refrigeration: While not strictly necessary, if your kitchen is very warm or you prefer chilled cupcakes, you can store them in an airtight container in the refrigerator for up to 5 days. Be aware that refrigeration can sometimes slightly alter the texture of the cake, making it a little firmer.
Freezing Cupcakes: To enjoy these delightful treats later, you can easily freeze them:
- Cool Completely: Ensure your cupcakes are absolutely cool before freezing. Warm cupcakes will create condensation, leading to soggy results.
- Wrap Individually: For best results, wrap each unfrosted cupcake tightly in plastic wrap. This prevents freezer burn and protects their delicate moisture.
- Airtight Container/Bag: Place the individually wrapped cupcakes inside a freezer-safe ziplock bag or a rigid freezer storage container. This provides an extra layer of protection.
- Freeze: Store in the freezer for up to 2-3 months.
To Thaw: When you’re ready to enjoy them, simply transfer the bag or container of frozen cupcakes to the counter and let them thaw overnight at room temperature. Once fully thawed, you can frost them as desired. If already frosted, they will thaw beautifully, often returning to their original moist texture.
Pro Tips for Achieving Perfect Oreo Cupcakes Every Time
- Accurate Flour Measurement: Always measure your all-purpose flour using the spoon and sweep method. Lightly spoon flour into your measuring cup until it overflows, then level it off with the back of a knife. Scooping directly can pack too much flour, leading to dry, dense cupcakes.
- Avoid Overmixing: This is a golden rule in baking! Once you add the dry ingredients to the wet, mix just until they are combined and no streaks of flour remain. Overmixing develops the gluten in the flour, resulting in a tough, chewy, and dry cake texture.
- The High-Heat Baking Trick: Starting the bake at 400ºF (200ºC) for the initial 5 minutes is a game-changer. This high heat activates the leavening agents quickly, causing the cupcakes to rise rapidly and form beautiful, domed tops. Reducing the heat to 350ºF (175ºC) then allows them to bake through evenly without burning.
- “Oreo Flour” for Frosting: As emphasized, finely blending your Oreos into a powdery “oreo flour” before adding them to the frosting is crucial. This ensures a smooth buttercream that pipes beautifully without clogging your tips and delivers consistent cookies and cream flavor throughout. A food processor or blender works wonders here.
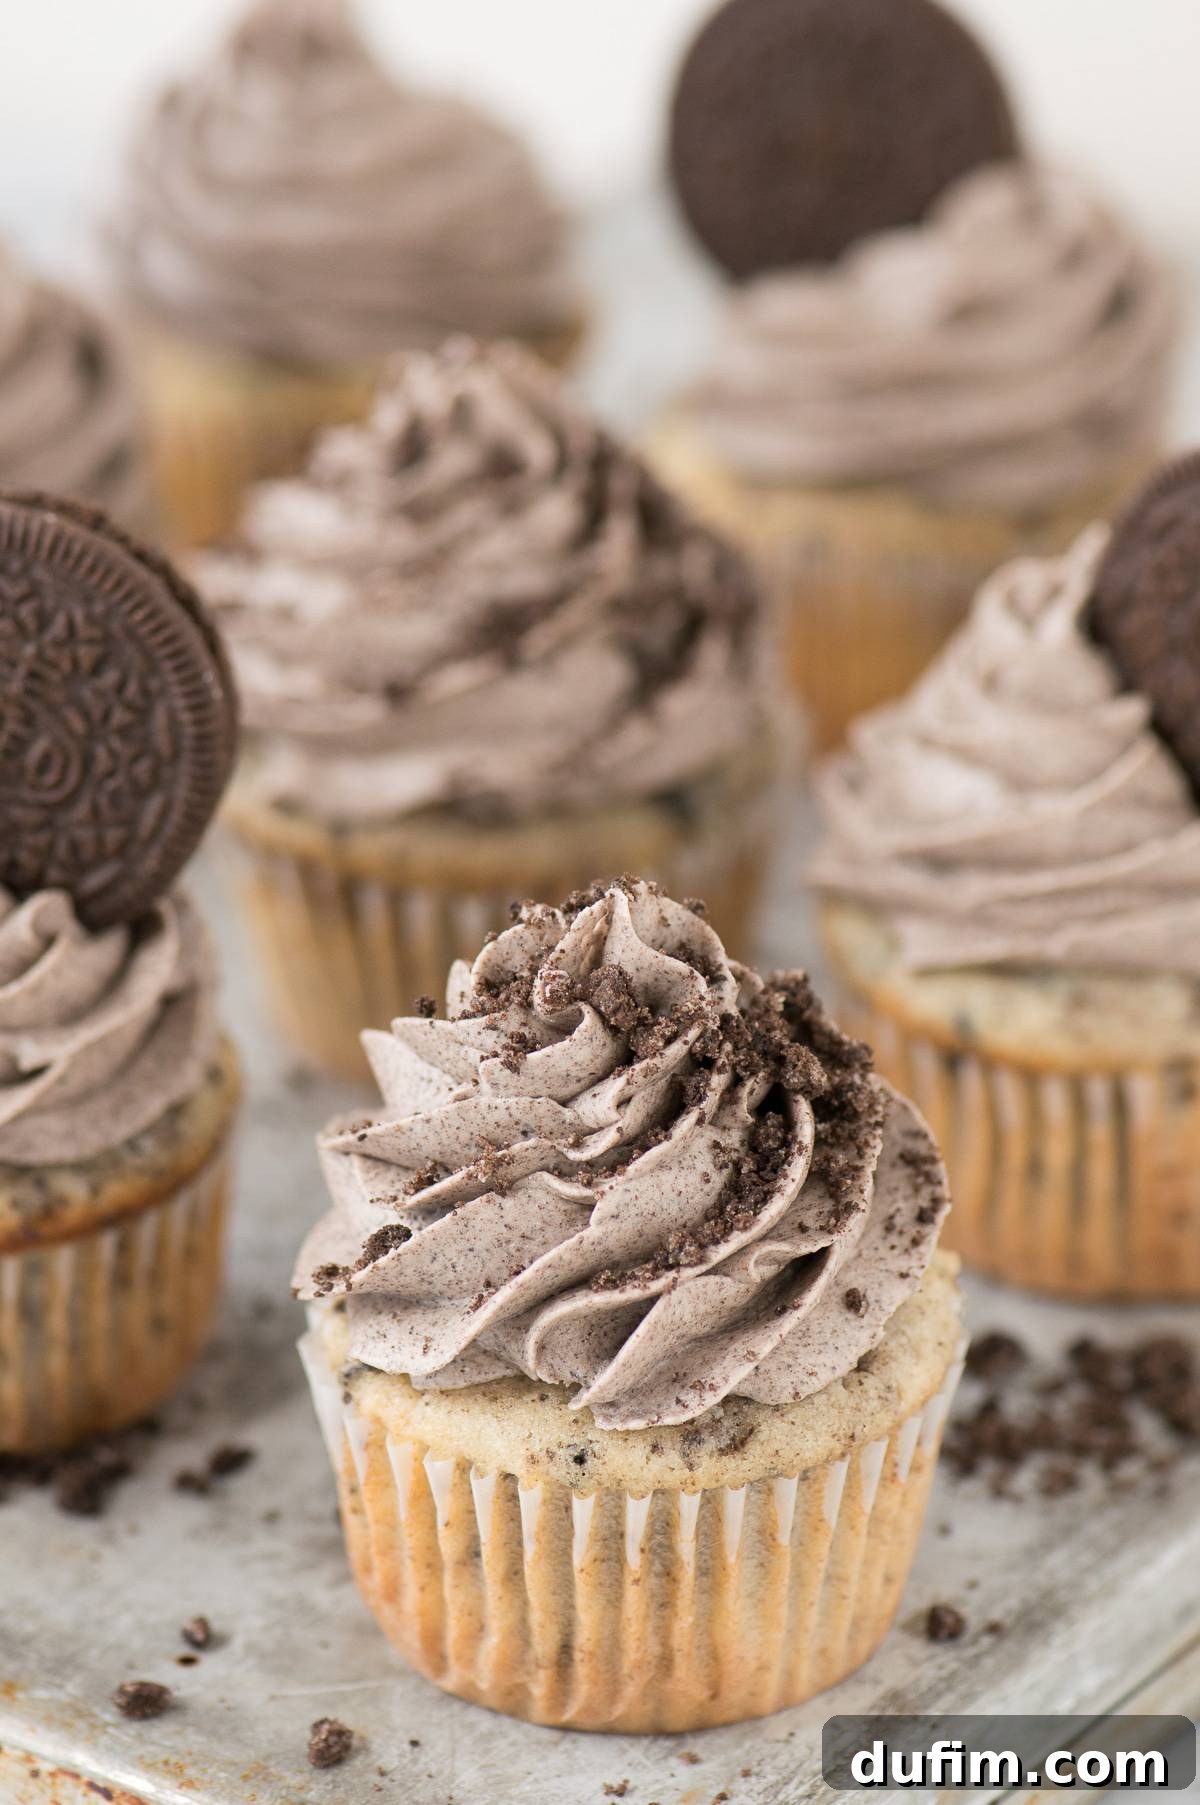
- Piping Tip Recommendations: For the gorgeous swirls shown in our photos, we used a Wilton 2D piping tip. If you don’t have that specific tip, a Wilton 1M or an Ateco 844 are excellent, very similar alternatives that will achieve a comparable elegant effect.
- Oreo Quantity for the Recipe: One family-sized pack of Oreos (approximately 15.3 oz or 432g) should be sufficient for this recipe. This quantity generally provides enough crushed Oreos for both the cake batter and the buttercream, with a few leftover cookies for garnishing the tops of your finished cupcakes, if desired.
- Room Temperature Ingredients: Always ensure your butter, eggs, and dairy (sour cream, milk) are at room temperature. This allows them to emulsify properly, creating a smooth, cohesive batter and a uniform, tender crumb. Cold ingredients can lead to a lumpy batter and a less consistent final product.
Cookies and Cream Cupcakes Recipe FAQs
Absolutely nothing! These two terms are often used interchangeably to describe the same delicious treat. “Oreo” is simply the well-known brand name that popularized the iconic chocolate wafer cookie with a creamy filling. Therefore, any cupcake that uses these types of chocolate sandwich cookies and a creamy filling inspiration can be called either an Oreo Cupcake or a Cookies and Cream Cupcake.
The delightful white filling in Oreos is officially referred to by the manufacturer as “creme” or “creme filling.” Despite its appearance and creamy texture, it’s not actually made with dairy cream, but rather a sweet, vanilla-flavored, shortening-based substance that perfectly complements the chocolate wafers.
For cupcakes that boast a richer flavor and superior moisture, milk is always the preferred choice over water. Milk contains fats and solids that water lacks, contributing to a more tender crumb and a deeper taste. This is precisely why our recipe strategically incorporates not only milk but also sour cream. The higher fat content and slight acidity of sour cream work wonders, ensuring these cupcakes are exceptionally ultra-moist and wonderfully flavorful.
You have excellent flexibility here! As long as your cupcakes are completely cooled, you can frost them at your convenience. Frosting them the night before can be a fantastic time-saver, especially when preparing for an event. There’s no need to worry about them losing freshness; frosted cupcakes can be beautifully stored in an airtight container at room temperature for up to 3 days, maintaining their deliciousness and moist texture.
More Irresistible Oreo Desserts to Try
If you’ve fallen in love with these Oreo Cupcakes, you’ll definitely want to explore these other fantastic Oreo-inspired treats from our collection:
- No-Bake Oreo Pie
- Oreo Cake
- Oreo Cheesecake
- Simple Oreo Dessert
- Oreo Angel Food Cake
★★★★☆
Tap stars to rate!
Oreo Cupcakes Recipe
Beth
10
15
1
1 25
12 cupcakes
Equipment
-
Electric Mixer (e.g., KitchenAid 9-Speed)
-
Piping Tip (e.g., Wilton Tip 2D)
-
Large Mixing Bowls
-
Kitchen Scale (optional, for precision)
-
Muffin Pan and Liners
Ingredients
For the Cookies and Cream Cupcakes
- ½ cup (113g) unsalted butter, room temperature (1 stick)
- ¾ cup (149g) granulated sugar
- 2 large egg whites
- ¾ cup (171g) sour cream
- ¼ cup (59ml) milk, skim or whole
- 1 tsp vanilla extract
- 1 ¼ cup (150g) all-purpose flour
- 1 tsp baking powder
- ¼ tsp salt
- ¾ cup (90g) crushed Oreos
For the Cookies and Cream Frosting
- 1 cup (226g) unsalted butter, room temperature (2 sticks)
- 1 tsp vanilla extract
- 2 cups (227g) powdered sugar
- 1 cup (120g) finely blended Oreos, blended into “Oreo flour” to prevent clogging piping tips
Instructions
Cupcakes
-
Preheat the oven to 400ºF (200ºC). Line a muffin pan with muffin liners.
-
In a mixing bowl, combine the butter and sugar. Beat using an electric mixer for 1-2 minutes until fluffy and pale. Add in the egg whites, sour cream, milk, and vanilla extract, beating lightly with the electric mixer until just combined. In a separate mixing bowl, combine the flour, baking powder, and salt. Gradually add the flour mixture to the wet ingredients a few spoonfuls at a time, mixing by hand with a spatula until just incorporated. Fold in the crushed Oreos. Fill the muffin liners 1/2 to 3/4 full.½ cup (113g) unsalted butter, room temperature,
¾ cup (149g) granulated sugar,
2 large egg whites,
¾ cup (171g) sour cream,
¼ cup (59ml) milk,
1 tsp vanilla extract,
1 ¼ cup (150g) all-purpose flour,
1 tsp baking powder,
¼ tsp salt,
¾ cup (90g) crushed Oreos -
Bake for 5 minutes at 400ºF (200ºC). Keeping the cupcakes in the oven, reduce the temperature to 350ºF (175ºC) and bake for an additional 8-9 minutes, or until a toothpick inserted into the center comes out with a few moist crumbs. Allow the cupcakes to cool completely on a wire rack before adding the frosting.
Cookies and Cream Frosting
-
In a mixing bowl, combine the room temperature butter and vanilla extract. Beat using an electric mixer until fluffy. Gradually add the powdered sugar, about 1 cup at a time, mixing by hand or with the mixer on low speed until combined after each addition. Continue adding powdered sugar until the frosting reaches your desired consistency and sweetness. Add in the finely blended Oreos (your “Oreo flour”). Use your electric mixer one last time to ensure everything is thoroughly incorporated and smooth. If the frosting becomes too thick, add a dash of milk or heavy cream, 1 teaspoon at a time, until it reaches a spreadable or pipeable consistency.1 cup (226g) unsalted butter, room temperature,
1 tsp vanilla extract,
2 cups (227g) powdered sugar,
1 cup (120g) finely blended Oreos
To Assemble
-
Once the cupcakes are completely cool, transfer the buttercream to a piping bag fitted with your desired tip (e.g., Wilton 2D). Push the buttercream down into the bag and twist the top a few times to secure it. Pipe the frosting onto each cupcake in a decorative swirl. Top each cupcake with an additional Oreo cookie or a piece of an Oreo, if desired, for an extra touch. Store frosted cupcakes in an airtight container at room temperature for up to 3 days.
Video
Watch a video tutorial for these Cookies and Cream Oreo Cupcakes:
Click here to watch the Cookies and Cream Oreo Cupcakes video!
This video provides visual guidance for making these delicious cupcakes, from mixing the batter to piping the perfect frosting swirl.
Notes
- For consistent results, always measure flour using the spoon and sweep method.
- For the smoothest frosting, blend Oreos into a fine “flour” consistency before adding them. This prevents piping tips from clogging.
- A family-sized pack of Oreos (approx. 15.3 oz) should provide enough cookies for both the batter, frosting, and extra for garnish.
Nutrition
Carbohydrates: 58g |
Protein: 4g |
Fat: 31g |
Saturated Fat: 18g |
Polyunsaturated Fat: 2g |
Monounsaturated Fat: 9g |
Trans Fat: 1g |
Cholesterol: 69mg |
Sodium: 228mg |
Potassium: 106mg |
Fiber: 1g |
Sugar: 42g |
Vitamin A: 804IU |
Vitamin C: 1mg |
Calcium: 36mg |
Iron: 3mg
Nutrition Disclosure
All nutritional values are approximate and provided to the reader as a courtesy. Changing ingredients and/or quantities will alter the estimated nutritional calculations.
Like this recipe? We’d love to hear from you!
Share your thoughts and rate it below!