
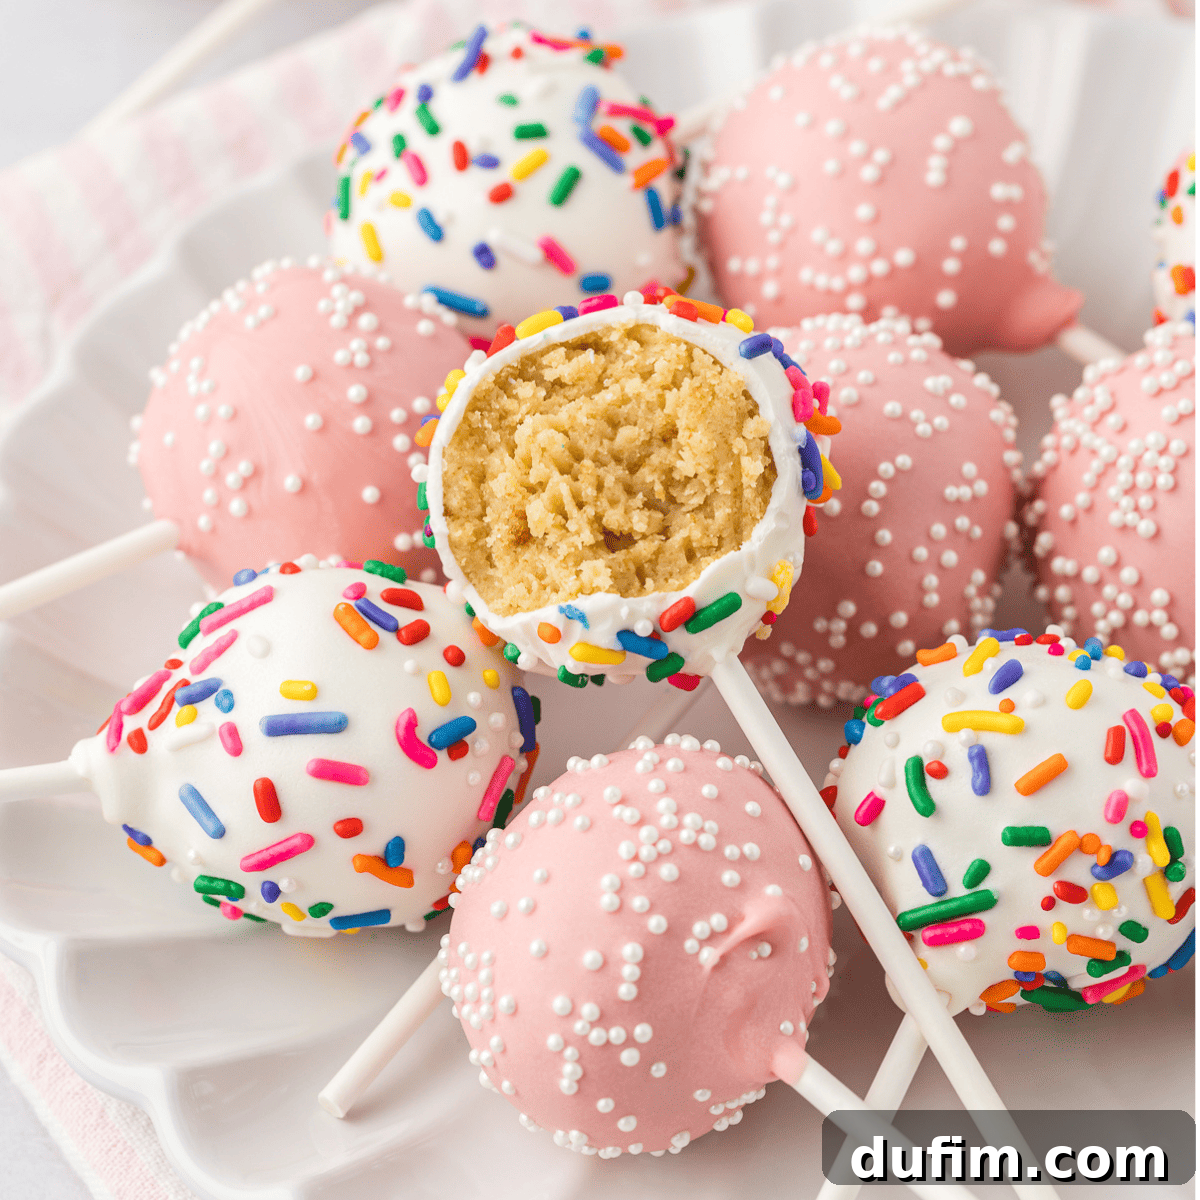
Mastering Homemade Cake Pops: Your Ultimate Guide to Bakery-Quality Treats
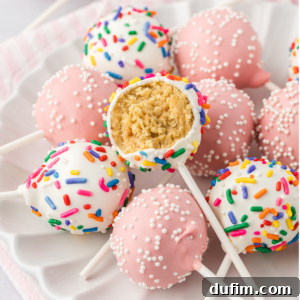
For years, I’ve poured my passion into crafting countless batches of cake pops for every occasion imaginable – from vibrant birthday celebrations and elegant baby showers to festive holiday platters. Through dozens of experiments, a few (okay, maybe more than a few!) melty mishaps, and continuous refinement, I’ve finally perfected a method that guarantees success every single time. My cake pops are celebrated for their incredible texture: a moist, rich, and tender interior perfectly encased in a smooth, flawless shell that sets beautifully. They won’t crumble, slide off the stick, or leave you with that generic, store-bought taste. Instead, prepare for a delightful treat that looks as stunning as it tastes, ready for dipping, decorating, and devouring.
Whether you’re a complete novice embarking on your first cake pop adventure or you’ve faced frustrating failures in the past, rest assured – I’ve got you covered. This comprehensive guide will walk you through each critical step, beginning with the initial mixing and precise rolling, all the way to mastering the art of drip-free dipping and setting. I’m sharing all the hard-earned tips and ingenious tricks I’ve discovered through extensive trial and error, so you can bypass the common frustrations. With this proven approach, you’ll soon be creating homemade cake pops that boast an undeniable bakery-quality finish and flavor, right from your own kitchen. Get ready to transform simple ingredients into edible works of art!
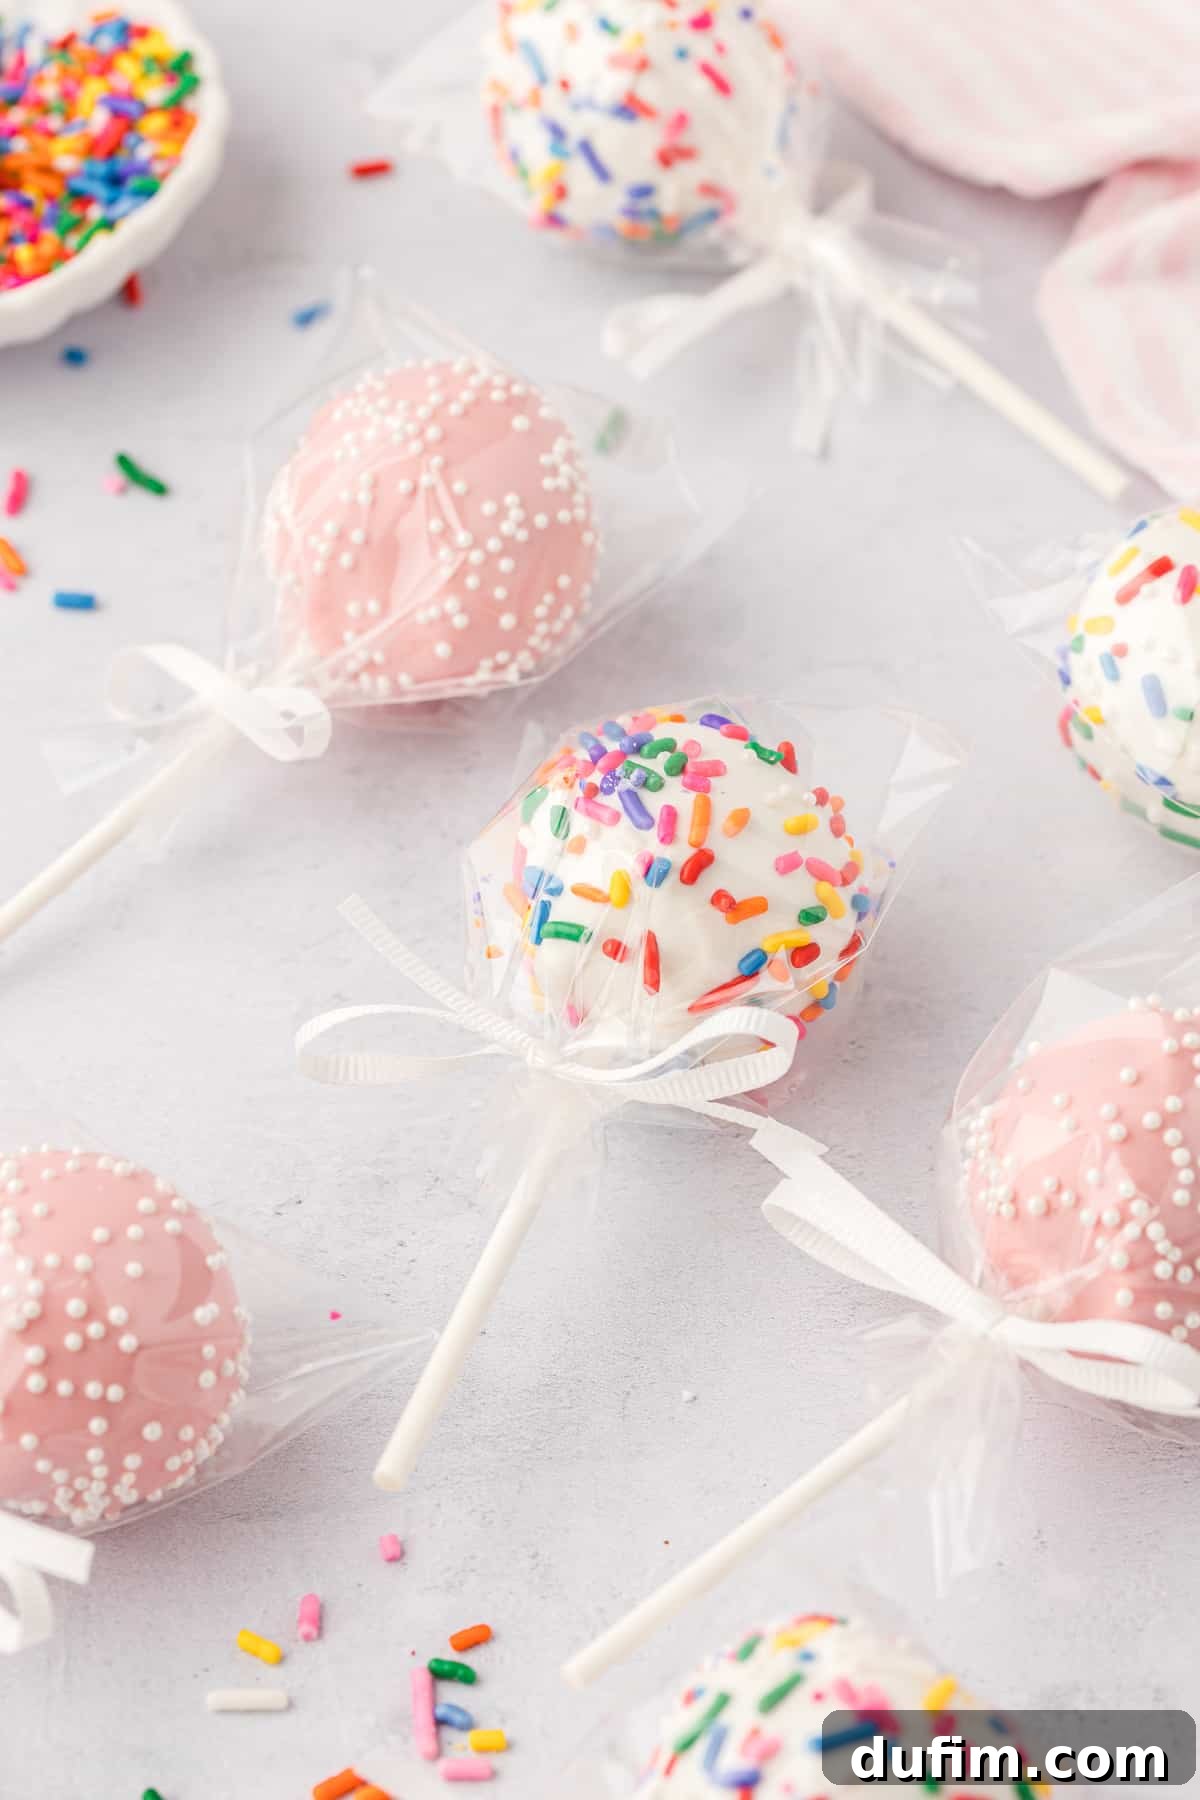
Crafting the Perfect Bite-Sized Cake Pop Treats at Home
The idea of creating a dainty, perfectly spherical dessert on a stick might seem daunting at first glance. However, I’m here to tell you that crafting the ultimate cake pop is significantly simpler than you might imagine! Forget those bland, often stale store-bought versions; when you meticulously follow this straightforward recipe, you’ll produce incredibly moist, flavorful, and exquisitely decorated treats that not only hold their shape beautifully but also genuinely rival the popular Starbucks birthday cake pops in both taste and presentation. This recipe empowers you to create impressive desserts with ease, transforming a simple box cake mix and a can of frosting into delightful gourmet-level confections that will have everyone asking for your secret.
Continue reading, because below I’m revealing all my tried-and-true best tips and clever tricks for achieving a flawless set after dipping, ensuring your candy coating is smooth and crack-free, and most importantly, preventing your delicious creations from tumbling off their sticks. By applying these professional insights, you’ll be making cake pops like an experienced pro, even if it’s your very first attempt. Get ready to impress everyone with your newfound cake pop mastery and create memorable treats for any celebration!
Top 3 Cake Pop Mistakes (and How to Fix Them!)
Even seasoned bakers can encounter challenges when making cake pops. It’s a delicate art, but with the right knowledge, you can overcome common pitfalls. Here are the three most frequent frustrations and my foolproof solutions to ensure your cake pops are always perfect, beautiful, and delicious:
- Cake Pops Falling Off the Stick: This is perhaps the most common and utterly frustrating issue. Imagine spending all that time rolling and dipping, only for your beautiful creation to plop into the melted chocolate! The key lies in proper chilling and creating a strong “glue.”
- Solution: Never, ever skip the chill time! After rolling your cake mixture into balls, place them in the refrigerator for a minimum of 2 hours, or until they are completely firm to the touch. This firmness is absolutely crucial for them to adhere securely to the stick and endure the dipping process without falling apart. Additionally, always dip the very tip of your lollipop stick (about ½ inch) into the melted chocolate or candy melts *before* inserting it into the exact center of each cake ball. This creates a secure, edible “glue” that strongly binds the cake ball to the stick, preventing any unwelcome detachment or embarrassing falls.
- Cracked Coating: A beautiful, smooth candy shell is the hallmark of bakery-quality cake pops. Cracks not only ruin the aesthetic but can also compromise the freshness of the cake inside.
- Solution: This issue typically arises from a significant and sudden temperature difference between your cake balls and the melted coating. If your cake balls are too cold (e.g., directly from the freezer) and your candy melts are too hot, the abrupt temperature change will cause the coating to contract too quickly, leading to unsightly cracks. My primary recommendation is to refrigerate your cake balls, NOT FREEZE them. The gentle chill ensures they are firm enough without being excessively cold. Furthermore, ensure your candy melts are at the correct, fluid consistency – warm enough to be smooth and easily dippable, but not so hot that they steam or sizzle, which can also contribute to cracking or scorching. Work quickly and keep your dipping environment relatively cool.
- Mushy or Overly Sweet Centers: The internal texture of a cake pop should be moist, rich, and cohesive, not soggy, crumbly, or excessively sugary. This often leads to an unpleasant eating experience.
- Solution: The main culprit here is usually too much frosting. While frosting is absolutely necessary to bind the crumbled cake crumbs together, an excess will result in a dense, overly sweet, and mushy texture that lacks that delicate cake pop chewiness. The trick is precision: add your frosting *a little at a time*, mixing thoroughly after each addition, until the mixture just barely holds together when pressed and can be easily rolled. You’re aiming for a soft, pliable dough-like consistency that can be smoothly rolled into balls without crumbling or turning into a sticky, unmanageable paste. Through extensive testing, I’ve found that precisely 1/2 cup of frosting hits that perfect “sweet spot” (pun intended!) for most standard box cake mixes, providing ideal moisture and binding without overwhelming sweetness.
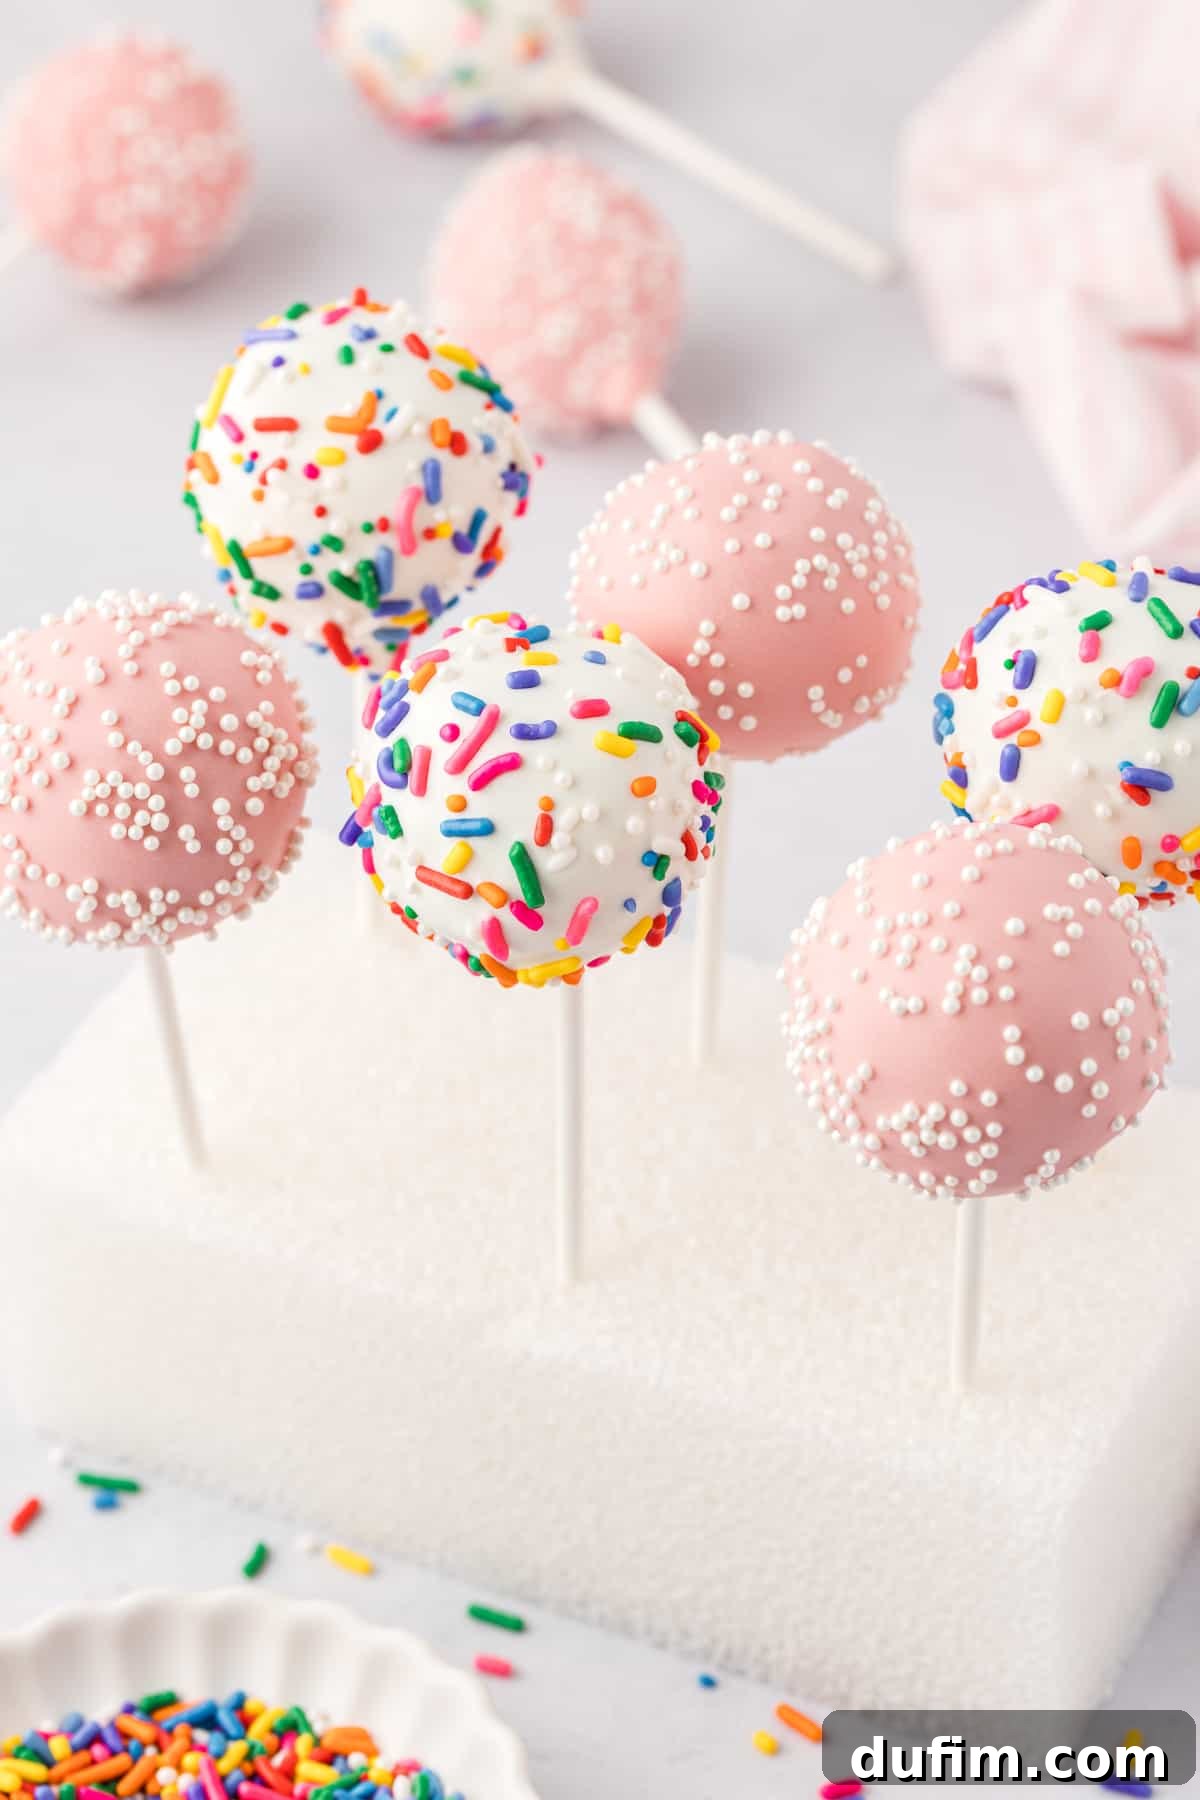
Why You’ll Adore This Easy Cake Pop Recipe
These homemade vanilla cake pops aren’t just a dessert; they’re a delightful experience packed with serious “wow” factor, guaranteed to bring smiles to faces of all ages. Here are just a few compelling reasons why this particular recipe will quickly become your absolute favorite go-to for sweet treats:
- Perfect Bite-Sized Indulgence: Their charming, convenient size makes them absolutely ideal for any gathering. They serve as a stress-free, portion-controlled dessert for bustling birthday parties, add a charming and elegant touch to a baby shower, or provide the ultimate sweet ending for any special occasion where individual servings are preferred.
- Starbucks Copycat Quality: Are you constantly craving that iconic, irresistibly moist Starbucks birthday cake pop flavor? This recipe delivers an uncannily similar taste and texture, allowing you to enjoy your favorite treat at home, often for a fraction of the cost. Get ready to recreate that coffee shop magic!
- Moist, Sweet, and Perfectly Balanced: We meticulously achieve that coveted moist and tender cake interior, perfectly balanced with just the right amount of sweetness. They’re rich, satisfying, and decadent without ever being cloyingly sweet, ensuring a delightful experience for every palate.
- Incredibly Easy to Make with Simple Ingredients: Don’t let their elegant and professional appearance fool you. Utilizing simple, readily available ingredients like a standard boxed cake mix and a can of store-bought frosting, this recipe significantly streamlines the entire process, making it wonderfully accessible even for beginner bakers with minimal experience.
- Endlessly Customizable for Any Theme: Unleash your inner pastry artist! This versatile base recipe can be effortlessly adapted with different cake mix flavors (think rich chocolate, vibrant red velvet, zesty lemon, or even a fun sprinkle-filled funfetti), various types of frosting (like tangy cream cheese or rich chocolate buttercream), and an endless array of sprinkles, edible glitter, or other decorations to perfectly match any party theme, holiday, or personal preference.
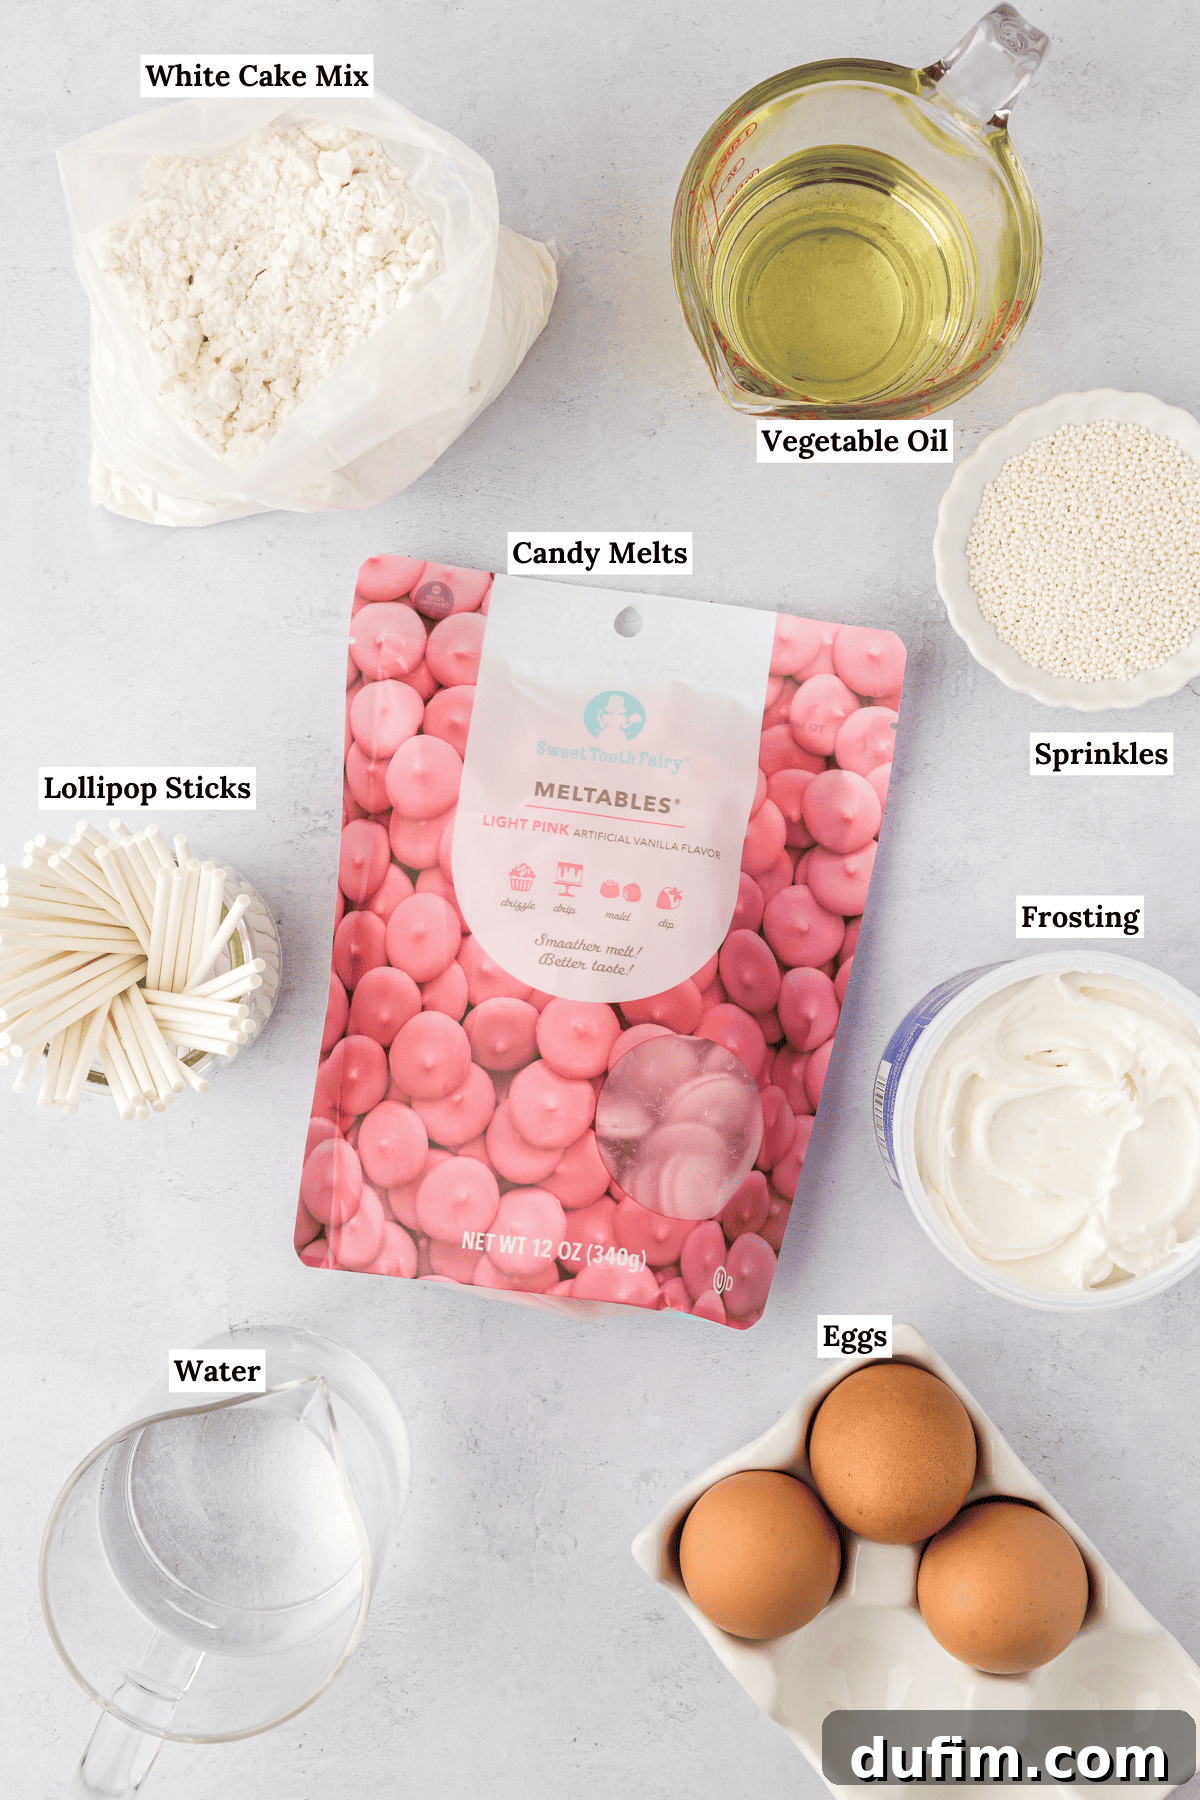
Essential Cake Pop Ingredients for a Flavorful Treat
While these delightful cake pops might look like they require a professional pastry chef and exotic, hard-to-find ingredients, the truth is quite the opposite! Our recipe relies on straightforward, easily accessible components you can find at any local grocery store. For precise measurements and detailed instructions, be sure to refer to the complete recipe card found further down the page. Here’s a quick overview of what you’ll need to gather to begin your cake pop journey:
- Box Cake Mix: This is the convenient and reliable foundation of our easy recipe. I typically opt for a classic white or vanilla cake mix, as it provides a neutral, versatile base that is perfect for pairing with any frosting or coating flavor you desire, allowing for maximum customization.
- Standard Cake Mix Box Ingredients: You’ll need the additional items specified on the back of your chosen cake mix box to prepare the cake itself. These commonly include fresh eggs, vegetable oil (or another neutral oil), and water, all of which contribute to a moist and tender cake.
- Frosting: The crucial binding agent for your cake pop dough. You have options here: use either a high-quality store-bought canned frosting for ultimate convenience (vanilla or cream cheese flavors work wonderfully and are universally loved) or your favorite homemade buttercream recipe for a more personalized touch. Remember, moderation is key when adding the frosting to ensure perfect texture!
- Candy Melts: Absolutely crucial for creating the vibrant, smooth, and perfectly set outer shell of your cake pops. Available in a vast array of colors, candy melts are specifically designed for easy melting and dipping, providing a superior, non-cracking finish and consistent texture compared to regular chocolate chips.
- Lollipop Sticks: These are essential for transforming your cake balls into actual “cake pops,” making them easy to hold and eat. Opt for sturdy, food-grade sticks that are long enough to comfortably support the cake ball and provide a good grip.
- Sprinkles: Your creative canvas for decoration! Choose your favorite colors, shapes, and types of sprinkles to personalize your cake pops for any occasion, holiday, or theme. This is where you can truly let your imagination shine.
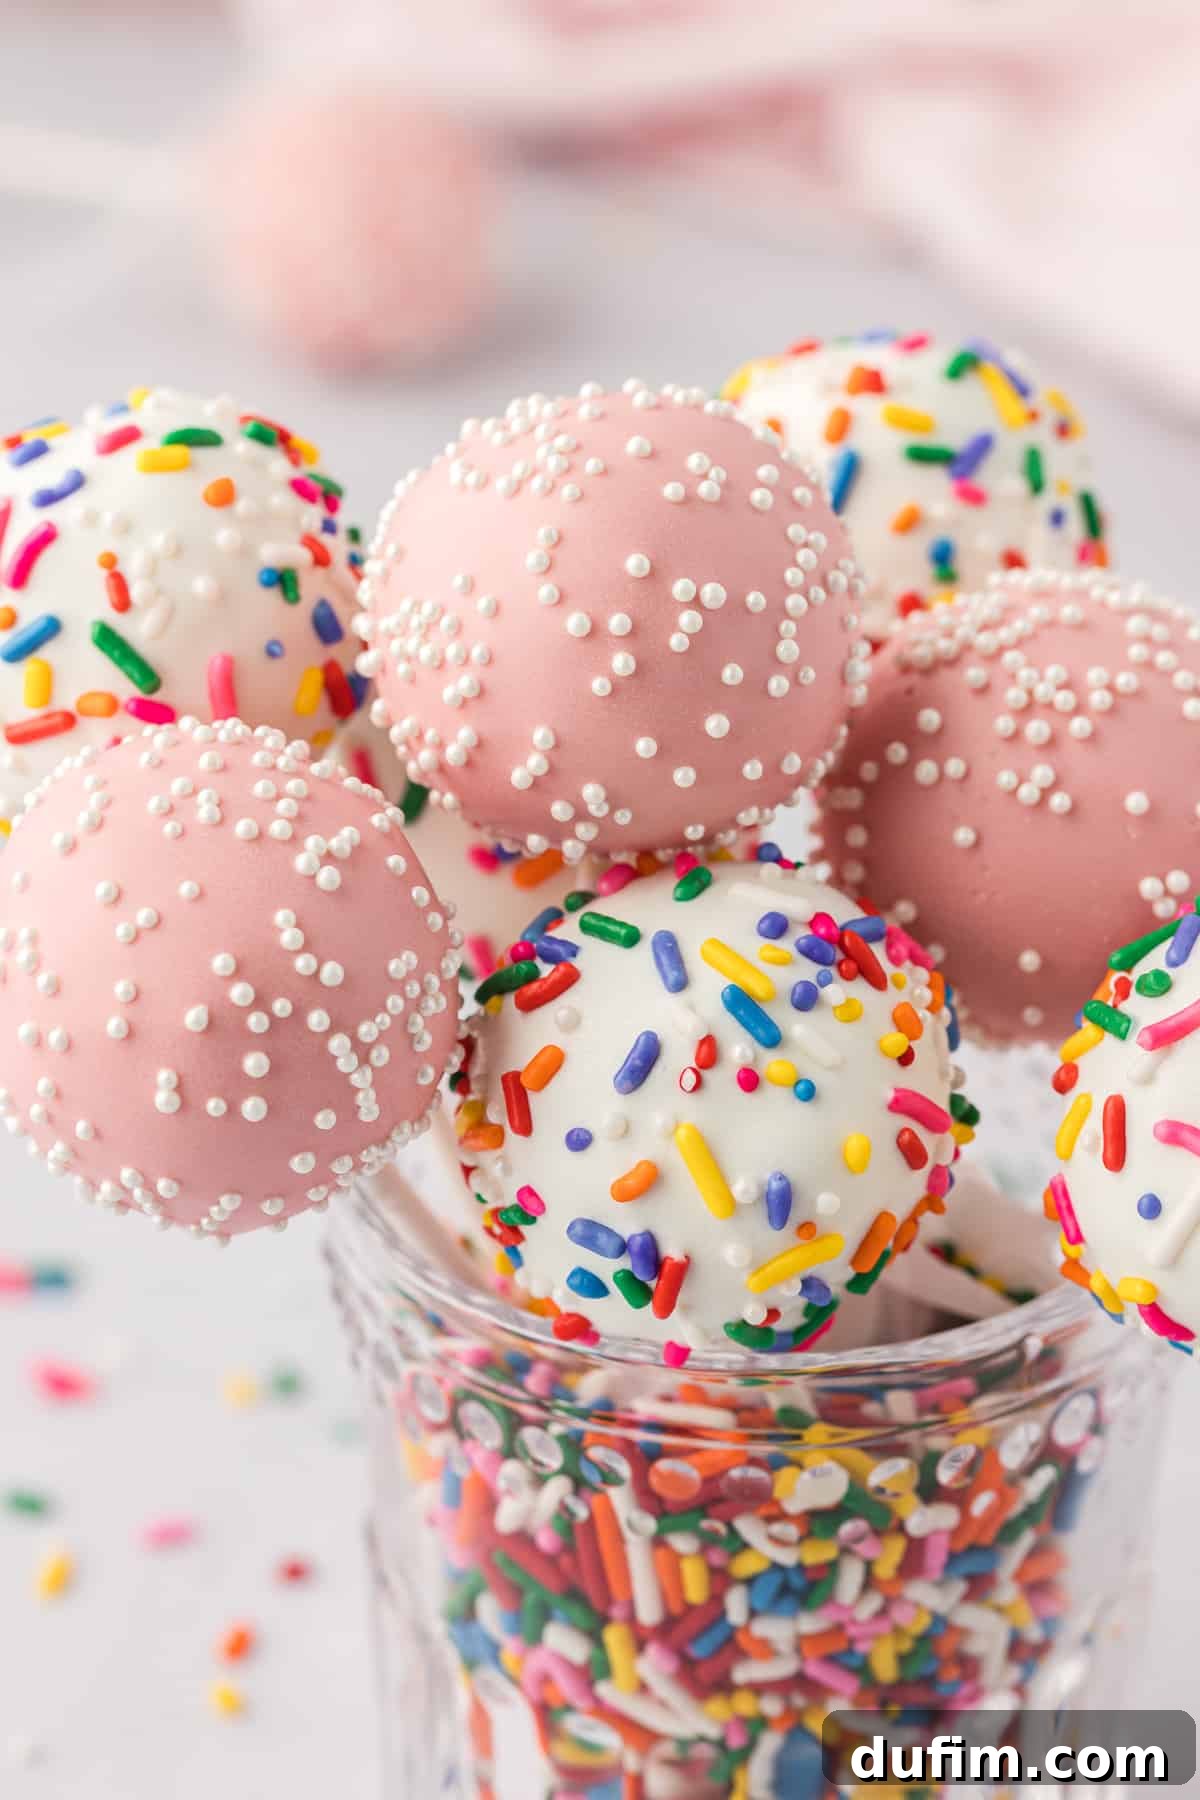
Step-by-Step Guide: How to Make Amazing Cake Pops with Box Cake Mix
Get ready to create truly impressive, crowd-pleasing cake pops right in your own home. This detailed, easy-to-follow process breaks down into just seven essential steps, ensuring a successful and enjoyable baking experience. Follow these instructions carefully, and you’ll be delighted with the professional-looking results.
- Prepare Your Oven and Baking Pan: Begin by precisely preheating your oven to 350ºF (175ºC). Take a 9×13 inch baking pan and lightly grease it with cooking spray, or alternatively, grease and flour it for extra non-stick assurance. This crucial step ensures your baked cake will easily release from the pan after baking without sticking. Set the prepared pan aside, ready for your cake batter.
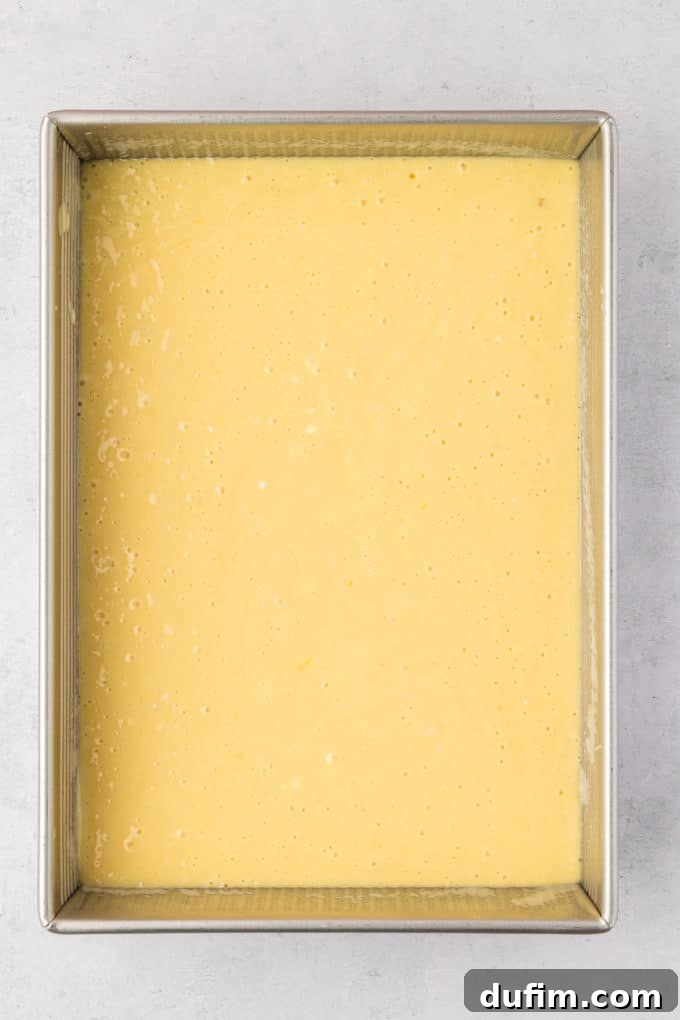
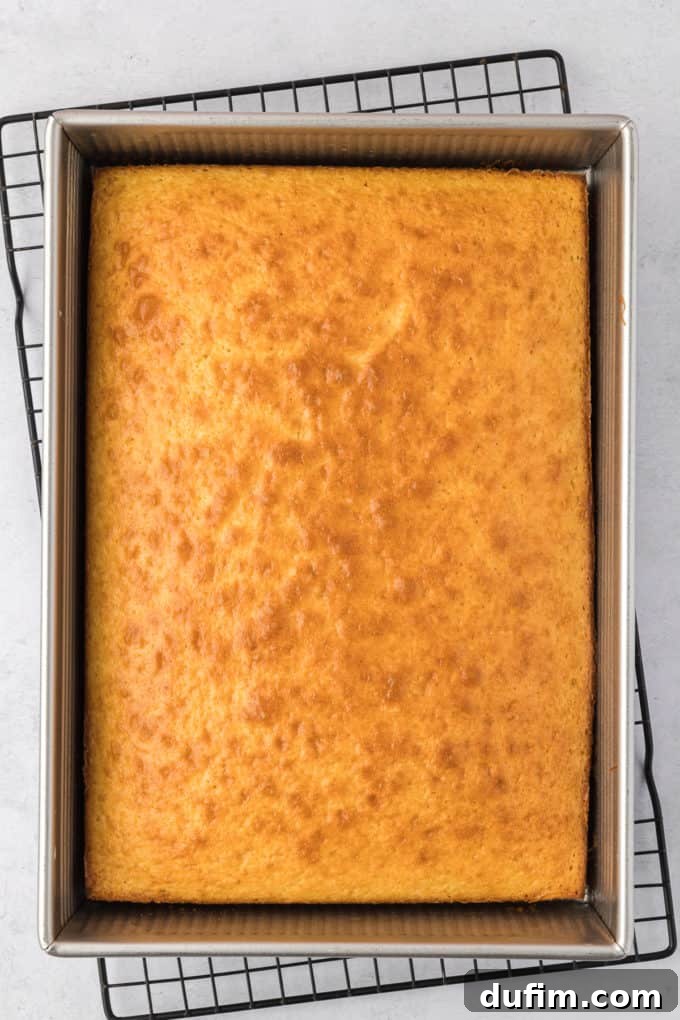
- Bake the Cake to Perfection: In a generously sized mixing bowl, combine the entire contents of the box cake mix, along with the specified amounts of water, oil, and eggs. Whisk these ingredients together thoroughly until they are completely combined and form a smooth, consistent batter, carefully following the specific instructions provided on the back of your cake mix box. Pour the prepared batter evenly into your greased 9×13 inch pan. Bake according to the recommended time on the cake mix package, typically until a toothpick inserted into the center comes out clean, indicating it’s fully cooked.
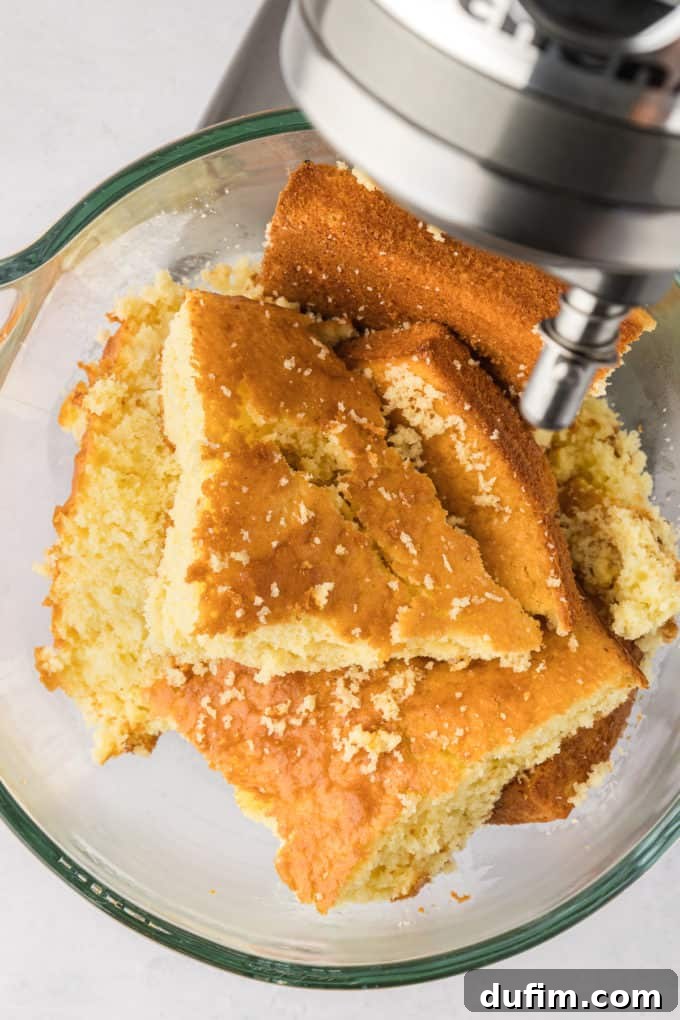
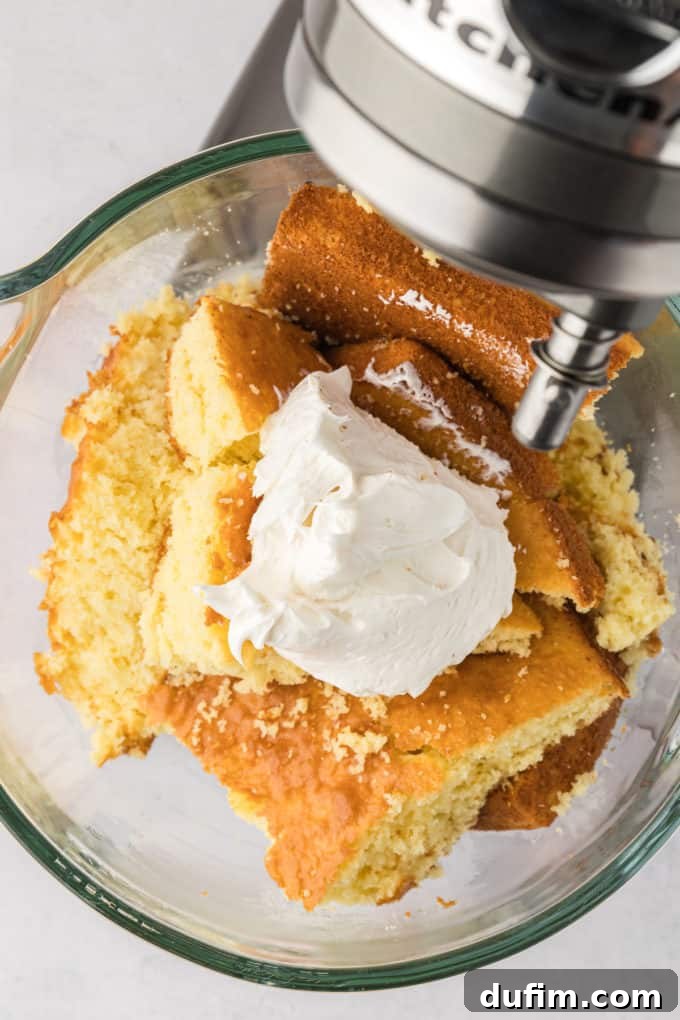
- Combine Cake and Frosting to Form a Smooth Dough: The moment your cake emerges from the oven, immediately and carefully transfer the warm cake (it’s perfectly fine if it breaks apart, as that’s part of the process) into a large, sturdy mixing bowl. Add precisely ½ cup of your chosen frosting. Using an electric mixer on low speed, beat the cake and frosting together thoroughly. Continue mixing until the ingredients are completely combined and form a consistent, cohesive, dough-like texture. It should be pliable enough to roll into balls without being overly sticky or excessively crumbly, indicating the ideal moisture balance.
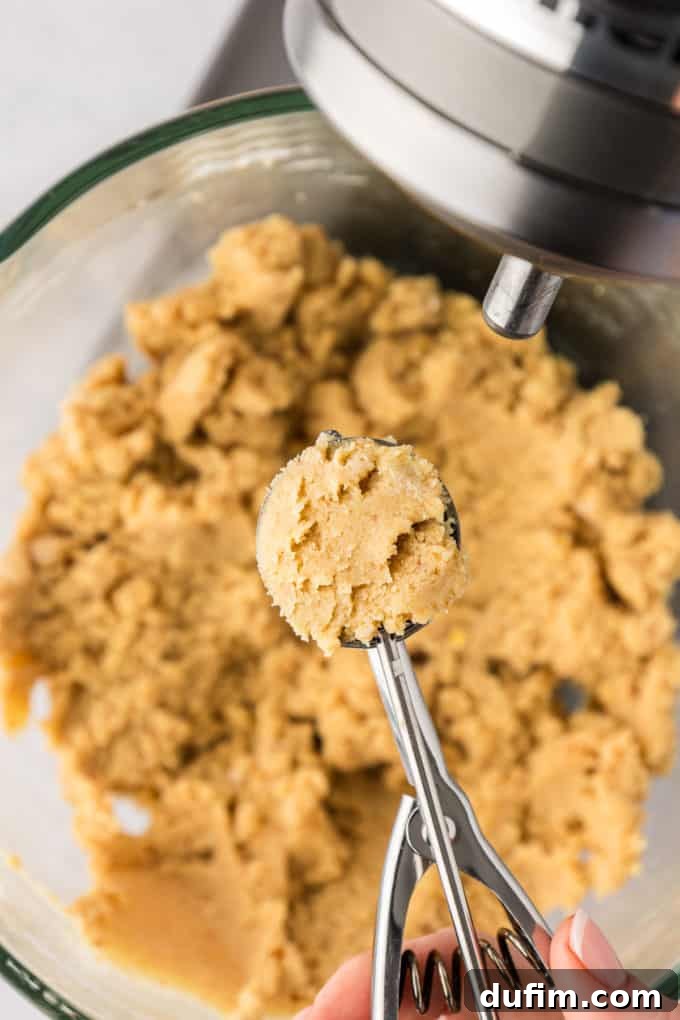
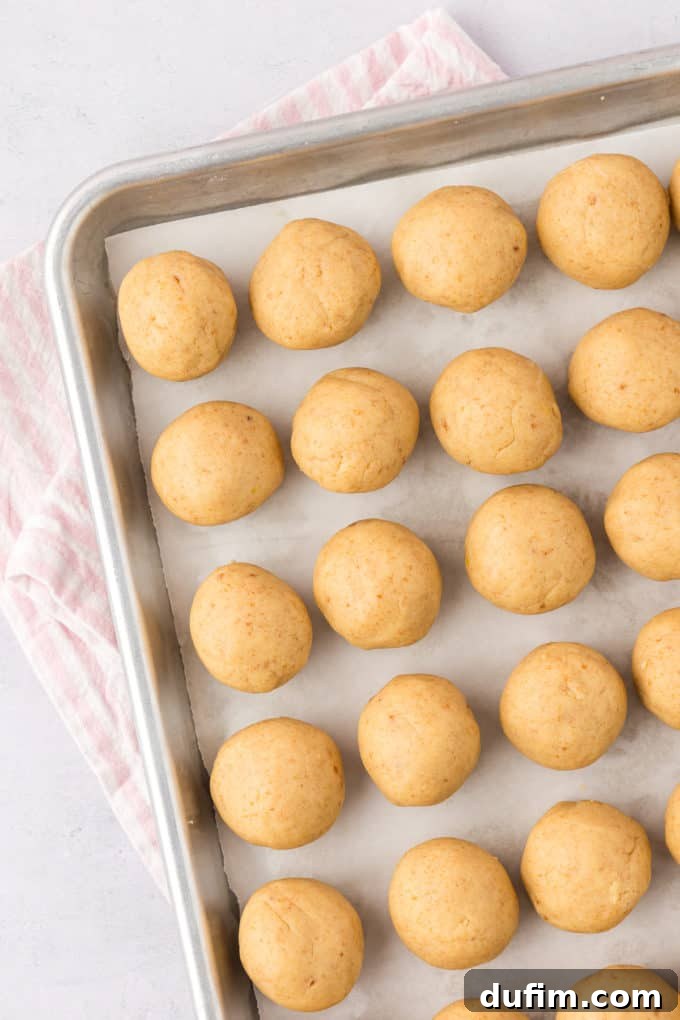
- Form Cake Balls and Chill Thoroughly: Using a tablespoon-sized cookie scoop for consistent sizing (this helps ensure all your cake pops are uniform), begin to form and gently roll the cake dough into uniform balls. Don’t overly stress if they aren’t perfectly round at this initial stage; we’ll have another opportunity to refine their shape after chilling. Arrange the formed cake balls evenly on a baking sheet lined with parchment paper or a silicone mat. Crucially, refrigerate them for a minimum of 2 hours. This extended chill time is absolutely vital: it significantly helps the balls firm up, adhere strongly to their sticks, and ensures they are much easier to dip without falling apart or crumbling. A critical note: I strongly advise against freezing the cake balls. While it might seem like a faster alternative, the extreme cold can cause the delicate candy coating to contract and crack once dipped, due to the sudden and drastic temperature change.
- Refine Ball Shape for a Polished Finish: After the cake balls have been thoroughly chilled and are firm to the touch, take them out of the refrigerator. At this point, you can re-roll them as needed between your palms to achieve perfectly smooth, round, and uniform spheres. This extra step contributes significantly to their professional appearance. To maintain their optimal coldness throughout the dipping process, keep the majority of the re-rolled balls in the fridge, pulling out only a small batch (2-3 at a time) as you melt and prepare your candy coating.
- Prepare the Smooth Candy Coating: Pour your chosen candy melts (12 oz) into a 2-cup liquid measuring cup. This tall, narrow container is absolutely ideal for easy and deep dunking of your cake pops, minimizing mess. Microwave the candy melts at 20-second intervals, stirring thoroughly and gently after each interval, until the mixture is completely melted and beautifully smooth, with no lumps remaining. Take extreme care not to overheat the candy melts, as this can cause them to seize, become thick, or even burn, rendering them unusable for dipping.
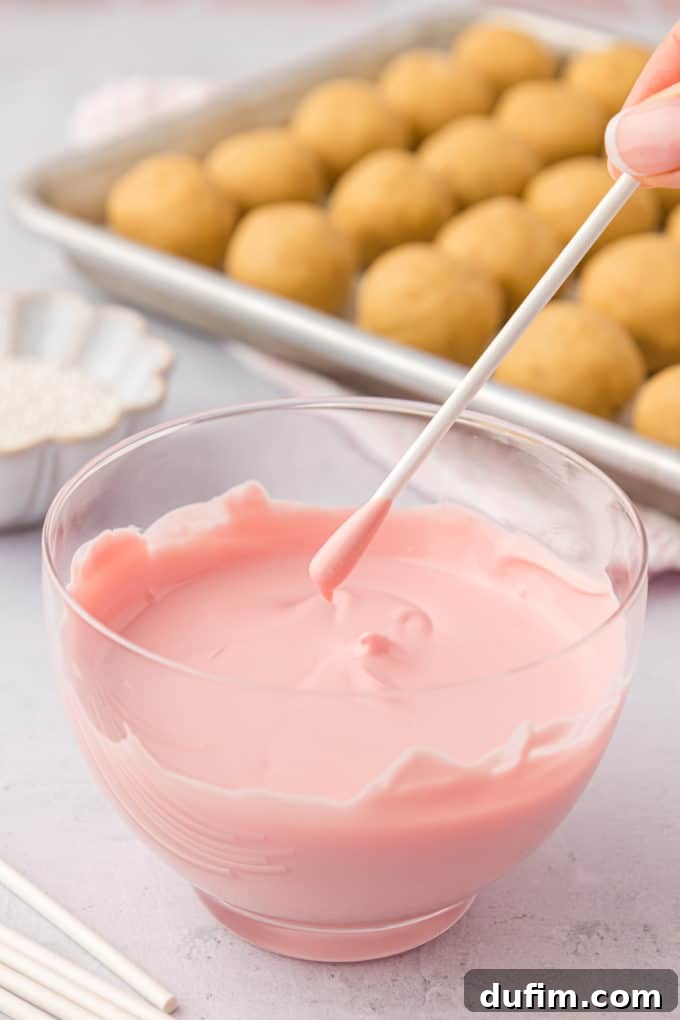
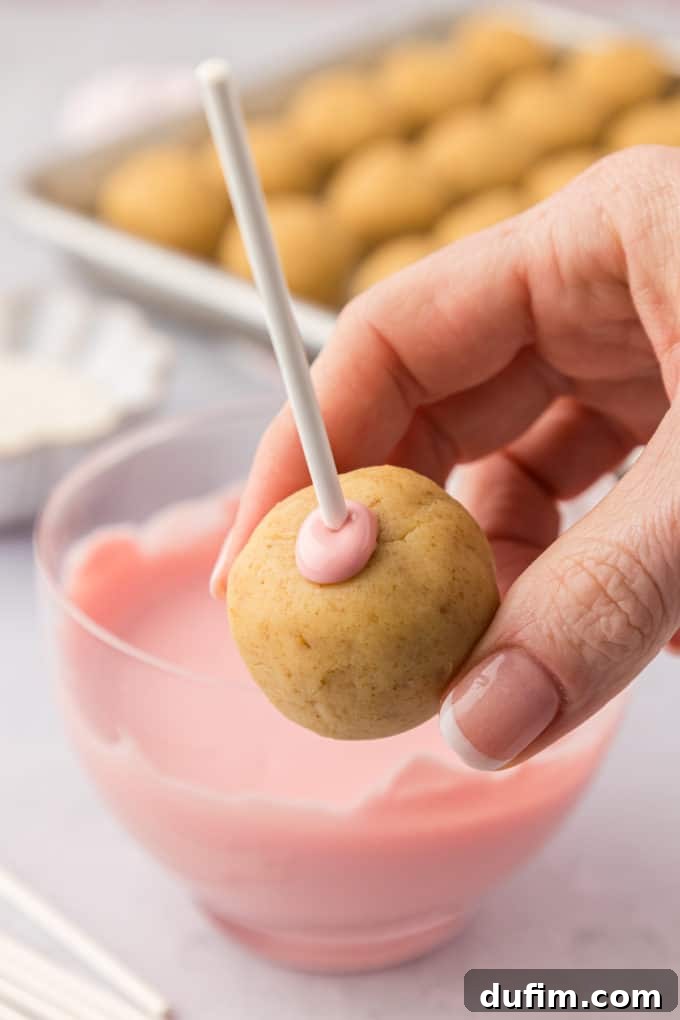
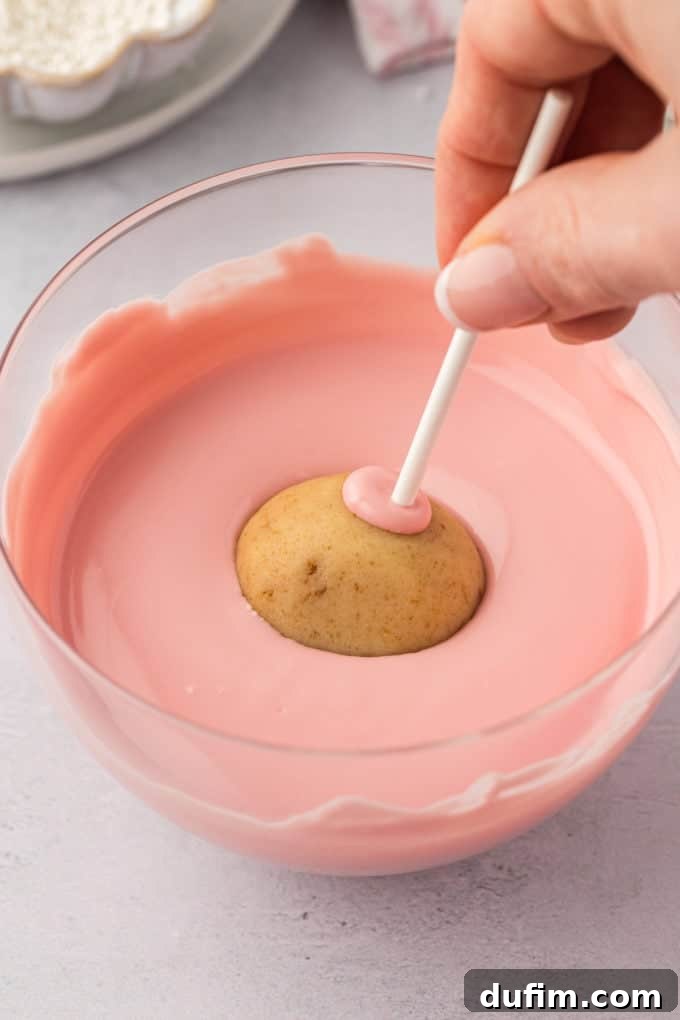
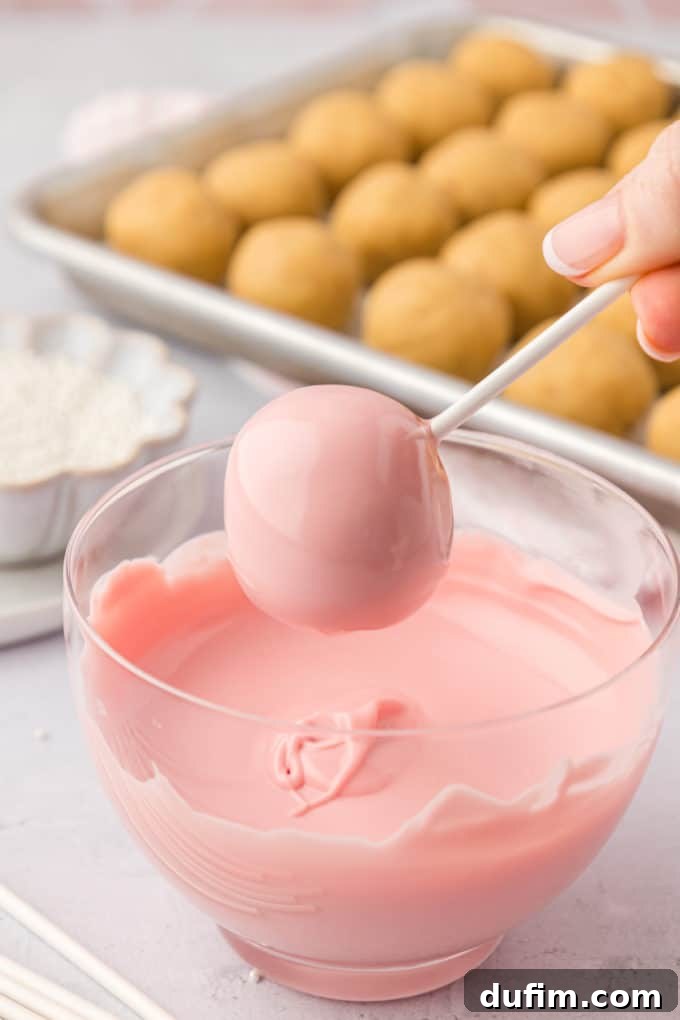
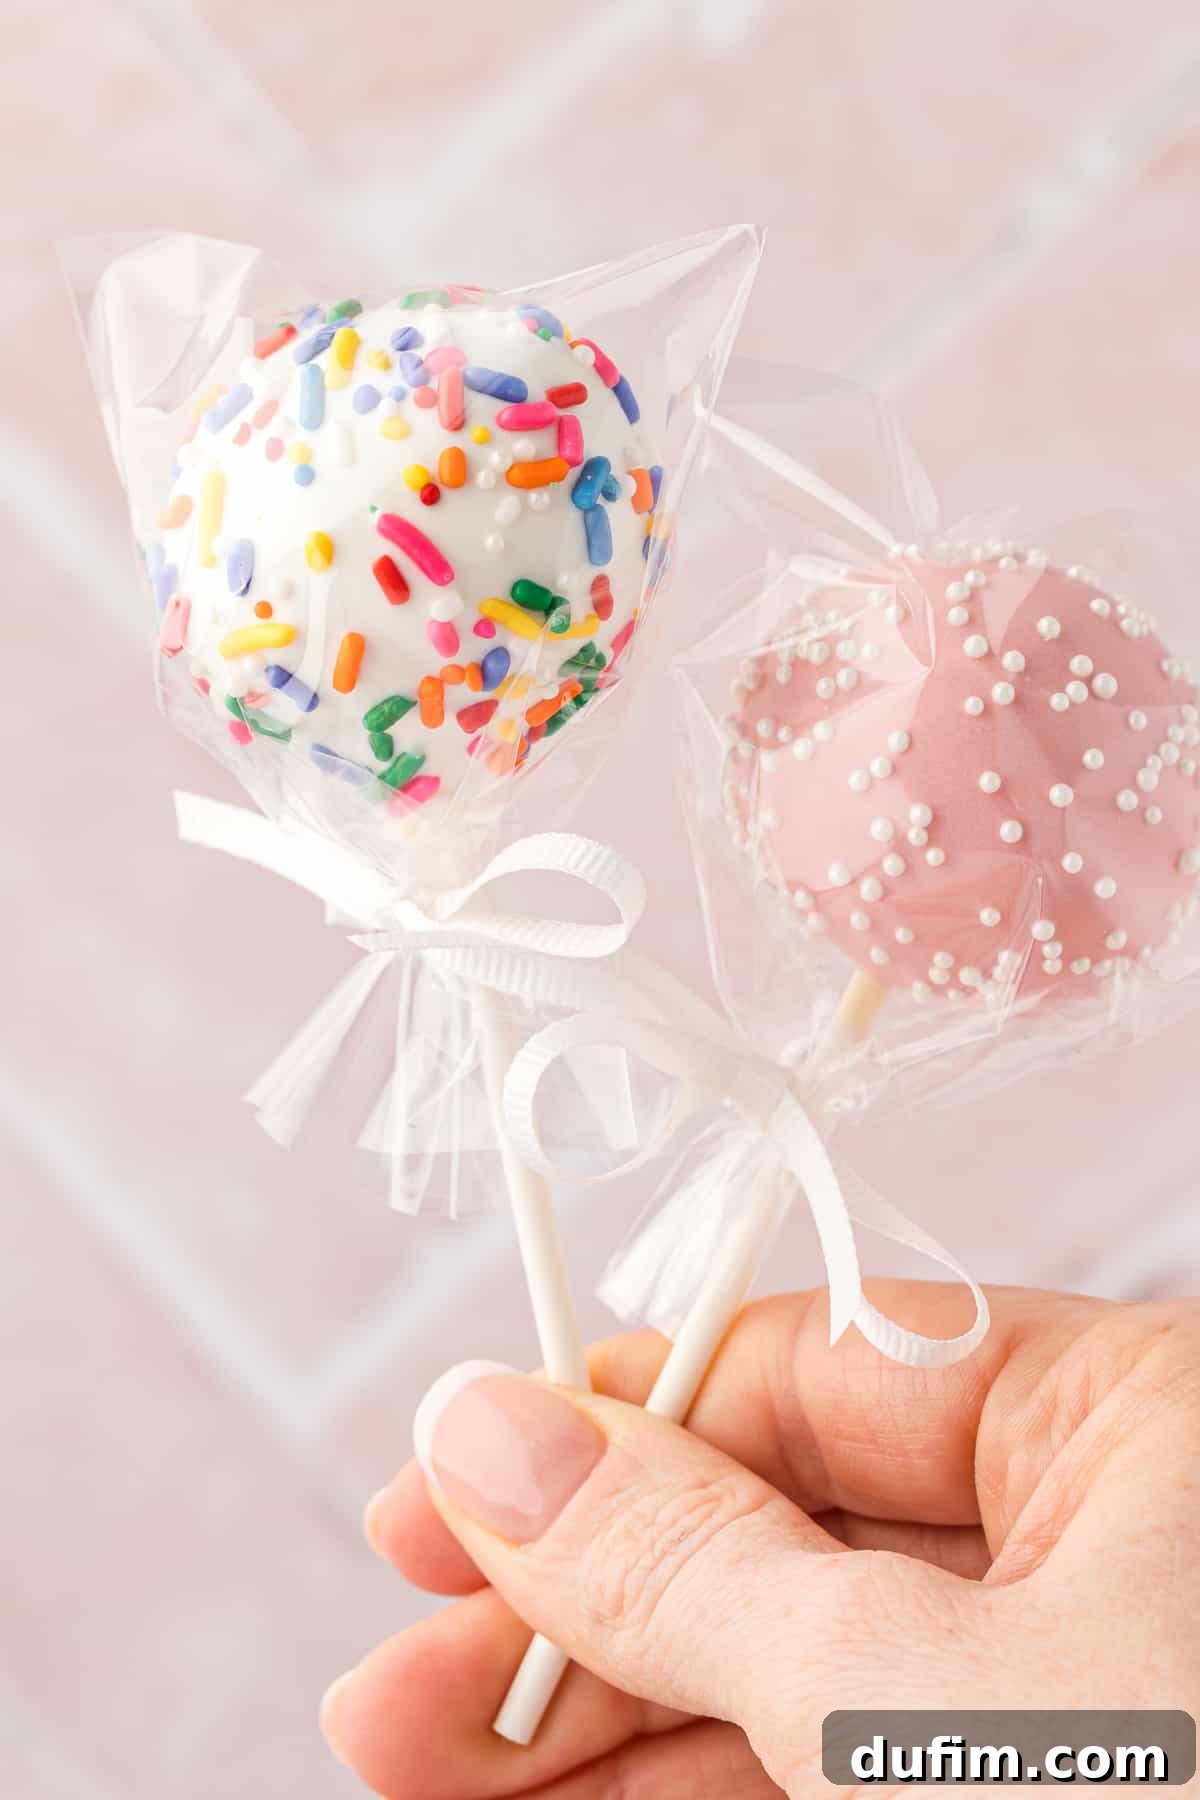
- Dip and Decorate for Perfection: This is the most rewarding step! Work quickly and efficiently in small batches of 2 or 3 cold cake balls at a time to ensure the remaining balls stay perfectly chilled. First, dip about ½ inch of a lollipop stick into the melted candy coating, then swiftly insert it halfway into the exact center of a cake ball. This “glue” ensures the ball stays securely attached. Next, carefully immerse the entire cake ball into the melted coating until it is fully and evenly covered. Make absolutely certain the coating extends slightly over the base of the cake ball where it meets the lollipop stick – this forms a crucial, aesthetically pleasing seal and prevents any gaps. Gently tap the stick against the edge of your measuring cup to allow any excess coating to drip off, creating a smooth, professional-looking finish. While the coating is still wet (it sets quickly!), immediately add your desired sprinkles or other decorations. Finally, place the decorated cake pops upright into a block of styrofoam or a sturdy cardboard box with pre-poked holes to allow the coating to set completely and harden. Promptly repeat this precise process with the remaining cake balls, always ensuring they stay very cold during the dipping phase for the best, most flawless results.
How to Make Homemade Cake Pops Ahead of Time
Planning a party, a special event, or simply want to get a head start on your baking? This cake pop recipe is wonderfully versatile and perfectly suited for making ahead! This strategic approach allows you to spread out the work, making the entire process much less stressful and more enjoyable. You can prepare the cake balls and refrigerate them without the candy coating, saving the final dipping and decorating for closer to your event.
- Preparation Stage: Simply follow steps 1 through 4 of the recipe (baking the cake, mixing with frosting to form the dough, forming the balls, and the initial chilling). Once your cake balls are firm and perfectly formed after their 2-hour chill, they are ready for storage.
- Storage: Carefully transfer the chilled cake balls to an airtight container. You can store them in the refrigerator for up to 2-3 days without any loss of quality. This allows you to tackle the more time-consuming steps well in advance.
- Finishing Touches: When you’re ready to serve, simply take the chilled cake balls out of the refrigerator, melt your candy coating, and proceed with steps 5, 6, and 7 (refining ball shape, making coating, and dipping/decorating). This staggered approach ensures fresh-tasting, beautifully coated treats exactly when you need them, without a last-minute rush.
The Best Cake Pop Recipe Tips for Consistent Success
Achieving truly spectacular cake pops, with their perfectly smooth coating, delightful texture, and secure adherence to the stick, comes down to a few critical techniques and attention to detail. For the absolute best results every single time, and to confidently avoid common frustrations, meticulously follow these expert tips:
- Thoroughly Mix the Cake and Frosting: This step is paramount for preventing dry, crumbly cake pops that won’t hold their shape. Ensure you beat the crumbled cake and frosting mixture with an electric mixer until it transforms into a uniform, cohesive, and pliable dough. There should be no dry cake crumbs left unmixed. The goal is a consistent, play-dough-like texture that holds together beautifully when pressed and rolled, indicating sufficient binding and moisture.
- Achieve Perfectly Round Cake Balls: Uniformly shaped cake pops not only look significantly more professional and appealing but also dip much more smoothly and evenly. The most effective method is a two-stage rolling process: initially, roll the cake-frosting dough into rough, tablespoon-sized balls. Then, critically, chill them completely for at least 2 hours until they are firm. Once firm, take them out and re-roll them again between your palms to achieve flawlessly smooth and perfectly round spheres. This double-rolling technique eliminates imperfections, ensures even coating, and provides a polished finish.
- Always Use Candy Melts for Coating: While melted chocolate chips might seem like a suitable alternative, candy melts are specifically formulated for dipping purposes. They provide a superior, ultra-smooth, and consistent coating that sets quickly and beautifully, without the common risks of seizing, streaking, or dripping excessively down the lollipop stick. Their optimal viscosity and formulation ensure a professional-looking, durable shell every single time, making them the superior choice for cake pops.
- Maintain Cold Cake Balls During Dipping: This cannot be stressed enough and is one of the most vital tips for successful dipping. Cold cake balls help the candy coating set rapidly and evenly, preventing the cake from softening or, worse, falling off the stick into your melted coating. Always work with very small batches of cake balls (2-3 at a time), keeping the majority of your prepared cake balls thoroughly refrigerated until they are just about to be dipped. This maintains their structural integrity.
- Tap Off Excess Coating Gently: After dipping each cake pop, gently but firmly tap the lollipop stick against the side of your measuring cup or bowl holding the melted candy. This crucial step allows any excess coating to drip away, preventing thick, clumpy layers and ensuring a sleek, even, and thin finish. A thin coating looks professional and avoids an overly sweet outer layer.
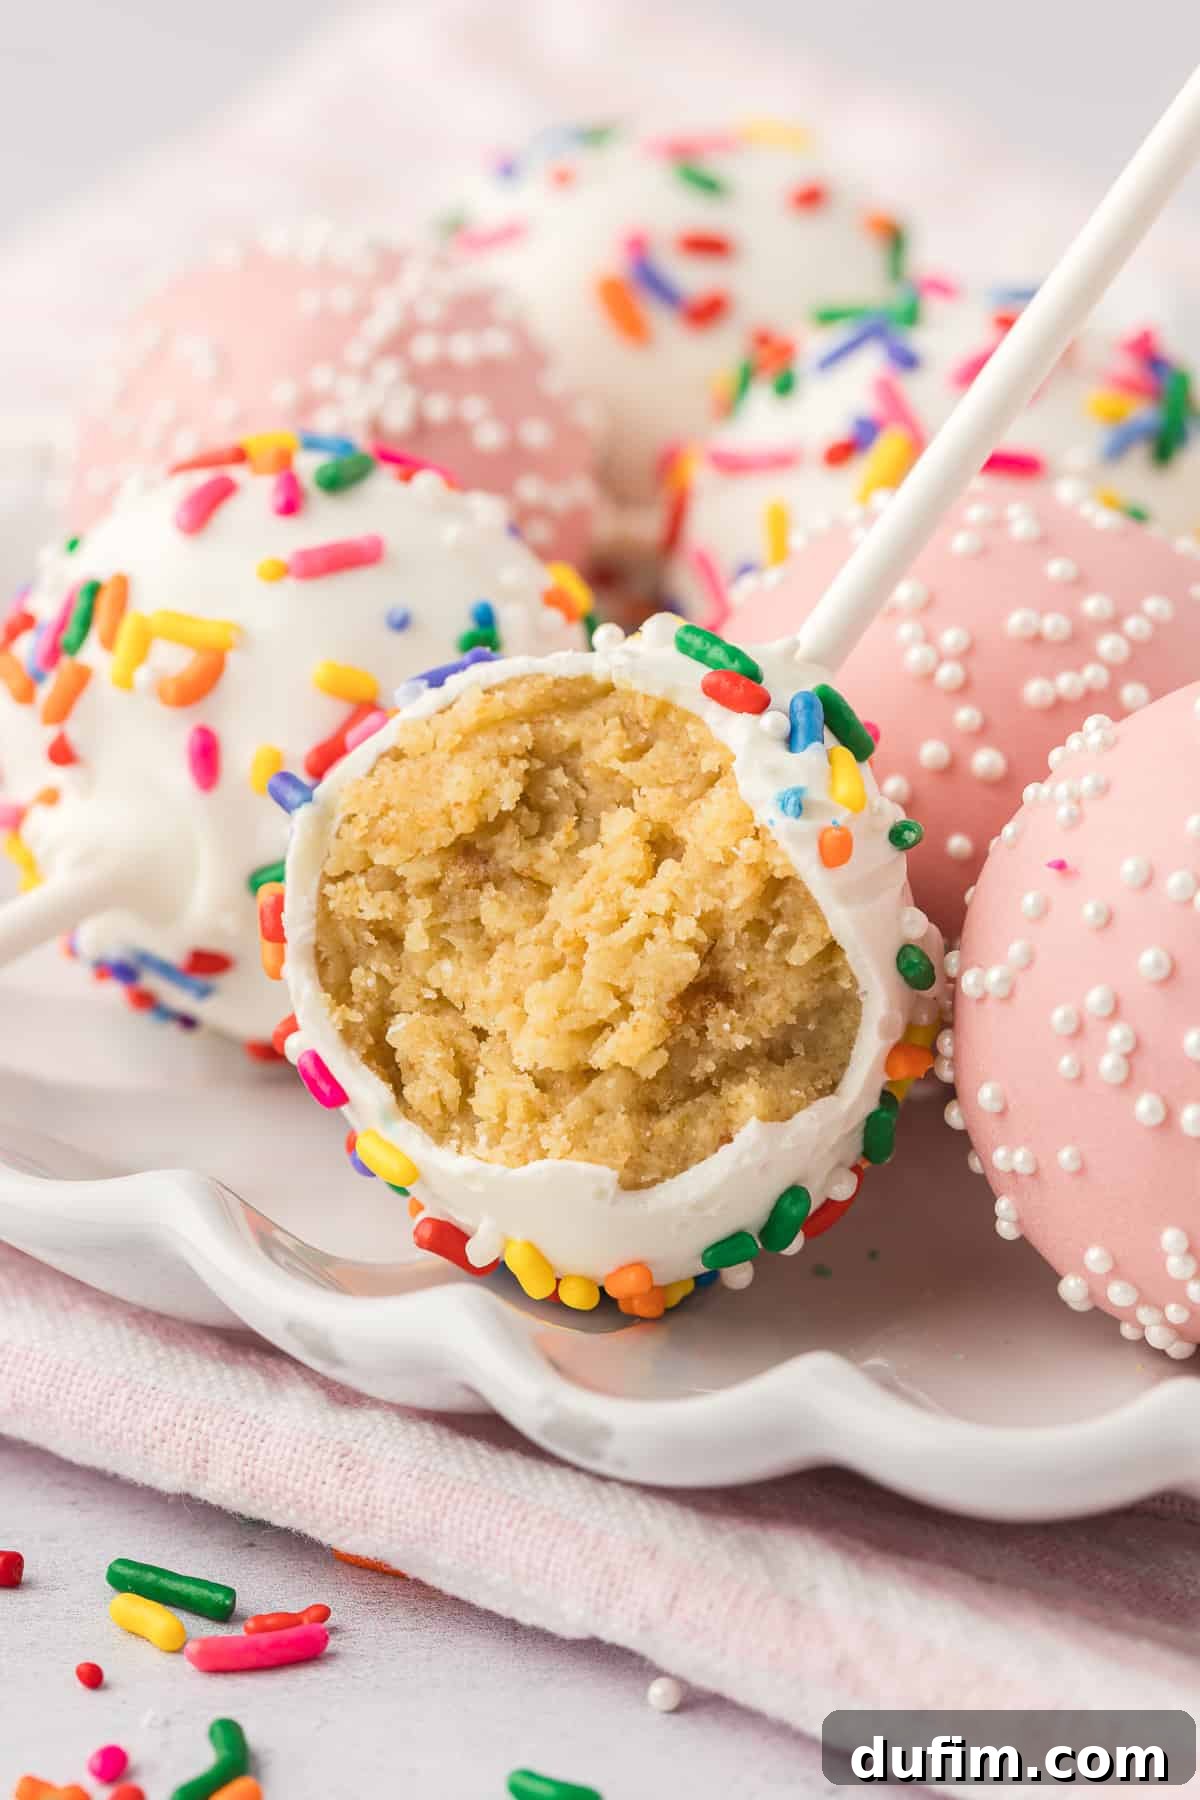
Creative Ways to Dry and Set Your Cake Pops Perfectly
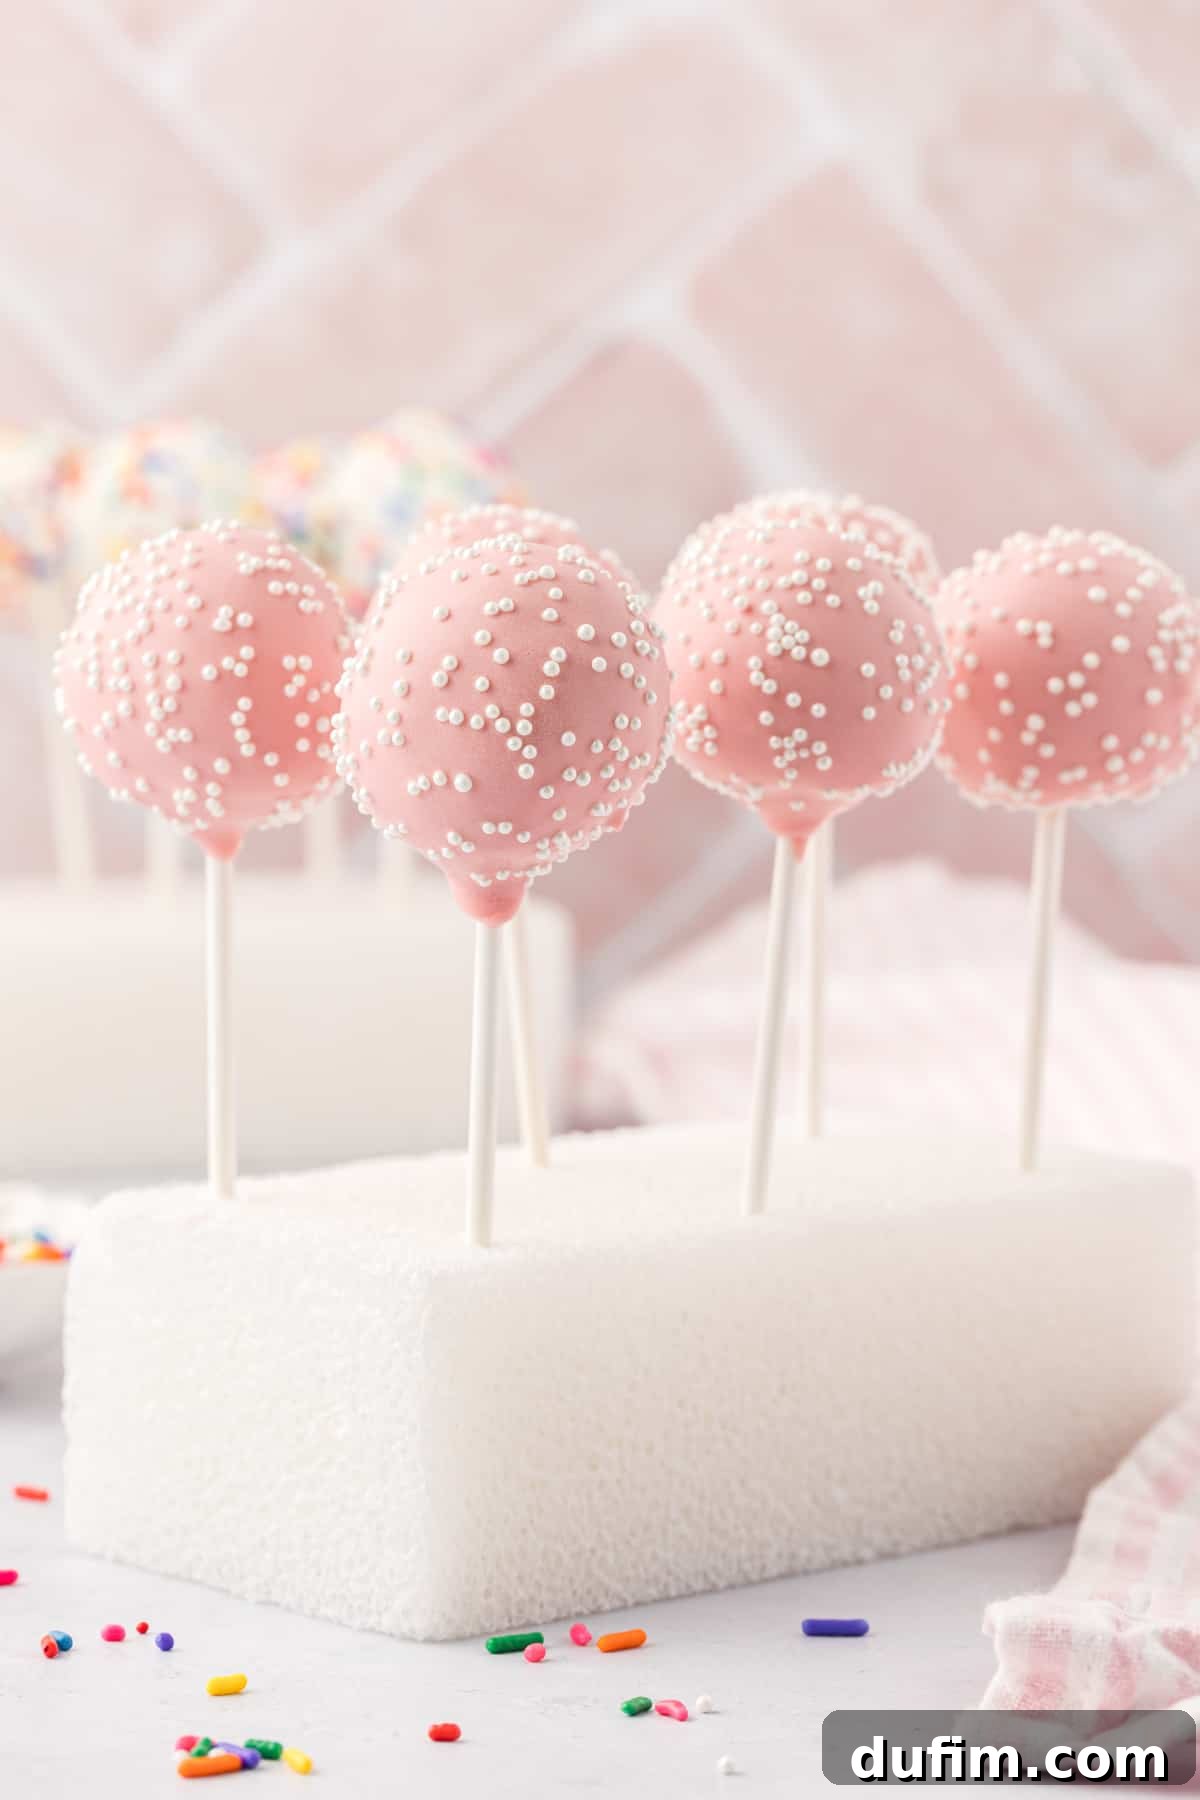
After the exciting dipping and decorating phase, the next critical step is allowing your cake pops to set properly. They need to stand upright without touching any surfaces until the candy coating hardens completely. This ensures a smooth finish and prevents any smudges or flattened sides. Fortunately, there are several ingenious and readily available options to help them dry perfectly:
- Cardboard Box with Strategically Placed Holes: This is a simple, cost-effective, and highly effective solution. Find any clean cardboard box you have on hand (a shoebox, an empty cereal box, or even a delivery box works wonderfully). Using a pencil, a skewer, or another sharp, pointed object, carefully poke holes into the top surface of the box. Ensure the holes are spaced evenly apart, allowing enough room so your drying cake pops don’t touch each other, and are just wide enough to snugly accommodate your lollipop sticks. Insert the sticks into the holes, allowing the cake pops to stand vertically and dry undisturbed.
- Upside-Down Colander: Repurpose your existing kitchenware for a quick and easy setup! Simply flip an ordinary colander upside down. The existing holes in the colander’s base are often perfectly sized for inserting cake pop sticks, allowing them to stand securely and spaced out. This is a fantastic impromptu solution when you need something fast.
- Empty Egg Carton: An eco-friendly and practical choice that’s often overlooked. An empty egg carton can be brilliantly repurposed to hold your cake pops. Just place the lollipop sticks directly into the individual egg compartments. The compartments will provide stable support, keeping your cake pops upright and separate as their coating sets. This works especially well for smaller batches.
- Styrofoam Block: For dedicated cake pop makers or those who plan to make them frequently, a sturdy styrofoam block (readily available at craft stores or sometimes in packaging materials) is an excellent investment. It provides firm, stable support, allows for easy insertion and removal of sticks, and can be reused countless times, making it a professional and reliable option.
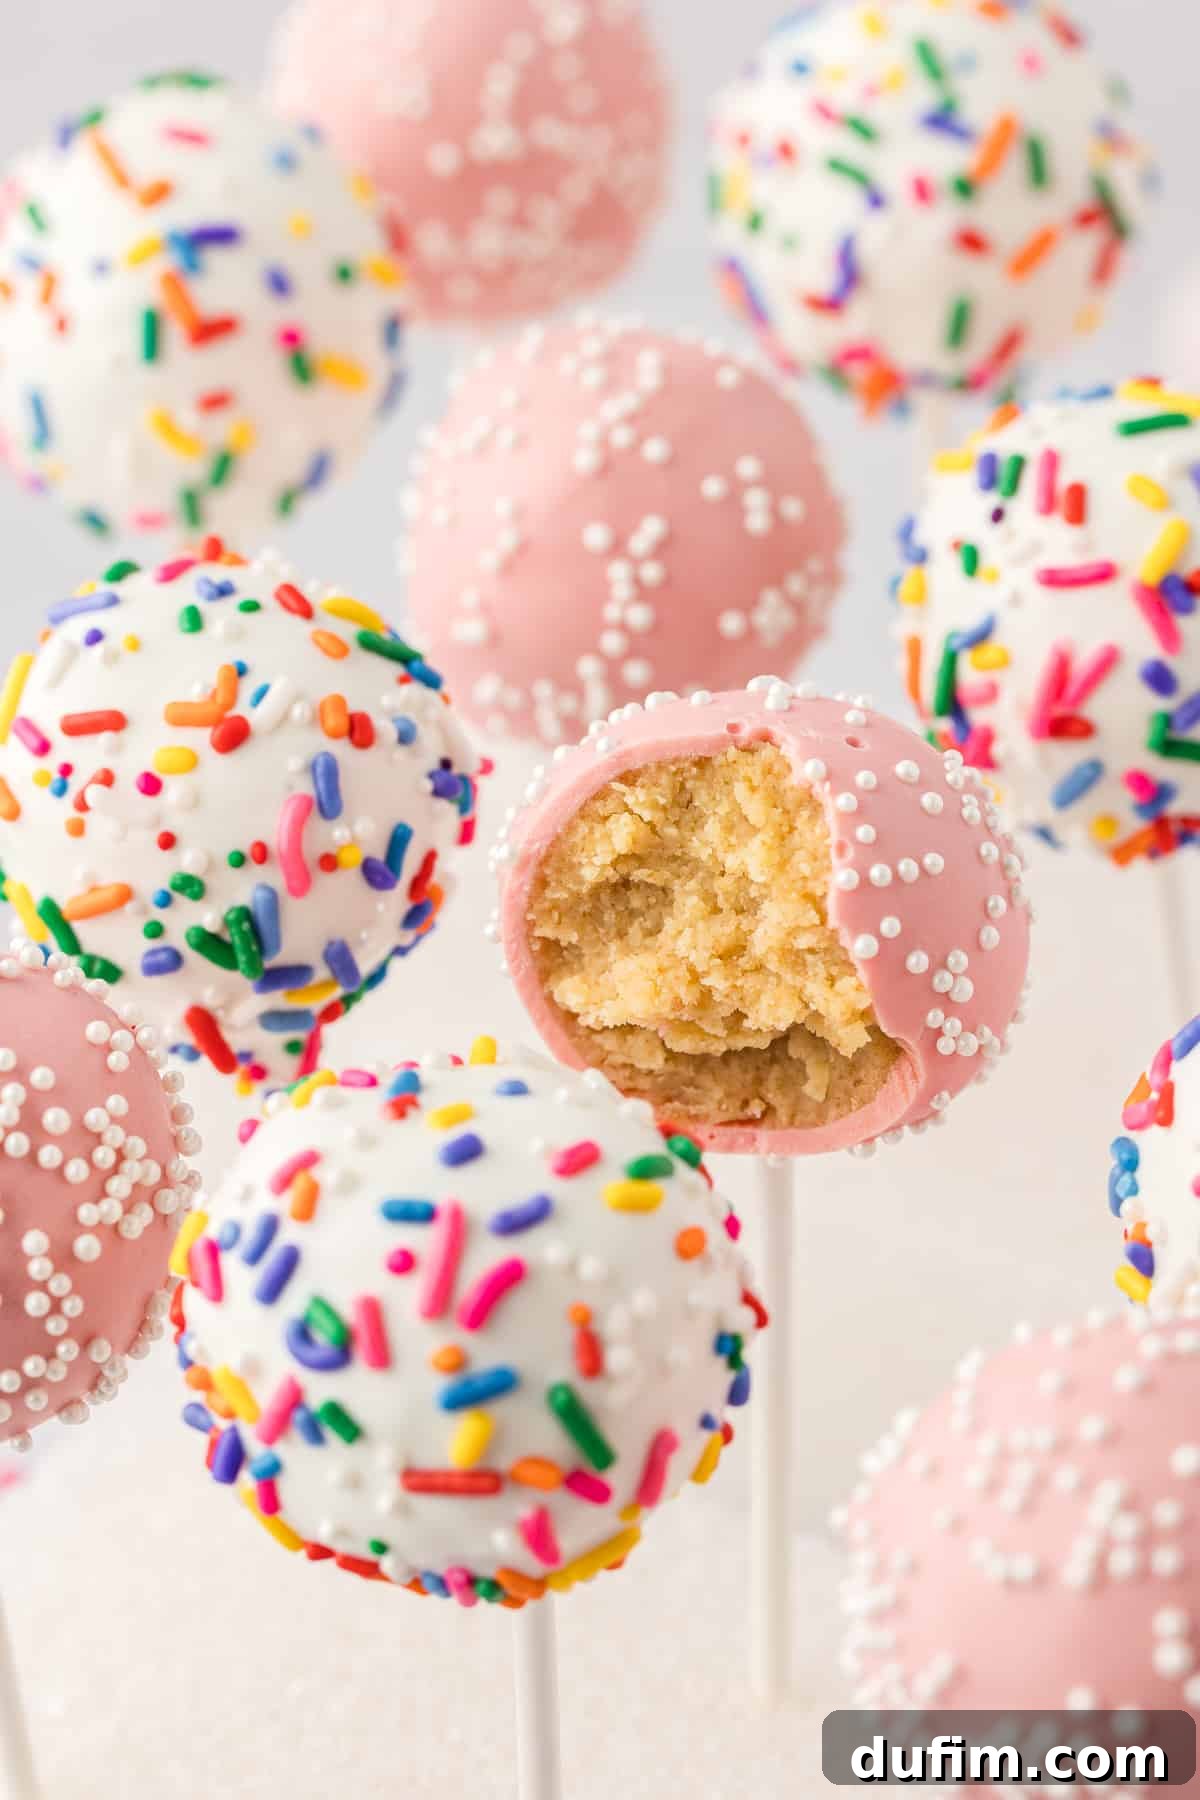
Storing Your Delicious Homemade Cake Pops
Proper storage is absolutely essential to maintain the freshness, texture, and overall quality of your homemade cake pops. Whether you prefer them at room temperature or chilled, they can be stored effectively to prolong their deliciousness for days or even months.
How Long Do Cake Pops Last?
Once dipped and fully set, your beautifully crafted cake pops have a surprisingly good shelf life, making them excellent for preparing in advance:
- At Room Temperature: If your cake pops are made with shelf-stable ingredients (such as a standard boxed cake mix, canned buttercream frosting, and candy melts), they can be safely stored in an airtight container at a cool room temperature (ideally below 70°F or 21°C) for 3-4 days. It is crucial to avoid direct sunlight or overly warm environments, as heat can cause the candy coating to soften, melt, or become sticky.
- Refrigerated: For significantly extended freshness, especially if your kitchen is warm, or if you’ve opted for a frosting like cream cheese buttercream or any other perishable ingredients, storing cake pops in an airtight container in the refrigerator is highly recommended. When refrigerated, they will maintain their optimal quality for up to 1 to 2 weeks. Be sure they are fully set before placing them in the fridge.
Can You Freeze Cake Pops?
Absolutely! This recipe for homemade cake pops is excellent for freezing once they are fully dipped and their candy coating has completely set and hardened. Freezing is a fantastic option for long-term storage or for preparing a large batch well in advance for future events.
- To Freeze: After your cake pops have been dipped, decorated, and are completely set, arrange them in a single layer on a baking sheet and place them in the freezer for about an hour, or until they are solid. This flash-freezing step prevents them from sticking together. Once solid, carefully transfer them to an airtight, freezer-safe container or a heavy-duty freezer bag. Ensure they are packed snugly to prevent freezer burn. They can be frozen for up to 2 months without compromising their delicious flavor or delightful texture.
- To Thaw: When you’re ready to enjoy your frozen cake pops, simply remove the desired number from the freezer and let them thaw gently at room temperature for at least 30 minutes to an hour, or until they are fully softened and ready to eat. Avoid microwaving, as this can cause the coating to melt unevenly, creating a mess, or making the cake part soggy.
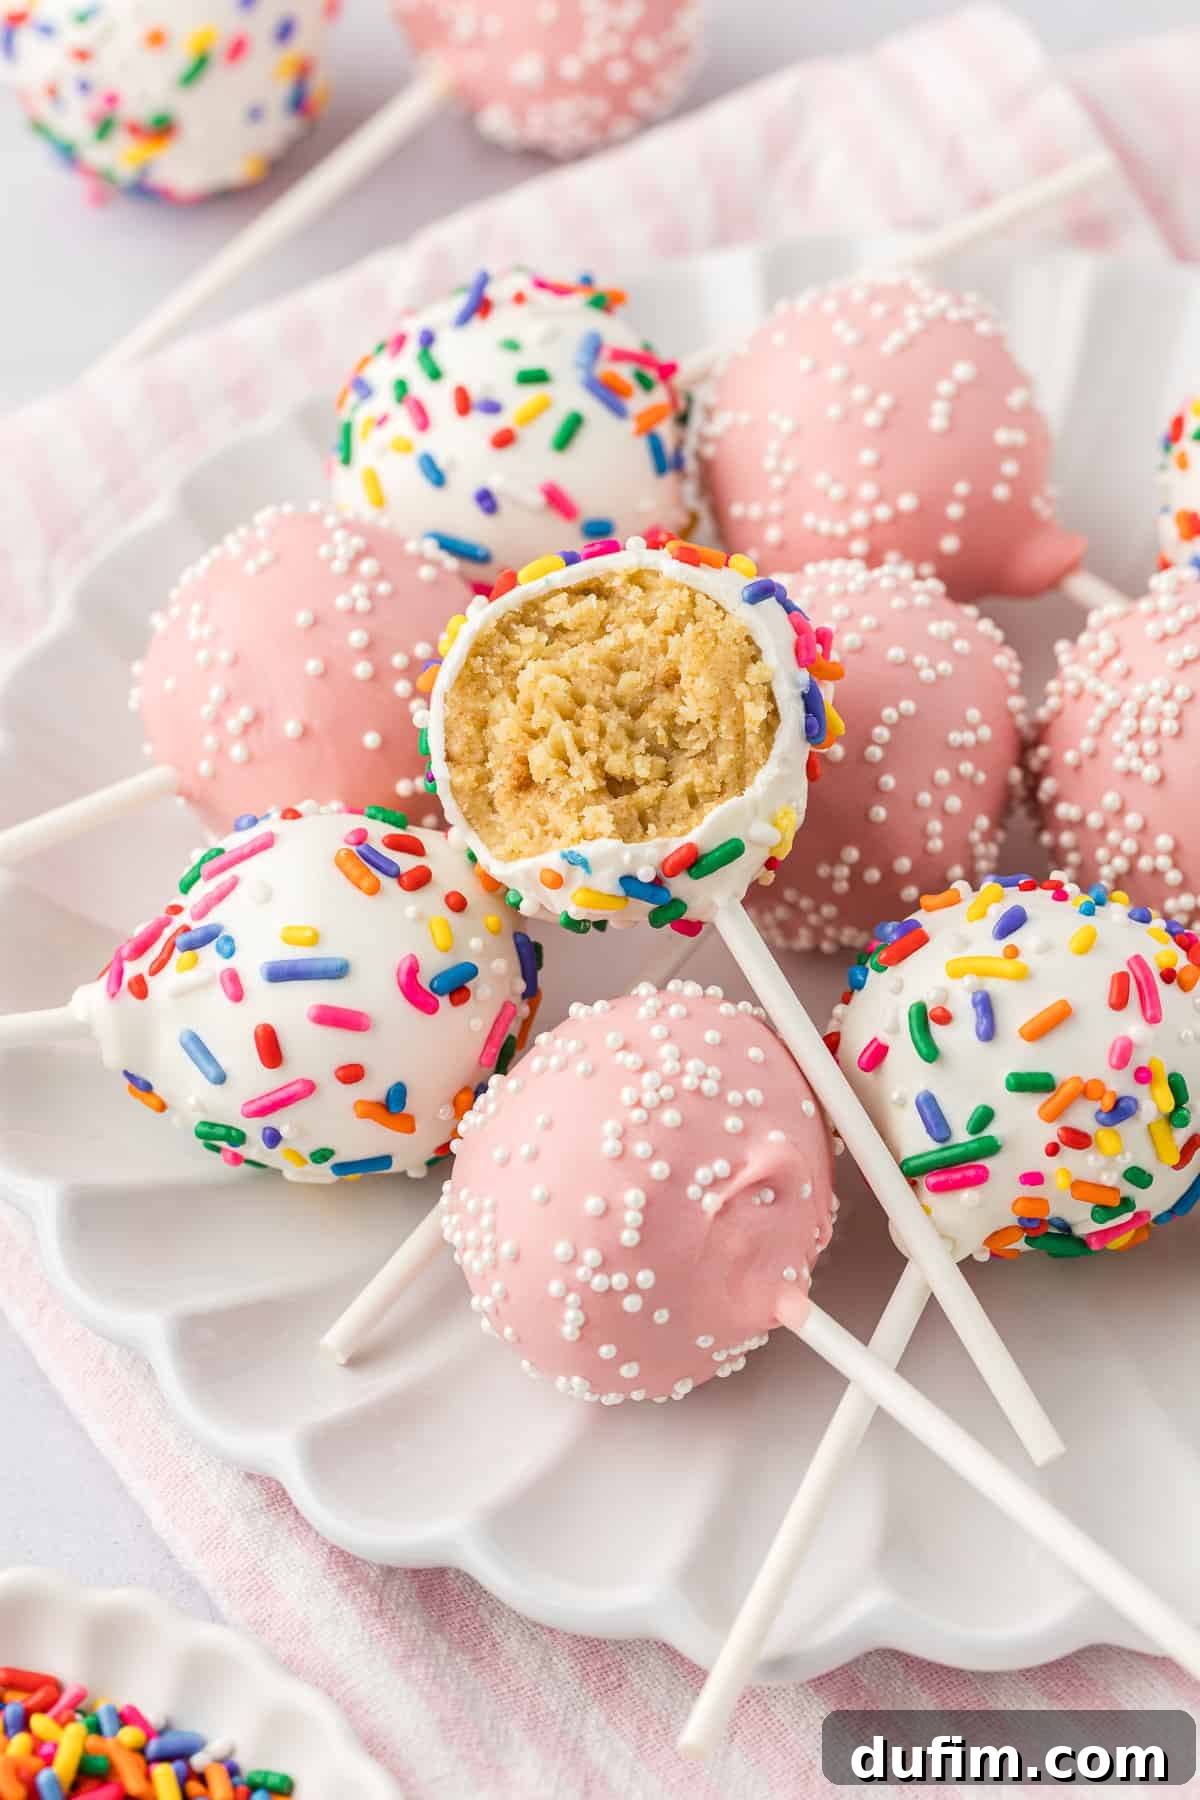
Cake Pop Recipe FAQs (Frequently Asked Questions)
Cake pops primarily fall apart for three common and preventable reasons:
- Insufficient Frosting: Not using enough frosting means there isn’t enough binding agent to adequately hold the crumbled cake particles together, leading to a loose and fragile ball.
- Lack of Proper Chilling: Skipping the crucial 2-hour chilling time before dipping leaves the cake balls too soft and unstable, making them prone to breaking or falling off the stick when handled or dipped into the warm coating.
- Improper Stick Insertion: Forgetting to first dip the lollipop stick into melted candy melts (which acts as a vital “glue”) before inserting it into the cake ball can result in a weak connection between the cake and the stick, inevitably leading to detachment during dipping or general handling.
Addressing these points will significantly increase your success rate for sturdy cake pops.
You can certainly make cake pops well in advance! The undipped cake balls can be prepared up to 2-3 days ahead of time and stored safely in an airtight container in the refrigerator. Once fully dipped and the coating has completely set, your homemade cake pops can be stored at cool room temperature for 3-4 days, or for an extended period of 1 to 2 weeks if kept refrigerated. For even longer storage, finished cake pops can be frozen for up to 2 months, making them perfect for event planning.
For this specific recipe, we precisely recommend using 1/2 cup of frosting. This meticulously measured amount strikes the perfect balance, providing enough moisture and binding power to create a cohesive dough without making the cake pops overly sweet or mushy in texture. You have the flexibility to use either convenient store-bought canned frosting or your cherished homemade variety, depending on your preference and available time.
Cake pops do not always require refrigeration. If they are crafted with entirely shelf-stable ingredients (such as a standard boxed cake mix, a canned buttercream frosting, and candy melts), they can be safely stored at cool room temperature (ideally under 70°F or 21°C) in an airtight container for up to 3–4 days. However, if your kitchen is particularly warm and humid, or if you’ve incorporated perishable ingredients like cream cheese frosting or fresh fruit into your cake pops, then refrigeration is highly advisable for both extended freshness and food safety. Always err on the side of caution.
More Delightful Birthday & Celebration Recipes You’ll Love
If you’ve enjoyed the rewarding process of making these fabulous cake pops, you’re in for a treat! Explore some of our other fantastic and crowd-pleasing recipes that are absolutely perfect for birthdays, joyous celebrations, or simply to satisfy a sweet craving. Each recipe is designed for delicious results and ease of preparation:
- Homemade Birthday Cake Ice Cream: Indulge in a scoop of pure celebration with this fun and festive ice cream, packed with birthday cake flavor and sprinkles.
- Classic Vanilla Cupcakes: Master the art of the perfect, fluffy vanilla cupcake. These timeless treats are a staple for any sweet spread and easy to decorate.
- Mini Funfetti Cheesecakes: Delight your guests with these adorable, individual cheesecakes bursting with colorful sprinkles and creamy flavor, perfect for portion control and easy serving.
- Moist & Cheerful Funfetti Cake Recipe: If you love sprinkles, this moist and tender funfetti cake is the ultimate celebratory dessert, guaranteed to bring joy with every slice.
Tap stars to rate!
Homemade Cake Pops (Easy DIY Recipe)
Beth
20 minutes
25 minutes
2 hours
30 minutes
32
cake pops
Pin Recipe
Rate & Comment
Print Recipe
Essential Equipment You’ll Need
-
Large Glass Mixing Bowl
-
Electric Stand Mixer (or powerful hand mixer)
-
9×13 Inch Baking Pan
-
Measuring Cups & Spoons (for accurate ingredient portions)
-
Parchment Paper or Silicone Baking Mat (for easy cleanup and non-stick surface)
-
Small Cookie Scoop (ideally 1 tablespoon size, for consistent cake ball sizing)
-
Tall, Narrow Heatproof Container (e.g., a 2-cup liquid measuring cup, perfect for easy cake pop dunking)
Ingredients for Delightful Cake Pops (Yields approx. 32)
-
15.25
oz
box white cake mix -
Ingredients listed on the back of the cake mix box,
e.g., 3 large eggs, ½ cup vegetable oil, 1 cup water -
½
cup
prepared frosting,
store-bought or homemade (vanilla or cream cheese recommended) -
12
oz
candy melts,
any color you desire for your coating -
Lollipop sticks -
Assorted sprinkles,
for festive decoration
Detailed Instructions for Perfect Cake Pops
-
1. Prepare Oven & Pan: Preheat your oven to 350ºF (175ºC). Lightly spray a 9×13 inch baking pan with nonstick cooking spray, or grease and flour it thoroughly. This crucial step ensures your baked cake will easily release from the pan after cooking. Set the prepared pan aside, ready for the cake batter.
-
2. Bake the Cake: In a large mixing bowl, combine the entire contents of the box cake mix, the specified amounts of water, oil, and eggs as instructed on the back of the cake mix box. Whisk thoroughly until the batter is smooth and well-combined. Pour the prepared batter evenly into your greased 9×13 inch pan and bake according to the package’s recommended time (typically 25-30 minutes), until a toothpick inserted into the center comes out clean.15.25 oz box cake mix,
Ingredients listed on the back of the cake mix box -
3. Mix Cake & Frosting into Dough: As soon as the cake is out of the oven, immediately and carefully transfer the warm cake (it’s fine if it breaks apart) into a large mixing bowl. Add ½ cup of your chosen frosting. Using an electric mixer on low speed, beat the cake and frosting together until they form a cohesive, smooth, dough-like texture. Ensure it’s thoroughly combined and pliable, without being sticky or overly crumbly.1/2 cup frosting
-
4. Form & Chill Cake Balls: Use a tablespoon-sized cookie scoop to portion the cake dough, then roll each portion between your palms into a ball. Don’t worry about perfect rounds yet. Place the cake balls on a parchment-lined baking sheet and refrigerate for a minimum of 2 hours until they are very firm to the touch. This crucial chilling step is vital for preventing the balls from falling off the sticks during dipping. Remember: do NOT freeze the cake balls, as this can cause the candy coating to crack due to extreme temperature differences.
-
5. Refine Ball Shape: After the 2-hour chilling period, take out the cake balls and re-roll them between your palms as needed to achieve perfectly smooth, uniformly round shapes. This ensures a professional and aesthetically pleasing finish. Keep the re-rolled balls in the fridge, only removing a few at a time as you prepare for dipping to maintain their optimal coldness.
-
6. Prepare Candy Coating: Place your 12 oz of candy melts into a tall, narrow 2-cup liquid measuring cup. This depth is ideal for easy, deep dunking. Microwave the candy melts in short 20-second bursts, stirring thoroughly after each interval, until the mixture is completely melted, smooth, and entirely lump-free. Be very careful not to overheat the candy melts, as this can cause them to seize or burn.12 oz candy melts
-
7. Dip & Decorate: Working quickly with batches of 2-3 very cold cake balls, first dip the tip of a lollipop stick (about ½ inch) into the melted candy coating, then swiftly insert it halfway into the exact center of a cake ball. This creates a secure bond. Next, fully immerse the cake ball into the melted coating, ensuring it covers the entire surface and extends slightly over the base where it meets the stick. Gently tap the stick against the edge of the measuring cup to allow any excess coating to drip off, creating a smooth, even finish. Immediately apply your desired sprinkles or other decorations while the coating is still wet. Finally, place the finished cake pop upright into a styrofoam block or a pre-holed cardboard box to set completely and harden. Continue this precise process with the remaining cake balls, always ensuring they stay very cold during the dipping phase for the best, most flawless results.Lollipop sticks,
Assorted sprinkles
Watch the Recipe Video: Homemade Cake Pops Tutorial
Recipe Notes & Pro Tips for Best Results
To ensure your cake pops set beautifully and efficiently after dipping, you’ll need a stable setup to hold them upright without touching any surfaces until the coating hardens completely. Here are a few practical and easily accessible options to help them dry perfectly:
- Cardboard Box with Holes:
- Grab any clean cardboard box you have (a shoebox or an empty cereal box works perfectly). Using a pencil, skewer, or similar sharp tool, carefully poke holes into the top surface of the box. Ensure the holes are spaced out enough so your cake pops don’t touch each other, and are just wide enough to snugly accommodate your lollipop sticks. Insert the sticks into the holes, allowing the cake pops to stand vertically and dry undisturbed.
- Upside-Down Colander:
- A simple yet effective kitchen hack! Just invert a colander, and its existing holes can serve as perfect, ready-made holders for your cake pop sticks. This is a quick and convenient setup when you’re in a pinch.
- Empty Egg Carton:
- An eco-friendly and practical choice. The individual compartments of an empty egg carton are ideally sized for securely holding cake pop sticks upright, keeping them separate and stable as the coating sets.
- Styrofoam Block:
- For more dedicated cake pop makers, a sturdy styrofoam block (often found at craft stores or sometimes in product packaging) offers excellent, firm stability and can be reused countless times. It provides a professional setup for drying multiple cake pops simultaneously.
Nutrition Information (Approximate)
Nutrition Facts
|
Calories: 38kcal
|
Carbohydrates: 5g
|
Fat: 2g
|
Saturated Fat: 1g
|
Polyunsaturated Fat: 0.3g
|
Monounsaturated Fat: 0.2g
|
Sodium: 11mg
|
Potassium: 1mg
|
Sugar: 5g
|
Calcium: 0.1mg
|
Iron: 0.01mg
Nutrition Disclosure
All nutritional values are approximate and provided to the reader as a courtesy. Please note that changing ingredients and/or quantities will alter the estimated nutritional calculations significantly. It is highly recommended to verify calculations independently for any specific dietary requirements or health-related purposes.
Loved this recipe? Share your thoughts and rate it below!
Your feedback helps us create more delicious content and improve for fellow bakers.