
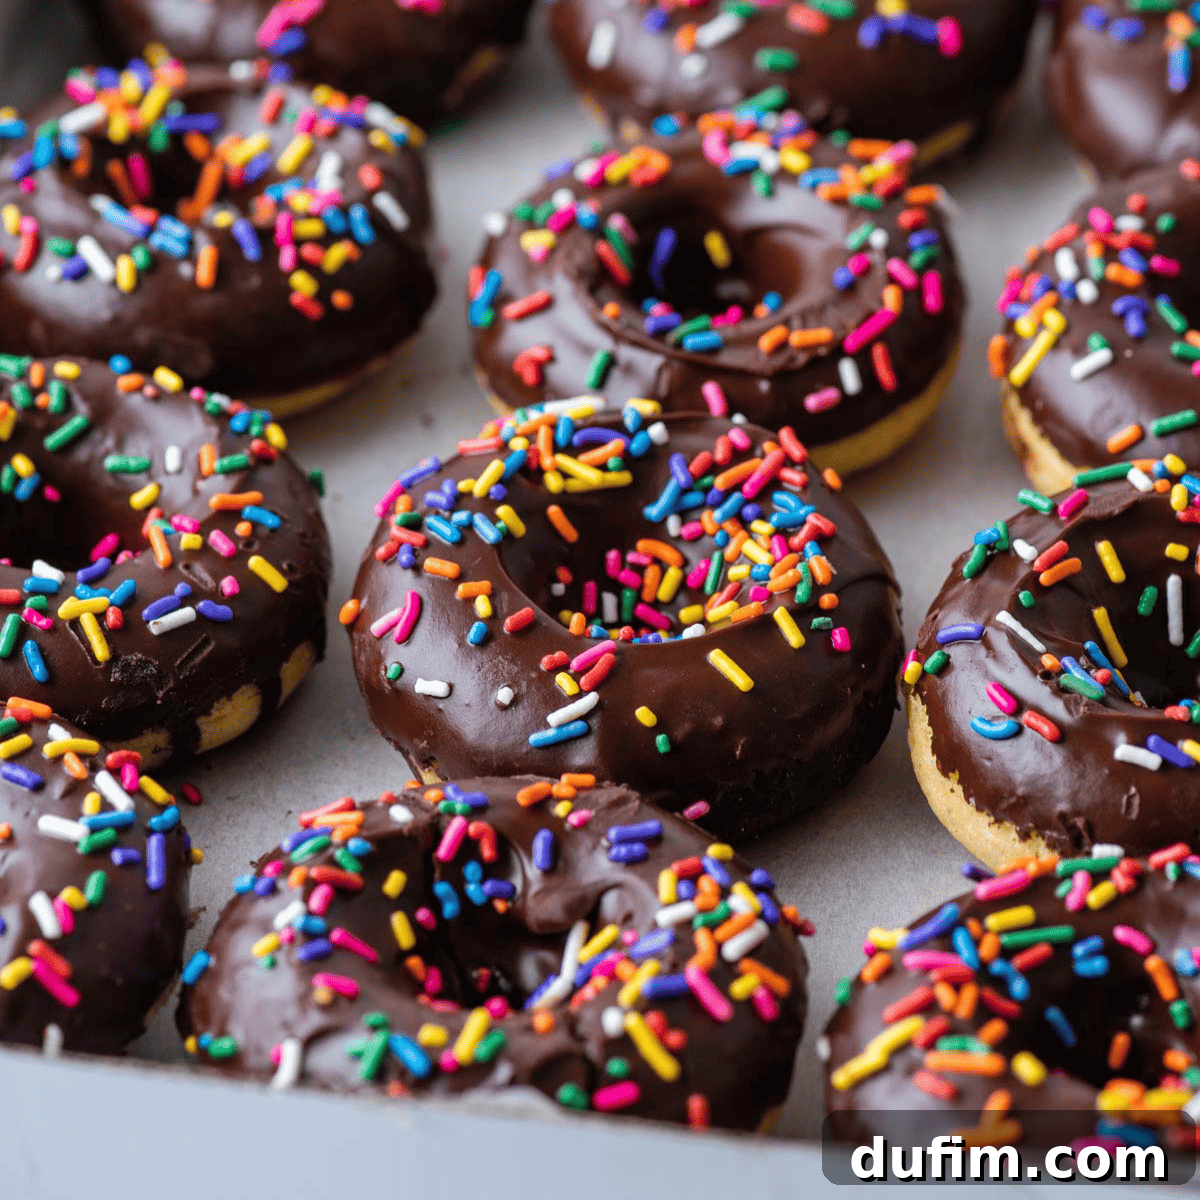
Master the Art of Homemade Baked Donuts: Your Go-To Recipe for Fluffy Perfection!
Welcome to the delightful world of homemade baked donuts, where the joy of creating these scrumptious treats is as much fun as devouring them! Forget the splattering oil and cumbersome cleanup of traditional deep-frying; our ultimate baked donut recipe offers a lighter, healthier, and incredibly easy way to enjoy fresh donuts right in your own kitchen. This tried-and-true recipe has been rigorously tested and perfected, guaranteeing perfectly fluffy, tender donuts every time, and even includes an outstanding gluten-free option for everyone to enjoy. Get ready to transform your kitchen into a sweet-smelling haven with these customizable delights!
I followed each step exactly and the donuts were perfect! They taste great, the texture was perfect and they look amazing! My husband even sent a photo to his mom to share his excitement over his “fancy sprinkle donut”.
-Jacki
Why Our Ultimate Baked Donut Recipe Stands Out
There are countless reasons why this baked donut recipe is destined to become your absolute favorite. It’s not just a recipe; it’s an invitation to effortlessly create bakery-quality donuts at home, pleasing every palate, even the pickiest eaters!
- Effortless Preparation: Say goodbye to messy deep-frying and lengthy prep times. Our recipe requires a mere 10 minutes of active preparation. You won’t need a stand mixer or hot oil—just a standard donut pan and a few basic kitchen tools. This simplicity makes donut making accessible and enjoyable for everyone, even on busy mornings.
- Pantry-Friendly Ingredients: You’ll be delighted by how simple the ingredient list is, relying almost entirely on common pantry staples. Chances are, you won’t even need to make a special trip to the store, allowing you to whip up a batch of these delicious treats whenever a craving strikes.
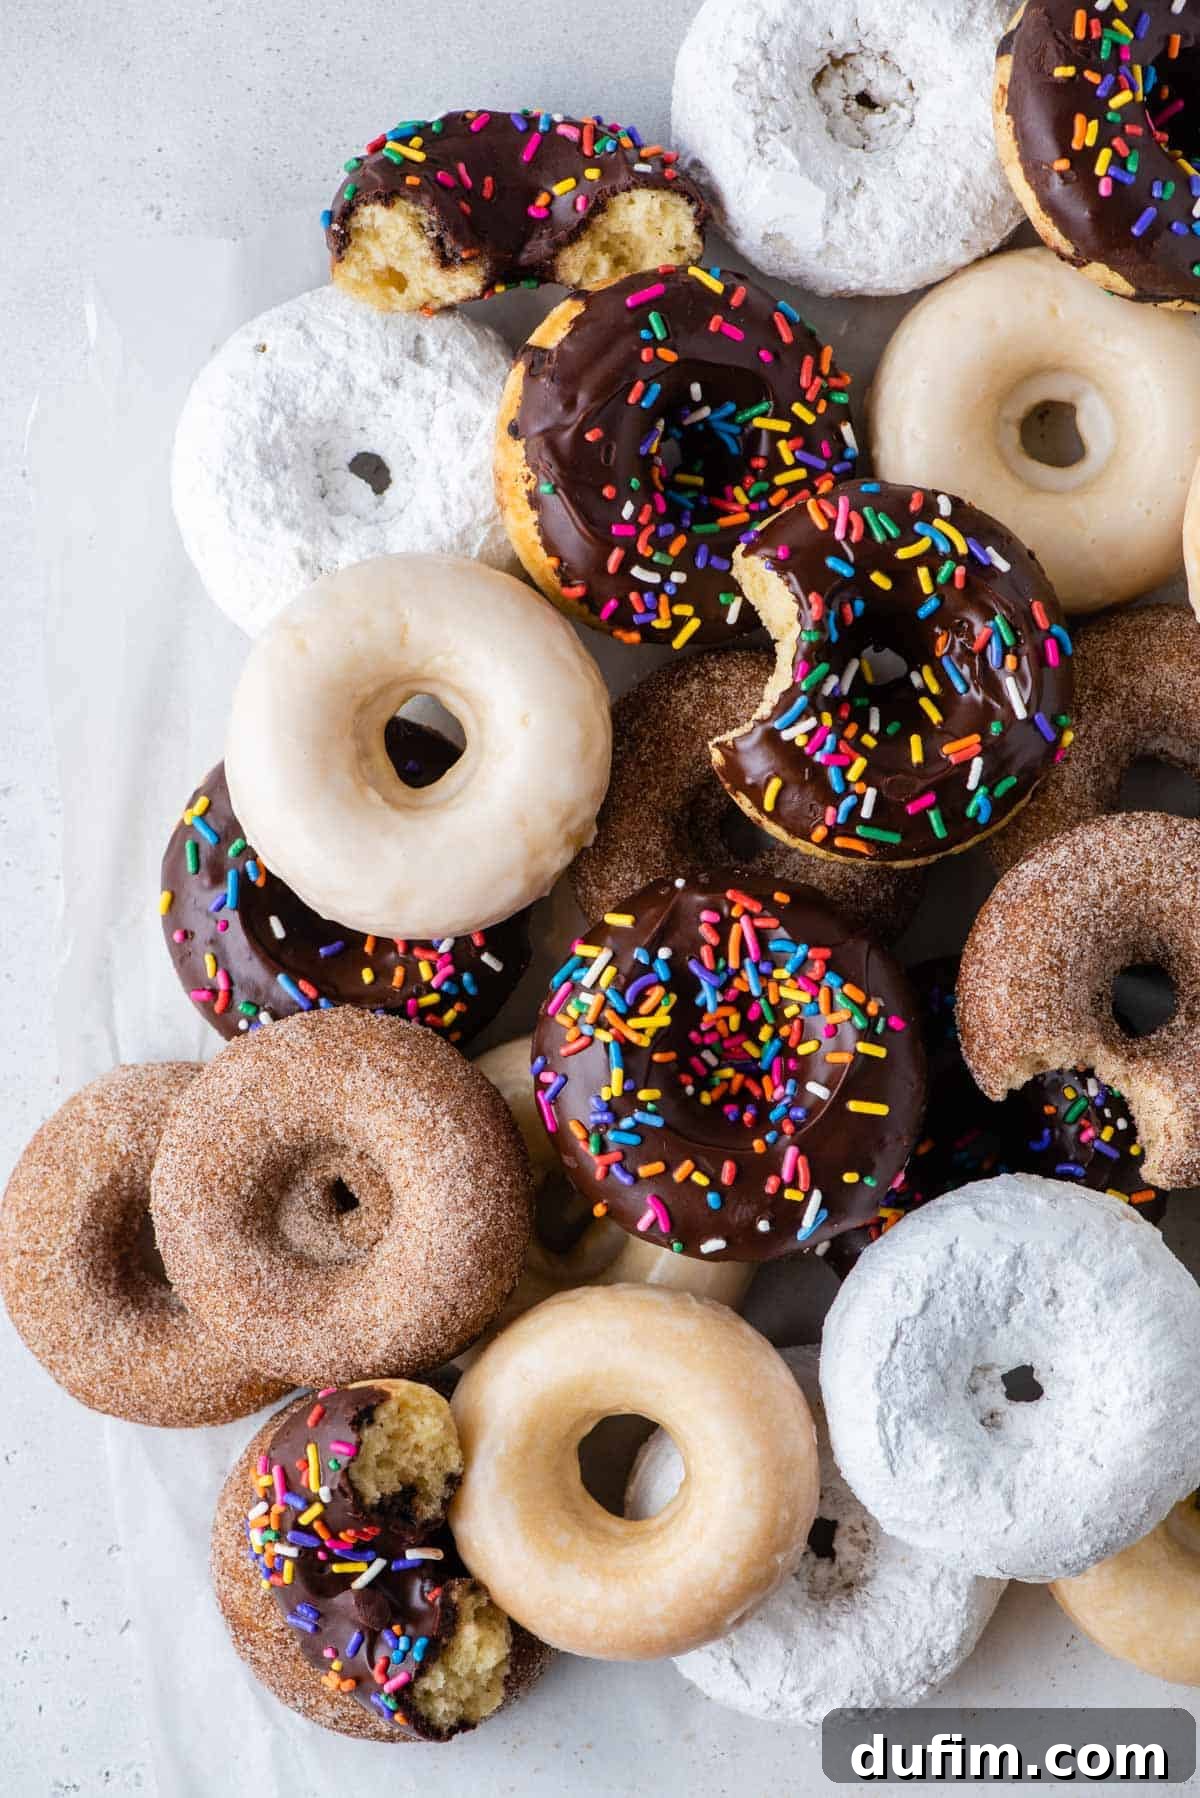
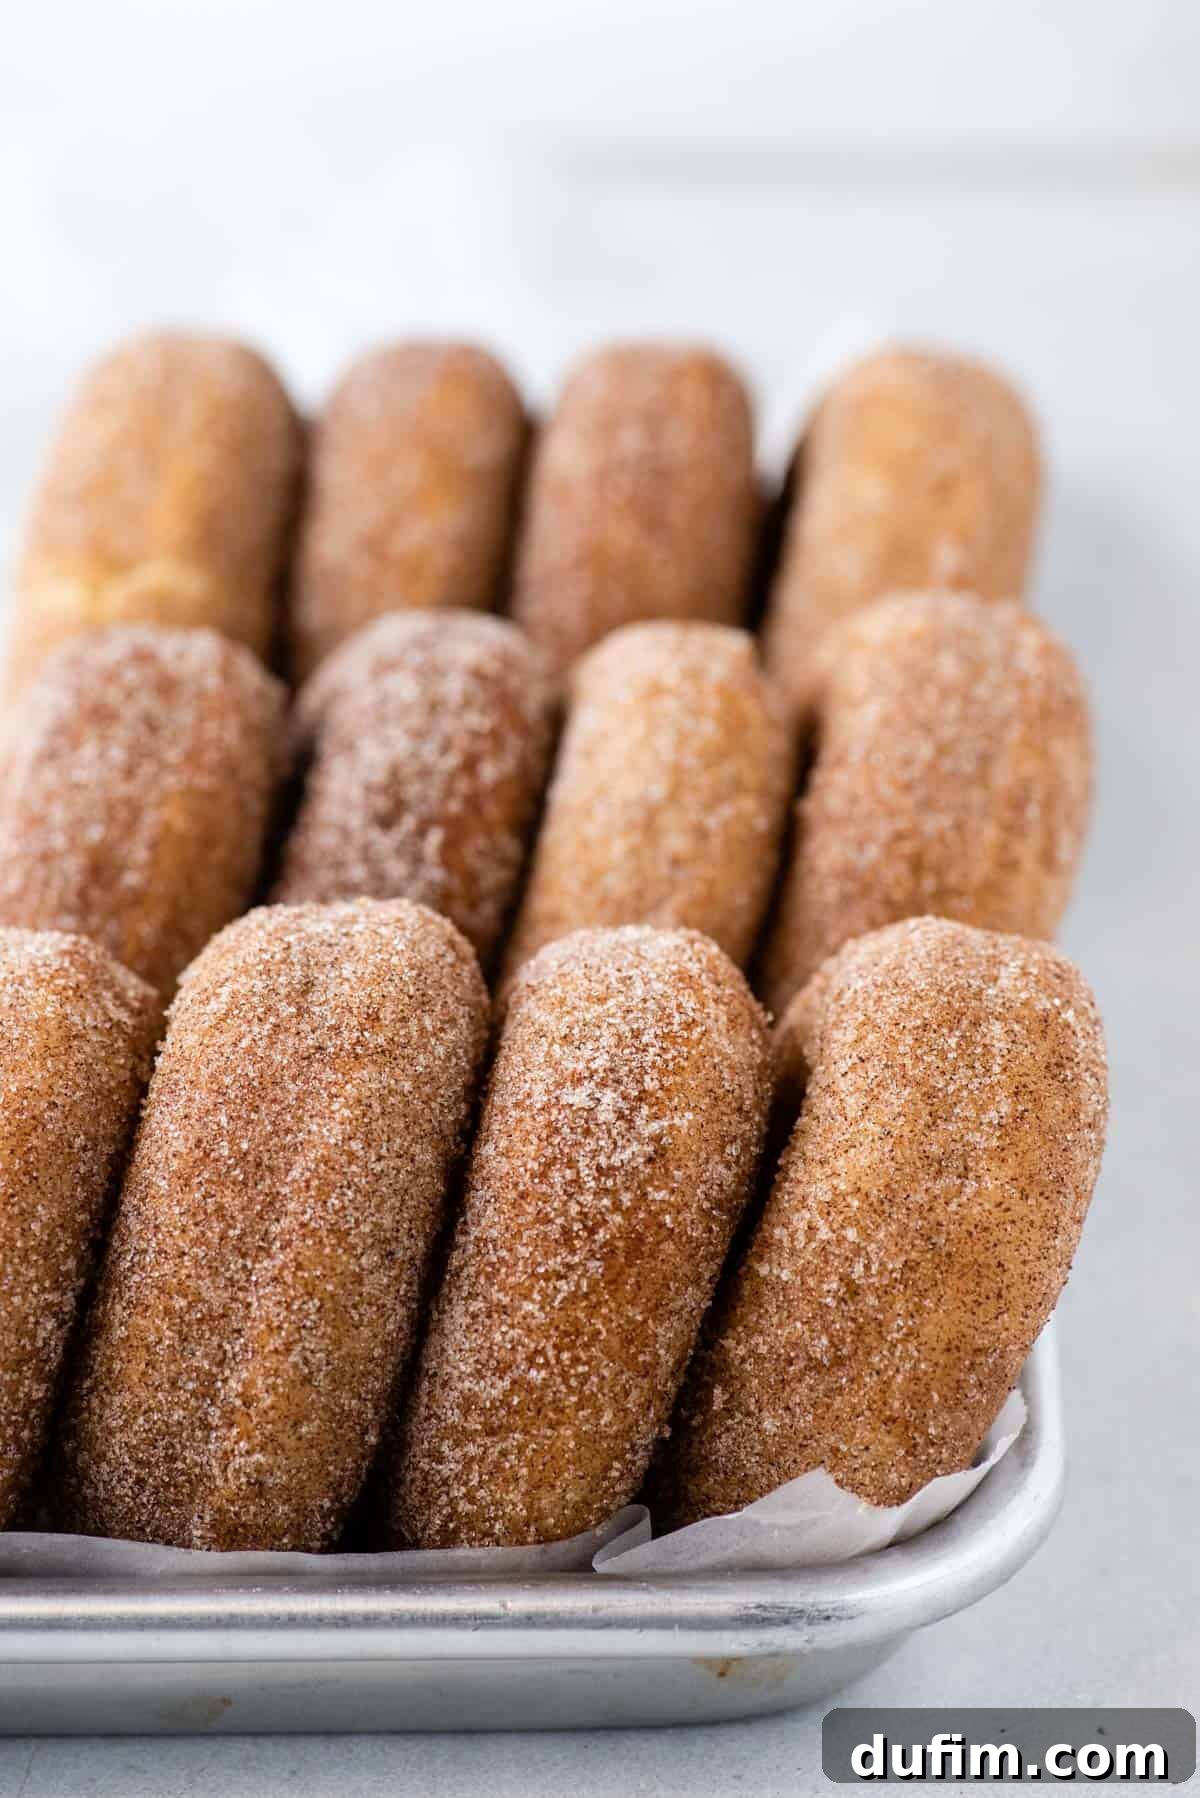
- Abundance of Flavor Choices: Why choose just one when you can have an assortment? This recipe goes beyond the basic donut, offering versatile options for classic glazes like Krispy Kreme-style, rich chocolate, delicate powdered sugar, and aromatic cinnamon sugar coatings. This variety ensures there’s a perfect topping for every donut lover!
- Healthier Indulgence: Baked donuts are a fantastic alternative to their fried counterparts, containing significantly less fat without compromising on flavor or texture. Enjoy a lighter treat that satisfies your sweet tooth, allowing for a guilt-free indulgence.
- Kid-Approved & Family Fun: Our recipe is designed for success and loved by children. Involve the little ones in the mixing and, especially, the decorating process for a fun and memorable family activity. Watching them customize their own “fancy sprinkle donuts” is half the joy!
Essential Ingredients for Perfect Baked Donuts
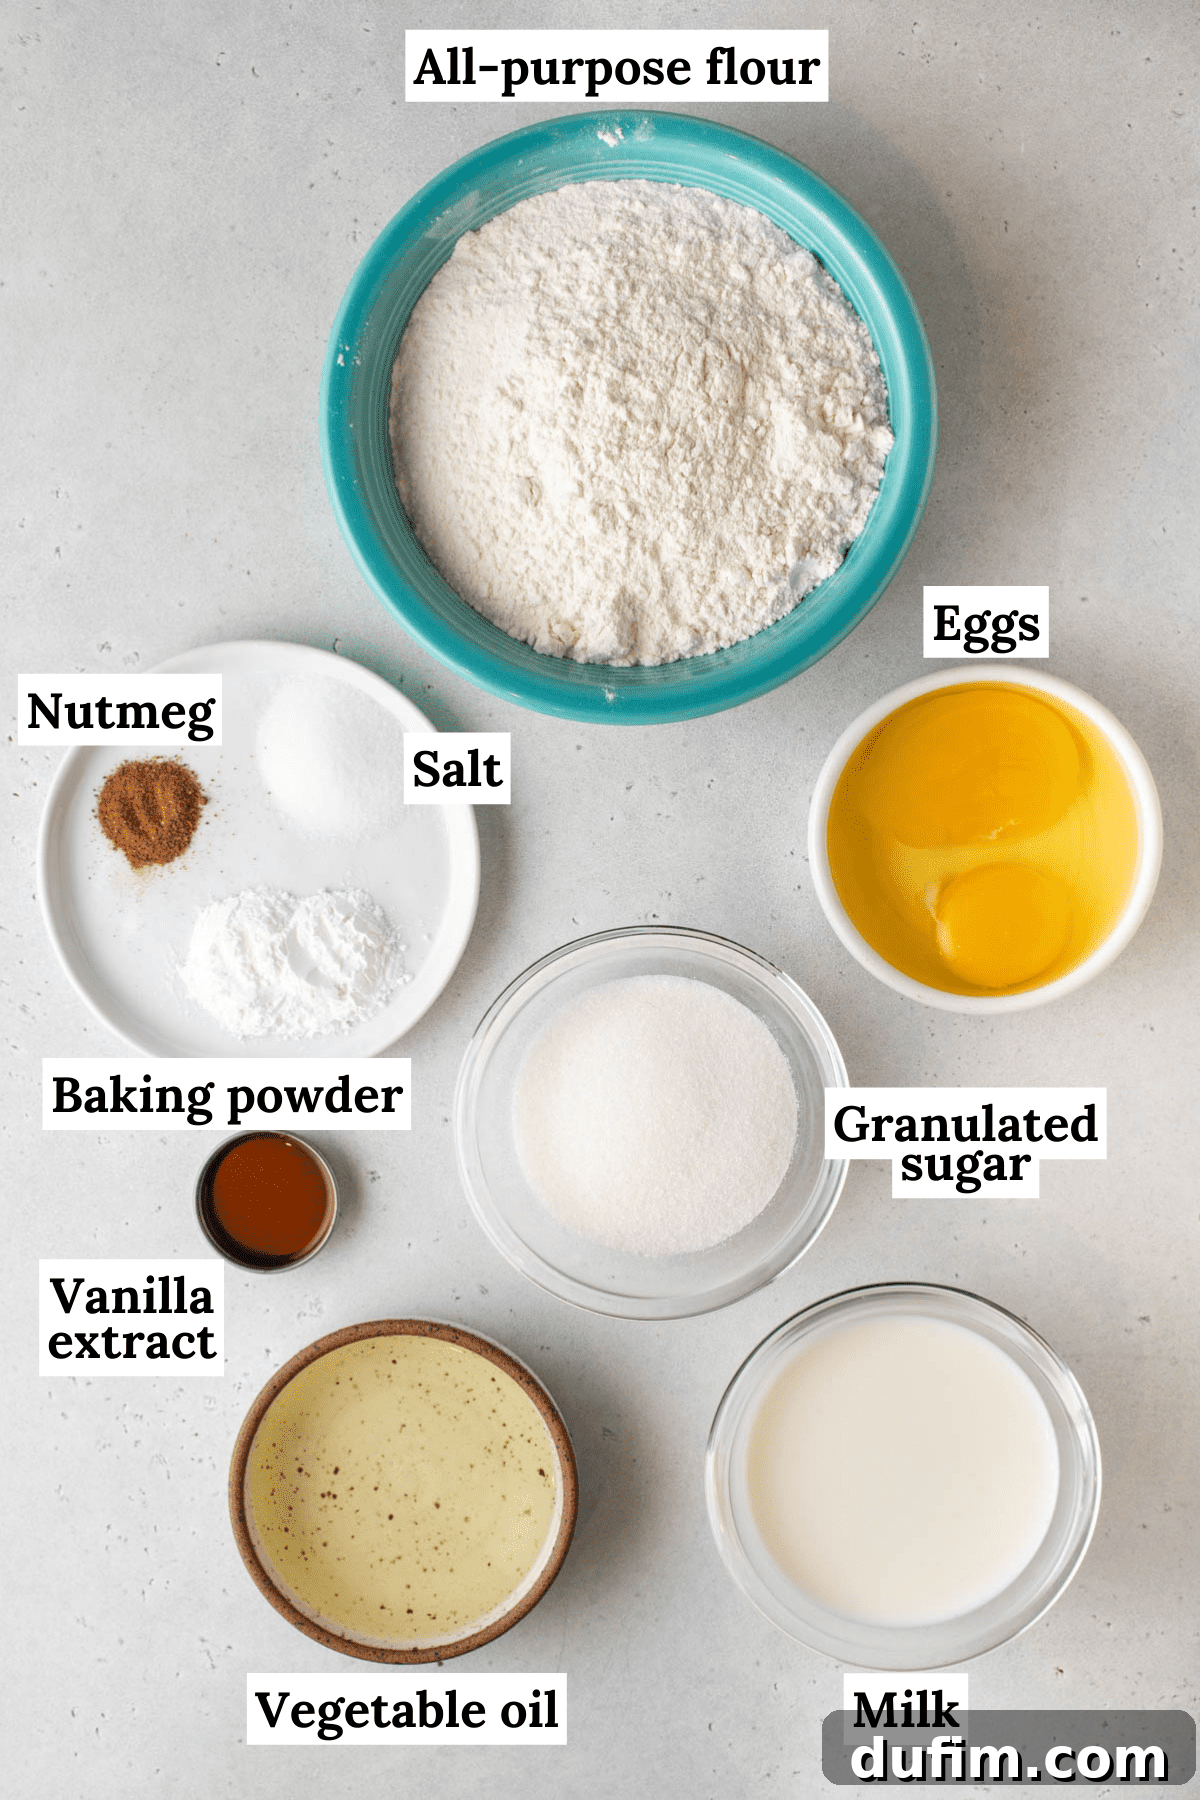
Creating these heavenly baked donuts requires less than 10 straightforward ingredients. Each component plays a vital role in achieving that perfect fluffy texture and delightful flavor profile. Here’s what you’ll need:
- All-purpose flour: The structural backbone of our donuts. Proper measurement is crucial for preventing a tough or overly dense texture.
- Nutmeg: This warming spice adds a distinctive, comforting flavor that is quintessential to a classic donut. Don’t skip it – it truly elevates the taste!
- Granulated sugar: Provides the perfect level of sweetness to the donut batter and contributes to a beautiful golden crust during baking.
- Baking powder: Our primary leavening agent, ensuring your donuts rise beautifully in the oven and achieve their signature light and airy crumb.
- Salt: A small amount of salt is essential for balancing the sweetness and enhancing all the other flavors in the batter, making them pop.
- Milk: Adds essential moisture and richness to the donuts. While whole milk provides the best flavor and a tender crumb, 2% milk can also be used successfully. Ensure it’s at room temperature for optimal mixing.
- Egg: Acts as a binder, adding richness, structure, and a lovely golden hue to the donuts. Using a large egg at room temperature will help it incorporate smoothly.
- Vanilla extract: Essential for that classic, comforting, and universally loved donut flavor. Opt for pure vanilla extract for the best aromatic results.
- Oil (Vegetable or Canola): Helps keep the donuts wonderfully moist and tender, contributing to their soft texture even after cooling.
How to Make Baked Donuts: A Step-by-Step Guide
Follow these simple steps to create a batch of irresistible homemade baked donuts. Remember, precision and gentle handling are key to achieving the perfect texture!
- Prepare the Donut Pan & Oven: Preheat your oven to 350°F (175°C). Generously spray your donut pan with non-stick cooking spray. Use a paper towel to thoroughly and evenly coat the inside of each donut well, including the center post. This ensures your donuts will release easily without sticking.
- Combine Dry Ingredients: In a medium-sized bowl, whisk together the all-purpose flour, nutmeg, granulated sugar, baking powder, and salt until they are well combined and no lumps remain. Whisking also helps to aerate the flour, contributing to a lighter donut texture. Set this bowl aside.
- Prepare the Wet Ingredients & Mix Batter: In a separate large mixing bowl, combine the milk, egg, vanilla extract, and oil. Use a whisk or spatula to gently beat these wet ingredients until they are just incorporated. Gradually add the dry ingredient mixture to the wet ingredients, mixing by hand with a spatula *just until combined*. It’s crucial not to overmix the batter; a few small lumps are perfectly acceptable. Overmixing will develop the gluten, resulting in tough donuts.
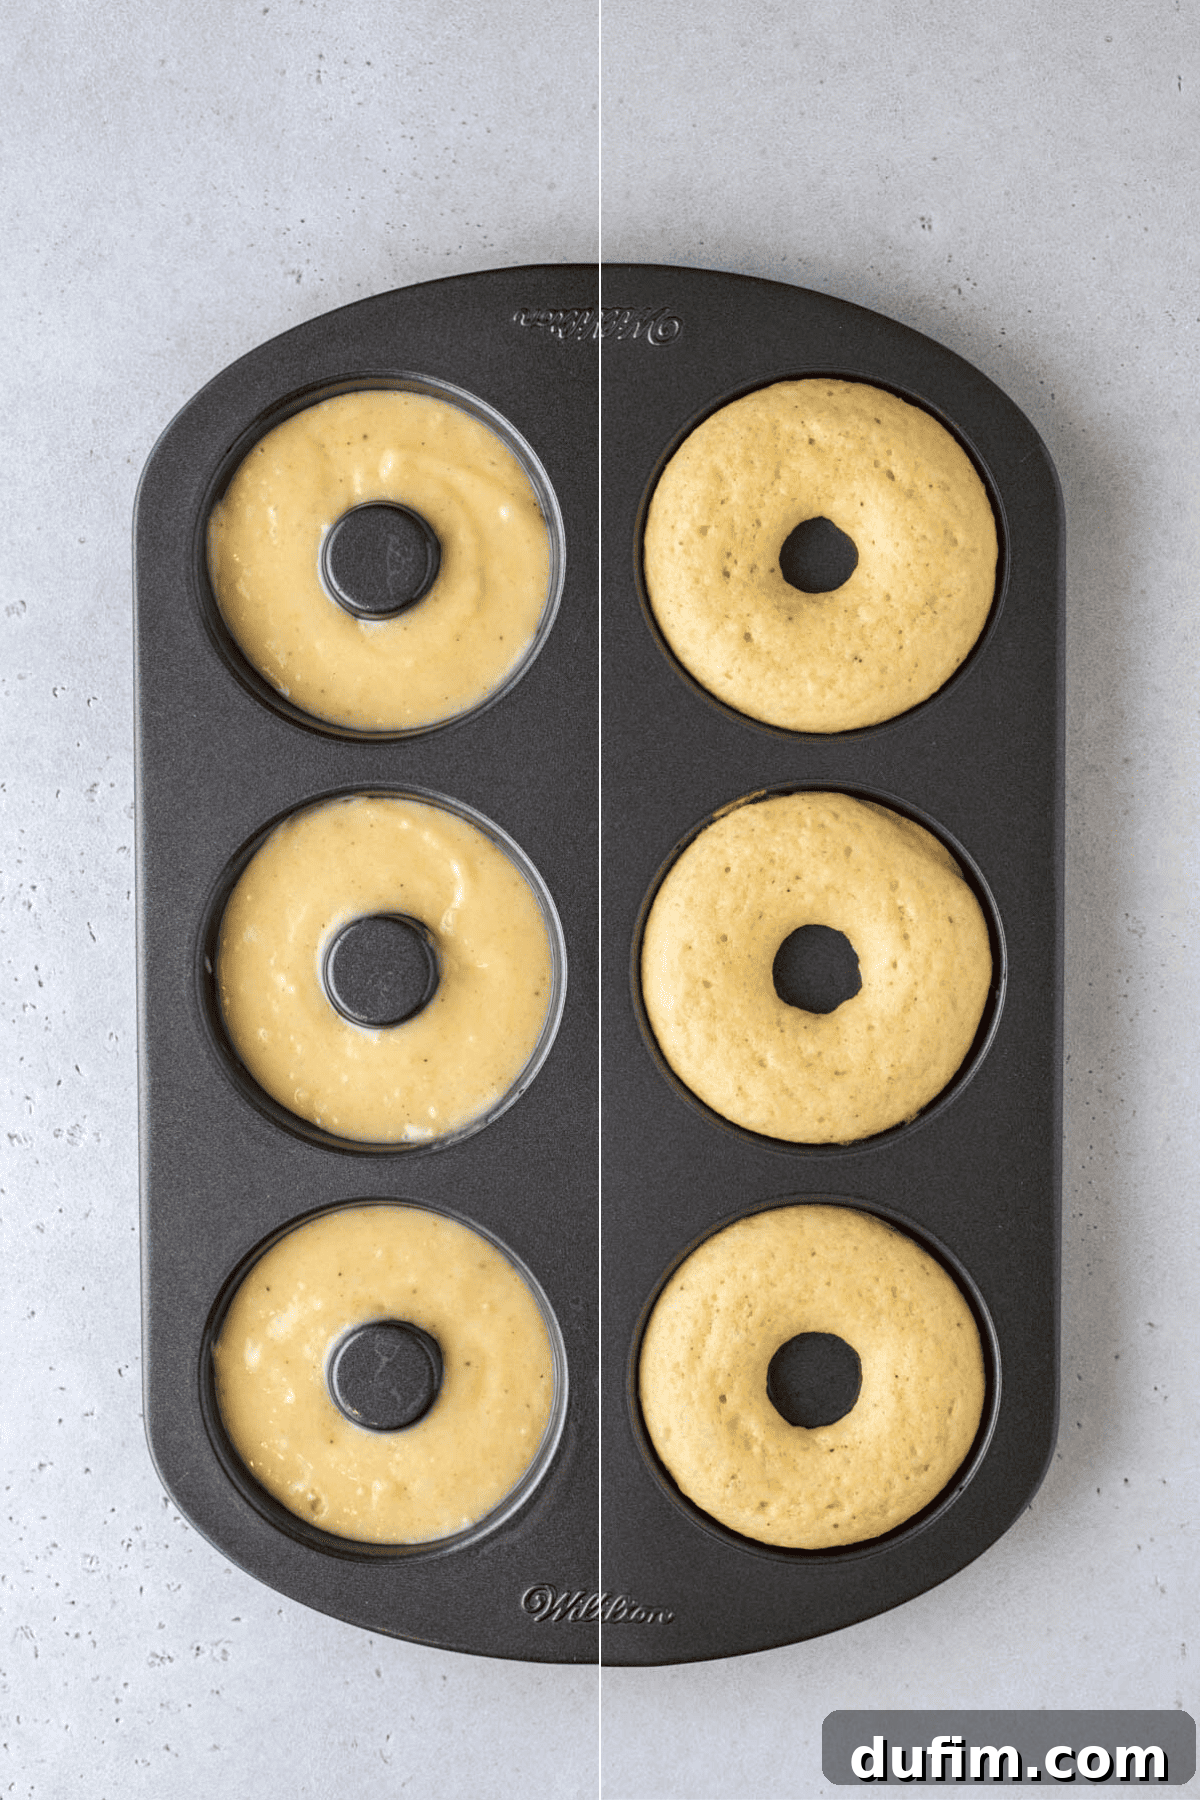
- Fill the Donut Pan: For neat, uniform donuts, transfer the batter into a large Ziploc bag. Snip off one corner of the bag (about a ½-inch opening) to create a makeshift piping bag. Pipe the batter evenly into each donut well, filling them approximately 1/2 to 3/4 full. Alternatively, you can use a cookie scoop to drop dollops of batter into the wells and then gently spread it with a small spatula to ensure an even surface.
- Bake & Cool: Bake the donuts for 10 to 11 minutes, or until they are golden brown around the edges and a toothpick inserted into the center of a donut comes out clean. Avoid overbaking, as this can dry them out. Allow the donuts to cool in the pan for 10 minutes. This cooling time helps them firm up, making them easier to handle. After 10 minutes, gently invert the donut pan onto a wire rack and tap it a few times to release the donuts. Let them cool completely on the rack before decorating.
Pro Tips for Baked Donut Perfection
Achieving bakery-quality baked donuts at home is easier than you think, especially with these insider tips to guide you through the process:
- Measure Flour Carefully: The most common baking mistake is incorrect flour measurement. Too much flour can lead to dense, dry donuts, while too little can make them too soft or crumbly. For ultimate accuracy, use a kitchen scale to measure flour by weight (grams). If you don’t have a scale, spoon the flour into your measuring cup and level it off with a straight edge (like the back of a butter knife) without packing it down.
- Avoid Overmixing the Batter: This cannot be stressed enough – overmixing is the arch-nemesis of tender baked goods. Mix your wet and dry ingredients only until they are just combined and no streaks of dry flour are visible. A slightly lumpy batter is actually ideal and will result in a much softer donut.
- Properly Fill the Donut Pan: For the neatest and most uniformly shaped donuts, piping the batter into the donut pan is highly recommended. A large Ziploc bag with a corner snipped off works perfectly as a makeshift piping bag. This method minimizes mess and ensures an even distribution of batter, which aids in consistent baking and a smooth surface for glazes. Fill each well about 1/2 to 3/4 full to allow for proper rising without overflowing.
- Know When Your Donuts Are Ready: Beyond visual cues like golden-brown edges, the toothpick test is your most reliable indicator. Insert a clean toothpick into the center of a donut; if it comes out clean or with a few moist crumbs, your donuts are perfectly baked. If it has wet batter clinging to it, bake for another minute or two.
- Help Toppings Stick: If you’re making cinnamon sugar or powdered sugar donuts and find the coating isn’t adhering well, a simple trick is to lightly brush the warm (but not hot) donuts with a bit of melted unsalted butter before tossing them in your chosen coating. The butter creates a slightly sticky surface that allows the sugars to cling beautifully.
- Use Room Temperature Ingredients: Ensure your milk and eggs are at room temperature. This allows them to emulsify and combine more easily and thoroughly with the other ingredients, leading to a smoother batter and a more consistent, tender crumb in your final donuts.
How to Properly Measure Flour for Baking Success
Accurate flour measurement is a foundational skill for successful baking. Here’s how to do it right:
- Use a Kitchen Scale: The most precise method is to use a digital kitchen scale, weighing your flour in grams. This eliminates variations due to packing.
- Spoon and Level Method (if no scale):
- Aerate the flour: Flour can become compact as it sits. Use a whisk or spoon to gently fluff up the flour in its container before measuring. This is aerating, not sifting, unless your recipe specifically calls for sifting.
- Spoon into measuring cup: Gently spoon the aerated flour into your dry measuring cup. Do not scoop directly from the bag, as this compacts the flour.
- Level off: Use the straight edge of a butter knife or a flat spatula to level off the excess flour from the top of the measuring cup. Do not tap the cup against the counter, as this will pack the flour down.
Pro-Tips for Filling Your Donut Pan Easily
Using the right tools and technique for filling your donut pan can make a significant difference in the final appearance and consistency of your baked donuts. I highly recommend investing in a good quality non-stick donut pan.
Before filling, always spray the pan generously with nonstick cooking spray. Then, take a paper towel and wipe the spray around each donut well to ensure an even coating. This little step dramatically helps with easy release after baking.
Next, for transferring the batter, my preferred method is to use a piping bag fitted with a large round tip. If you don’t have one, a simple Ziploc bag with one corner snipped off works perfectly! Twist the top of the bag closed to create pressure, then pipe the batter into each donut well. Aim to fill them about 1/2 to 3/4 full. While you can use a cookie scoop to drop dollops of batter, I find piping is less messy and helps create more uniformly shaped donuts with a smoother top, which is ideal for glazing.
Total Time Required for Baked Donut Bliss
From start to finish, these delicious baked donuts come together remarkably quickly, making them perfect for a spontaneous treat or a fun weekend breakfast:
- Prep Time: 10 minutes (for mixing batter and filling the pan)
- Bake Time: 10-13 minutes (depending on your oven)
- Cooling & Glazing Time: 10-15 minutes (to allow donuts to cool and glazes to set)
- Total Time: Approximately 30-38 minutes
Delicious Glazes & Toppings for Your Baked Donuts
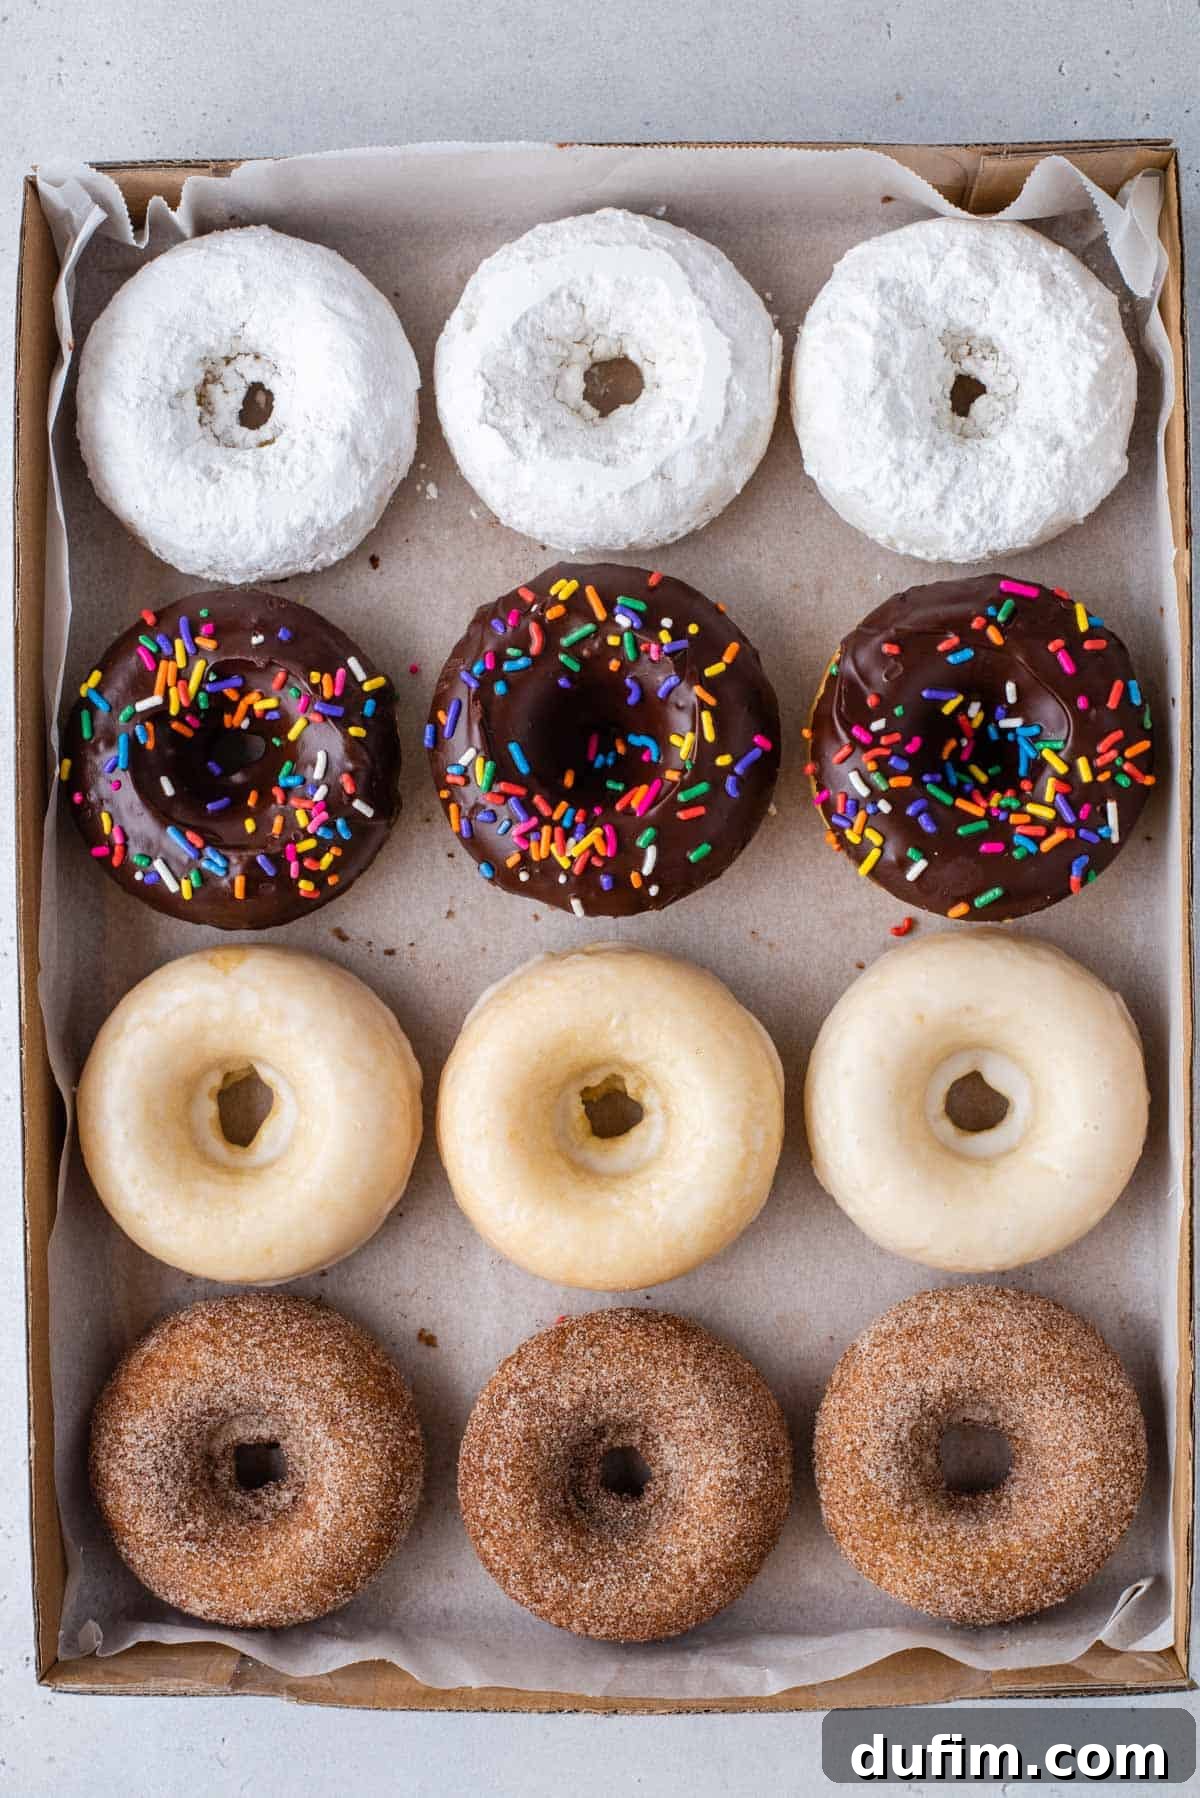
Now for the most exciting part – customizing your baked vanilla donuts with delectable glazes and toppings! This is where you can truly let your creativity shine and tailor each donut to your liking. We’ve included recipes for four classic donut glazes that are sure to impress. Note that each recipe yields enough glaze for 12 donuts, so if you plan to make multiple flavors, simply cut each glaze recipe in half.
Rich Chocolate Glaze
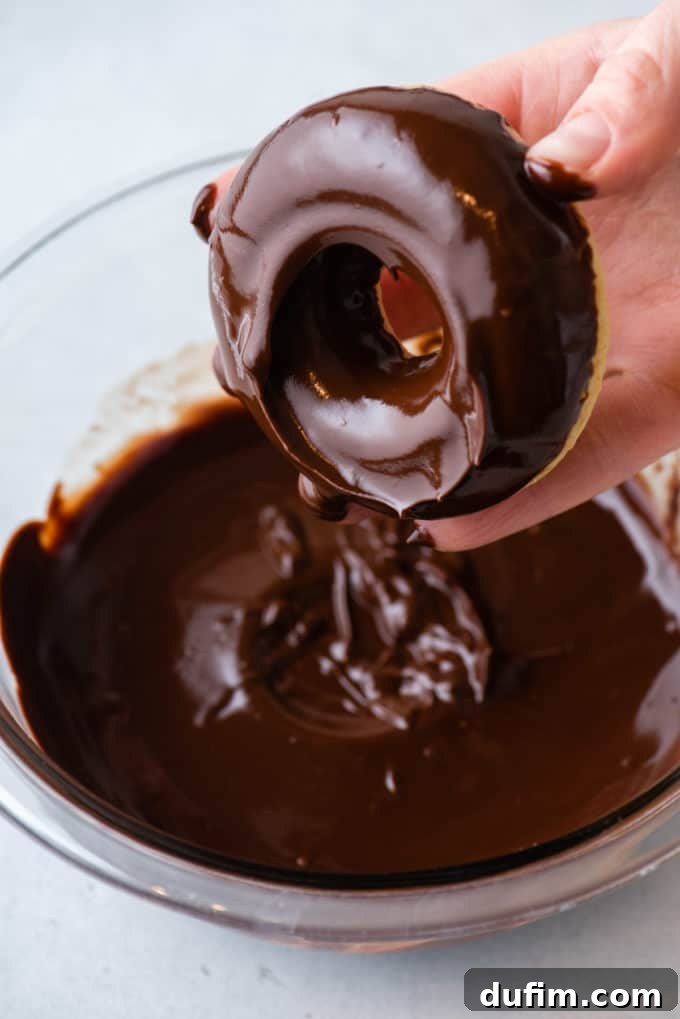
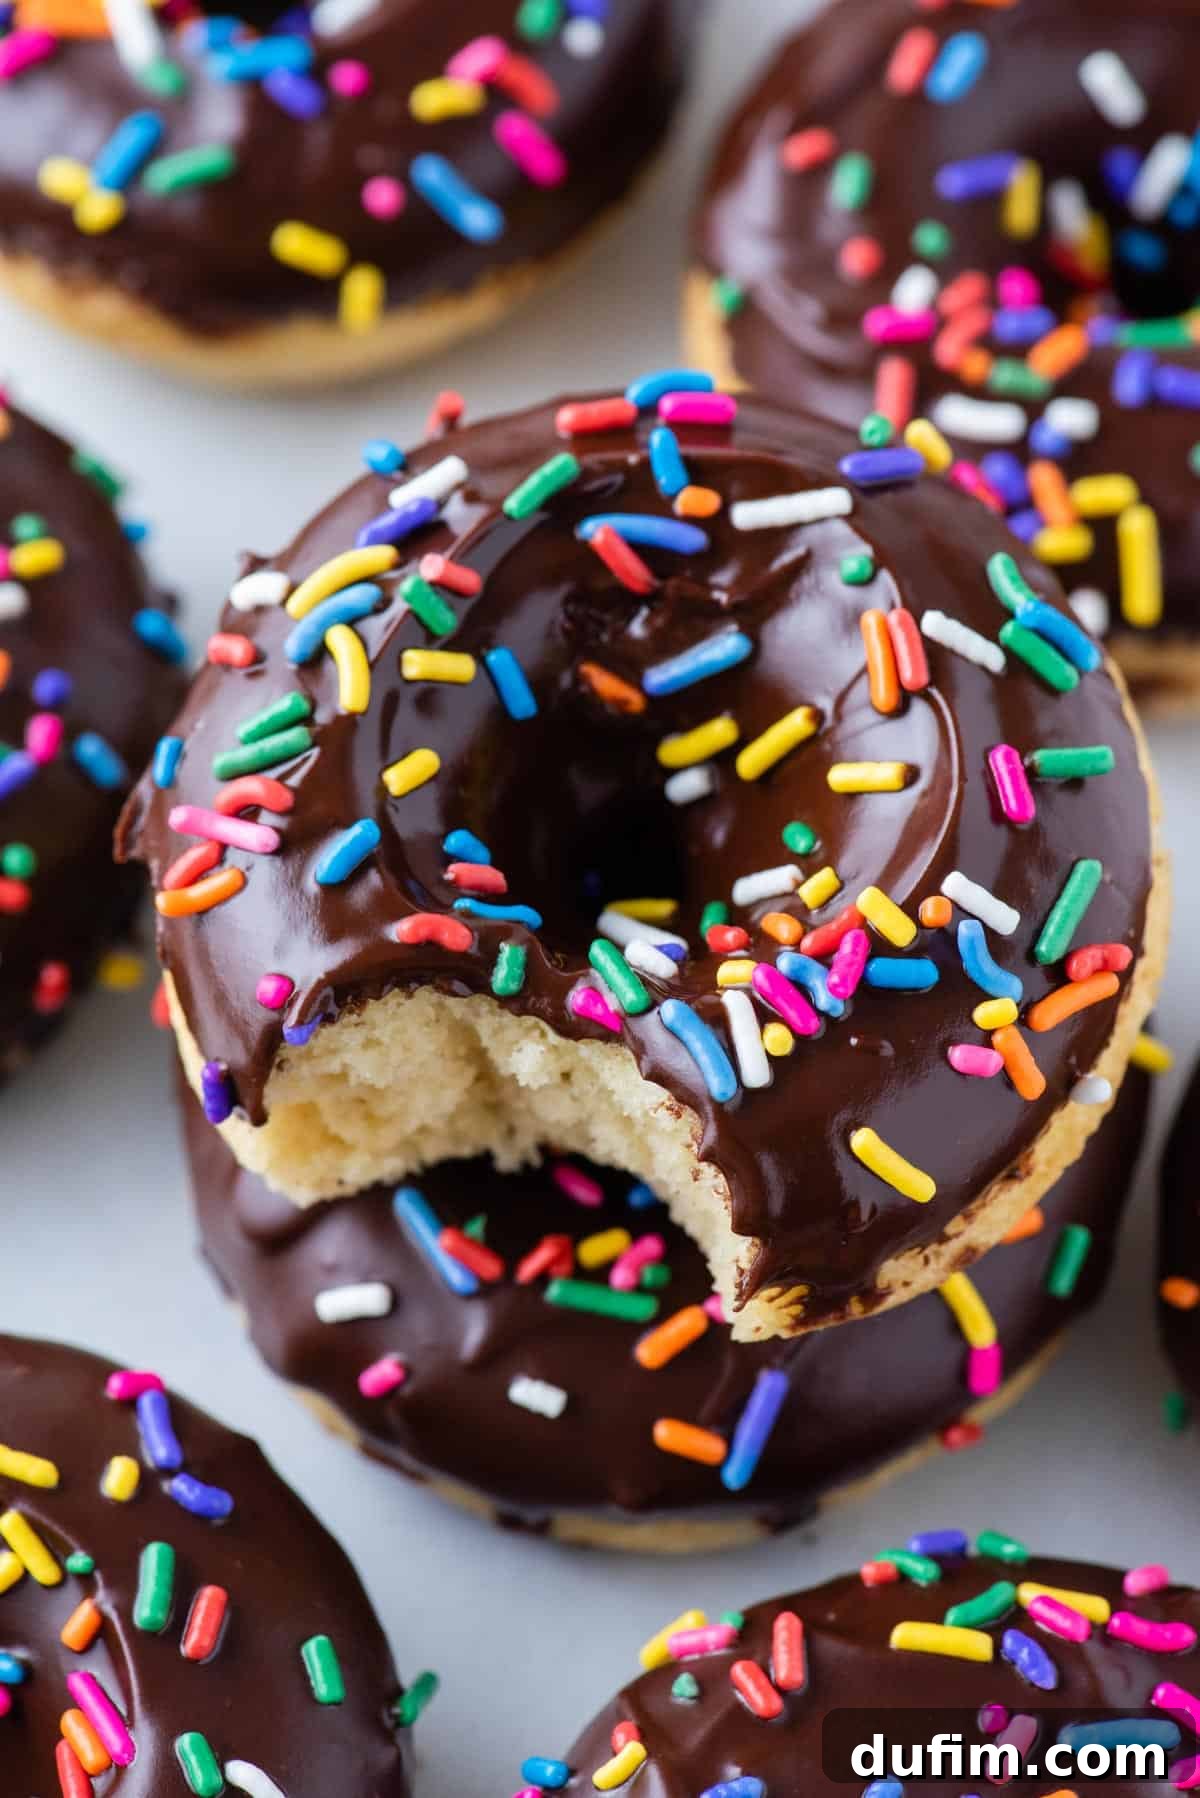
Indulge in the decadent bliss of a rich chocolate glaze, perfect for any chocolate lover. It sets beautifully and is ideal for adding sprinkles!
- Semi-sweet chocolate chips: For the best flavor, always choose a high-quality brand of chocolate chips.
- Unsalted butter: Adds a luscious richness and helps create a smooth, pliable glaze.
- Light corn syrup: This secret ingredient provides a beautiful, professional-looking shine to your glaze and helps prevent it from crystallizing.
- Rainbow sprinkles: Completely optional, but who can resist the festive charm of colorful sprinkles?
Classic Krispy Kreme Style Glaze
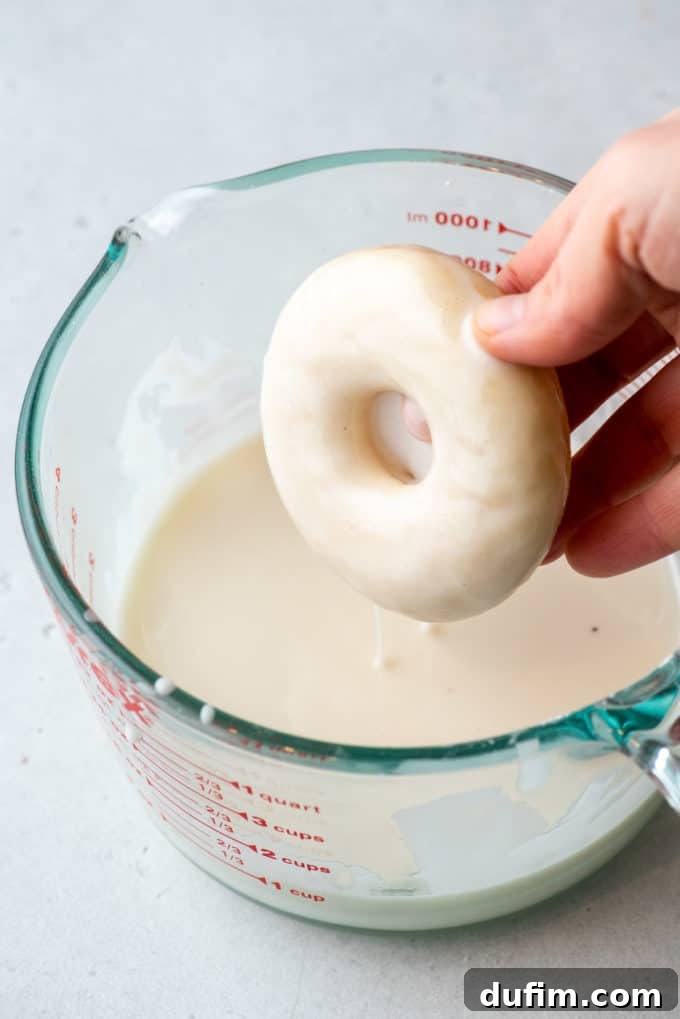
Recreate the iconic, melt-in-your-mouth experience of a classic glazed donut with this simple yet irresistible copycat Krispy Kreme glaze.
- Powdered sugar (confectioners’ sugar): The essential base for this smooth, sweet glaze. Sift it for the silkiest results.
- Milk (whole milk recommended): Used to achieve the perfect pourable consistency. Adjust the amount as needed – a bit more for a thinner glaze, a bit less for a thicker one.
- Vanilla extract: A touch of pure vanilla enhances the classic sweetness and adds depth to the flavor.
Simple Powdered Sugar Coating
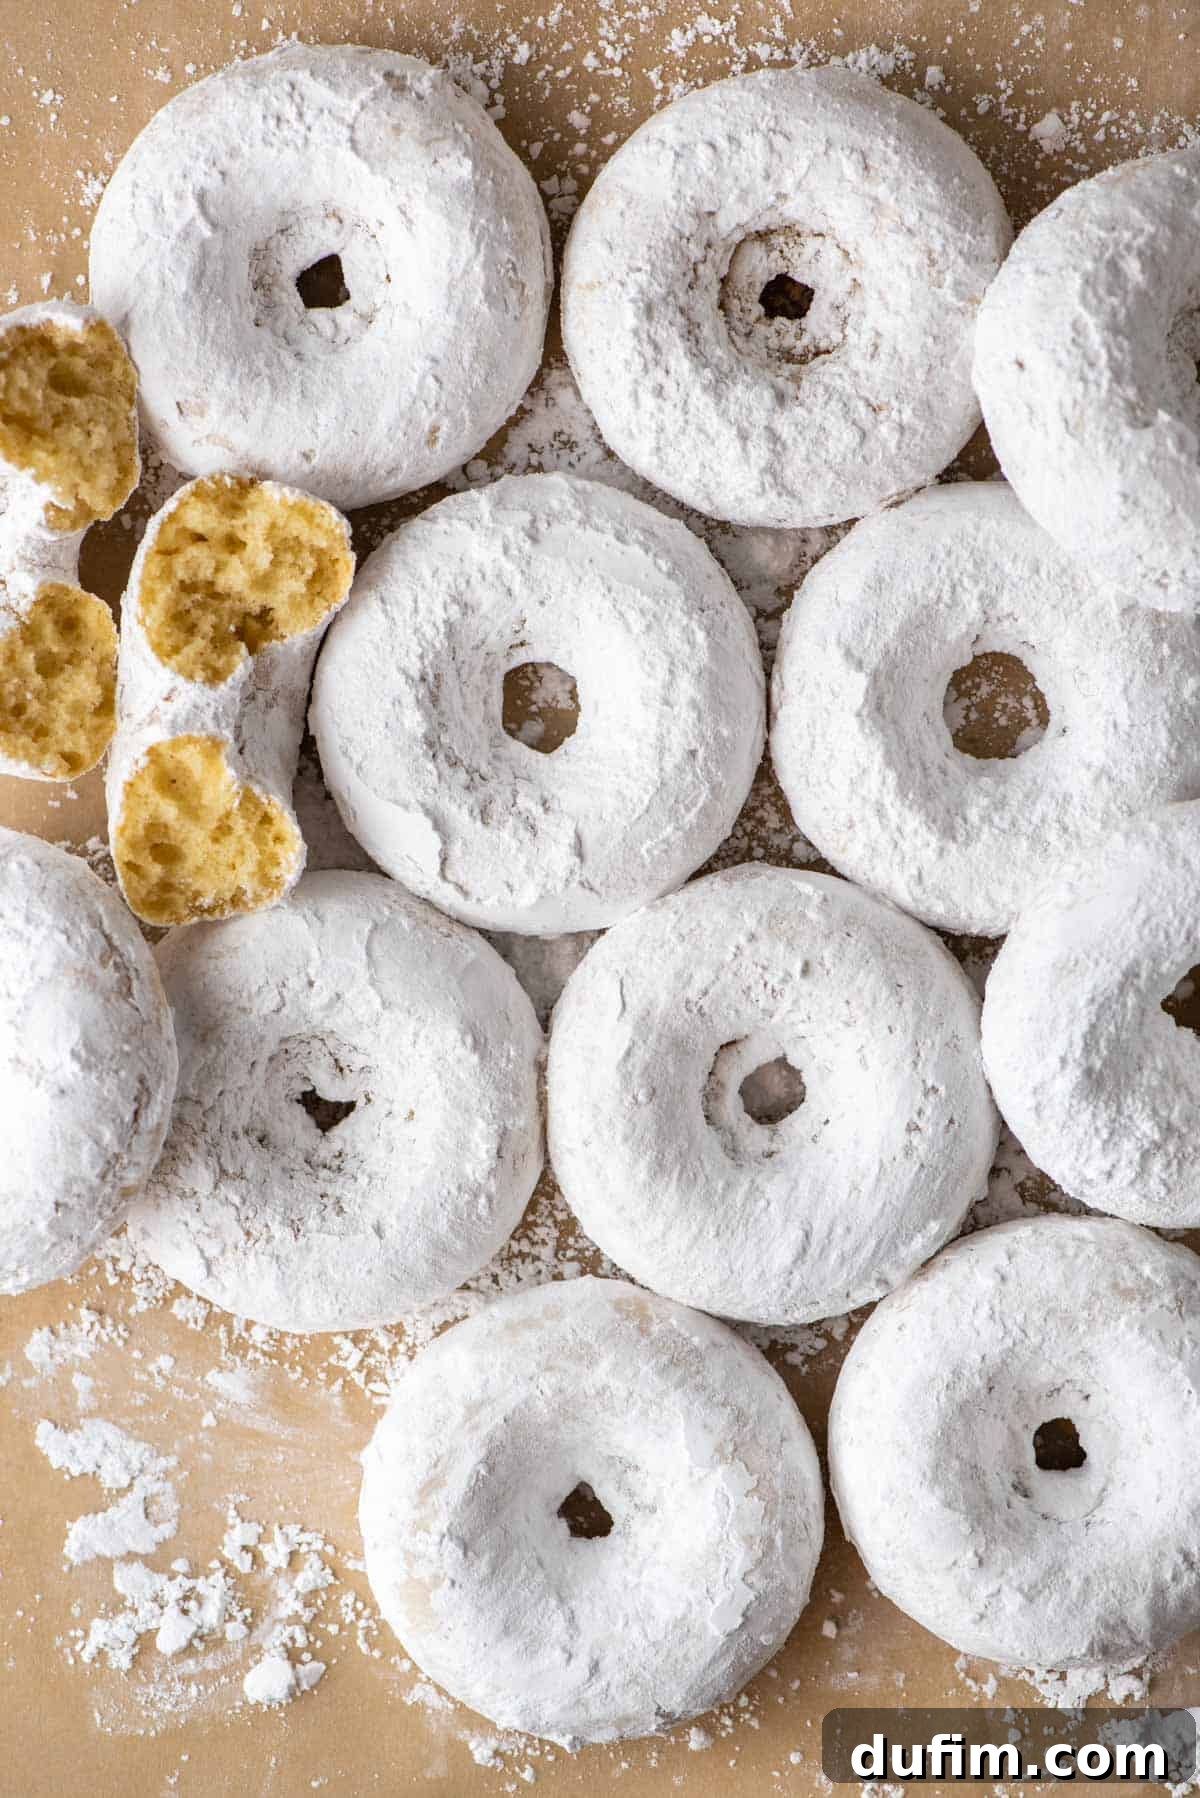
For an elegantly simple finish that lets the donut flavor truly shine, a dusting of powdered sugar is a timeless choice. It’s light, sweet, and incredibly easy.
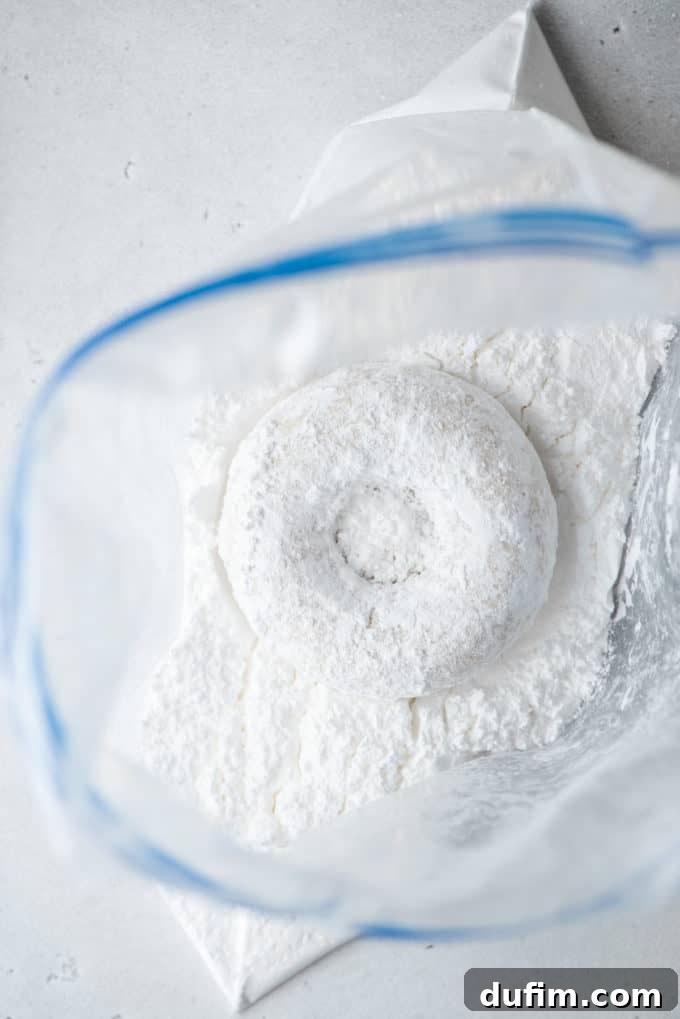
- Powdered sugar: The only ingredient you need for this effortlessly delicious gluten-free donut topping!
- (Optional) Melted butter: A small amount to lightly brush on donuts before coating to help the sugar adhere better.
Aromatic Cinnamon Sugar Coating
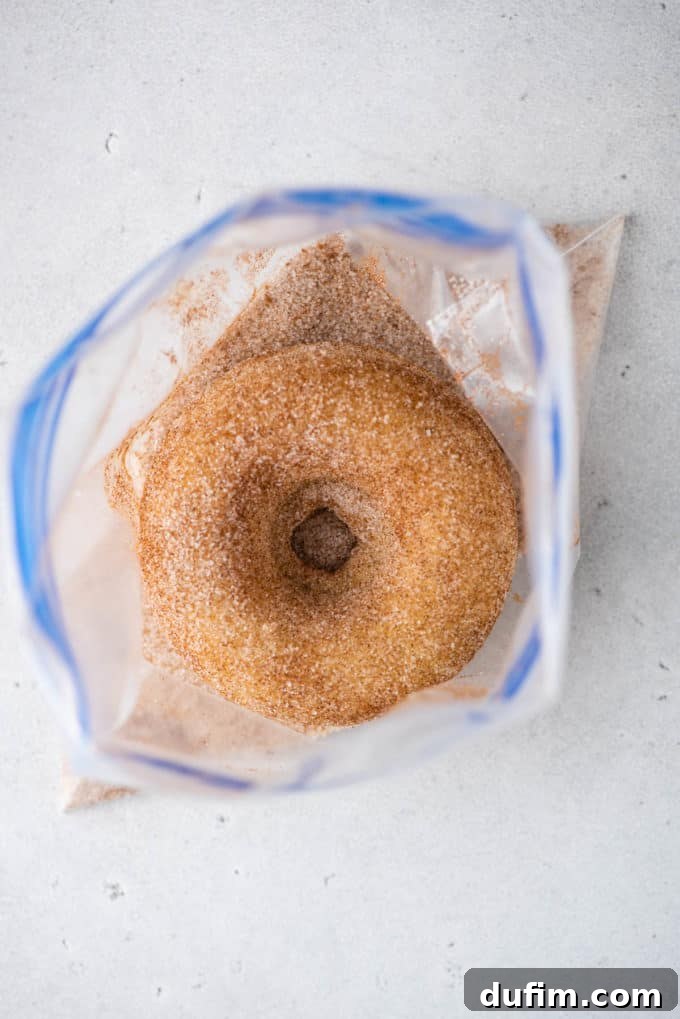
Warm, comforting, and wonderfully aromatic, a cinnamon sugar coating adds a delightful spice and a slight textural crunch to your baked donuts.
- Granulated sugar: Provides the sweet base for this classic coating.
- Cinnamon: Ground cinnamon is the star, bringing warmth and a fragrant spice. Adjust to your preferred intensity.
- (Optional) Melted butter: As with powdered sugar, a light brush of butter will make this coating stick perfectly.
Make Them Gluten-Free: A Delicious Alternative!
Don’t let dietary restrictions keep you from enjoying these delightful treats! Our baked donut recipe is incredibly versatile and can be easily adapted to be gluten-free, yielding equally fantastic results. I’ve personally made these donuts with both regular all-purpose flour and various gluten-free flour blends on multiple occasions, consistently achieving awesome results.
The key to successful gluten-free baking is often a high-quality, ‘measure for measure’ or ‘1-for-1’ gluten-free all-purpose flour blend. For this recipe, I highly recommend King Arthur’s Gluten Free Measure for Measure Flour. This specific blend is expertly formulated to substitute traditional wheat flour at a direct 1:1 ratio, simplifying the conversion process significantly.
When using gluten-free flour, you might notice the batter is slightly thicker or requires a tiny bit more liquid. Trust your instincts and adjust if necessary, but generally, the direct swap works wonderfully. You’ll still achieve wonderfully light and fluffy donuts that taste just as good as their gluten-containing counterparts!
Storing Your Homemade Baked Donuts
To keep your delicious homemade baked donuts fresh and flavorful for as long as possible, proper storage is key. Whether you plan to enjoy them within a few days or save them for a future treat, here are the best ways to store them:
- Room Temperature Storage: These donuts can be stored at room temperature for 2 to 3 days. It’s crucial that they cool completely before storing, especially if they are glazed. Place them in an airtight container to protect them from air exposure and prevent them from drying out. Storing them cool prevents any moisture from building up inside the container, which can make them mushy or sticky.
- Freezing Baked Donuts: Baked donuts freeze beautifully, allowing you to enjoy fresh-tasting treats whenever you like.
- Preparation for Freezing: Allow the donuts to cool completely. If you’ve added a glaze, ensure it has fully set and hardened before proceeding.
- Wrapping: Individually wrap each cooled donut tightly in plastic wrap. This step prevents freezer burn and helps maintain their freshness.
- Container: Place the individually wrapped donuts inside a freezer-safe Ziploc bag or an airtight freezer container.
- Freezer Life: Store in the freezer for up to 3 months.
- Thawing Instructions: To enjoy, simply place the frozen donuts on the counter to thaw at room temperature for about 30 minutes. For a warm, just-baked experience, microwave an unwrapped donut for 15-20 seconds.
Frequently Asked Questions About Baked Donuts
Homemade baked donuts can become tough if the batter is overmixed, causing too much gluten to develop. Overmixing leads to a dense, chewy texture rather than the desired light and fluffy crumb. Additionally, using too much flour or baking the donuts for too long at too high a temperature can also contribute to a tougher texture.
Baked donuts might turn crispy if they are baked at too high a temperature or for too long, causing them to dry out and harden. Over-baking evaporates too much moisture. Using an excessive amount of sugar in the recipe can also lead to a crispier exterior, as sugar caramelizes and hardens when baked.
Absolutely! While a donut pan is ideal for the classic shape, you can certainly make baked donuts without one. A simple workaround is to use a muffin pan. Fill muffin cups about two-thirds full with the donut batter. They won’t have the traditional donut shape, but they will still taste just as delicious and have the same tender texture.
Making baked donuts requires minimal equipment: a non-stick donut pan, two mixing bowls (one large, one medium), a whisk, a rubber spatula, and ideally a piping bag or a large Ziploc bag for easily filling the donut wells. A kitchen scale is also recommended for precise flour measurement.
It’s generally not recommended to prepare the donut batter too far in advance. The baking powder begins to activate as soon as it comes into contact with the wet ingredients. If the batter sits for too long (more than 30 minutes to an hour), the leavening agents can lose their potency, resulting in flatter, denser donuts. For best results, mix the batter just before baking.
More Delicious Breakfast & Dessert Recipes
If you loved making these baked donuts, be sure to explore our other fantastic breakfast and dessert recipes:
- Irresistible Chocolate Chip Scones
- Fluffy Coffee Cake Muffins
- Seasonal Pumpkin Spice Donuts
- Classic Chocolate Chip Muffins
- Perfect Blueberry Muffins
4.15 from 157 ratings
Rate this recipe!
Vanilla Donut Recipe (Baked)
By: Beth
This baked donut recipe is our absolute favorite! Easily whip up these homemade donuts with a variety of glaze choices. This recipe has been tested and proven, and it even includes an outstanding gluten-free donut option.
Rate Recipe
Print Recipe
Equipment
- Donut Pan
- Kitchen Scale (recommended for accuracy)
- Glass Mixing Bowls (various sizes)
- Whisk & Spatula
- Ziploc bag or piping bag
Ingredients
For the Donuts
- 2 cups (240g) all-purpose flour
- ½ tsp nutmeg
- ½ cup (99g) granulated sugar
- 2 tsp baking powder
- 1 tsp salt
- ½ cup + 2 Tbsp milk (whole milk recommended)
- 2 large eggs
- 1 tsp vanilla extract
- ¼ cup + 2 Tbsp vegetable oil
For the Chocolate Glaze
- ½ cup (85g) semi-sweet chocolate chips
- 2 Tbsp unsalted butter
- 2 tsp light corn syrup
- Rainbow sprinkles (optional)
For the Krispy Kreme Style Glaze
- 1 ½ cups (169g) powdered sugar
- 1-2 Tbsp milk (whole milk recommended)
- 1 tsp vanilla extract
For the Powdered Sugar Coating
- 1 cup (113g) powdered sugar
- (Optional) Melted unsalted butter, for brushing
For the Cinnamon Sugar Coating
- ⅔ cup (133g) granulated sugar
- 2 tsp cinnamon
- (Optional) Melted unsalted butter, for brushing
Instructions
For the Donuts (Yields 12 donuts)
- Preheat the oven to 350ºF (175°C). Spray a donut pan with non-stick cooking spray, then use a paper towel to evenly coat the entire donut well and center post.
- In a smaller bowl, combine the flour, nutmeg, granulated sugar, baking powder, and salt. Whisk until combined. Set aside.
- In a mixing bowl, combine the milk, eggs, vanilla extract, and vegetable oil. Use a whisk or spatula to beat until just combined. Gradually add the flour mixture, mixing by hand with a spatula just until combined. Be careful not to overmix; a few lumps are fine.
- Transfer the batter to a Ziploc bag (with one corner cut off) or a piping bag. Pipe the batter into the donut wells, filling them 1/2 to 3/4 full. Alternatively, use a cookie scoop and gently spread the batter with a small spatula if needed.
- Bake for 10-11 minutes, or until a toothpick inserted in the center of a donut comes out clean. Allow the donuts to cool for 10 minutes in the donut pan. Then, carefully turn the donut pan upside down and tap it against a counter a few times to release the donuts. Transfer to a wire rack to cool completely before decorating.
For the Chocolate Glaze
- In a microwave-safe bowl, combine the chocolate chips, butter, and corn syrup. Microwave on 50% power for 60-90 seconds, stirring every 30 seconds, until fully melted and smooth.
- Transfer the glaze to a shallow dish. Dip one cooled donut at a time into the glaze, allowing any excess to drip off back into the bowl. Place on a wire rack to set for 1-2 minutes, then add sprinkles if desired.
For the Krispy Kreme Style Glaze
- In a small bowl, combine the powdered sugar, milk (start with 1 Tbsp), and vanilla extract. Whisk until smooth and pourable. Add more milk (a tiny bit at a time) if it’s too thick, or more powdered sugar if it’s too runny, until desired consistency is reached.
- Transfer the glaze to a shallow dish. Dip one cooled donut at a time into the glaze, allowing the excess to fall off into the bowl. For a thicker coating, I recommend dipping donuts twice, allowing about 15 minutes of resting time between each dip.
For the Powdered Sugar Coating
- Put the powdered sugar in a large Ziploc bag. If desired, lightly brush cooled donuts with melted unsalted butter. Add one donut at a time to the bag, seal, and shake gently to coat completely. Repeat as necessary.
For the Cinnamon Sugar Coating
- Combine the granulated sugar and cinnamon in a large Ziploc bag. If desired, lightly brush cooled donuts with melted unsalted butter. Add one donut at a time to the bag, seal, and shake gently to coat completely. Repeat as necessary.
Video Tutorial
Watch our step-by-step video for a visual guide on making these amazing baked donuts!
Notes
This recipe consistently delivers fantastic results even when made gluten-free! We highly recommend King Arthur Gluten Free Measure for Measure Flour for a successful 1:1 substitute.
Nutrition Information
All nutritional values are approximate and provided to the reader as a courtesy. Changing ingredients and/or quantities will alter the estimated nutritional calculations.
- Calories: 375kcal
- Carbohydrates: 67g
- Protein: 4g
- Fat: 11g
- Saturated Fat: 4g
- Polyunsaturated Fat: 3g
- Monounsaturated Fat: 3g
- Trans Fat: 0.1g
- Cholesterol: 38mg
- Sodium: 284mg
- Potassium: 98mg
- Fiber: 1g
- Sugar: 49g
- Vitamin A: 127IU
- Vitamin C: 0.01mg
- Calcium: 71mg
- Iron: 2mg
Like this recipe? Rate and comment below!