

The Ultimate Apple Coffee Cake: Double the Crumb, Irresistible Fall Flavor
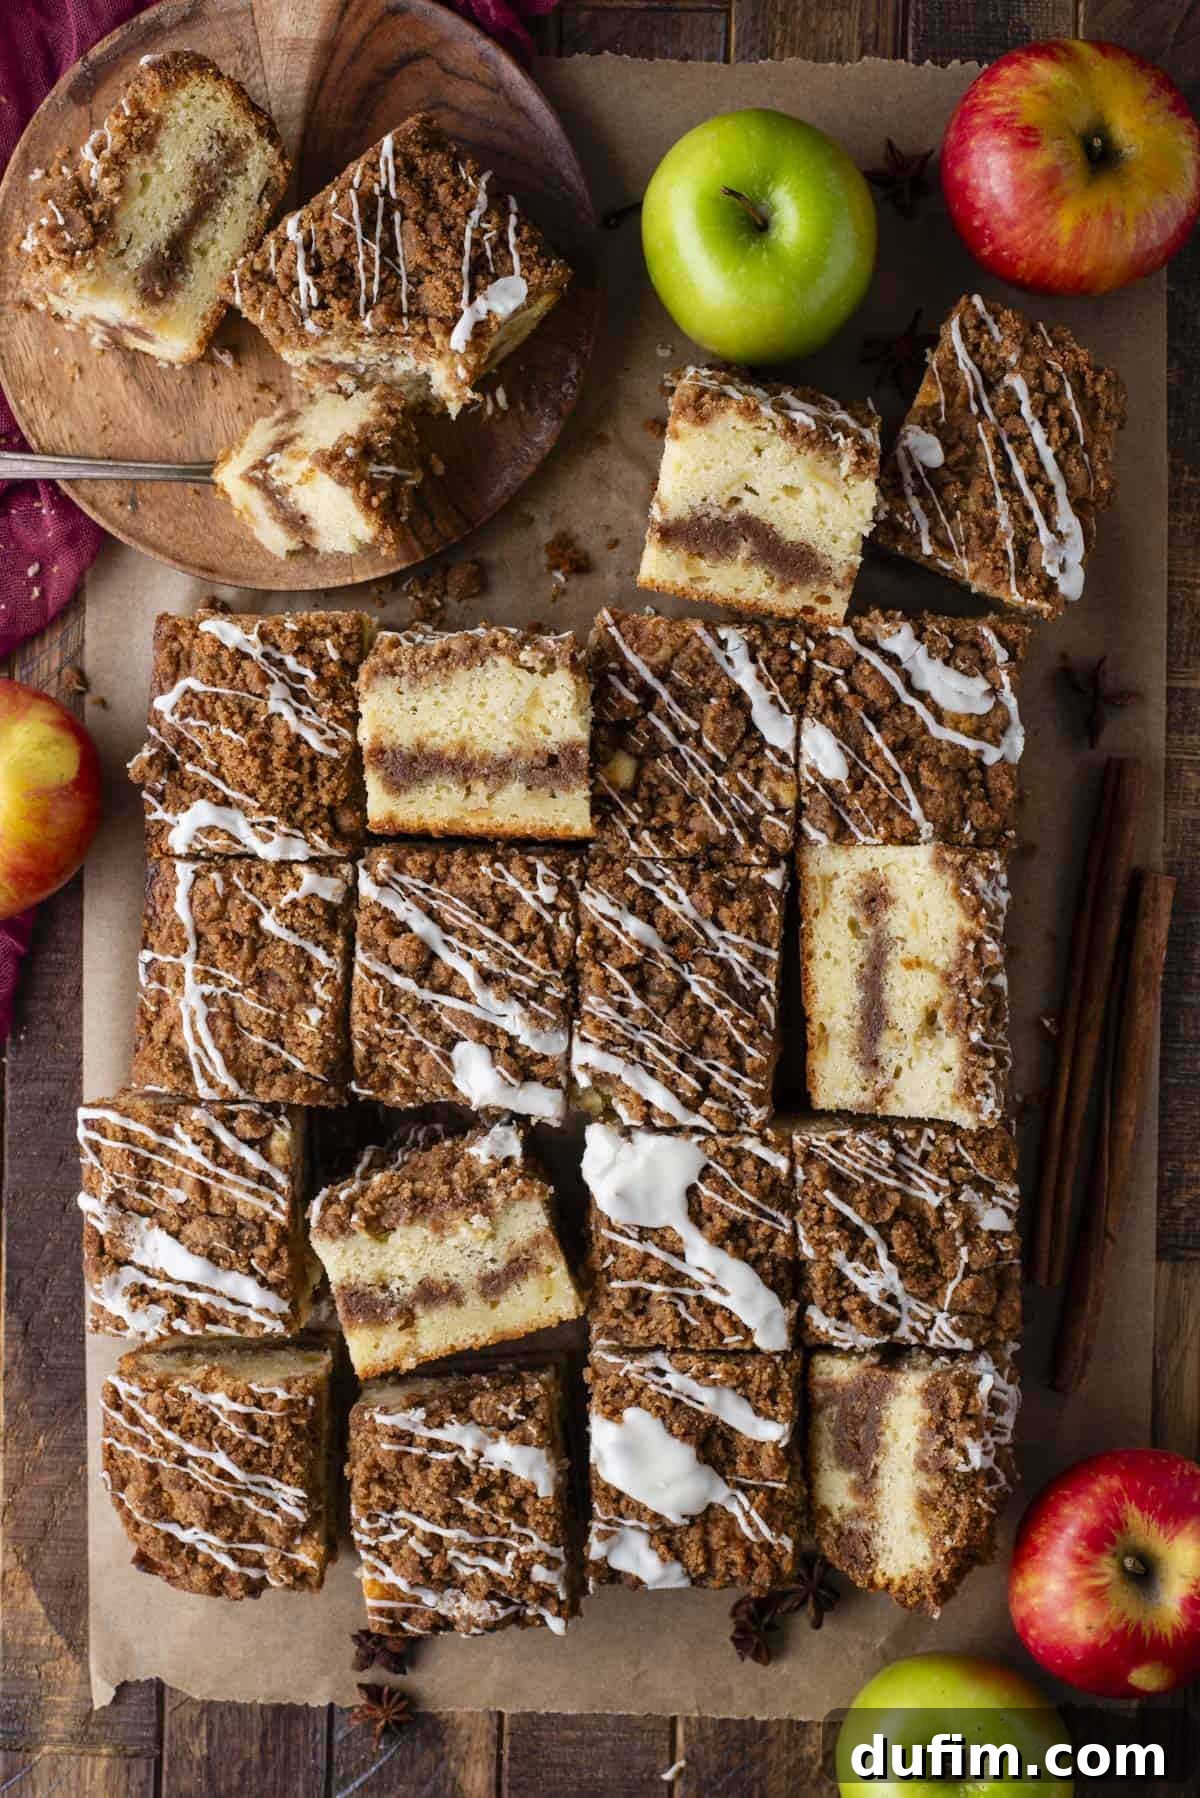
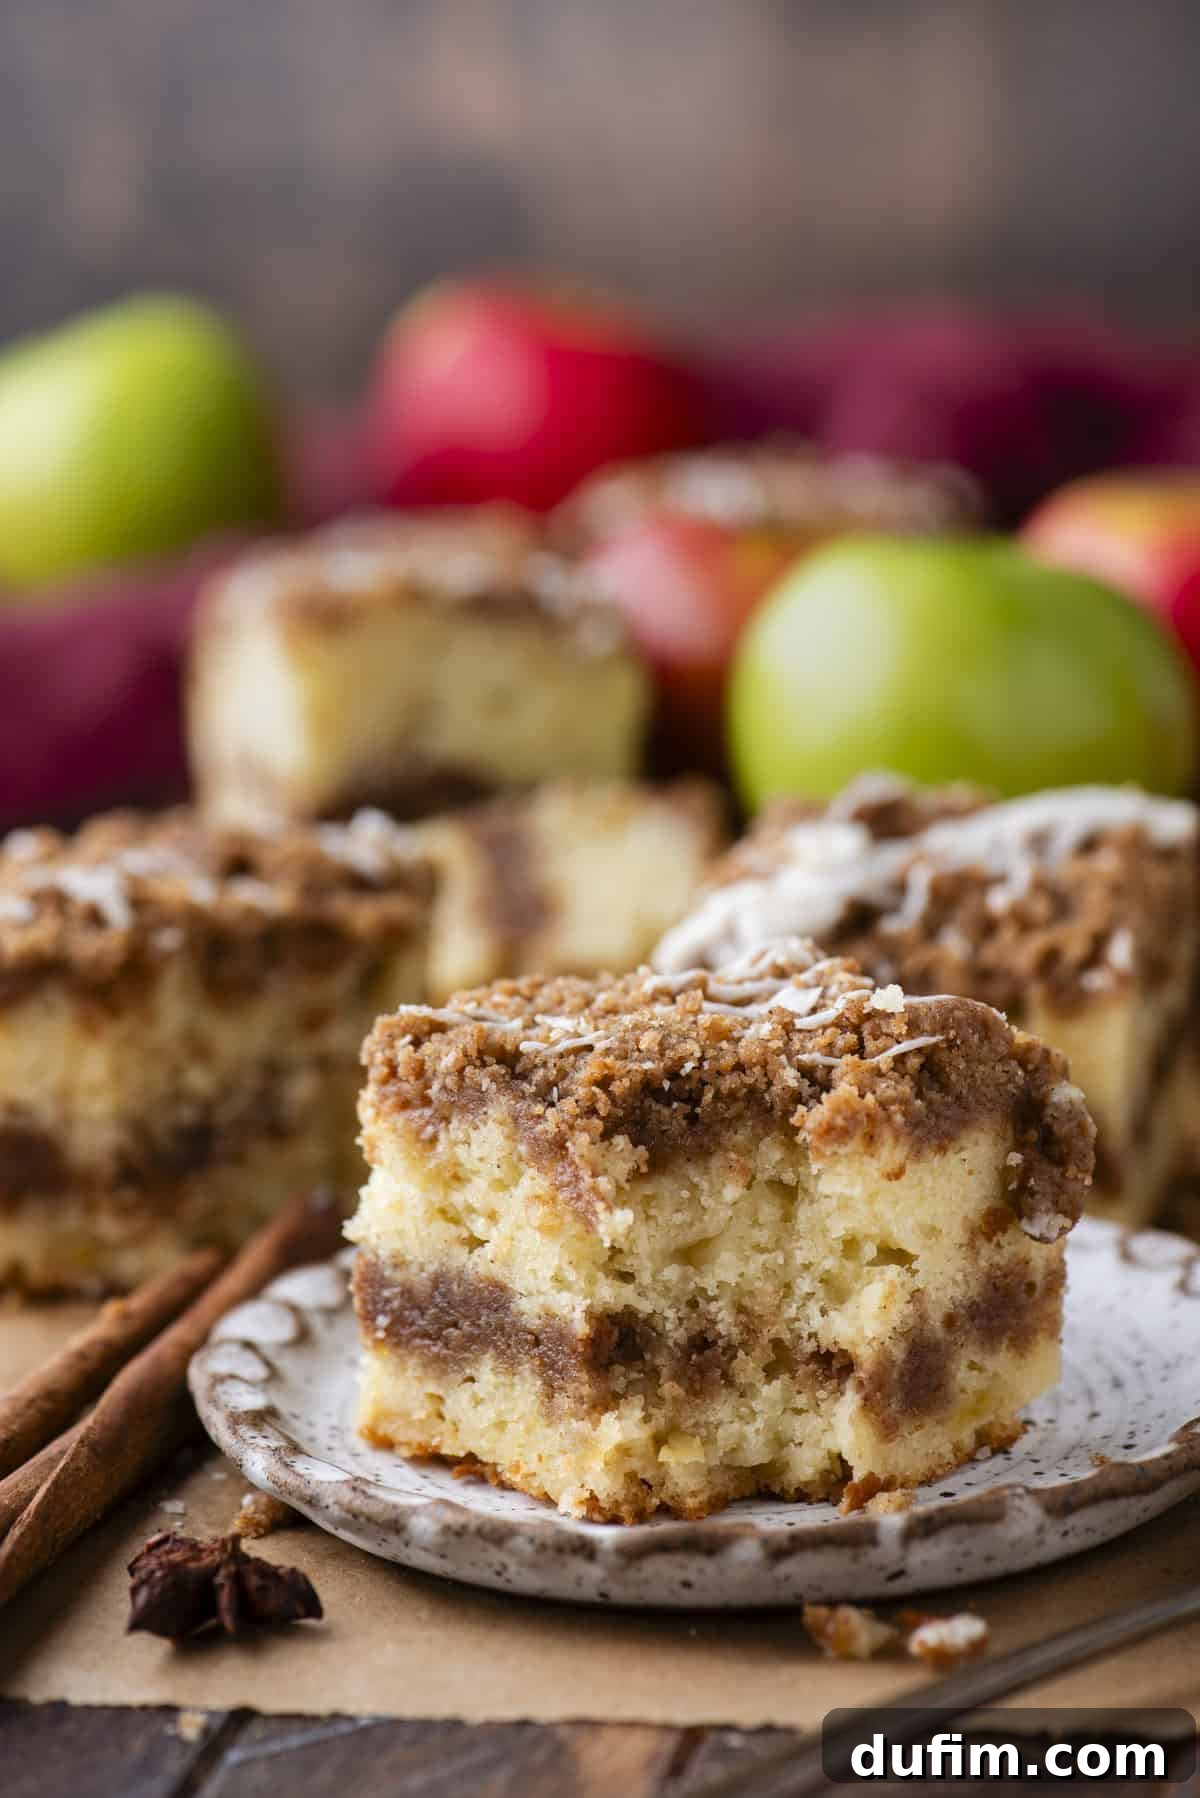
Prepare to elevate your autumn baking with a recipe that promises pure delight: our sensational Apple Coffee Cake. This isn’t just another seasonal treat; it’s a meticulously perfected masterpiece, built upon the foundation of our widely celebrated classic coffee cake recipe. Known for its incredible 4.91-star rating and a luxurious double layer of buttery, spiced streusel, our original crumb cake set a high bar. We’ve taken that same dedication to excellence and infused it into this apple-rich version, ensuring every forkful delivers a harmonious blend of tender cake, aromatic spices, and luscious apple pieces, all gloriously crowned with an abundant, irresistible crumb topping. Get ready to bake a true bakery-worthy gem right in your own kitchen.
Crafting Bakery-Quality Apple Coffee Cake at Home
My journey to perfect this Apple Coffee Cake involved extensive testing and a deep understanding of the subtle nuances that transform a good dessert into an exceptional one. Incorporating apples into a moist cake presents a unique challenge, primarily due to their varying moisture content and how their size affects the overall texture of the bake. To achieve the perfect balance, I conducted multiple rounds of experimentation, focusing intently on apple chunk size.
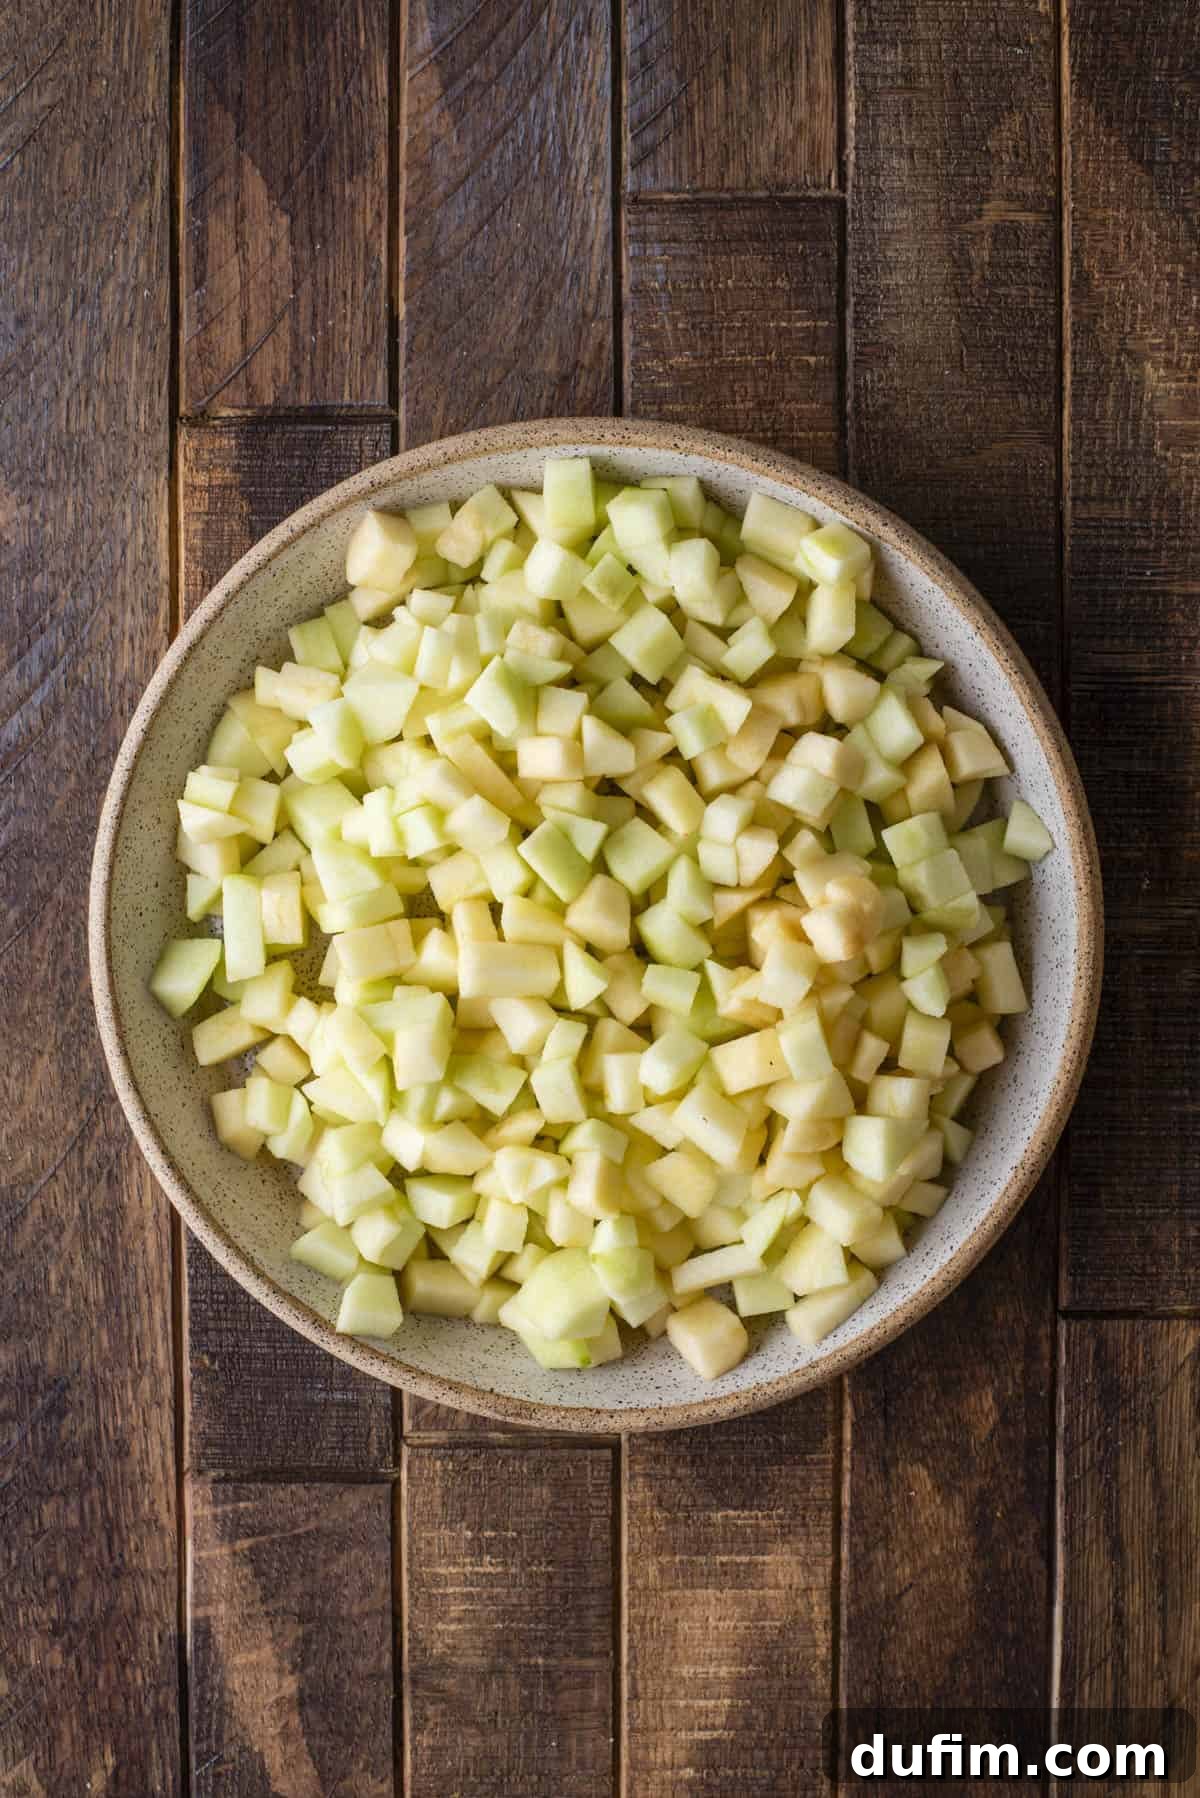
Initial trials with ½-inch apple pieces, while seemingly convenient, led to an undesirable outcome. The larger chunks created distinct pockets within the cake where the batter baked unevenly, resulting in areas that felt overly moist, almost raw in spots. This inconsistency was simply not up to the standard I aimed for. Driven by this, I shifted my focus to smaller, more uniform ¼-inch cubes. This adjustment proved to be a game-changer. The smaller pieces integrated seamlessly into the batter, allowing for consistent baking throughout the cake. They retained their shape beautifully, offering delightful bursts of apple flavor and a tender bite without compromising the delicate, fluffy crumb structure of the cake itself. This precision in dicing is paramount to avoiding a soggy bottom or underbaked sections, ensuring a uniformly tender cake with perfectly cooked apples in every slice.

Beyond the structural integrity, the spice profile of this apple coffee cake received a significant upgrade. While my classic coffee cake features a subtle hint of cinnamon in the crumb, an apple version demands a much bolder, more enveloping warmth. I generously increased the cinnamon content throughout both the cake and the crumb topping, infusing every layer with that cozy, aromatic essence synonymous with autumn and beloved apple desserts. The result is everything I had hoped for: a wonderfully soft, buttery cake that melts in your mouth, punctuated by vibrant, perfectly tender apple pieces, all crowned with our signature, thick, and irresistible streusel. This isn’t merely a recipe; it’s an invitation to master a truly remarkable fall baking staple, confident in a creation thoroughly tested and perfected for unparalleled texture, profound flavor, and consistent reliability. This is the apple coffee cake you’ve been dreaming of, ready to be created and enjoyed in your very own home.
Your Guide to the Best Homemade Apple Coffee Cake
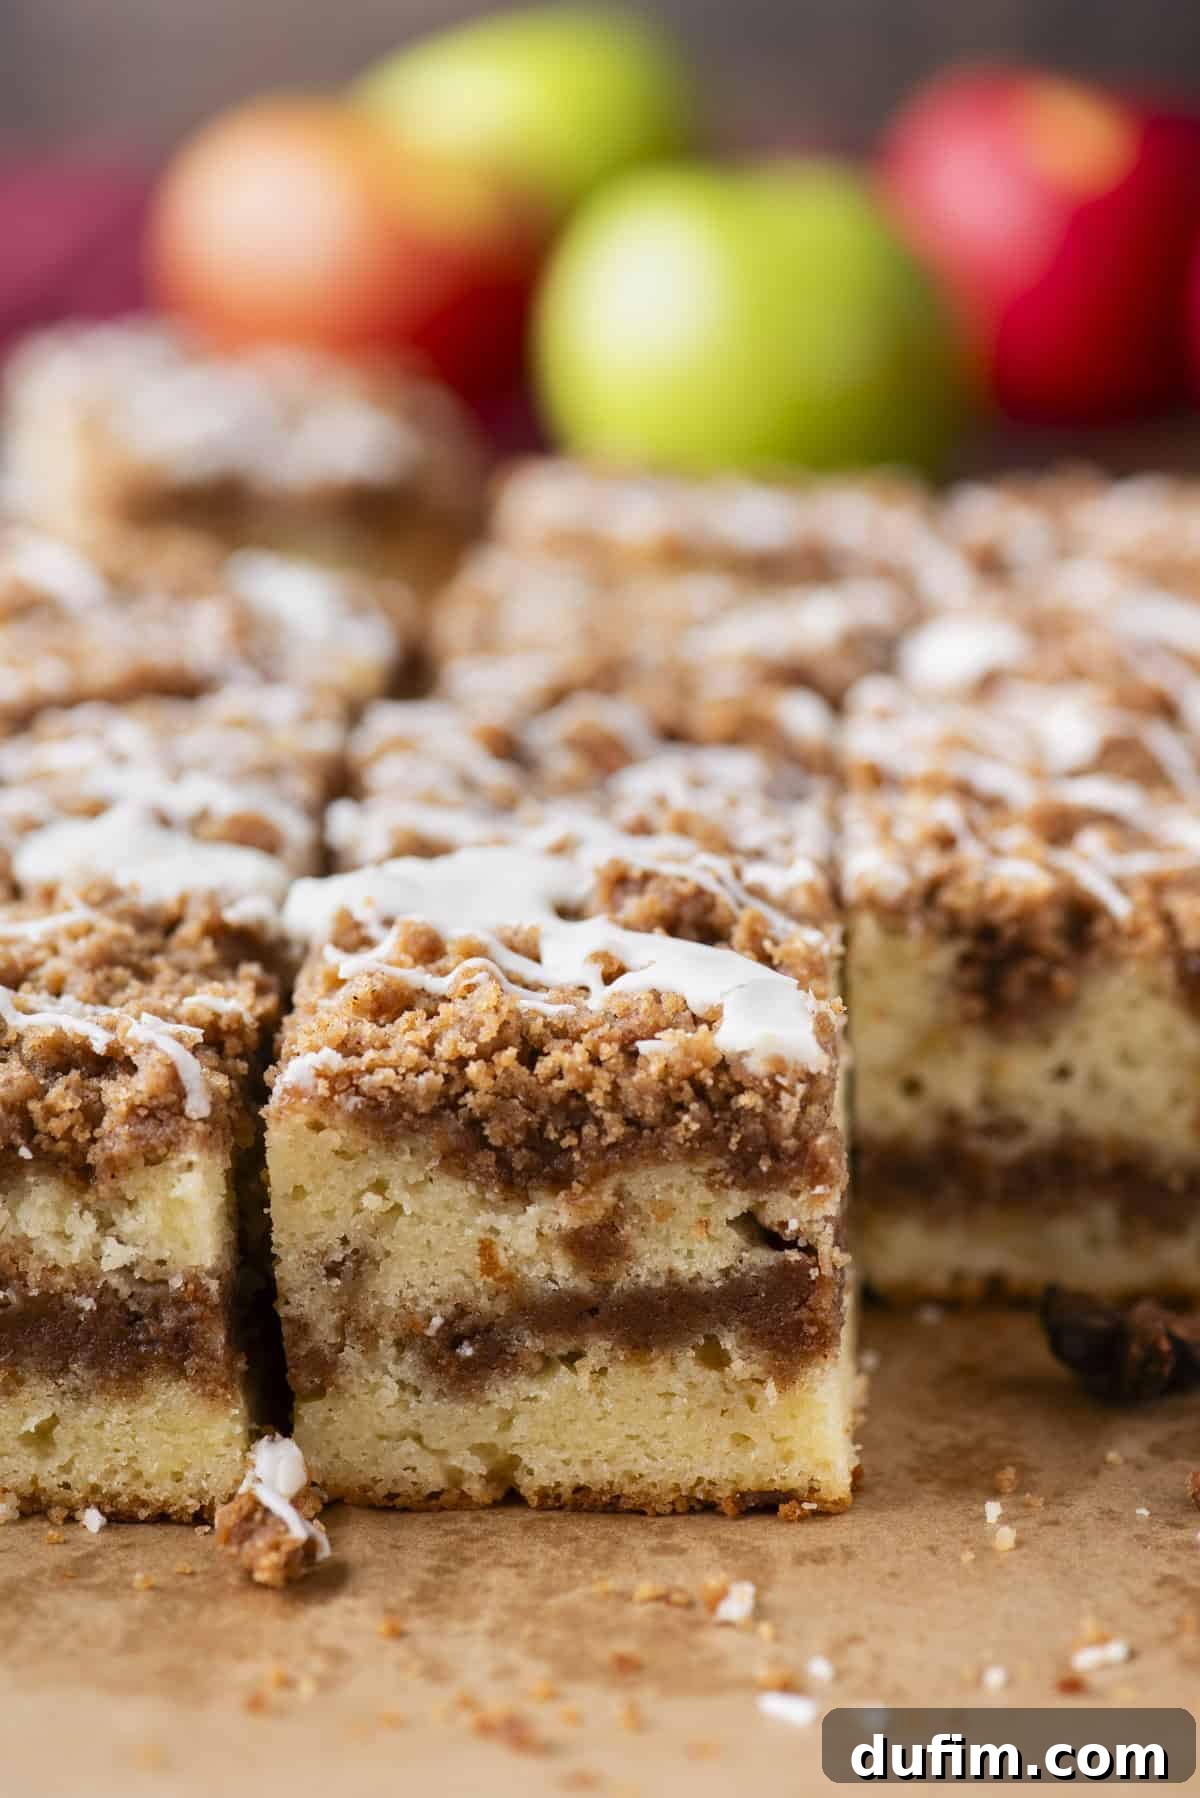
This recipe consistently ranks among my top favorites for a reason. There’s truly nothing more comforting and satisfying than a warm, generously crumb-topped slice of this cinnamon apple coffee cake, especially when paired with a steaming hot cup of coffee. Whether you’re celebrating the peak of apple season or simply craving that cozy taste of fall, this cake hits all the right notes. Below, you’ll find a detailed, step-by-step guide to creating this impressive dessert. Follow these instructions carefully to ensure a perfect, bakery-quality result every time.
Crafting the Irresistible Crumb Topping
The secret to an exceptional coffee cake often lies in its crumb topping. Our double-crumb method ensures a generous, buttery, and perfectly spiced streusel that’s both nestled within the cake and piled high on top. This abundance of crumb adds incredible texture and flavor to every bite.
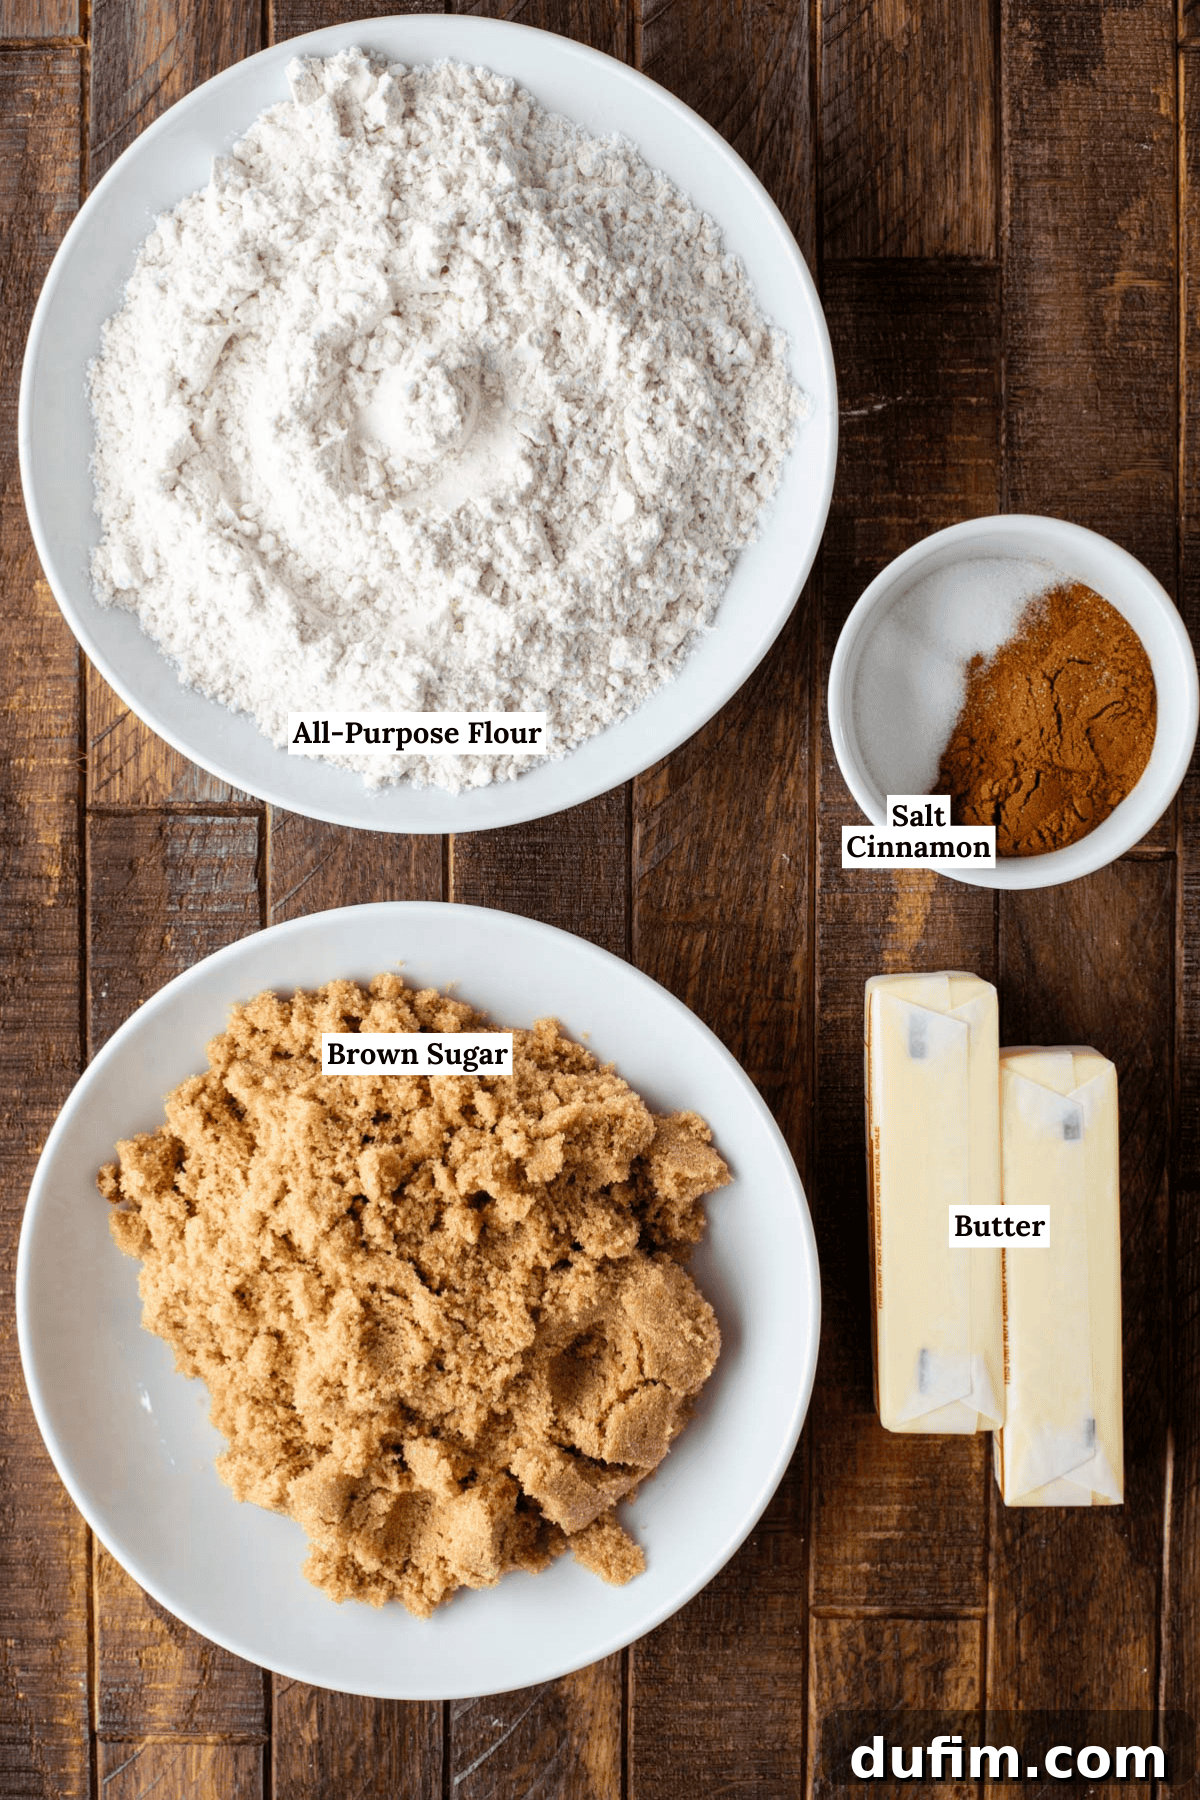
- Combine Dry Ingredients: In a spacious mixing bowl, combine the all-purpose flour, packed brown sugar, ground cinnamon, and salt. Use a whisk to thoroughly combine these ingredients, ensuring the spices are evenly distributed throughout the mixture. This step is crucial for consistent flavor in your streusel.
- Incorporate Melted Butter: Pour the melted unsalted butter over the dry mixture. Using a rubber spatula, a fork, or even your fingertips, work the butter into the dry ingredients. Continue mixing until the mixture is thoroughly moistened and resembles wet sand with a delightful formation of larger clumps. These clumps are what give the streusel its signature bakery-style texture. Avoid overworking it into a paste. Set this rich crumb mixture aside while you prepare the cake batter.
Preparing the Moist Apple Cake Batter
This cake batter is designed for tenderness and moisture, perfectly complementing the spiced apples and rich crumb topping. Accuracy in measurements and mixing technique will ensure the best results.
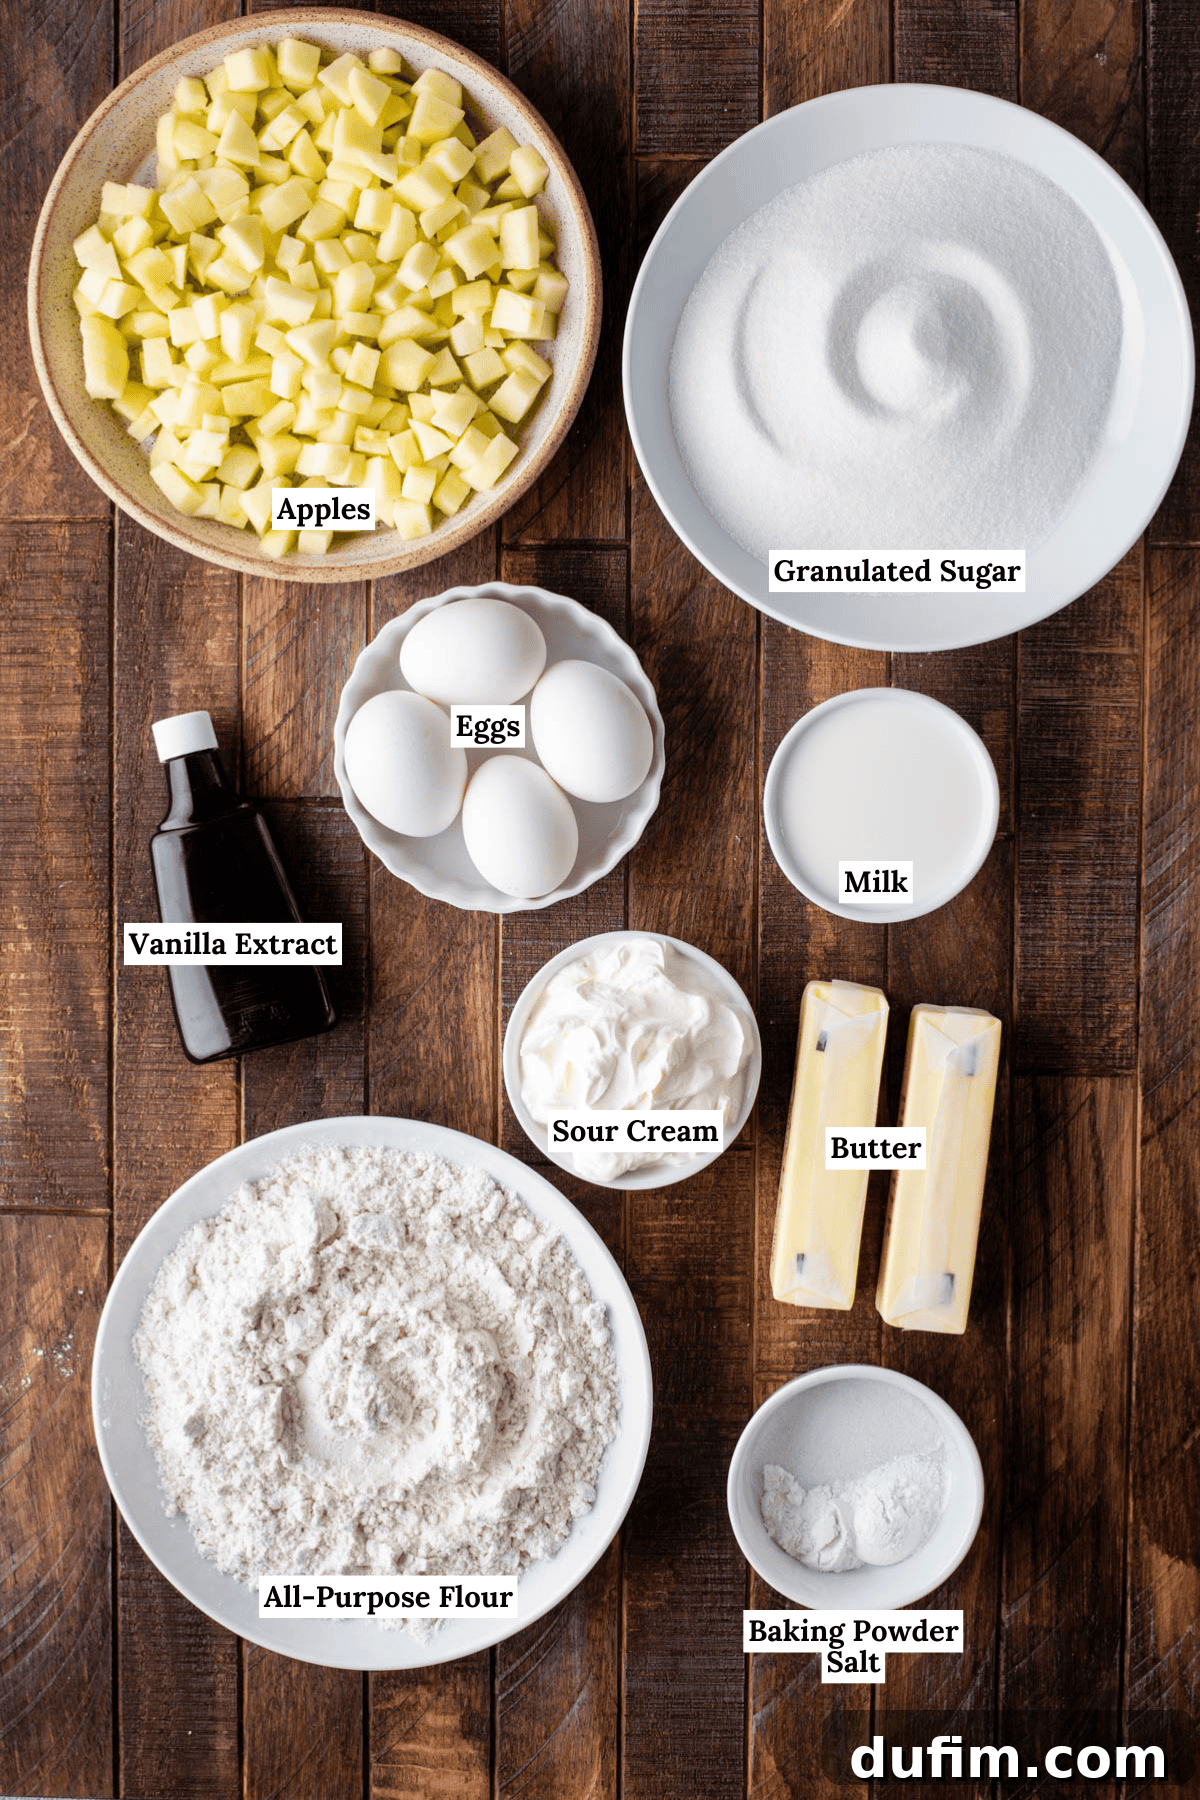
- Prepare the Apples: Begin by carefully peeling and coring your chosen apples. Then, dice them into uniform ¼-inch chunks. Consistency in size is absolutely vital here; it ensures the apples cook evenly throughout the cake and prevents any pockets of underbaked batter. You’ll need approximately 2.5 to 3 cups of diced apples total, which roughly translates to 285-315 grams. If you prefer a more rustic, pronounced apple presence, you can opt for ½-inch pieces, but be mindful that this might slightly alter the cake’s texture.
- Preheat Oven and Prepare Pan: Preheat your oven to a steady 350ºF (175ºC). Lightly grease a 9×13 inch baking pan with nonstick cooking spray, or for easier removal, line the pan with parchment paper, leaving an overhang on the sides. It’s crucial that your pan measures 9×13 inches *internally*, not including the rim, to ensure the cake bakes to the correct thickness and crumb layers are well-distributed. If you are unsure, using a slightly larger pan is preferable to a smaller one, which could lead to overflow.
- Whisk Dry Cake Ingredients: In a small mixing bowl, combine the all-purpose flour, baking powder, and salt. Use a whisk to stir these ingredients together thoroughly until they are uniformly mixed. This ensures the leavening agents and salt are evenly distributed throughout the dry components, contributing to the cake’s rise and balanced flavor. Set this mixture aside.
- Cream Butter and Sugar: In a large mixing bowl, using an electric mixer (either a stand mixer with the paddle attachment or a hand mixer), beat the softened unsalted butter and granulated sugar together on medium-high speed. Continue beating for 1-2 minutes until the mixture becomes notably light, fluffy, and pale in color. This creaming process is essential as it incorporates air into the mixture, which is crucial for achieving a tender and airy cake texture.
- Incorporate Eggs and Vanilla: Add the large eggs to the creamed butter and sugar mixture, one at a time. Beat well after each addition, ensuring each egg is fully incorporated before adding the next. This helps create an emulsion and prevents the batter from separating. Once the eggs are fully mixed, stir in the vanilla extract. The mixture might appear slightly curdled at this stage, but don’t worry; it will come together as you add the remaining ingredients.
- Alternate Dry and Wet Ingredients – Part One: Add approximately half of the prepared dry flour mixture to the butter-sugar-egg mixture. Beat on low speed until just combined. It’s important to avoid overmixing at this stage, as excessive gluten development can lead to a tough cake.
- Add Sour Cream and Milk: Next, add the sour cream and milk to the batter. Increase the mixer speed to low-medium and beat for about 30 seconds until these wet ingredients are mostly smooth and integrated.
- Finish with Dry and Apples: Finally, add the remaining dry flour mixture along with the diced apples to the batter. Beat on low speed only until everything is just combined. Use a rubber spatula to scrape down the sides and bottom of the bowl, ensuring no pockets of dry flour or unmixed ingredients remain. Again, exercise caution not to overmix, as overworking the batter once flour is added can result in a dense cake.
- Layering the Cake and Crumb:
- First Batter Layer: Carefully pour half of the cake batter into your prepared 9×13 inch baking pan. Use a spatula to gently spread the batter into an even layer across the bottom of the pan.
- First Crumb Layer: Measure out approximately 3 cups of your prepared crumb topping. Evenly sprinkle this crumb mixture over the first layer of cake batter. We are aiming for about 6.5 cups of crumb total for the recipe, so you will save the remaining 3.5 cups for the final top layer.
- Second Batter Layer: Carefully spoon the remaining cake batter over the first crumb layer. Use your spatula to gently spread it out, covering the crumb as evenly as possible. This step might be a little delicate as the crumb layer tends to shift, but patience will yield a beautiful result.
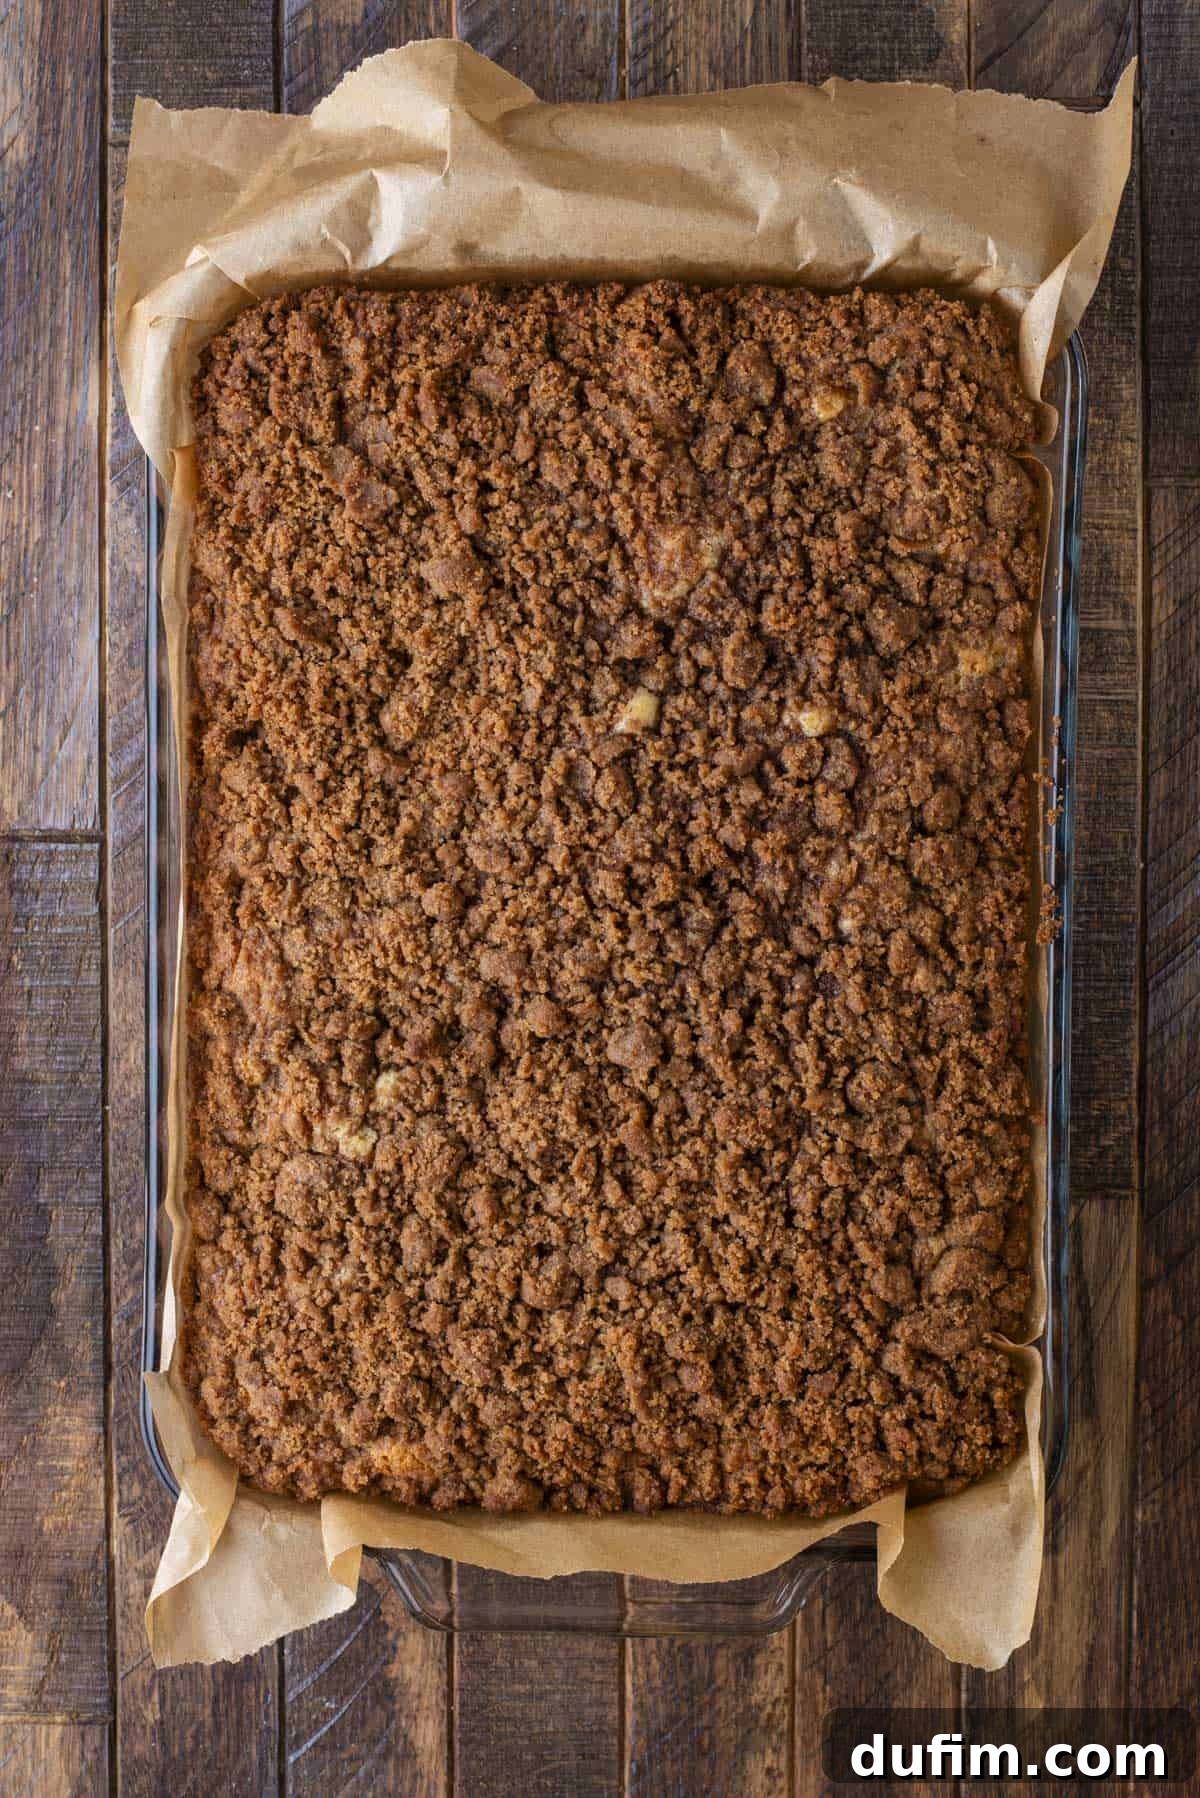
- Final Crumb Layer: Generously sprinkle the remaining crumb topping (about 3.5 cups) over the top of the cake batter, ensuring an even and abundant layer of streusel. This final layer will bake into a golden, crunchy topping.
- Bake to Golden Perfection: Place the assembled cake in your preheated oven. Bake for an initial 45 minutes. After this time, loosely tent the cake with a large piece of aluminum foil. This crucial step prevents the top from over-browning while allowing the inside of the cake to continue baking thoroughly. Continue baking for an additional 35-45 minutes, or until a wooden skewer or toothpick inserted into the very center of the cake comes out clean or with only a few moist crumbs attached.
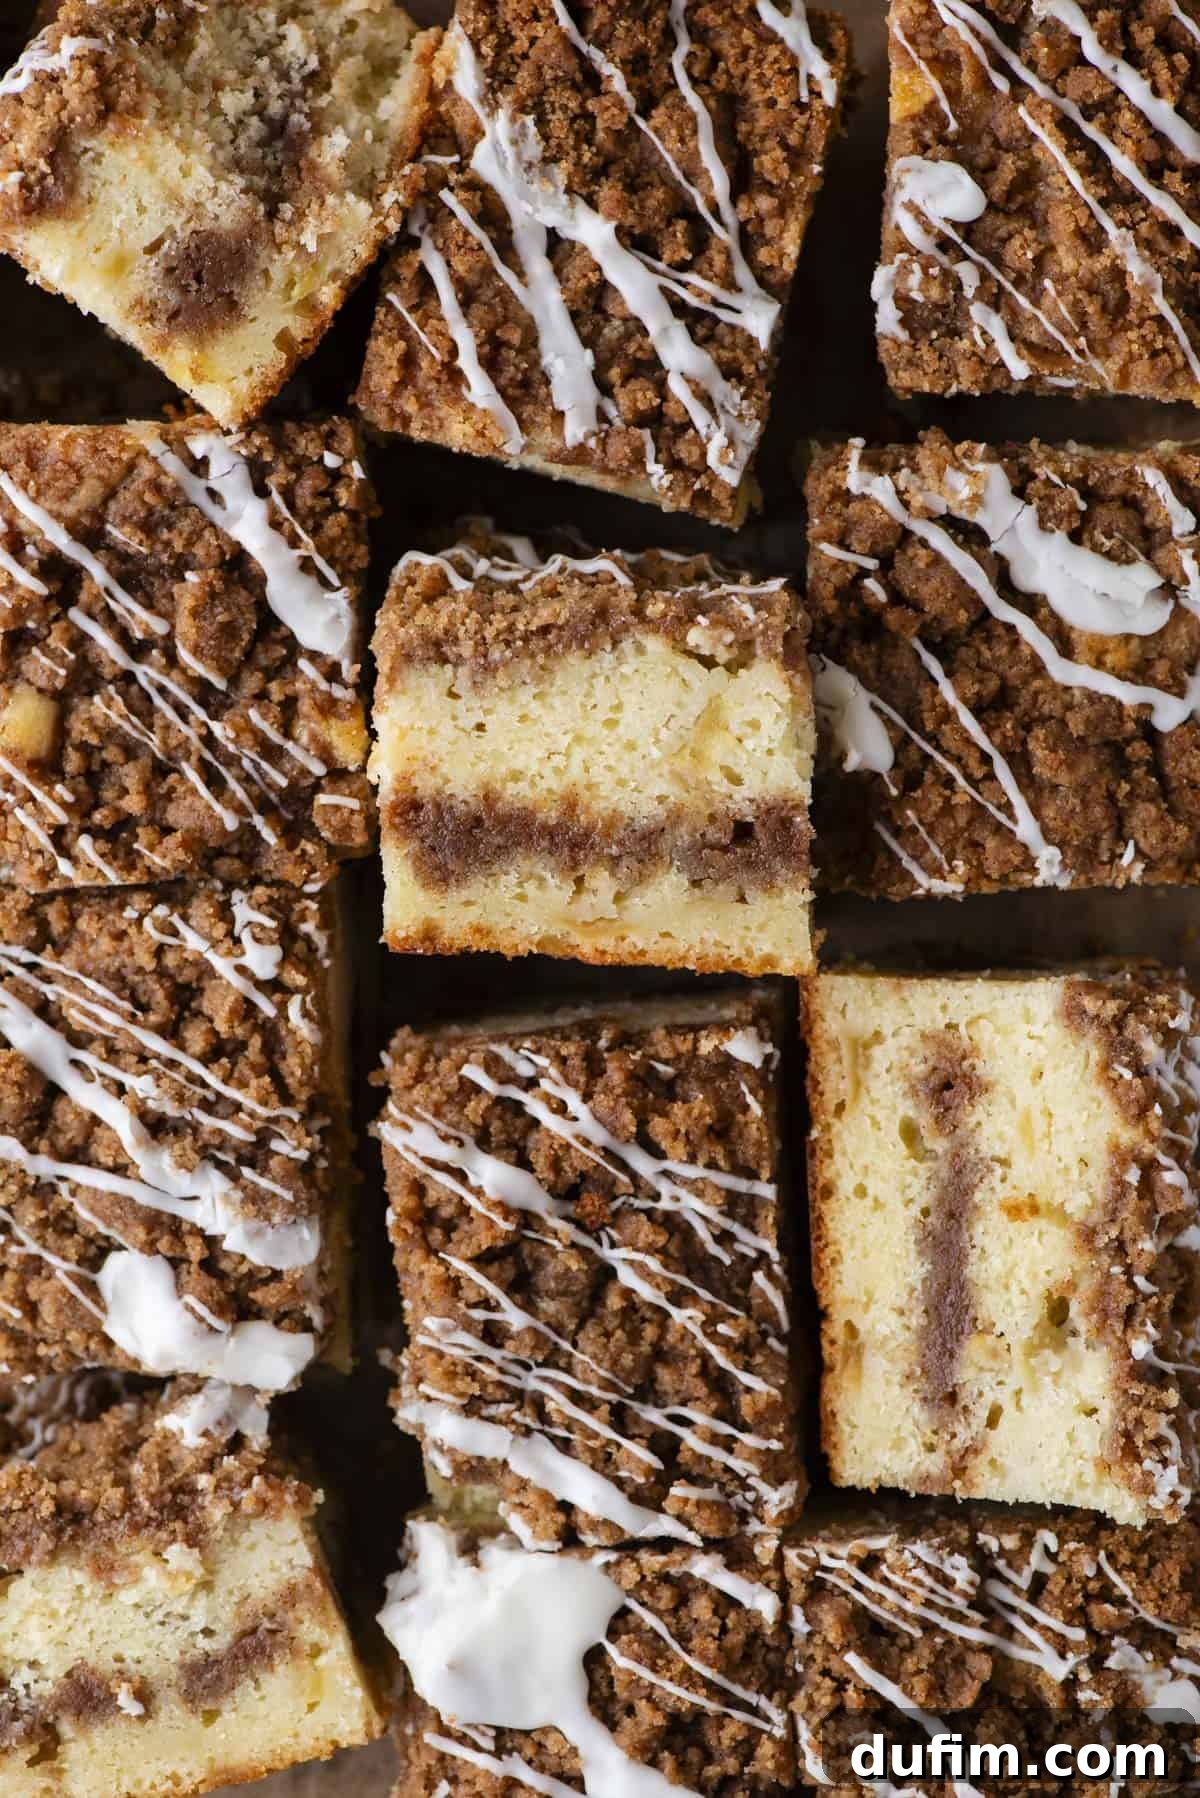
- Cool and Glaze: Once baked, remove the cake from the oven and transfer it to a wire rack to cool completely. Allowing the cake to cool fully before glazing is essential; it ensures the glaze sets properly and doesn’t melt into the warm cake. Once cool, proceed with the glaze instructions, then slice and serve. Cover any leftovers and store them at room temperature for up to 3 days, or in the refrigerator for up to 1 week to maintain freshness.
Quick and Easy Vanilla Glaze (Optional)
A simple, sweet glaze adds an extra touch of elegance and moisture to this already delightful coffee cake. It’s incredibly quick to whip up and highly recommended for that classic bakery finish.
- Combine Ingredients: In a small mixing bowl, combine the powdered sugar, vanilla extract, and initially, 2 tablespoons of heavy cream or milk.
- Whisk to Smoothness: Use a small whisk to vigorously combine these ingredients until the mixture is completely smooth and has a pourable, slightly thick consistency. If the glaze appears too thick to drizzle easily, add more heavy cream or milk, ½ teaspoon at a time, whisking well after each addition, until you reach your desired drizzling consistency.
- Drizzle and Serve: Once the apple coffee cake has cooled completely (this is important for the glaze to set correctly), artfully drizzle the prepared glaze over the top. Allow the glaze a few minutes to firm up slightly before slicing into generous squares and serving.
Selecting the Perfect Apples for Your Coffee Cake
The choice of apple variety is more critical than you might think, as it profoundly influences the flavor, moisture, and structural integrity of your baked coffee cake. For truly optimal results, aim for apples that are firm and crisp, capable of holding their shape during the baking process without turning into mush, and offering a delightful balance of sweetness and tartness. Here are some of the best varieties, along with their characteristics for baking:
- Fuji: These apples are beloved for their exceptionally sweet flavor and remarkable crispness. Fujis maintain their texture beautifully even after extended baking, contributing sweetness without becoming overly soft.
- Gala: With a mildly sweet flavor and a lovely floral aroma, Galas offer a slightly softer texture once baked compared to firmer varieties, but they still hold their structure well, adding a gentle sweetness.
- Granny Smith: If you love a bright, tangy contrast to the sweetness of the cake, Granny Smiths are your go-to. Their tartness cuts through the richness, and their firm flesh ensures they hold their shape exceptionally well, preventing a mushy texture.
- Honeycrisp: A true crowd-pleaser, Honeycrisps are renowned for their incredible crispness and perfectly balanced sweet-tart flavor. They are a fantastic all-around baking apple, offering both great taste and texture.
For an even more complex and intriguing flavor profile, consider combining different types of apples. A popular choice is to blend a tart variety like Granny Smith with a sweeter one such as Fuji or Honeycrisp. This creates a delightful depth of flavor, offering nuances that a single apple type might miss. Regardless of the varieties you choose, remember the golden rule: dice the apples into even ¼-inch chunks (approximately 2.5-3 cups total, or 285-315 grams). While you can cut them into ½-inch chunks if you prefer larger pieces, be aware that this might slightly alter the cake’s overall texture, as smaller pieces have proven to bake more consistently.
Elevate Your Apple Coffee Cake Experience: Serving Suggestions
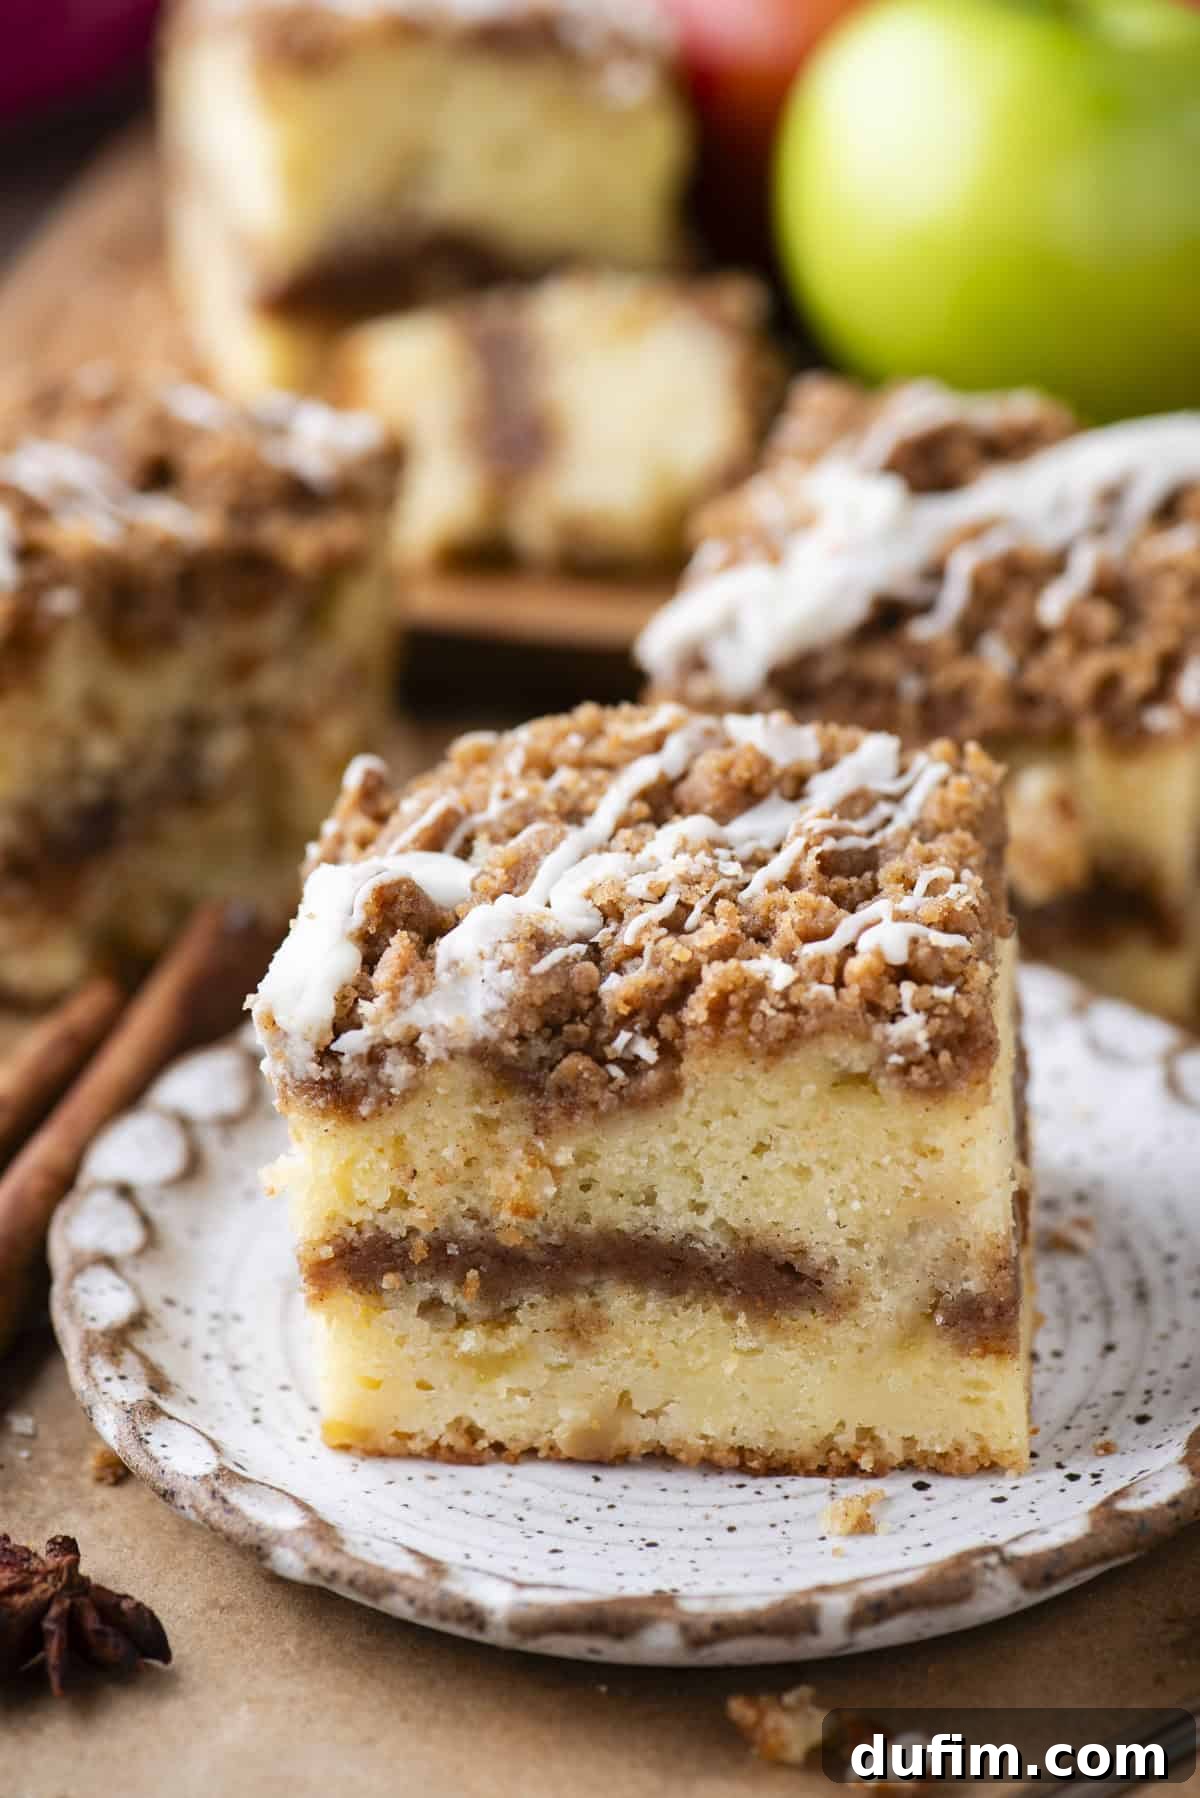
This cinnamon apple coffee cake is remarkably versatile, making it the perfect sweet treat for virtually any occasion. Its warm, comforting flavors and inviting aroma make it an ideal choice for breakfast, a delightful centerpiece for brunch gatherings, or a satisfying dessert after any meal. Here are a few ways to enjoy and enhance your apple coffee cake experience:
- Morning Bliss: Start your day on a perfect note by pairing a generous slice with your favorite hot beverage. A classic cup of freshly brewed coffee is an obvious and timeless choice, but it also beautifully complements a spiced chai latte, a warm mug of homemade apple cider, or even a robust black tea. The warmth of the drink will highlight the cake’s spiced notes.
- Brunch Star: Transform your brunch spread into something truly special by featuring this coffee cake. Serve it alongside other brunch staples such as fluffy scrambled eggs, crispy bacon, a vibrant fruit salad, or even a savory quiche. Its sweet and comforting presence will balance the other dishes perfectly.
- Dessert Indulgence: For an elevated and truly decadent dessert experience, gently warm a slice of coffee cake for a few seconds in the microwave or a toaster oven. Then, top it with a generous scoop of premium vanilla bean ice cream. The exquisite contrast of cold, creamy ice cream melting into the warm, spiced cake is an absolute dream. Alternatively, a dollop of freshly whipped cream or a luscious drizzle of homemade caramel sauce would also be an exquisite addition.
- Afternoon Treat: Enjoy a slice as a comforting pick-me-up during the afternoon. It pairs wonderfully with a simple glass of cold milk, or for a lighter option, a delicate herbal tea. It’s a perfect way to satisfy a sweet craving without feeling overly heavy.
- Holiday Gatherings: Its festive flavors and comforting aroma make it an excellent choice for holiday breakfasts or dessert tables, especially during Thanksgiving or Christmas.
Frequently Asked Questions (FAQ) About Apple Coffee Cake
Your apple coffee cake is perfectly done when its top is beautifully golden brown and a wooden skewer or toothpick inserted into the very center of the cake comes out clean. A few moist crumbs clinging to the toothpick are perfectly acceptable and indicate a tender crumb, but any wet batter means it needs more time in the oven. The aluminum foil tent method mentioned in the instructions is key to achieving an evenly baked interior without over-browning the luscious streusel topping.
While you can certainly leave the apple skins on if you prefer, peeling them is generally recommended for apple coffee cake. Apple skins can become slightly chewy after baking, which might detract from the cake’s otherwise tender and soft texture. Peeling ensures a uniformly smooth and pleasant eating experience, allowing the apple chunks to truly melt into the cake and become an integral part of its moist texture.
While fresh apples are always preferred for their superior texture and vibrant flavor, you can use frozen apples if fresh ones aren’t available. If you choose to use frozen, make sure to thaw them completely first. Crucially, pat them very, very dry with paper towels to remove as much excess moisture as possible. Excess water from frozen fruit can significantly alter the cake’s texture, potentially leading to a soggy result. You might also consider tossing the thawed and dried apples with a tablespoon of flour before adding them to the batter; this helps absorb any lingering moisture.
If your crumb topping isn’t forming those desirable clumps, it might be due to a few factors. Ensure your butter is fully melted when you add it, and then thoroughly work it into the dry ingredients using your hands or a sturdy spatula. The key is to compress the mixture slightly; this encourages the butter to bind the dry ingredients into distinct clumps. If the mixture seems too dry and powdery, add a tiny bit more melted butter (start with a teaspoon) to help bind it. Conversely, if it’s too wet and resembles a paste, add a tablespoon or two of extra flour until it reaches the desired sandy-with-clumps consistency.
For this particular recipe, a 9×13 inch baking pan (measuring internally) is ideal. Glass or ceramic pans tend to retain heat more, leading to a slightly longer baking time, while metal pans conduct heat more quickly. Regardless of material, ensuring it’s the correct size is crucial for the cake’s thickness and baking time. Always grease and flour or line with parchment paper to prevent sticking.
Storing & Freezing Your Delicious Apple Coffee Cake
To ensure your apple coffee cake stays as fresh and delicious as the day it was baked, proper storage is paramount. Whether you’re planning to savor it over a few days or save some for a future craving, here’s how to best preserve its wonderful taste and texture:
- Room Temperature Storage: For immediate enjoyment, leftover coffee cake can be stored beautifully at room temperature for up to 3 days. To maintain its moisture and prevent it from drying out, it’s crucial to place it in an airtight container. If you don’t have an airtight container large enough, tightly wrap individual slices or the entire remaining cake in plastic wrap, followed by an additional layer of aluminum foil. This double-layer protection is highly effective.
- Refrigerator Storage: If you need to extend the freshness beyond three days, or if you live in a particularly warm or humid climate, storing the coffee cake in the refrigerator is a great option. When refrigerated, it will keep well for up to 1 week. Always ensure it’s kept in an airtight container or tightly wrapped to prevent it from absorbing refrigerator odors and to lock in its moisture.
- Freezing for Later: One of the best qualities of this apple crumb cake is how wonderfully it freezes, allowing you to enjoy a taste of fall anytime you desire.
- Cool Completely: Before freezing, it is absolutely essential that the cake cools down to room temperature. Freezing a warm cake can lead to excess condensation and ice crystals, which can negatively impact texture upon thawing.
- Wrap Securely: Once completely cool, wrap individual slices or larger portions tightly in plastic wrap. Ensure there is no air exposure, which is the primary cause of freezer burn.
- Add Extra Protection: Follow the plastic wrap with a layer of heavy-duty aluminum foil for added protection. Alternatively, place the securely wrapped cake in a freezer-safe, airtight container.
- Freeze: The cake can be frozen for up to 3 months. Clearly label the package with the date for easy tracking.
- Thawing and Reheating: When you’re ready to indulge, transfer the frozen cake to the refrigerator overnight to thaw gradually. For that freshly baked warmth, gently reheat individual slices in the microwave for a few seconds (start with 15-20 seconds) or in a toaster oven until warmed through. This brings back its comforting aroma and tender texture.
More Irresistible Apple Desserts to Try
If you’ve fallen head over heels for the comforting flavors of this apple coffee cake, you’ll surely enjoy exploring these other delightful apple-centric treats from our collection. Each recipe offers a unique way to celebrate the versatility and deliciousness of apples:
- Homemade Apple Butter
- Classic Baked Apples
- Decadent Caramel Apple Fudge
- Charming Apple Hand Pies
Apple Coffee Cake Recipe
This recipe has an average rating of 4.29 out of 5 stars, based on 7 ratings.
By: Beth
Prep Time: 25 minutes
Cook Time: 1 hour 20 minutes
Servings: 16 slices
Bring the comforting flavors of fall to your kitchen with this truly bakery-worthy apple coffee cake! Built on a beloved, highly-rated classic coffee cake recipe, this version is generously loaded with perfectly diced apples, infused with extra warming cinnamon, and crowned with a decadent double layer of buttery crumb topping. Each recipe has been rigorously tested for perfect texture and flavor, guaranteeing no soggy pockets—just a wonderfully tender cake and an abundance of buttery crumble in every single bite.
Equipment Needed:
- Electric Mixer (stand mixer with paddle attachment or hand mixer)
- Large Mixing Bowls
- Small Mixing Bowls
- Rubber Spatula
- 9×13 inch Baking Pan (ensure internal measurements are 9×13 inches)
- Measuring Cups and Spoons
- Whisk
Ingredients:
For the Crumb Topping:
- 3 cups (360g) all-purpose flour
- 2 cups (426g) brown sugar, packed
- 2 ½ Tbsp cinnamon
- 1 ½ tsp salt
- 1 cup (226g) unsalted butter, melted
For the Cake:
- 3 cups (360g) all-purpose flour
- 2 ½ tsp baking powder
- 1 tsp salt
- 1 cup (226g) unsalted butter, softened (at room temperature)
- 2 cups (396g) granulated sugar
- 4 large eggs (at room temperature)
- 2 tsp vanilla extract
- 1 cup (227g) sour cream (at room temperature)
- ½ cup (118ml) milk (at room temperature)
- 2 ½-3 cups (about 285-315g) diced apples, peeled, cored, and cut into ¼-inch chunks
For the Glaze (Optional):
- 1 cup (113g) powdered sugar
- ½ tsp vanilla extract
- 2-4 Tbsp heavy cream or milk
Instructions:
- Important Note on Pan Size: Not all 9×13 inch pans have the same internal dimensions. For this recipe, ensure your pan measures 9×13 inches on the inside, excluding the edge. If you are in doubt, it is always safer to use a slightly larger baking pan to prevent any overflow during baking.
- Prepare the Crumb Topping: In a large mixing bowl, combine the all-purpose flour, packed brown sugar, ground cinnamon, and salt. Stir these dry ingredients together thoroughly with a whisk. Pour in the melted unsalted butter and use a rubber spatula or your clean hands to moisten and combine the mixture. Continue mixing until the mixture is crumbly with some delightful larger clumps forming. Set this crumb topping aside.
- Prepare the Apples: Peel, core, and then dice the apples into uniform ¼-inch chunks. Aim for even pieces to ensure consistent baking throughout the cake. You will need approximately 2.5 to 3 cups of diced apples total, which is roughly 285-315 grams. If you prefer larger apple pieces, you can cut them into ½-inch chunks, but note this may slightly affect the cake’s texture.
- Preheat Oven & Prepare Pan: Preheat your oven to 350ºF (175ºC). Generously spray a 9×13 inch baking pan with nonstick cooking spray, or line the pan with parchment paper, leaving an overhang on the longer sides for easy lifting.
- Combine Dry Cake Ingredients: In a small mixing bowl, whisk together the all-purpose flour, baking powder, and salt. Stir to combine them thoroughly.
- Cream Butter & Sugar: In a large mixing bowl, using an electric mixer, beat the softened unsalted butter and granulated sugar together on medium-high speed. Continue beating for 1 to 2 minutes, until the mixture is light, fluffy, and pale.
- Add Eggs & Vanilla: Beat in the large eggs, one at a time, until each is fully incorporated. Then, mix in the vanilla extract.
- Mix Cake Batter:
- Add half of the dry flour mixture to the wet ingredients. Beat on low speed until the flour is just combined. Avoid overmixing.
- Add the sour cream and milk to the batter. Beat on low speed for about 30 seconds, until mostly smooth.
- Add the remaining flour mixture and the diced apples to the batter. Beat on low speed until everything is just combined. Use a spatula to scrape down the sides and bottom of the bowl, ensuring no dry pockets remain. Remember, do not overmix.
- Assemble the Layers:
- Pour half of the prepared cake batter into your prepared 9×13 inch pan. Use a spatula to gently spread it into an even layer.
- Measure out approximately 3 cups of the crumb topping and sprinkle it evenly over the first layer of cake batter.
- Carefully spoon the remaining cake batter over the crumb layer. Use a spatula to gently spread it into an even layer, covering the crumb as best as possible. This step might be a little tricky as the crumb layer tends to move around, so be patient and gentle.
- Sprinkle the remaining crumb topping (approximately 3.5 cups) generously and evenly over the top of the cake batter.
- Bake: Place the cake in the preheated oven and bake for 45 minutes. After this initial period, place a large piece of aluminum foil loosely over the cake. This “tenting” prevents the top from over-browning while allowing the inside of the cake to continue baking thoroughly. Bake for an additional 35-45 minutes, or until a wooden skewer or toothpick inserted into the center comes out clean or with only a few moist crumbs attached.
- Cool & Glaze: Once baked, remove the cake from the oven and allow it to cool completely on a wire rack before applying the glaze. For the glaze, in a small mixing bowl, combine the powdered sugar, vanilla extract, and 2-4 tablespoons of heavy cream or milk. Whisk until the mixture is smooth and has a pourable consistency. Drizzle the glaze artfully over the cooled cake. Slice and serve.
- Storage: Cover any leftover coffee cake tightly and store at room temperature for up to 3 days, or in the refrigerator for up to 1 week. For longer storage, the cake can be frozen (see “Storing & Freezing Your Delicious Apple Coffee Cake” section above for detailed instructions).
Nutrition Information (Approximate Per Slice):
Serving Size: 1 slice | Calories: 671kcal | Carbohydrates: 99g | Protein: 7g | Fat: 28g | Saturated Fat: 17g | Polyunsaturated Fat: 1g | Monounsaturated Fat: 7g | Trans Fat: 1g | Cholesterol: 119mg | Sodium: 468mg | Potassium: 158mg | Fiber: 2g | Sugar: 61g | Vitamin A: 915IU | Vitamin C: 1mg | Calcium: 119mg | Iron: 3mg
Please note that all nutritional values provided are approximate and are offered as a courtesy to the reader. Changes to ingredients and/or quantities used will alter the estimated nutritional calculations.