
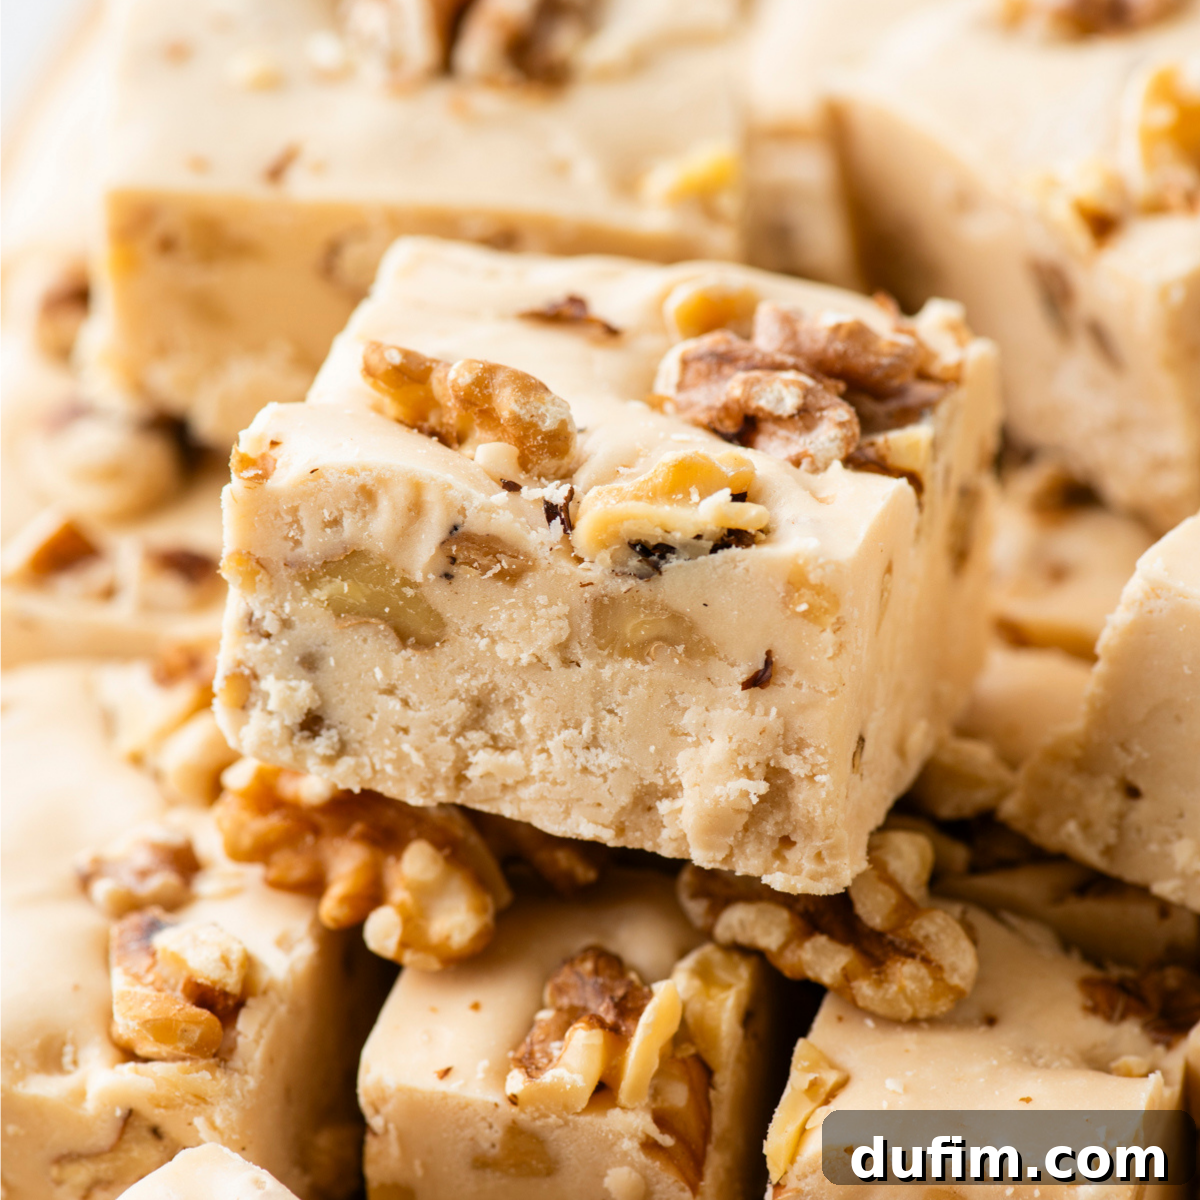
Mastering Maple Walnut Fudge: A Guide to Creamy, Irresistible Homemade Delights
After numerous test batches, meticulously adjusting sugar ratios, and even enduring one very burnt pot of maple syrup, this maple fudge recipe finally achieved the perfect balance. It’s wonderfully creamy, slices effortlessly, and bursts with authentic maple flavor. While real maple syrup offers unparalleled depth, it also makes fudge more susceptible to crystallization than standard recipes. However, perseverance paid off, leading to a foolproof method that consistently delivers exceptional results.
We extensively experimented with various cooking temperatures, sugar combinations, and butter levels. The goal was to ensure the sugar crystals remained minuscule and blended seamlessly, resulting in a velvety smooth texture rather than a gritty one. This isn’t a shortcut condensed milk fudge; it’s a true, traditional cooked maple fudge, meticulously crafted around the magnificent essence of real maple syrup.
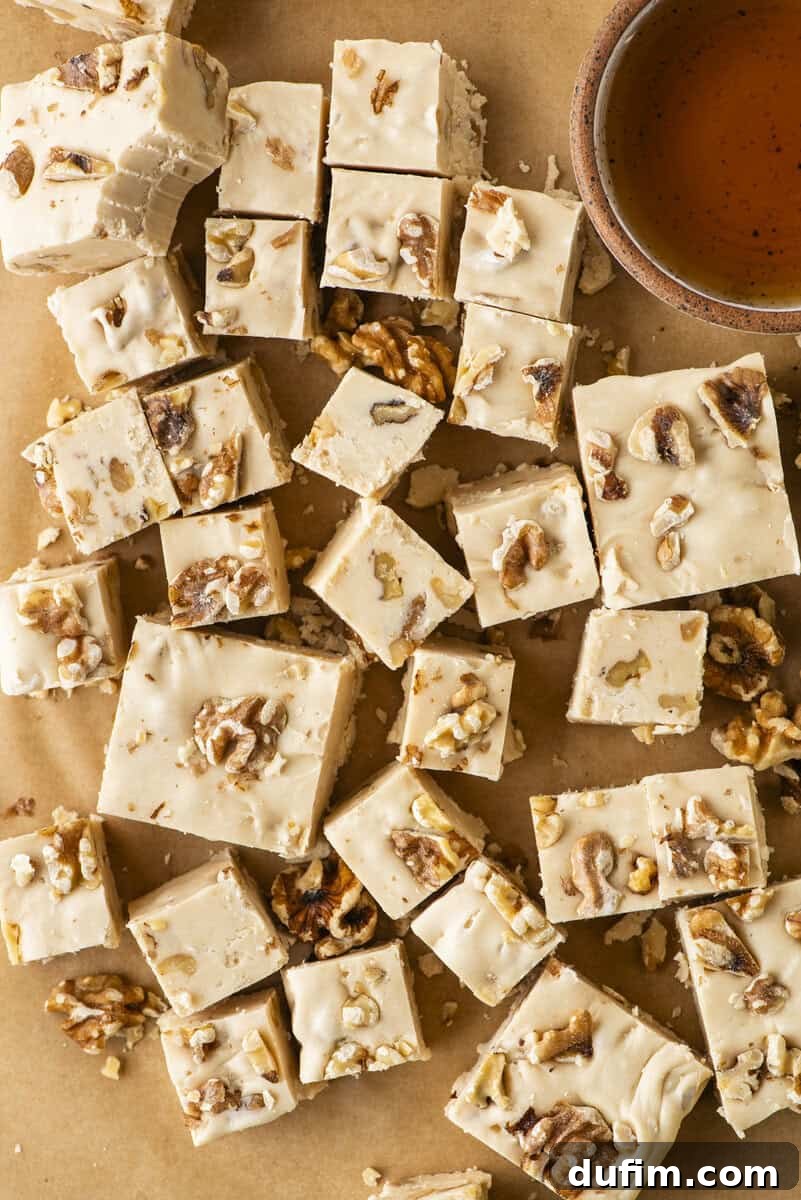
The Journey to Perfection: Key Learnings from 7 Batches of Maple Fudge
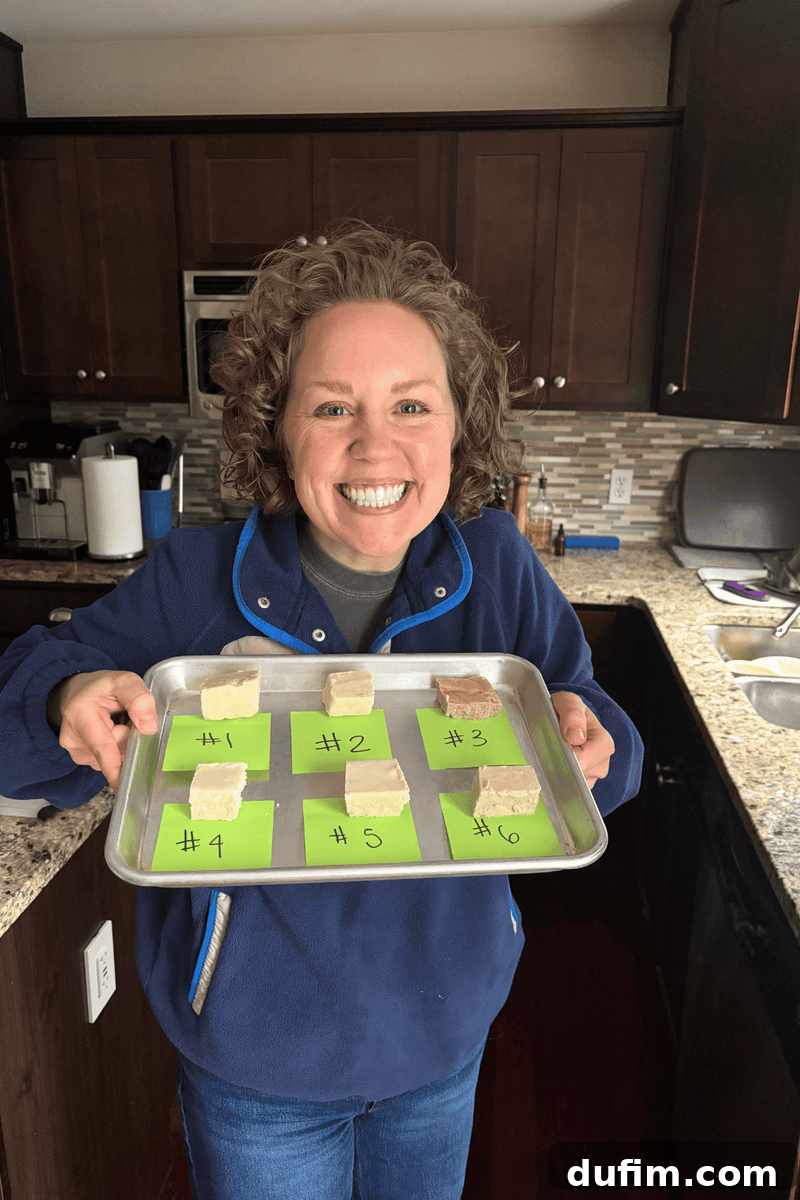
Developing this maple fudge recipe was a true labor of love, requiring seven distinct test batches to achieve perfection. Maple syrup, with its unique chemical composition, behaves quite differently from granulated sugar in candy making. This inherent difference is precisely why crafting a consistently smooth and creamy maple fudge demanded such rigorous and careful testing.
Most classic fudge recipes, such as an easy chocolate fudge, often rely on ingredients that are more predictable and easier to control. Maple syrup, however, contains natural minerals that can act as nucleation sites, encouraging sugar crystals to form as the fudge cools. If these crystals grow too large, the fudge develops an unpleasantly grainy texture. This characteristic makes maple fudge a somewhat trickier confection to master, but the rich, authentic flavor it provides is well worth the extra effort.
The Irreplaceable Flavor of Real Maple Syrup
The foremost lesson learned was the undeniable superiority of real maple syrup. Early tests included a version made with maple extract. While the aroma was certainly inviting, the flavor was noticeably flat and lacked the complex, nuanced sweetness and deep character found in batches made with pure maple syrup. For truly exceptional maple fudge, there’s simply no substitute for the real thing.
Finding the Sweet Spot: Optimal Cooking Temperatures
We carefully tested different final cooking temperatures, specifically within the narrow range of 236°F to 238°F. This small variation, while seemingly insignificant, profoundly impacts the fudge’s final texture. A slightly lower temperature leaves more moisture, resulting in a softer fudge, while a slightly higher temperature removes more moisture, creating a firmer, more set consistency. Achieving that perfect melt-in-your-mouth creaminess requires hitting the precise temperature sweet spot, which, for this recipe, settled consistently between 236°F and 238°F.
The Role of Butter: Texture and Clean Slices
Another crucial adjustment involved subtly reducing the amount of butter. Initially, using too much butter made the fudge overly soft, leading to sticky, messy cuts. A slight reduction in butter content significantly improved the fudge’s ability to set cleanly, allowing for perfectly defined, non-sticky squares every time. This highlights how precise adjustments to fat content can dramatically influence the final product’s handling and appearance.
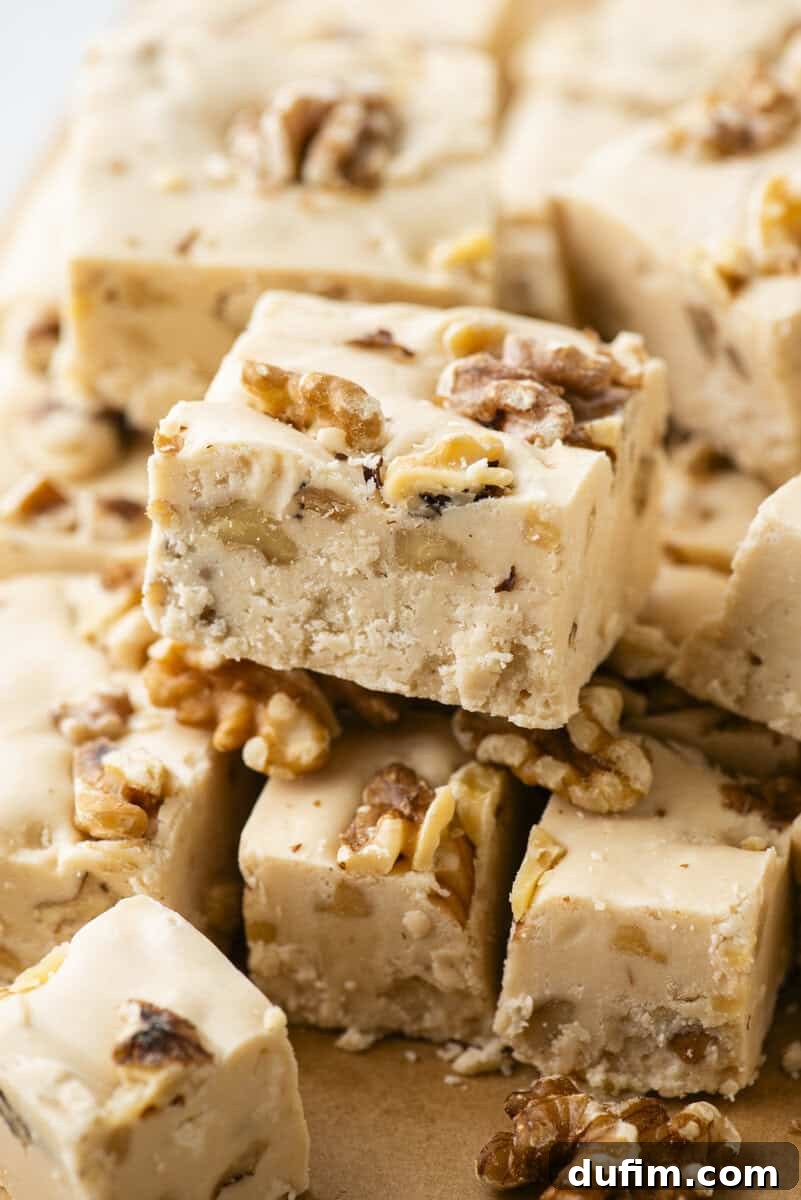
The Magic of Brown Sugar: Depth and Color
Experimentation also involved comparing recipes made with only granulated sugar against those incorporating a blend of granulated and brown sugar. The brown sugar version was the clear winner. It imparted a deeper, more complex caramel flavor, enhancing the natural maple notes, and contributed to a richer, more inviting maple candy color. The molasses in brown sugar also aids in preventing excessive crystallization, further contributing to a smooth texture.
Corn Syrup: The Crystal Commander
To further combat the crystallization challenge inherent in maple syrup, a small amount of corn syrup was introduced. Maple syrup’s natural minerals, as mentioned, can promote graininess. Corn syrup acts as an interfering agent, inhibiting the formation of large sugar crystals and instead encouraging the development of extremely fine, imperceptible crystals. This ensures the fudge remains exquisitely smooth and creamy, avoiding any gritty sensation.
The Essential Step: Maple Syrup Reduction
One of the most impactful discoveries was the importance of reducing the maple syrup first. This initial step concentrates the pure maple flavor, ensuring that its distinct essence truly shines through once all the other ingredients are added and the fudge is cooked. Without this reduction, the delicate maple flavor might be overshadowed by other sugars and fats.
Learning from Mistakes: The Burnt Pot Revelation
Reducing maple syrup requires diligent supervision. A memorable test batch resulted in a pot completely coated in stubborn, burnt maple crystals because the syrup was left unattended on the stove for too long. The silver lining? A simple trick for effortless cleanup was discovered: filling the pot with water and boiling it dissolves the hardened sugar, making cleanup remarkably easy. This cautionary tale underscores the need for attentiveness during the reduction process.
After seven rounds of dedicated testing and refinement, this final version of maple fudge offers an unparalleled experience: true maple flavor, a creamy, melt-in-your-mouth texture, and fudge that slices cleanly every single time, free from stickiness or graininess.
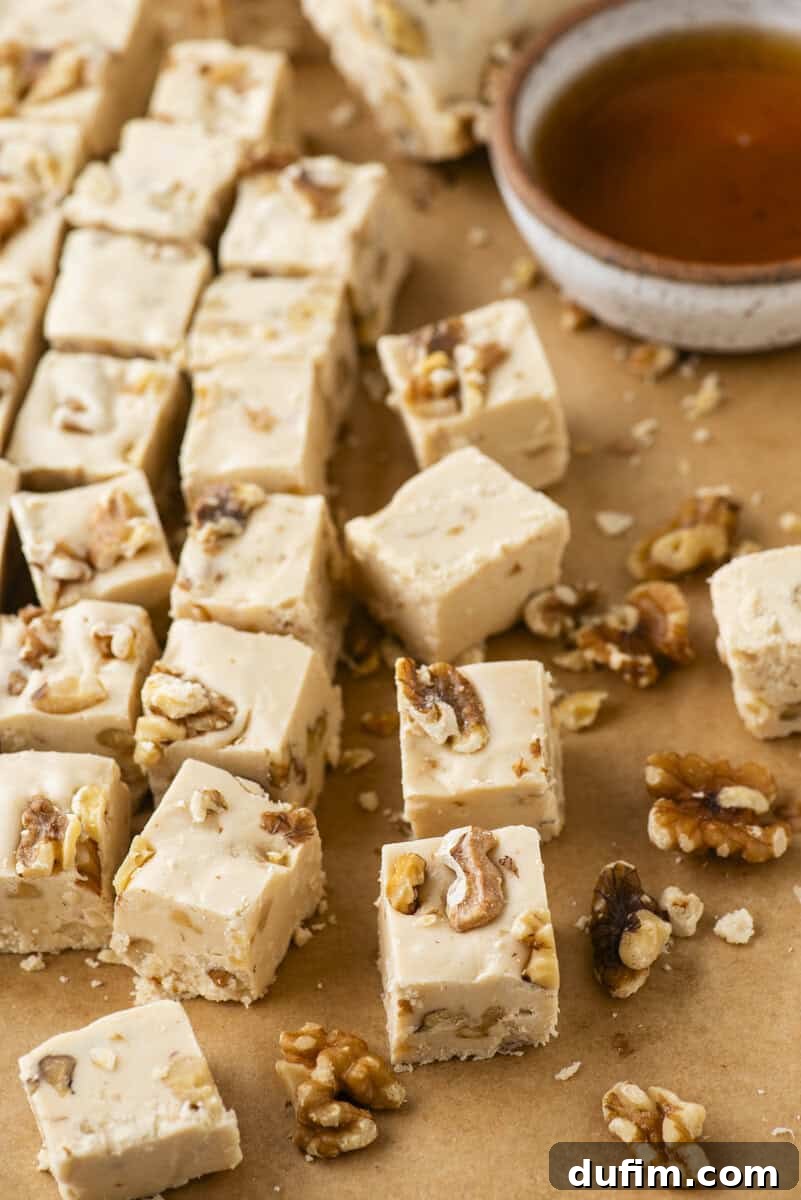
Understanding and Preventing Grainy Maple Fudge
Maple fudge often poses a greater challenge than other fudge varieties due to the unique properties of maple syrup. As previously discussed, maple syrup contains natural minerals that act as catalysts for sugar crystallization as the mixture cools. When these sugar crystals grow too large, the fudge acquires an undesirable grainy or gritty texture. The ultimate goal in crafting perfect maple fudge isn’t to entirely eliminate crystal formation, but rather to manipulate the process so that the crystals remain exceedingly small and smooth, blending seamlessly into the creamy matrix.
Achieving this smooth texture involves two primary strategies: precisely cooking the fudge mixture to the correct temperature range and incorporating a small amount of corn syrup. The accurate cooking temperature ensures that the sugar solution is sufficiently concentrated, while the corn syrup acts as an interfering agent, preventing the rapid growth of large sugar crystals. Through our extensive testing, this refined recipe has been engineered to consistently keep those crystals tiny, resulting in a fudge that genuinely melts in your mouth while delivering an intense and deep maple flavor that homemade candy enthusiasts will adore.
For another delightful and equally creamy confection that melts in your mouth, be sure to try our creamy peanut butter fudge recipe – it’s incredibly easy to make!
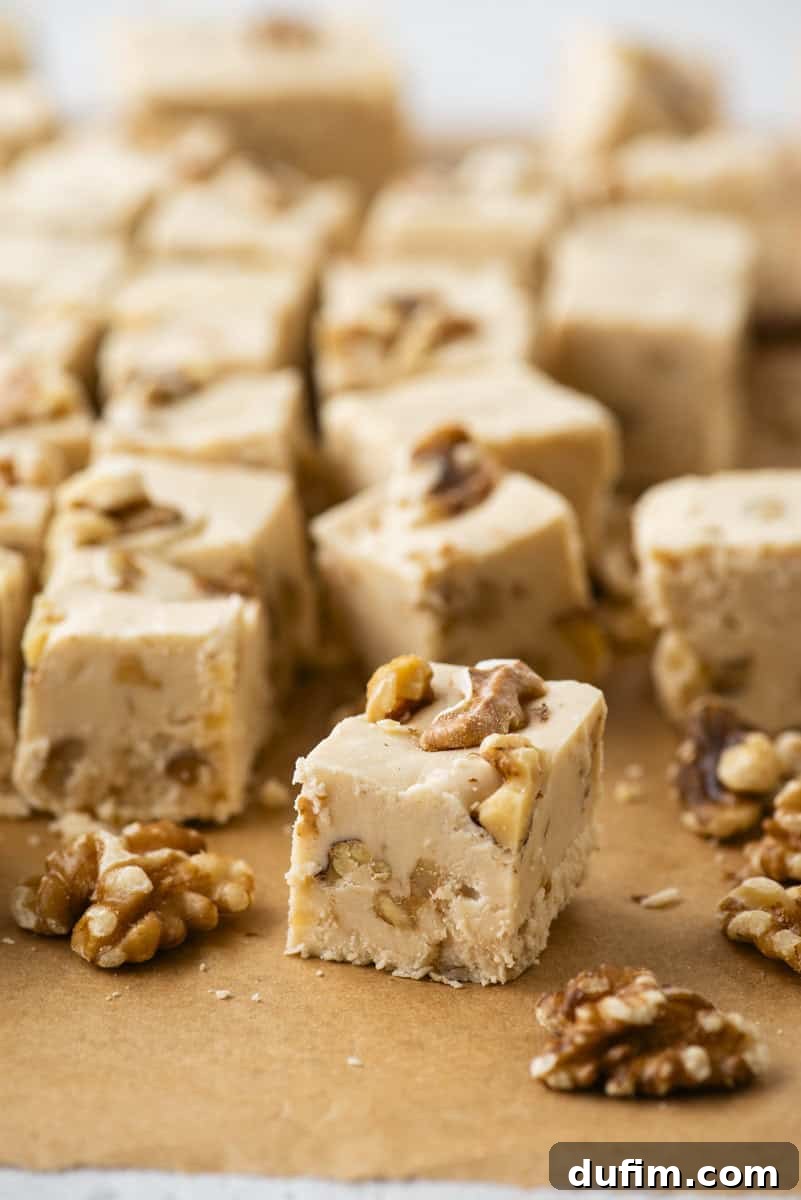
Essential Ingredients for Perfect Maple Fudge
Each ingredient in this recipe plays a vital role in creating the irresistible flavor and texture of our maple fudge. Here’s a closer look at what each component contributes:
- Maple Syrup: The star of the show! Reducing the maple syrup first is a crucial step that concentrates its natural sugars and deepens its distinctive flavor, ensuring the finished fudge has an authentic and pronounced maple taste.
- Brown Sugar: Beyond sweetness, brown sugar introduces rich, warm caramel notes that complement the maple beautifully. Its molasses content also contributes to the fudge’s appealing, darker maple-candy color and helps in achieving a smoother texture by slightly inhibiting crystallization.
- Corn Syrup: This ingredient is a secret weapon against graininess. A small amount of corn syrup helps control sugar crystallization, ensuring that any crystals that form are extremely fine and imperceptible on the palate, keeping the fudge wonderfully creamy.
- White Chocolate Chips: These chips melt seamlessly into the fudge base, contributing to its creamy, stable structure and providing a subtle, sweet backdrop that allows the maple flavor to truly shine.
- Marshmallow Creme: A fantastic stabilizer, marshmallow creme gives the fudge its characteristic soft, pillowy, and melt-in-your-mouth texture. It helps create a light and airy consistency that sets beautifully.
- Toasted Walnuts: Maple and walnuts are a classic culinary pairing for a reason. Toasting the walnuts before adding them amplifies their nutty flavor, making it deeper and more aromatic, and provides a delightful textural contrast to the smooth fudge.
How to Make Irresistible Homemade Maple Fudge
Crafting this incredible homemade maple fudge is a rewarding experience, made easy by following these detailed steps. You can also jump to the full recipe card below for a printable version.
Prepare Your Walnuts and Pan
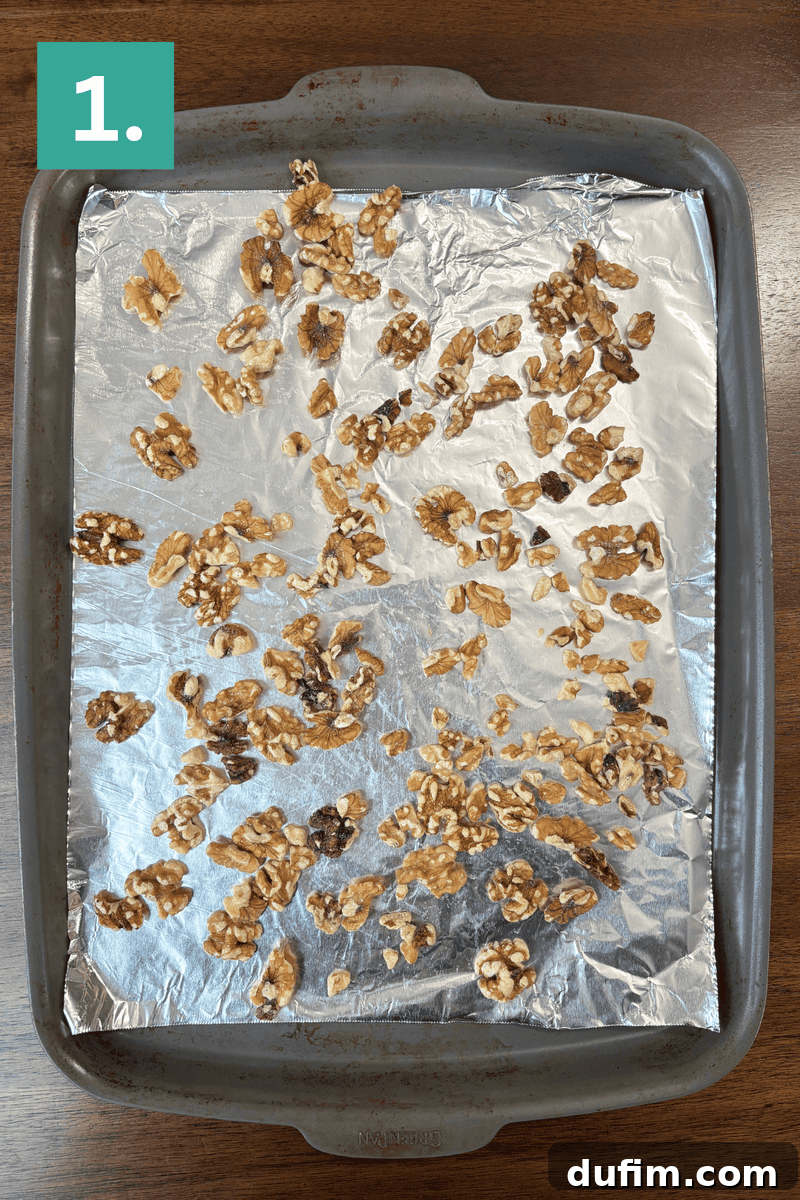
1. Toast the Walnuts: Preheat your oven to 350ºF (175°C). Spread the whole walnuts in a single, even layer on a rimmed baking sheet that has been lined with parchment paper or aluminum foil. This prevents sticking and makes cleanup easier. Toast the walnuts for about 7 to 10 minutes, stirring them two or three times during the baking process to ensure even browning. Keep a close eye on them, as nuts can burn quickly. They are ready when they are lightly browned and release a fragrant, nutty aroma. Because walnuts at the edges tend to toast faster, a quick stir helps them brown uniformly.
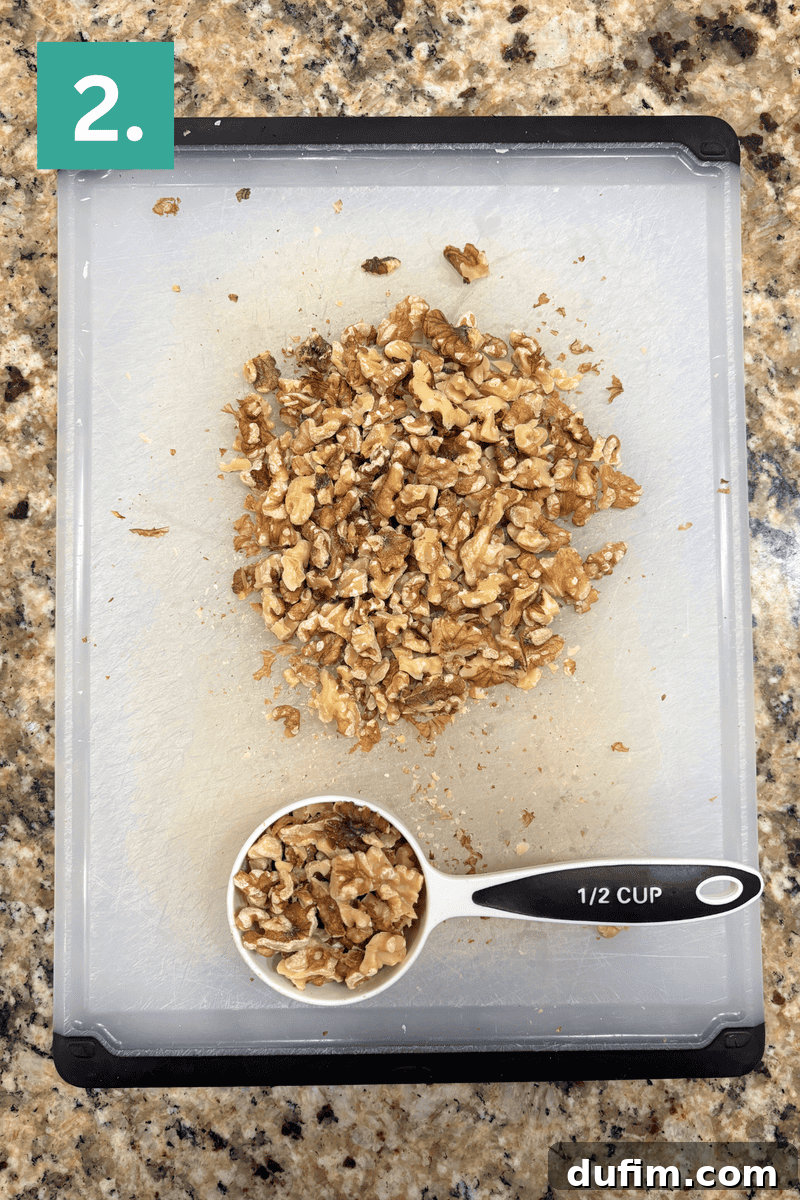
2. Cool and Chop Walnuts: As soon as the walnuts are toasted, immediately transfer them from the hot baking sheet to a clean plate. This stops the cooking process and prevents them from over-toasting. Once the walnuts have cooled completely, roughly chop them. Divide the chopped walnuts into two portions: 1 cup for mixing into the fudge and ½ cup for sprinkling on top. While toasting enhances flavor, you can also use raw walnuts if preferred, though the toasted flavor is highly recommended.
3. Prepare the Pan: Line an 8×8 or 9×9 inch square baking pan with aluminum foil. Make sure the foil extends beyond the edges of the pan; these overhangs will serve as convenient handles to easily lift the set fudge out later. Set this prepared pan aside.
Reduce the Maple Syrup
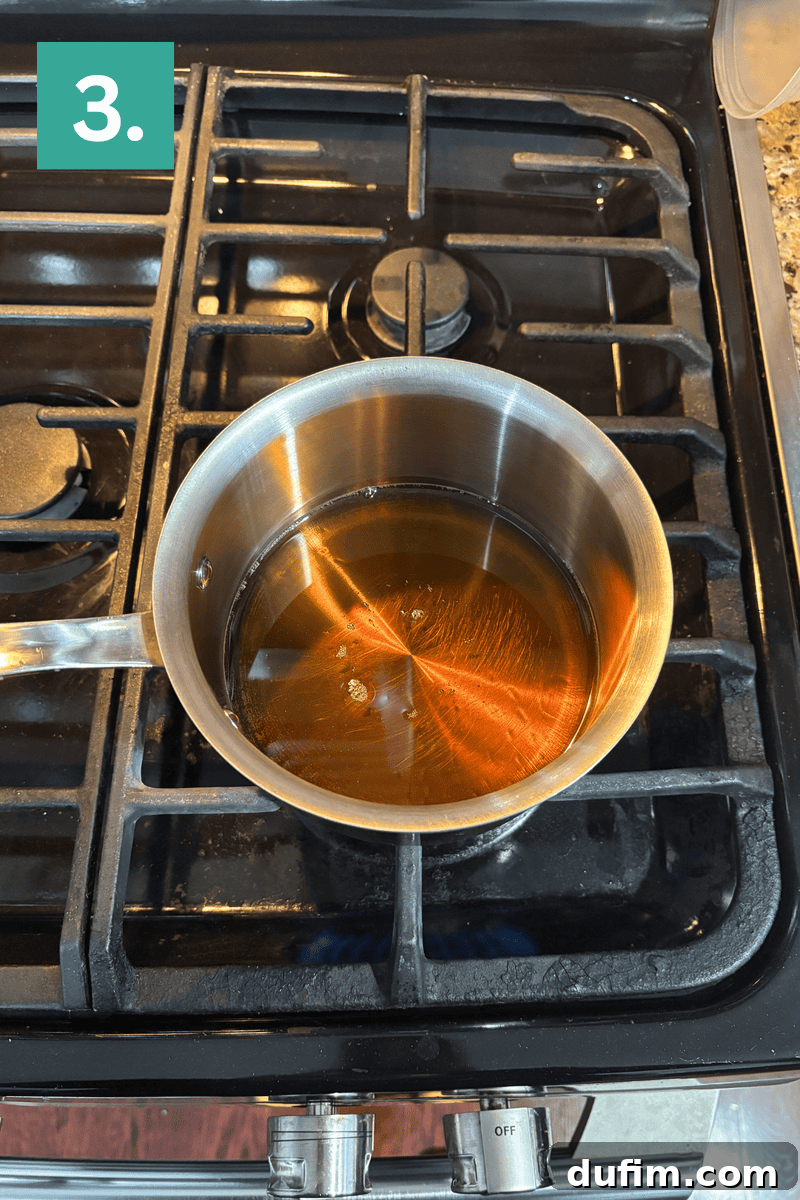
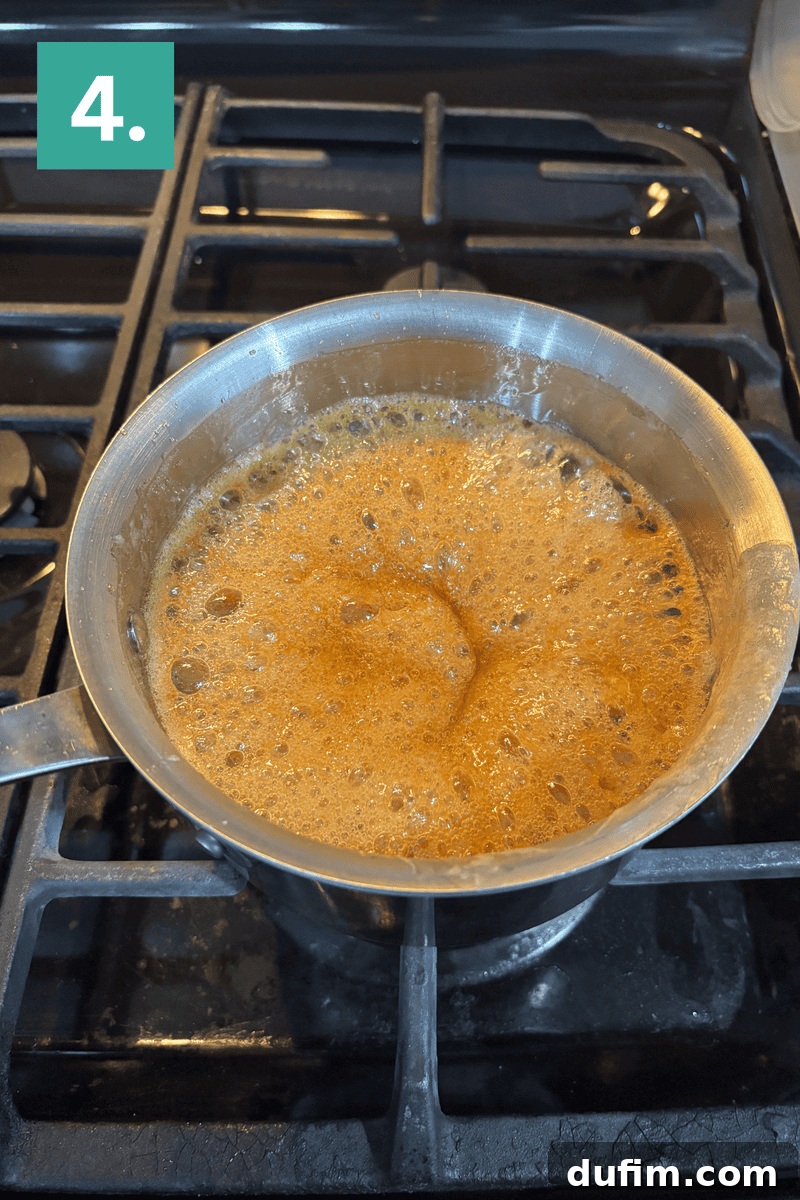
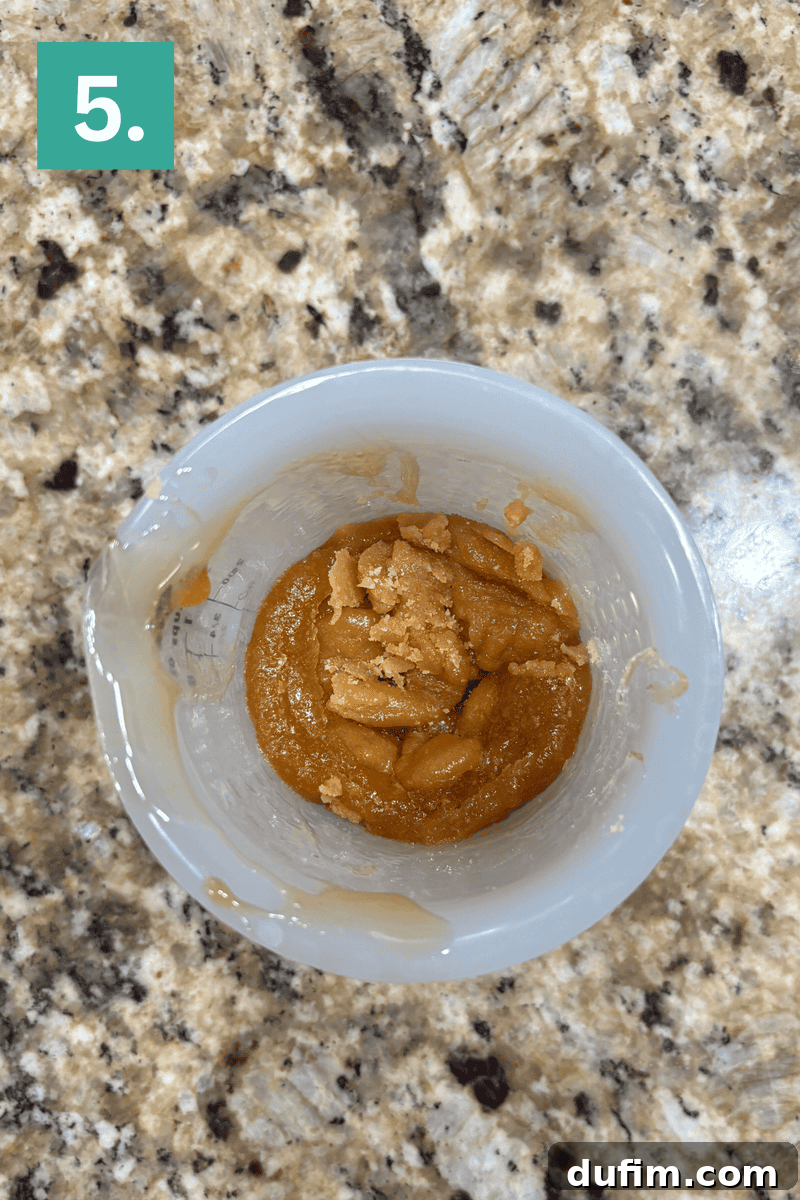
4. Reduce Maple Syrup: Pour the maple syrup into a small, heavy-bottomed saucepan. Place it over medium heat and bring it to a rolling boil. Once boiling, reduce the heat to medium-low or low, allowing the syrup to simmer gently. Let it boil uncovered for approximately 15 to 20 minutes. It’s crucial to keep a constant eye on the syrup during this process to prevent it from overflowing or burning. If you notice the bubbles rising too close to the edge of the pan, simply turn the heat down slightly. After about 15 minutes, carefully pour the hot syrup into a heatproof measuring cup to check its volume. You want it to reduce to about ½ cup (approximately 140-150g). If it hasn’t reached this volume yet, return it to the saucepan and continue simmering, checking every few minutes. Once reduced to the correct volume, set the concentrated maple syrup aside to cool. As it cools, the reduced syrup will thicken and may even crystallize slightly; this is a normal part of the process and ensures a deeper maple flavor in your fudge.
Cook the Fudge Base
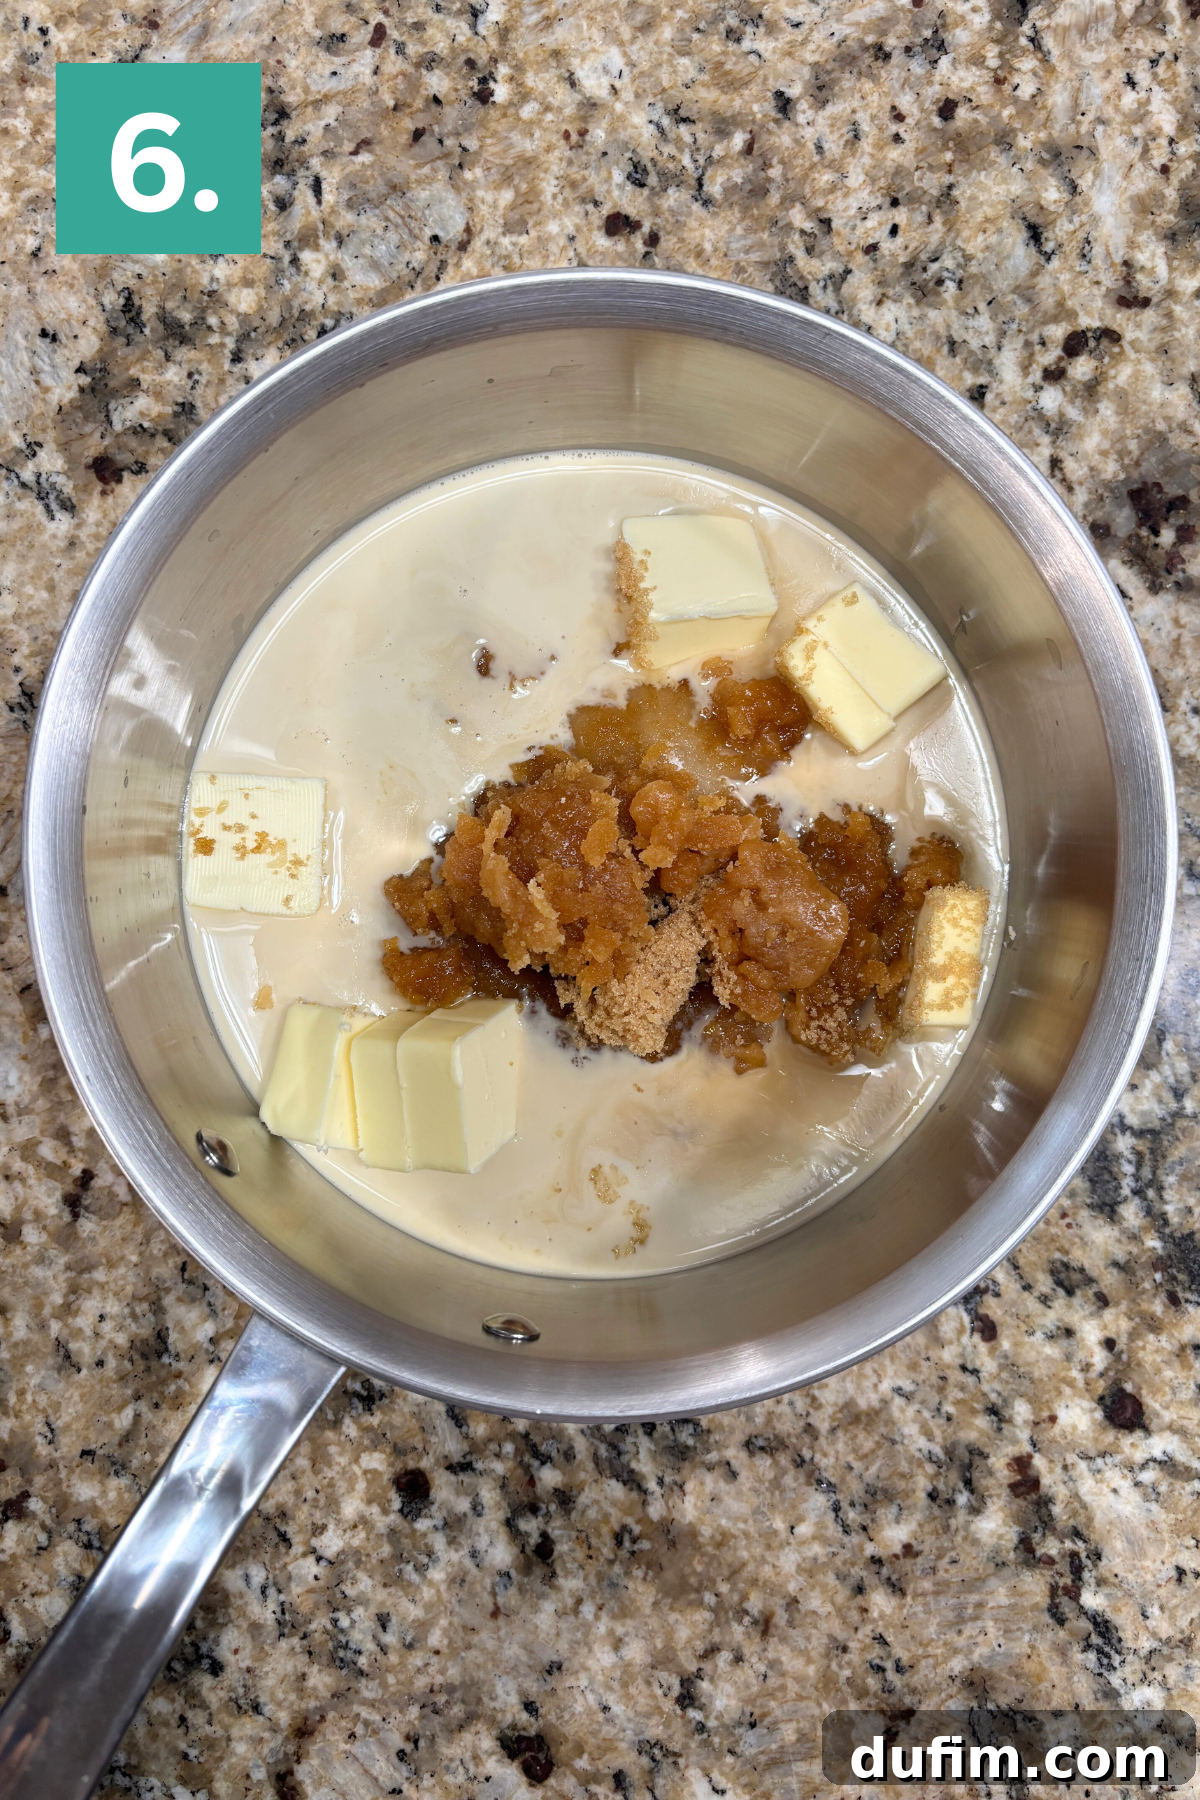
5. Combine Main Ingredients: In a separate, medium-sized, heavy-bottomed saucepan, combine the granulated sugar, brown sugar, cubed unsalted butter, evaporated milk, corn syrup, and the cooled, reduced maple syrup. Place the saucepan over medium heat. Stir the mixture constantly with a wooden spoon or heatproof spatula until all the sugars are completely melted and dissolved. Continue stirring occasionally until the mixture reaches a full, rolling boil. This initial stirring is crucial to prevent sugar from scorching on the bottom of the pan.
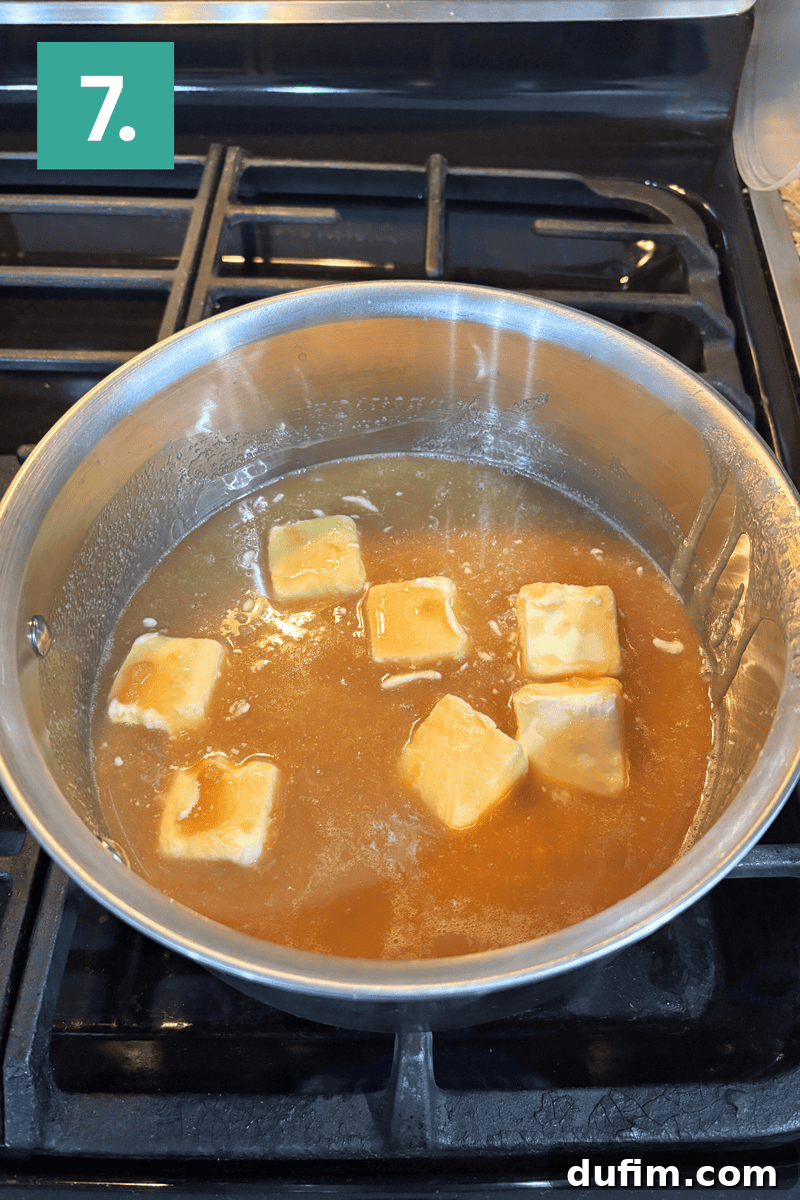
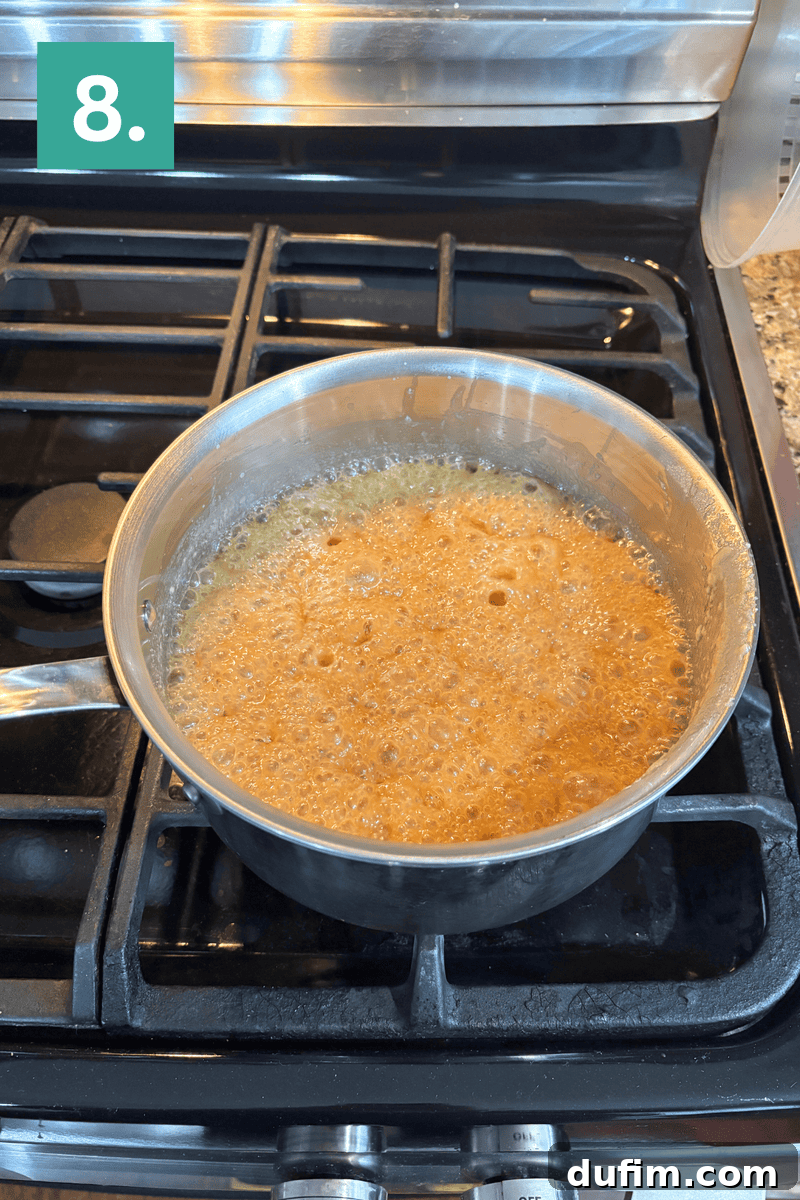
6. Boil to Temperature: Once the mixture reaches a full boil, cease stirring. Allow the mixture to continue boiling undisturbed for approximately 4 to 8 minutes. During this time, it is vital to monitor the temperature using an accurate instant-read candy thermometer. The fudge is ready when the thermometer reads between 236°F and 238°F (113°C to 114°C), which corresponds to the soft-ball stage in candy making. Ensure that the tip of the thermometer is suspended in the liquid and not touching the bottom of the pan, as this can give a false, higher reading and lead to overcooked fudge. Hitting this precise temperature is key to achieving the desired creamy, sliceable texture.
Finishing and Setting the Fudge
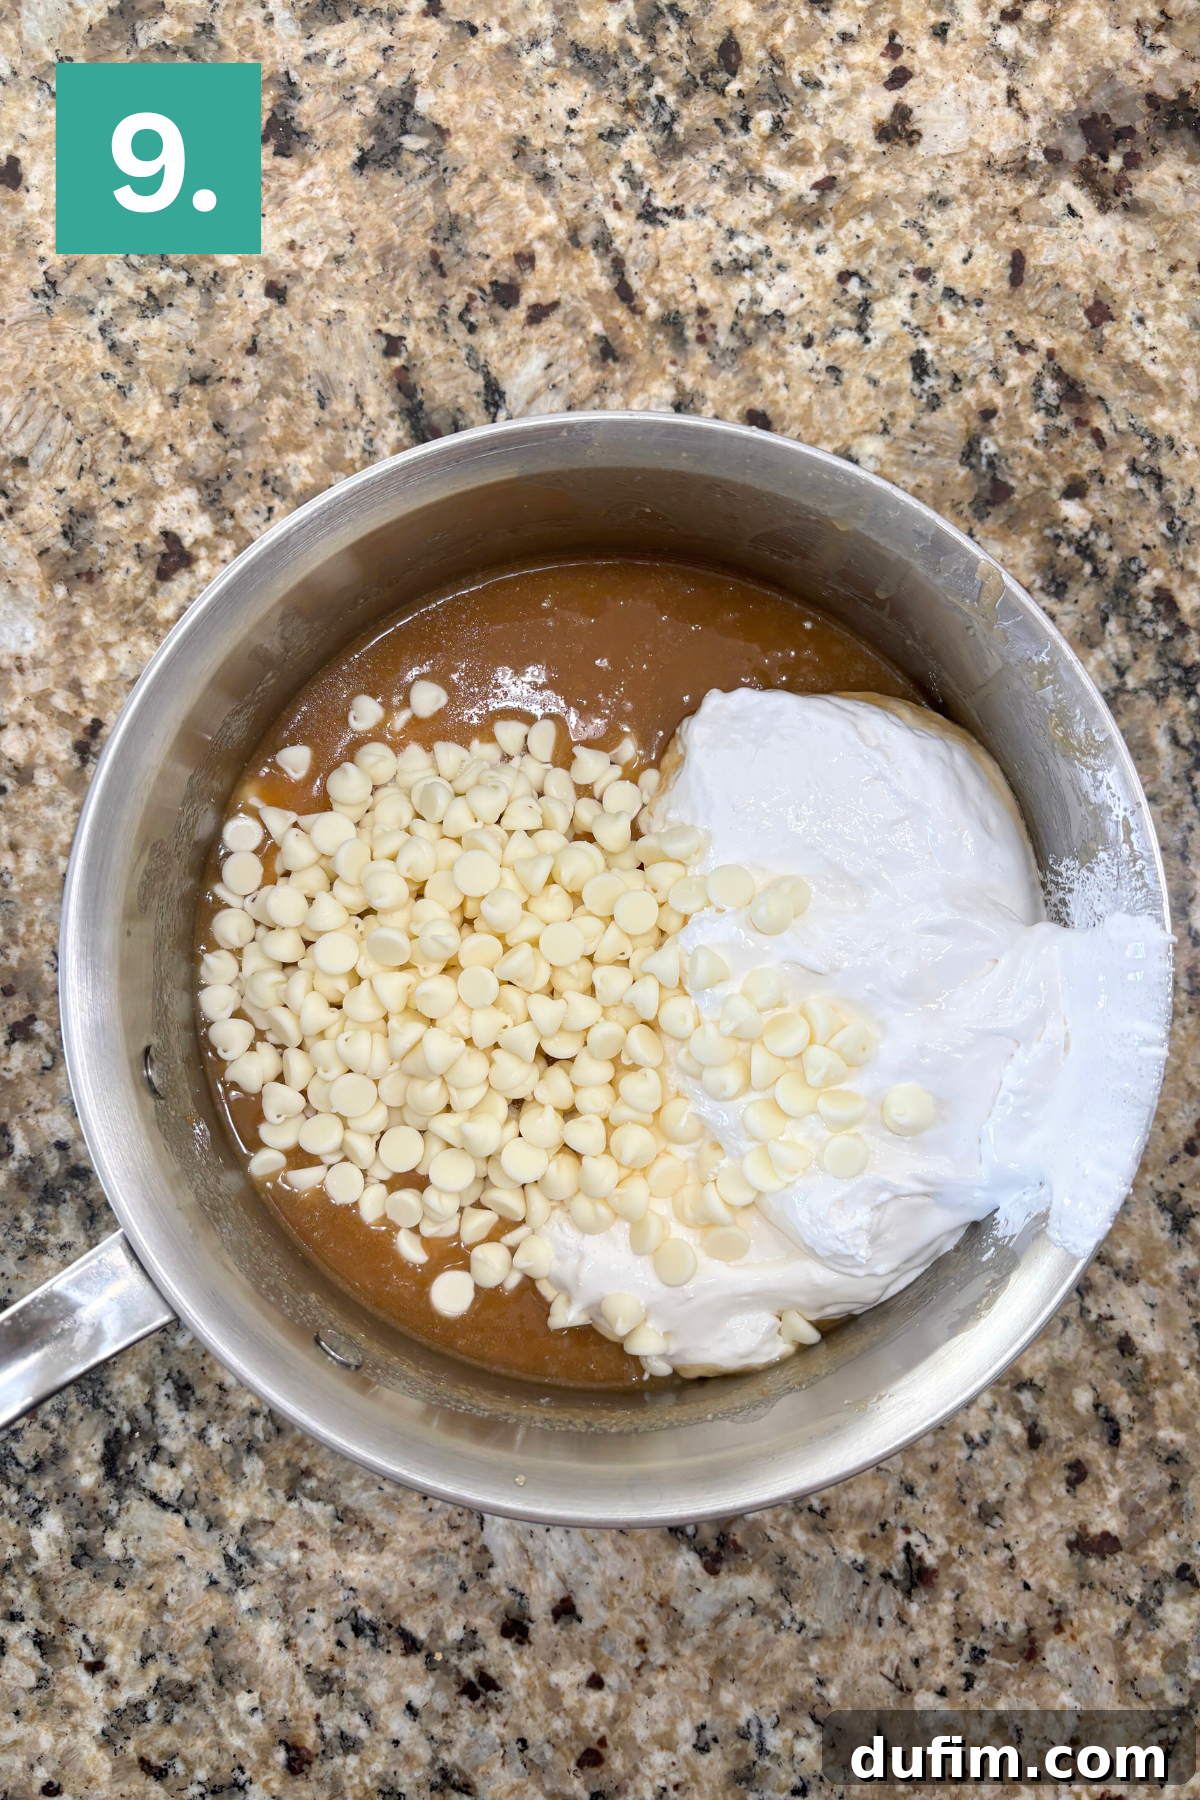
7. Incorporate Remaining Ingredients: As soon as the fudge mixture reaches the target temperature of 236-238°F, immediately remove the saucepan from the heat. Without delay, stir in the white chocolate chips, marshmallow creme, and salt. Continue to stir vigorously with your spatula until the mixture is completely smooth and all the chocolate chips and marshmallow creme have fully melted and incorporated. This process helps to cool the fudge slightly and ensures a uniform, creamy consistency.
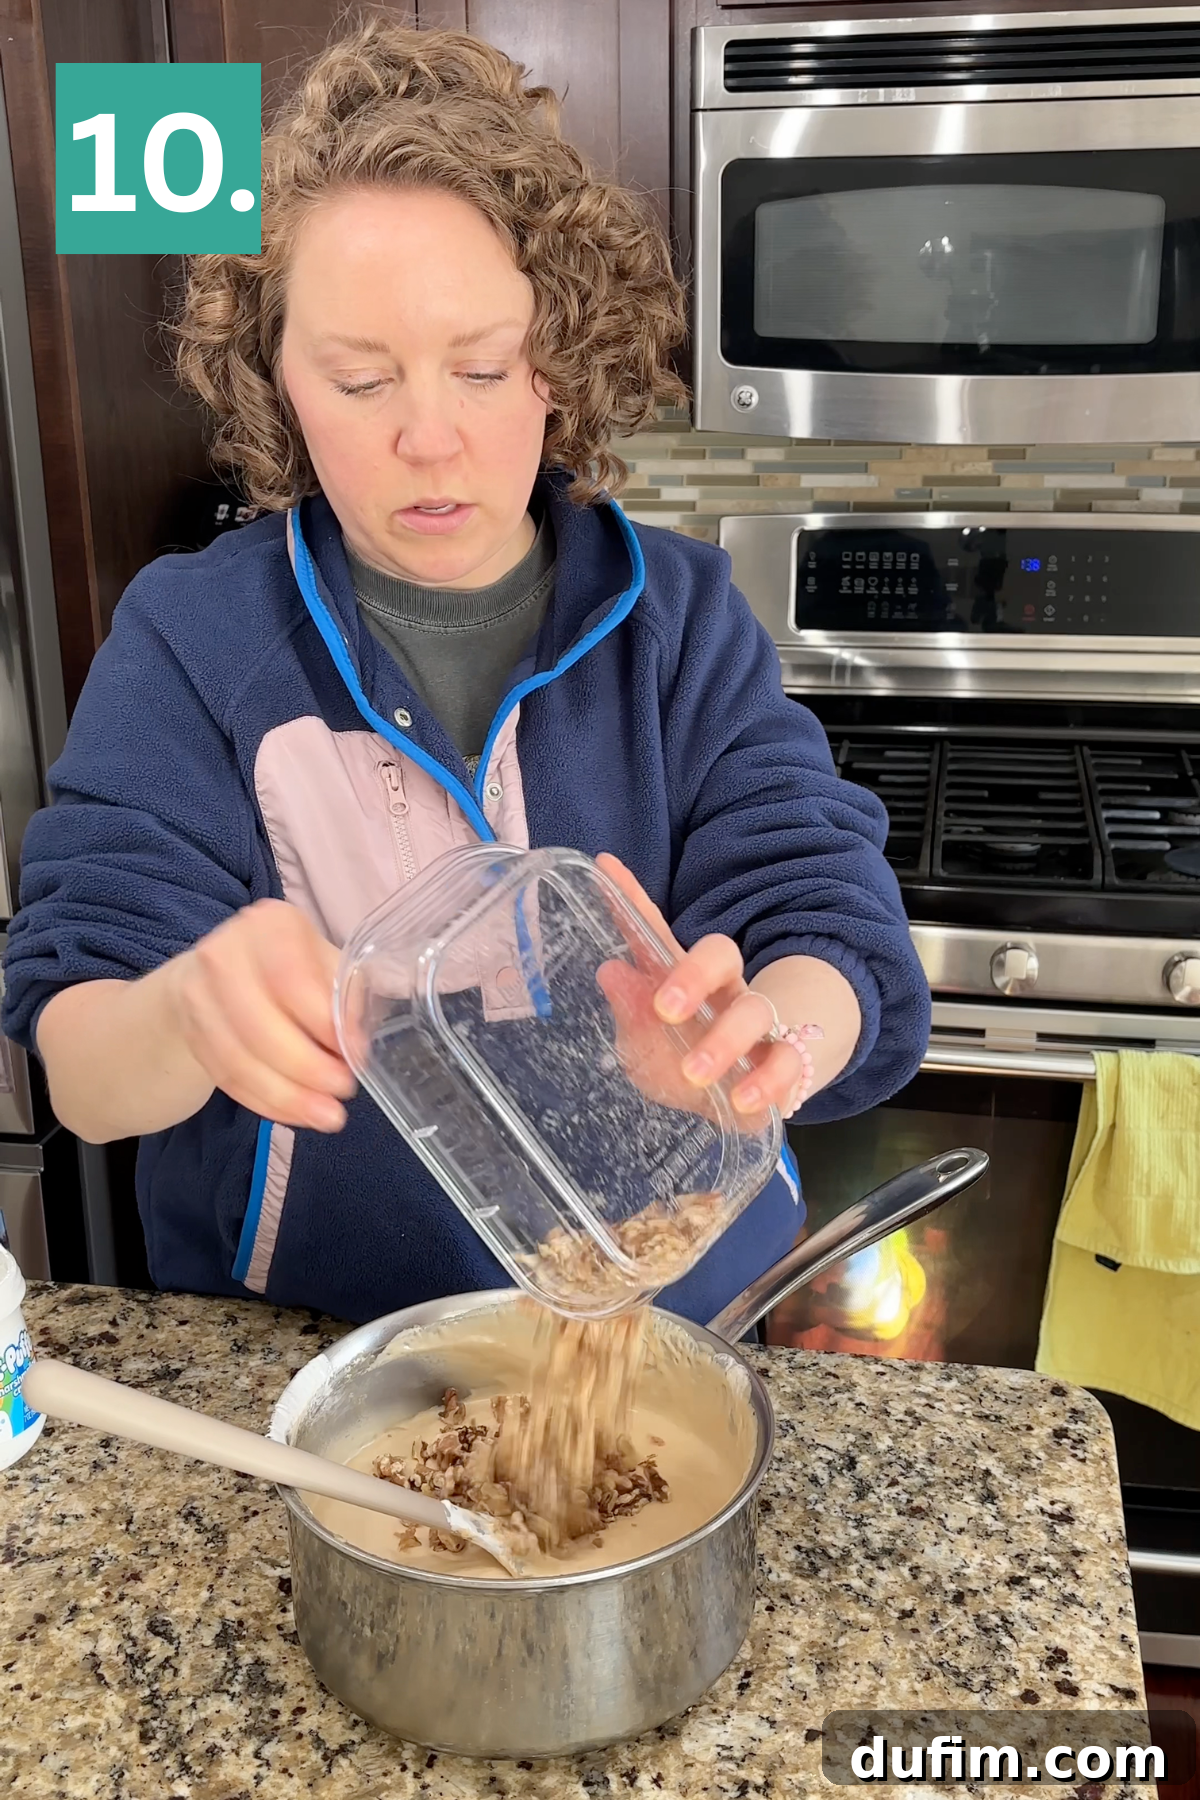
8. Mix in Walnuts: Gently fold in 1 cup of the toasted and chopped walnuts. Stir just enough to ensure the walnuts are evenly distributed throughout the rich, warm fudge mixture. Over-mixing is not necessary at this stage.
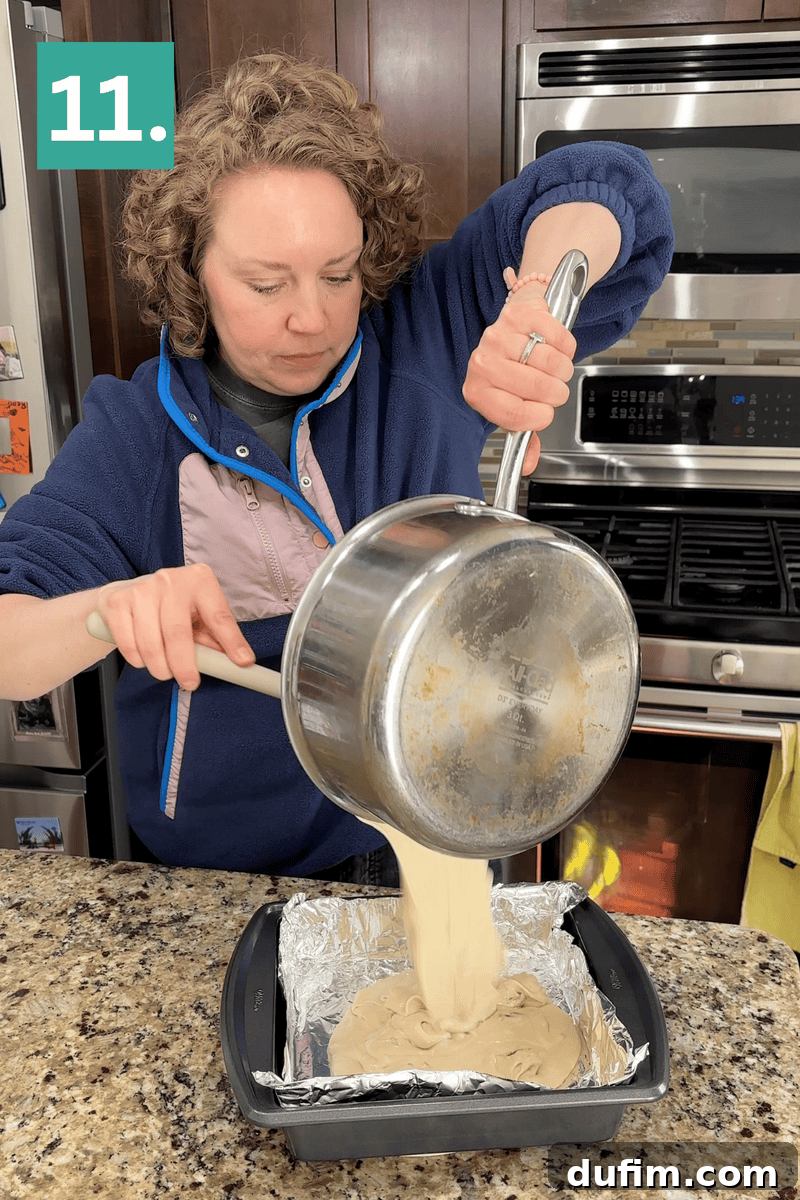
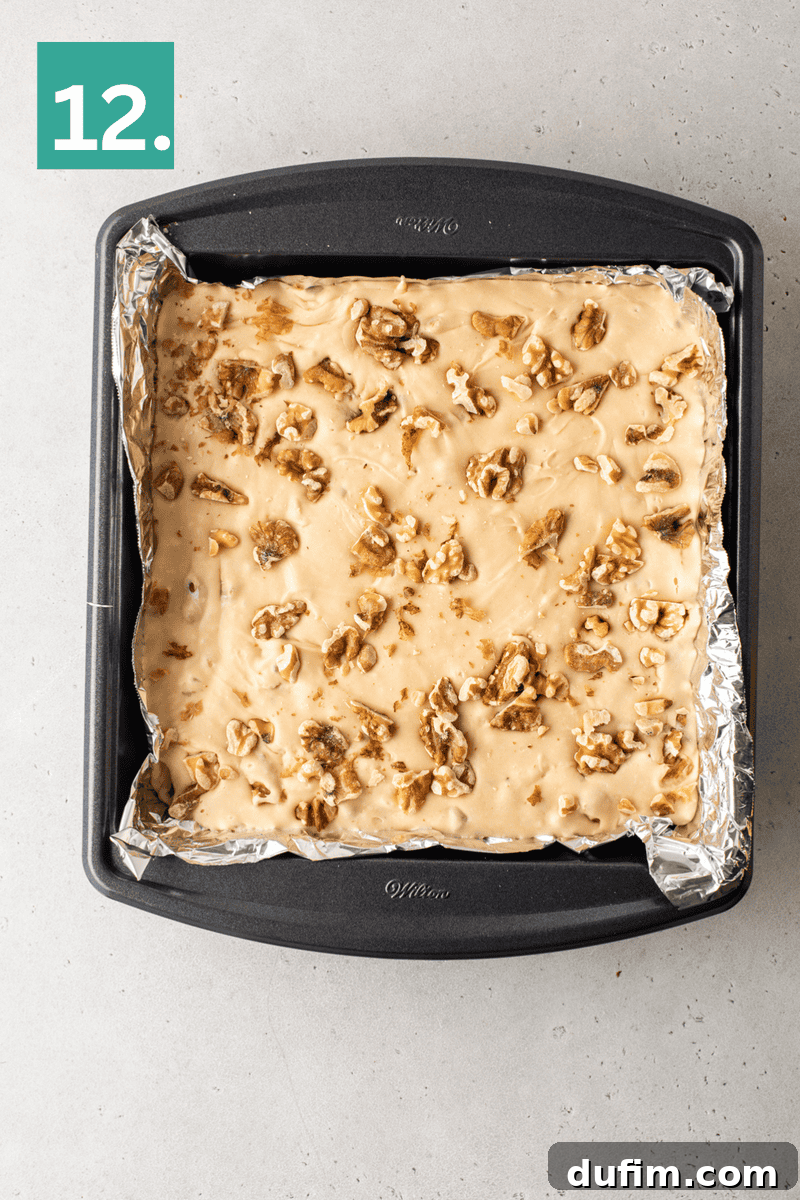
9. Transfer to Pan: Carefully pour the warm fudge mixture into the prepared 8×8 or 9×9 inch square pan. Use your spatula to spread it evenly to the corners. Immediately sprinkle the remaining ½ cup of chopped walnuts evenly over the entire surface of the fudge. Lightly press them into the fudge if desired.
10. Cool and Set: Allow the fudge to cool completely and set fully at room temperature before attempting to cut it. This process typically takes about 6 to 8 hours. For the cleanest, most professional-looking slices and the best texture, allowing it to set overnight is highly recommended. Patience is key for perfect fudge!
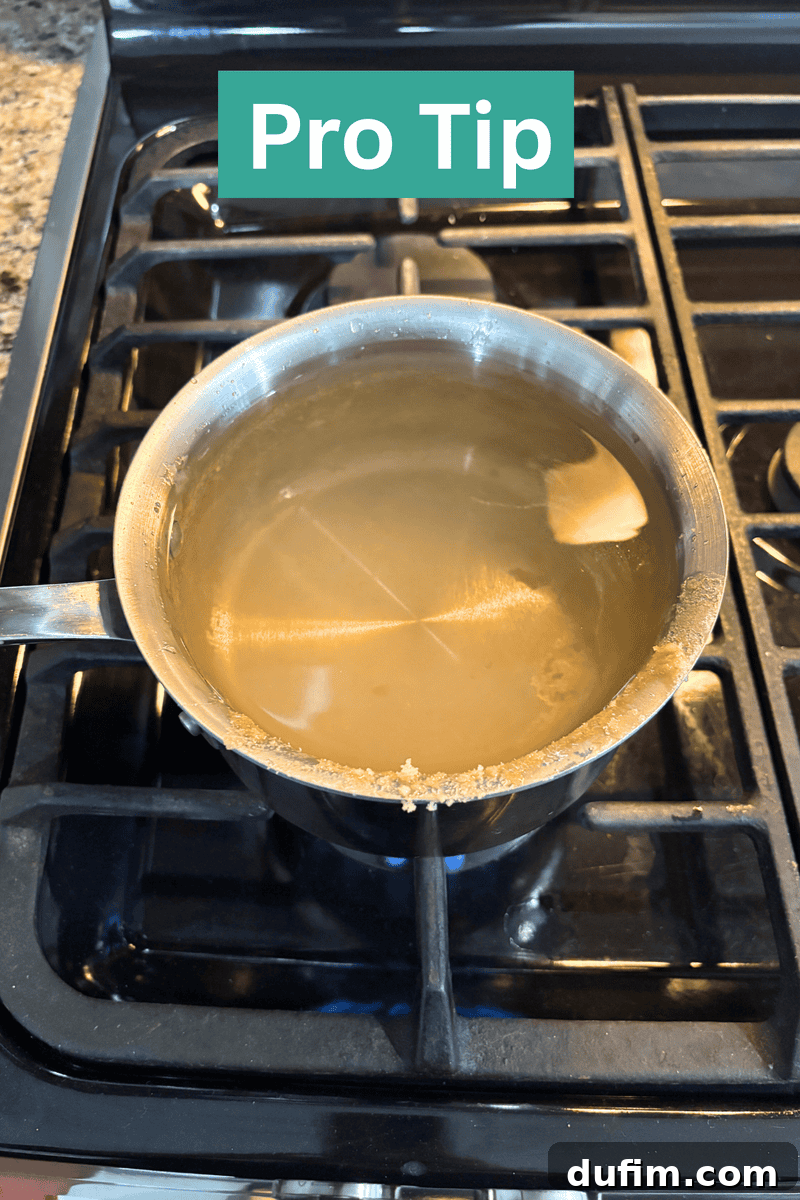
Pro Tip: How to Effortlessly Clean Burnt Sugar from Your Pan
Dealing with crystallized maple syrup or cooked fudge residue that has hardened onto your saucepan can seem like an insurmountable cleaning task. However, there’s a surprisingly simple and effective solution. Once the pan has cooled down, fill it with water – enough to cover all the burnt or hardened sugar residue. Place the pan back on the stove over high heat and bring the water to a rolling boil. Allow it to boil for several minutes; the heat and steam will work wonders in dissolving the stubborn, hardened sugar. As the sugar loosens and melts back into the water, carefully pour out the hot water (be cautious of steam!). You’ll find that the pan is now incredibly easy to wipe clean with a sponge or brush. This method saves you from endless scrubbing and keeps your cookware pristine.
Knowing When Your Maple Fudge is Perfectly Set
Achieving perfectly sliceable fudge requires patience and knowing when it’s truly set. Maple fudge needs adequate time to firm up completely before you attempt to cut it. A well-set fudge will have a surface that appears matte rather than shiny and will feel firm to the touch when gently pressed with a fingertip. If you carefully lift the aluminum foil or parchment paper lining from the pan, the entire slab of fudge should hold its shape rigidly, without any bending or sagging.
Most batches of this maple fudge will set beautifully within about 6 to 8 hours at comfortable room temperature. However, for the absolute cleanest, most professional-looking slices and the finest texture, I highly recommend letting your fudge sit overnight. This extended cooling period allows the internal structure to fully stabilize, making it much easier to achieve crisp, non-sticky cuts. If, after several hours, the fudge still feels noticeably soft or pliable when pressed, it simply needs more time to cool down and set completely. Resist the urge to cut it too soon!
Achieving Pristine Fudge Squares: Expert Cutting Tips
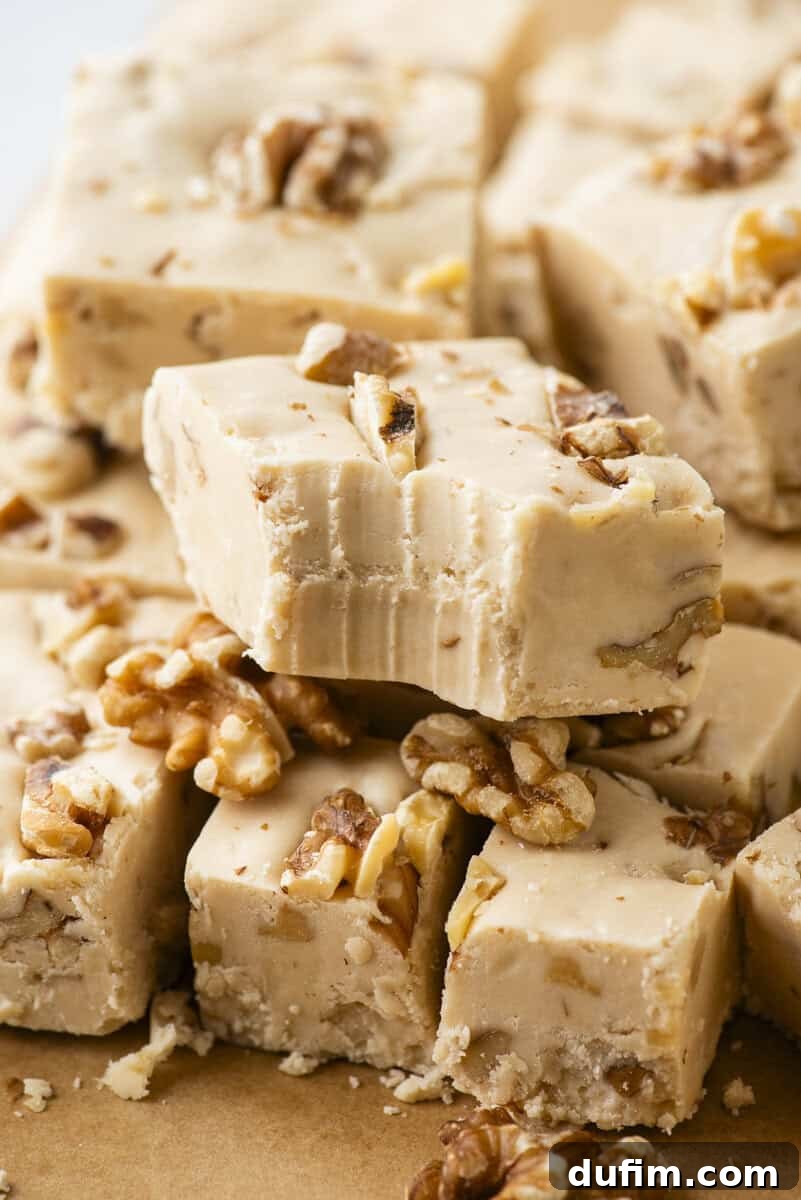
Once your delectable maple fudge has fully set and is firm to the touch, you’re ready to cut it into beautiful, clean squares. The first and most important tip is to utilize the foil or parchment paper lining. Gently lift the entire slab of fudge out of the baking pan using these overhangs. This allows you to place the fudge on a flat cutting surface, making it significantly easier to achieve neat, precise cuts without damaging the edges.
For the cleanest possible cuts, a simple trick makes all the difference: run a sharp, thin-bladed knife under very hot water, then immediately wipe it completely dry. The warm blade will glide effortlessly through the firm fudge, creating crisp edges without sticking or dragging the fudge. This technique minimizes crumbling and ensures a smooth cut.
Additionally, remember to wipe the knife blade clean after each cut. Residual fudge on the knife can cause subsequent cuts to become messy and smeared. Keeping the blade clean ensures that every square has sharp, defined edges, presenting your homemade maple fudge in the most appealing way possible.
Storage and Make-Ahead Tips for Your Maple Fudge
Homemade maple fudge is not only delicious but also remarkably convenient for storage and make-ahead planning. To maintain its optimal freshness and texture, store your maple fudge in an airtight container at room temperature. It will remain wonderfully fresh for up to one week. When layering pieces of fudge in the container, place small sheets of parchment paper or wax paper between each layer to prevent them from sticking together.
If your kitchen tends to be on the warmer side, or if you prefer a firmer texture, you can certainly refrigerate the fudge. However, for the best and most tender, melt-in-your-mouth experience, always allow refrigerated fudge to come back to room temperature before serving.
Fudge is also an excellent candidate for freezing, making it perfect for holiday preparation or enjoying later. I have a dedicated post detailing how to freeze fudge. To freeze, wrap the fully set fudge tightly first in plastic wrap, then again in aluminum foil. Place the wrapped fudge in a freezer-safe container or heavy-duty freezer bag. It can be stored in the freezer for up to three months. When you’re ready to enjoy it, thaw the fudge at room temperature while it is still wrapped. This prevents condensation from forming on the surface, which can affect the texture. This maple fudge makes a delightful addition to Christmas cookie tins and homemade candy trays, making gift-giving easy and delicious.
Exciting Maple Fudge Flavor Variations
This classic maple walnut fudge recipe serves as a perfect base for creative flavor variations. Feel free to experiment and customize to your heart’s delight:
- Maple Pecan Fudge: For a slightly different nutty profile, simply swap the toasted walnuts for an equal amount of toasted pecans. Pecans offer a distinctively sweeter and softer nut flavor, which harmonizes beautifully with the rich maple, creating a truly decadent treat.
- Maple Bourbon Fudge: Elevate your maple fudge with a sophisticated hint of bourbon. When you’re stirring in the white chocolate chips and marshmallow creme, add one to two teaspoons of your favorite bourbon. The bourbon introduces a warm, complex note that deepens and complements the maple flavor, adding an adult twist to this classic candy.
- Maple Bacon Fudge: For a delightfully unexpected sweet, salty, and smoky combination, replace the nuts with 1 cup of crispy, finely chopped bacon. Ensure the bacon is thoroughly cooked until very crisp and then patted dry to remove any excess grease before stirring it into the fudge. This variation offers an intriguing and incredibly addictive flavor profile that will surprise and delight.
Explore More Irresistible Fudge Recipes
If you’ve fallen in love with making homemade fudge, we have plenty more recipes for you to explore:
- Chocolate Peanut Butter Fudge
- Vanilla Fudge
- Rocky Road Fudge
- Peanut Butter Microwave Fudge
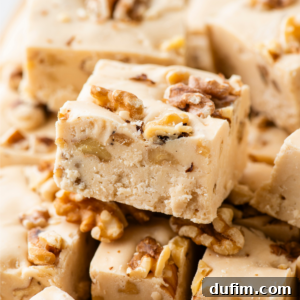
Maple Walnut Fudge
By: Beth
Prep Time: 30 minutes | Cook Time: 8 hours (setting time included) | Servings: 24
After seven test batches, multiple sugar ratios, and one very burnt pot of maple syrup, this maple fudge finally landed in the sweet spot between creamy, sliceable, and packed with real maple flavor. Real maple syrup gives incredible depth, but it also makes fudge more prone to crystallizing than standard fudge, but I didn’t give up.
Ingredients
- ¾ cup (247g) maple syrup, reduced to about ½ cup (140-150g)
- 1 ½ cups (297g) granulated sugar
- ¾ cup (161g) brown sugar
- ½ cup (113g) unsalted butter
- ⅔ cup (160g) evaporated milk
- 2 Tbsp (40g) corn syrup
- 12 oz (340g) white chocolate chips
- 7 oz marshmallow creme
- ½ tsp salt
- 1 ½ cups (about 155g) whole walnuts, toasted and chopped (divided)
Instructions
- Toast Walnuts: Preheat oven to 350ºF (175°C). Spread walnuts in a single layer on a parchment-lined baking sheet. Toast for 7-10 minutes, stirring occasionally, until fragrant and lightly browned. Transfer to a plate to cool. Once cool, rough chop, dividing into 1 cup and ½ cup portions.
- Prepare Pan: Line an 8×8 or 9×9 inch square pan with aluminum foil, leaving overhang for easy lifting. Set aside.
- Reduce Maple Syrup: In a small saucepan over medium heat, bring maple syrup to a boil. Reduce heat to medium-low and simmer for 15-20 minutes, or until volume is reduced to about ½ cup (140-150g). Keep a close eye to prevent overflow. Set aside to cool; it will thicken and may crystallize, which is normal.
- Combine Ingredients: In a medium saucepan over medium heat, combine granulated sugar, brown sugar, butter, evaporated milk, corn syrup, and the reduced maple syrup. Stir constantly until sugar melts. Continue stirring occasionally until the mixture reaches a full boil.
- Boil to Temperature: Stop stirring. Let the mixture boil for 4-8 minutes, or until an instant-read thermometer reads 236-238ºF (113-114°C). Ensure thermometer tip is suspended in liquid, not touching the pan bottom.
- Mix in Finishing Ingredients: Remove saucepan from heat. Immediately stir in white chocolate chips, marshmallow creme, and salt. Stir until the mixture is completely smooth and melted.
- Stir in Walnuts: Add 1 cup of the toasted, chopped walnuts to the fudge. Stir until evenly distributed.
- Transfer: Pour the fudge into the prepared pan. Sprinkle the remaining ½ cup of walnuts evenly on top.
- Cool and Set: Allow the fudge to cool and set completely at room temperature for 6-8 hours, or preferably overnight, for clean slices.
Notes
- To Store: Store maple fudge in an airtight container at room temperature for up to 1 week. Place parchment paper between layers to prevent sticking. If your kitchen is warm, you can refrigerate it, but let it come to room temperature before serving for the best texture.
- To Make Ahead: Fudge is perfect for making ahead. Prepare the fudge 1 to 2 days in advance and store it tightly covered at room temperature. Slice just before serving for the cleanest edges.
- To Freeze: Wrap the fully set fudge tightly in plastic wrap, then place it in a freezer-safe container or bag. Freeze for up to 3 months. Thaw at room temperature while still wrapped to prevent condensation from forming on the surface.

Nutrition Information
All nutritional values are approximate and provided to the reader as a courtesy. Changing ingredients and/or quantities will alter the estimated nutritional calculations.
- Serving: 1g
- Calories: 252kcal
- Carbohydrates: 44g
- Protein: 1g
- Fat: 9g
- Saturated Fat: 6g
- Polyunsaturated Fat: 0.3g
- Monounsaturated Fat: 2g
- Trans Fat: 0.2g
- Cholesterol: 15mg
- Sodium: 73mg
- Potassium: 95mg
- Fiber: 0.03g
- Sugar: 41g
- Vitamin A: 139IU
- Vitamin C: 0.2mg
- Calcium: 65mg
- Iron: 0.1mg