
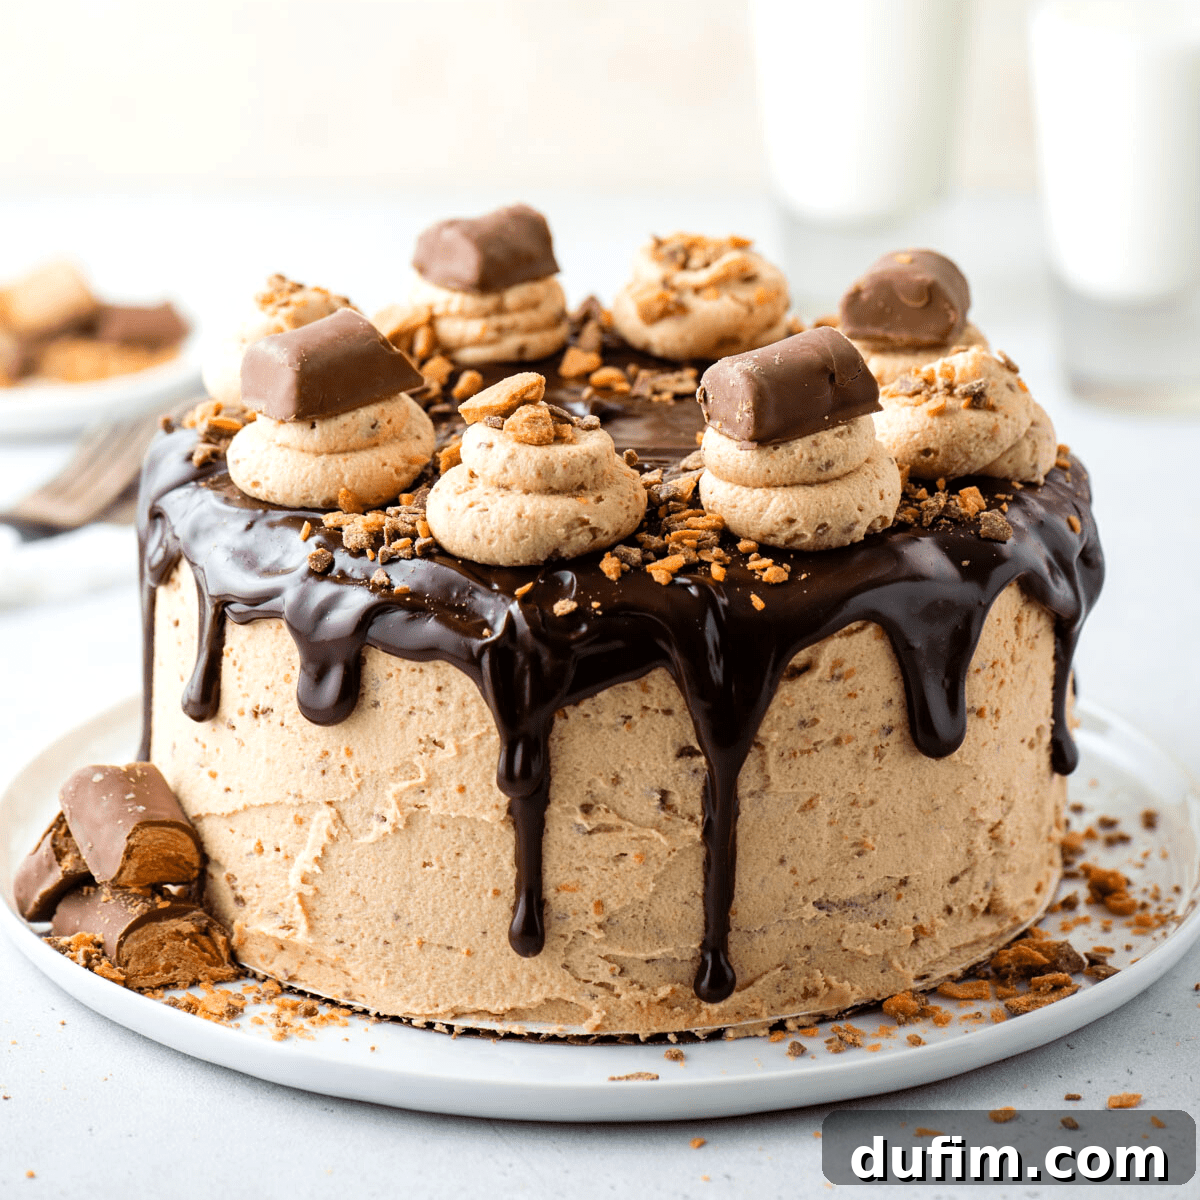
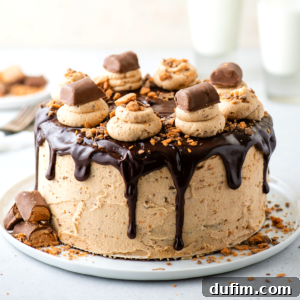
Prepare to experience a dessert like no other with our sensational Butterfinger Cake! This recipe takes a beloved classic and elevates it to an entirely new level, combining the deep, satisfying flavors of rich chocolate with the irresistible crunch and creamy notes of Butterfinger candy bars. Starting with a moist and tender chocolate cake base, perfected over weeks of dedicated refinement, we then introduce a luxurious peanut butter cream cheese frosting, generously studded with chopped Butterfinger pieces. The grand finale? A glistening layer of homemade chocolate ganache that truly makes this cake an unforgettable indulgence. The result is not just a cake, but a show-stopping centerpiece that promises to be incredibly addictive.
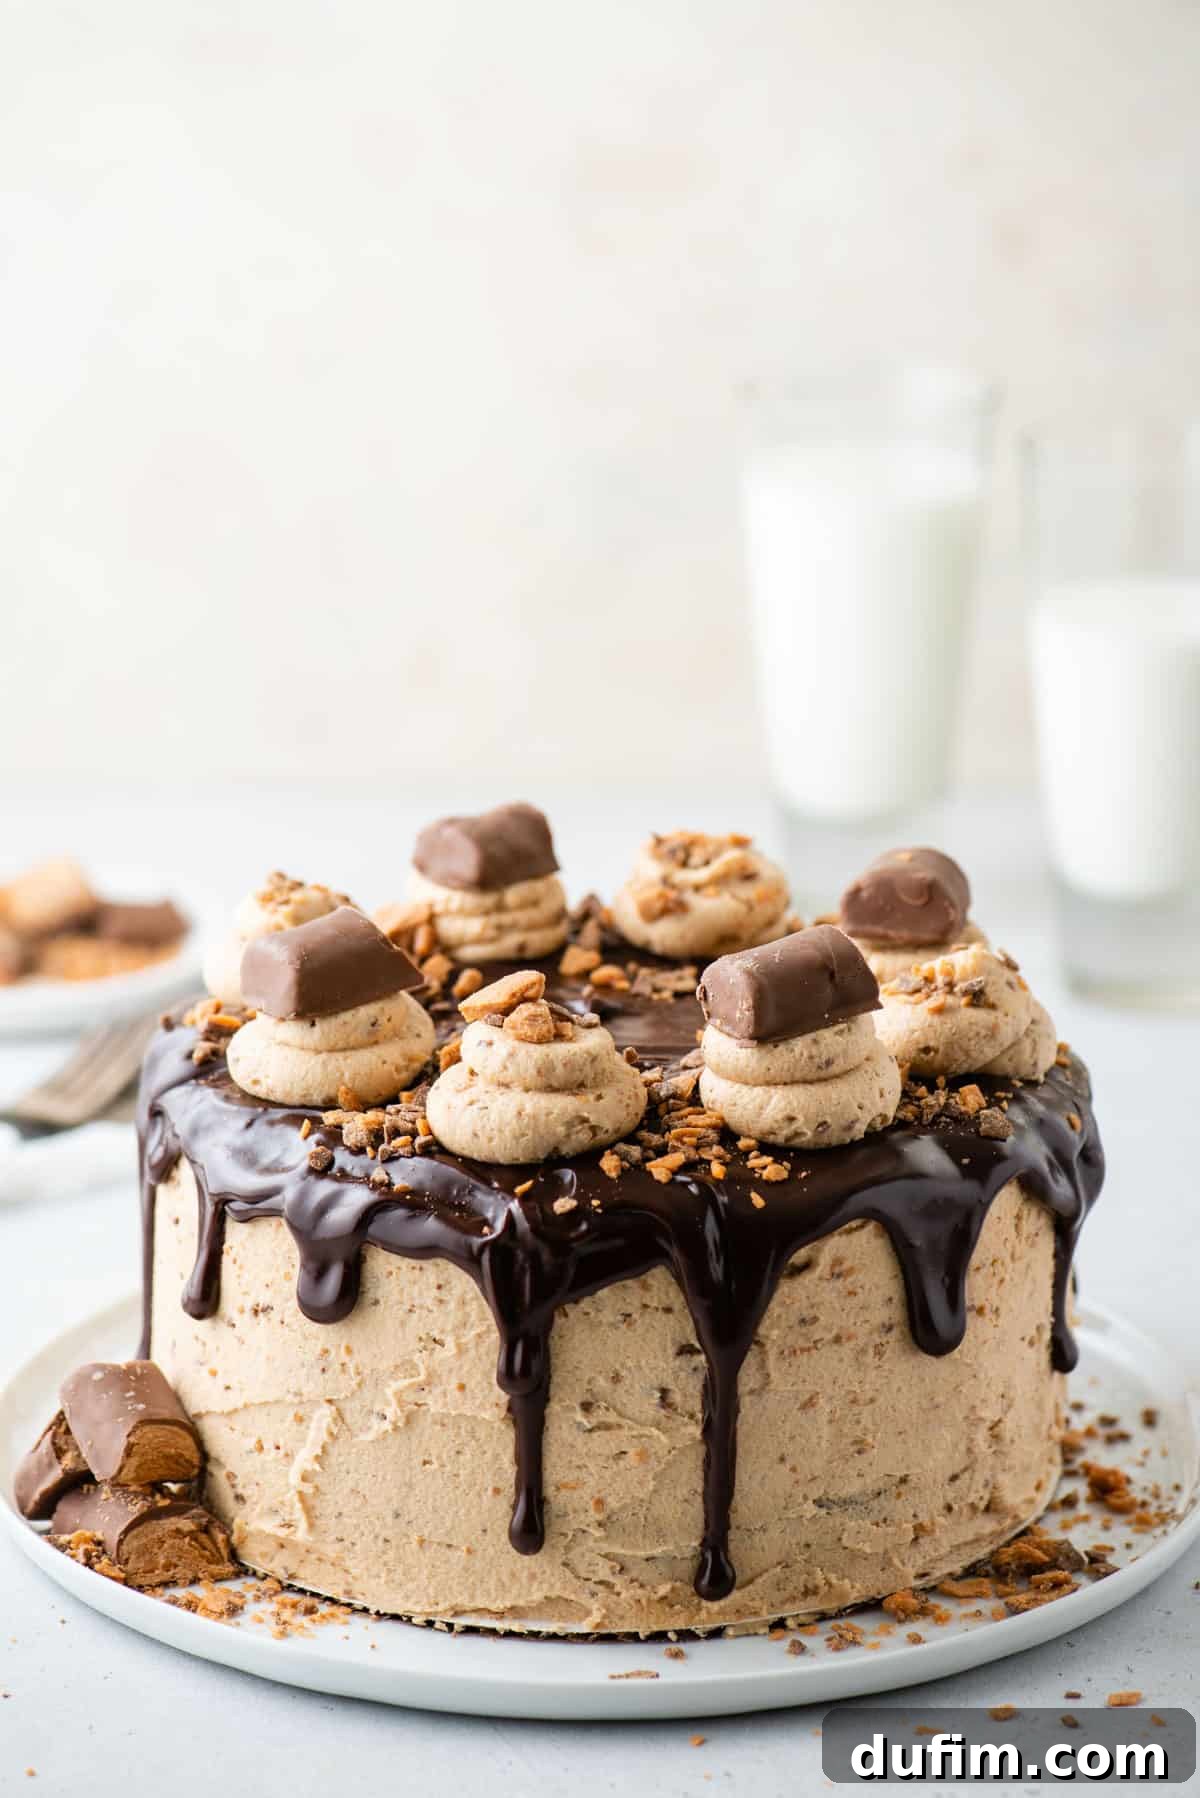
My culinary journey to perfect this cake involved meticulous attention to every detail. I was determined to infuse the chocolate cake batter with an intense, authentic chocolate flavor that truly shines through, not just relying on cocoa powder but incorporating melted chocolate for unparalleled depth. This foundational element, once perfected, became the canvas for our vibrant Butterfinger theme. The decision to pair it with a creamy peanut butter cream cheese frosting was a stroke of genius, offering a perfect balance to the sweetness and adding a delightful tang. Every bite is enhanced by generous flecks of crunchy Butterfinger bits, providing that signature texture and flavor. Finally, a lavish pour of rich chocolate ganache takes this dessert from delicious to truly extraordinary, adding a sophisticated sheen and an extra layer of chocolatey goodness.
Despite its impressive, bakery-quality presentation, please don’t be daunted. I’ve dedicated considerable effort to crafting clear, easy-to-follow instructions, complete with all my expert tips and tricks. My goal is to empower you to bake this spectacular cake successfully on your very first attempt, no matter your baking experience. You’ll be amazed at how achievable it is to create such a stunning and delectable dessert in your own kitchen.
When it comes to the classic pairing of chocolate and peanut butter in candy, many immediately think of Reese’s Peanut Butter Cups. However, the unique, crunchy, and intensely peanut-buttery Butterfinger bar is often overlooked, a true unsung hero of the candy aisle. In this recipe, we bring the Butterfinger bar out of the shadows and into the spotlight, allowing its distinctive flavor and texture to take center stage. Its crispy, flaky peanut butter core, enrobed in chocolate, is absolutely magical when chopped and incorporated into a cake, adding a textural contrast and an explosion of flavor that is simply irresistible.
The Foundation: A Perfectly Moist Chocolate Buttermilk Cake
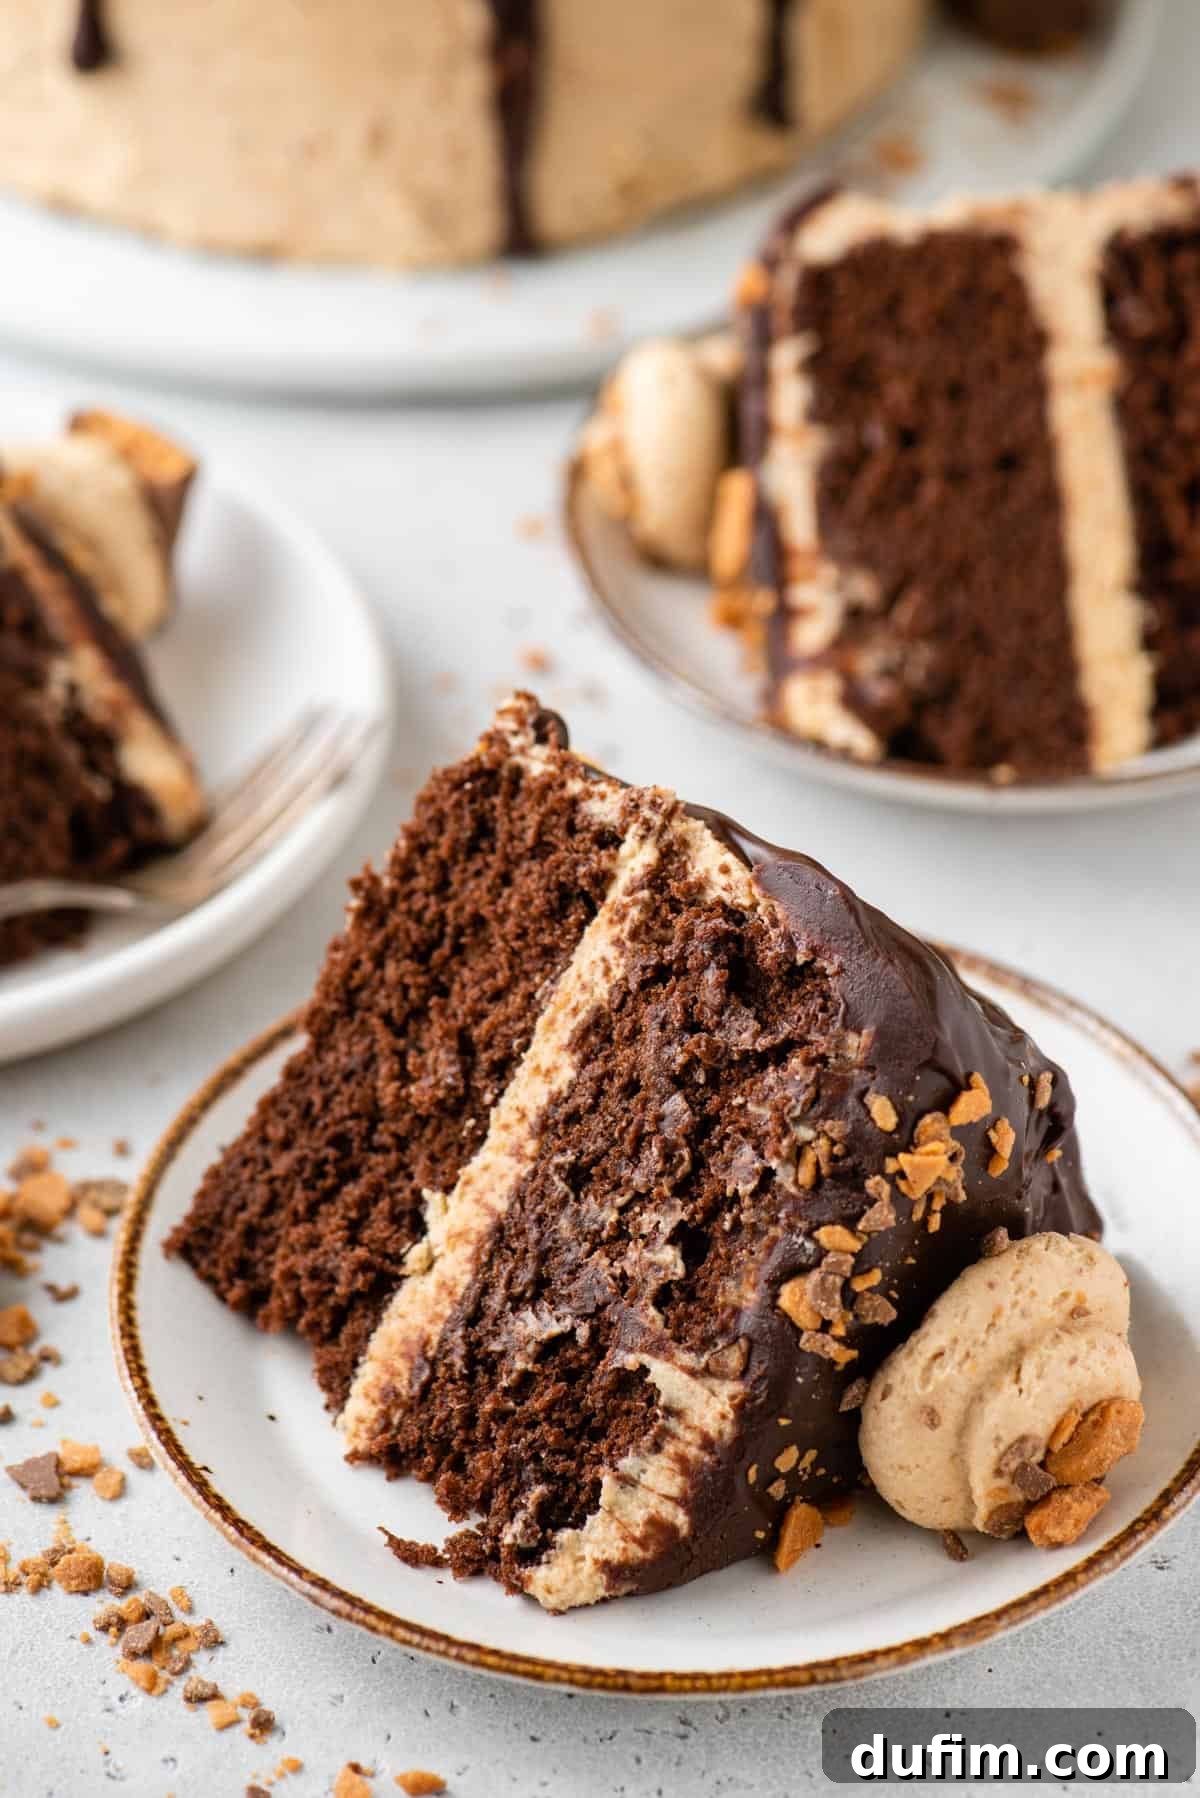
The journey to this ultimate Butterfinger cake begins with a simple, yet profoundly impactful, buttermilk chocolate cake recipe. Buttermilk is a secret weapon in baking, known for its ability to transform baked goods. While it imparts a subtle tang that beautifully complements the chocolate, its primary role is to react with the baking soda, creating an incredibly tender, moist crumb. This chemical reaction results in a lighter, more delicate texture that melts in your mouth.
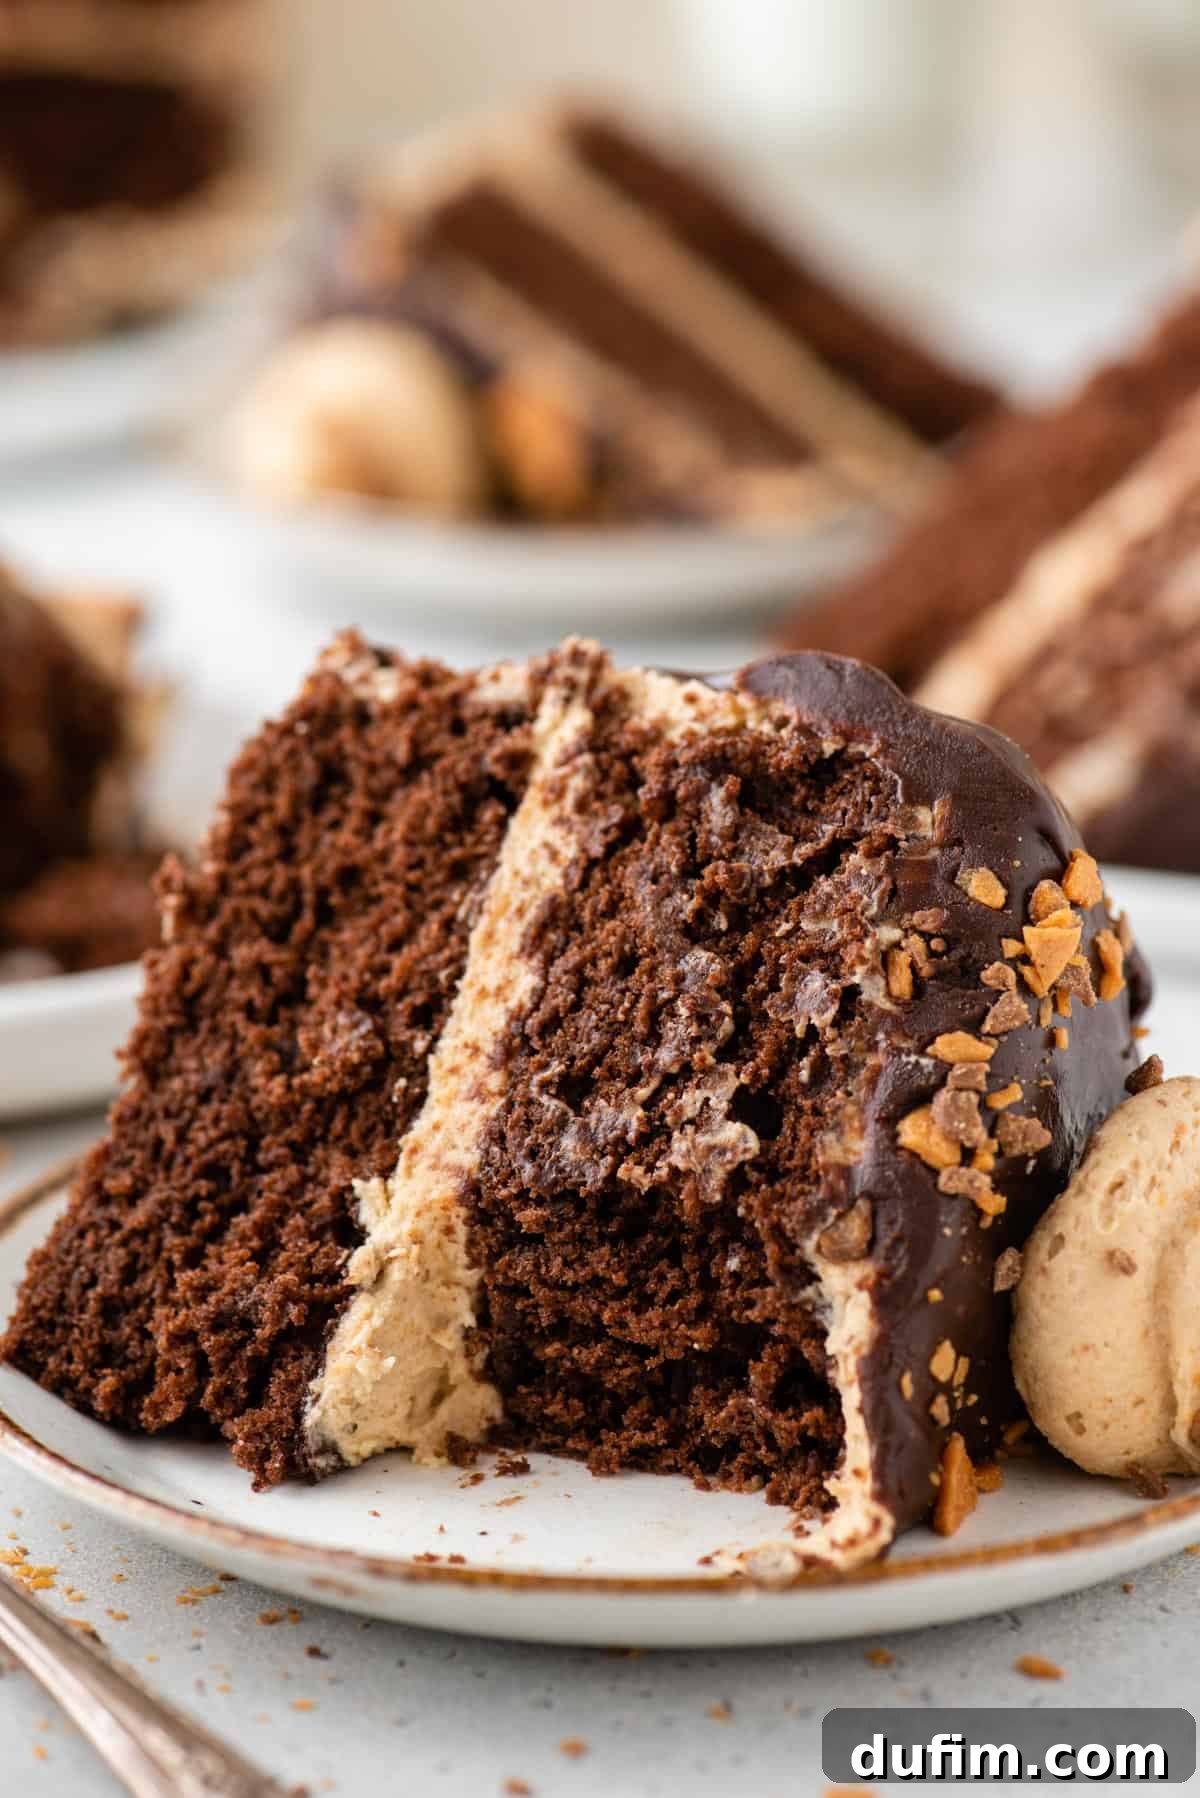
What truly sets this chocolate cake apart is its dual chocolate infusion. We don’t just rely on natural unsweetened cocoa powder; we also incorporate rich, melted bittersweet chocolate baking bar directly into the batter. This combination creates an unparalleled depth of chocolate flavor that simply cannot be achieved by using one or the other alone. The cocoa powder contributes to the cake’s dark hue and classic chocolate essence, while the melted chocolate adds a luxurious richness and a nuanced, complex chocolate profile. The synergy between these two forms of chocolate ensures that every slice is bursting with intense, authentic chocolate goodness, providing the perfect base for our peanut butter and Butterfinger elements.
Elevating the Experience: Peanut Butter Cream Cheese Frosting & Ganache
Beyond the exceptional cake layers lies a frosting that truly defines this dessert: our homemade peanut butter cream cheese frosting. Instead of a straightforward, potentially heavy peanut butter buttercream, we introduce cream cheese into the mix. This not only lightens the frosting, giving it a wonderfully fluffy and airy texture, but also adds a crucial tangy note that expertly balances the overall sweetness of the cake. The cream cheese cuts through the richness of the peanut butter and chocolate, creating a harmonious flavor profile that keeps you coming back for more.
To further enhance the Butterfinger experience, the frosting is generously flecked with crunchy little bits of chopped Butterfinger bar. These candy pieces provide delightful pockets of texture and bursts of that signature peanut butter and toffee-like flavor throughout every bite. Once the cake is beautifully frosted and adorned, it receives its crowning glory: a luscious drizzle of homemade chocolate ganache. This velvety smooth topping not only adds an elegant, professional finish but also contributes another layer of intense chocolate flavor and a luxurious mouthfeel, truly taking this cake from delightful to absolutely sublime.
This Butterfinger cake isn’t just a dessert; it’s a celebration of one of the most beloved flavor combinations known to mankind: peanut butter and chocolate. This pairing is timeless, universally adored, and always in style, making this cake perfect for virtually any occasion—be it a birthday, a holiday gathering, or simply a weekend treat. What’s even better is that whipping up this impressive cake is far less daunting than it appears. It’s not overly difficult or excessively time-consuming, and many of the core ingredients are likely staples in your pantry. A quick trip to grab some Butterfingers and a few other odds-and-ends, and you’ll be well on your way to baking this masterpiece. Imagine the joy of creating such a stunning and flavorful cake from scratch, ready to impress family and friends or simply to savor yourself on a cozy, rainy afternoon.
Explore More Candy-Inspired Delights
If you find yourself enchanted by the idea of transforming your favorite candies into extraordinary desserts, then you’re in for a treat! Our collection features a variety of recipes inspired by classic confections, designed to bring joy to any sweet tooth. Following the indulgence of this Butterfinger cake, we highly recommend exploring our Rolo Stuffed Brownies, which offer gooey caramel centers within rich brownies. For fellow peanut butter cup enthusiasts, our Reese’s Cup Cookies are an absolute must-try, delivering that iconic flavor combination in cookie form. And for a simpler, no-bake option that doesn’t skimp on fun, our No Bake M&M Pie is a colorful and delightful choice. If you’re a dedicated Butterfinger aficionado, don’t miss our equally delightful Butterfinger Pie recipe, another fantastic way to enjoy your favorite crunchy candy!
Butterfinger Cake: Essential Ingredients
Refer to the detailed recipe instructions below for precise ingredient quantities and comprehensive preparation steps.
For the Rich Chocolate Cake Layers:
- All-purpose flour: The structural base for a tender crumb.
- Natural unsweetened cocoa powder: Crucial for deep chocolate flavor; Dutch process cocoa is not recommended as this recipe is balanced for natural cocoa’s acidity.
- Baking soda: Works with buttermilk to create rise and tender texture.
- Baking powder: Provides additional lift for a fluffy cake.
- Salt: Enhances all the flavors and balances sweetness.
- Unsalted butter: Ensure it’s at room temperature for optimal creaming with sugar.
- Granulated sugar: Sweetens the cake and contributes to moisture.
- Bittersweet chocolate baking bar: Melted and slightly cooled, this adds intense chocolate depth without cooking the eggs prematurely.
- Large eggs: Provide structure, richness, and moisture; use at room temperature.
- Buttermilk: Delivers a tender crumb and a subtle tang. Easily homemade by adding 1 tablespoon of white vinegar or lemon juice to a liquid measuring cup, then filling to the 1 cup mark with whole milk. Whisk and let sit for 5 minutes until slightly thickened.
- Hot tap water: Helps create a thin batter, contributing to a moist cake and blooming the cocoa.
For the Creamy Peanut Butter Cream Cheese Frosting:
- Cream cheese: Softened to room temperature for a smooth, lump-free frosting with a delightful tang.
- Unsalted butter: Also at room temperature, essential for a light and fluffy frosting.
- Creamy peanut butter: Opt for regular creamy peanut butter (like Jif or Skippy) rather than natural varieties that require stirring, as their varying oil content can affect frosting consistency.
- Powdered sugar: Sweetens and thickens the frosting, creating a silky smooth texture.
- Vanilla extract: A touch of warmth and aromatic complexity.
- Salt: Balances the sweetness and enhances the peanut butter flavor.
- Butterfingers: Finely chopped, these iconic candy bars are the star, adding irresistible crunch and flavor to the frosting and for garnish.
For the Decadent Chocolate Ganache:
- Heavy whipping cream: The base for a rich and smooth ganache.
- Chocolate chips: Semi-sweet chocolate chips are ideal for a balanced, luxurious ganache.
Pro Tip: Expertly Chopping Butterfinger Bars
Achieving the perfect Butterfinger bits for your cake and frosting is simpler than you might think. I highly recommend placing a sheet of parchment paper on a sturdy cutting board. This provides a non-stick surface and makes cleanup a breeze. Use a sharp chef’s knife to chop the Butterfingers into your desired size pieces. The parchment paper isn’t just for neatness; it’s a clever trick. Once chopped, you can easily lift and fold the paper to funnel all those delicious Butterfinger bits directly into a bowl or onto the cake without any mess or sticky residue.
While a food processor might seem like a quick solution, I’ve found that candy bars, especially those with a unique texture like Butterfingers, are best chopped by hand. This method allows you to control the size and consistency of the pieces, preventing them from becoming too fine or turning into a sticky, melted clump on the blades. Hand-chopping also minimizes the risk of the chocolate melting from the heat generated by a food processor, ensuring perfectly defined, crunchy candy pieces throughout your cake.
Crafting Your Masterpiece: How to Make a Butterfinger Cake
Baking a layer cake might seem like a grand undertaking, but this Butterfinger cake recipe is designed to be approachable and manageable. Like many sophisticated layer cakes, this recipe can be conveniently made in stages, allowing you to prepare components ahead of time and assemble them when ready. You can even freeze the baked chocolate cake layers, providing a fantastic head start for busy schedules or future cravings.
Step 1: Prepare the Irresistible Chocolate Cake
Prepare Your Pans: Begin by preheating your oven to a precise 350ºF (175°C). Grease two 8-inch springform pans generously with unsalted butter, ensuring both the sides and bottoms are well-coated. To guarantee effortless cake removal, line the bottom of each pan with a parchment paper circle. Set these prepared pans aside.
Melt the Bittersweet Chocolate: Roughly chop the bittersweet chocolate baking bar into smaller, uniform pieces. Place these pieces in a microwave-safe bowl. Heat the chocolate in the microwave for 2 minutes at 50% power. Stir thoroughly, then continue heating in short, 30-second intervals at 50% power, stirring after each, until the chocolate is completely melted and smooth. Crucially, allow the melted chocolate to cool slightly before incorporating it into the wet ingredients; this prevents it from cooking the eggs prematurely.
Combine Dry Ingredients: In a medium mixing bowl, whisk together the all-purpose flour, natural unsweetened cocoa powder, baking soda, baking powder, and salt until thoroughly combined. This ensures even distribution of leavening agents. Set this bowl aside.
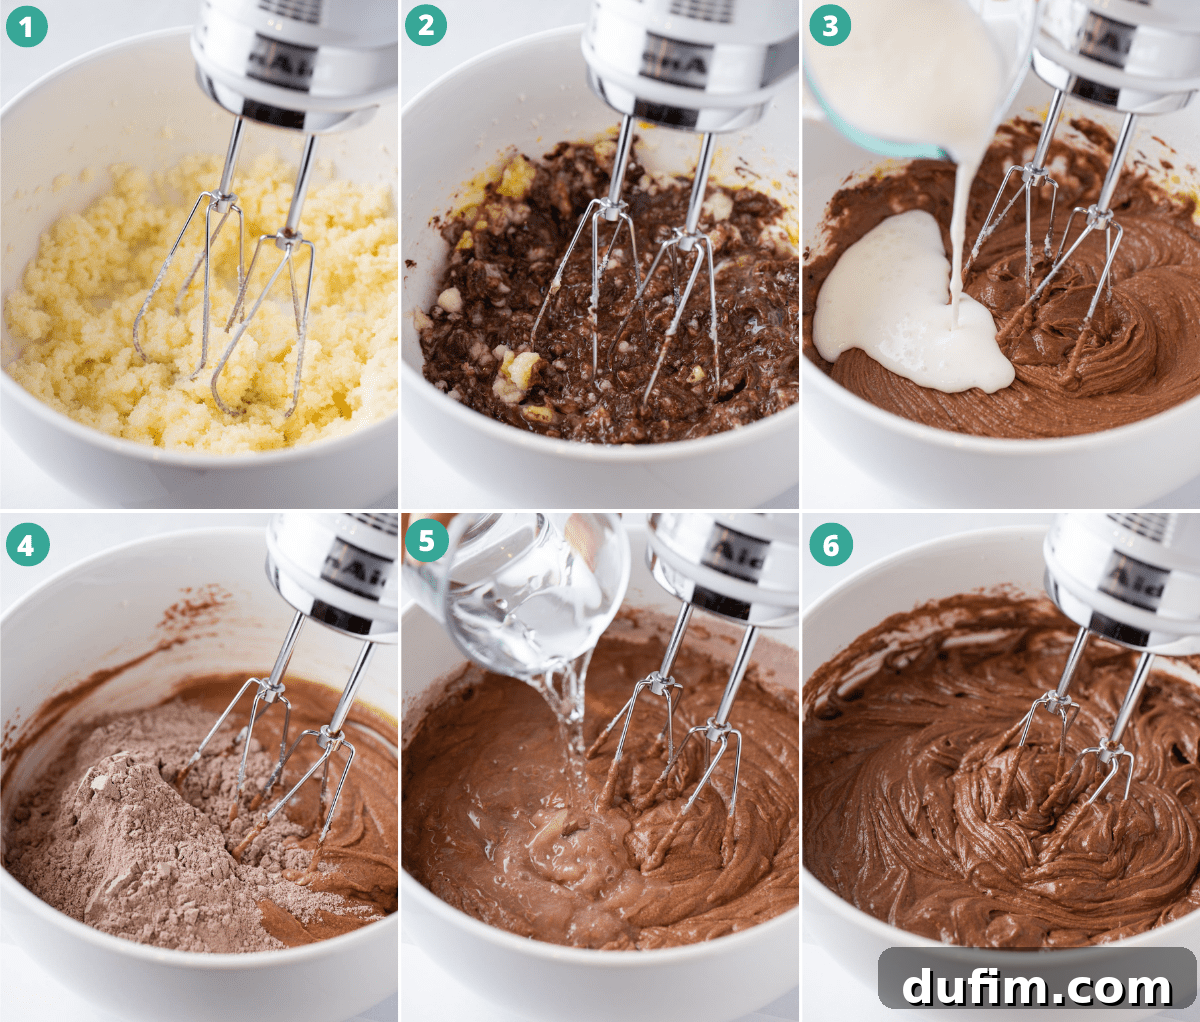
Cream Wet Ingredients: In a separate, larger mixing bowl, using an electric mixer, beat the room temperature unsalted butter and granulated sugar together for a full 2 minutes. Continue beating until the mixture is visibly pale and fluffy, signifying that air has been incorporated. Next, beat in the large eggs one at a time, followed by the slightly cooled melted chocolate. Mix for approximately 30 seconds until just combined. Overmixing at this stage can lead to a dense cake.
Finish the Batter: With the mixer on low speed, add half of the buttermilk and beat for about 20 seconds, just until partially incorporated. Then, add half of the dry ingredients mixture and beat on low speed until streaks of flour disappear. Pour in the remaining buttermilk along with the hot tap water; beat only until the liquid is just mixed into the batter. Finally, add the remaining dry ingredients and beat on the lowest speed possible until the batter is uniformly combined and smooth. Be careful not to overmix, as this can develop the gluten too much, resulting in a tough cake.
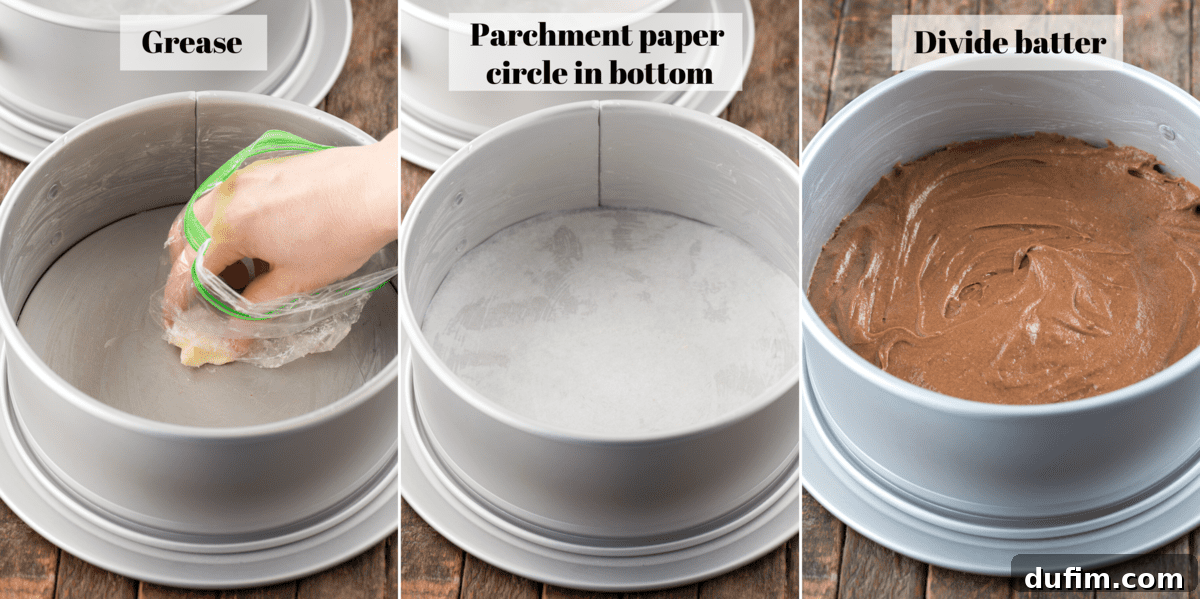
Bake to Perfection: Evenly divide the prepared batter between the two 8-inch springform pans. Aim for approximately 2 ½ cups of batter in each pan for consistent layers. For perfectly level cakes with fewer cracks, consider using bake-even cake strips around the outside of your pans. Place both pans on the same rack, in the center of your preheated oven. Bake for 33 to 39 minutes, or until a wooden toothpick inserted into the very center of a cake comes out clean, indicating it’s fully baked. Remember that baking times can vary significantly depending on your specific oven and the size of your pans, so always trust the toothpick test.
Cool Completely: Allow the freshly baked cakes to cool in their pans for a good 20 to 30 minutes. This crucial cooling period helps the cakes set and firm up, making them easier to handle. After this initial cooling, carefully remove the cakes from the springform pans and transfer them to wire racks to cool completely. Ensure the cakes are absolutely cool to the touch before attempting to frost them; otherwise, your frosting will melt and slide off.
Step 2: Whip Up the Luxurious Peanut Butter Cream Cheese Frosting
Begin the Frosting Base: In a clean mixing bowl, combine the room temperature cream cheese, softened unsalted butter, and creamy peanut butter. Using an electric mixer on high speed, beat these ingredients together for 2 to 3 minutes until the mixture is incredibly light, fluffy, and perfectly smooth. Scrape down the sides of the bowl as needed to ensure everything is well incorporated.
Incorporate Powdered Sugar: Reduce the mixer speed to low. Gradually add 2 cups of the powdered sugar, beating until the sugar is fully incorporated and the frosting begins to thicken. Continue scraping down the bowl to prevent any dry pockets of sugar.
Final Flavorings and Butterfinger Bits: Add the remaining powdered sugar, vanilla extract, and salt. Mix on low speed until everything is well combined and the frosting is smooth. Now, it’s time for the star ingredient: gently fold in 1 cup of the finely chopped Butterfingers. Mix on low speed just until the candy pieces are evenly distributed throughout the frosting. Remember to reserve about ½ cup of chopped Butterfingers for decorating the finished cake. If, at any point, the frosting appears too thick for your liking, you can beat in an additional tablespoon of heavy cream or milk, one teaspoon at a time, until your desired consistency is achieved.
Step 3: Craft the Velvety Chocolate Ganache
Melt the Chocolate and Cream: Place your chosen chocolate chips (semi-sweet works beautifully here) and heavy whipping cream in a microwave-safe bowl. Microwave the mixture for 20 to 30 seconds, or just until you see the heavy cream beginning to bubble around the edges. This indicates it’s hot enough to melt the chocolate.
Achieve Smoothness: After microwaving, resist the urge to stir immediately. Allow the mixture to sit undisturbed for 1 minute. This allows the hot cream to fully melt the chocolate chips. Then, using a spatula or whisk, gently stir the mixture from the center outwards until it transforms into a smooth, glossy, and uniform ganache. It’s imperative that the ganache cools to room temperature before you apply it to the cake. If the ganache is too warm, it will be too thin and will simply run off the cake, creating a messy rather than a beautiful drip effect.
Step 4: The Grand Assembly
Prepare Cake Layers: Once your chocolate cake layers are completely cool, carefully check for any domes on top. If needed, use a cake leveler or a long serrated knife to gently trim off any domed tops, creating perfectly flat layers that stack neatly. To ensure your cake remains stable during frosting and serving, spread a small amount of peanut butter cream cheese frosting onto the center of your cake plate or stand. This acts as a “glue” to secure the first cake layer.
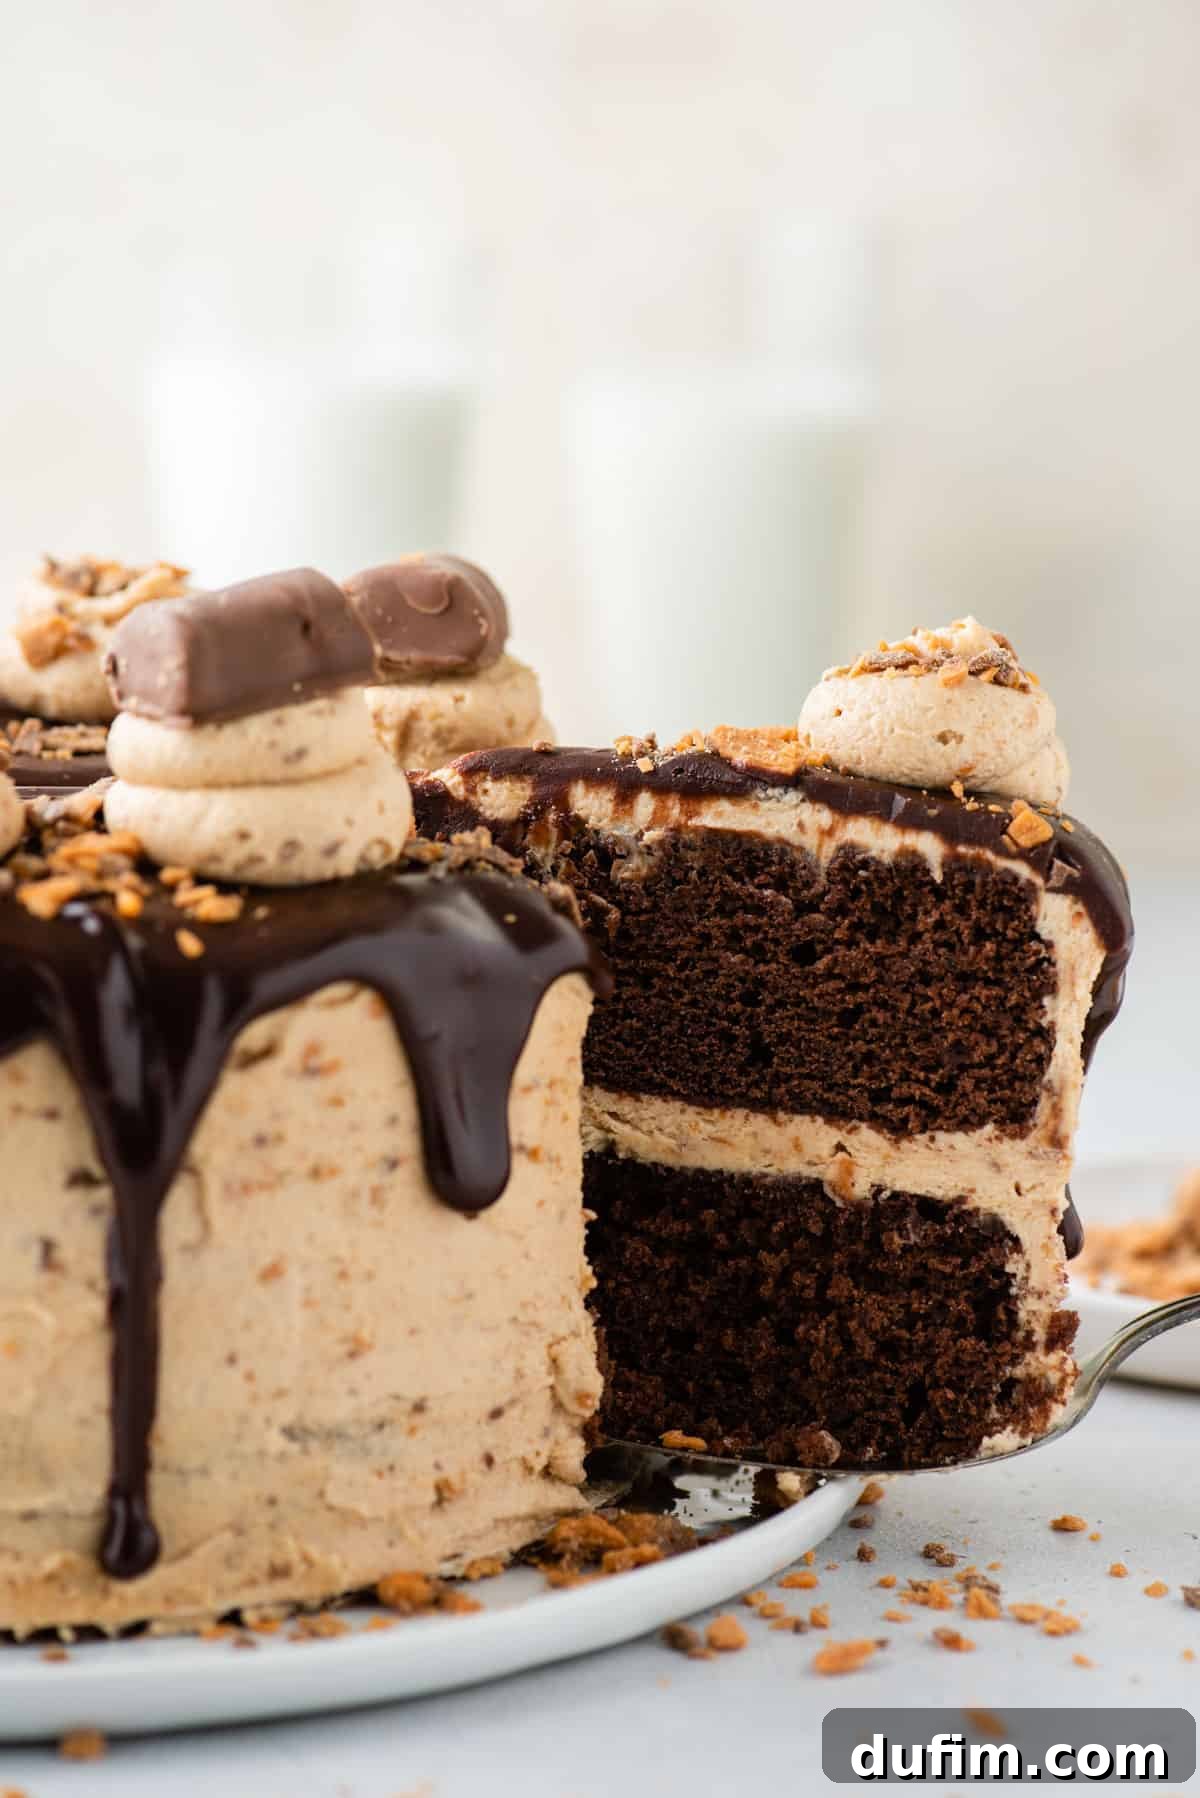
Layer and Frost: Carefully place the first leveled cake layer onto the frosted spot on your cake plate. Measure out approximately ¾ to 1 cup of the peanut butter cream cheese frosting and spread it evenly over the top of this first layer. Gently place the second cake layer on top, aligning it carefully. Now, use the remaining frosting to generously cover the sides and top of the entire cake, creating a smooth and even coat. If you plan to pipe decorative swirls on top of the cake, set aside about ½ cup of frosting for this purpose.
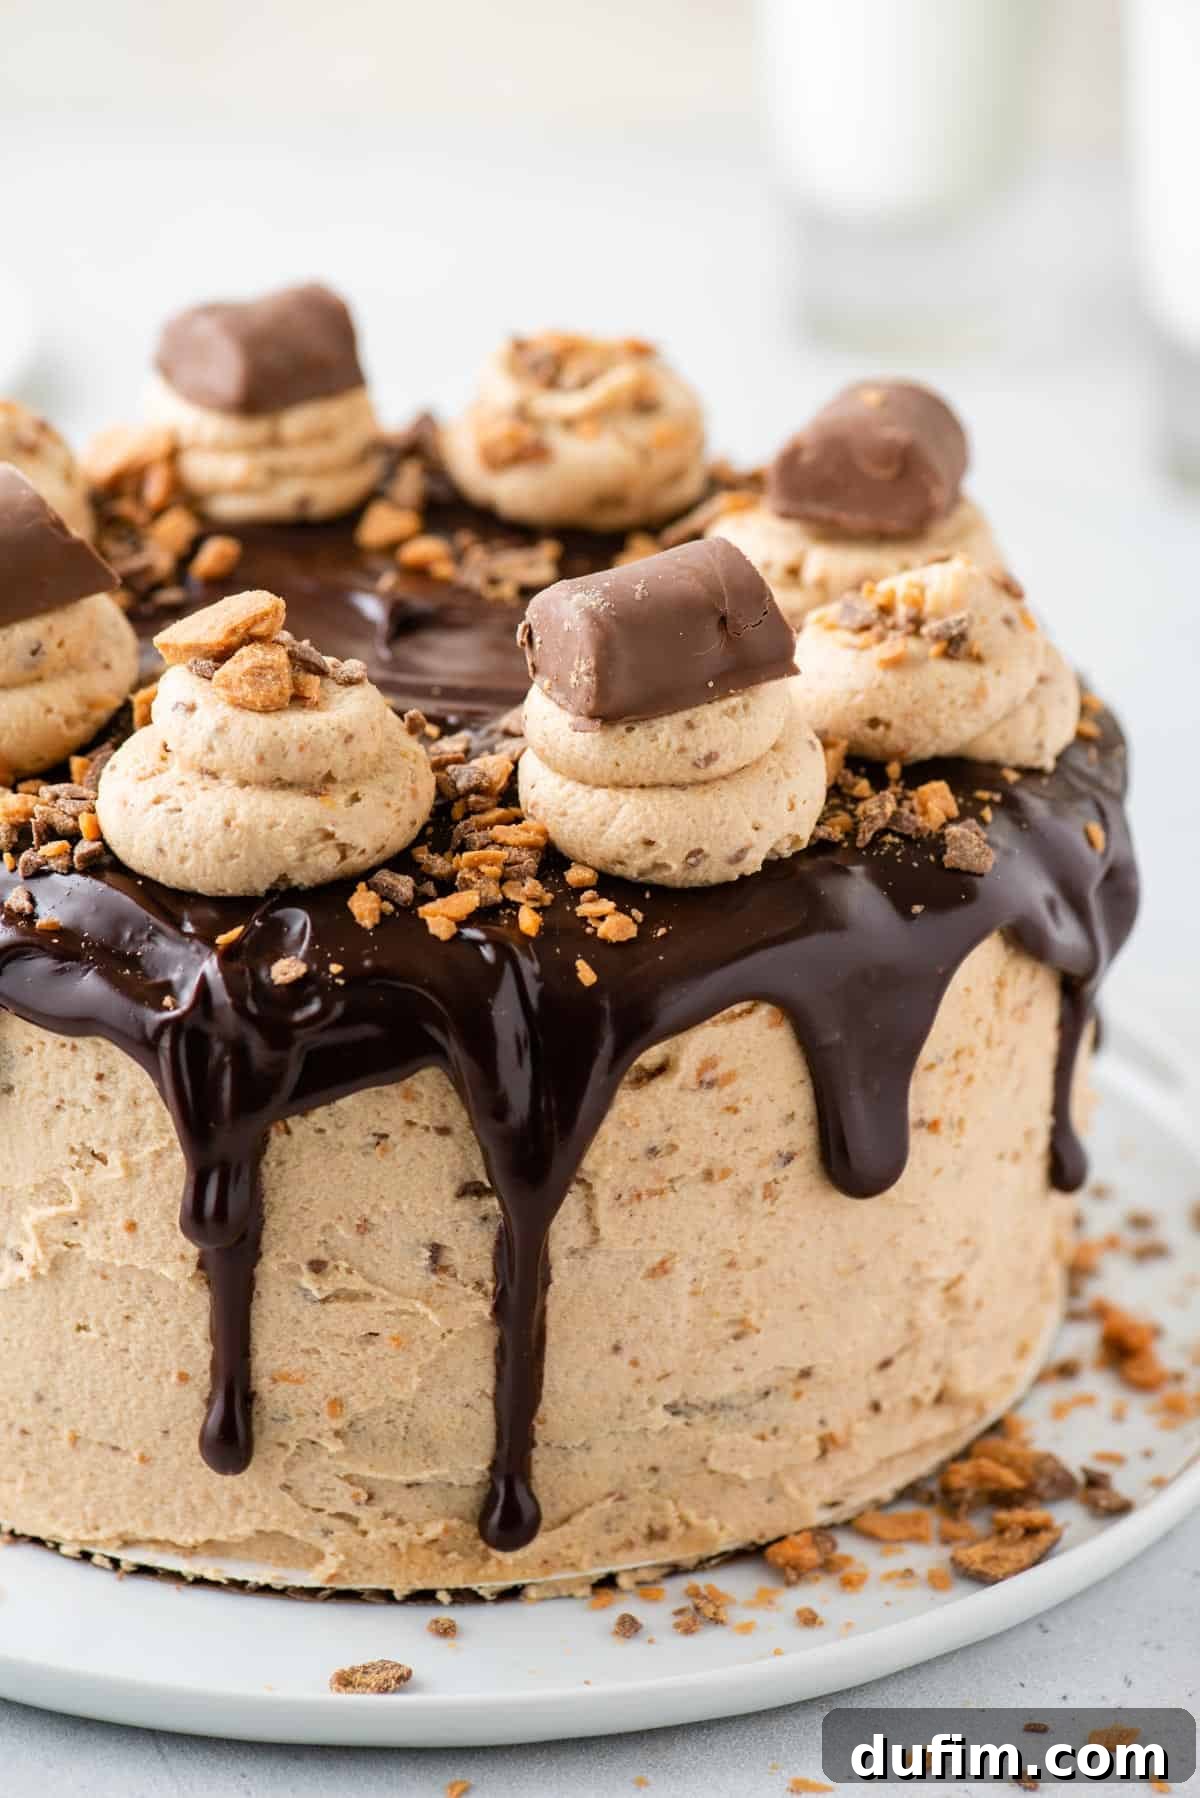
Add the Drip Ganache: With your chocolate ganache now cooled to room temperature, it’s time to add that professional drip. Using a spoon, carefully drizzle the ganache around the perimeter of the cake top, allowing it to gracefully drip down the sides. Alternatively, a squeeze bottle can give you more control for precise drips. Once the edges are done, pour the remaining ganache into the middle of the cake top and use the back of a spoon to spread it evenly. To set the ganache and prevent it from shifting while you add final decorations, briefly refrigerate the cake for about 10 minutes.
Final Flourish: Once the ganache is set, retrieve your reserved ½ cup of frosting. If you wish, transfer it to a piping bag fitted with a large round piping tip. Pipe decorative swirls or dollops around the edge of the cake top. Finally, generously sprinkle the remaining finely chopped Butterfinger pieces over the frosting swirls and any exposed ganache, creating a visually appealing and utterly delicious finish as pictured. Your ultimate Butterfinger cake is now ready to be admired and devoured!
Do I Need to Refrigerate Cake Layers Before Frosting?
While some baking recipes do recommend chilling cake layers in the refrigerator before frosting, particularly for very soft or delicate cakes, it is generally not necessary for this robust Butterfinger cake recipe. The key is to ensure that your cake layers are completely cooled to room temperature before you begin applying the frosting. Attempting to frost a warm cake will inevitably lead to melted, sliding frosting and a crumbly mess. As long as your cake layers are thoroughly cooled, you can proceed directly with frosting. There’s no additional need to refrigerate them before this step, saving you time and effort.
Expert Tips for a Flawless Butterfinger Cake
Achieving a bakery-worthy Butterfinger cake is easier with these simple yet effective tips:
- Embrace Room Temperature Ingredients: This is a golden rule in baking, especially for cakes and frostings. Room temperature eggs, butter, and buttermilk emulsify much better, resulting in a smoother, more uniform batter and a lighter, fluffier cake texture. Plan ahead and allow these ingredients to sit out for at least 30-60 minutes before you begin the recipe.
- Avoid Over-mixing the Cake Batter: Once you’ve added the dry ingredients, mix the cake batter only until the ingredients are just combined and no streaks of flour remain. Over-mixing develops the gluten in the flour, which can lead to a dense, tough, and chewy cake instead of the desired tender and moist crumb.
- Utilize Bake-Even Cake Strips: For beautifully flat cake layers without domes or cracked tops, consider using bake-even cake strips. These ingenious tools, soaked in water and wrapped around the outside of your cake pans before baking, help the cake bake more evenly by insulating the edges. This ensures a consistent temperature throughout the batter, resulting in perfectly level layers that are a joy to frost and stack.
- Don’t Skimp on Cooling Time: Patience is a virtue in baking. Ensure your cake layers are completely cool before frosting. Even slightly warm layers will melt your carefully prepared frosting, leading to a messy, unstable cake.
- Taste and Adjust Frosting: Before final assembly, taste your peanut butter cream cheese frosting. Depending on your peanut butter and personal preference, you might want a tiny pinch more salt to enhance the flavors or a touch more powdered sugar for added sweetness and thickness.
Estimated Time Commitment for Your Butterfinger Cake
- Prep the Batter: Approximately 15 minutes of active preparation time for combining ingredients.
- Baking Time: Expect 33-39 minutes for your cake layers to bake to perfection.
- Complete Cooling: Allow at least 1 hour for the cake layers to cool completely on wire racks. This step is crucial and cannot be rushed.
- Frosting Preparation: Just 5 minutes to whip up the creamy peanut butter cream cheese frosting.
- Assembly & Decorating: Allocate 10-20 minutes for leveling, stacking, frosting, and applying the ganache and final Butterfinger garnish.
Storing Your Decadent Chocolate Butterfinger Cake
To preserve the freshness and flavor of your Butterfinger cake, proper storage is key. This cake, with its cream cheese frosting, can be stored at room temperature for a short period. Ensure the cake is covered tightly with plastic wrap or placed in an airtight cake dome or container. When stored correctly, it will remain fresh and delicious for up to 3 days on your countertop. For longer storage or in very warm climates, refrigeration is recommended to maintain the frosting’s integrity.
Can This Butterfinger Cake Recipe Be Frozen?
Absolutely, this Butterfinger cake is perfectly suitable for freezing, allowing you to enjoy slices of this delightful dessert long after it’s baked! You can freeze the entire cake or individual slices for up to 3 months. For best results and to keep your frosting looking pristine, follow these steps:
- For Whole Cake (with perfect frosting): Place the frosted cake uncovered on a parchment-lined baking sheet and freeze until the frosting is completely firm (this usually takes a few hours). Once solid, remove the cake from the freezer and wrap it tightly in several layers of plastic wrap, followed by aluminum foil. Alternatively, place the wrapped cake in an airtight container or a large freezer bag, ensuring it’s protected from freezer burn.
- For Leftovers (less concerned about aesthetics): If you’re freezing individual slices or simply have leftover cake and are less concerned about maintaining the frosting’s unblemished appearance, you can skip the initial freezing step. Simply place the cake slices or remaining cake directly into an airtight container or freezer bag, making sure it’s sealed well.
When you’re ready to enjoy, thaw the frozen cake or slices overnight in the refrigerator. Once thawed, you can bring it to room temperature for about 30 minutes before serving for the best texture and flavor.
More Delightful & Easy Cake Recipes to Try
If you’ve enjoyed baking and indulging in this Butterfinger cake, you’ll love exploring more of our accessible yet impressive cake recipes. Each recipe is crafted to bring joy to your kitchen and delight to your taste buds, proving that homemade cakes can be both extraordinary and simple to create.
- Vibrant Orange Cake: A zesty and refreshing cake bursting with citrus flavor, perfect for a sunny day.
- Rich Chocolate Raspberry Cake: A harmonious blend of decadent chocolate and tart raspberries, a sophisticated treat for any occasion.
- Classic Honey Bun Cake: A comforting and sweet cake that mimics the beloved breakfast pastry, complete with a sticky glaze.
- Bright Lemon Cake: A light, airy, and tangy lemon layer cake that’s a true crowd-pleaser and ideal for spring and summer gatherings.
This recipe is highly rated: 4.74 out of 5 stars from 15 ratings!
Butterfinger Cake Recipe
Rate
Equipment
-
Two 8-inch Springform Pans
-
Large Glass Mixing Bowls
-
Electric Mixer (Stand or Handheld)
-
Heat-Resistant Spatula
-
Wire Cooling Racks
-
Parchment Paper
Ingredients
Chocolate Cake
- 2 ½ cups (300g) all purpose flour
- ⅓ cup (28g) natural unsweetened cocoa powder
- ½ tsp baking soda
- 1 tsp baking powder
- 1 tsp salt
- ½ cup (113g) unsalted butter, 1 stick, room temperature
- 1 ½ cups (297g) granulated sugar
- 3 oz bittersweet chocolate baking bar, melted & cooled
- 2 large eggs
- 1 cup (236ml) buttermilk
- ½ cup (118ml) hot tap water
Peanut Butter Cream Cheese Frosting
- 8 oz (226g) cream cheese, room temperature
- 1 cup (226g) unsalted butter, 2 sticks, room temperature
- 1 cup (270g) creamy peanut butter
- 4 cups (454g) powdered sugar
- 1 tsp vanilla extract
- ½ tsp salt
- 1 ½ cups finely chopped Butterfingers, divided
Chocolate Ganache
- ⅓ cup (79ml) heavy whipping cream
- ¾ cup (129g) chocolate chips, semi-sweet recommended
Instructions
Chocolate Cake
-
Preheat your oven to 350º F (175°C). Generously grease two 8-inch springform pans with unsalted butter, covering both the sides and bottom. For easy cake removal, line the bottom of each pan with a parchment paper circle. Set aside the prepared pans.
-
Roughly chop the bittersweet chocolate baking bar into smaller, uniform pieces. Place these pieces in a microwave-safe bowl. Microwave for 2 minutes at 50% power. Stir the chocolate, then continue microwaving in 30-second intervals at 50% power, stirring after each interval, until the chocolate is fully melted and smooth. Allow the melted chocolate to cool slightly to avoid cooking the eggs when added to the batter.
-
In a medium mixing bowl, combine the all-purpose flour, natural unsweetened cocoa powder, baking soda, baking powder, and salt. Whisk these dry ingredients together thoroughly to ensure they are well distributed. Set this bowl aside.2 ½ cups (300g) all purpose flour, ⅓ cup (28g) natural unsweetened cocoa powder, ½ tsp baking soda, 1 tsp baking powder, 1 tsp salt
-
In a separate, larger mixing bowl, using an electric mixer, beat the room temperature unsalted butter and granulated sugar for a full 2 minutes, or until the mixture is light, pale, and fluffy. Add the eggs one at a time, beating after each addition, then incorporate the cooled melted chocolate. Beat again for approximately 30 seconds until just combined.½ cup (113g) unsalted butter, 1 ½ cups (297g) granulated sugar, 2 large eggs, 3 oz bittersweet chocolate baking bar
-
With the electric mixer on low speed, add half of the buttermilk and beat for about 20 seconds, just until partially mixed. Then, add half of the dry ingredients mixture and beat until just incorporated. Next, pour in the remaining buttermilk along with the hot tap water; beat only until the liquid is just mixed into the batter. Finally, add the remaining dry ingredients and beat on the lowest speed until the batter is uniformly combined and smooth. Avoid overmixing.1 cup (236ml) buttermilk, ½ cup (118ml) hot tap water
-
Evenly divide the prepared cake batter between the two 8-inch pans, aiming for approximately 2 ½ cups of batter in each pan. If using bake-even cake strips, secure them around the outside of the pans at this point.
-
Place both pans on the same rack in the center of the oven. Bake for 33-39 minutes, or until a wooden toothpick inserted into the center of a cake comes out clean. Note that baking times can vary based on your oven and pan size.
-
Allow the cakes to cool in their pans for 20-30 minutes. This allows them to firm up before removal. Then, carefully remove the cakes from the pans and transfer them to wire racks to cool completely before frosting.
Peanut Butter Cream Cheese Frosting
-
In a mixing bowl, combine the room temperature cream cheese, softened unsalted butter, and creamy peanut butter. Using an electric mixer on high speed, beat these ingredients together for 2-3 minutes until the mixture is light, fluffy, and smooth.8 oz (226g) cream cheese, 1 cup (226g) unsalted butter, 1 cup (270g) creamy peanut butter
-
Reduce the mixer speed to low. Gradually add 2 cups of the powdered sugar, beating until fully incorporated and the frosting begins to thicken. Scrape down the sides of the bowl as needed.4 cups (454g) powdered sugar
-
Add the remaining powdered sugar, vanilla extract, and salt. Mix on low speed until all ingredients are well combined and the frosting is smooth.1 tsp vanilla extract, 1/2 tsp salt
-
Gently fold in 1 cup of the finely chopped Butterfingers. Mix on low speed just until the candy pieces are evenly distributed. Reserve the remaining ½ cup of chopped Butterfingers for decorating the top of the cake. If the frosting is too thick, beat in an additional tablespoon of heavy cream or milk, one teaspoon at a time, until the desired consistency is reached.1 1/2 cups finely chopped Butterfingers
Chocolate Ganache
-
Place the chocolate chips and heavy cream in a microwave-safe bowl. Microwave for 20-30 seconds, or until the heavy cream begins to bubble around the edges. Allow the mixture to stand undisturbed for 1 minute to allow the chocolate to melt fully. Then, use a spatula or whisk to stir the mixture gently from the center outwards until it is completely smooth and glossy. Ensure the ganache cools to room temperature before applying it to the cake; warm ganache will be too thin and will run off the cake.1/3 cup (79ml) heavy whipping cream, 3/4 cup (129g) chocolate chips
Assemble
-
Once the cake layers are completely cooled, if necessary, use a cake leveler or a long serrated knife to carefully level any domed tops, creating flat surfaces for stacking. Spread a small amount of the peanut butter cream cheese frosting onto the bottom of your cake plate or stand; this will act as a “glue” to prevent the cake from sliding.
-
Place the first cake layer directly over the small amount of frosting on your plate. Measure approximately ¾ to 1 cup of frosting and spread it evenly over the top of this first layer. Carefully place the second cake layer on top, aligning it precisely. Use the remaining frosting to cover the sides and top of the entire cake, creating a smooth and even coat. Reserve about ½ cup of frosting if you plan to pipe additional decoration on top of the cake.
-
Once the ganache has cooled to room temperature and reached a pourable but slightly thickened consistency, use a spoon or a squeeze bottle to drizzle it artfully around the sides of the cake, allowing it to drip gracefully down the edges. Fill in the middle of the cake top with the remaining ganache and spread it evenly with the back of a spoon. To allow the ganache to set before adding final frosting decorations, place the cake in the refrigerator for about 10 minutes.
-
If desired, transfer the reserved frosting to a piping bag fitted with a large round piping tip. Pipe decorative swirls or dollops around the edge of the cake. Finally, generously sprinkle the remaining finely chopped Butterfinger pieces over the piped frosting and ganache to complete your stunning Butterfinger cake.
-
Slice and serve your magnificent cake. To store any leftovers, cover the cake tightly with plastic wrap and keep it at room temperature for up to 3 days for optimal freshness.
Watch the Video Tutorial
For a visual guide to making this incredible Butterfinger Cake, watch our detailed video tutorial. It covers all the steps, from baking the moist chocolate layers to creating the perfect peanut butter cream cheese frosting and drizzling the rich chocolate ganache. This video makes it even easier to achieve bakery-quality results at home!
Notes
For those with dietary considerations, I’ve successfully made this recipe using gluten-free flour, yielding excellent results! I highly recommend King Arthur’s Gluten-Free Measure for Measure Flour. It can be used as a direct, one-for-one substitute for regular all-purpose flour without requiring any other adjustments to the recipe.
Nutrition Information (per serving)
Carbohydrates: 116g |
Protein: 11g |
Fat: 25g |
Saturated Fat: 10g |
Polyunsaturated Fat: 4g |
Monounsaturated Fat: 9g |
Trans Fat: 0.03g |
Cholesterol: 40mg |
Sodium: 553mg |
Potassium: 319mg |
Fiber: 4g |
Sugar: 84g |
Vitamin A: 181IU |
Vitamin C: 0.04mg |
Calcium: 82mg |
Iron: 3mg
Nutrition Disclosure
All nutritional values are approximate and provided to the reader as a courtesy. Changing ingredients and/or quantities will alter the estimated nutritional calculations. These values are calculated using a third-party nutrition calculator and should be considered estimates.
Love this recipe as much as we do? Rate and share your thoughts below!