
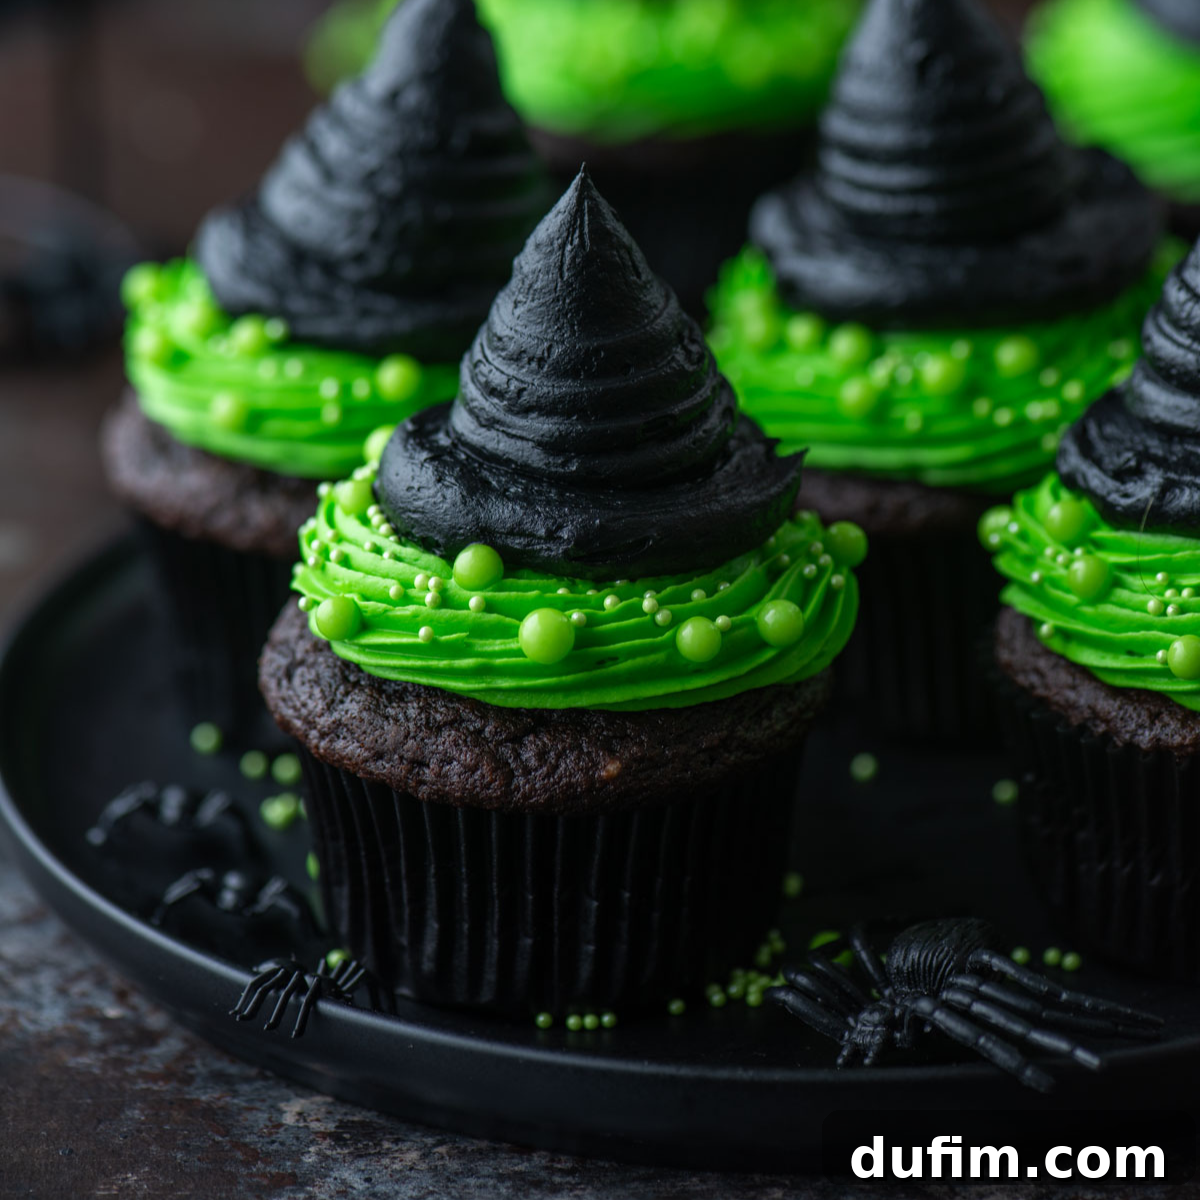
Get ready to cast a spell of delight at your next Halloween gathering with these enchanting Witch Hat Cupcakes! These bold, vibrant, and utterly delicious treats are designed to impress without requiring professional baking skills. My easy-to-follow, step-by-step instructions will guide you through creating moist, rich chocolate cupcakes topped with a whimsical witch hat design, perfect for home bakers of all levels.
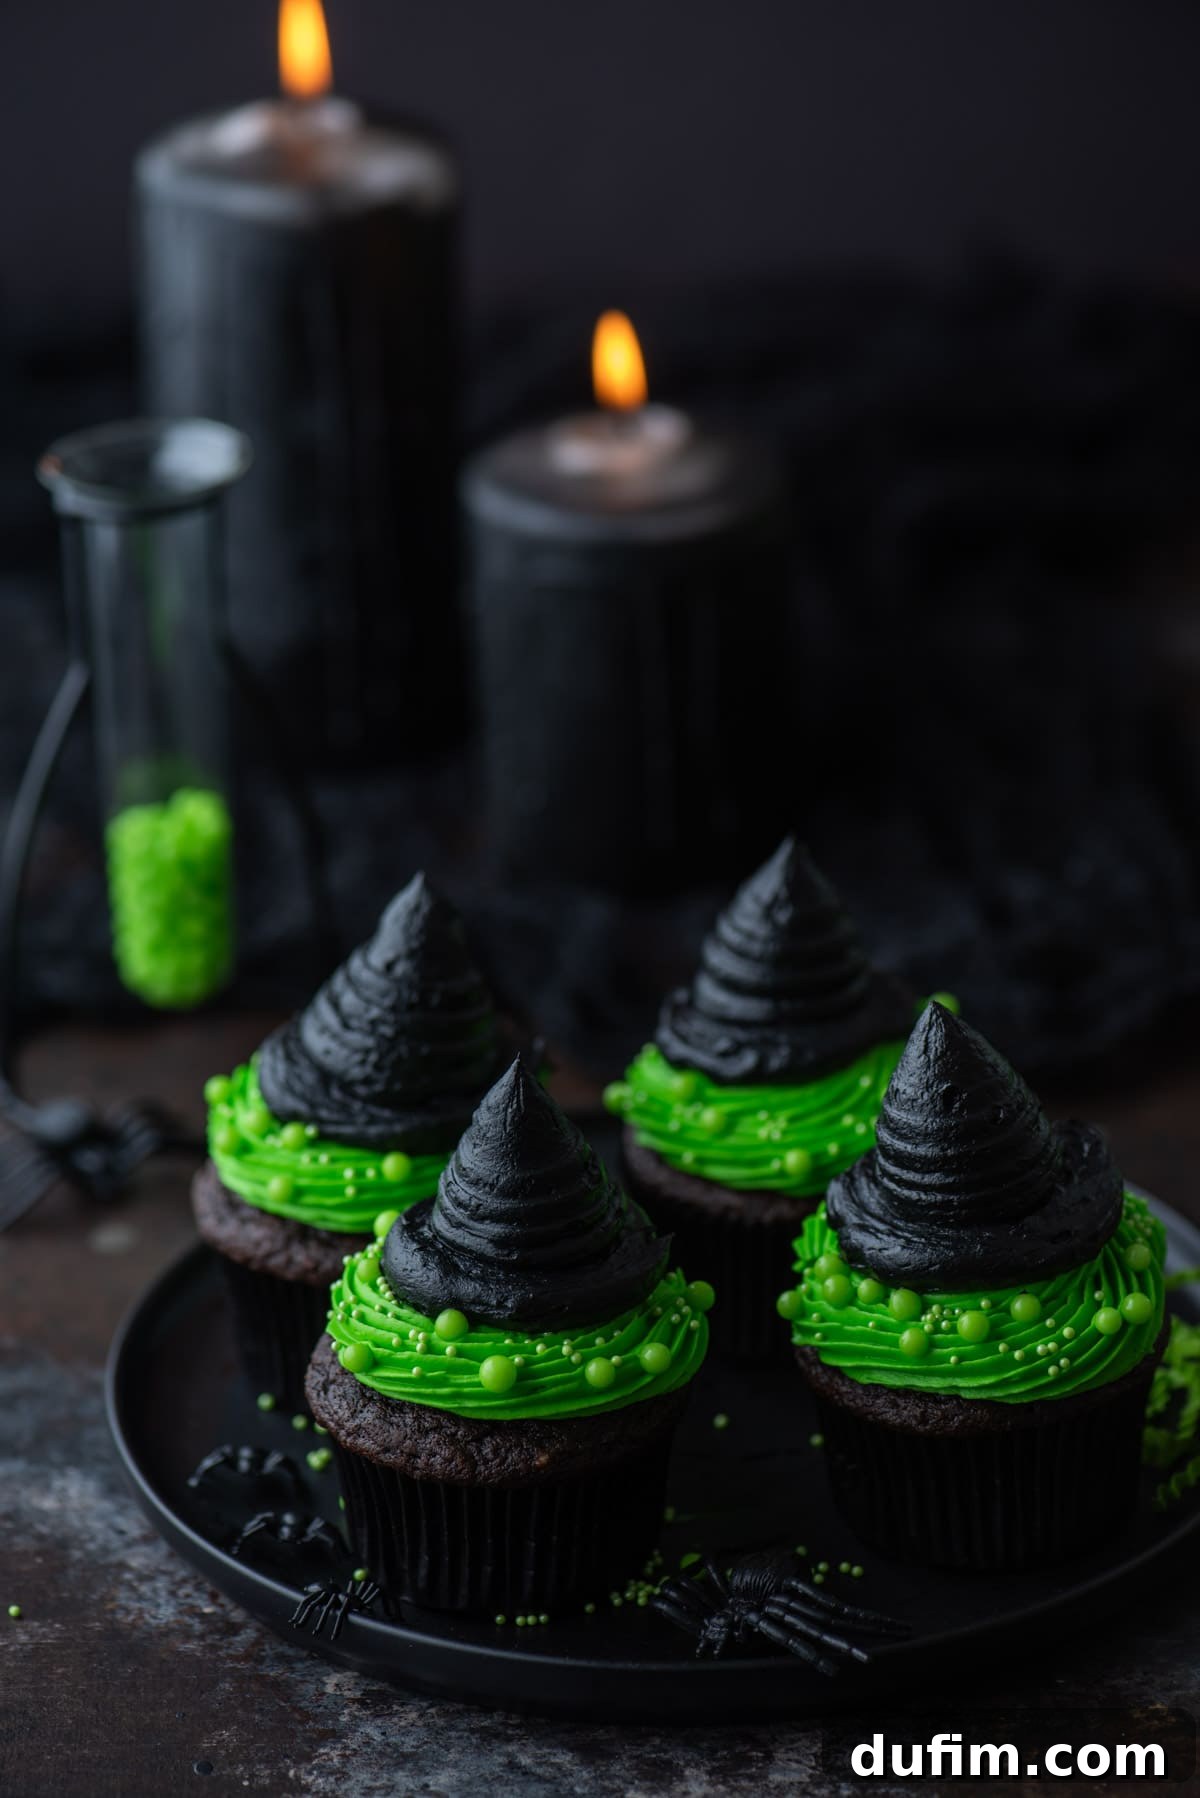
The Ultimate Halloween Party Treat: Whimsical Witch Hat Cupcakes!
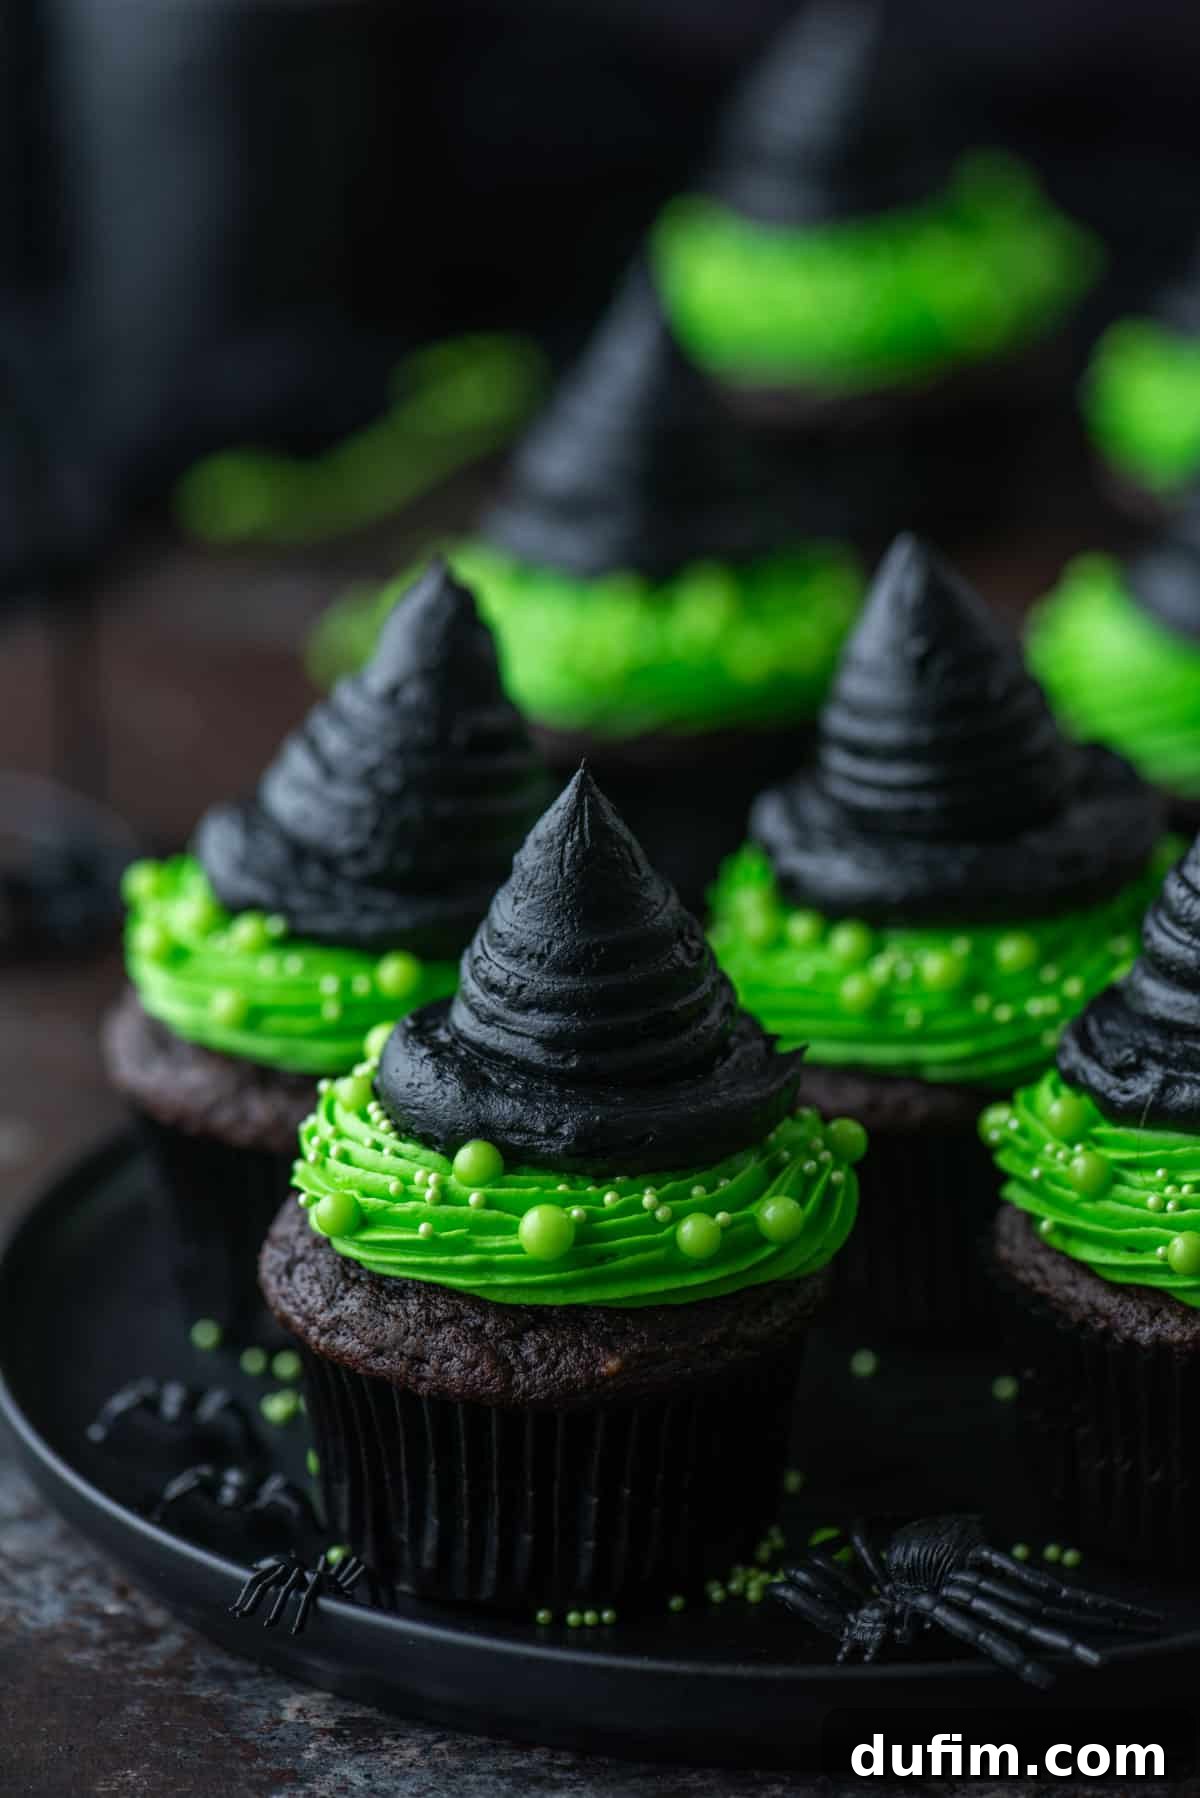
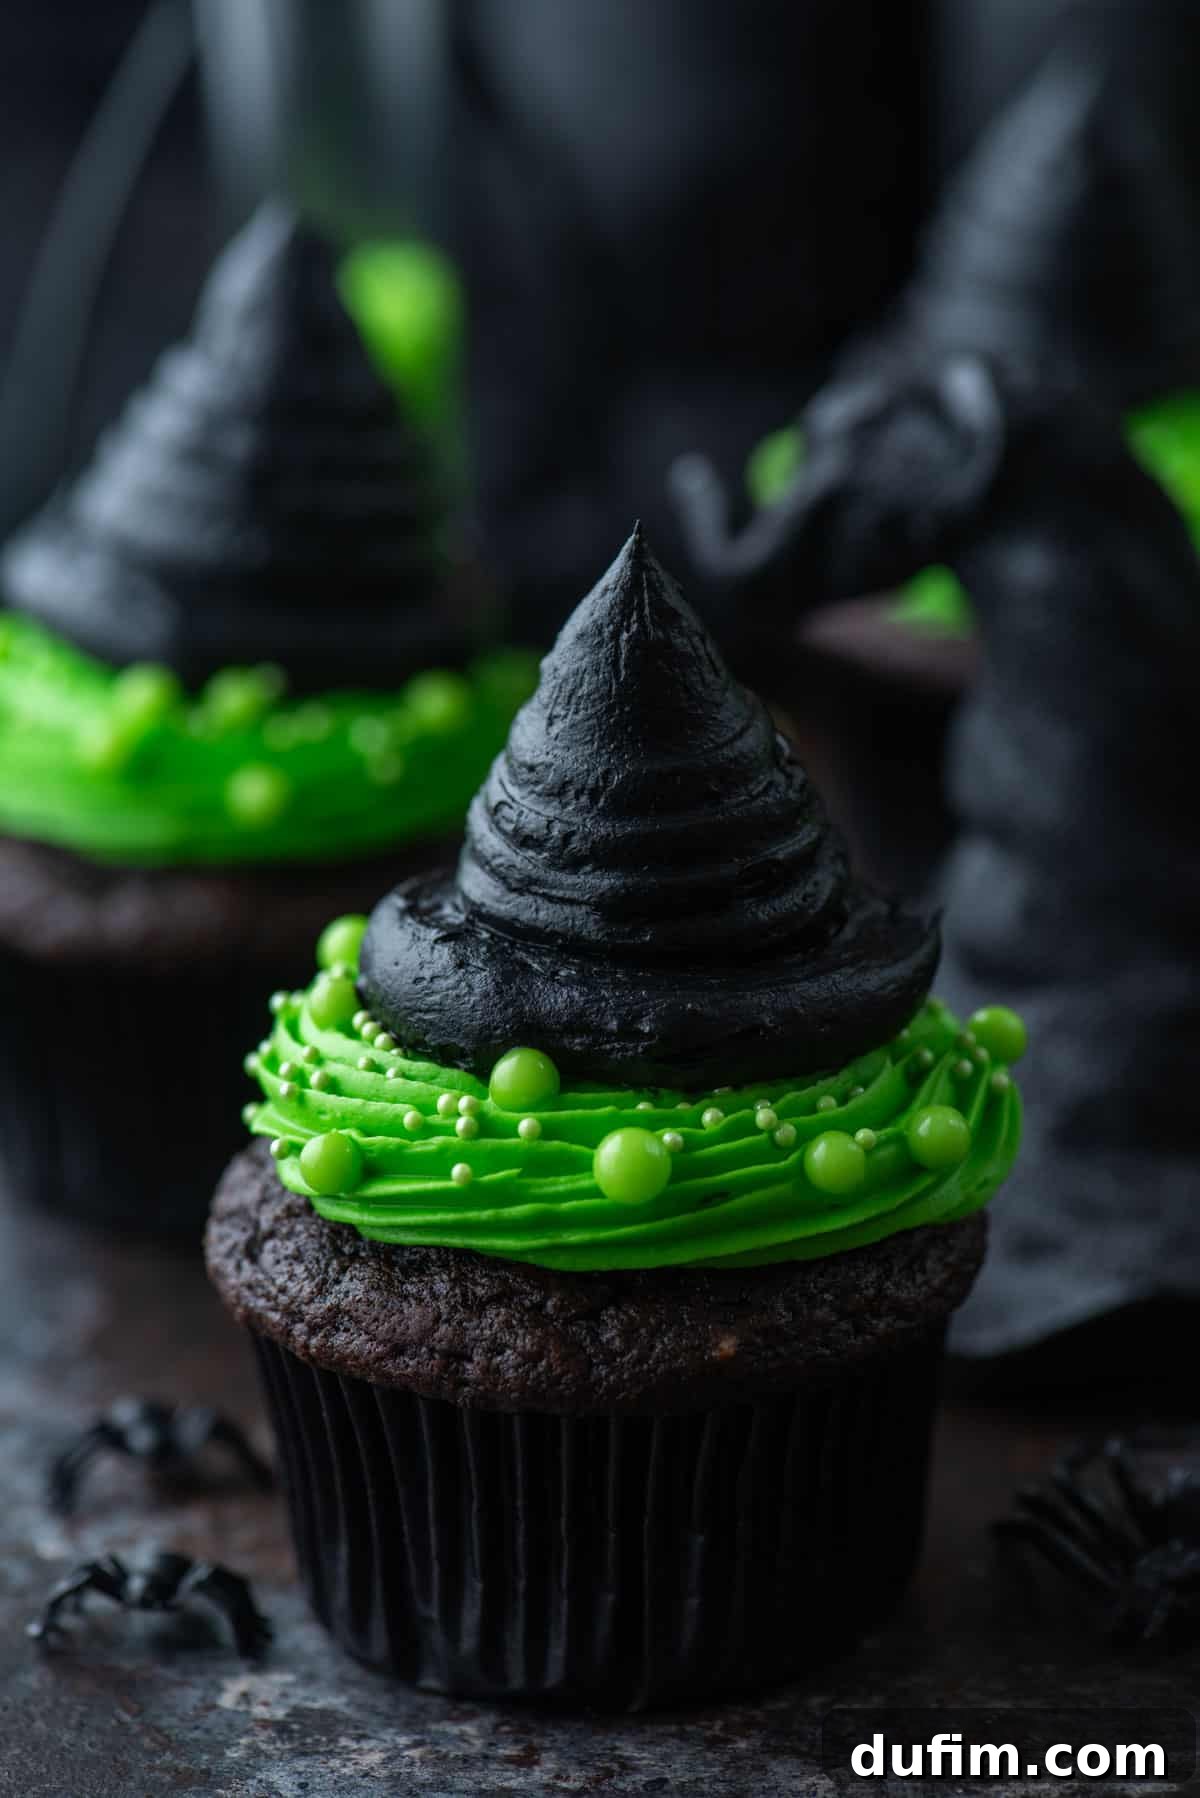
There’s something truly magical about these cute witch hat cupcakes that makes them an absolute favorite for Halloween festivities. Beyond their captivating appearance, these aren’t just pretty faces; they deliver on taste too! Each cupcake features a deeply moist and intensely rich chocolate base, generously crowned with my delightfully smooth and easy homemade vanilla frosting. The combination creates a dessert that’s both visually stunning and incredibly delicious.
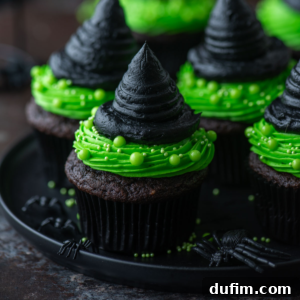
These cupcakes are more than just a treat; they’re a centerpiece! Their vibrant green and stark black frosting, shaped into iconic witch hats, immediately captures the spirit of Halloween. They are the perfect dessert to get everyone, from the youngest trick-or-treaters to the most seasoned party guests, into the festive mood. Whether you’re hosting a grand Halloween bash, contributing to a school bake sale, or simply want to add a touch of playful spookiness to your family’s holiday, these adorable witch hat cupcakes are your go-to recipe for an easy, impressive, and memorable Halloween delight.
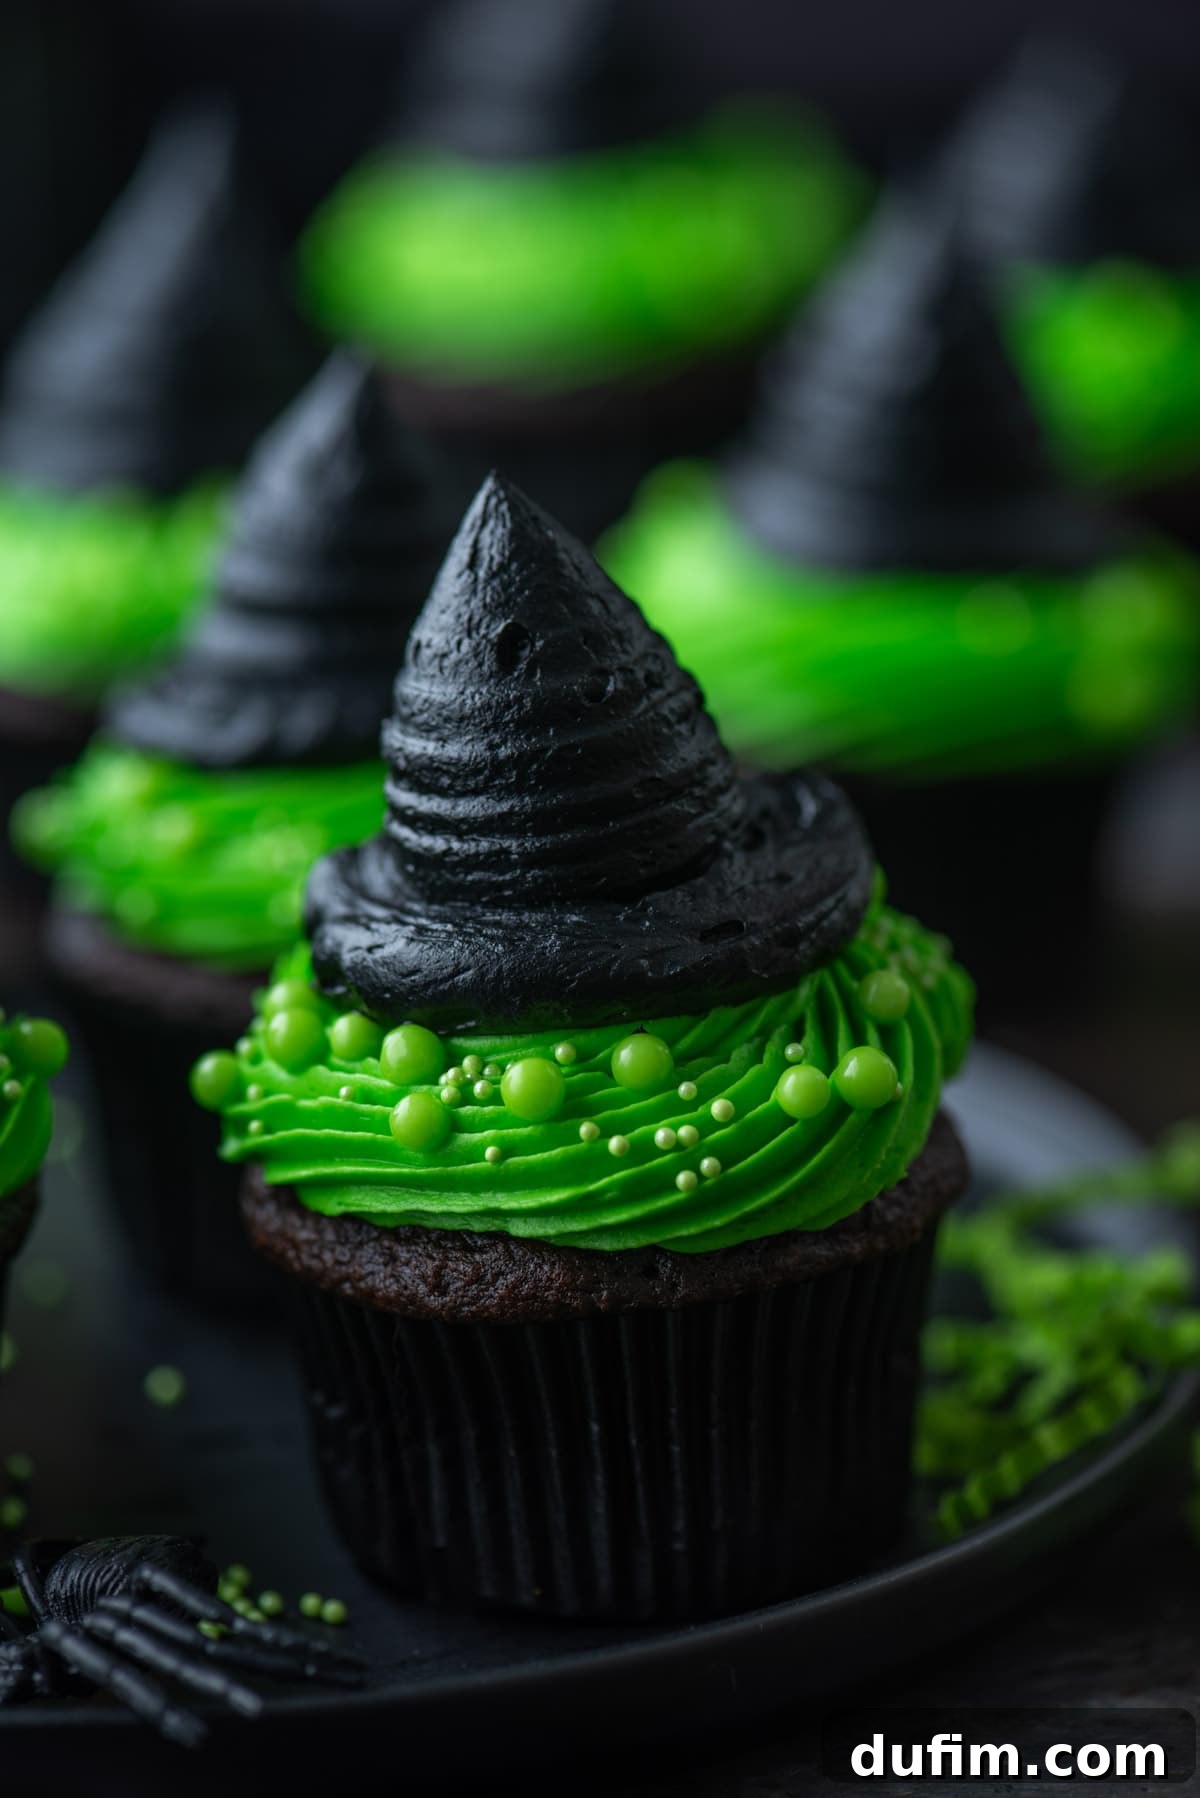
Why These Witch Hat Halloween Cupcakes Are an Absolute Must-Make
These charming Witch Hat Cupcakes aren’t just another dessert; they’re an experience! Here’s why they’re destined to become your new favorite Halloween tradition:
- The Quintessential Spooky Treat for Halloween: With their iconic witch hat design and vibrant colors, these cupcakes perfectly embody the playful and mysterious spirit of Halloween. They’re not just food; they’re a festive decoration!
- Universally Loved by Kids and Adults Alike!: The delightful combination of rich chocolate and sweet, creamy frosting appeals to every palate. Plus, their adorable and spooky appearance makes them a hit with children, while adults appreciate the homemade touch and delicious flavor.
- Unbelievably Moist Chocolate Cupcakes: Forget dry, crumbly cakes. Our recipe ensures each bite is soft, tender, and bursting with deep chocolate flavor, creating a truly decadent base for your witch hats.
- Effortless Homemade Frosting: Skip the store-bought tubs! Our simple frosting recipe is easy to whip up, perfectly customizable with colors, and yields a smooth, pipeable consistency that’s ideal for creating those distinct witch hat shapes.
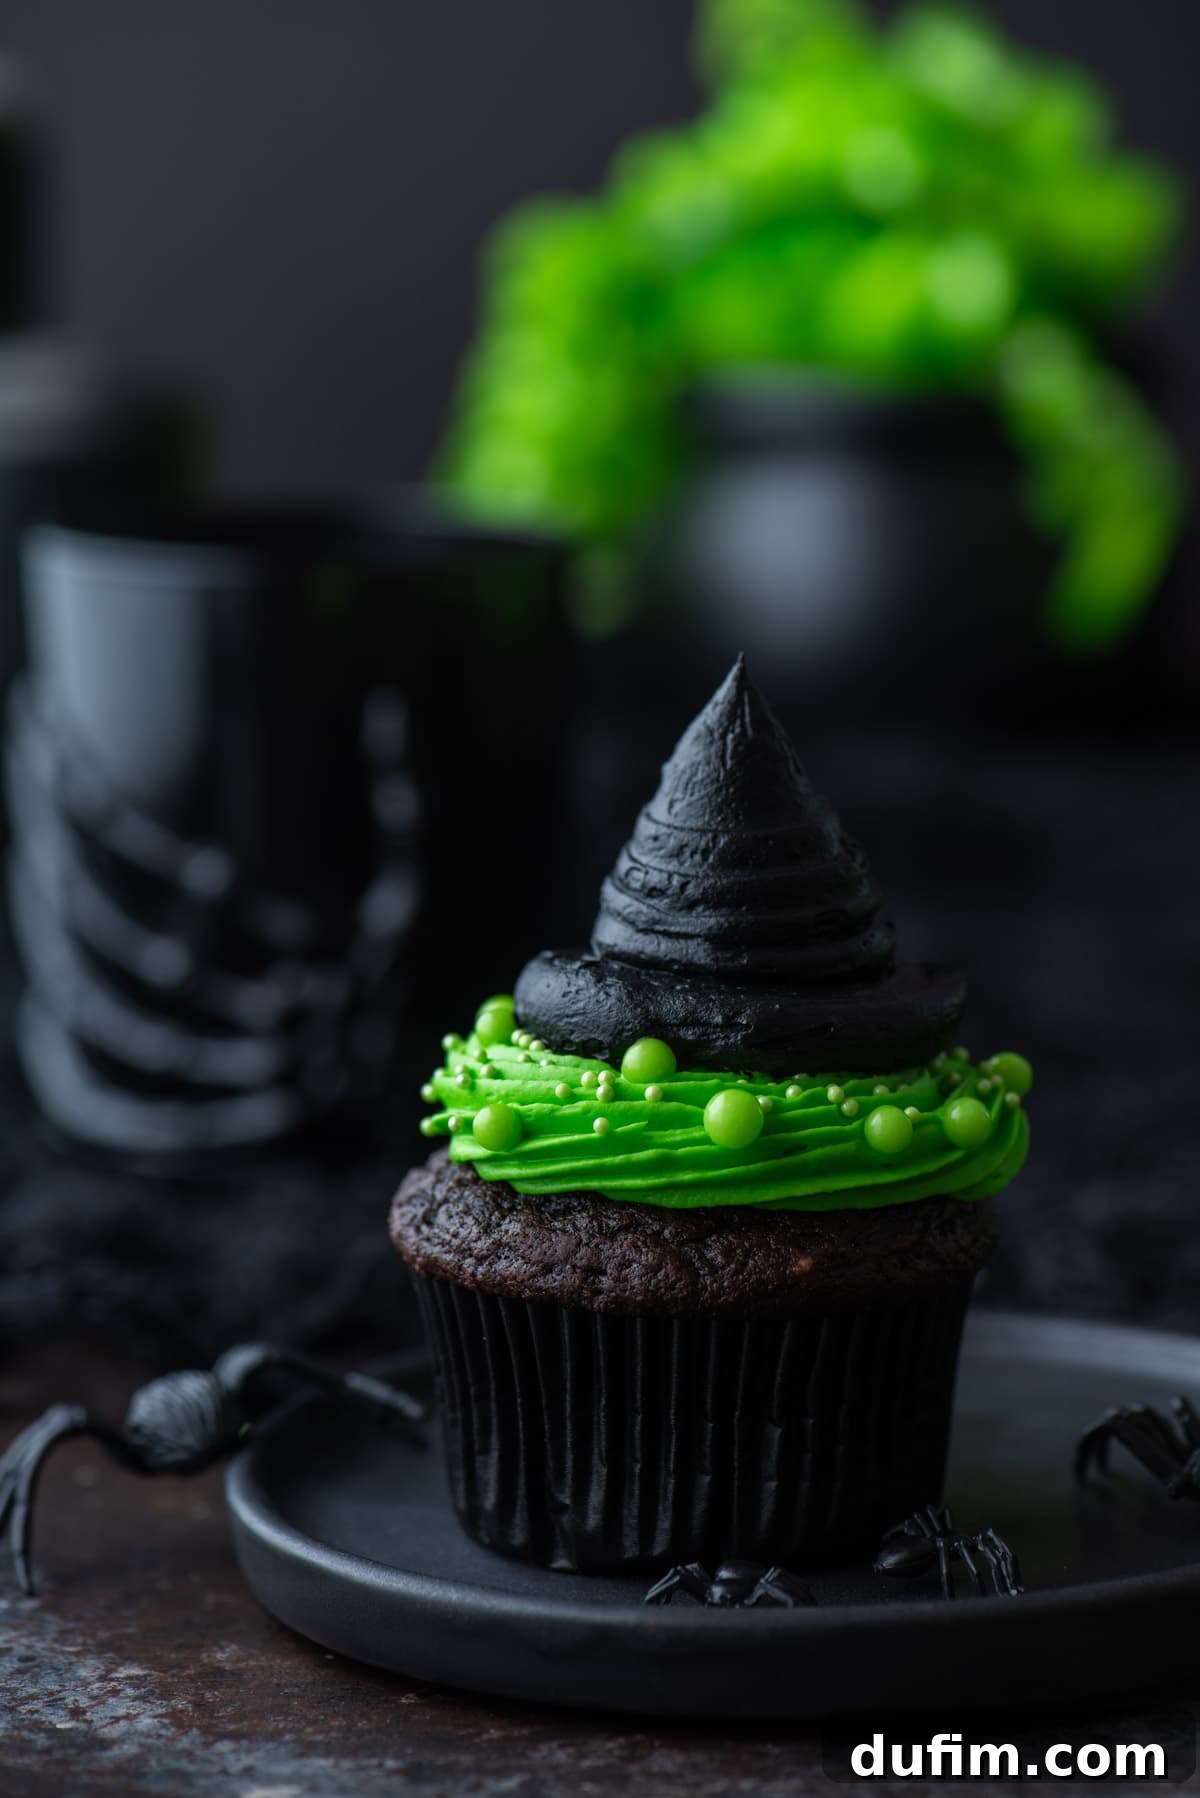
Gather Your Ingredients: What You’ll Need for Magical Witch Hat Cupcakes
Crafting these adorable and delicious Halloween cupcakes is simpler than you might think, thanks to a list of readily available ingredients. This recipe combines a classic, moist chocolate cupcake base with a versatile, easy-to-make vanilla frosting. Find the complete list with precise measurements and detailed instructions in the recipe card below.
For the Decadent Chocolate Cupcakes:
- All-Purpose Flour: The foundation of our tender cupcake structure. Ensure it’s spooned and leveled for accurate measurement.
- Cocoa Powder: For that rich, deep chocolate flavor. You can use natural unsweetened cocoa powder for a classic chocolate taste or Dutch-processed cocoa for a darker color and milder flavor. Both work beautifully!
- Instant Coffee Granules (optional): A secret ingredient! Just a teaspoon enhances the chocolate flavor without making the cupcakes taste like coffee. Brands like Folger’s work perfectly.
- Baking Soda & Baking Powder: Our dynamic duo of leavening agents, ensuring your cupcakes rise perfectly and have a light, airy texture.
- Salt: Essential for balancing sweetness and enhancing all the flavors in the cupcake.
- Unsalted Butter: Make sure it’s at room temperature! Softened butter creams beautifully with sugar, creating a light and fluffy base for your batter.
- Granulated Sugar: Provides sweetness and helps create that moist texture.
- Eggs: Large eggs, also at room temperature, bind the ingredients and add richness and moisture.
- Buttermilk: This acidic ingredient reacts with baking soda to create a tender crumb and adds a subtle tang that complements the chocolate perfectly.
- Hot Tap Water: Helps to bloom the cocoa powder, intensifying its flavor and ensuring a smooth batter.
For the Creamy Vanilla Frosting:
- Unsalted Butter: Again, room temperature is key for a smooth, lump-free frosting that whips up light and fluffy.
- Vanilla Extract: Pure vanilla extract provides that classic, comforting flavor that pairs wonderfully with chocolate.
- Powdered Sugar (Confectioners’ Sugar): This fine sugar dissolves easily, giving the frosting its smooth, creamy texture. Adjust the amount to achieve your desired consistency and sweetness.
- Milk or Heavy Cream: A dash can be added if your frosting becomes too thick, helping you achieve the perfect pipeable consistency.
Special Extras for Decorating:
- Piping Bags: Essential for neatly applying your vibrant green and black frosting designs.
- Black and Green Gel Food Coloring: Gel colors are preferred over liquid dyes as they provide intense color without altering the frosting’s consistency.
- Green Nonpareil Sprinkles (Small and Large): These add a playful, textured “rim” to your witch hats, enhancing their magical look.
- Wilton 1A Piping Tip: Ideal for creating the smooth, wide brim of the witch hat.
- Wilton 32 Piping Tip: Perfect for piping the base layer of green frosting, adding a lovely ruffled effect.
Step-by-Step Guide: How to Bake and Decorate Your Own Witch Hat Cupcakes
Even with minimal baking experience, you can create these enchanting witch hat cupcakes right at home. Just follow these simple steps for a truly spellbinding result. The full recipe with precise ingredients and measurements is available in the recipe card below.
Part 1: Baking the Perfect Chocolate Cupcakes
- Prepare for Baking: Begin by preheating your oven to 350º F (175°C). Line a standard muffin pan with festive cupcake liners. This step ensures easy removal and a clean presentation.
- Combine the Dry Ingredients: In a medium-sized mixing bowl, whisk together the all-purpose flour, unsweetened natural cocoa powder, instant coffee granules (if using), baking soda, baking powder, and salt. Whisking thoroughly ensures all leavening agents and flavorings are evenly distributed. Set this dry mixture aside.
- Cream the Wet Ingredients: In a large mixing bowl, using an electric mixer, beat the room temperature unsalted butter and granulated sugar for about 2 minutes. Continue beating until the mixture is light in color and notably fluffy. This creaming process incorporates air, contributing to a tender cupcake. Next, add the eggs, one at a time, beating for 30 seconds after each addition until fully incorporated.
- Alternate Wet and Dry Additions: With the mixer on low speed, gradually add half of the buttermilk to the butter mixture, beating for about 20 seconds until just combined. Then, add half of the dry ingredients and mix until no streaks of flour remain. Follow this with the remaining buttermilk and the hot water, mixing briefly. Finally, add the remaining dry ingredients and beat on low speed just until everything is combined and the batter is smooth. Be careful not to overmix, as this can lead to tough cupcakes.
- Bake to Perfection: Divide the cupcake batter evenly among the prepared muffin liners, filling each approximately halfway full. Bake for 17-19 minutes at 350º F (175°C). You’ll know they’re done when a toothpick inserted into the center comes out with only a few moist crumbs attached. Once baked, transfer the cupcakes to a wire rack to cool completely before you even think about frosting them. Cooling is crucial for frosting success!
Part 2: Crafting the Creamy Homemade Frosting
- Whip Butter and Vanilla: In a clean mixing bowl, combine the softened unsalted butter and vanilla extract. Using an electric mixer, beat on medium-high speed for 1-2 minutes until the mixture is light, creamy, and visibly fluffy. This initial whipping makes the frosting airy.
- Gradually Add Powdered Sugar: With the mixer on low speed, gradually add the powdered sugar, a cup at a time, mixing until fully incorporated after each addition. This prevents a sugar cloud in your kitchen! Once all sugar is added, increase speed to medium and beat until smooth.
- Introduce Food Coloring (Optional): If you plan to color your frosting (which we will for our witch hats!), this is the ideal time. Add gel food coloring gradually until you achieve your desired vibrant shades.
- Adjust Consistency and Taste: Taste the frosting and add more powdered sugar if you prefer it sweeter or thicker. If the frosting becomes too thick to pipe smoothly, add a dash of milk or heavy cream, one teaspoon at a time, until it reaches a spreadable, pipeable consistency.
- For Extra Fluffy Frosting (Optional): For an exceptionally light and airy frosting, add 1/4 cup of heavy whipping cream when you add the last portion of powdered sugar. Then, whip the frosting on high speed for an additional 3-4 minutes until it’s super fluffy and holds stiff peaks.
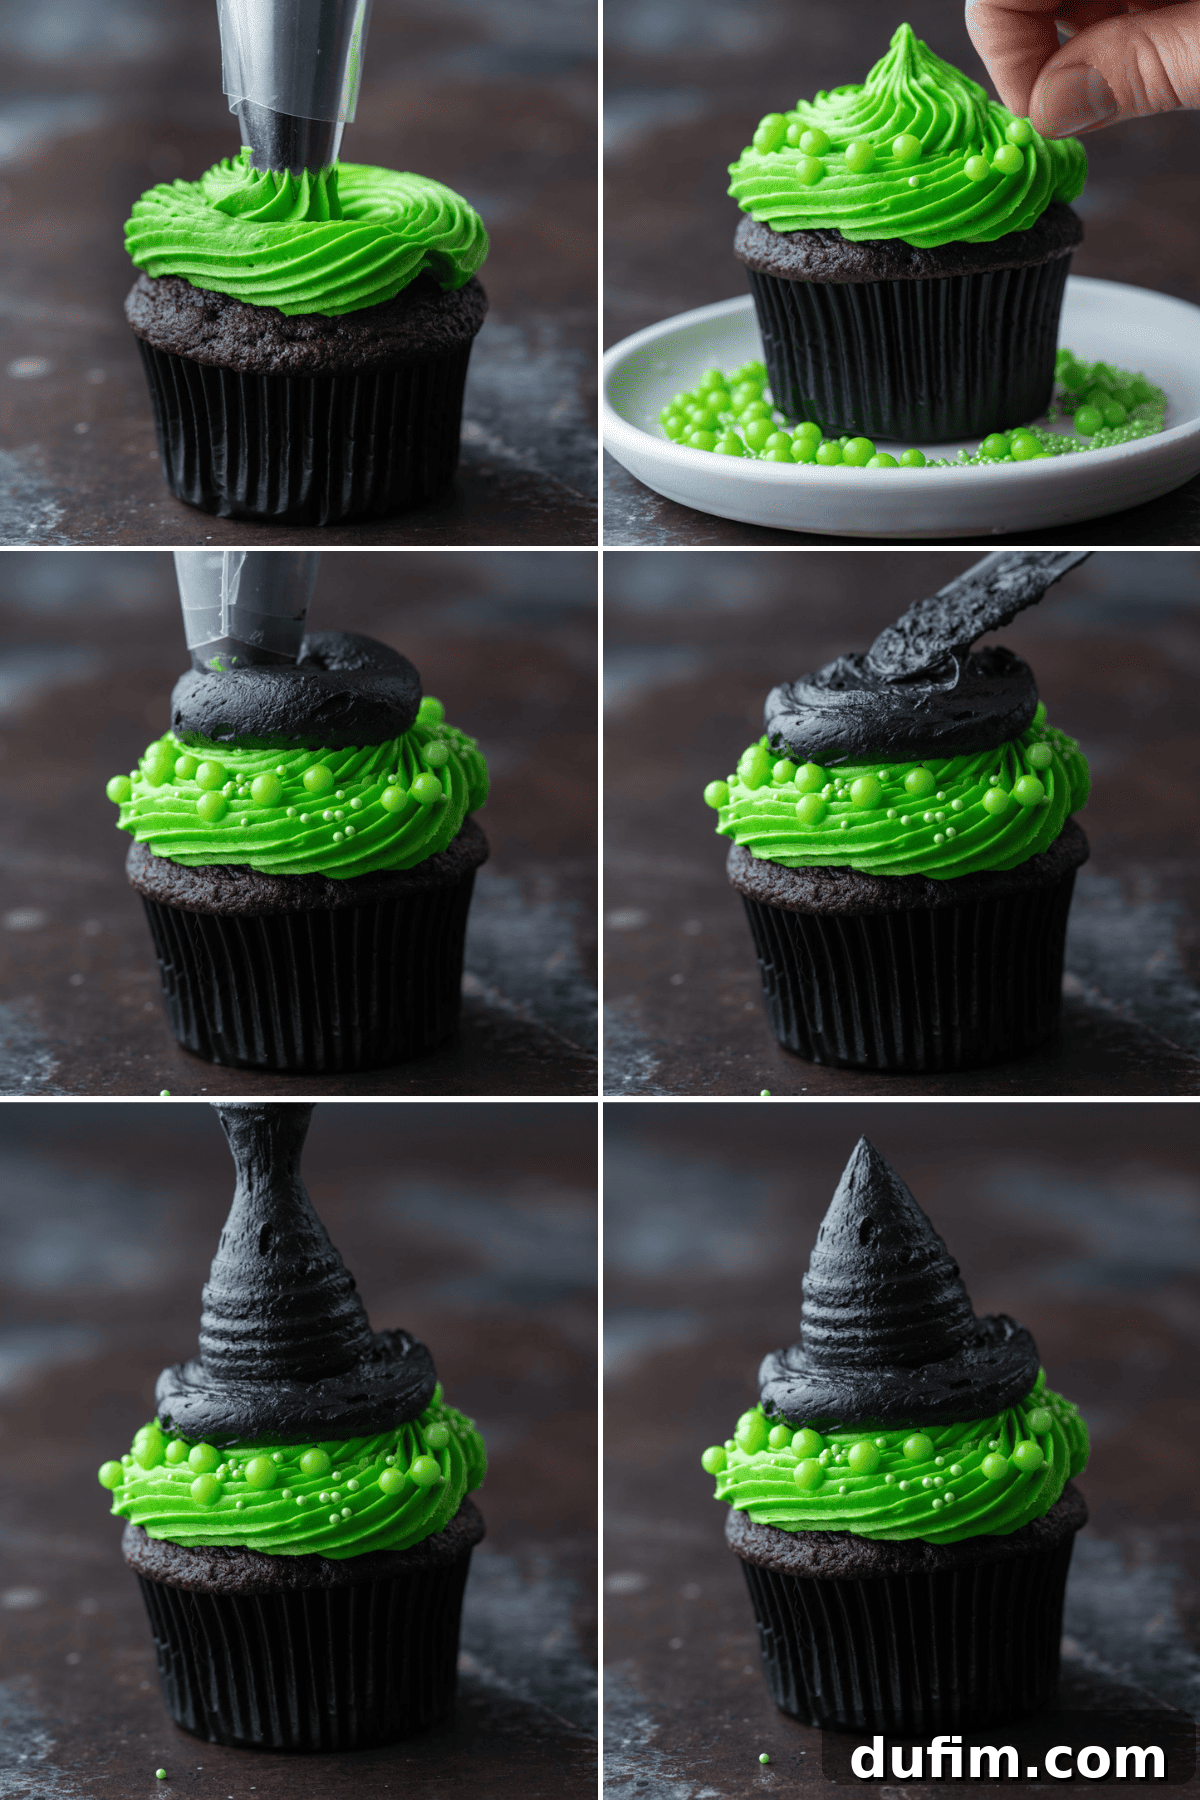
Part 3: Assembling Your Spooky Witch Hat Masterpieces
- Dye Your Frosting: Divide your prepared vanilla frosting into two separate bowls. Add green gel food coloring to one bowl and black gel food coloring to the other. Mix each bowl thoroughly until you achieve vibrant, consistent colors.
- Prepare Green Frosting Bag: Take one piping bag and fit it with a Wilton 32 tip. Carefully transfer the green frosting into this bag.
- Prepare Black Frosting Bag: Take a second piping bag and fit it with a Wilton 1A tip. Transfer the black frosting into this bag.
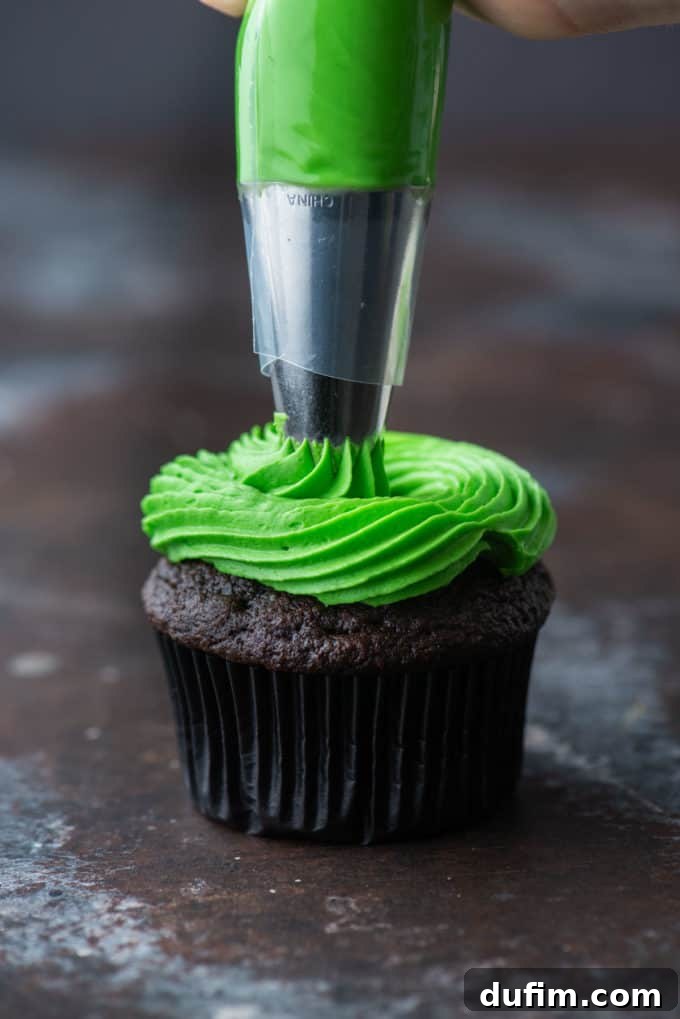
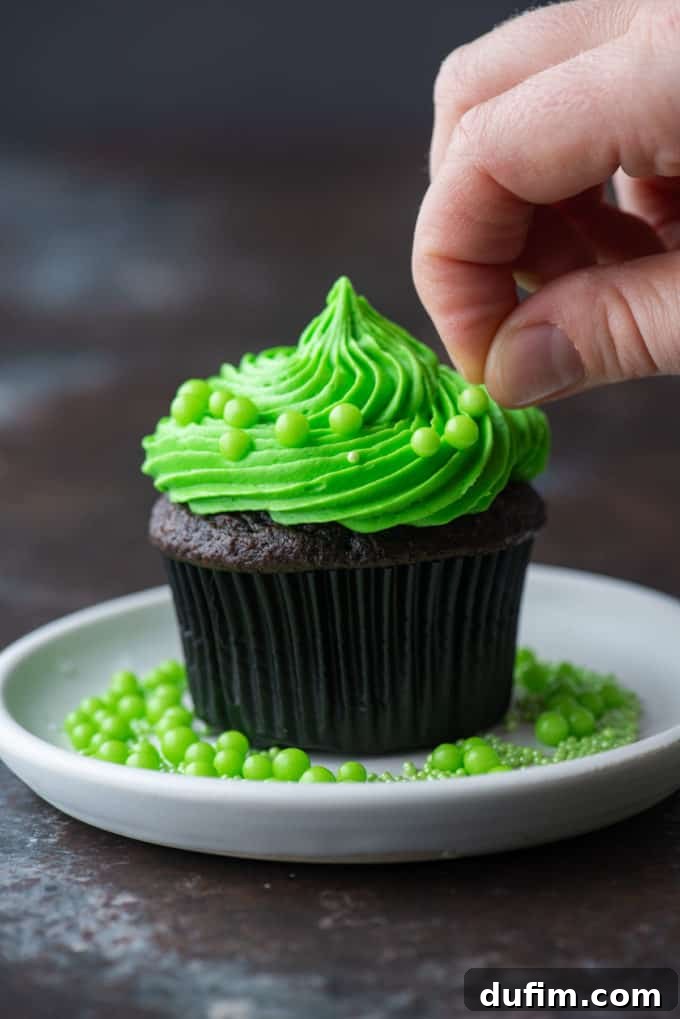
- Pipe the Green Base: Using the piping bag with green frosting and the Wilton 32 tip, pipe a single, elegant layer of green frosting onto each cooled chocolate cupcake. You can create a simple swirl or a slightly ruffled base.
- Add Magical Sprinkles: While the green frosting is fresh, gently sprinkle green ball nonpareil sprinkles around the outer edges of the green frosting. This creates a charming and festive border, mimicking the brim of a witch hat.
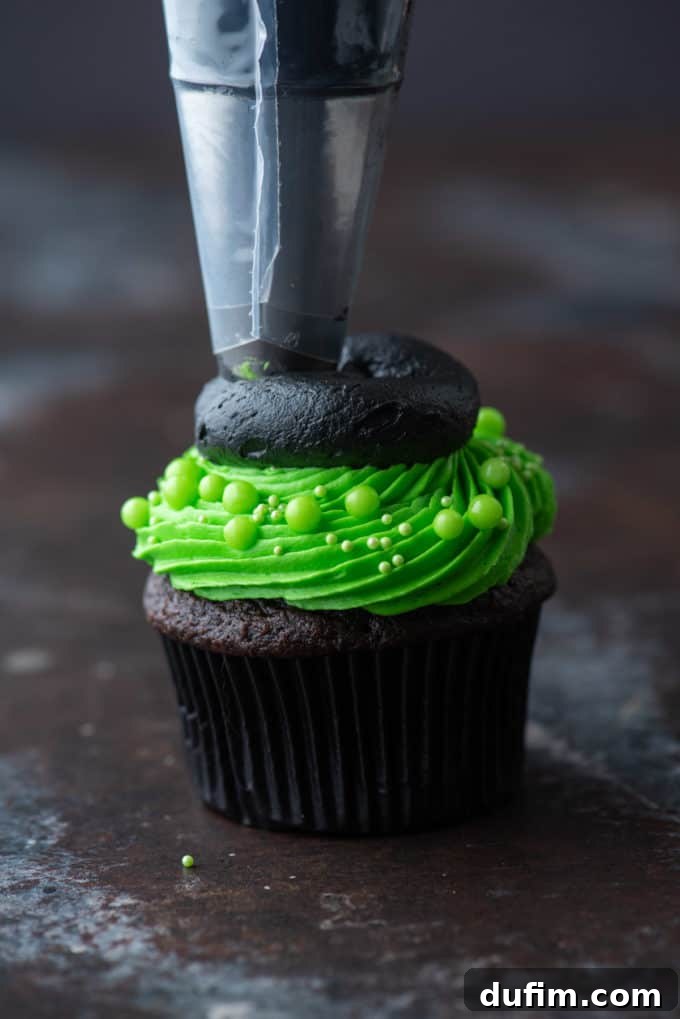
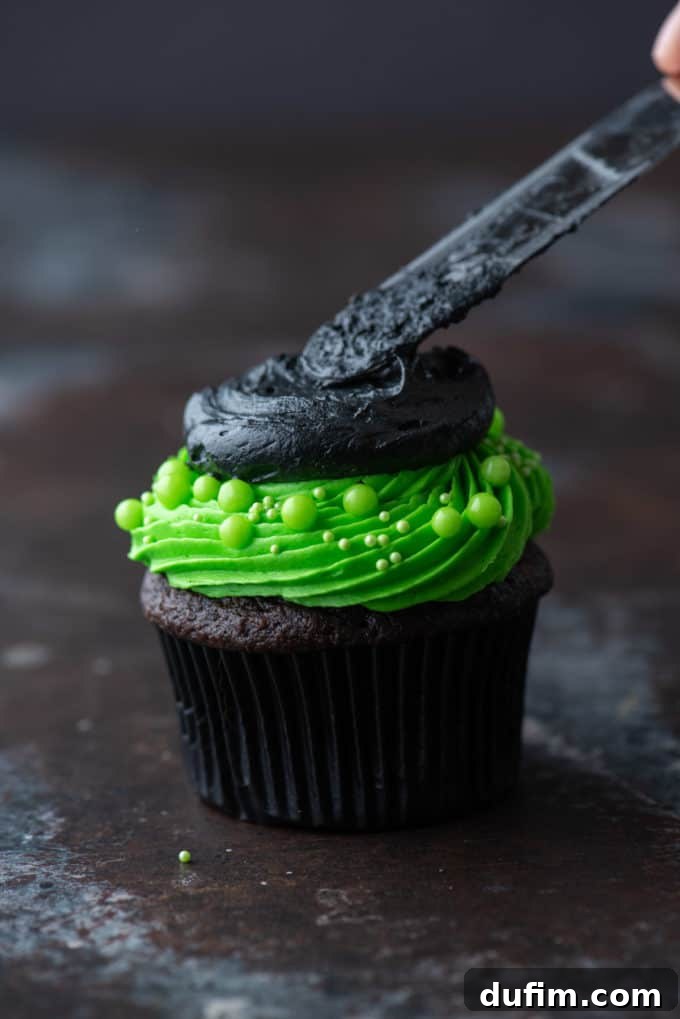
- Create the Witch Hat Brim: Switch to the piping bag with black frosting and the Wilton 1A tip. Starting in the center of the green frosting, pipe a wide, flat circle. This forms the distinctive brim of your witch’s hat. You can gently smooth and define the edges with a small offset spatula or the back of a spoon if desired.
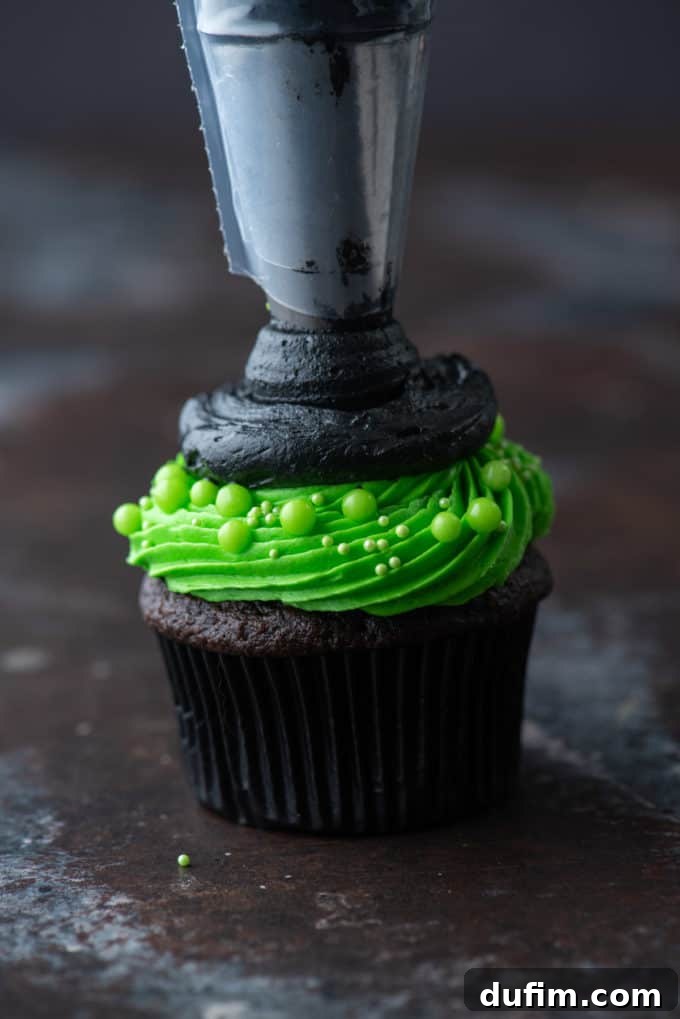
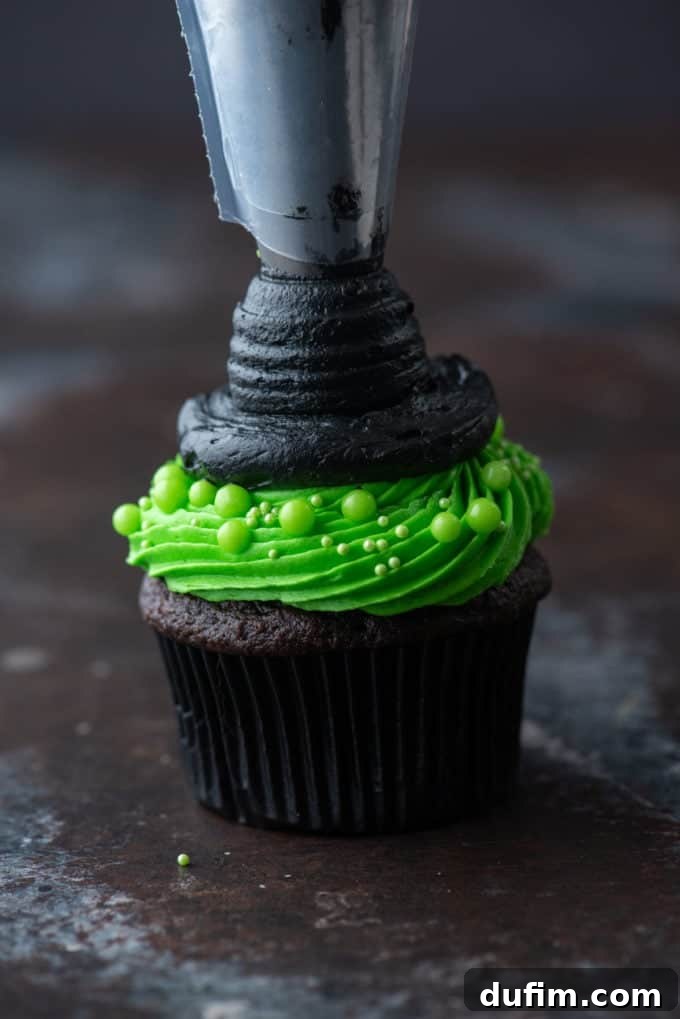
- Form the Witch Hat’s Peak: To pipe the upper part of the hat, continue using the black frosting and the Wilton 1A tip. Apply consistent pressure to the piping bag, gently lifting it upwards from the brim and slightly lowering it to create subtle creases or folds in the hat, mimicking fabric. As you reach the desired height for the top of the hat, gradually release pressure on the bag and slowly lift it away to form a sharp, pointed peak. Repeat this magical transformation for all your remaining cupcakes.
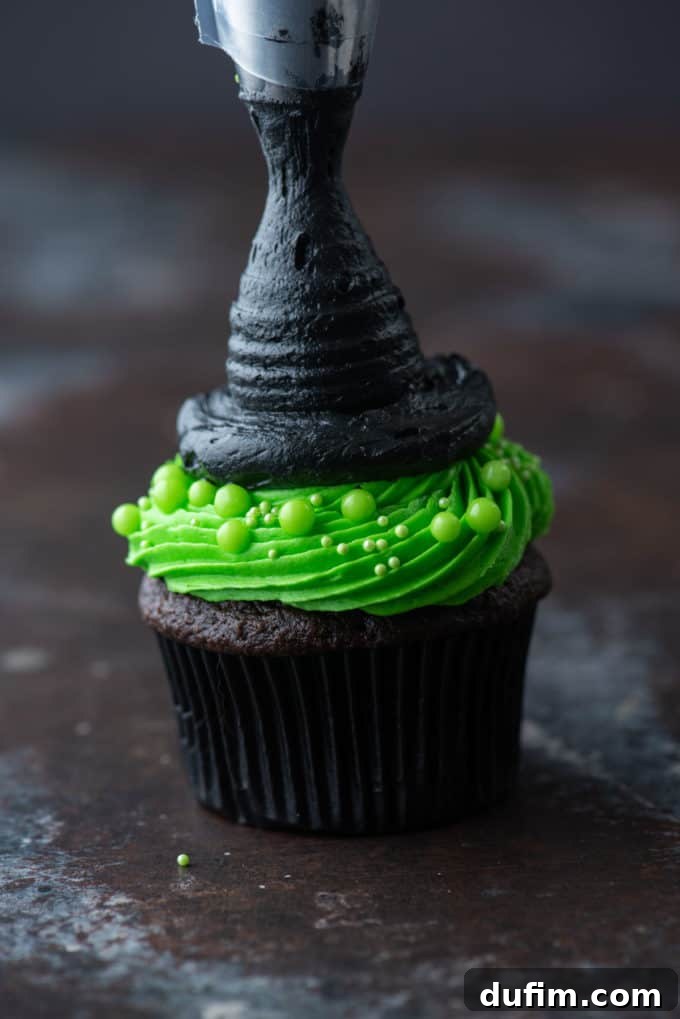
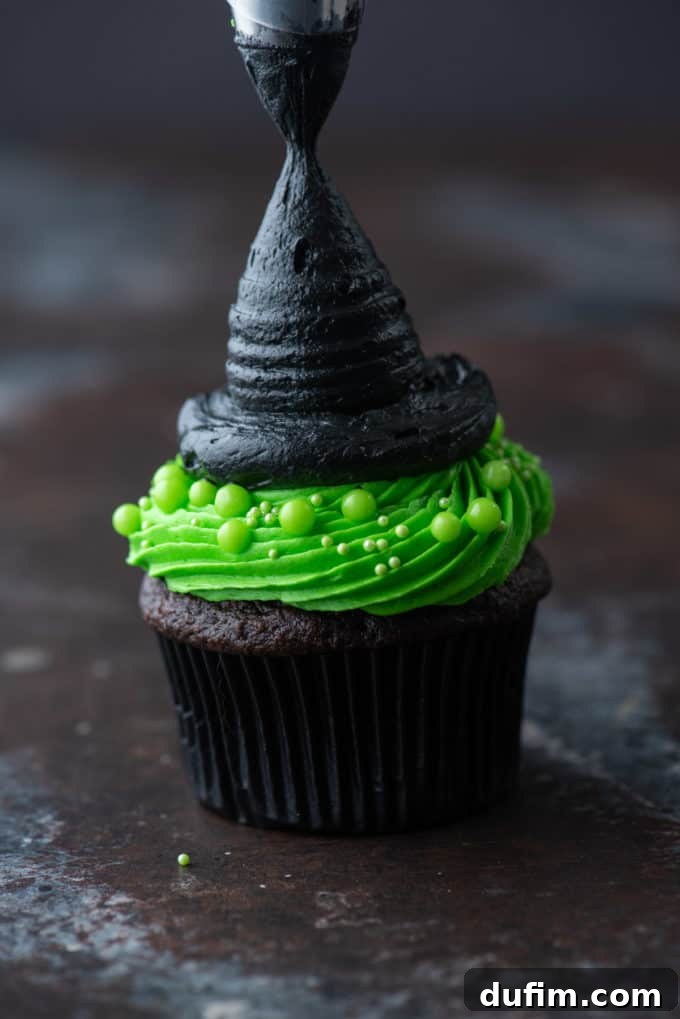
Expert Tips for Bewitching Halloween Cupcakes
- Room Temperature Ingredients: This is a golden rule for baking! Ensure your butter, eggs, and buttermilk are at room temperature. This allows them to emulsify properly, creating a smoother batter and a more uniform, tender crumb in your cupcakes.
- Don’t Overmix: Once you add the dry ingredients to the wet, mix only until just combined. Overmixing develops the gluten in the flour, leading to tough, dense cupcakes. A few small lumps are perfectly fine.
- Measure Flour Correctly: For accurate results, spoon your flour into the measuring cup and then level it off with a straight edge. Scooping directly from the bag can compact the flour, resulting in too much flour and dry cupcakes.
- Quality Cocoa Makes a Difference: Since chocolate is a star flavor here, use a good quality cocoa powder. Both natural unsweetened and Dutch-processed will work, but Dutch-processed will give you a darker cupcake with a slightly milder, less acidic chocolate flavor.
- Gel Food Coloring is Best: For vibrant frosting colors like green and black, gel food coloring is highly recommended. It’s more concentrated than liquid food coloring, so you need less of it, preventing your frosting from becoming runny.
- Practice Your Piping: If you’re new to piping, don’t worry! You can practice on a piece of parchment paper first. Scrape the frosting back into the bag and try again. Precision comes with practice.
- Cool Completely: Frosting warm cupcakes is a recipe for disaster. Ensure your cupcakes are entirely cooled to room temperature before applying any frosting to prevent it from melting and sliding off.
Storing & Freezing Suggestions for Freshness
To enjoy these enchanting Witch Hat Cupcakes at their absolute best, I recommend serving them on the same day they are decorated. The beautiful, intricate frosting designs are freshest and most stable when newly piped.
However, if you happen to have any magical leftovers, they can be stored in an airtight container at room temperature for up to 2 days. To preserve their whimsical shape, choose a container tall enough not to flatten the witch hats. For longer storage, you can place them in the refrigerator, but bring them back to room temperature before serving for the best texture and flavor.
If you’re planning ahead for a big Halloween bash, you can certainly bake the chocolate cupcakes a day or two in advance. Store the unfrosted cupcakes in an airtight container at room temperature. For optimal results, prepare and add the frosting and sprinkles just a few hours before you plan to serve them. This ensures the frosting is fresh, vibrant, and perfectly shaped for your party.
While the unfrosted chocolate cupcakes freeze beautifully for up to 2-3 months in an airtight container, freezing the fully decorated witch hat cupcakes isn’t recommended as the frosting’s texture and appearance might suffer upon thawing. For make-ahead convenience, bake and freeze the plain cupcakes, then thaw, make fresh frosting, and decorate closer to your event.
Want to Make an Assortment of Easy Halloween Cupcakes?
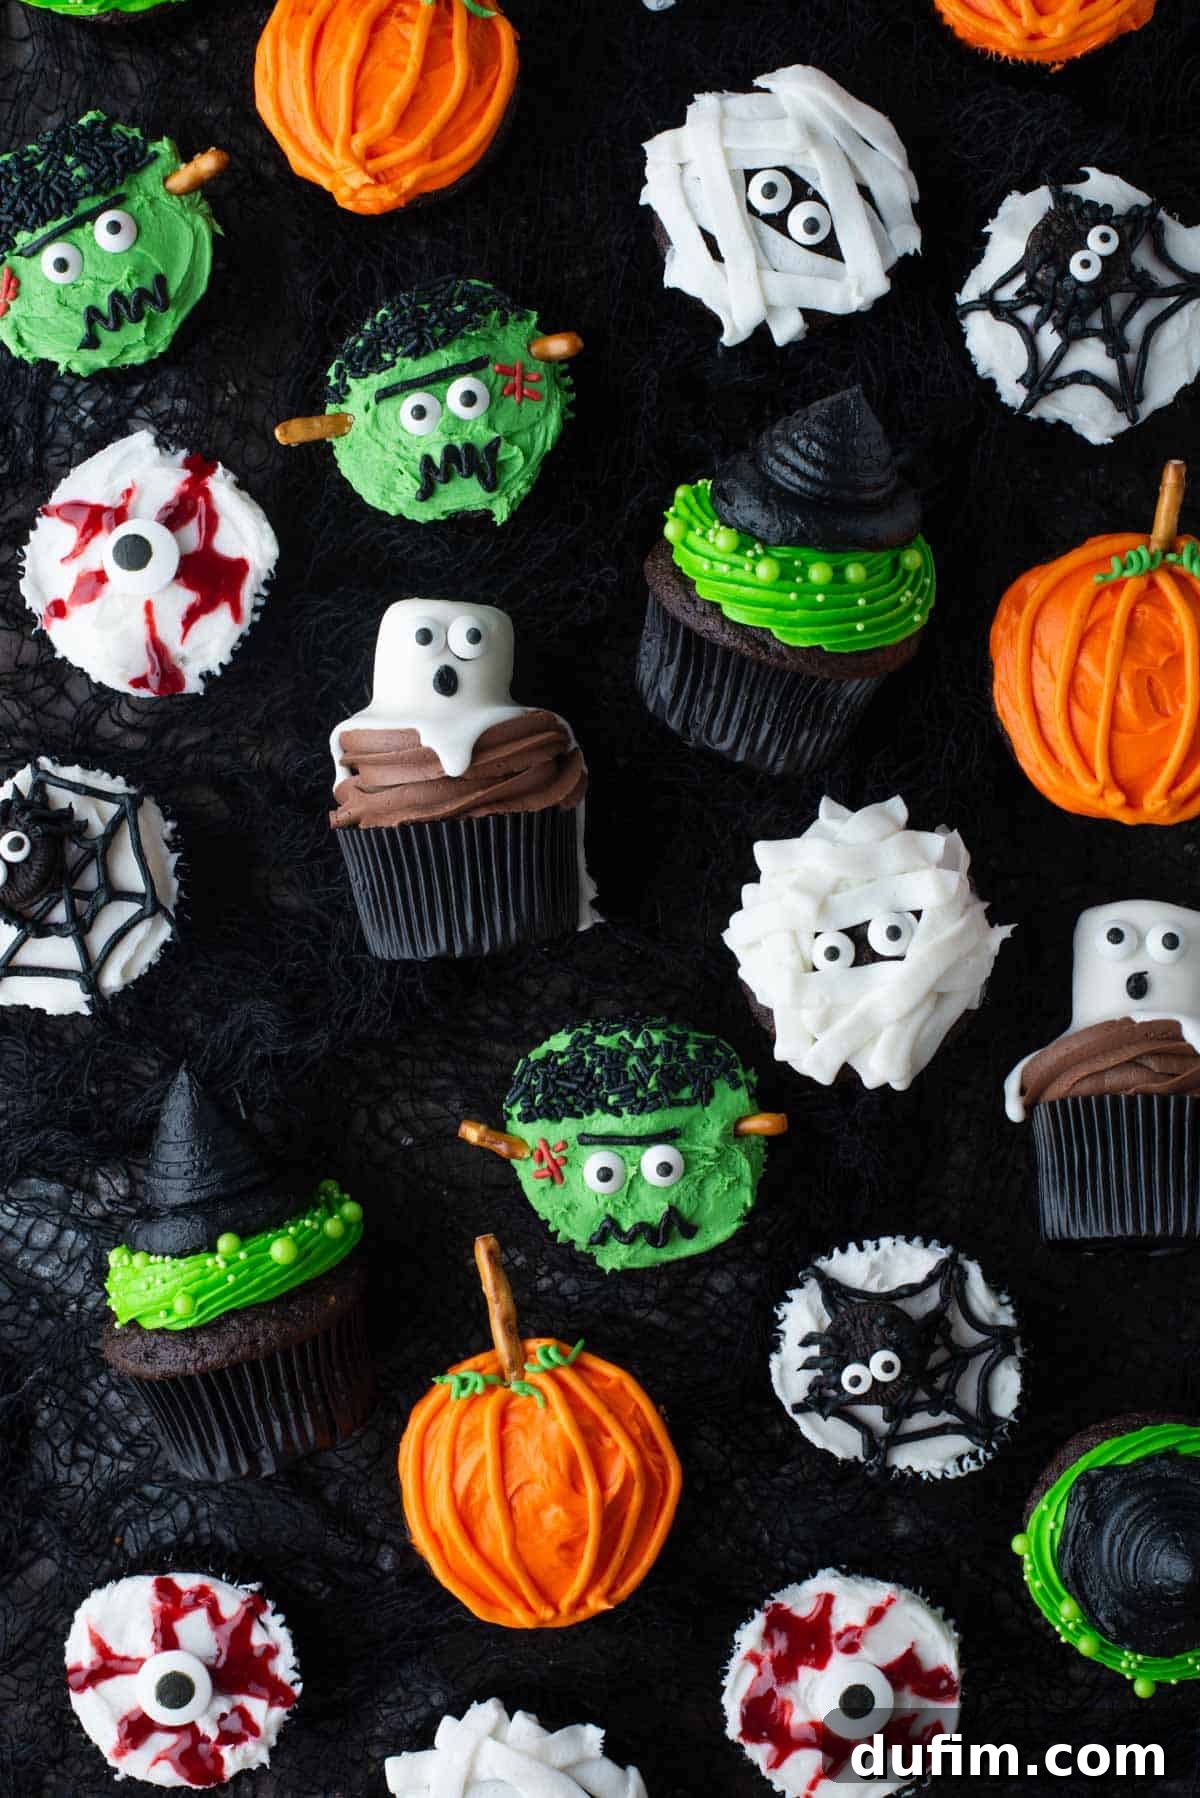
Looking to create a truly spectacular Halloween dessert spread? Beyond these fantastic Witch Hat Cupcakes, check out our other fun and easy Halloween cupcake recipes! Mix and match to create a delightful spooky assortment:
- Frankenstein Cupcakes
- Mummy Cupcakes
- Eyeball Cupcakes
- Pumpkin Patch Cupcakes
- Spider Web Cupcakes
- Ghost Cupcakes
- Spider Cupcakes
More Witch-Themed Recipes for a Magical Halloween
If you’re under the spell of all things witchy, explore these other fantastic witch-themed recipes that are perfect for adding extra magic to your Halloween celebrations:
- Witch Hat Cookies
- Melted Witch Brownies
- Bubbling Witch’s Cauldron Brownies
Tap stars to rate!
Witch Hat Cupcakes
Beth
35
19
30
24
cupcakes
Rate
Equipment
-
Glass Mixing Bowl
-
KitchenAid 9-Speed Mixer
-
Muffin Pan
-
Piping Bag
-
My favorite spatula!
Ingredients
Chocolate Cupcakes
-
2
cups (240g)
all purpose flour -
¾
cup (63g)
cocoa powder,
natural unsweetened or dutch processed cocoa powder -
1
tsp
instant coffee granules such as Folger’s,
optional -
½
tsp
baking soda -
1
tsp
baking powder -
1
tsp
salt -
½
cup (113g)
unsalted butter,
1 stick, room temperature -
1 ½
cups (297g)
granulated sugar -
2
large
eggs -
1
cup (236ml)
buttermilk -
½
cup (118ml)
hot tap water
Frosting
-
1 ½
cup (339g)
unsalted butter,
3 sticks, room temperature -
1
tsp
vanilla extract -
2-3
cups (227-339g)
powdered sugar - Dash milk or heavy cream if frosting becomes too thick
Extras
-
Piping bag
-
Black and green gel food coloring
-
Green nonpareil sprinkles,
small and large -
Wilton 1A Piping Tip
-
Wilton 32 Piping Tip
Instructions
Chocolate Cupcakes
-
Preheat the oven to 350º F (175°C). Line a muffin pan with muffin liners.
-
In a mixing bowl combine the all-purpose flour, unsweetened natural cocoa powder, instant coffee granules, baking soda, baking powder, and salt. Set aside.2 cups (240g) all-purpose flour,
¾ cup (63g) cocoa powder,
1 tsp instant coffee granules such as Folger’s,
½ tsp baking soda,
1 tsp baking powder,
1 tsp salt -
In a separate mixing bowl, beat the butter and granulated sugar with an electric mixer for 2 minutes, until pale and fluffy. Add in the eggs, beat again for 30 seconds after each.½ cup (113g) unsalted butter,
1 ½ cups (297g) granulated sugar,
2 large eggs -
Add in half of the buttermilk, beat for about 20 seconds. Add in half of the dry ingredients, beat. Add the remaining buttermilk plus the hot water, beat just until the liquid is mixed in, then add the remaining dry ingredients and beat on low speed until combined.1 cup (236ml) buttermilk,
½ cup (118ml) hot tap water -
Fill the muffin liners 1/2 full. Bake for 17-19 minutes at 350º F (175°C) or until a few moist crumbs remain on a toothpick when inserted into the center. Allow the cupcakes to cool completely before adding the frosting.
Frosting
-
In a mixing bowl, combine the butter and vanilla extract, beat using an electric mixer until fluffy, 1-2 minutes.1 ½ cup (339g) unsalted butter,
1 tsp vanilla extract -
Gradually add the powdered sugar, mixing on low until combined.2-3 cups (227-339g) powdered sugar
-
If you want to add food coloring, do so now.
-
Taste as needed to determine if you want more powdered sugar. If the frosting becomes too thick, add a dash of milk or heavy cream.Dash milk or heavy cream if frosting becomes too thick
-
If you want an extra fluffy frosting, add in 1/4 cup heavy whipping cream when adding the last bit of powdered sugar. Whip for 3-4 minutes.
Assemble
-
Divide the frosting into 2 bowls, dye one bowl green and the other black using gel food coloring.Black and green gel food coloring
-
Transfer the green frosting into a piping bag fitted with a Wilton 32 tip.Piping bag,
Wilton 32 Piping Tip -
Transfer the black frosting into a piping bag fitted with a Wilton 1A tip.Wilton 1A Piping Tip,
Piping bag -
Pipe a single layer of green frosting onto the cooled cupcake, forming the base.
-
Sprinkle green ball nonpareil sprinkles around the edges of the green frosting to create a decorative border.Green nonpareil sprinkles
-
Using the black frosting, start in the center of the cupcake and pipe a wide, flat circle. This will form the brim of the witch’s hat.
-
Then, pipe the remaining hat by applying gentle pressure to the bag, lifting, and slightly lowering the bag to create natural creases in the hat. As you reach the desired peak, release pressure slowly and pull the bag away to form a sharp point. Repeat with the remaining cupcakes.
Like this recipe? Rate and comment below!