
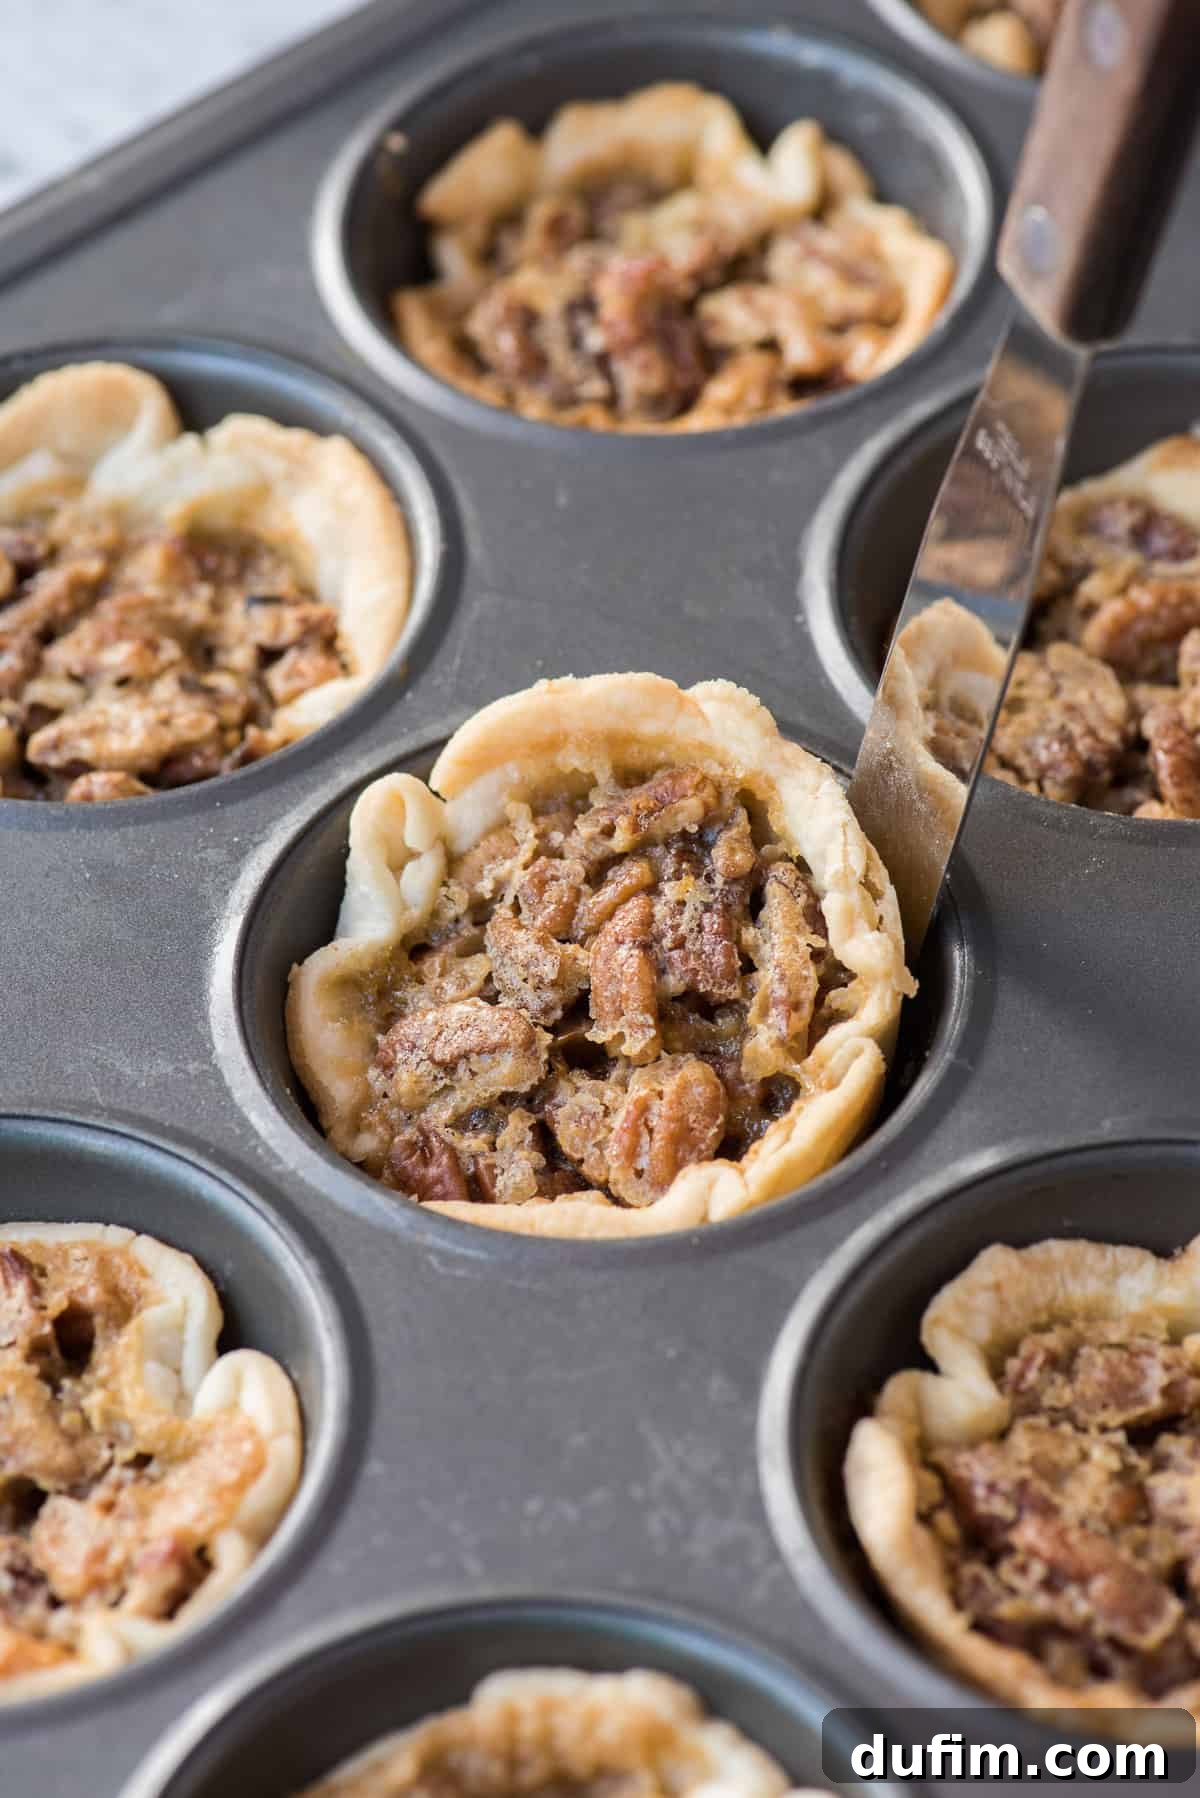
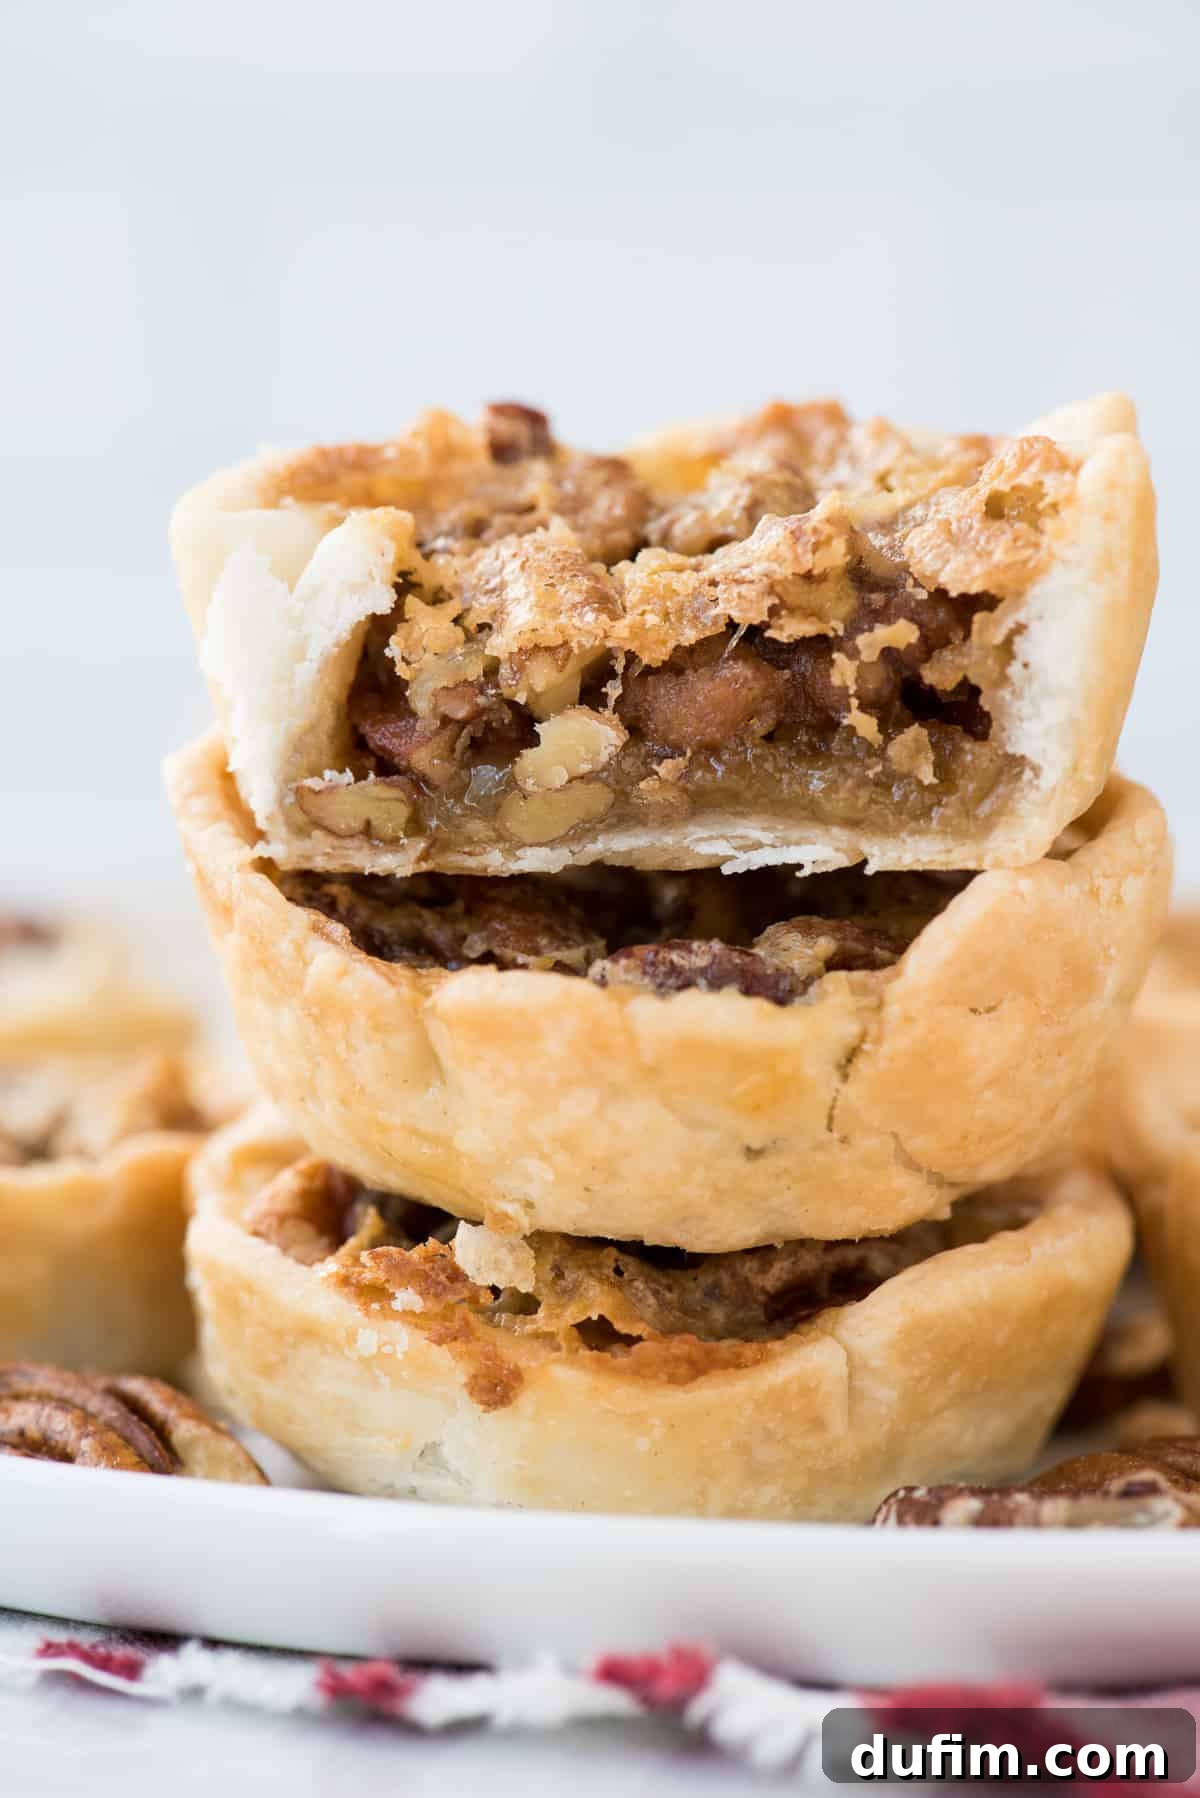
Indulge in the exquisite flavor of these mini pecan pies, thoughtfully crafted without corn syrup. Instead, they boast the rich, natural sweetness of real maple syrup, delivering an unparalleled taste experience. These delightful pecan tassies are incredibly easy to prepare in a standard muffin pan, requiring just 8 simple ingredients. Perfect for holiday gatherings, they can be conveniently made ahead of time and frozen, ensuring a stress-free celebration.
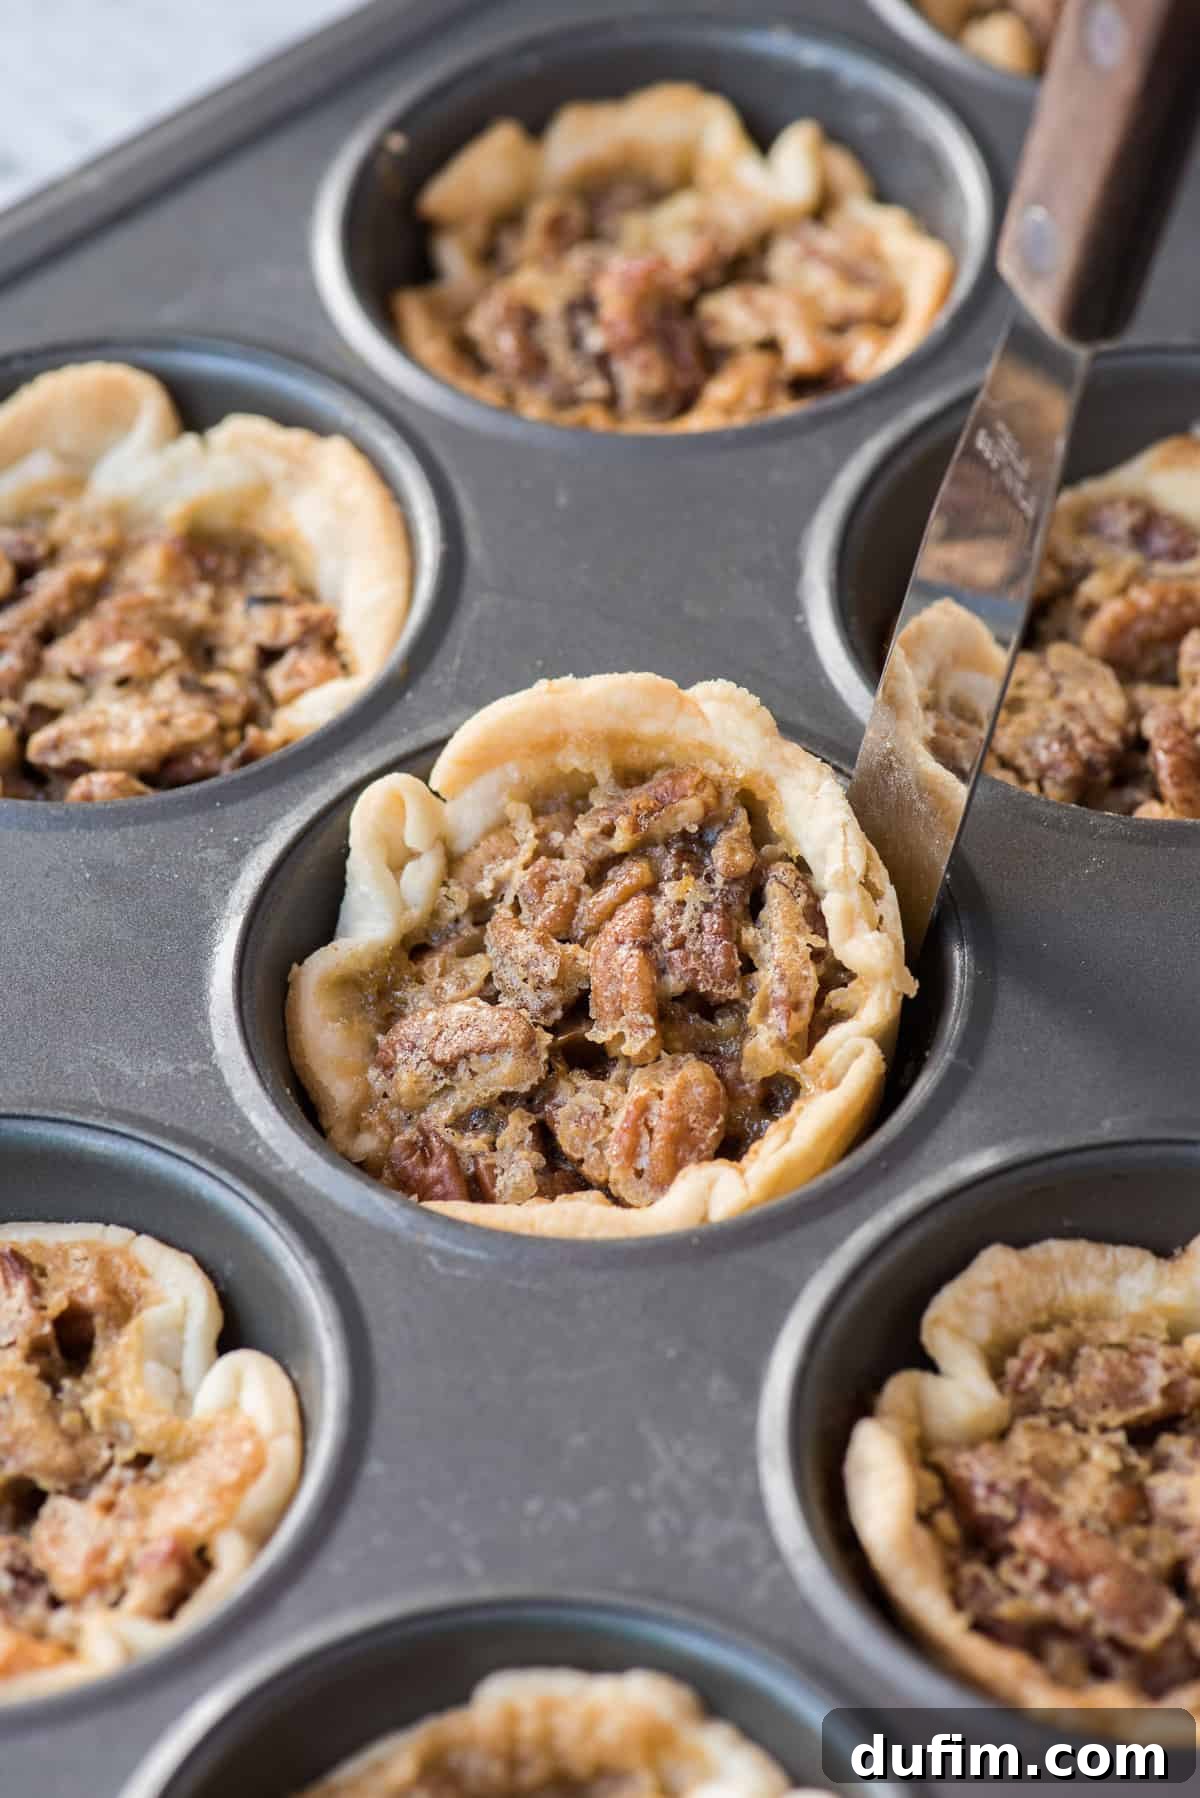
There’s nothing quite like a classic pecan pie, but sometimes, a lighter, more naturally sweetened version is exactly what you crave. This recipe for mini pecan pies, lovingly referred to as pecan tassies, fulfills that desire beautifully. We’ve successfully removed corn syrup from the equation, replacing it with the wholesome, complex notes of real maple syrup. This isn’t just a simple substitution; it’s a flavor elevation that brings a cozy, comforting, and distinctly autumnal essence to every bite.
The journey to creating these perfect individual desserts has been a delightful one, and I’m thrilled to share this corn syrup-free version with you. The incredible depth of flavor in these pecan tassies is almost entirely attributable to the pure maple syrup. Its nuanced sweetness, often described as caramel-like with hints of vanilla, perfectly complements the earthy richness of the pecans. For the best results, I strongly recommend investing in a high-quality, pure maple syrup – the difference in taste is truly noticeable and worth every drop.
While this recipe prioritizes convenience without sacrificing flavor, feel free to use your favorite homemade pie dough if you have a cherished recipe. However, for those busy holiday seasons or when time is of the essence, a good quality store-bought pie dough works wonderfully, making these mini pies surprisingly quick to assemble. Whether you’re a seasoned baker or just starting out, you’ll find these petite pies a joy to create and an even greater joy to devour!
How to Craft Your Easy Maple Pecan Tassies
Creating these delectable mini pecan pies is a straightforward process, making them an ideal project for bakers of all skill levels. Follow these simple steps to bring these sweet treats to life:
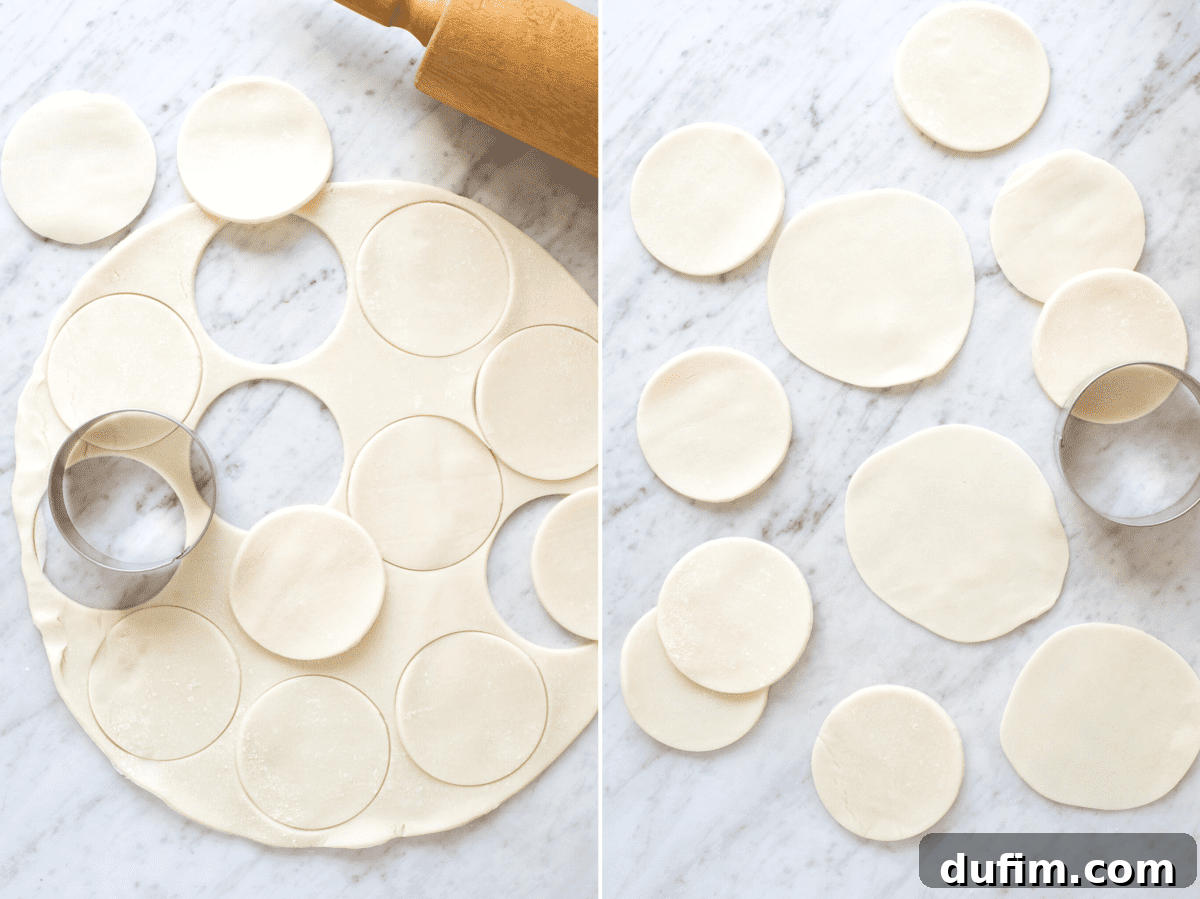
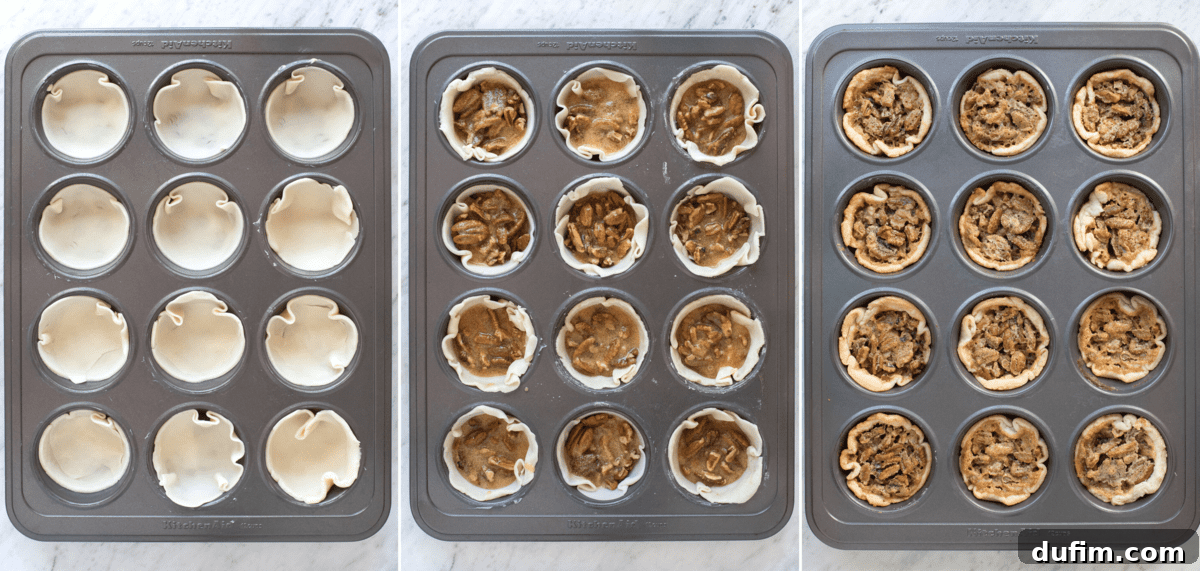
- **Prepare Your Pie Crusts:** Begin by unrolling your store-bought (or homemade) pie dough. Using a 3 or 4-inch round cookie cutter, cut out 12 circles. Lightly flour your work surface and, with a rolling pin, gently roll each circle until it measures approximately 5 inches in diameter. This ensures they are perfectly sized to fit your standard muffin pan wells.
- **Line the Muffin Pan:** Press each rolled-out dough circle into the buttered wells of your muffin pan. Use your fingers to gently shape and press the dough, ensuring it fully covers the bottom and sides of each well, forming a neat little cup.
- **Craft the Irresistible Filling:** In a medium mixing bowl, combine all the filling ingredients: chopped pecans, brown sugar, pure maple syrup, a large egg, melted and cooled unsalted butter, vanilla extract, and a pinch of salt. Stir everything together with a spatula until the mixture is thick and well combined. The consistency should be gooey and rich, ready to bake into perfection.
- **Fill the Crusts:** Carefully spoon about 2 tablespoons of the pecan filling into each prepared pie crust in the muffin pan. It’s important not to overfill the wells; aim for them to be about 1/2 to 3/4 full. The filling will expand and bubble slightly during baking, and leaving enough room will prevent it from overflowing.
- **Bake to Golden Perfection:** Place your muffin pan in a preheated oven and bake for 20-25 minutes. Keep an eye on them towards the end of the baking time. The pies are done when the edges of the filling appear set and stable, with just a slight jiggle in the very center.
Total Time to Deliciousness
One of the many advantages of these mini pecan pies is their relatively quick turnaround time, making them a fantastic option for impromptu gatherings or when you’re managing multiple holiday dishes. Here’s a breakdown of the time commitment:
- **Preparation (Hands-on):** Approximately 15 minutes. This includes rolling out the pie dough and mixing the luscious pecan filling.
- **Baking Time (Oven):** A quick 20-25 minutes.
- **Cooling Time (Essential):** Allow 20-30 minutes for the pies to cool in the pan. This step is crucial for the filling to fully set and for easy removal.
From start to finish, you’re looking at about an hour and ten minutes before you can enjoy these delightful treats, though the actual hands-on work is minimal!
Knowing When Your Mini Pecan Pies Are Perfectly Baked
Achieving the ideal consistency for pecan pie filling is key to a truly satisfying dessert. For these mini versions, it’s particularly important to know when they are done without overbaking. The secret lies in a subtle jiggle test.
Once you believe your mini pecan pies are close to being ready, gently give the muffin pan a slight shake. If the centers of the pies jiggle just a little, much like a firm custard, but the edges are stable and set, then your pies are perfectly baked! If, however, you shake the pan and the filling shows a wavy motion extending from the center all the way to the edge, they need a few more minutes in the oven. Remember, the filling will continue to cook and firm up as the mini pies cool, resulting in that wonderfully gooey yet set texture we all love.
Effortless Removal: Getting Your Mini Pies Out of the Muffin Pan
Removing delicate mini pies from a muffin pan can sometimes be a challenge if not done correctly. Here are three essential tips to ensure your pecan tassies come out perfectly intact and looking beautiful:
- **Generous Greasing is Key:** The most crucial first step is to generously grease your muffin pan. While cooking sprays might seem convenient, butter provides a superior non-stick surface and adds a lovely flavor to the crust. Make sure to coat every crevice of each muffin well before adding your pie crusts.
- **Address Overflow Promptly:** Sometimes, the delicious pecan filling might bubble over the pie crust and onto the muffin pan during baking. If this happens, don’t fret! As soon as the pies come out of the oven and while they are still warm, take a small, thin spatula or a butter knife. Gently work it around the edges of any overflowed filling, loosening it from the pan. This quick action prevents the caramelized sugar from hardening and sticking firmly to the pan, which would make later removal difficult.
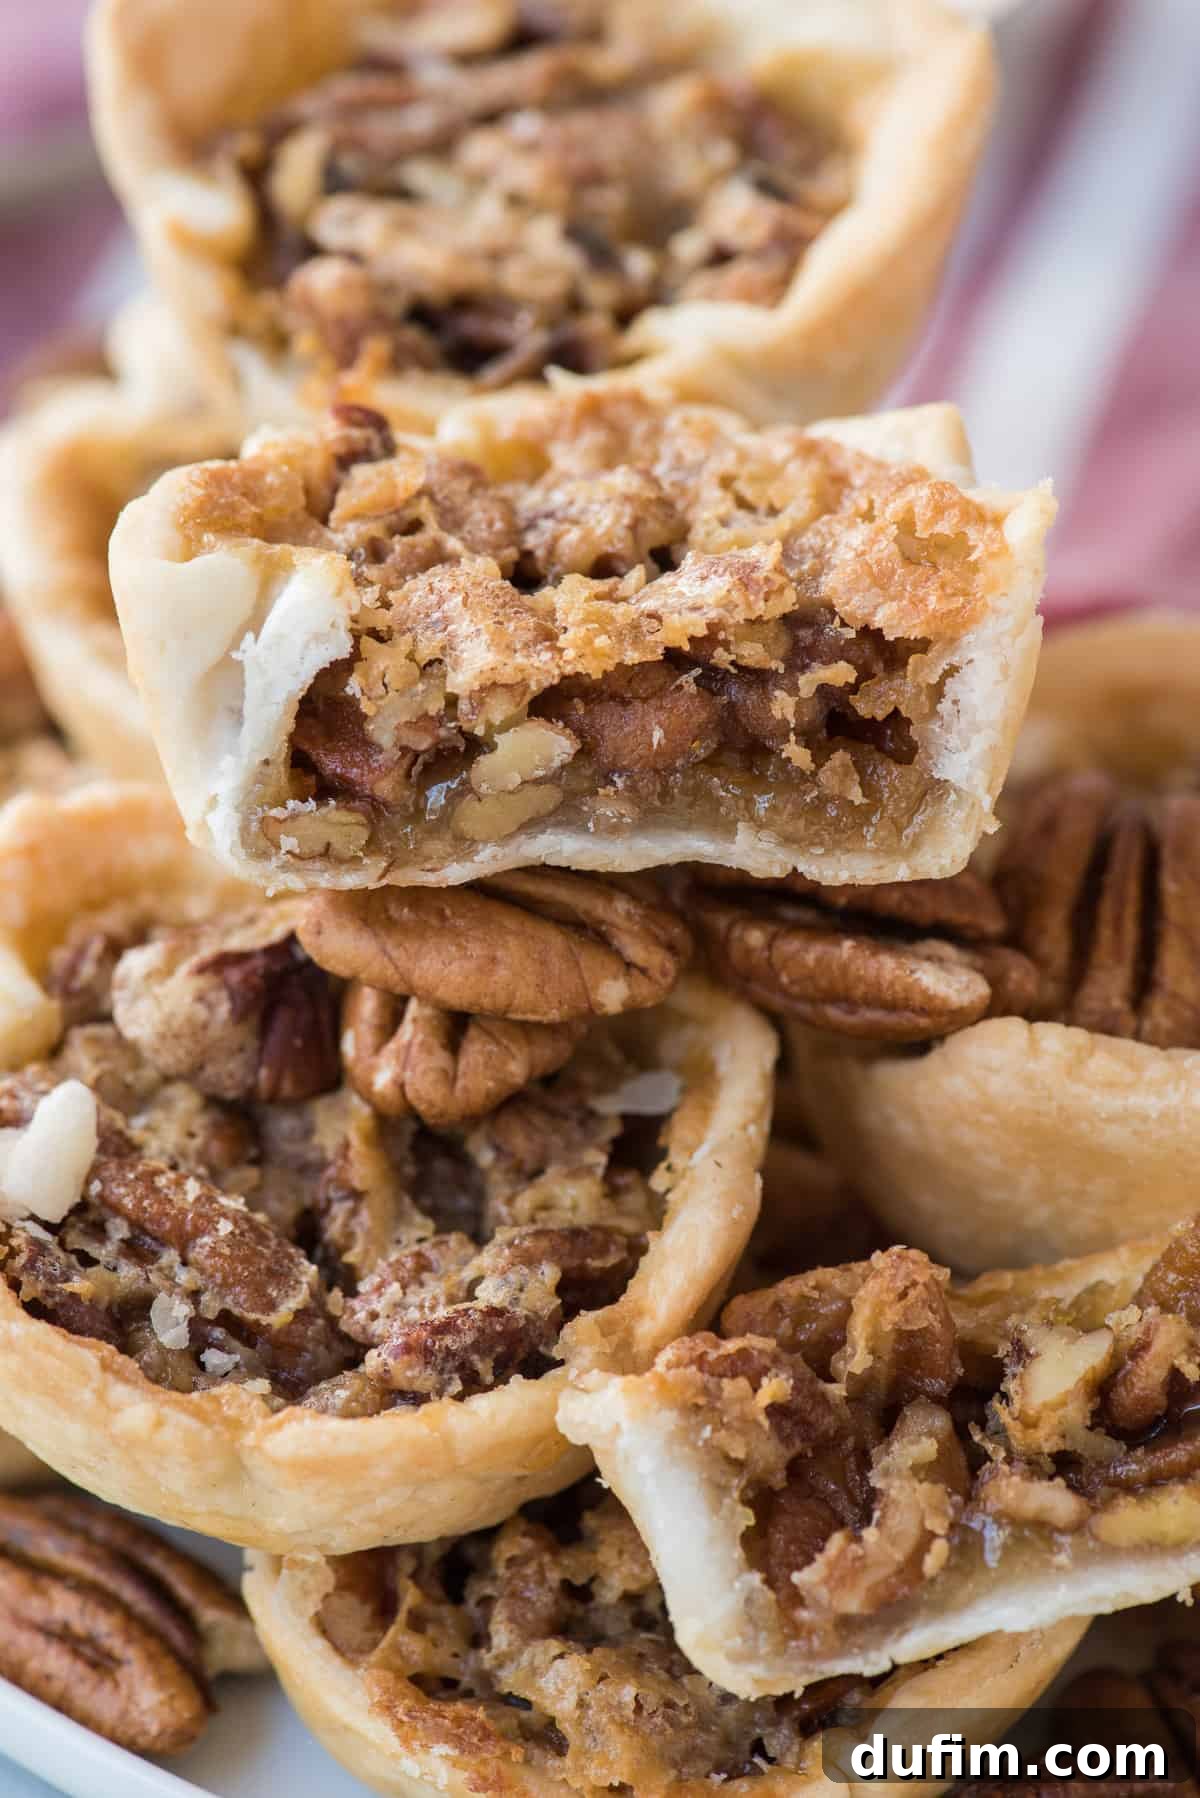
- **Cool Completely Before Removing:** Patience is a virtue when it comes to removing baked goods from a pan, especially with sticky fillings like pecan pie. After the pies have fully cooled in the muffin pan, use the same small spatula or butter knife. Go gently around the outside of each muffin well, carefully separating the pie from the pan. Once loosened, the pies should pop out easily with the help of the spatula. Resisting the urge to remove them while still warm is vital for maintaining their shape and preventing breakage.
Storing Your Mini Pecan Pies for Freshness
Proper storage ensures your mini pecan pies remain fresh and delicious for as long as possible. Whether you plan to enjoy them within a couple of days or want to extend their shelf life, here are the best practices:
- **Short-Term Storage (1-2 Days):** If you anticipate serving these delightful pies within one to two days, they can be stored at room temperature. Simply place them in an airtight container on your kitchen counter. This helps maintain their tender crust and gooey filling.
- **Extended Storage (Up to 5 Days):** For longer enjoyment, or if your kitchen is particularly warm, it’s best to refrigerate your mini pecan pies. Transfer them to a sealed container and store them in the fridge for up to five days. You can serve them chilled or gently warm them in the oven before serving for a freshly baked feel.
Freezing Mini Pecan Pies: Perfect for Make-Ahead Holiday Planning
One of the greatest advantages of these mini pecan pies is their freezer-friendliness, making them an ideal make-ahead dessert for busy holiday seasons like Thanksgiving or Christmas. You can prepare them weeks in advance and simply thaw them when needed.
- **Flash Freezing for Preservation:** Once your pies have completely cooled, arrange them in a single layer on a baking sheet. Place the baking sheet in the freezer for about 30 minutes. This “flash freezing” step prevents the pies from sticking together, making them easier to store individually later.
- **Secure Packaging for Long-Term Storage:** After flash freezing, you can wrap two pies together in a layer of aluminum foil. This provides an excellent barrier against freezer burn. Then, place the foil-wrapped pies inside a large freezer-safe bag. Squeeze out as much air as possible before sealing to maximize freshness. Properly stored, these pies can last for up to 1-2 months in the freezer.
- **Thawing Instructions:** When you’re ready to enjoy your frozen mini pecan pies, simply transfer the freezer bag from the freezer to the refrigerator overnight. This allows them to thaw gently and evenly. For an extra touch of warmth and a crisper crust, you can briefly warm the thawed pies in a preheated oven (around 300°F/150°C) for about 10-15 minutes before serving.
Pro Tips for Perfect Mini Pecan Pies
To ensure your mini pecan pies turn out perfectly every time, keep these expert tips in mind:
- **Choose the Right Muffin Pan:** Always use a standard-size regular muffin pan, not mini muffin pans or jumbo ones. The recipe is calibrated for this specific size to ensure proper baking and crust-to-filling ratio.
- **Butter, Butter, Butter:** As mentioned earlier, generously buttering your muffin pan is crucial for preventing sticking and for easy removal. Don’t skimp on this step!
- **Precise Dough Rolling:** Be sure to roll your pie dough circles to approximately 5 inches in diameter. If the circles are too small, the pecan filling will likely bubble up and get stuck to the muffin pan walls, making it incredibly difficult to remove the pies cleanly. A larger diameter allows the crust to form a protective barrier around the filling.
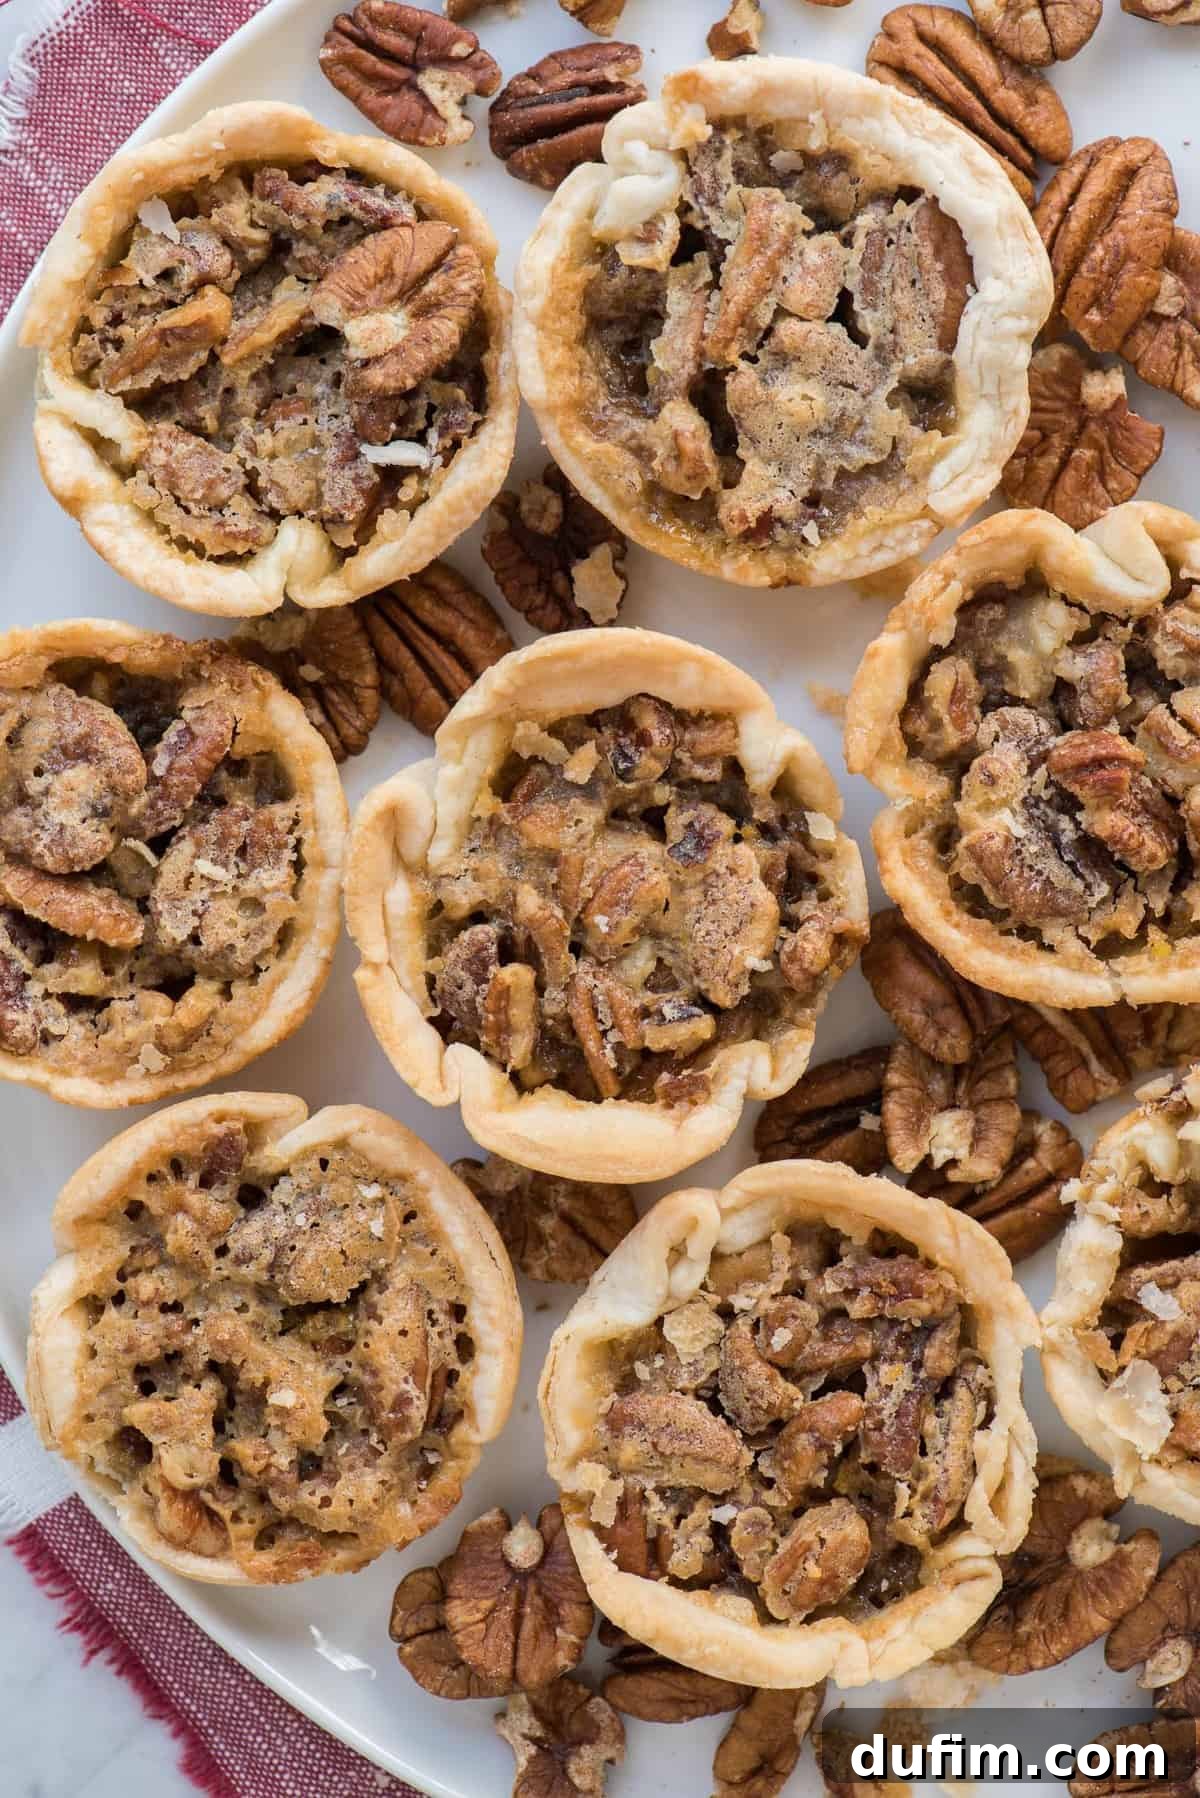
- **Pecan Preference:** The texture of your pecans can significantly influence the pie’s overall mouthfeel. You can use finely chopped, rough chopped, or even whole pecans, depending on your preference. Finely chopped pecans will create a denser, more uniform filling, while rough chopped or whole pecans will add a delightful chewiness and more pronounced nutty bite.
- **Quality Maple Syrup:** This recipe relies on the robust flavor of maple syrup. Using real, high-quality maple syrup (Grade A Dark, Robust Taste is often preferred for baking) will make a noticeable difference compared to artificial maple-flavored syrups.
- **Don’t Overfill:** Resist the temptation to fill the pie crusts to the brim. The filling expands as it bakes, and overfilling can lead to sticky spills and difficulty removing the pies. Aim for about 1/2 to 3/4 full.
More Irresistible Holiday Desserts
If you’re planning a holiday feast and looking for more crowd-pleasing dessert ideas, or just want to expand your baking repertoire, consider these other fantastic recipes:
- Easy Pumpkin Dump Cake
- Velvety Classic Cheesecake
- Decadent No-Bake Oreo Pie
- Copycat Starbucks Pumpkin Pound Cake

Tap stars to rate!
Mini Pecan Pies
Rate This Recipe
Print Recipe
Equipment
-
Muffin Pan
-
Glass Mixing Bowl
-
Kitchen Scale
-
My favorite spatula!
Ingredients
- 2 store bought pie crusts
- 2 cups (228g) chopped pecans
- ½ cup (107g) brown sugar
- ¼ cup (78g) maple syrup
- 1 large egg
- 2 Tbsp (29g) unsalted butter, melted & cooled
- 1 tsp vanilla extract
- ½ tsp salt
Instructions
-
Preheat the oven to 350º F (175°C). Generously butter a regular sized muffin pan. I recommend using butter instead of non-stick cooking spray for better flavor and easier removal. Set aside.
-
Using a 3 or 4 inch circle cookie cutter, cut out 12 circles from the 2 pie crusts. Using a small amount of flour and a rolling pin, roll each circle until it’s 5 inches in diameter. Place one circle in each muffin well. Use your fingers to press and form the dough to fully cover the well and the sides.2 store bought pie crusts
-
In a mixing bowl, combine the pecans, brown sugar, maple syrup, egg, melted & cooled butter, vanilla extract and salt. Stir with a spatula until thick and well incorporated. Place about 2 tablespoons of the pecan mixture in each muffin well. The wells should only be about 1/2 to 3/4 full. The pecan mixture will bubble up during baking so be sure not to overfill the muffin pan.2 cups (228g) chopped pecans, 1/2 cup (107g) brown sugar, 1/4 cup (78g) maple syrup, 1 large egg, 2 Tbsp (29g) unsalted butter, 1 tsp vanilla extract, 1/2 tsp salt
-
Bake for 20-25 minutes, or until the pecan mixture is set and stable around the edges, but still slightly jiggly in the very middle. Remove the pan from the oven and let cool.
-
If some of the pecan filling bubbles over the pie crust onto the muffin pan, take a small spatula or butter knife when the pies first come out of the oven and gently loosen it from the pan while the mixture is still warm.
-
After the pies have cooled completely in the muffin pan, use the same small spatula or butter knife and gently go around the outside of each muffin well, helping to loosen the pie. Then use the spatula to pop the pies out.
Notes
If serving within 1-2 days, store the pies in a sealed container on the counter. For longer storage, up to 5 days, store in a sealed container in the fridge.
Nutrition
Nutrition Disclosure
All nutritional values are approximate and provided to the reader as a courtesy. Changing ingredients and/or quantities will alter the estimated nutritional calculations.